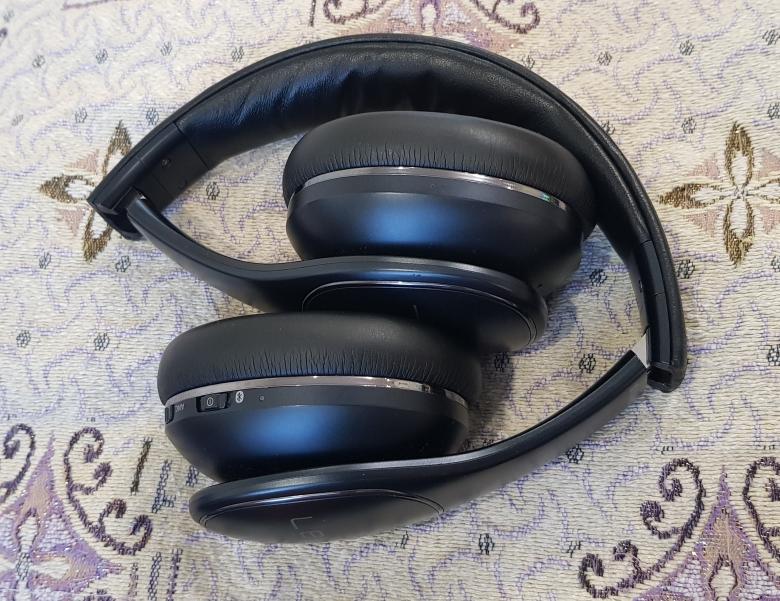
Repair Headphone Headband Samsung Level On Pro
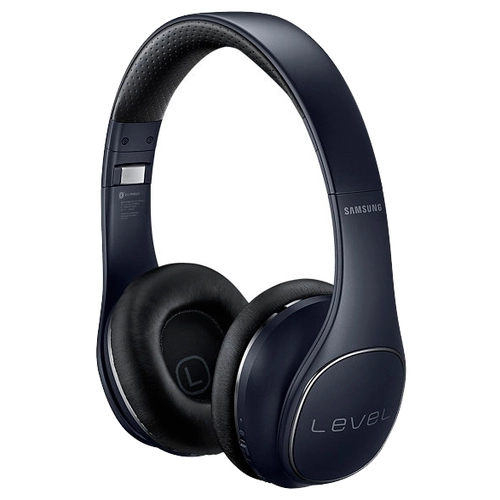
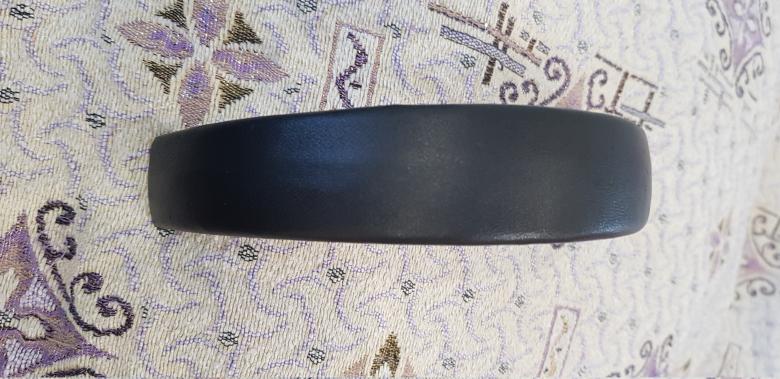
I got on the occasion of the headphones Samsung Level On Pro EO PN920 with Bluetooth. Headphones pleased me for exactly 5 months, after which it seemed to me that they started somehow not very well kept on my head. A quick inspection revealed that there were cracks on the headband, many cracks, I would even say a great deal disastrous. The operation was exceptionally homely and very careful, the headphones did not drag around the city, and you could even blow dust off them, as I treat any equipment carefully.
Disclamer: I will not deal with the issue of sound quality, whether they are repairing or not, or I had to go and buy new necessarily correct vendors who understand how to use headphones. I decided to fix it, and to do it in such a way that the end result looked acceptable and, if possible, preserved the folding functionality. I also note that at the beginning of the repair I didn’t plan the article, so I didn’t take so many photos of the repair process itself, but just believe there, everyone will cope.
We disassemble the headphones, unscrew the 2 small screws from the inside of the headband with a Torx T5 screwdriver on each side, remove the pads, then gently pry with a thin screwdriver to separate the soft inner pad with eco-leather. Below on the photo you can see the quality of the skin of young dermatins, (by the way, such I got)
')
The remaining U-shaped cover is shifted in the direction from the cushion, it is desirable to use hands or a rubberized part of a screwdriver for this, since can damage this delicate plastic. We also remove the stoppers of each headphone; they are simply pulled out onto themselves.
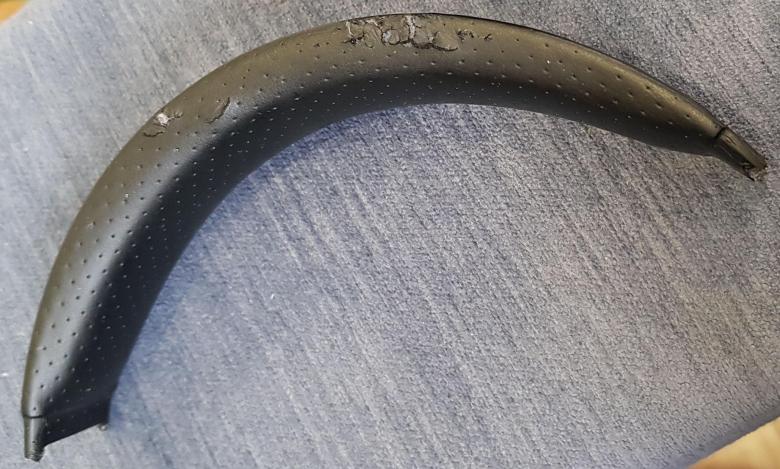
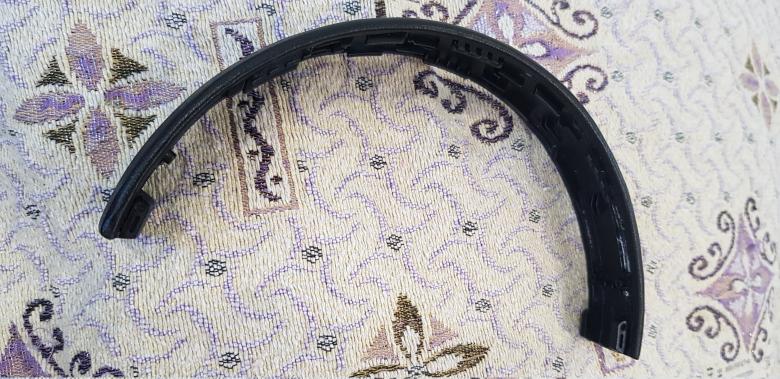
After this we squeeze out the hinge pin of the earpiece itself with a thin screwdriver and here we have the headband in our hands:

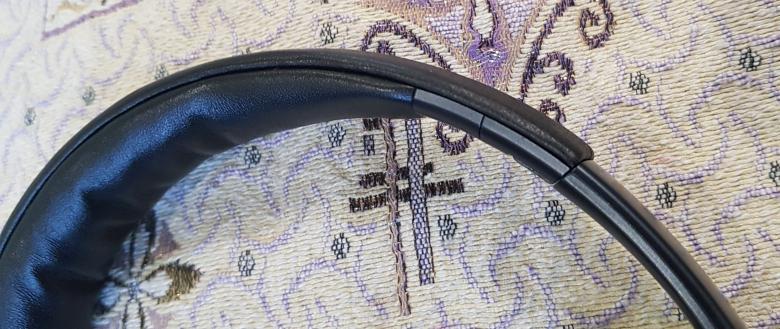
Actually the problem itself:

At this stage I went to google, it became clear that I definitely should not be alone in this problem. And indeed, the problem with the cracking of the headband is quite massive, many people are faced with this, even breaking to pieces, and on well-known ad sites even offer repairs to this particular model. On the Internet, I found this repair option . So I definitely will not do. Finally, I went to aliexpress, in the hope of finding a new headband, but unfortunately only ear cushions are offered there, and with most of them, the order is complete. So we will fix it on our own.
It became clear that the headband must somehow be strengthened. I went to the local market to shop for women's jewelry, I bought two women's iron rims cheaply, one turned out to be 5mm wide, the other 7mm, laid all the spare parts on the table:

In shape, they fit well, and after 20 minutes of straightening with hands, they came up almost perfectly. Try on:

Here I must say that there are two options for repair, either to strengthen the headband on the outside, which seemed to me more correct, but would require skinning, or glue the iron bezel inside, which will save you from working with the skin, but it will not save you from breaking the ends of the headband on which the headphones themselves are held. Here it can be seen that the cracks have already gone behind the hinges, and the iron rim can no longer be glued in there, since the stopper of the headphones will disturb.

Measure off the bezel, cut off the excess, apply to the headband

We put on scotch tape, partially collect headphones to check the pressure of the resulting structure. If everything suits (and I was set up with a 7mm bezel), then we disassemble it back, press the bezel and use an awl to draw lines along the bezel contour to precisely fit it to its seat and subsequently precisely combine the two parts. The bezel is one, that the second one is not in perfect shape, so it stood up on a headband with a certain bevel, but only in this position, it pressed all over the plane to the headband

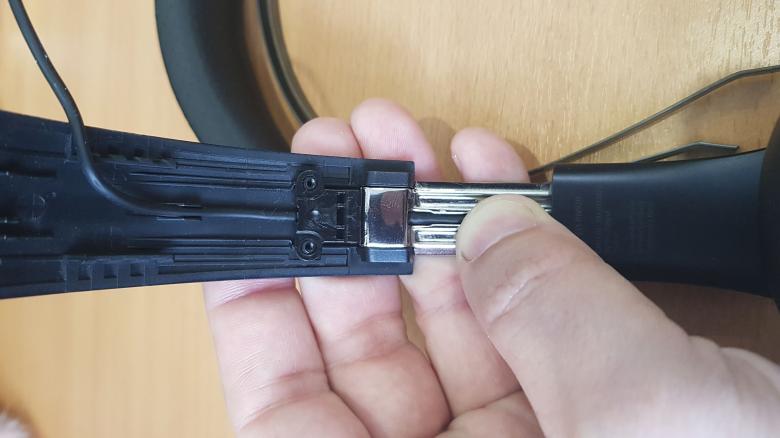
I decided to glue the bezel on the 88th glue, since in the first place it does not tan after solidification, and secondly it is very durable and easy to buy. In order for the glue to have better adhesion, the glueing areas need to be sanded and made rough (yes, yes, the first time I didn’t sander and I had to clean all the glue). I used the usual sandpaper for the rim and the files for the headband. Glue the bezel in accordance with the instructions for the glue, with the obligatory degreasing and time exposure. Next, you need to press the bezel along the entire length of the headband, here I was puzzled for a long time, how to do it without damaging the already rather fragile headband. A good option was a clamp-ticks here such a plan.
It is necessary to adjust the tongs so that they are well pressed, without breaking the plastic. After connecting the headband and the rim, you need to walk this clip along the entire length of the rim, the rim is pressed, squeezing the glue, wait for 30-60 seconds and move to the next section, and after that it will not be torn off. After cutting along the entire length, I fastened the tongs at both ends of the resulting structure and left it so that the glue would dry completely. Instead of ticks, I think you can pick up small clamps.
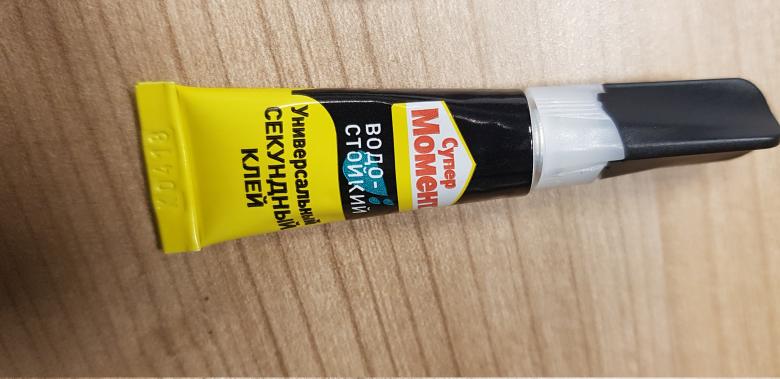
At this point, I still decided to glue the old cracks, I thought for a long time what, but I did not think of it, we glue one crack and a new one will immediately form in a different place. I read a series of articles on adhesives and plastics of a respected steanlab and realized that finding the right adhesive for me, which is infinitely far from chemistry, will somehow not be easy, but it is better not to approach dichloroethane at all. Therefore, without further ado, he walked through the usual cyanoacrylate over all the cracks and that's it. But how to protect against future cracks? I looked at the glue gun and thought that this is quite an option as a binder. To prevent the newly formed cracks from starting to walk along its entire length, it is necessary to fill the remaining space on both sides of the rim with the usual hot melt glue from the thermogun.

After applying a smudge of 1.5 cm glue, I press and smooth it with glossy paper - a substrate of various kinds of stickers; it does not stick to the hot glue.
Next, I needed leather, I ordered a piece of skin for aliexpress as soon as I decided to repair the headband, and after 2 weeks I already had a piece of skin about 30x30 cm. He took the thinnest skin he could find - 0.3-0.5 mm, since it stretches better and is easier to mold. I must say that before that I had not worked with the skin and this was my first experience. In fact, the skin bought at random. After the headphones were ready, I found out that in Moscow you can buy leather of much better quality and at the same time cheaper. Therefore, I don’t see much point in ordering blindly to aliexpress, it’s easier to go to the store and touch all the options and choose the most suitable one. Layfkhak - a small piece of glove leather can be bought in various "shoe repairs", "mending clothes" and so on. My skin is more suitable for the definition of salon - for trim cars.
The skin-tight skin began from the soft bottom. We remove leatherette with improvised means.

It is glued on some not very good rubber glue, it is torn off easily.
We straighten a loose piece of dermatin, smooth and glue transparent tape to the skin on the reverse side and cut out the resulting template with a small margin of 1-2mm, I didn’t follow exactly all the cutouts of the template, this is to nothing, the edges will be hidden behind the overlays. So that the skin does not leave folds, you need to start to glue on one side in parallel pulling the skin along the edge, then go to the other side and also glue in the stretch. Glue only the same shoulder, which was glued and the original leatherette. The skin to the foam is not glued. I used the glue like this:
Why this particular glue? It has several very important parameters for this job. It does not leave whitish streaks, it freezes quite quickly, and at the same time it has a time margin of 5-10 seconds before the surfaces join and after solidification it is completely transparent and not fragile like ordinary cyanoacrylate. Even in the pros, unlike the last one, it does not have superfluidity and can be applied quite neatly on a thin edge of 2 mm. I smeared areas of 2 cm and stuck my skin with my fingers, held it for a minute in the pressed state and glued the next section. Here the biggest danger is to slap an open area of skin with glue, so if somewhere the glue has come out, and you want to intercept more comfortably, it is better not to, or keep in mind that skin can be stained.
After sizing, I did this:

It can be seen that there are small folds - it was necessary to stretch the skin better and evenly during sizing, and also to take into account that the skin stretches differently in the longitudinal and transverse direction and the pattern is positioned correctly, and not in order to save the skin, as it happened in my case. But in principle for the first time, and I think it turned out quite normal, the folds look natural.
Getting down to the headband. After covering the headband, it will increase in size by the thickness of the skin and the soft interior may not snap into its latches. Therefore, you need to take a sharp stationery knife and remove the collar at the edges of the headband, flush with the main one, as well as from the ends, where the 2-3mm skin will overlap. You can accurately measure the height of the material being removed from the ends with a caliper, I had a skin thickness of 0.5 mm, I added 0.1 mm to the glue, so I removed 0.6 mm on each side, it worked out perfectly. At this moment, I had to Dremel remove some material from the iron rim, at the same time rounding its edge. Therefore, you can immediately measure the bezel at 0.5mm shorter on each side. With a stationery knife, plastic is removed without problems, the main thing is not to rush and act neatly, not forgetting about the safety of your own hands.

Then I took the skin, by this moment I realized that it stretches in each direction in different ways. Attached the headband to the skin in the direction where it stretches better and drew a pattern, leaving a margin of about 5mm on each side, this is more than enough. According to the experience at the ends, the stock can be left at 1-2 mm, my skin was very easily and strongly stretched, so there was too much of a stock of 1 cm in the sum of the sides, then just cut off the excess.
First, we glue one end, after a couple of minutes the glue is already set and you can tighten the skin along the entire length. After smearing the second end of the headband with glue, I pulled the skin as much as possible and glued it. Cut to size after gluing it was not very convenient. I think it is better to measure it right away, take a margin of 3-5 mm from the maximum stretch and cut the edge evenly and glue it along a flat edge, or have thin nail scissors available. Well, then we pull up the side and glue them 2-3 cm.

The end result obkleyki headband skin.
Well, then it remains to collect everything. There were no problems with the build. Everything clearly fell into place.
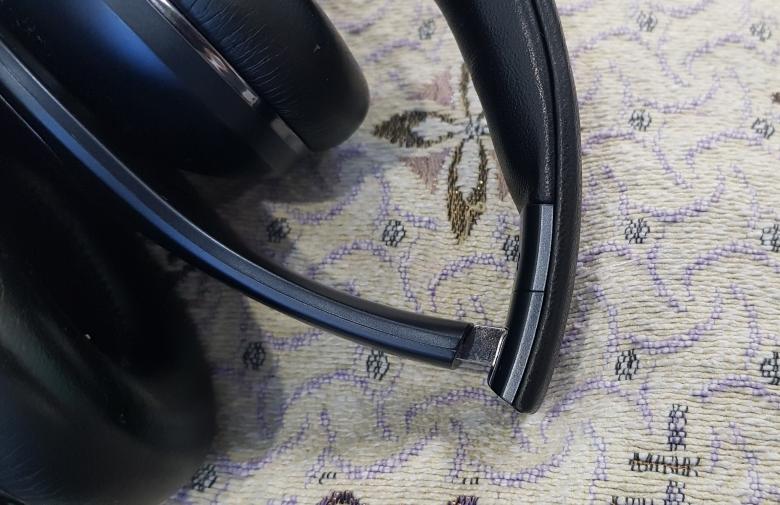


I was completely satisfied with the result, the headphones have a very neat look, they fit perfectly on the head without falling off, and I hope they will last for a long time. The repair budget was about 700 rubles, and the rest of the skin will definitely be used. The basic rule that helped me was to take my time, to do everything slowly, for my own pleasure.
PS: This is my pilot article on Habré, please do not kick much.
Source: https://habr.com/ru/post/454524/
All Articles