The history of assembling a “village supercomputer” from spare parts from eBay, Aliexpress and a computer store. Part 3
Good day, habrovchane! I will continue my story of assembling a "supercomputer in the village."
Link to 1 part of the story
Link to part 2 of the story
I will begin the third part with expressing sincere gratitude to my friends who supported me in difficult times, motivated me, helped with money by sponsoring this rather expensive business for a long time and even helped with the purchase of components from abroad in cases where I could not buy them on straight myself. For example, if a company selling server parts in the United States or Canada simply did not send to Russia. Without their long and regular help, my progress would have been much more modest.
')
So, thanks to their requests, I made up my mind and started an account on Youtube, bought an old Lumia 640 smartphone that I use exclusively as a video camera and started making informative videos, both about building a “village supercomputer” and about other aspects and projects of my village life.
Playlist "Country Supercomputer":
Those who want spoilers can get acquainted, although of course it is better to do it in the process of reading my story or even after it.
The second part of my story was interrupted by the fact that it connected a Tesla K20M, GT 610 and M.2 NVE SSD + disk array to the system. By the way, how good is this Dell board? Let it have a built-in "disk shelf" for only 6 devices and RAID is not "the most sophisticated in the world", but unlike its more professional external colleagues, it skips the TRIM command on SSD. What is also important if you are using non-professional server SSDs intensively.
By the way, there is also one interesting and important point about this board. Chipset radiators are low with small fins. This works well when the board is in the original rack, where powerful turbines blow it along. But when using the board separately, it is necessary to remove the plastic sticker from the closest to the radiator expansion slots, and the distant one should be replaced with any suitable radiator from the chipset of the old motherboard with large edges, because the chip located under it is heated most of all on the board.
Having removed the video card from the system, I began to assemble the skeleton for my server, in the test version everything was on electrical tape, matchboxes and other plastic supports, but for full use of 24/7/365 this option did not seem to me acceptable. It was necessary to make a normal frame of the aluminum corner. The aluminum corners from “Leroy Merlin” were sent to the course, which were sent to me by a friend from the Moscow region, in their nearby city they were simply not sold anywhere at all!
In addition to the corners, the screws were used for the M5 countersunk head and nuts, M3 screws and nuts, small furniture angles, aluminum rivets for 5 mm holes, riveters, a metal saw, a screwdriver, a 5.0 mm drill for metal, a file, a Phillips screwdriver, cable screeds and arms growing out of ass.
Corners were used to attach the board to the frame and some other elements. This certainly added a few heights to the entire system, because the board was raised high enough above the bottom plane of the frame, but I decided that this was permissible for me. I didn’t fight for every gram of weight, a millimeter of height, in the end it’s not an onboard computer for aircraft where the standard is “15 G on 3 axes, strikes up to 1000 G and vibration”.
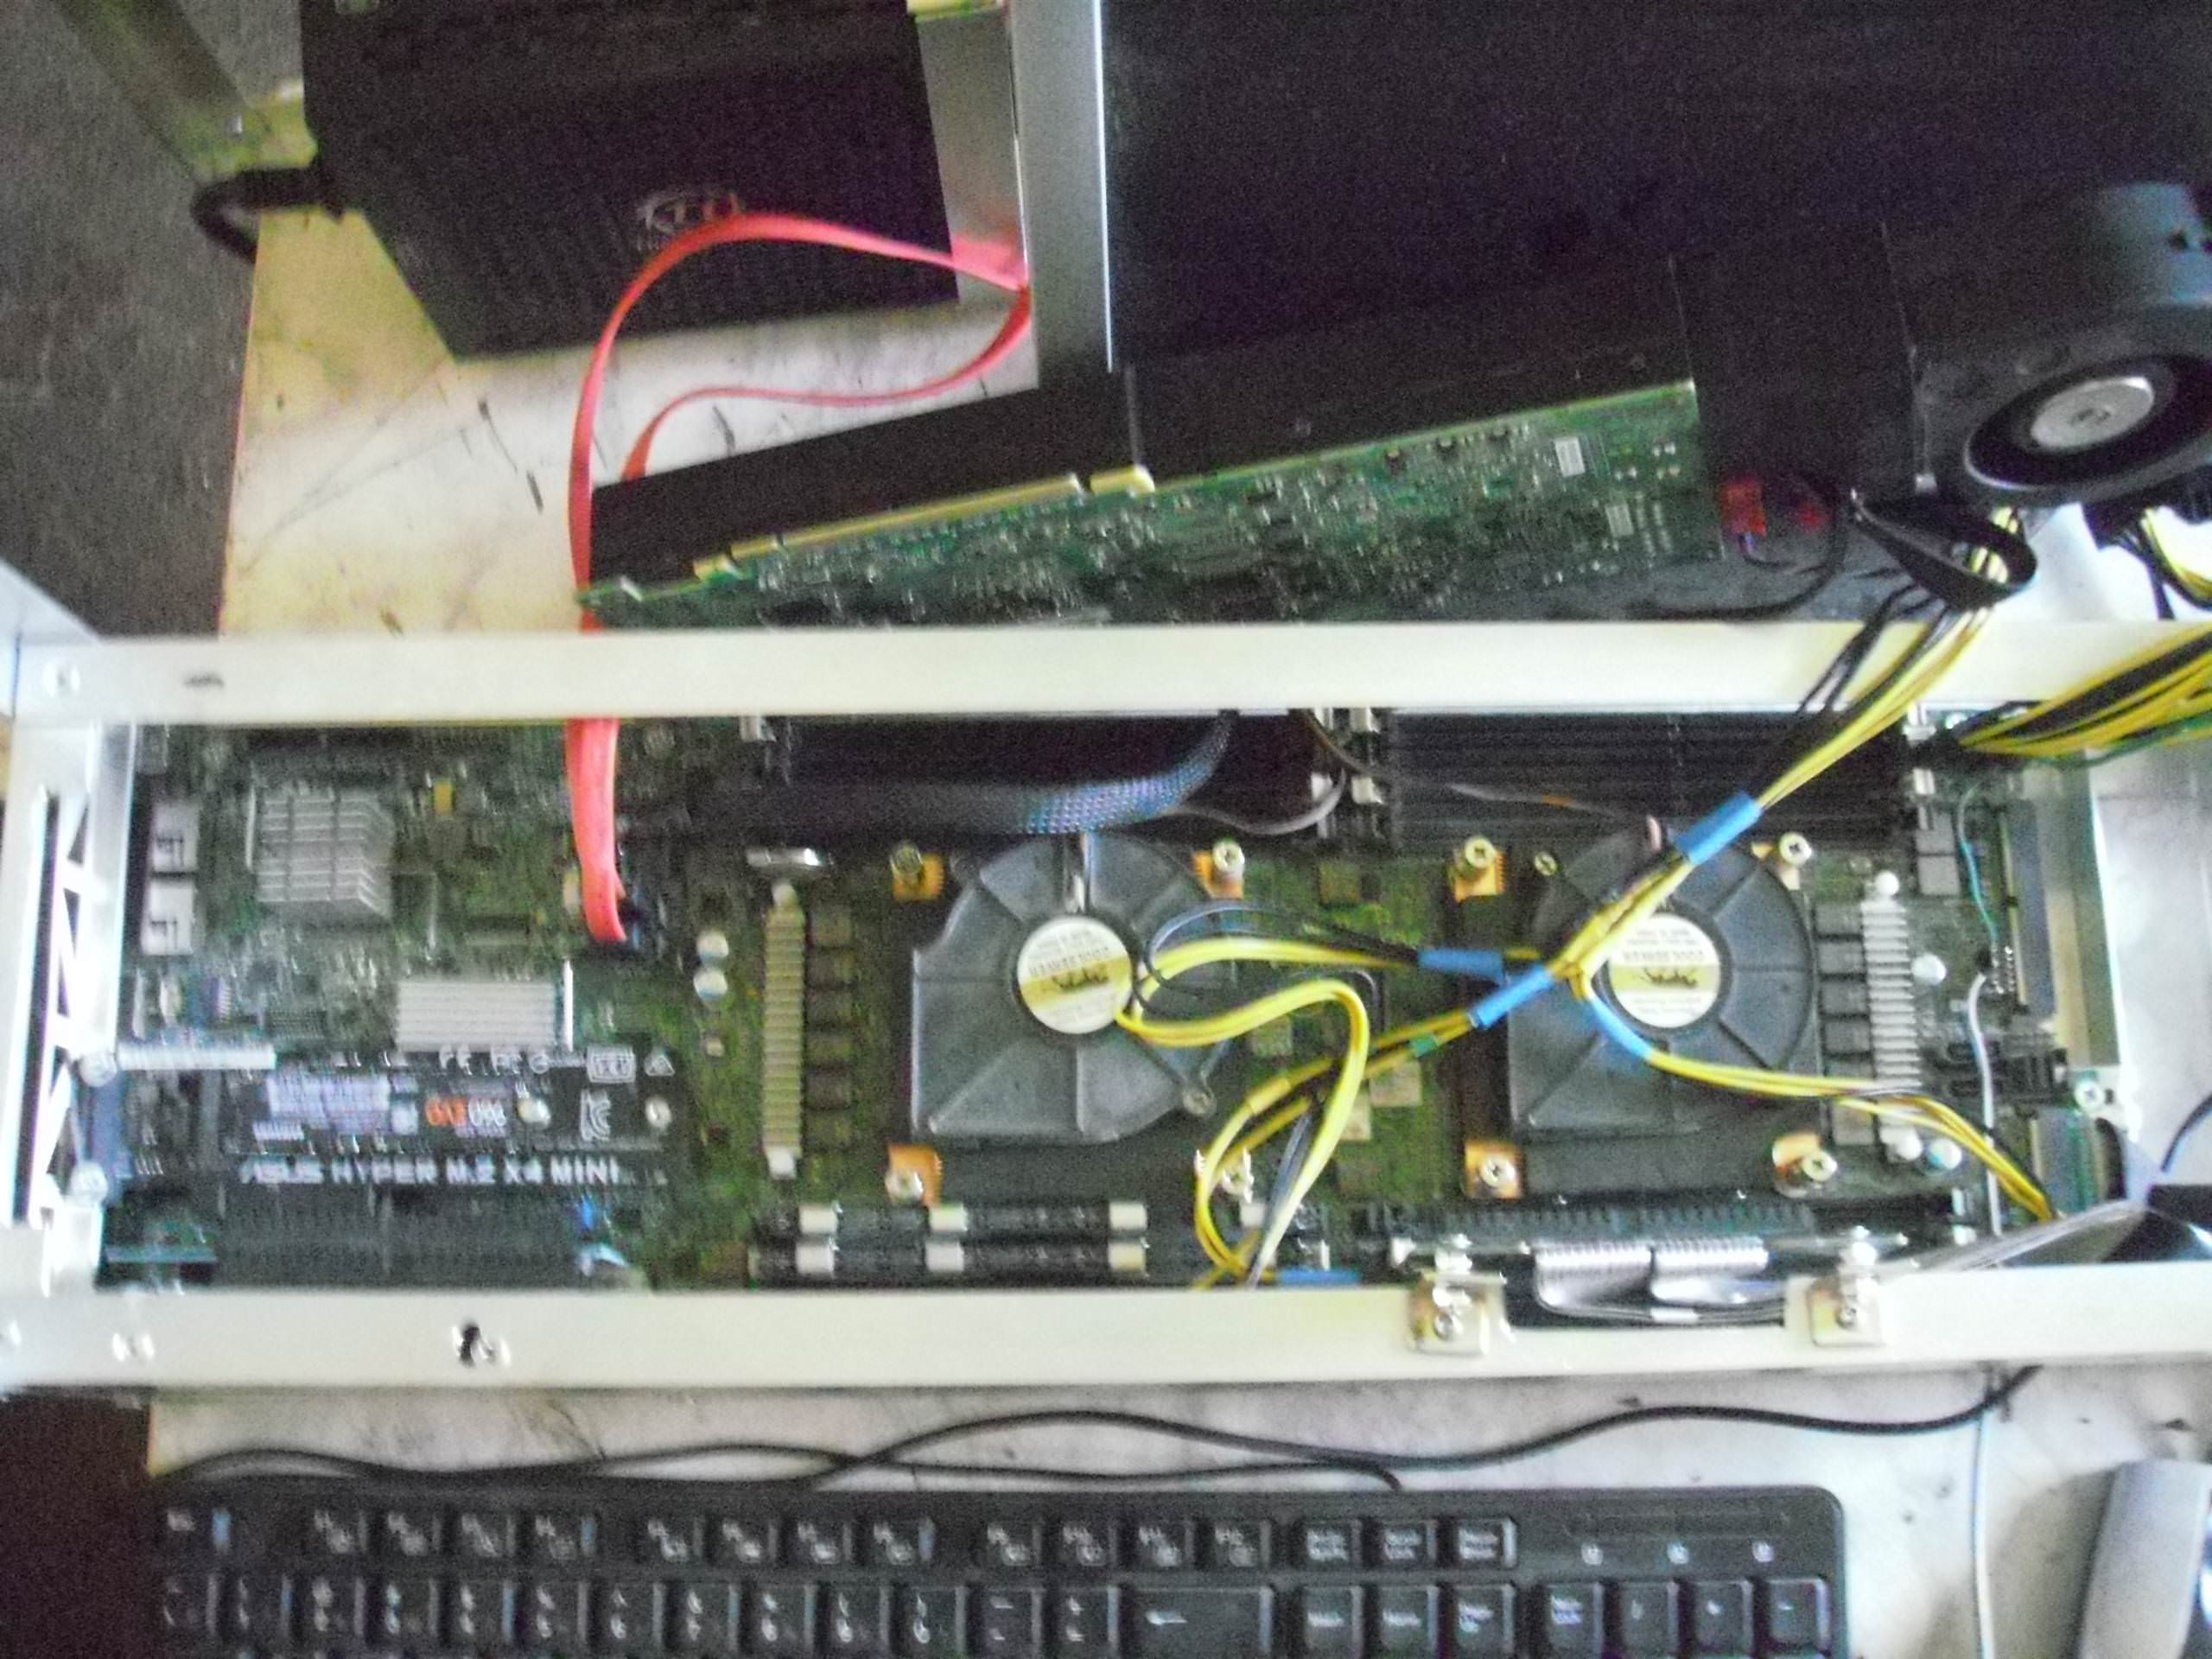
The board is installed, the risers are screwed, the adapter is screwed with an SSD M.2.
The board, SSD, risers and Tesla are in place. DC-DC is not yet screwed into place and it hangs on the wires behind the scenes. This is the server version 1.0, while still on one Tesla K20M.
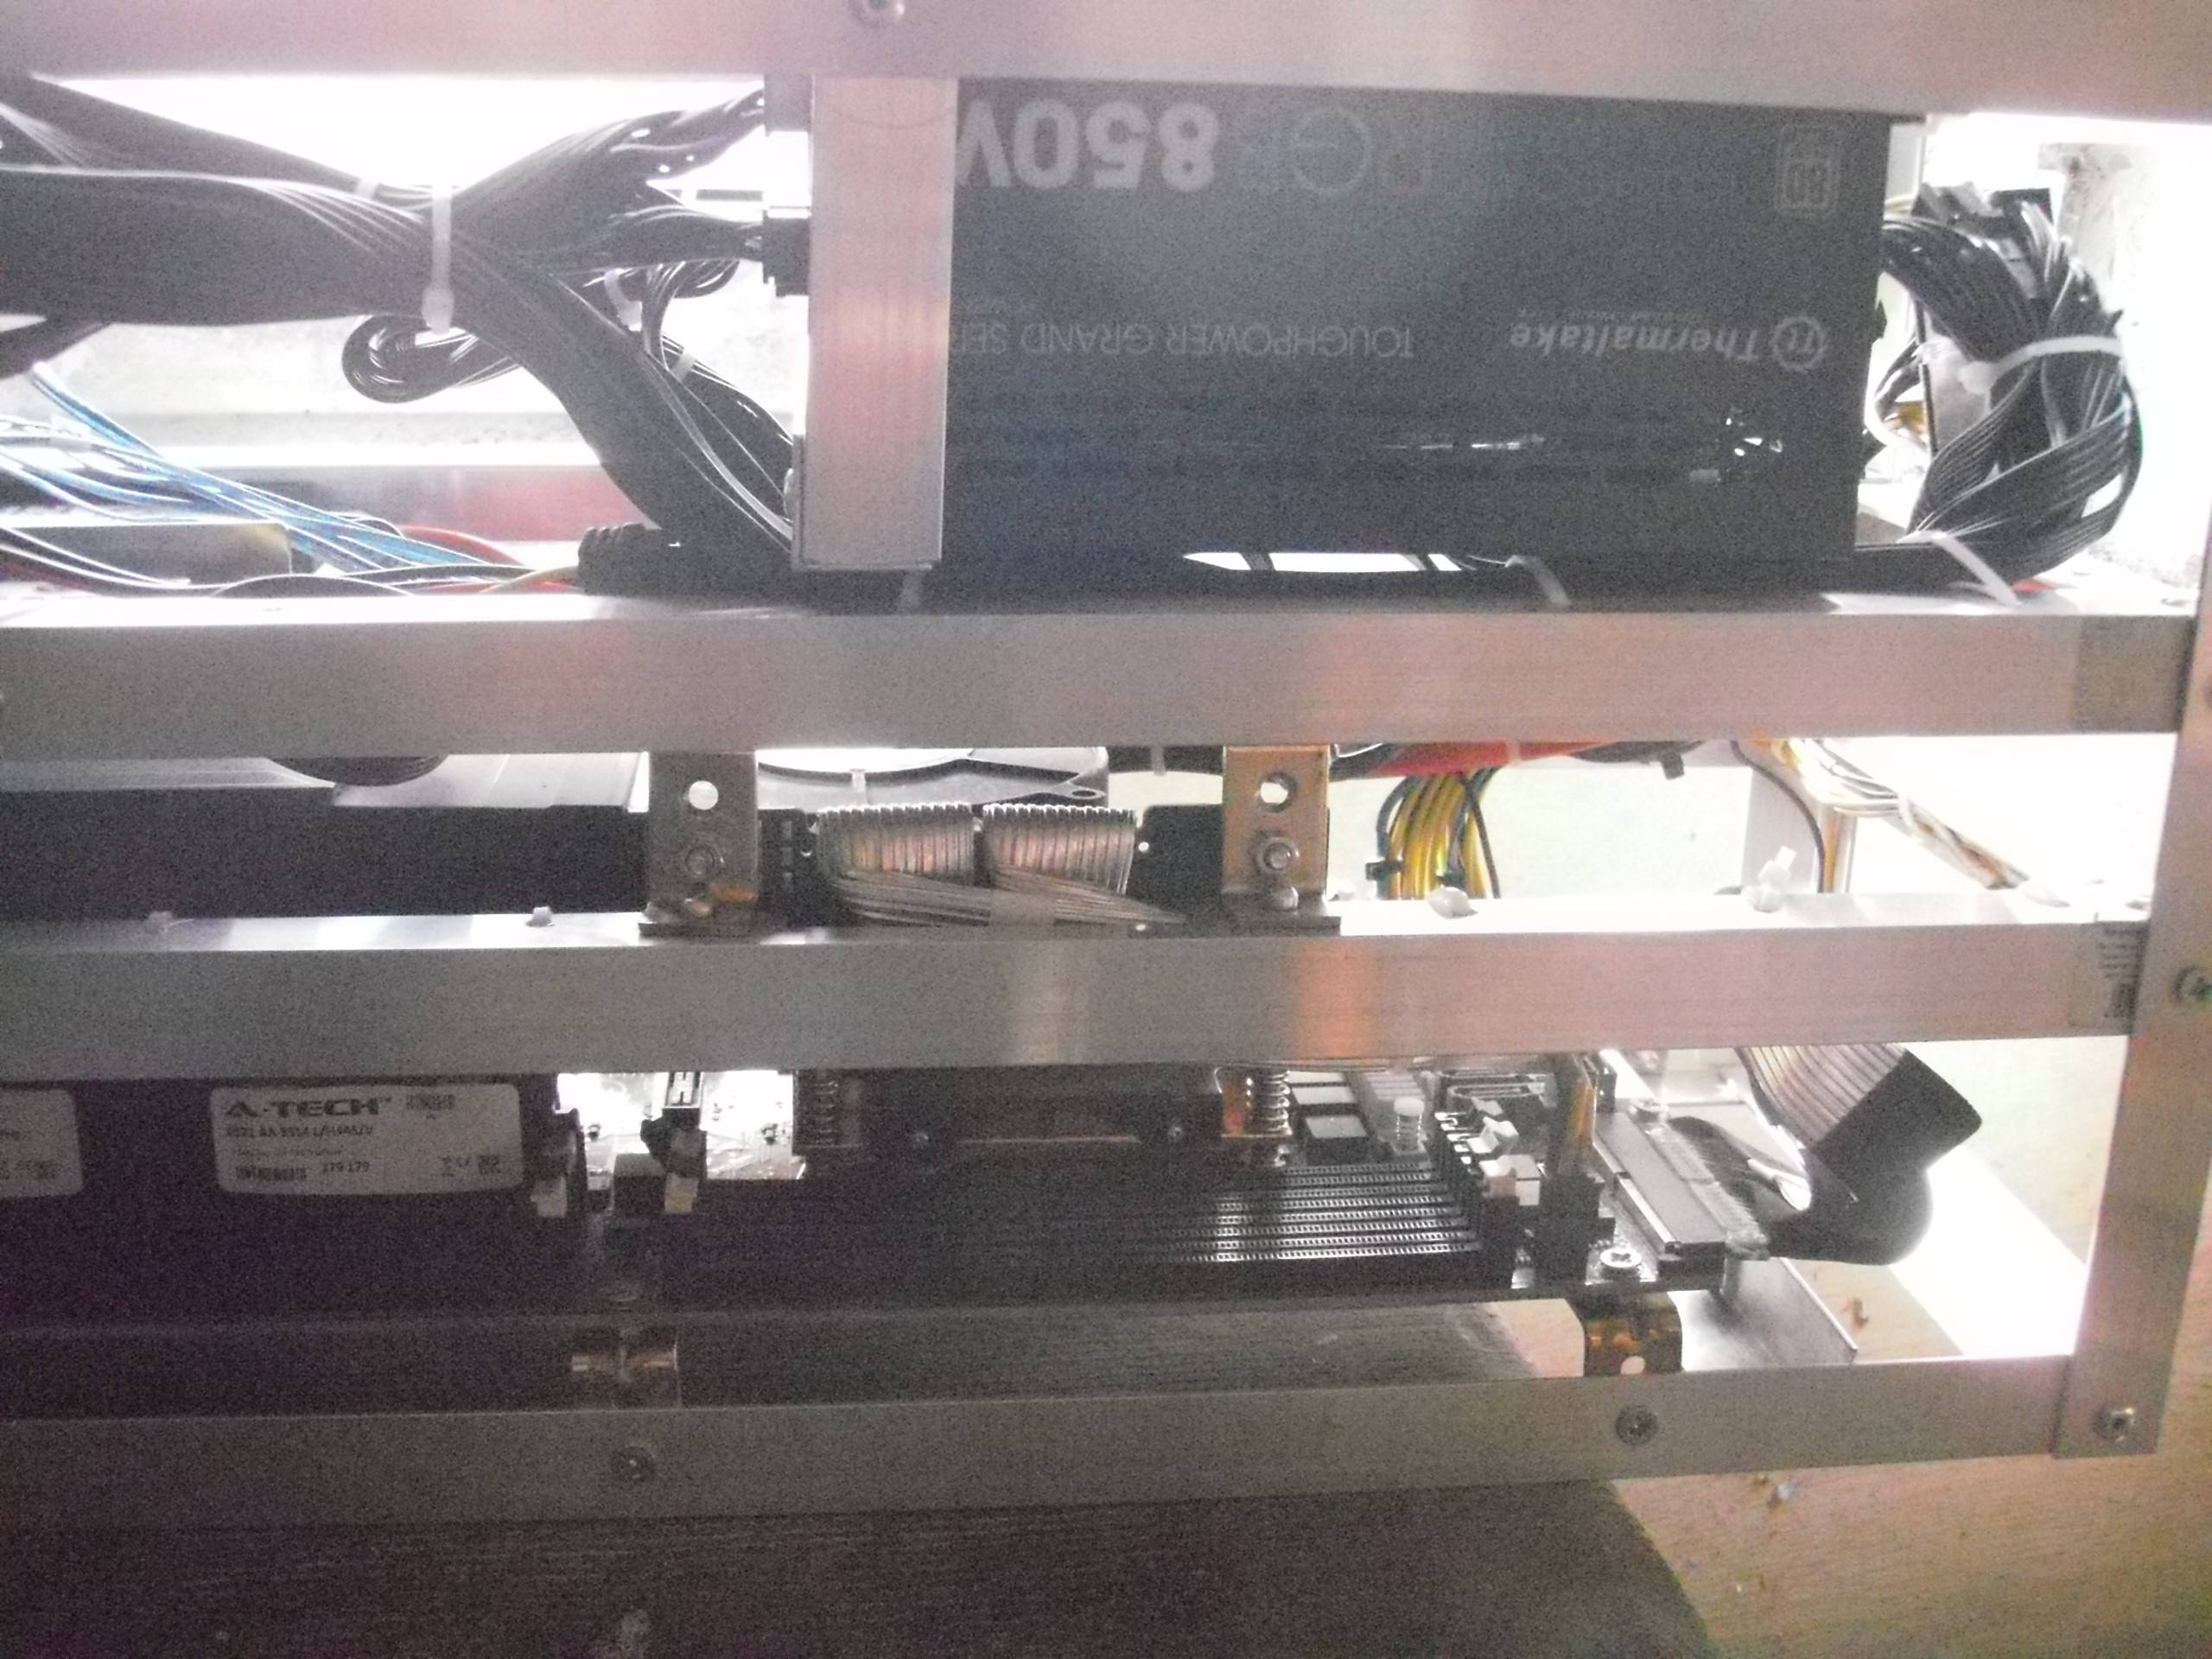
Here DC-DC is already attached to the frame, there it is, there is a small veil on the side of the motherboard under the “tails” of the power supply.
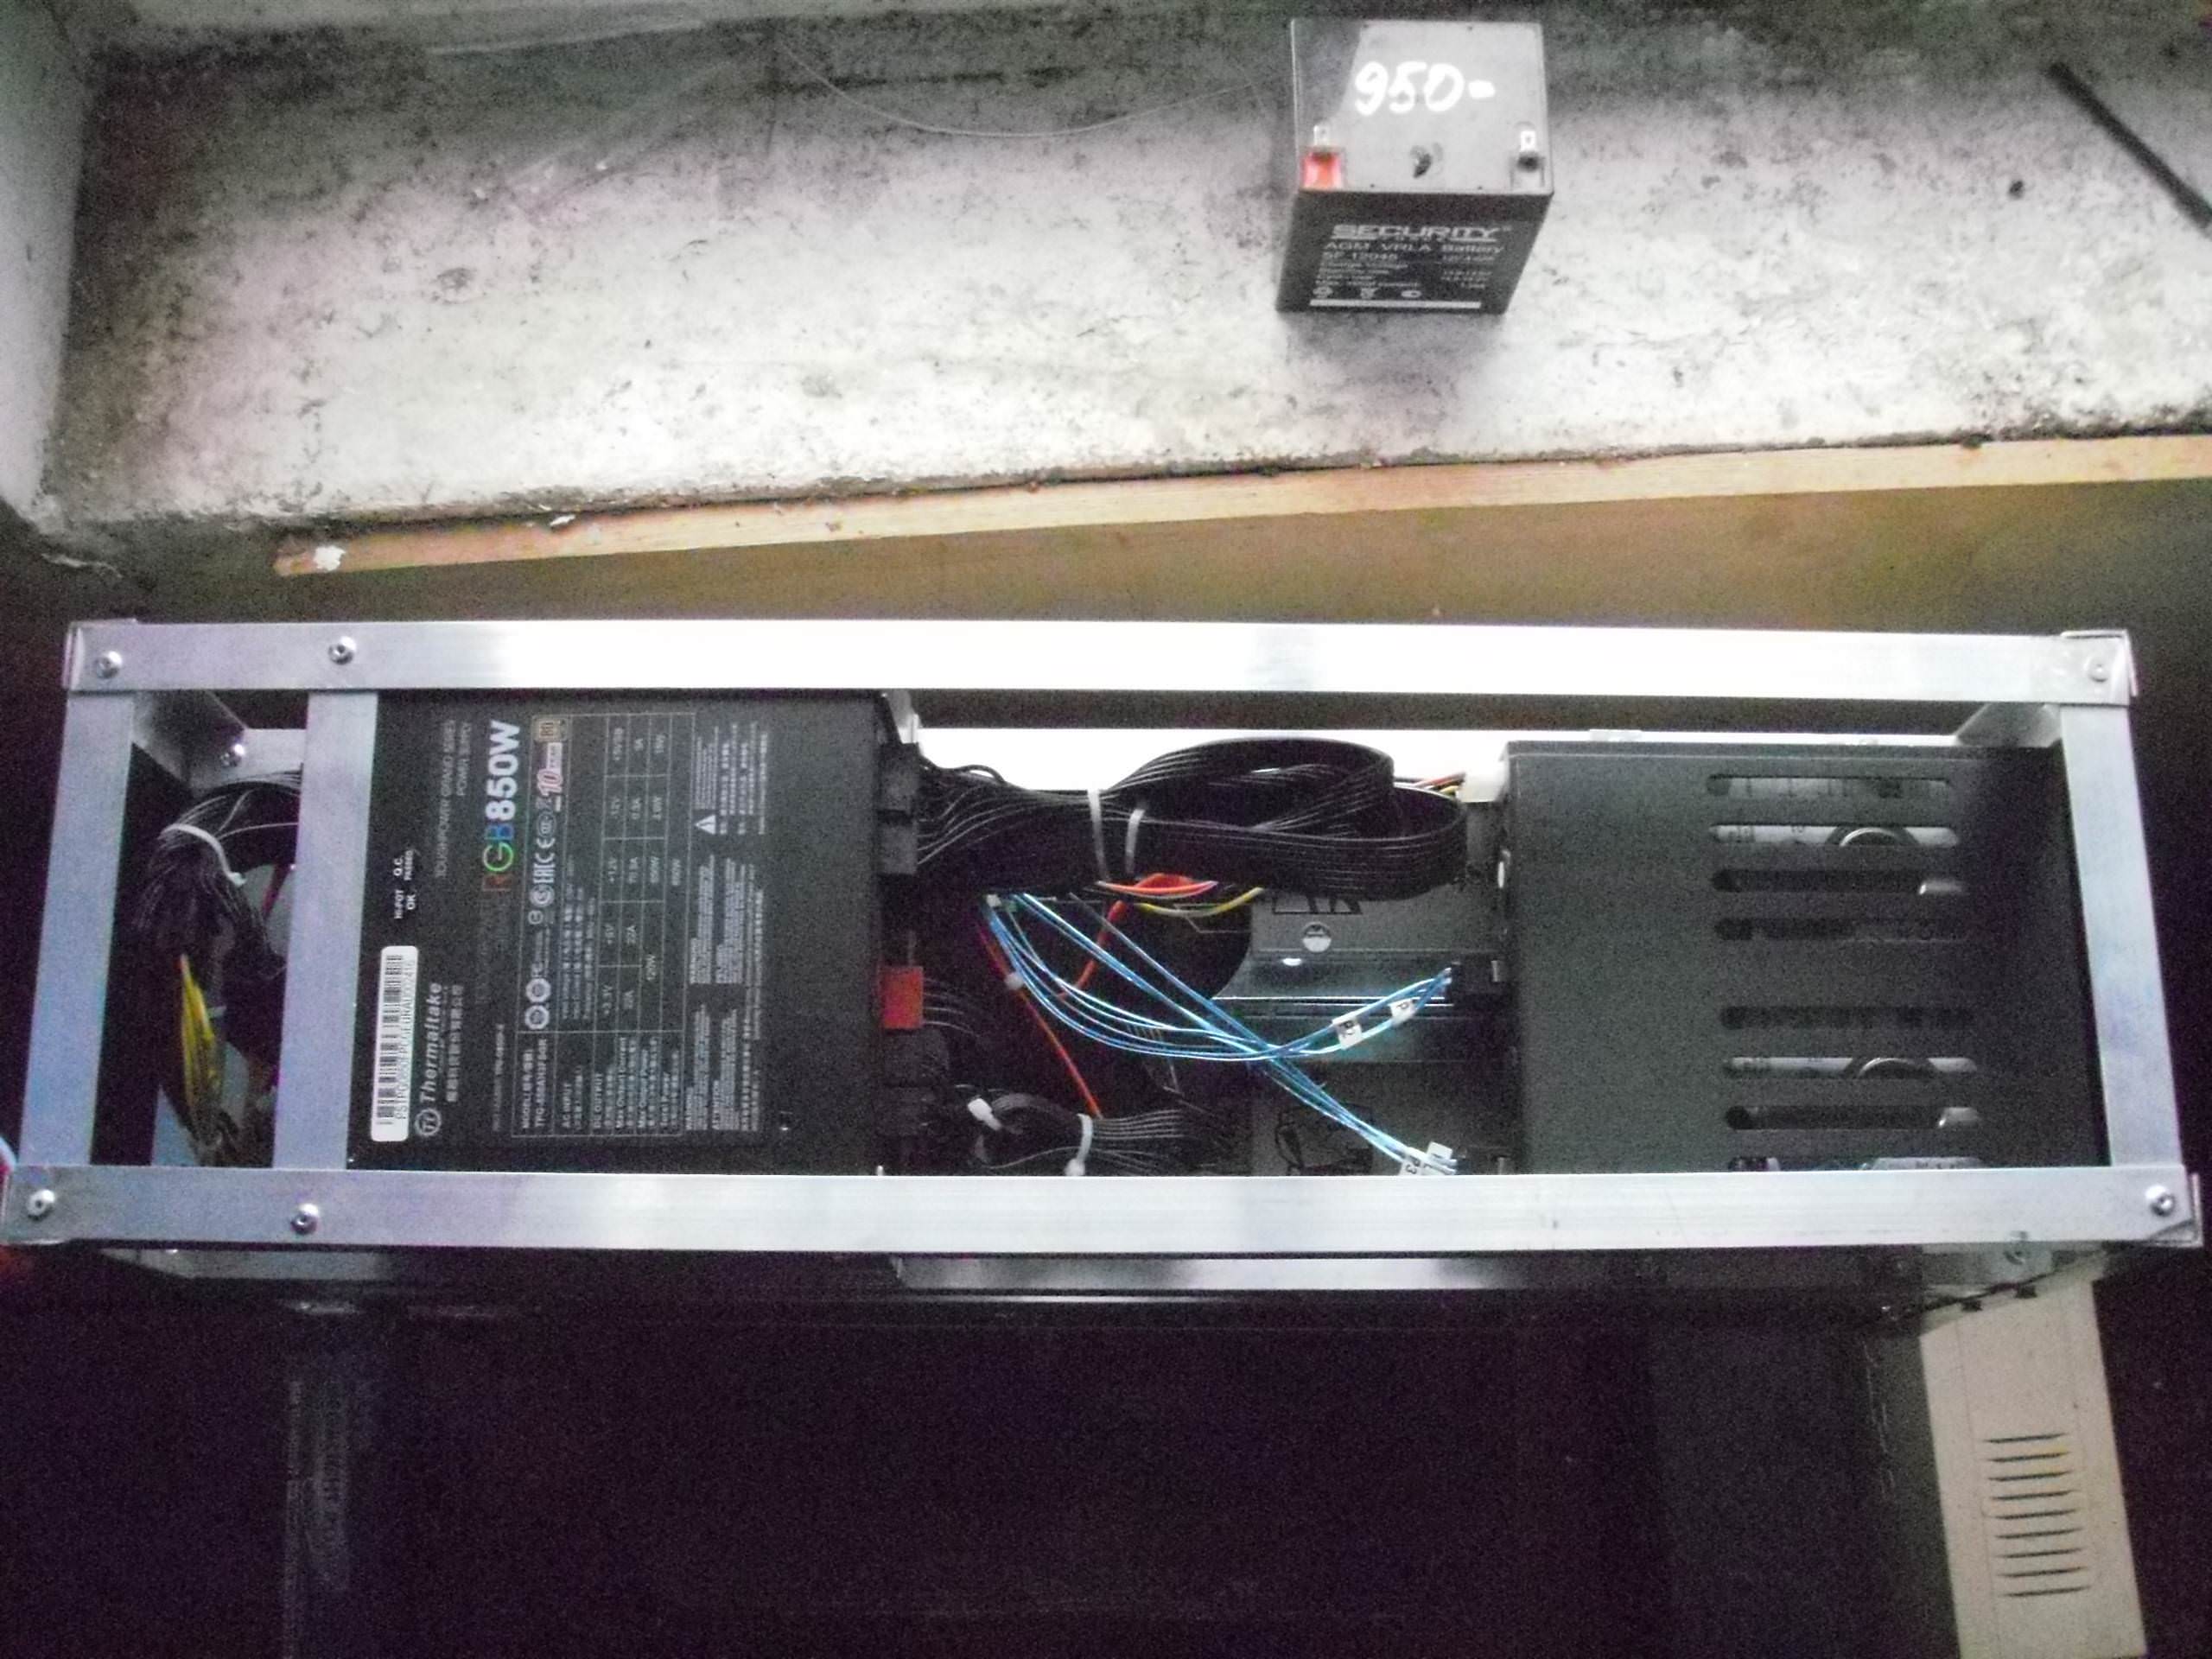
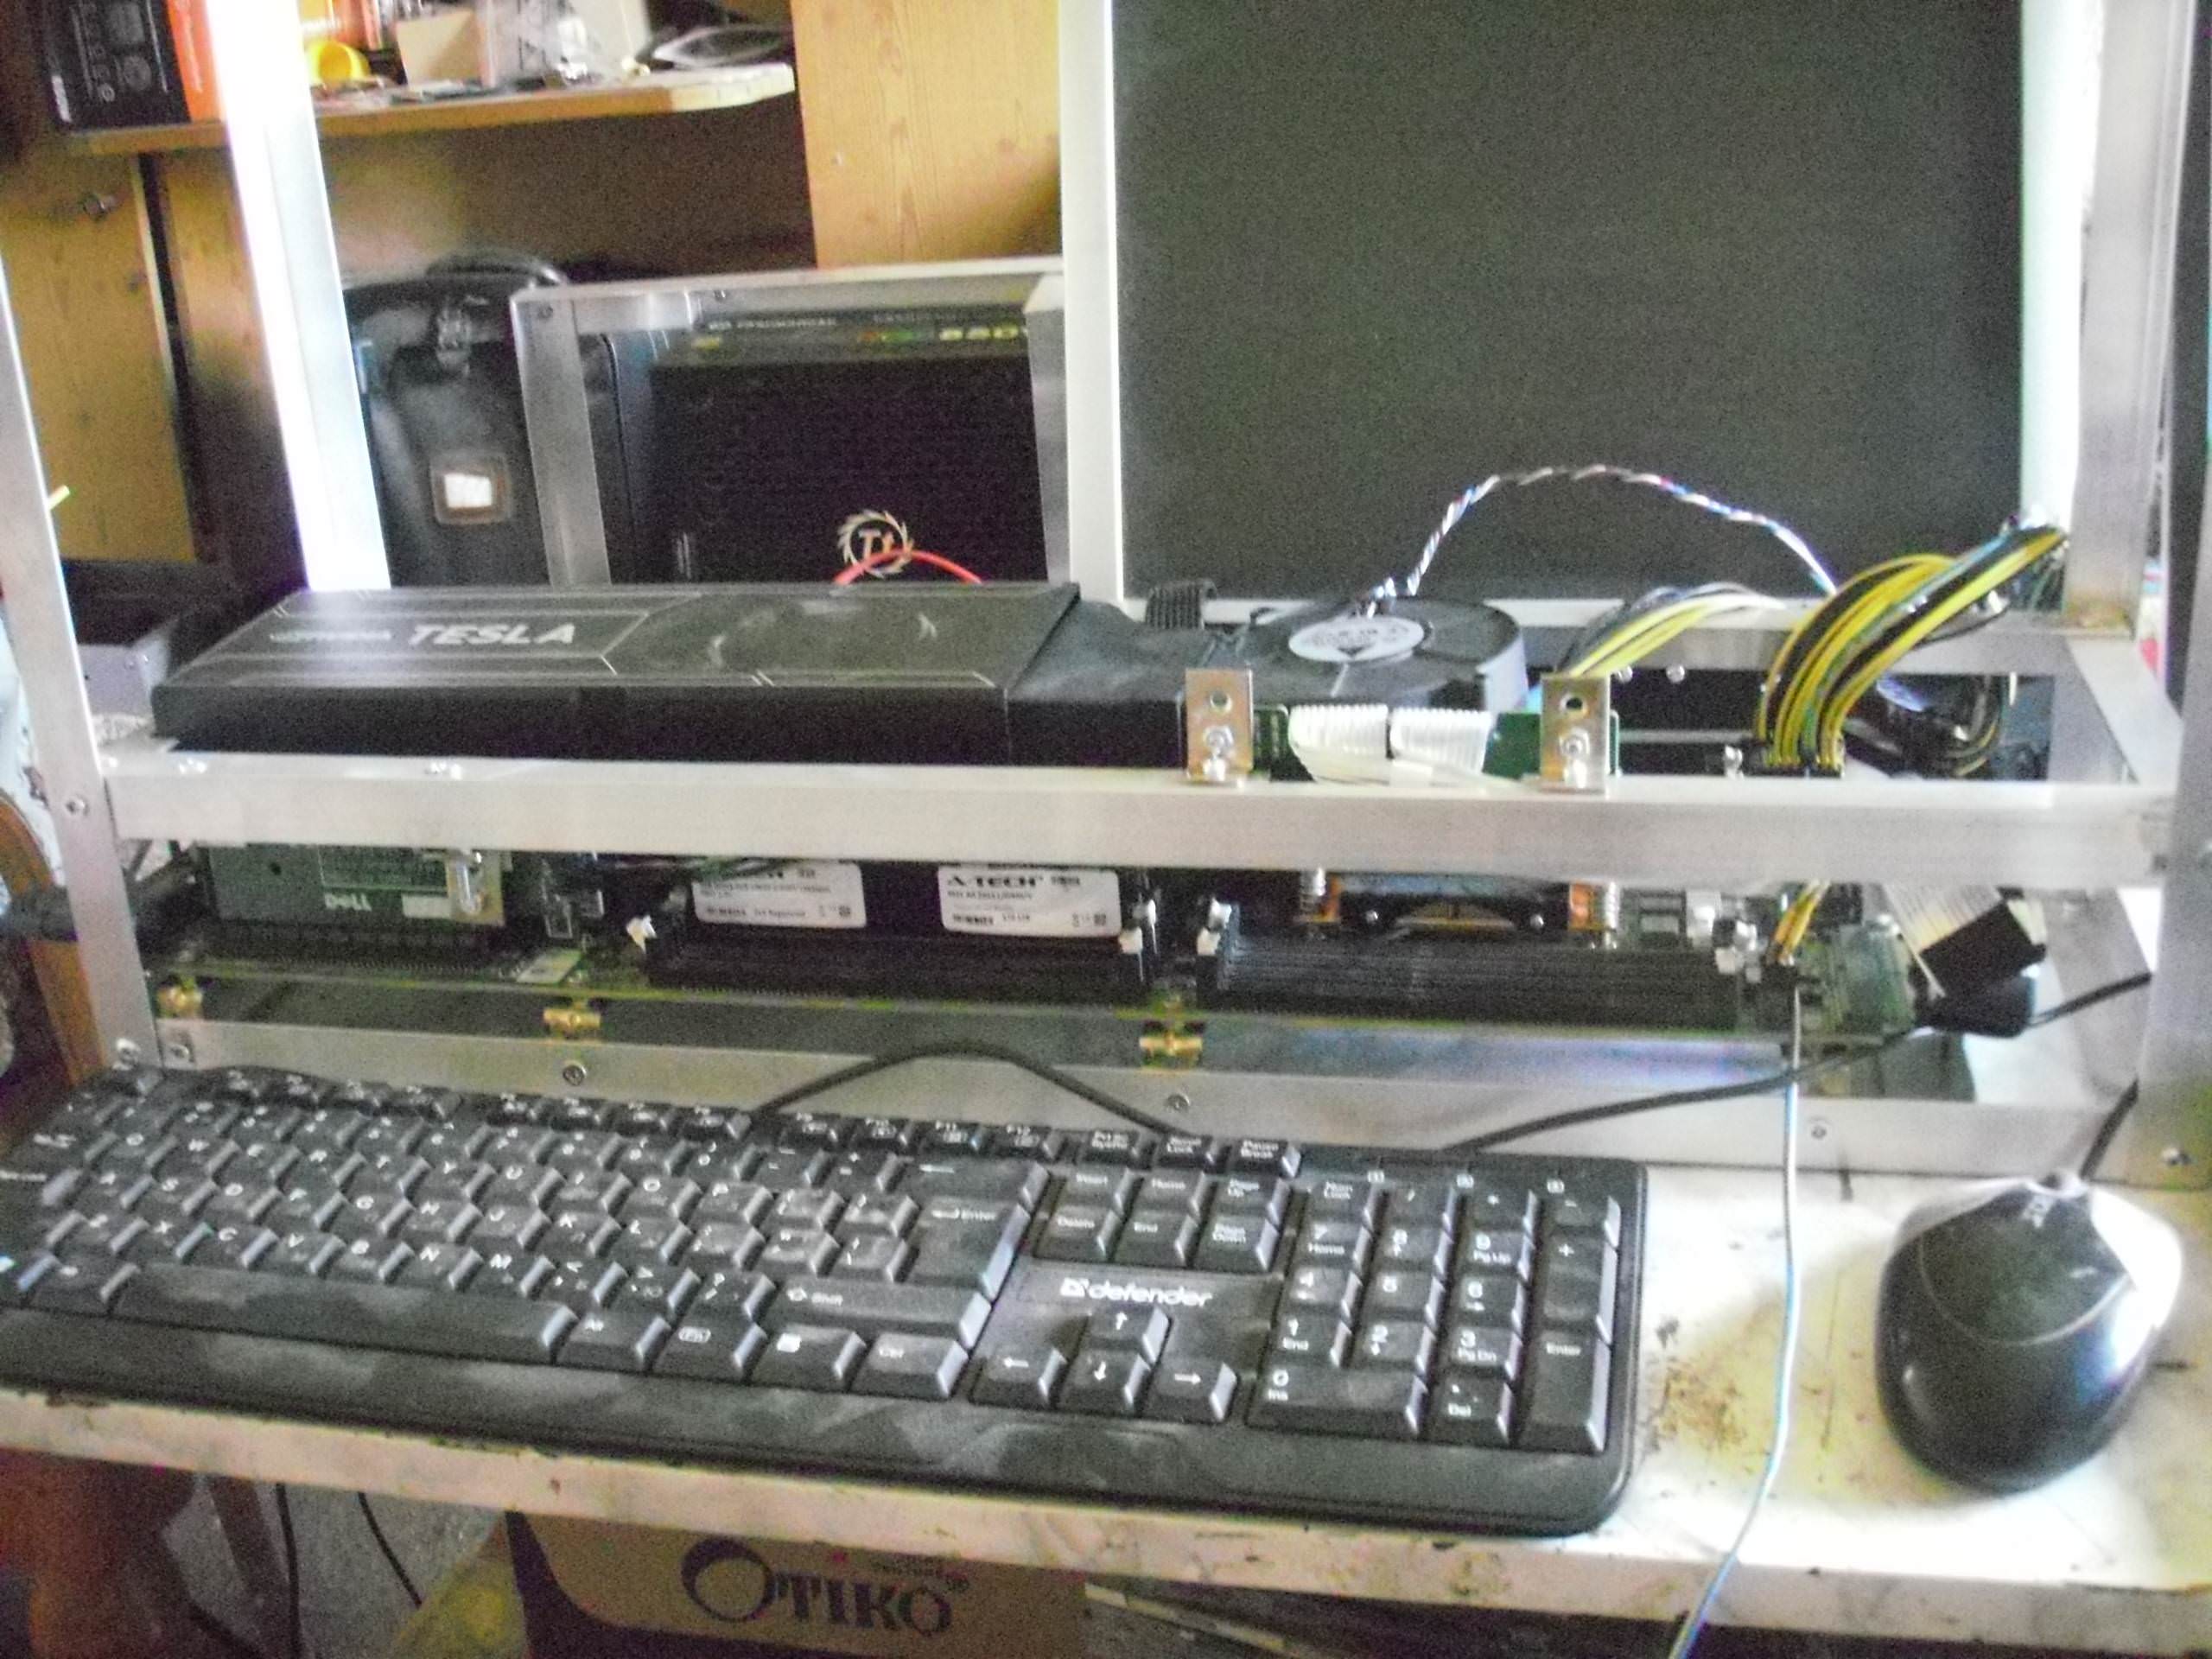
And this system is already assembled, top view. Above Tesla one more time from the corners in which a pair of SSDs are screwed side by side, above them an HDD basket, and on top of it a BP 850 W Thermaltek is modular hanging on the frame closing frame. BP fashionable, gaming, with RGB-backlit that I turned off so as not to blink like a Christmas tree. The only powerful modular power unit in the stores in a nearby city at that time.
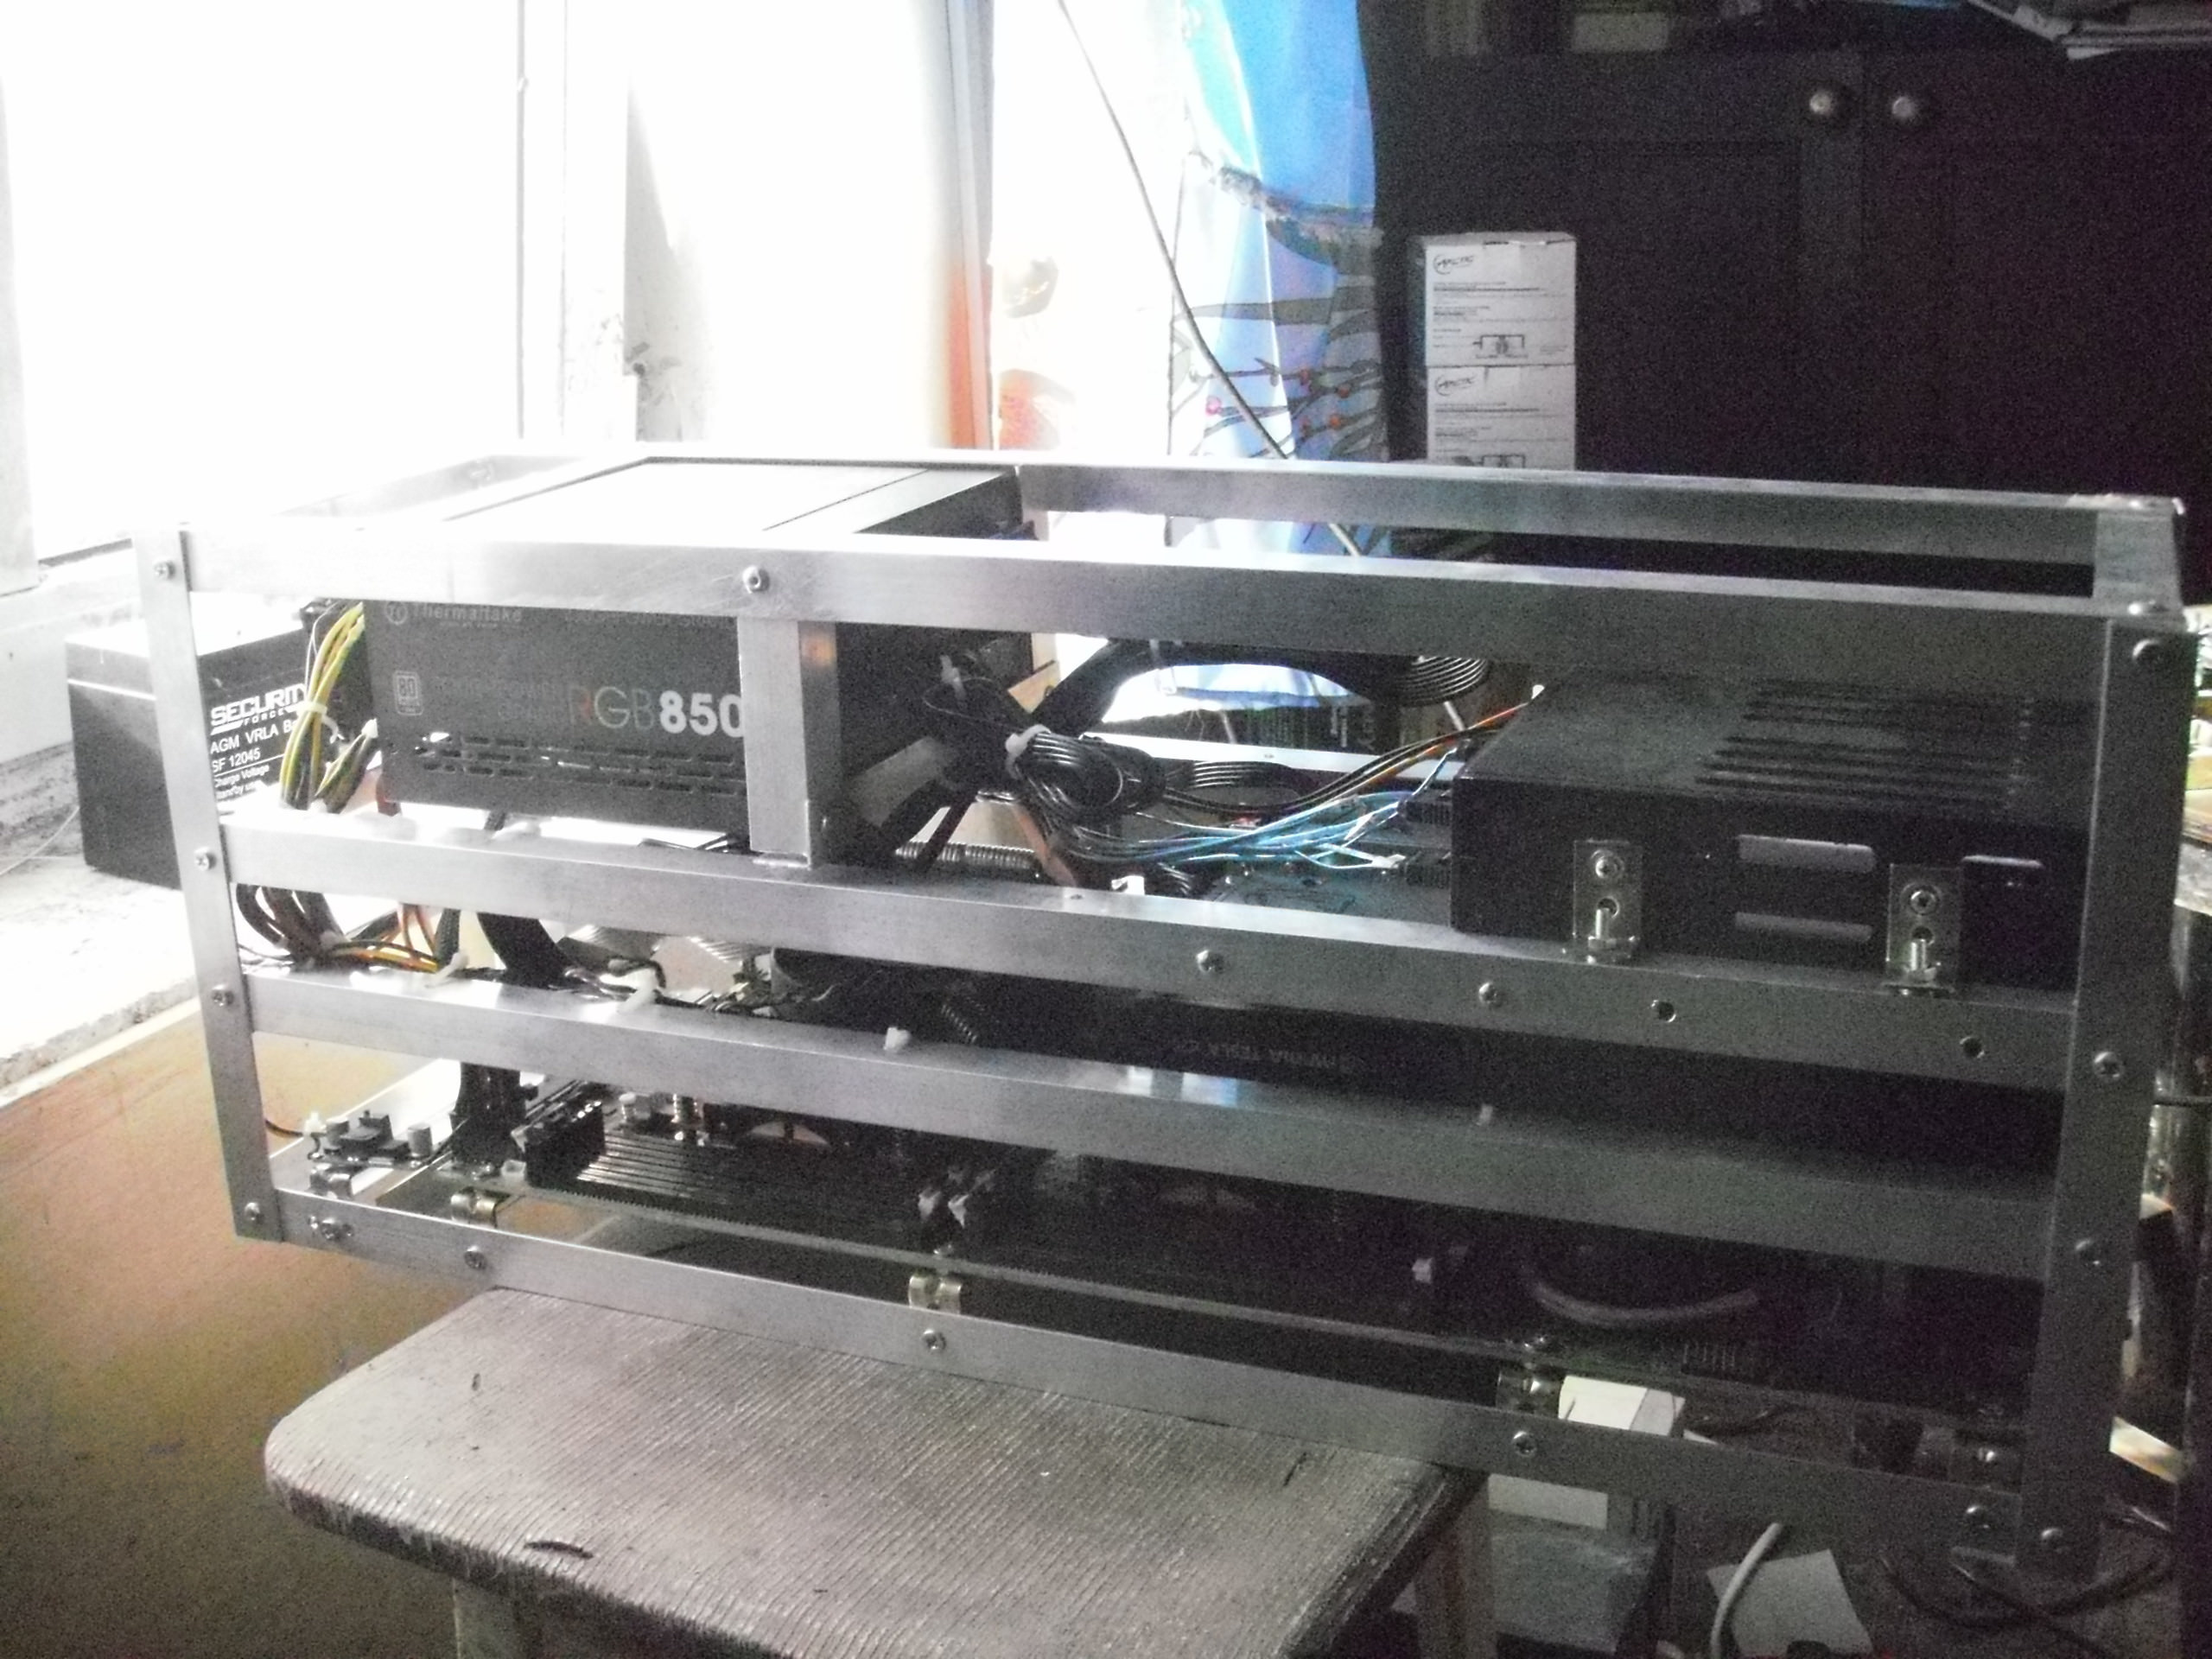
View of server version 1.0 from the side.

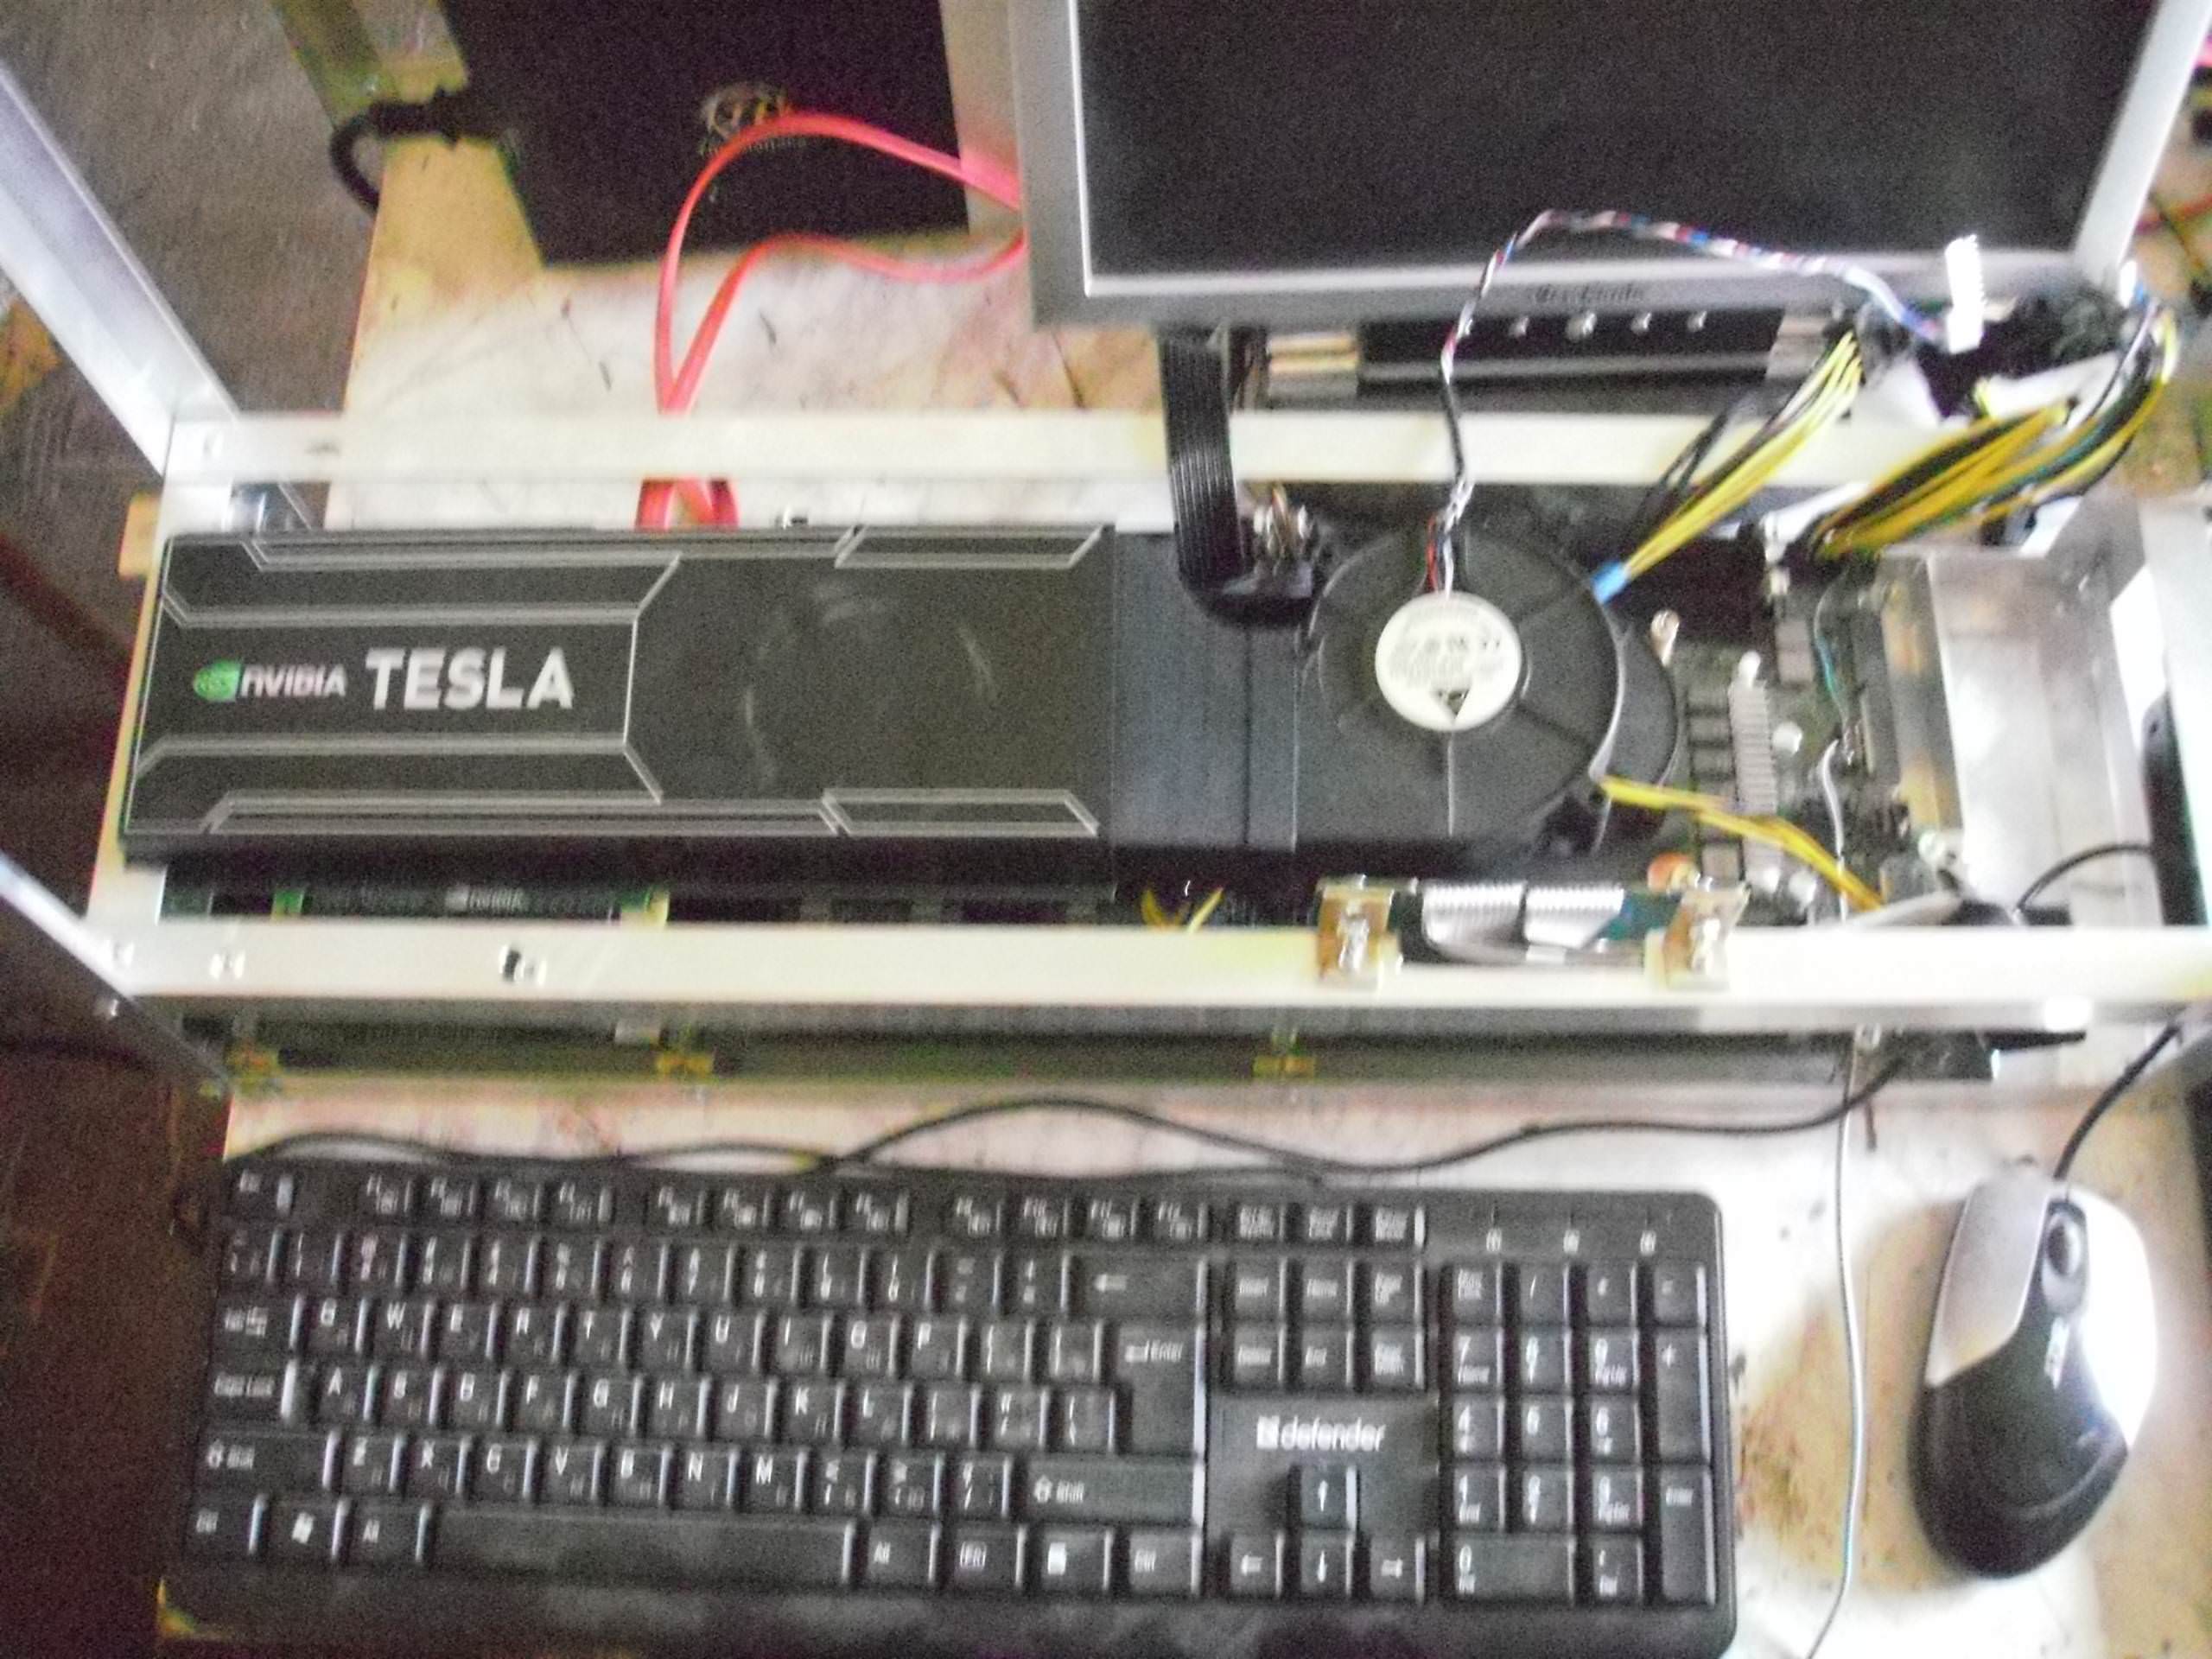
View of the server from the "front end". The connectors and rivers for the disks I made on one side as in server systems, so that for all the manipulations it was not necessary to turn the whole system back and forth. On the “cutout bar”, a takeaway with two USB 2.0 is screwed in, which I plugged in instead of a card reader, and the adapter board on M.2 is screwed to its bottom.
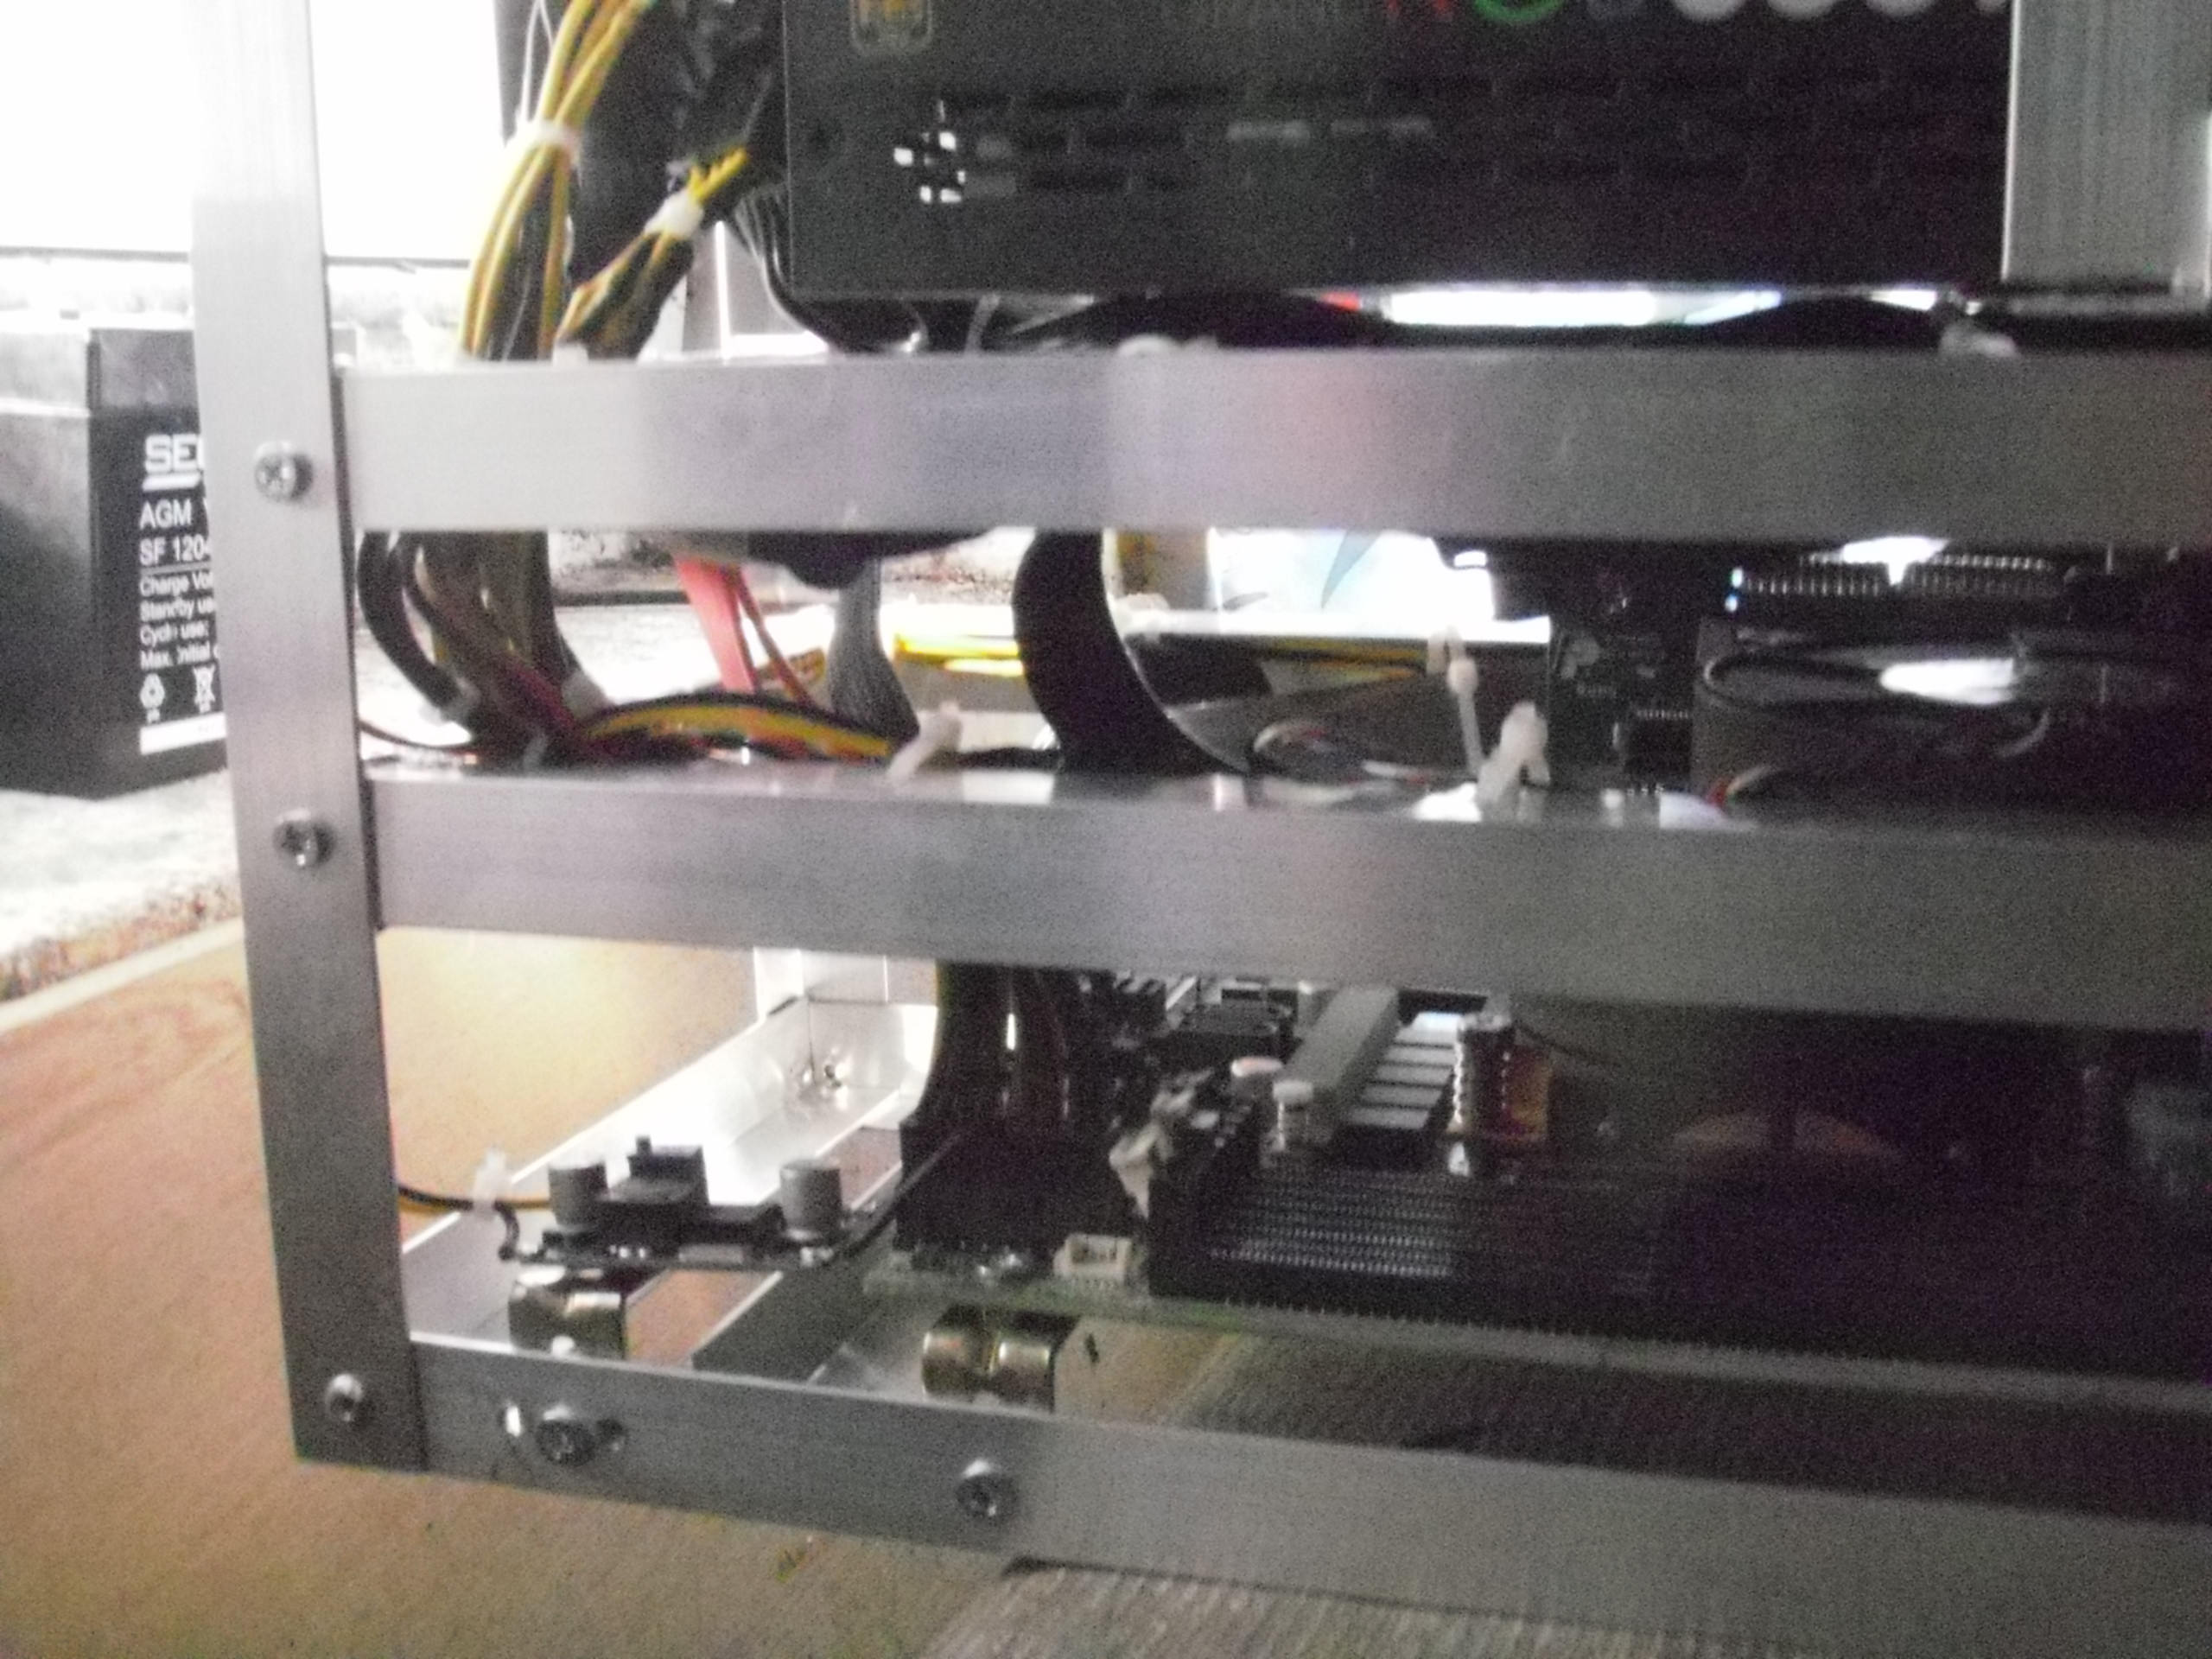
Here it is shown how the DC-DC and the board are fixed, the very corners of which I spoke.
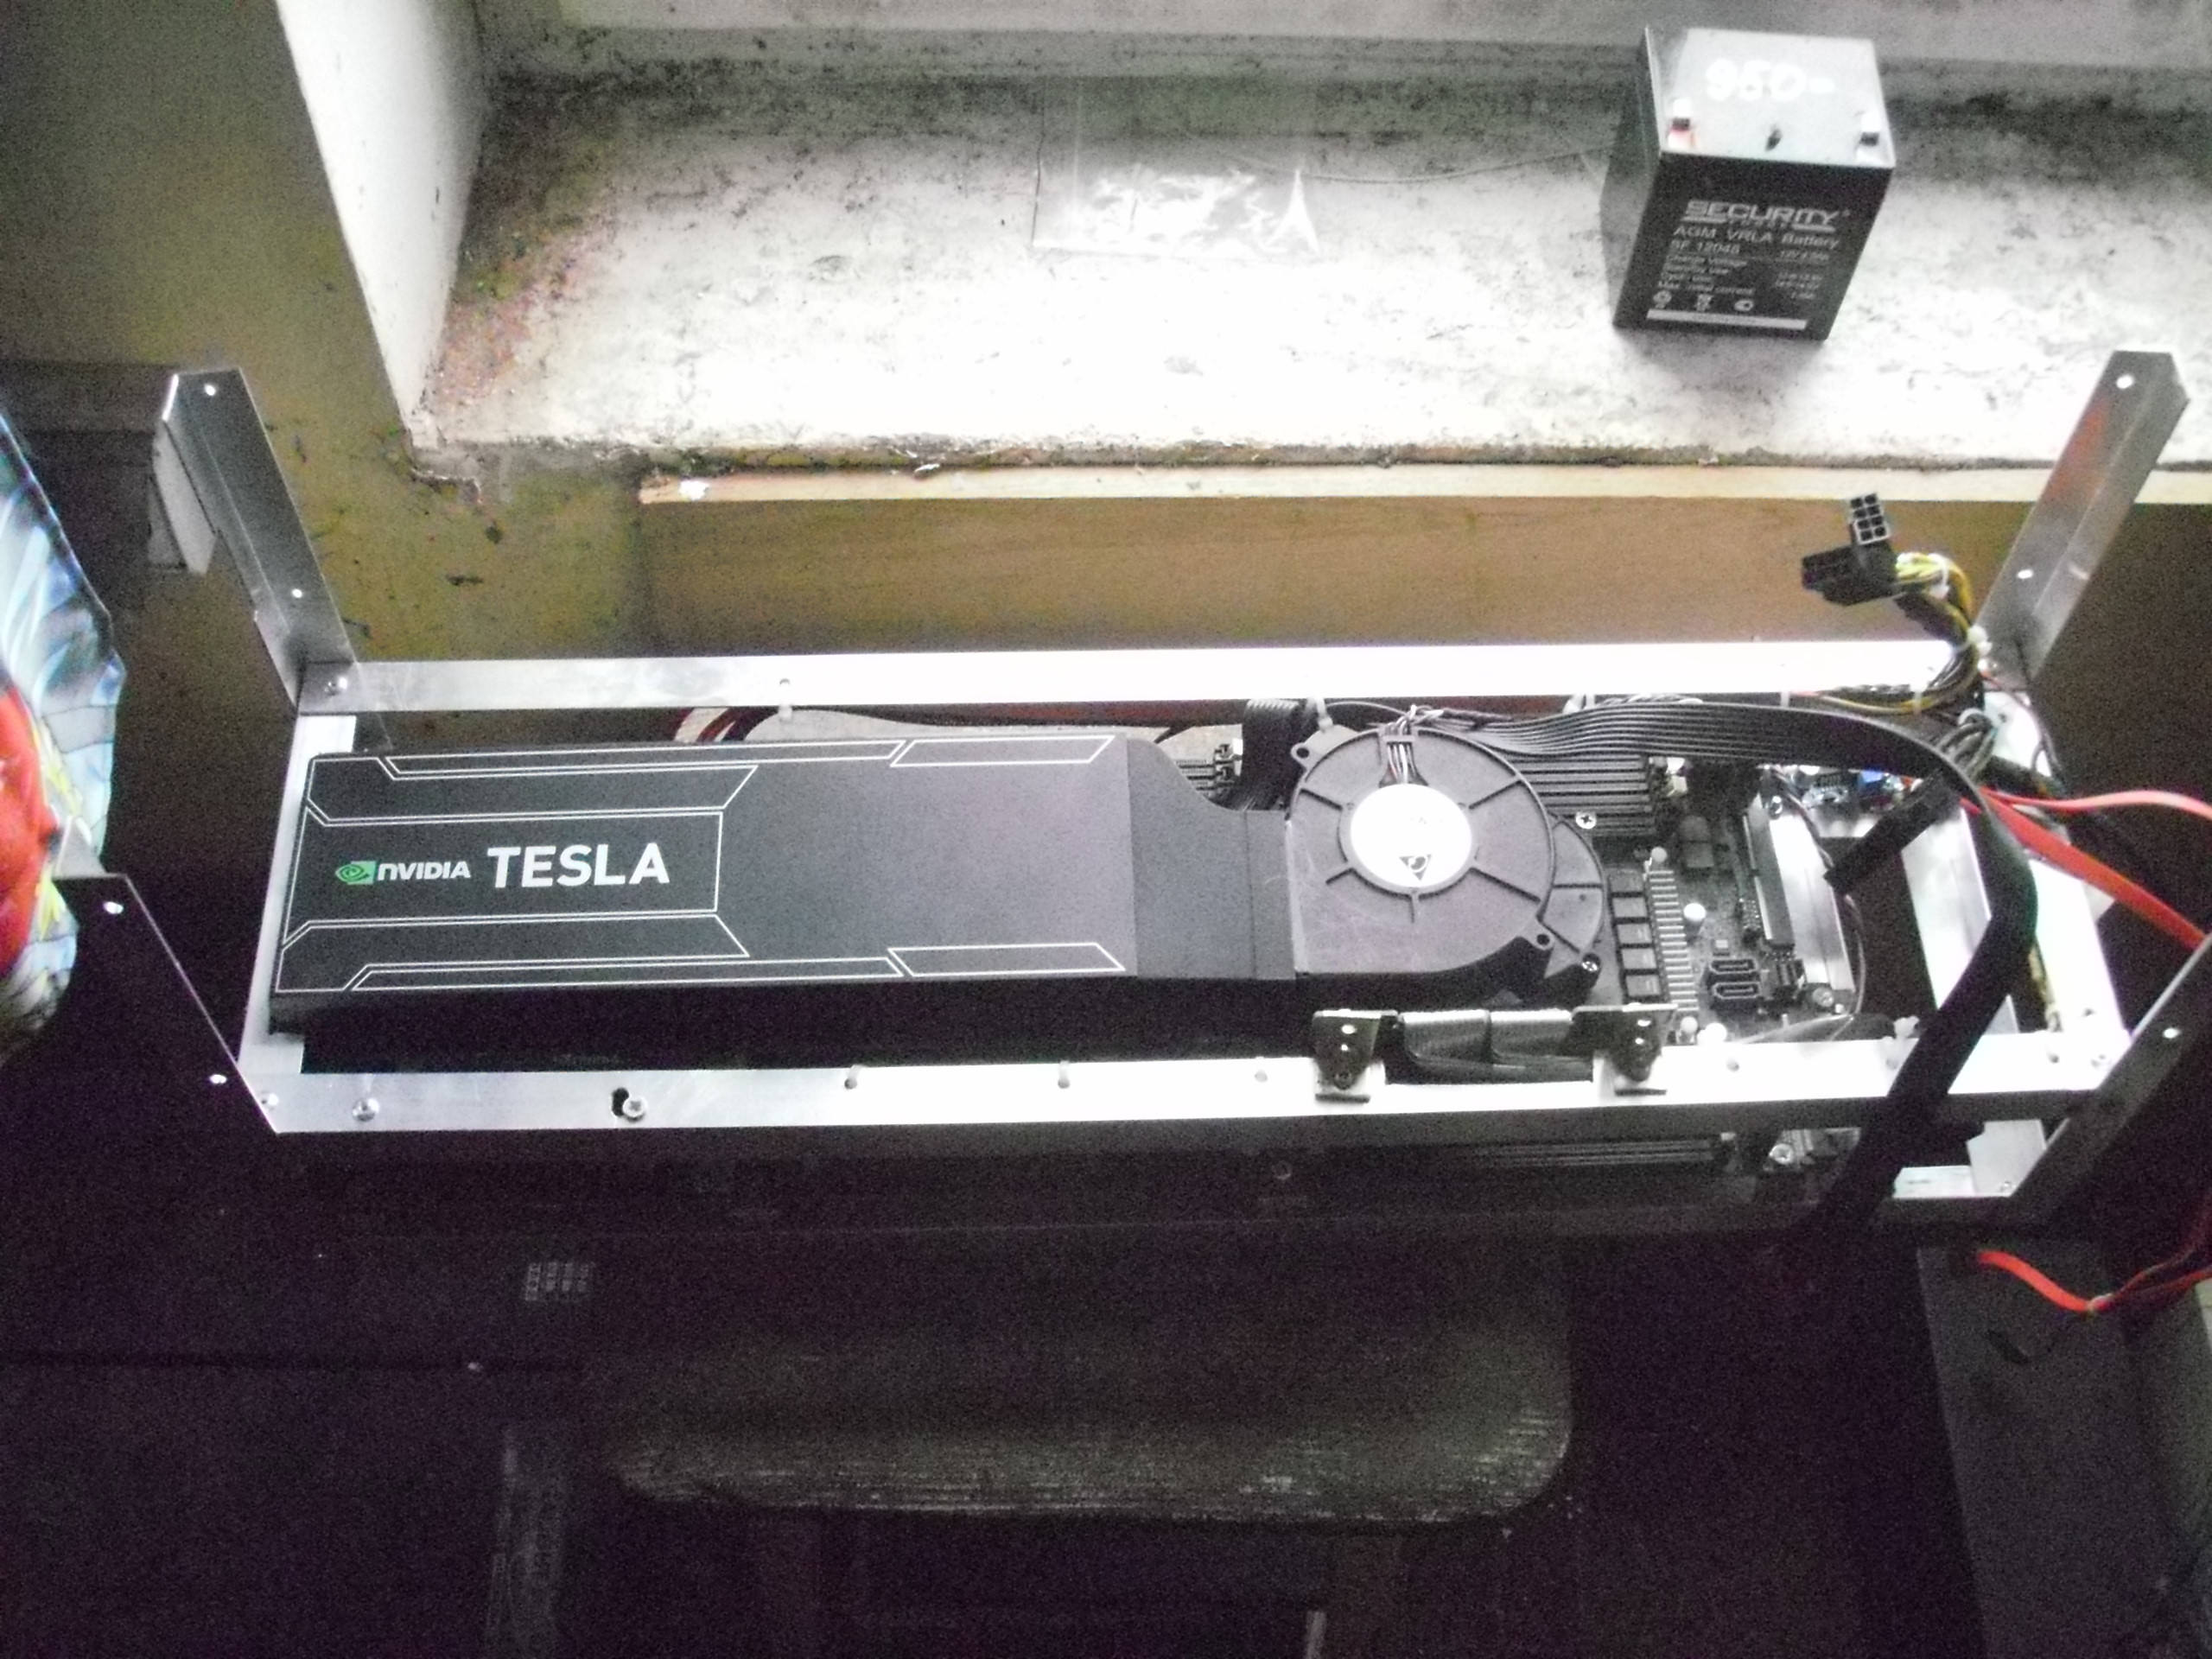
View from the other side, as fixed by the GPGPU riser, which is an EdgeSlot.
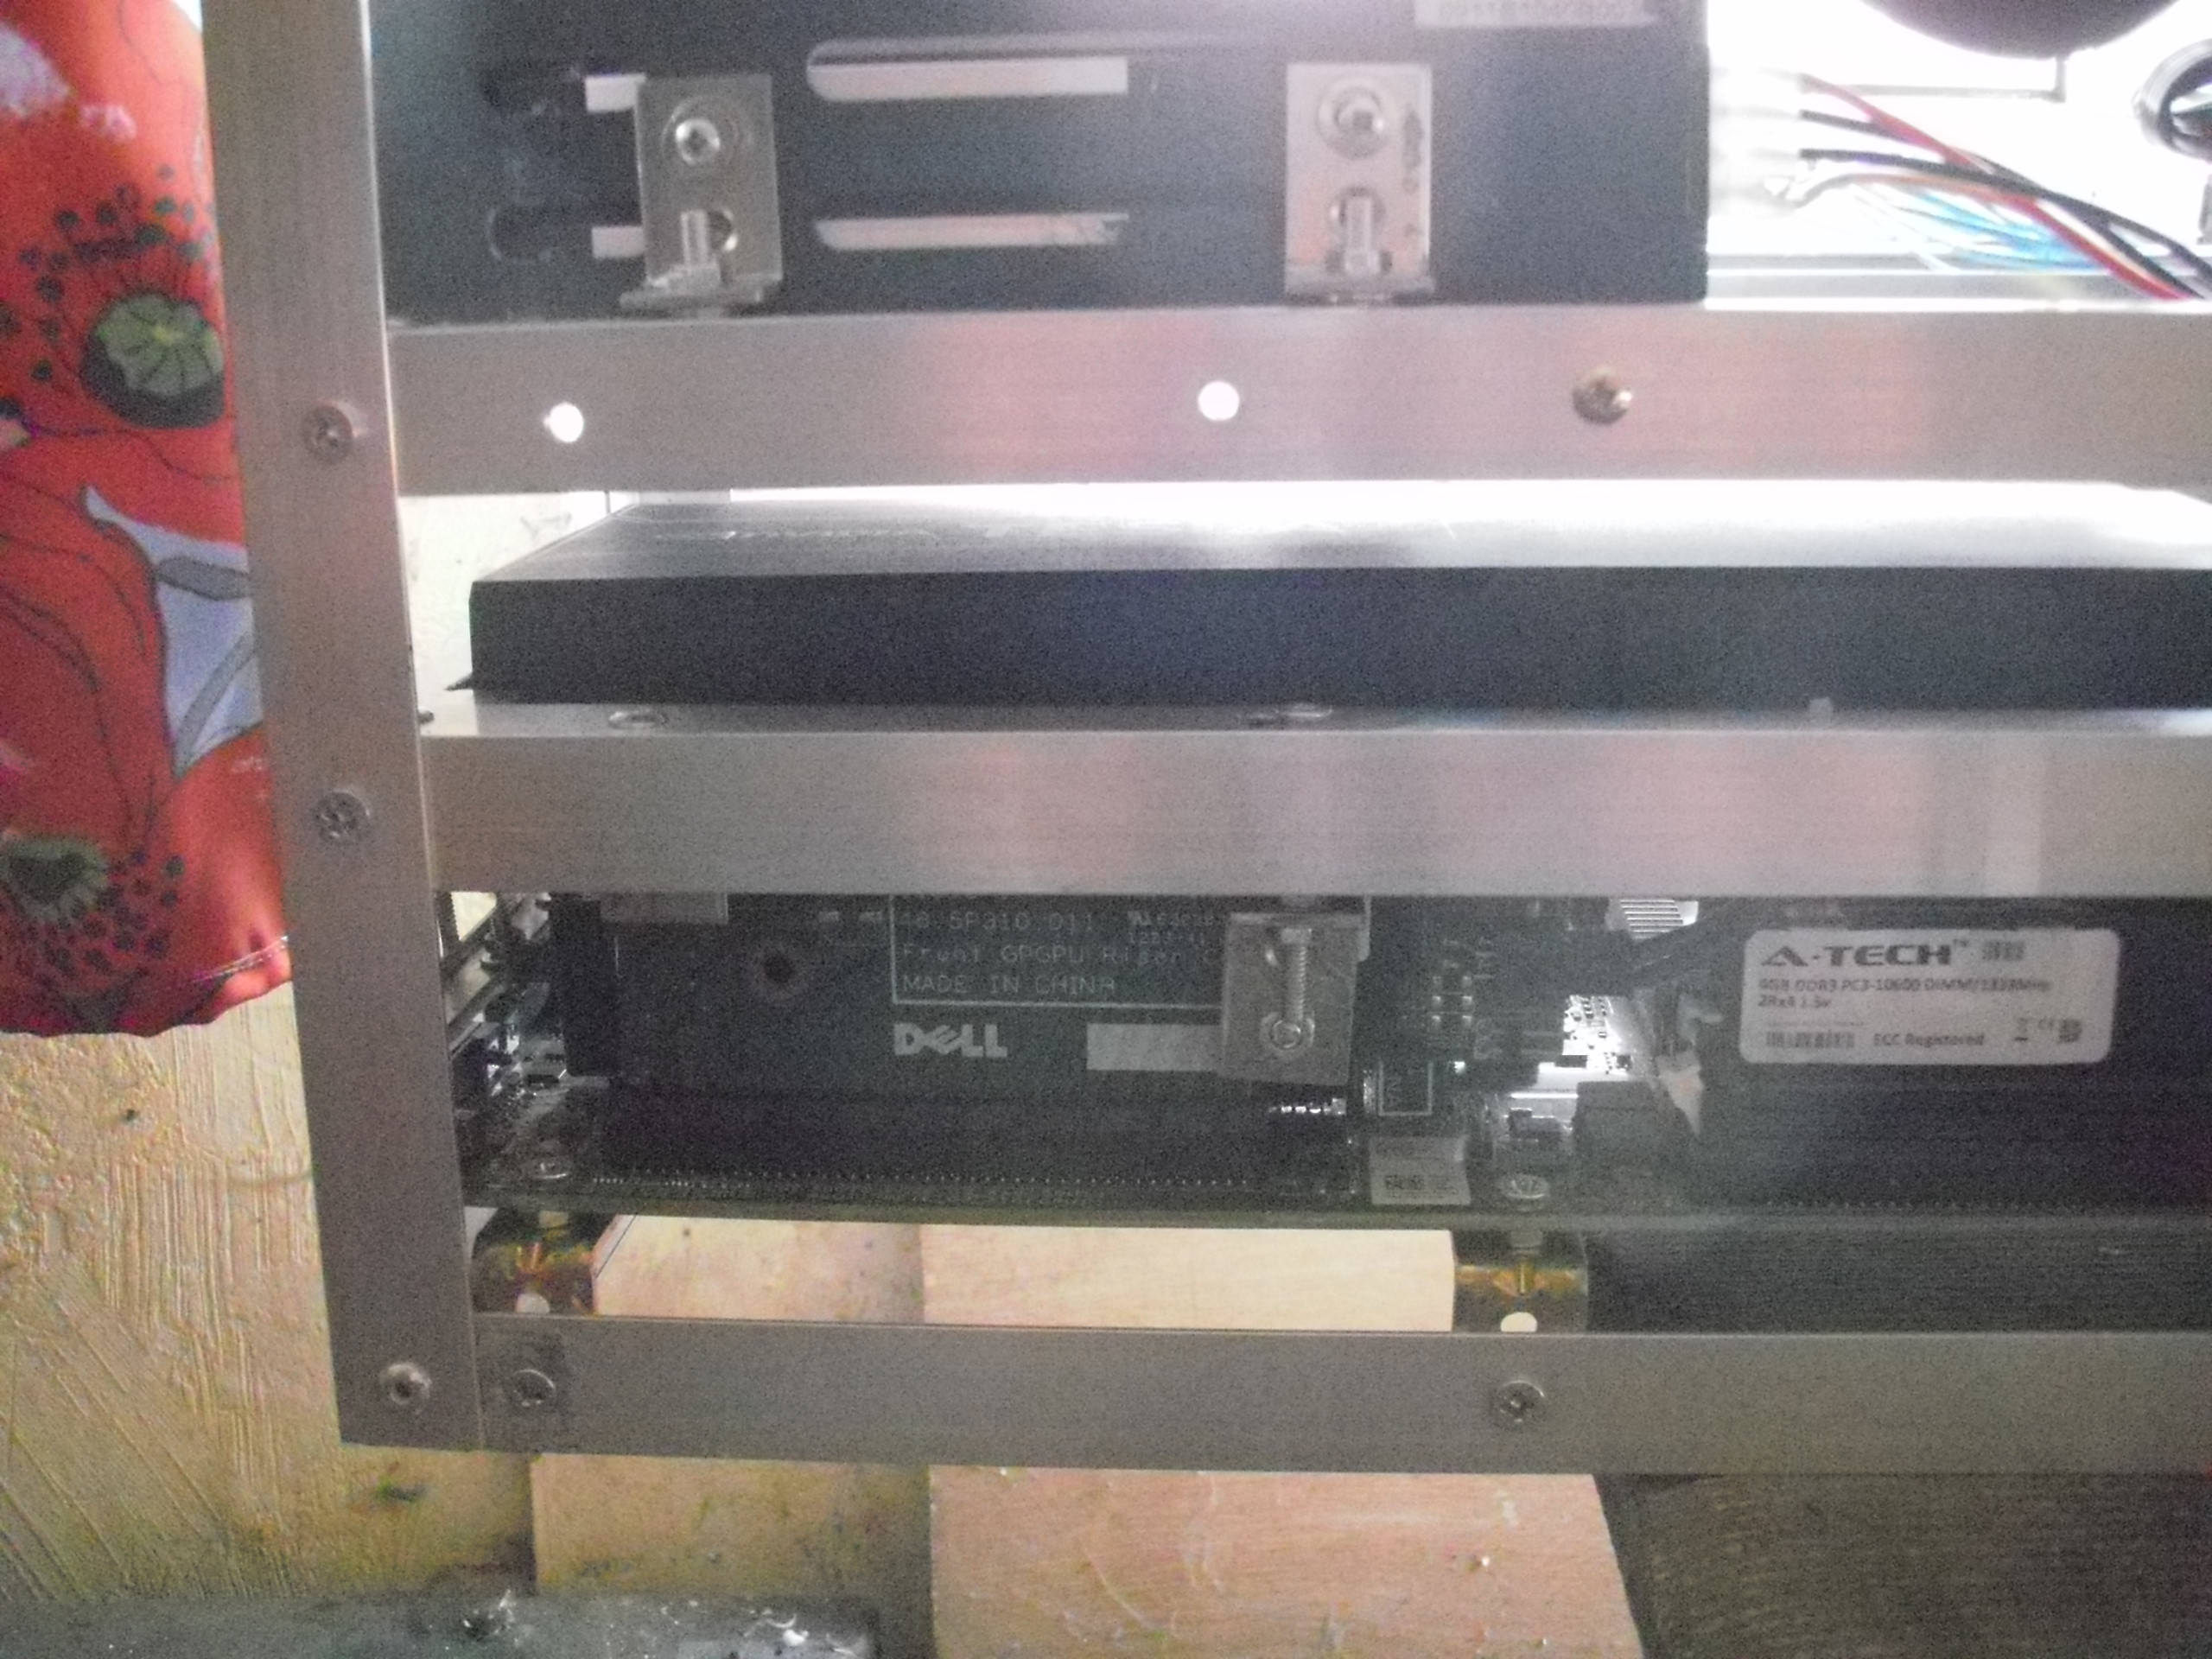
That high angle riser with extra power for the GPGPU that I bought through Shopota from America.
The car was assembled, an operating system, drivers were installed, the CUDA Toolkit was configured ...
Here is a small video about it.
In this form, the system with one Tesla K20M 5 GB worked for half a year, while my astronomer friend considered his tasks. Then he went on vacation and all of a sudden on eBay server tesla K20X 6 GB for 6000 p / y were found, would be a sale from a data center in England. And we decided to build a second version of the “supercomputer” already on 3x Tesla K20X.
Tesla was bought, the second motherboard was bought exactly the same, only decided to save on delivery and chose delivery service eBow. Which took her to Spain and there she gave out to some completely left type. A dispute was opened on eBay, the seller from the USA supported me and the money was returned, and already the third payment went to my usual expensive but reliable USPS. Other spare parts also arrived and here is a video about the beginning of the assembly of the “village supercomputer” 2.0.
Video about the parts for this very "machine".
The launch of the board and some features.
Then he began to collect the skeleton of the second version of the server.
Tesla arrived K20H, the first video.
Cognitive video about the Tesla K20X, about the design of the card and its cooling system, and a bummer with a waterblock from the GTX 780 Ti.
Continuation of the video about the Tesla K20H, scanned her board on the scanner, if anyone suddenly need.
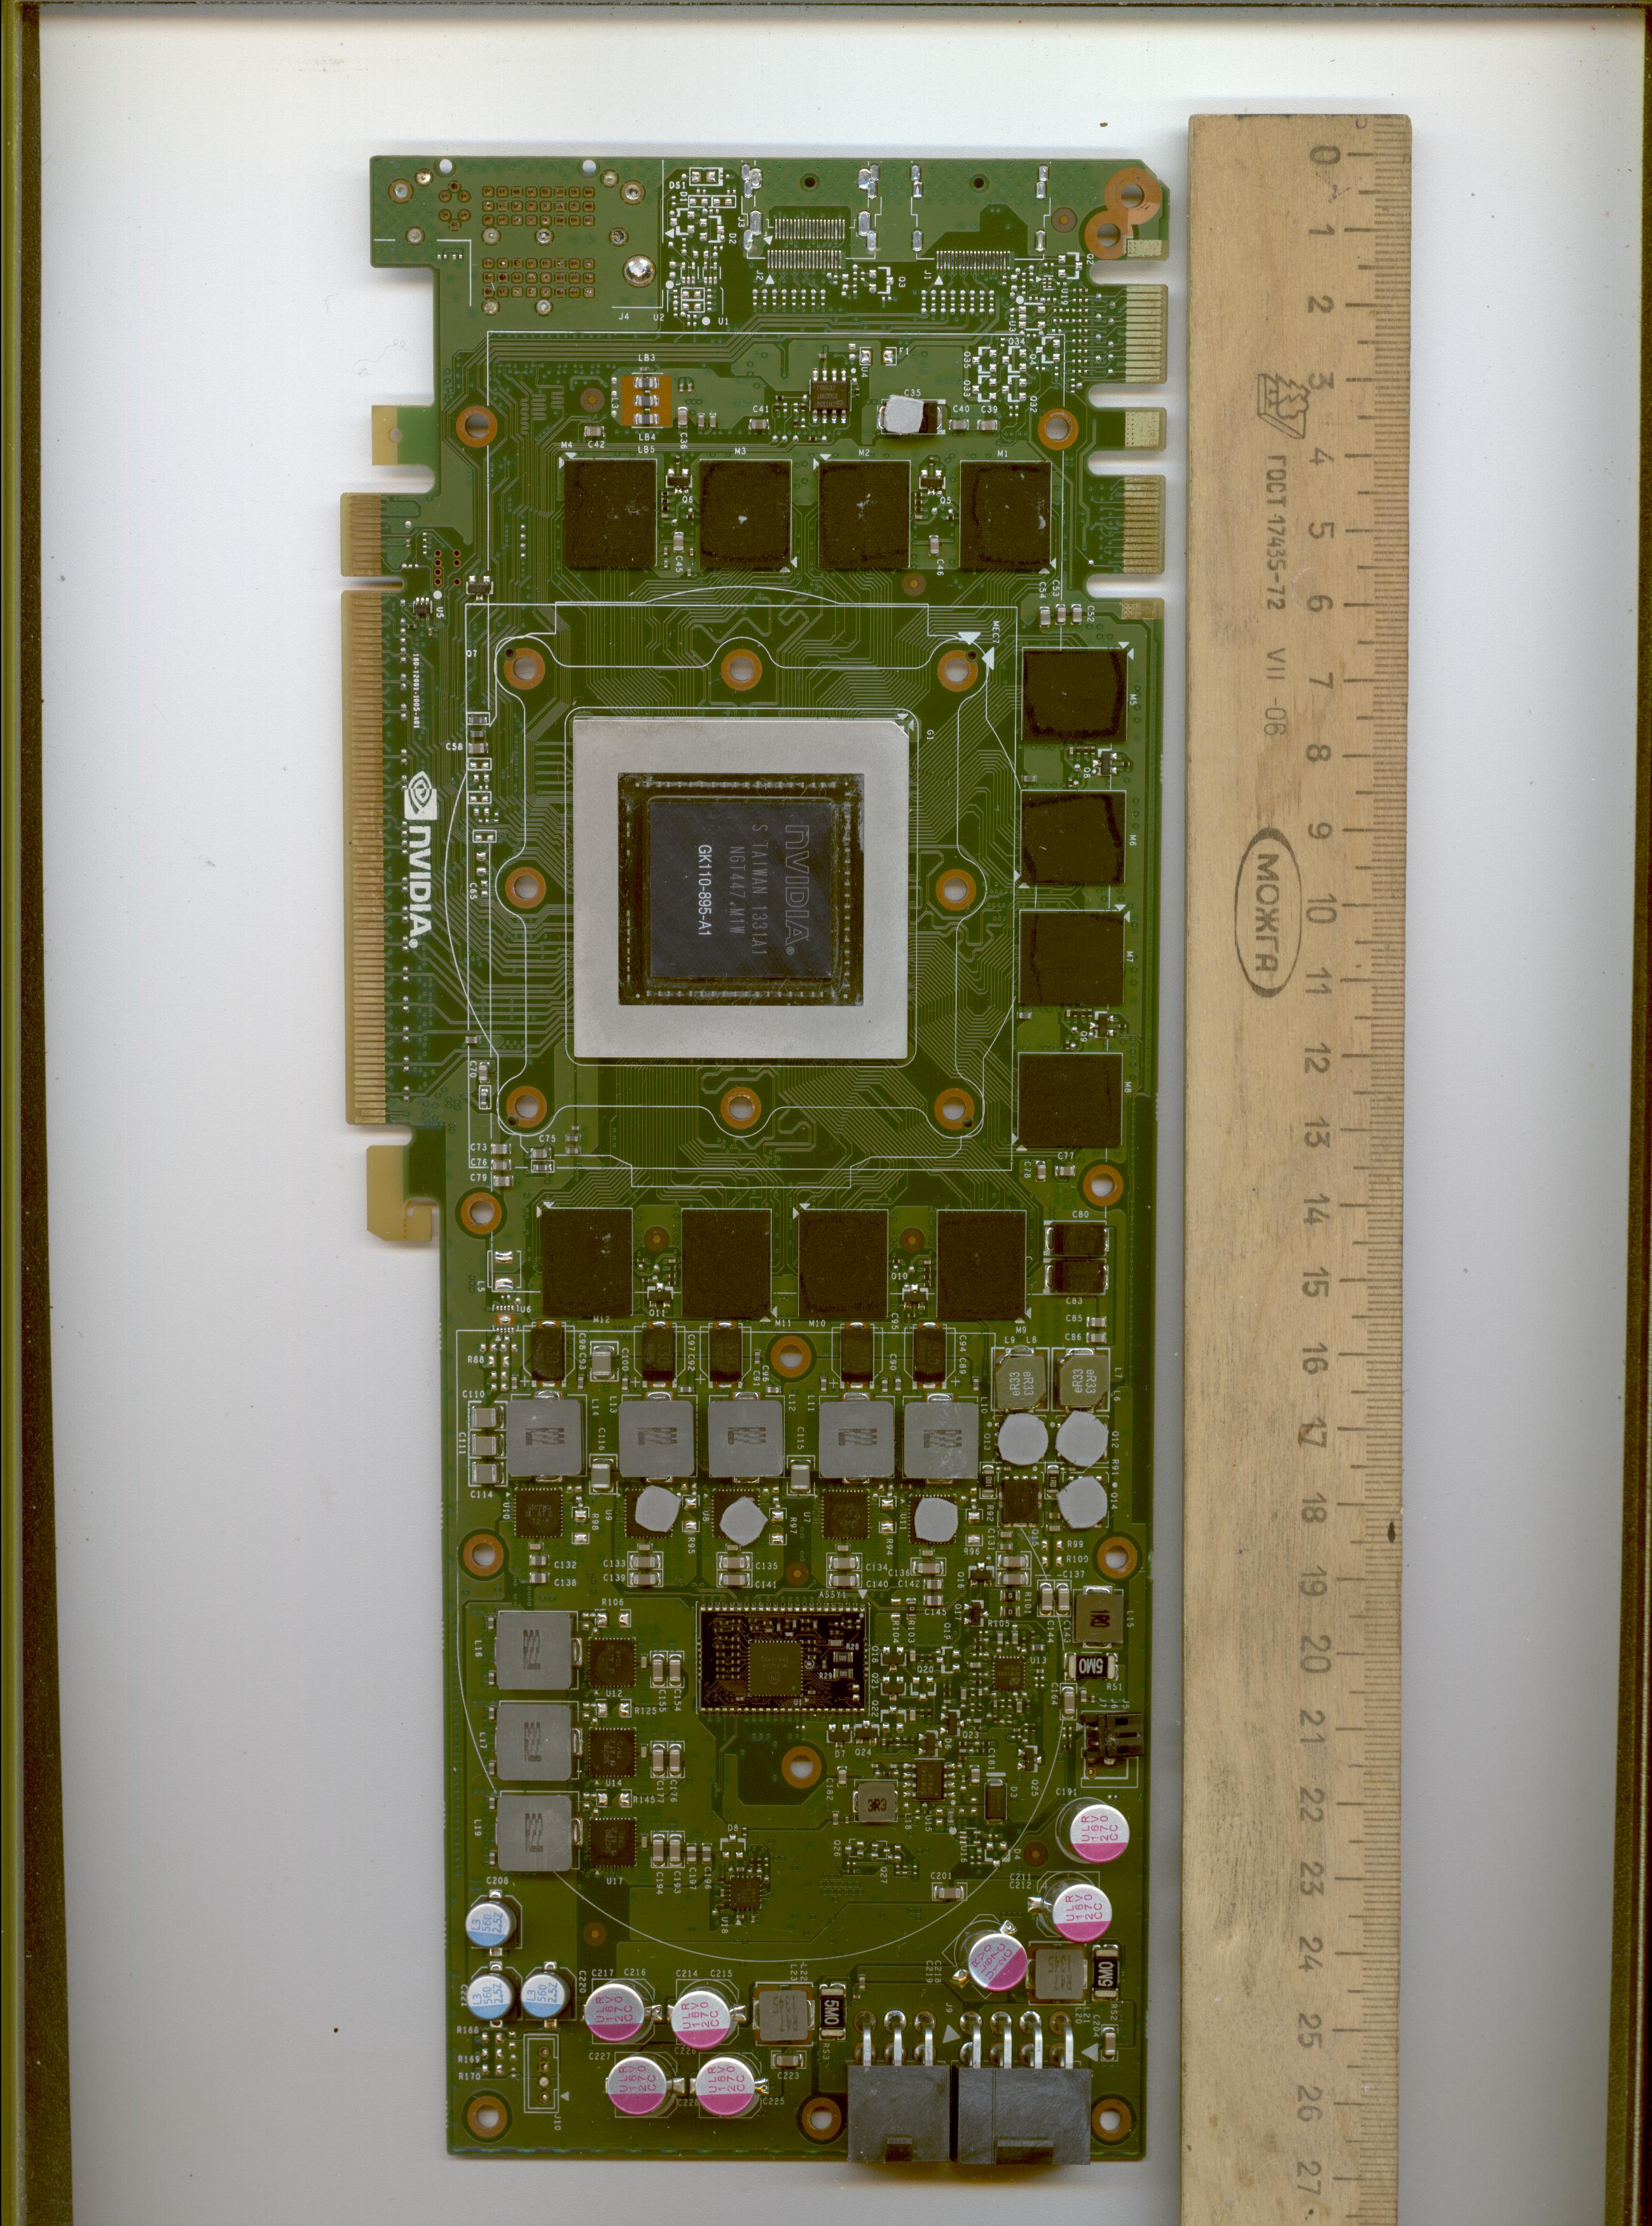
Front side with a GPU chip.
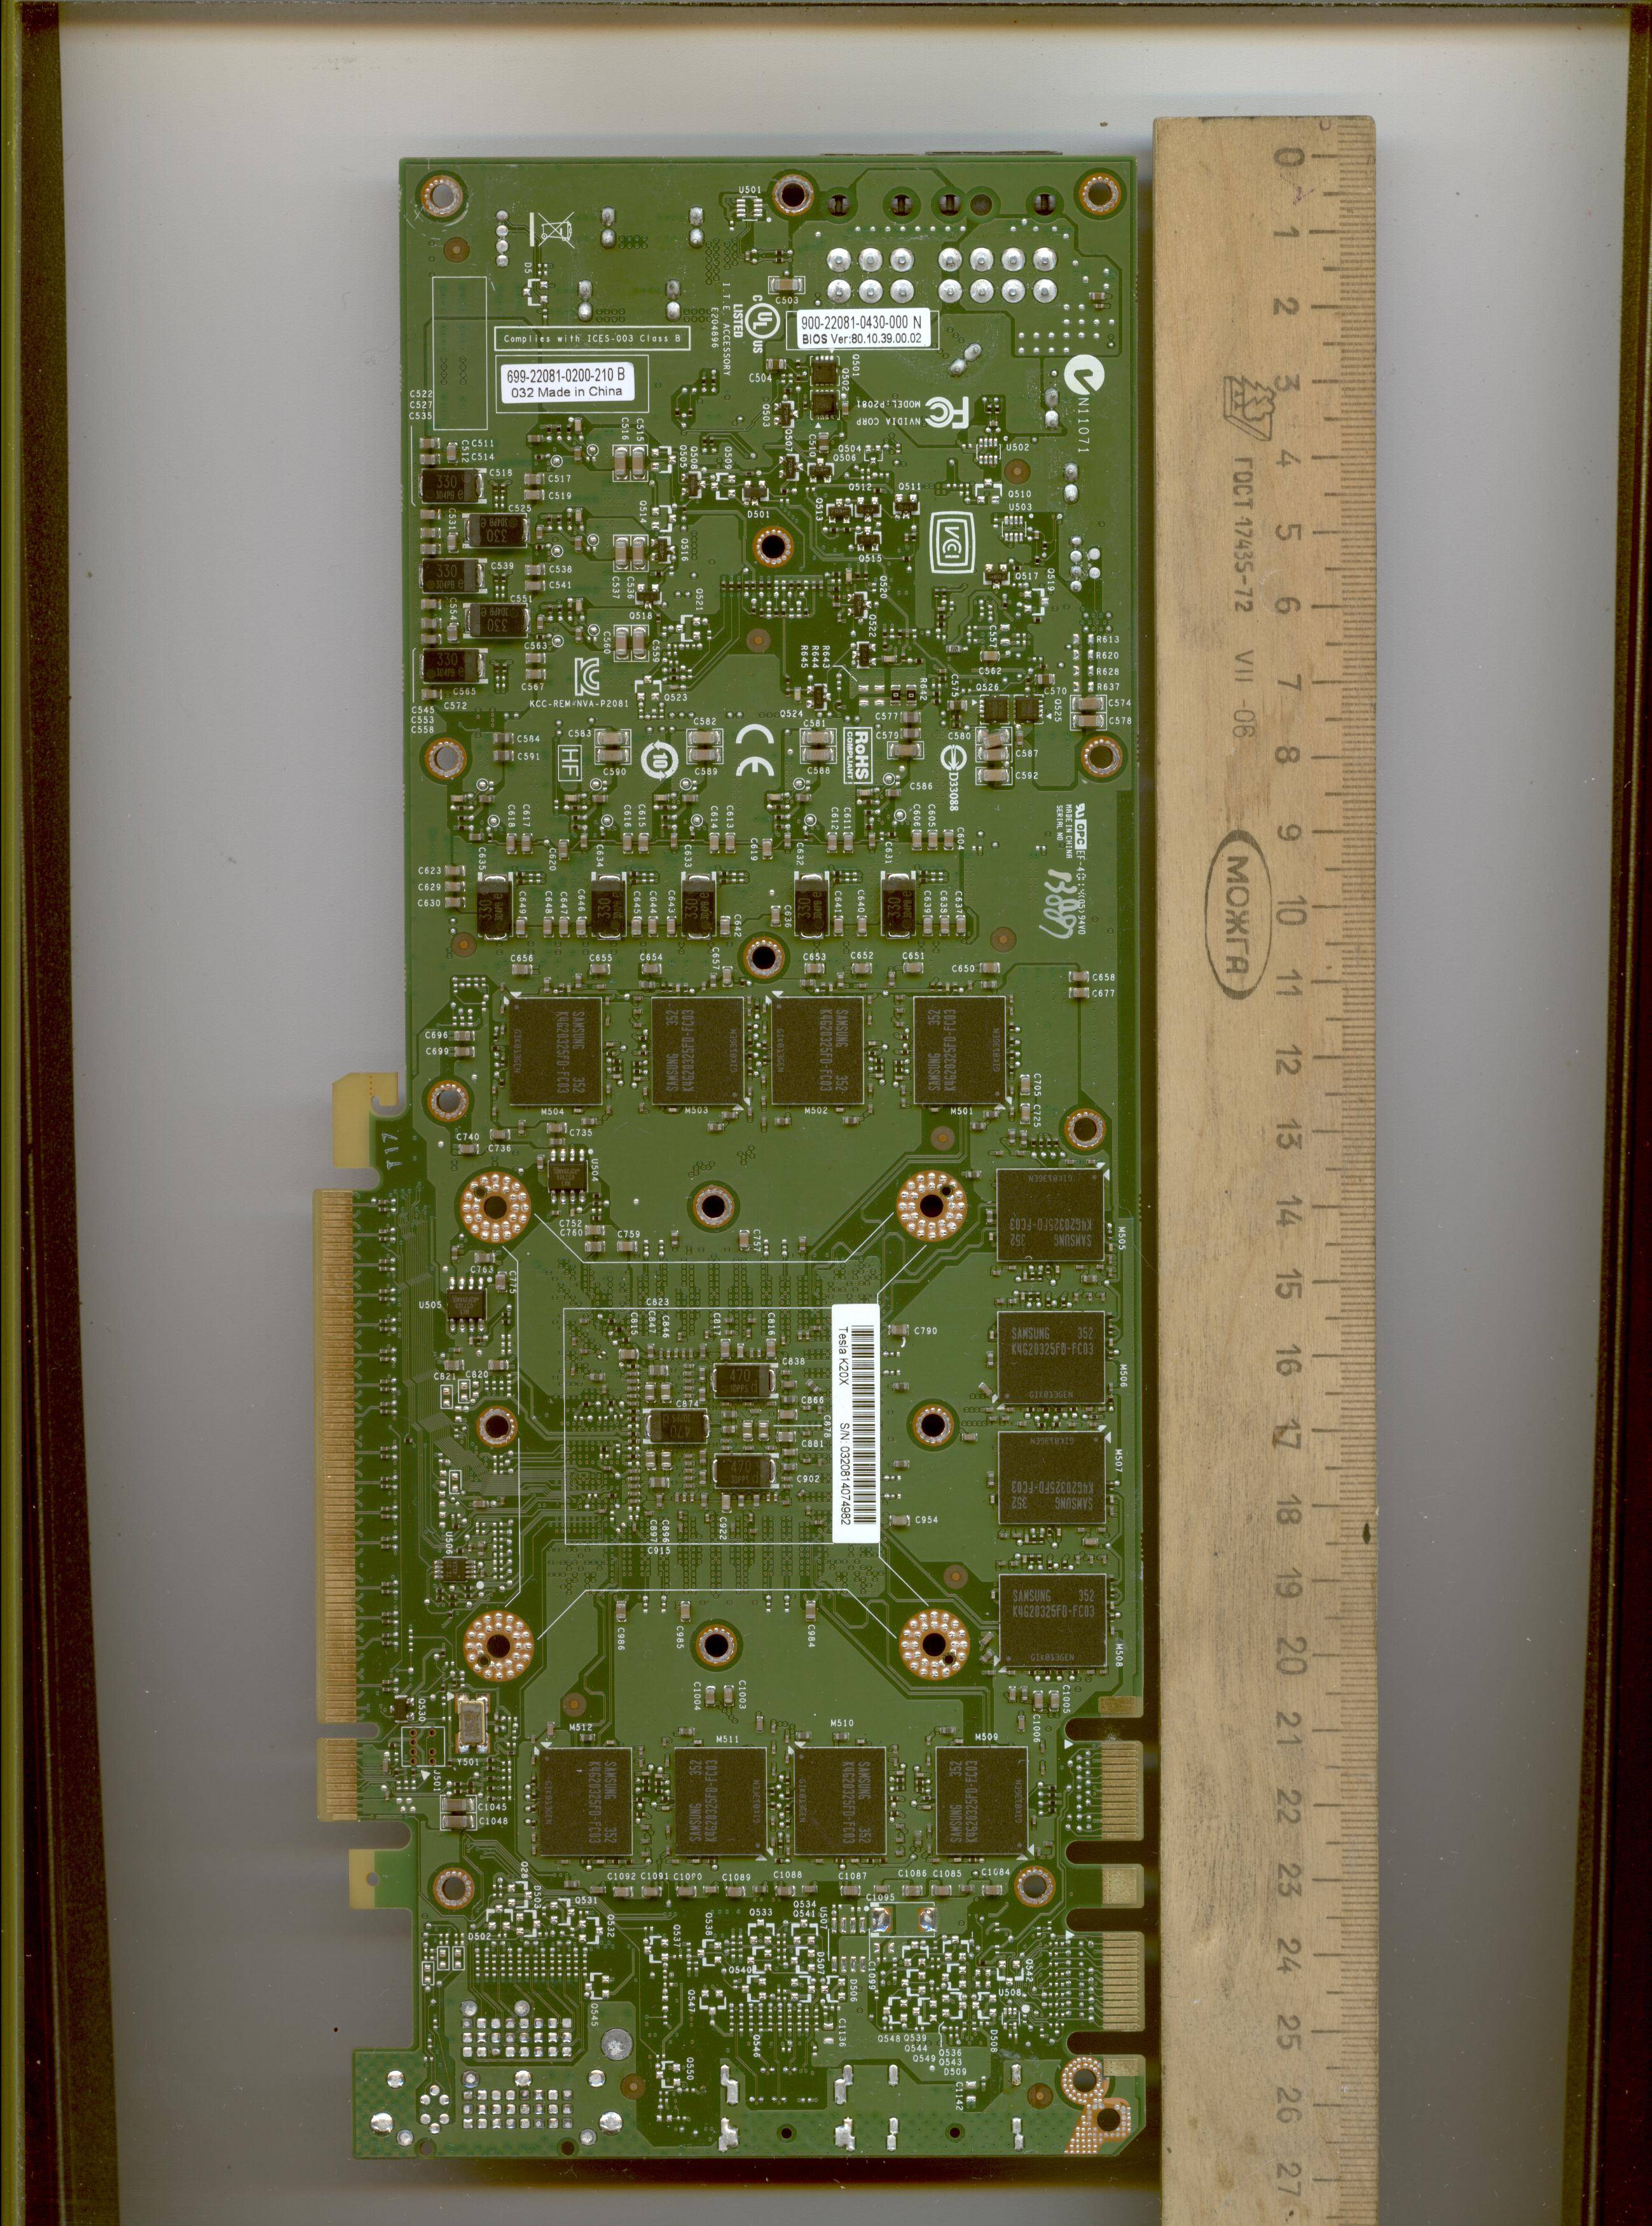
Backside.
As you can see, the Tesla K20 is similar in general to the GTX 780 GTX 780 ti GTX TITAN on the GK110 Kepler GPU, but it’s not compatible with the circuit board and the cooling system. If I have a Quadro K5200 K6000 GK110 Kepler, then I will compare its fee with the Tesla K20 board, but for the time being, I don’t have the above mentioned Quadro.
But the continuation of the build server 2.0
Again 1U coolers with snails and other things that are required for a server of greater power than the first. By the way, I had to disassemble the first server to assemble the second one, until my friend had no urgent need to count.
A little cable management ...
And the second Tesla is set in its place.
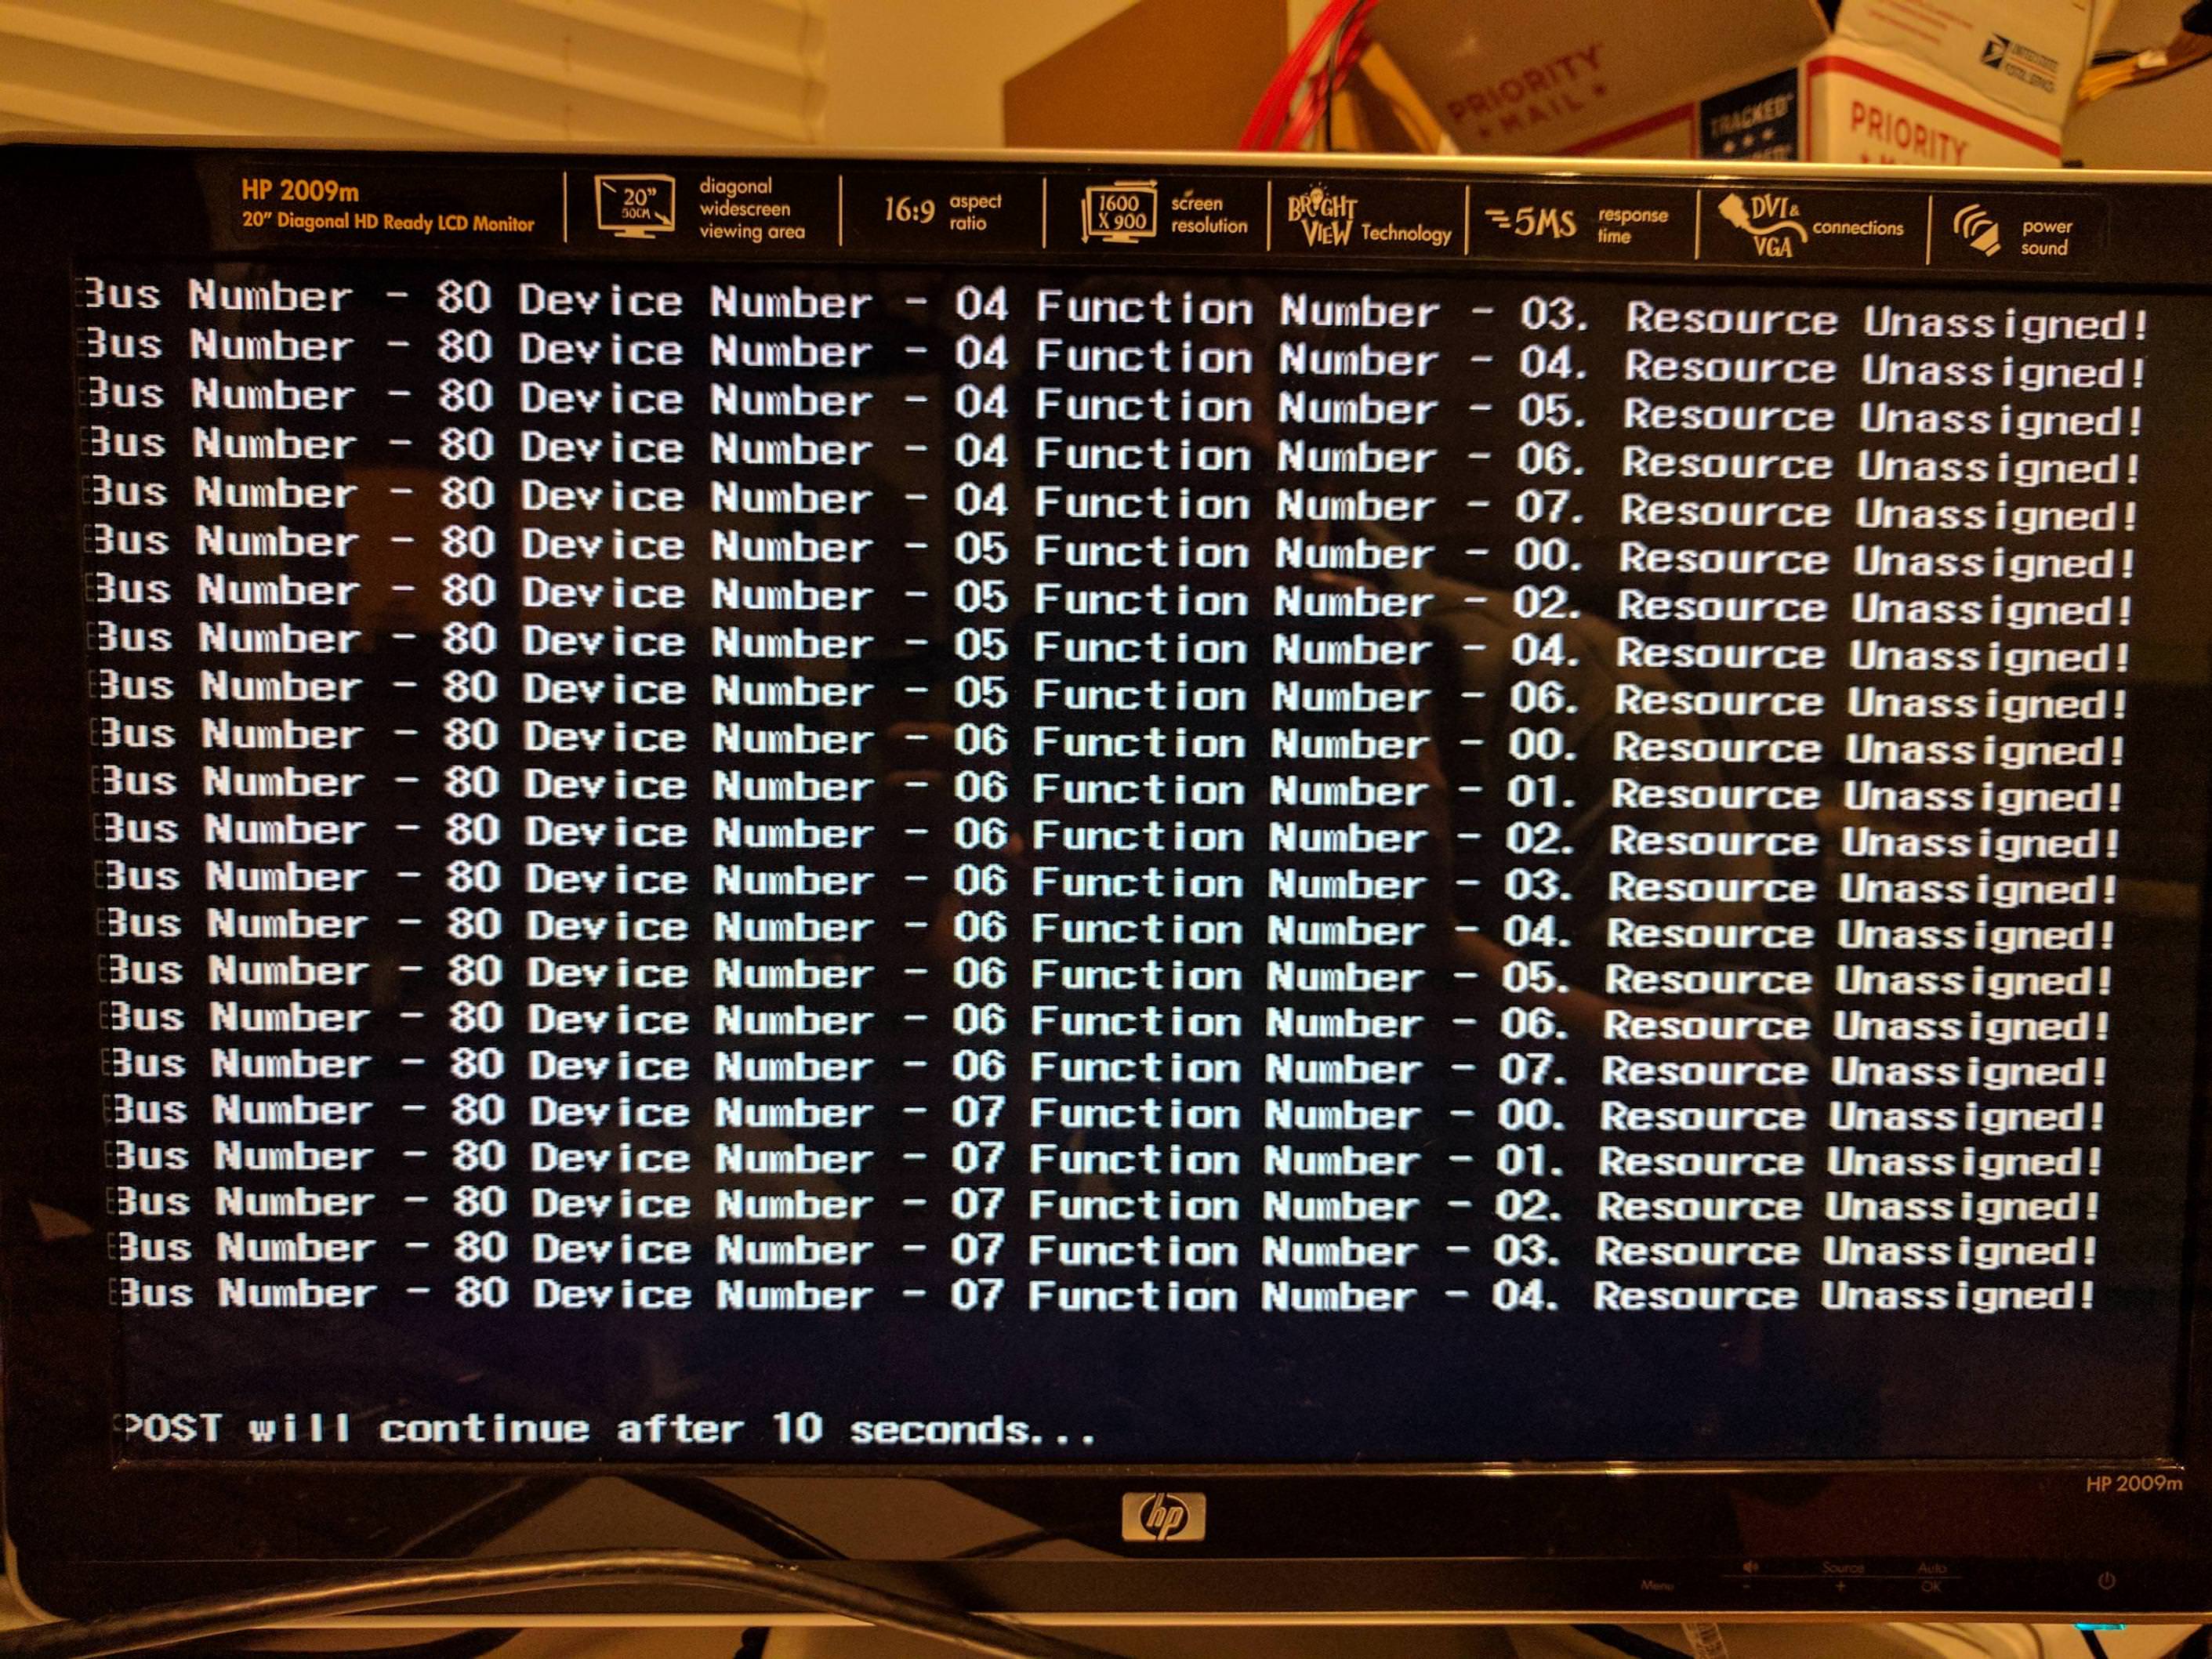
And here I was grasped by the offensive bummer. It turned out that the system does not pull 3 pieces of Tesla K20. When the BIOS starts up, it’s such an error and that’s it, the third Tesla doesn’t work at all. Even the BIOS update to version 2.8.1 did not help, after which the board from Dell DCS 6220 turned into Dell C6220 2.8.1 I turned on and off various options in BIOS, even tried to tape some of the contacts on Teslah to make them 8x - nothing helped. I had to accept and stop at configuration 2 Tesla K20X + NVE SSD. By the way, in version 2.0 of the server all SATA drives live in one Chinese basket for 6 compartments. Now there is a pair of Samsung 860 EVO 500 Gb + 4 terabyte Sigate. Samsung I bought on Ali for 3600 apiece. OEM wheels, but they suit me.
Now the “supercomputer 2.0” is fully assembled and ready to go.
In other parts arrived parts purchased on the second system and I picked up the first one, right here about this video.
And I suggest that readers vote on what to do with the first board? What to collect on its basis interesting? Or if someone wants to buy it, like Tesla K20M and K20X with or without snail coolers - I'm ready, write.
Here is such a story, I hope it turned out to be interesting and useful for dear readers.
PS: Those who have had the patience to read to the end - subscribe to my channel on YouTube, comment, rate, like / dislike - it will motivate me to further publish and shoot new educational videos.
Link to 1 part of the story
Link to part 2 of the story
I will begin the third part with expressing sincere gratitude to my friends who supported me in difficult times, motivated me, helped with money by sponsoring this rather expensive business for a long time and even helped with the purchase of components from abroad in cases where I could not buy them on straight myself. For example, if a company selling server parts in the United States or Canada simply did not send to Russia. Without their long and regular help, my progress would have been much more modest.
')
So, thanks to their requests, I made up my mind and started an account on Youtube, bought an old Lumia 640 smartphone that I use exclusively as a video camera and started making informative videos, both about building a “village supercomputer” and about other aspects and projects of my village life.
Playlist "Country Supercomputer":
Those who want spoilers can get acquainted, although of course it is better to do it in the process of reading my story or even after it.
The second part of my story was interrupted by the fact that it connected a Tesla K20M, GT 610 and M.2 NVE SSD + disk array to the system. By the way, how good is this Dell board? Let it have a built-in "disk shelf" for only 6 devices and RAID is not "the most sophisticated in the world", but unlike its more professional external colleagues, it skips the TRIM command on SSD. What is also important if you are using non-professional server SSDs intensively.
By the way, there is also one interesting and important point about this board. Chipset radiators are low with small fins. This works well when the board is in the original rack, where powerful turbines blow it along. But when using the board separately, it is necessary to remove the plastic sticker from the closest to the radiator expansion slots, and the distant one should be replaced with any suitable radiator from the chipset of the old motherboard with large edges, because the chip located under it is heated most of all on the board.
Having removed the video card from the system, I began to assemble the skeleton for my server, in the test version everything was on electrical tape, matchboxes and other plastic supports, but for full use of 24/7/365 this option did not seem to me acceptable. It was necessary to make a normal frame of the aluminum corner. The aluminum corners from “Leroy Merlin” were sent to the course, which were sent to me by a friend from the Moscow region, in their nearby city they were simply not sold anywhere at all!
In addition to the corners, the screws were used for the M5 countersunk head and nuts, M3 screws and nuts, small furniture angles, aluminum rivets for 5 mm holes, riveters, a metal saw, a screwdriver, a 5.0 mm drill for metal, a file, a Phillips screwdriver, cable screeds and arms growing out of ass.
Corners were used to attach the board to the frame and some other elements. This certainly added a few heights to the entire system, because the board was raised high enough above the bottom plane of the frame, but I decided that this was permissible for me. I didn’t fight for every gram of weight, a millimeter of height, in the end it’s not an onboard computer for aircraft where the standard is “15 G on 3 axes, strikes up to 1000 G and vibration”.
The board is installed, the risers are screwed, the adapter is screwed with an SSD M.2.
The board, SSD, risers and Tesla are in place. DC-DC is not yet screwed into place and it hangs on the wires behind the scenes. This is the server version 1.0, while still on one Tesla K20M.
Here DC-DC is already attached to the frame, there it is, there is a small veil on the side of the motherboard under the “tails” of the power supply.
And this system is already assembled, top view. Above Tesla one more time from the corners in which a pair of SSDs are screwed side by side, above them an HDD basket, and on top of it a BP 850 W Thermaltek is modular hanging on the frame closing frame. BP fashionable, gaming, with RGB-backlit that I turned off so as not to blink like a Christmas tree. The only powerful modular power unit in the stores in a nearby city at that time.
View of server version 1.0 from the side.
View of the server from the "front end". The connectors and rivers for the disks I made on one side as in server systems, so that for all the manipulations it was not necessary to turn the whole system back and forth. On the “cutout bar”, a takeaway with two USB 2.0 is screwed in, which I plugged in instead of a card reader, and the adapter board on M.2 is screwed to its bottom.
Here it is shown how the DC-DC and the board are fixed, the very corners of which I spoke.
View from the other side, as fixed by the GPGPU riser, which is an EdgeSlot.
That high angle riser with extra power for the GPGPU that I bought through Shopota from America.
The car was assembled, an operating system, drivers were installed, the CUDA Toolkit was configured ...
Here is a small video about it.
In this form, the system with one Tesla K20M 5 GB worked for half a year, while my astronomer friend considered his tasks. Then he went on vacation and all of a sudden on eBay server tesla K20X 6 GB for 6000 p / y were found, would be a sale from a data center in England. And we decided to build a second version of the “supercomputer” already on 3x Tesla K20X.
Tesla was bought, the second motherboard was bought exactly the same, only decided to save on delivery and chose delivery service eBow. Which took her to Spain and there she gave out to some completely left type. A dispute was opened on eBay, the seller from the USA supported me and the money was returned, and already the third payment went to my usual expensive but reliable USPS. Other spare parts also arrived and here is a video about the beginning of the assembly of the “village supercomputer” 2.0.
Video about the parts for this very "machine".
The launch of the board and some features.
Then he began to collect the skeleton of the second version of the server.
Tesla arrived K20H, the first video.
Cognitive video about the Tesla K20X, about the design of the card and its cooling system, and a bummer with a waterblock from the GTX 780 Ti.
Continuation of the video about the Tesla K20H, scanned her board on the scanner, if anyone suddenly need.
Front side with a GPU chip.
Backside.
As you can see, the Tesla K20 is similar in general to the GTX 780 GTX 780 ti GTX TITAN on the GK110 Kepler GPU, but it’s not compatible with the circuit board and the cooling system. If I have a Quadro K5200 K6000 GK110 Kepler, then I will compare its fee with the Tesla K20 board, but for the time being, I don’t have the above mentioned Quadro.
But the continuation of the build server 2.0
Again 1U coolers with snails and other things that are required for a server of greater power than the first. By the way, I had to disassemble the first server to assemble the second one, until my friend had no urgent need to count.
A little cable management ...
And the second Tesla is set in its place.
And here I was grasped by the offensive bummer. It turned out that the system does not pull 3 pieces of Tesla K20. When the BIOS starts up, it’s such an error and that’s it, the third Tesla doesn’t work at all. Even the BIOS update to version 2.8.1 did not help, after which the board from Dell DCS 6220 turned into Dell C6220 2.8.1 I turned on and off various options in BIOS, even tried to tape some of the contacts on Teslah to make them 8x - nothing helped. I had to accept and stop at configuration 2 Tesla K20X + NVE SSD. By the way, in version 2.0 of the server all SATA drives live in one Chinese basket for 6 compartments. Now there is a pair of Samsung 860 EVO 500 Gb + 4 terabyte Sigate. Samsung I bought on Ali for 3600 apiece. OEM wheels, but they suit me.
Now the “supercomputer 2.0” is fully assembled and ready to go.
In other parts arrived parts purchased on the second system and I picked up the first one, right here about this video.
And I suggest that readers vote on what to do with the first board? What to collect on its basis interesting? Or if someone wants to buy it, like Tesla K20M and K20X with or without snail coolers - I'm ready, write.
Here is such a story, I hope it turned out to be interesting and useful for dear readers.
PS: Those who have had the patience to read to the end - subscribe to my channel on YouTube, comment, rate, like / dislike - it will motivate me to further publish and shoot new educational videos.
Source: https://habr.com/ru/post/454480/
All Articles