Creation of multi-module Gradle project SpringBoot + Angular in IDEA
Quite often in my practice is used a bunch of Spring + Angular. I want to share my experience in preparing a similar project in the IntelliJ IDEA development environment.
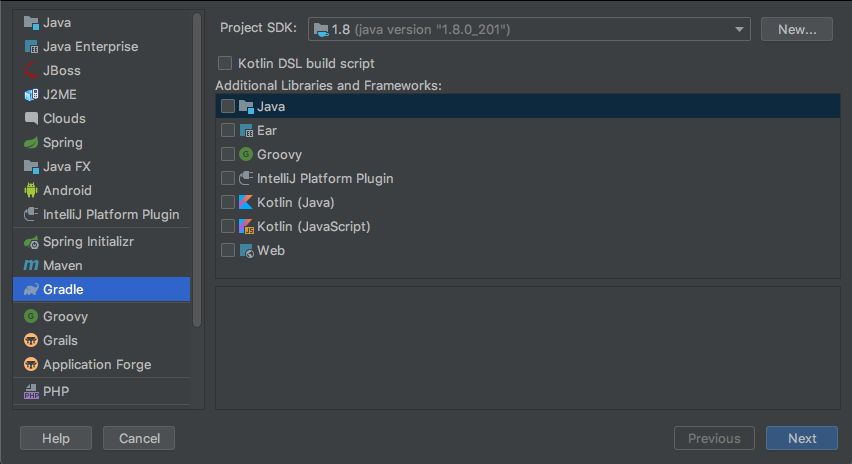
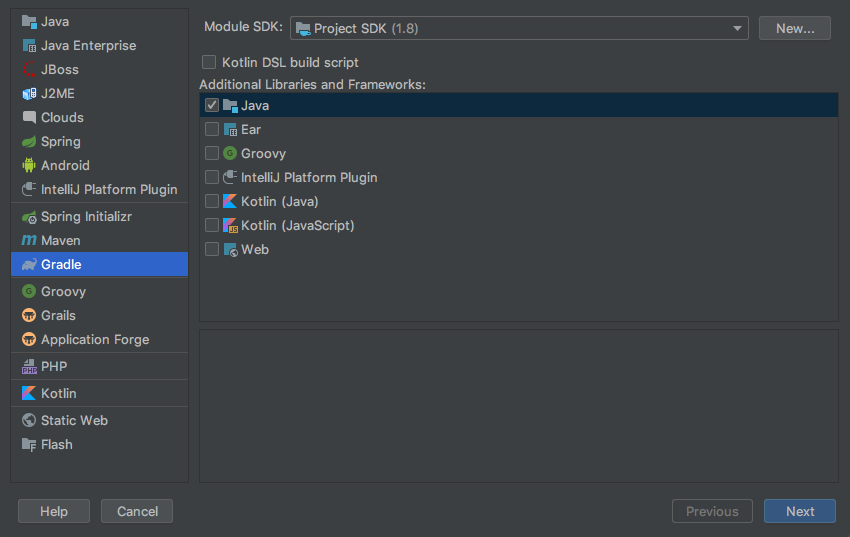
Create an empty Gradle project
To begin with, we will create an empty Gradle project in IDEA, while removing all the checkboxes of libraries and frameworks.
Let our artifact be “demo”, and the group “com.habr”. After creating the project, the settings.gradle and build.gradle files will be automatically generated with the following content:
build.gradle
')
group 'com.habr' version '1.0' settings.gradle
rootProject.name = 'demo' Create a module for Spring
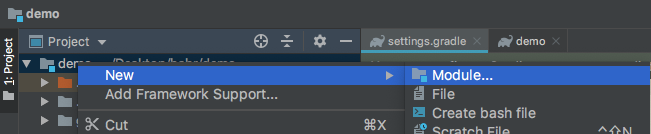
Next, we will add a module to our project in which the server part of our application will be placed, i.e. Spring.
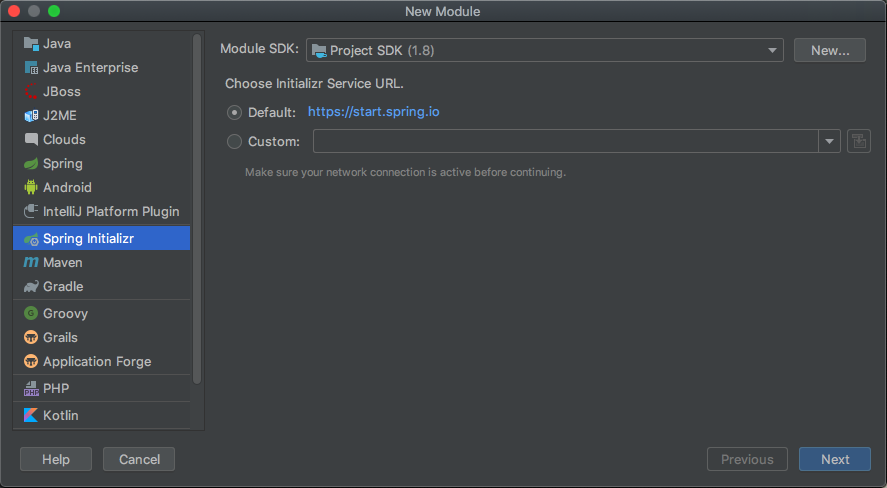
When creating this module we will use Spring Initializr.
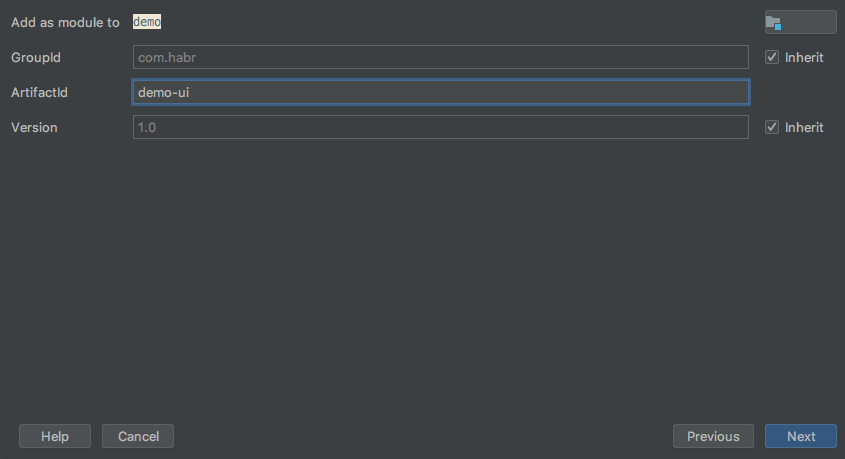
We name the module “demo-server”, indicate the type of the Gradle project, the group com.habr, and the name of the main package org.habr.demo.
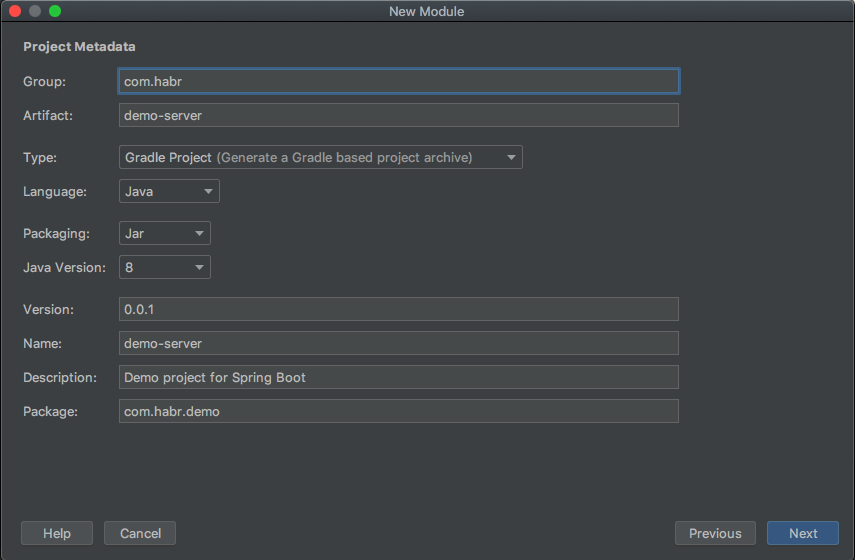
Next, you need to select all the necessary components of the Spring framework, in this example, I chose only "web", but you can choose everything you need.

After creating the demo-server module, note that 2 files were created in it: build.gradle and settings.gradle. From the settings.gradle of this module, you need to move the following lines to the beginning of the project settings.gradle file, and the module settings.gradle to delete.
pluginManagement { repositories { gradlePluginPortal() } } In addition, in the project settings.gradle, you need to add the created module, in the end we get:
settings.gradle
pluginManagement { repositories { gradlePluginPortal() } } rootProject.name = 'demo' include 'demo-server' After that, we delete the following lines from the build.gradle file of the demo-server module:
group = 'com.habr' version = '0.0.1' At this, the creation of the first module can be considered complete, but we will return to it in order to link it with the second one.
Create a module for Angular
Create a demo-ui module as a java gradle project.
Let's call the created module “demo-ui”.
In the created project, you must delete the src folder. After performing this operation, open the terminal in the root folder of this module.

In the opened terminal execute the command:
ng new demo-ui The command will lead to the installation of Angular, and a folder with the same name will be created inside the demo-ui module.
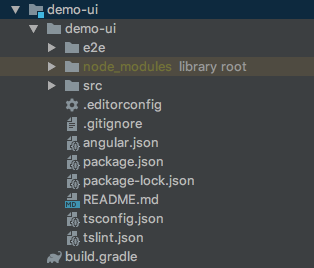
All contents of the created folder, except for node-modules, must be moved to the root of the module, and the folder itself must be deleted.

Now we will set up the build, for this we bring the build.gradle of the demo-ui module to the following form:
plugins { id 'java' id "com.moowork.node" version "1.3.1" } node { version = '10.14.1' npmVersion = '6.4.1' download = true } jar.dependsOn 'npm_run_build' jar { // "demo-ui" - Angular , ng new from 'dist/demo-ui' into 'static' } Module is ready.
We connect modules
It remains only to add a dependency to the build.gradle of the demo-server module.
implementation project(':demo-ui') As a result, we get the following build.gradle in the “demo-server” module:
plugins { id 'org.springframework.boot' version '2.1.5.RELEASE' id 'java' } apply plugin: 'io.spring.dependency-management' sourceCompatibility = '1.8' repositories { mavenCentral() } dependencies { implementation project(':demo-ui') implementation 'org.springframework.boot:spring-boot-starter-web' testImplementation 'org.springframework.boot:spring-boot-starter-test' } Launch
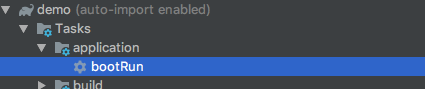
To run the application, simply run the Gradle task.
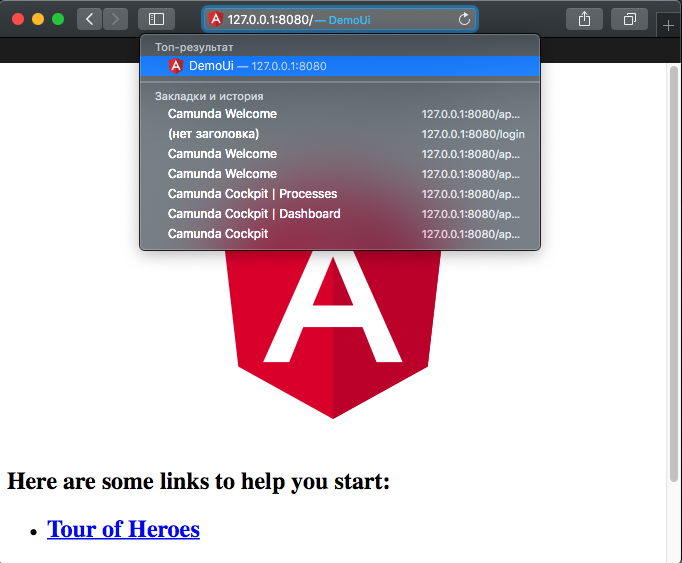
After which the application will be assembled and launched, it can be opened in the browser.
Well, if you want to get a jar-file, then just run the build task.

The collected file will be waiting for you in demo-server / build / libs.

Source: https://habr.com/ru/post/454198/
All Articles