VMware NSX for the smallest. Part 6. Configuring VPN
Part one. Introductory
Part two. Configuring Firewall and NAT Rules
Part Three DHCP setup
Part Four Routing Setup
Part Five Load balancer setup
Today we look at the VPN settings that NSX Edge offers us.
')
In general, we can divide the VPN technology into two key types:
- Site-to-site VPN. IPSec is most commonly used to create a secure tunnel, for example, between the main office network and the network at a remote site or in the cloud.
- Remote Access VPN. It is used to connect individual users to private networks of organizations using the VPN client software.
NSX Edge allows us to use both options.
We will configure using a test bench with two NSX Edge, a Linux server with a racoon daemon installed and a Windows laptop for testing Remote Access VPN.
IPsec
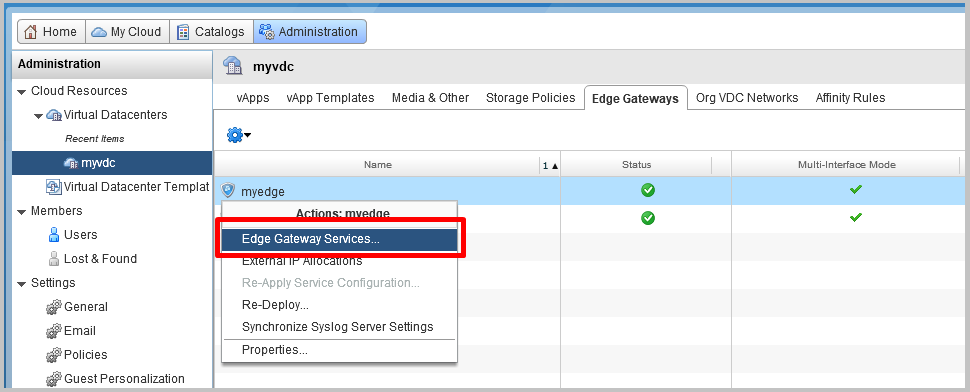
- In the vCloud Director interface, go to the Administration section and select vDC. On the Edge Gateways tab, select the Edge we need, right-click and select Edge Gateway Services.
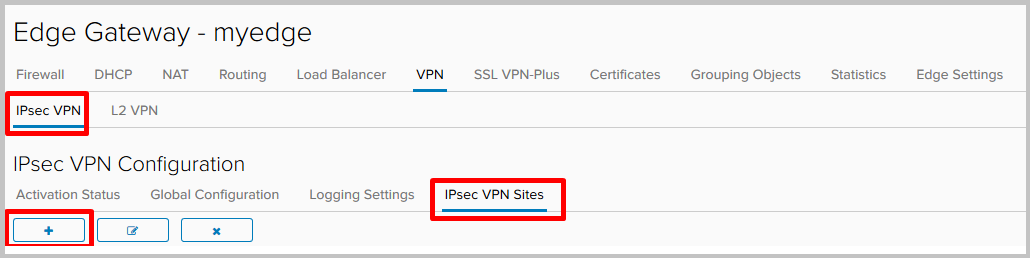
- In the NSX Edge interface, go to the VPN-IPsec VPN tab, then go to the IPsec VPN Sites section and click + to add a new site.
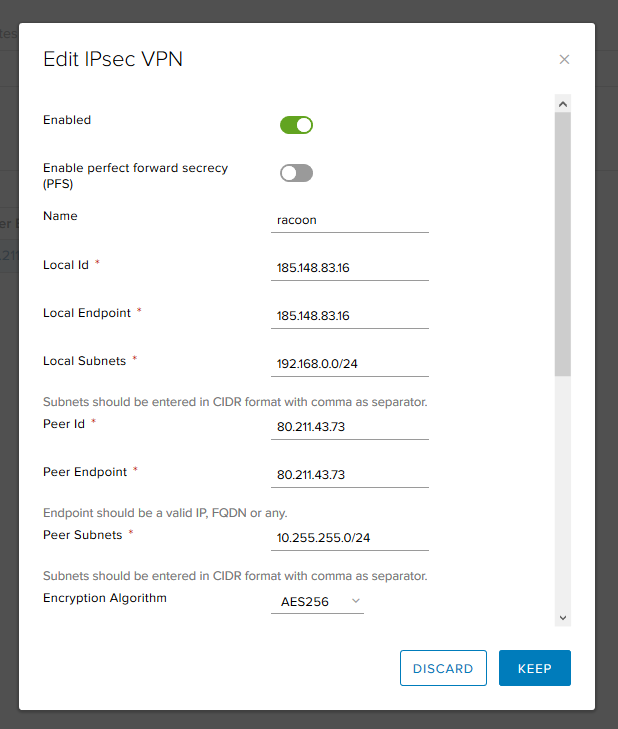
- Fill in the required fields:
- Enabled - activates the remote site.
- PFS - ensures that each new cryptographic key is not associated with any previous key.
- Local ID and Local Endpoin t is the external address of the NSX Edge.
- Local Subnet s - local networks that will use IPsec VPN.
- Peer ID and Peer Endpoint - the address of the remote site.
- Peer Subnets are networks that will use IPsec VPN on the remote side.
- Encryption Algorithm - tunnel encryption algorithm.
- Authentication - how we will authenticate the peer. You can use the Pre-Shared Key or certificate.
- Pre-Shared Key - specify the key that will be used for authentication and must coincide on both sides.
- Diffie-Hellman Group - key exchange algorithm.
After filling in the required fields, click Keep.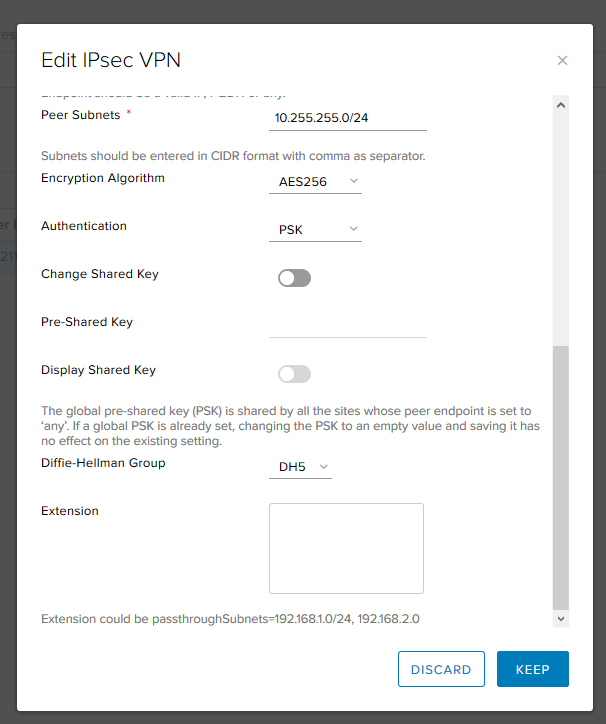
- Is done.

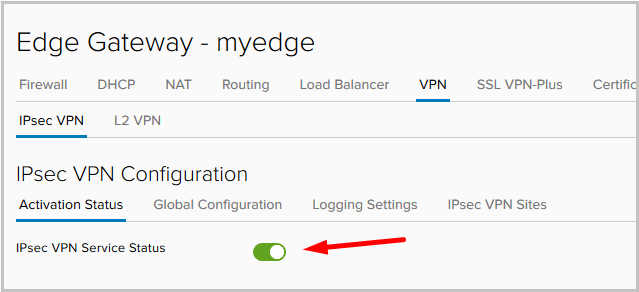
- After adding the site, go to the Activation Status tab and activate the IPsec Service.
- After the settings are applied, go to the Statistics tab -> IPsec VPN and check the status of the tunnel. We see that the tunnel has risen.

- Check the tunnel status from the Edge gateway console:
- show service ipsec - check service status.

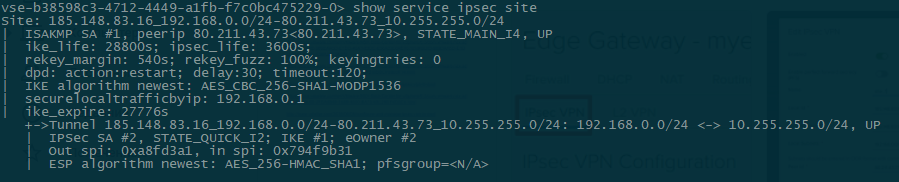
- show service ipsec site - information about the site status and agreed parameters.
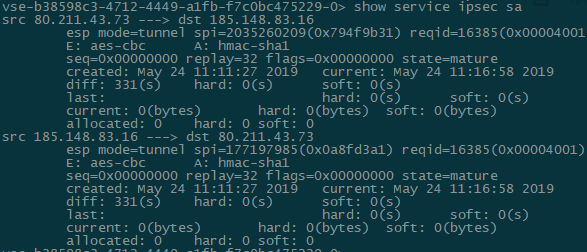
- show service ipsec sa - check the status of the Security Association (SA).
- show service ipsec - check service status.
- Check connectivity with a remote site:
root@racoon:~# ifconfig eth0:1 | grep inet inet 10.255.255.1 netmask 255.255.255.0 broadcast 0.0.0.0 root@racoon:~# ping -c1 -I 10.255.255.1 192.168.0.10 PING 192.168.0.10 (192.168.0.10) from 10.255.255.1 : 56(84) bytes of data. 64 bytes from 192.168.0.10: icmp_seq=1 ttl=63 time=59.9 ms --- 192.168.0.10 ping statistics --- 1 packets transmitted, 1 received, 0% packet loss, time 0ms rtt min/avg/max/mdev = 59.941/59.941/59.941/0.000 msConfiguration files and additional commands for diagnostics from a remote Linux server:root@racoon:~# cat /etc/racoon/racoon.conf log debug; path pre_shared_key "/etc/racoon/psk.txt"; path certificate "/etc/racoon/certs"; listen { isakmp 80.211.43.73 [500]; strict_address; } remote 185.148.83.16 { exchange_mode main,aggressive; proposal { encryption_algorithm aes256; hash_algorithm sha1; authentication_method pre_shared_key; dh_group modp1536; } generate_policy on; } sainfo address 10.255.255.0/24 any address 192.168.0.0/24 any { encryption_algorithm aes256; authentication_algorithm hmac_sha1; compression_algorithm deflate; } === root@racoon:~# cat /etc/racoon/psk.txt 185.148.83.16 testkey === root@racoon:~# cat /etc/ipsec-tools.conf #!/usr/sbin/setkey -f flush; spdflush; spdadd 192.168.0.0/24 10.255.255.0/24 any -P in ipsec esp/tunnel/185.148.83.16-80.211.43.73/require; spdadd 10.255.255.0/24 192.168.0.0/24 any -P out ipsec esp/tunnel/80.211.43.73-185.148.83.16/require; === root@racoon:~# racoonctl show-sa isakmp Destination Cookies Created 185.148.83.16.500 2088977aceb1b512:a4c470cb8f9d57e9 2019-05-22 13:46:13 === root@racoon:~# racoonctl show-sa esp 80.211.43.73 185.148.83.16 esp mode=tunnel spi=1646662778(0x6226147a) reqid=0(0x00000000) E: aes-cbc 00064df4 454d14bc 9444b428 00e2296e c7bb1e03 06937597 1e522ce0 641e704d A: hmac-sha1 aa9e7cd7 51653621 67b3b2e9 64818de5 df848792 seq=0x00000000 replay=4 flags=0x00000000 state=mature created: May 22 13:46:13 2019 current: May 22 14:07:43 2019 diff: 1290(s) hard: 3600(s) soft: 2880(s) last: May 22 13:46:13 2019 hard: 0(s) soft: 0(s) current: 72240(bytes) hard: 0(bytes) soft: 0(bytes) allocated: 860 hard: 0 soft: 0 sadb_seq=1 pid=7739 refcnt=0 185.148.83.16 80.211.43.73 esp mode=tunnel spi=88535449(0x0546f199) reqid=0(0x00000000) E: aes-cbc c812505a 9c30515e 9edc8c4a b3393125 ade4c320 9bde04f0 94e7ba9d 28e61044 A: hmac-sha1 cd9d6f6e 06dbcd6d da4d14f8 6d1a6239 38589878 seq=0x00000000 replay=4 flags=0x00000000 state=mature created: May 22 13:46:13 2019 current: May 22 14:07:43 2019 diff: 1290(s) hard: 3600(s) soft: 2880(s) last: May 22 13:46:13 2019 hard: 0(s) soft: 0(s) current: 72240(bytes) hard: 0(bytes) soft: 0(bytes) allocated: 860 hard: 0 soft: 0 sadb_seq=0 pid=7739 refcnt=0 - Everything is ready, site-to-site IPsec VPN is up and running.
In this example, we used PSK for peer authentication, but a variant with certificate authentication is also possible. To do this, go to the Global Configuration tab, enable certificate authentication and select the certificate itself.
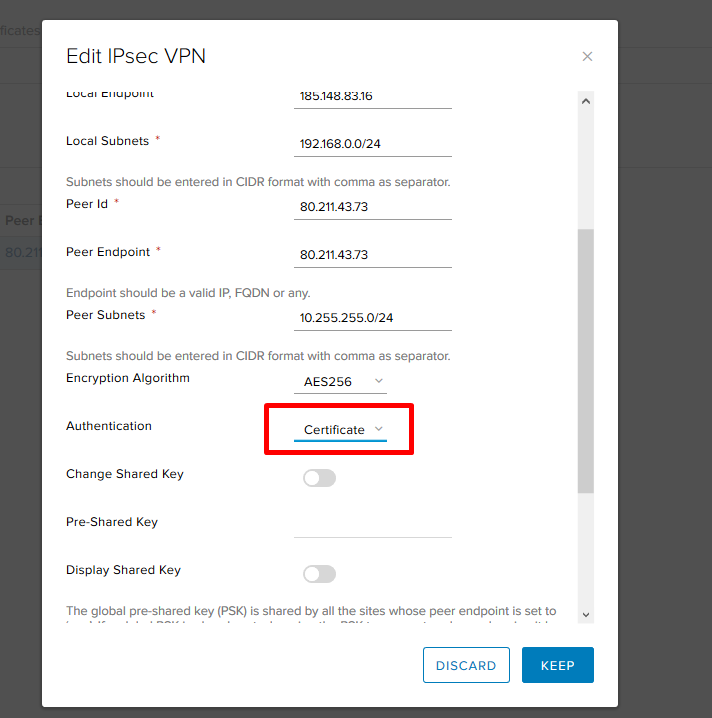
In addition, in the site settings you will need to change the authentication method.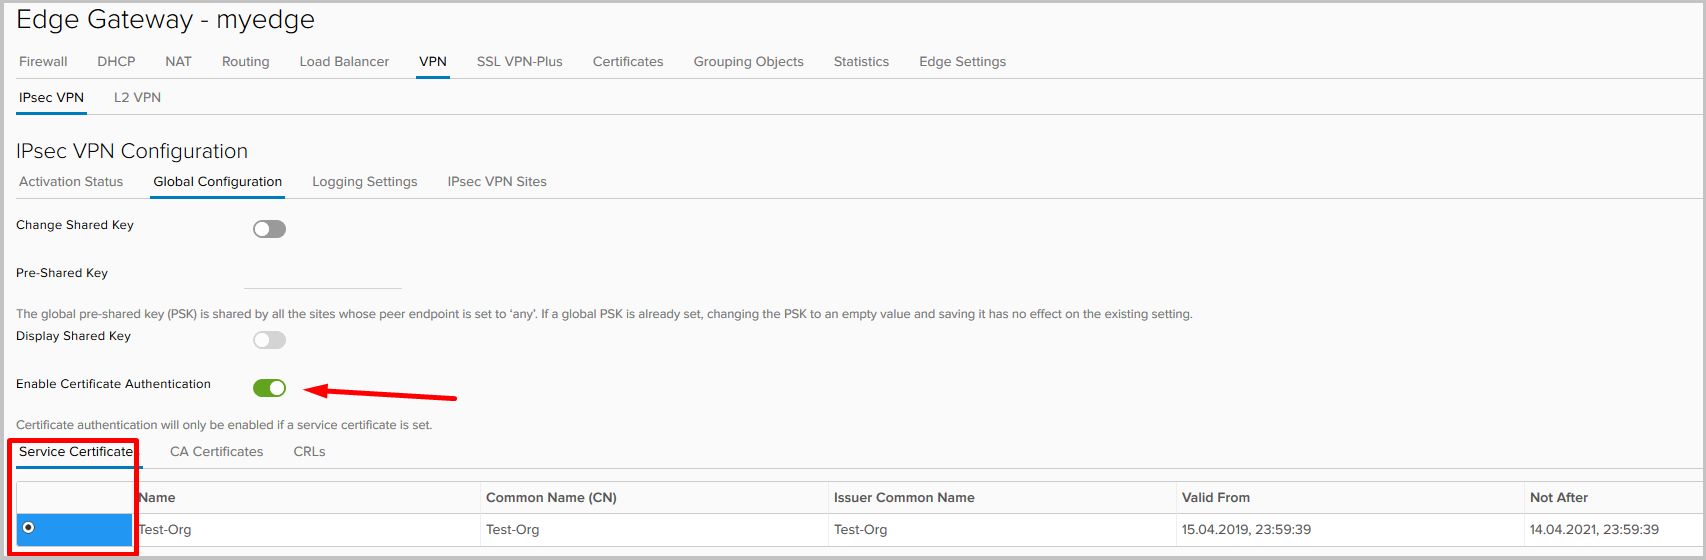
I note that the number of IPsec tunnels depends on the size of the Edge Gateway deployed (read about this in our first article ).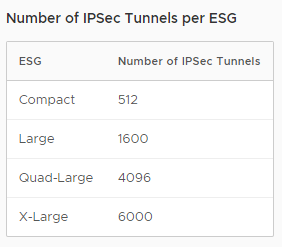
SSL VPN
SSL VPN-Plus is one of the Remote Access VPN options. It allows individual remote users to securely connect to private networks behind the NSX Edge. An encrypted tunnel in the case of SSL VPN-plus is established between the client (Windows, Linux, Mac) and NSX Edge.
- We proceed to the setting. In the Edge Gateway service control panel, go to the SSL VPN-Plus tab, then to Server Settings. We select the address and port on which the server will listen for incoming connections, enable logging and select the necessary encryption algorithms.
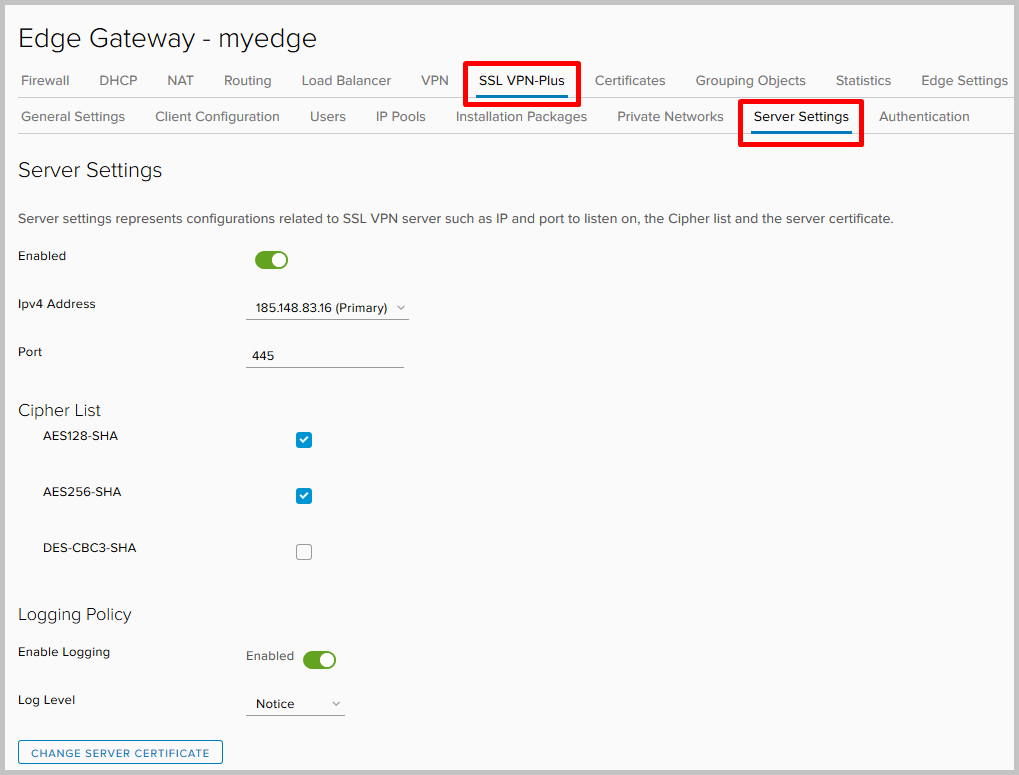
Here you can also change the certificate that the server will use.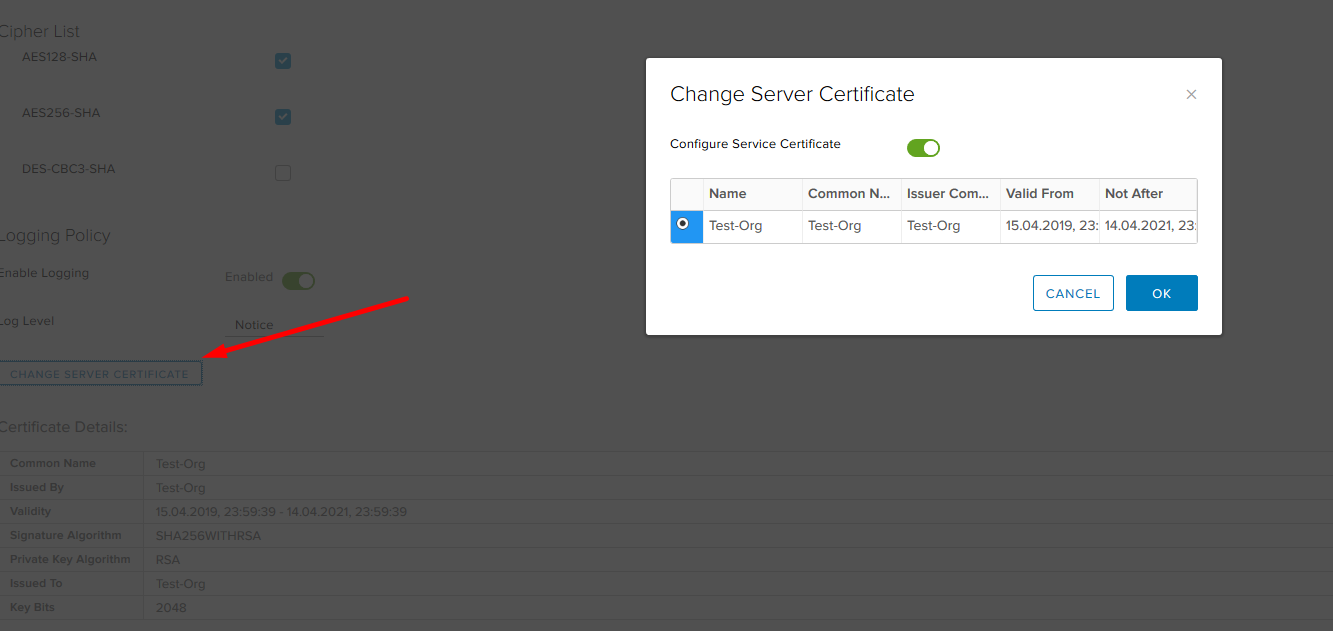
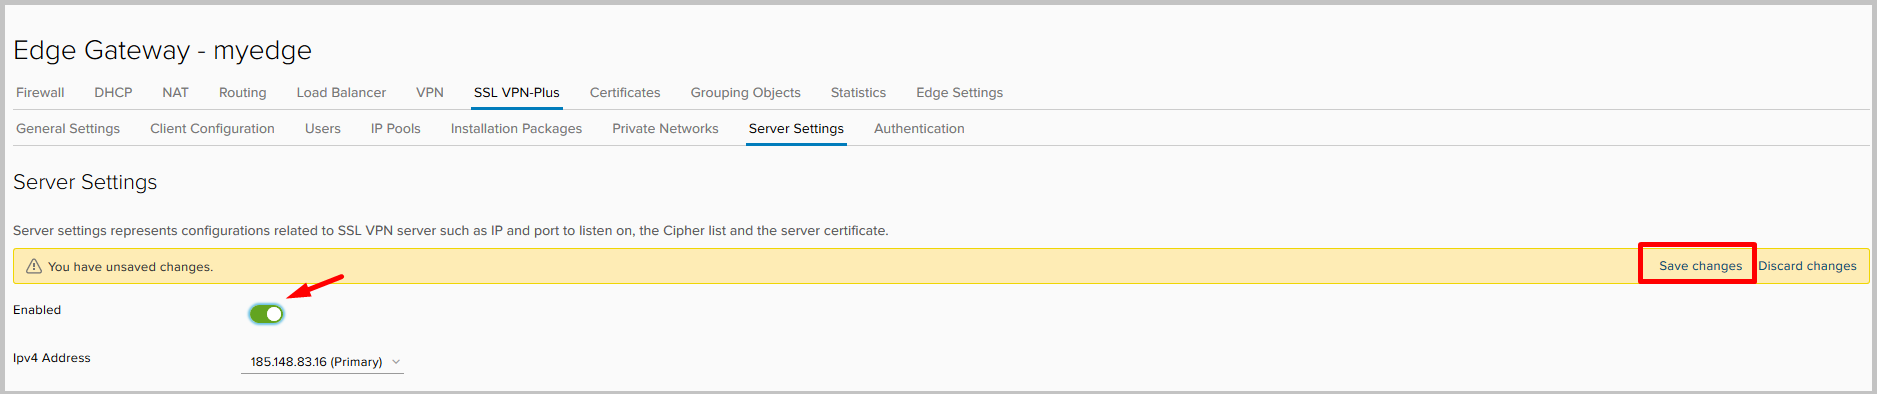
- After everything is ready, we turn on the server and do not forget to save the settings.
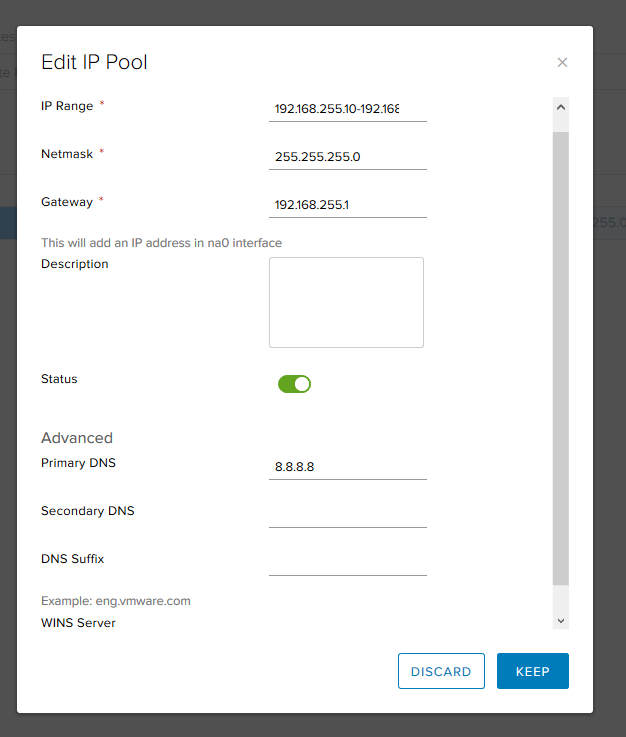
- Next, we need to configure a pool of addresses that we will issue to clients upon connection. This network is separate from any existing subnet in your NSX environment; it does not need to be configured on other devices on physical networks, except for the routes that point to it.
Go to the IP Pools tab and click +.
- Select addresses, subnet mask and gateway. Here you can change the settings for DNS and WINS servers.
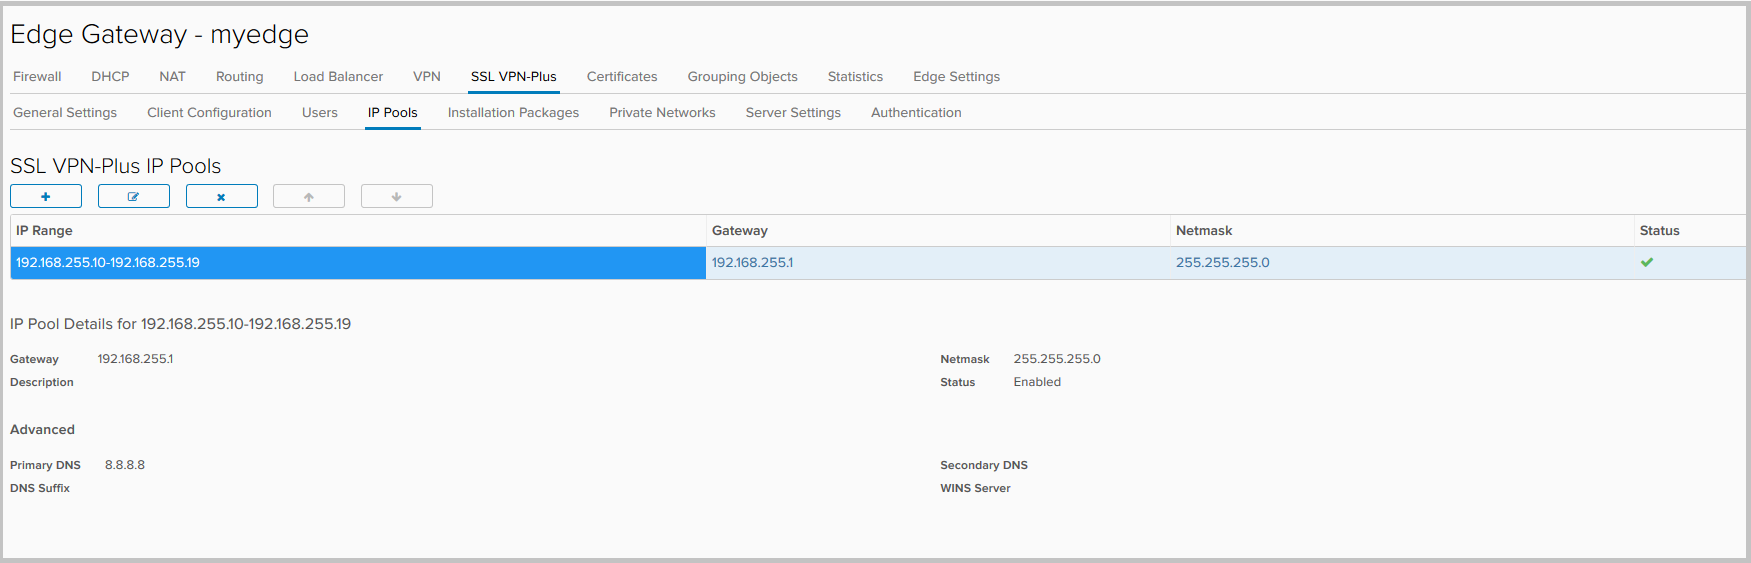
- The resulting pool.
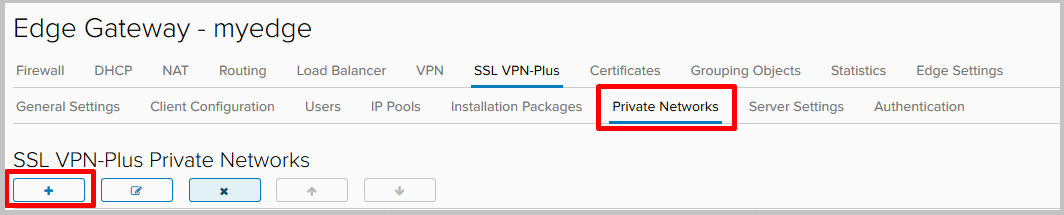
- Now we will add networks, access to which will be at users connecting to VPN. Go to the tab Private Networks and click +.
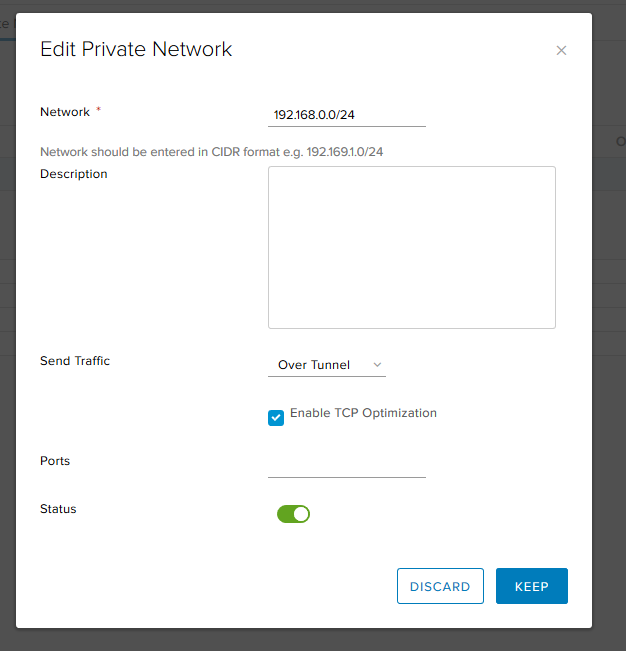
- Fill in:
- Network - a local network to which remote users will have access.
- Send traffic, it has two options:
- over tunnel — send traffic to the network through the tunnel,
- bypass tunnel — send traffic to the network directly bypassing the tunnel. - Enable TCP Optimization - check if you chose the option over tunnel. When optimization is enabled, you can specify the port numbers for which you want to optimize traffic. Traffic for the remaining ports of this particular network will not be optimized. If no port numbers are specified, traffic for all ports is optimized. Read more about this feature here .
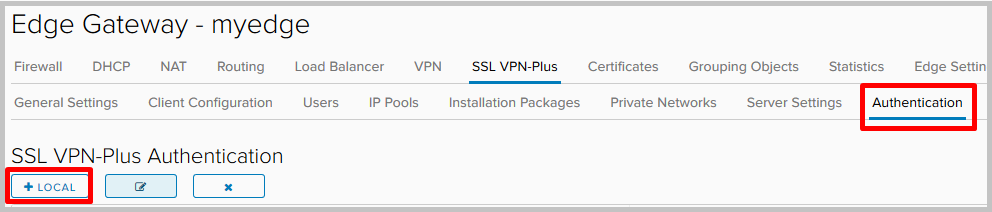
- Next, go to the Authentication tab and click +. For authentication, we will use a local server on the NSX Edge itself.
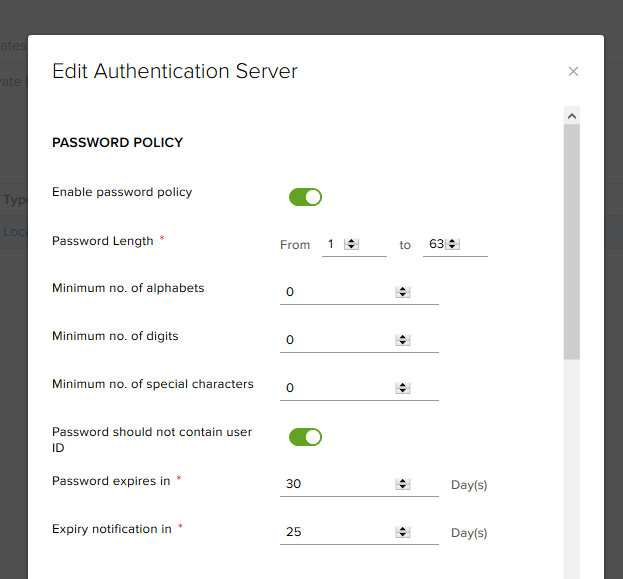
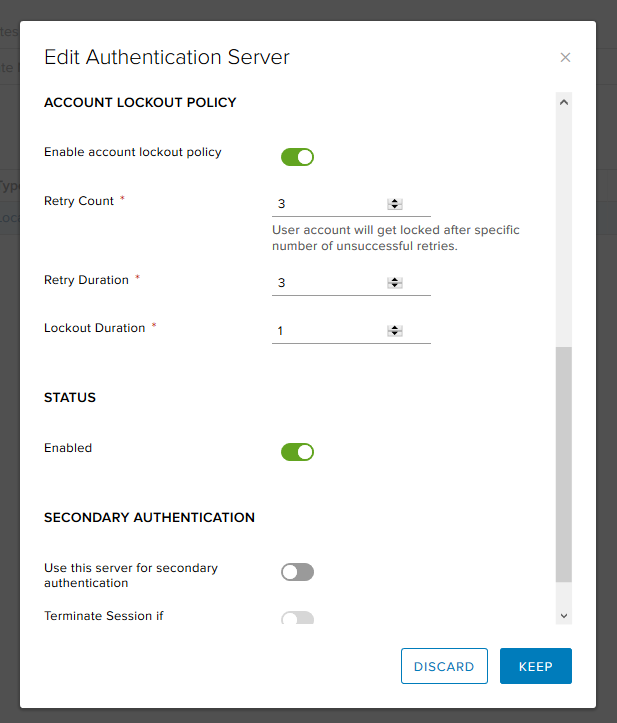
- Here we can select policies to generate new passwords and configure options for blocking user accounts (for example, the number of retries if the password is entered incorrectly).
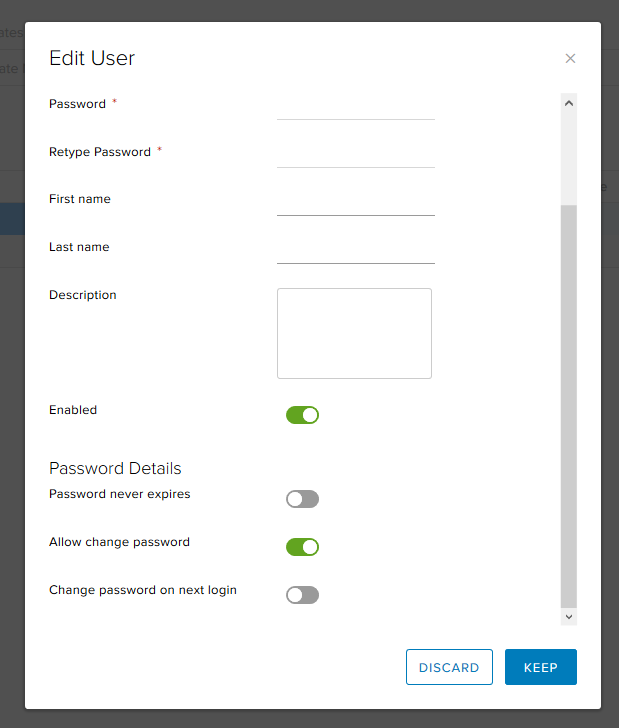
- Since we use local authentication, we need to create users.

- In addition to basic things like a name and password, you can, for example, prohibit a user from changing the password or, on the contrary, forcing him to change the password on the next login.
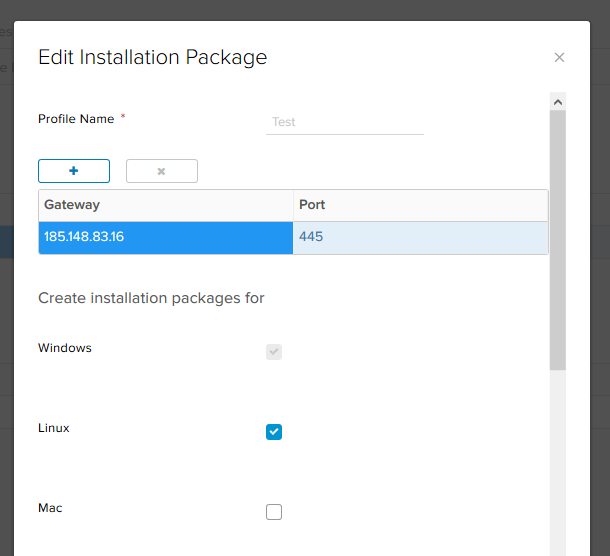
- After all the necessary users are added, go to the Installation Packages tab, click + and create the installer itself, which the remote employee will download to install.

- Click +. Select the address and port of the server to which the client will connect, and the platforms for which you need to generate an installation package.
Below in this window, you can specify client settings for Windows. Choose:- start client on logon - the VPN client will be added to the autoload on the remote machine;
- create desktop icon - create a VPN client icon on the desktop;
- server security certificate validation - will validate the server certificate upon connection.
Server setup is complete.

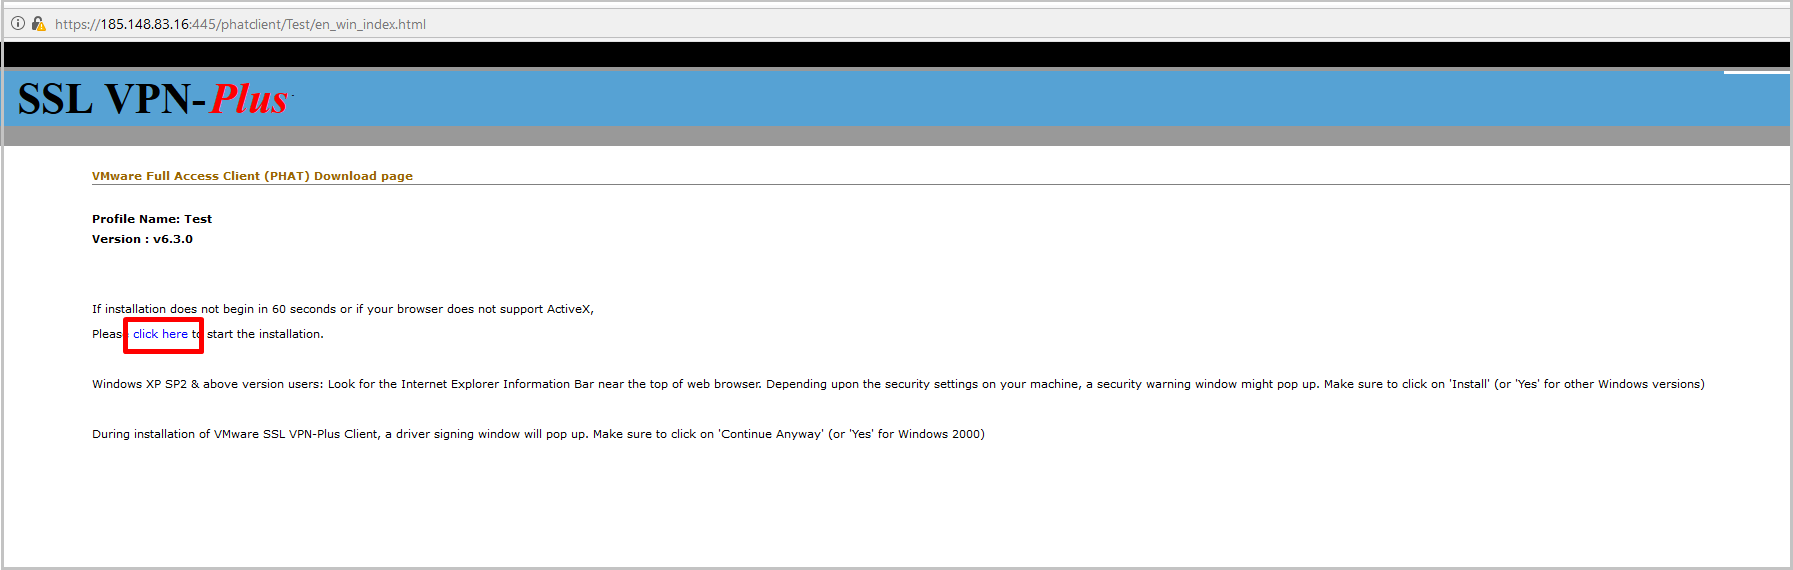
- Now download the installation package we created in the last step to the remote PC. When setting up the server, we specified its external address (185.148.83.16) and port (445). It is to this address that we need to go to the web browser. In my case, this is 185.148.83.16 : 445.
In the authorization window, you must enter the credentials of the user we created earlier.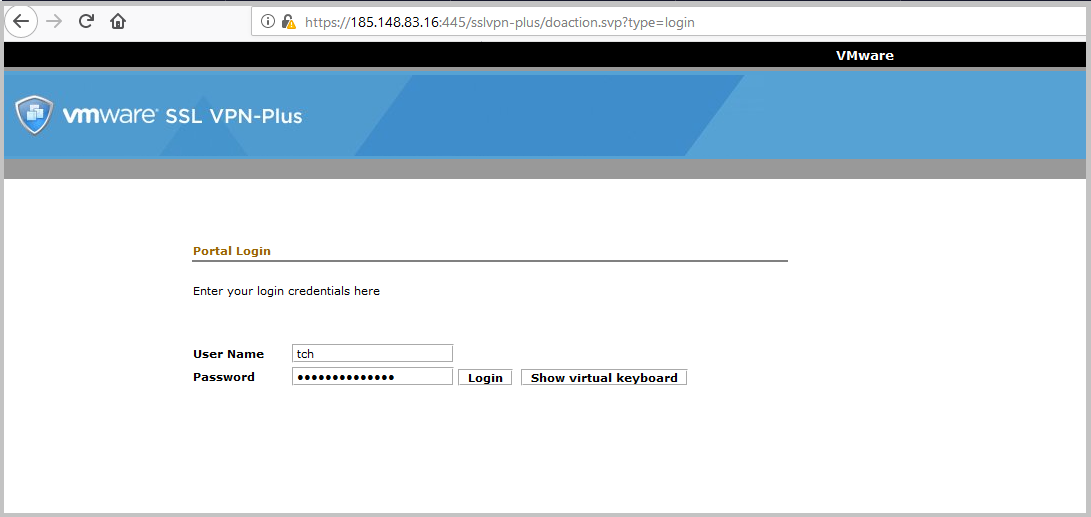
- After logging in, a list of created installation packages available for download appears in front of us. We have created only one - and download it.

- We click on the link, the client starts downloading.
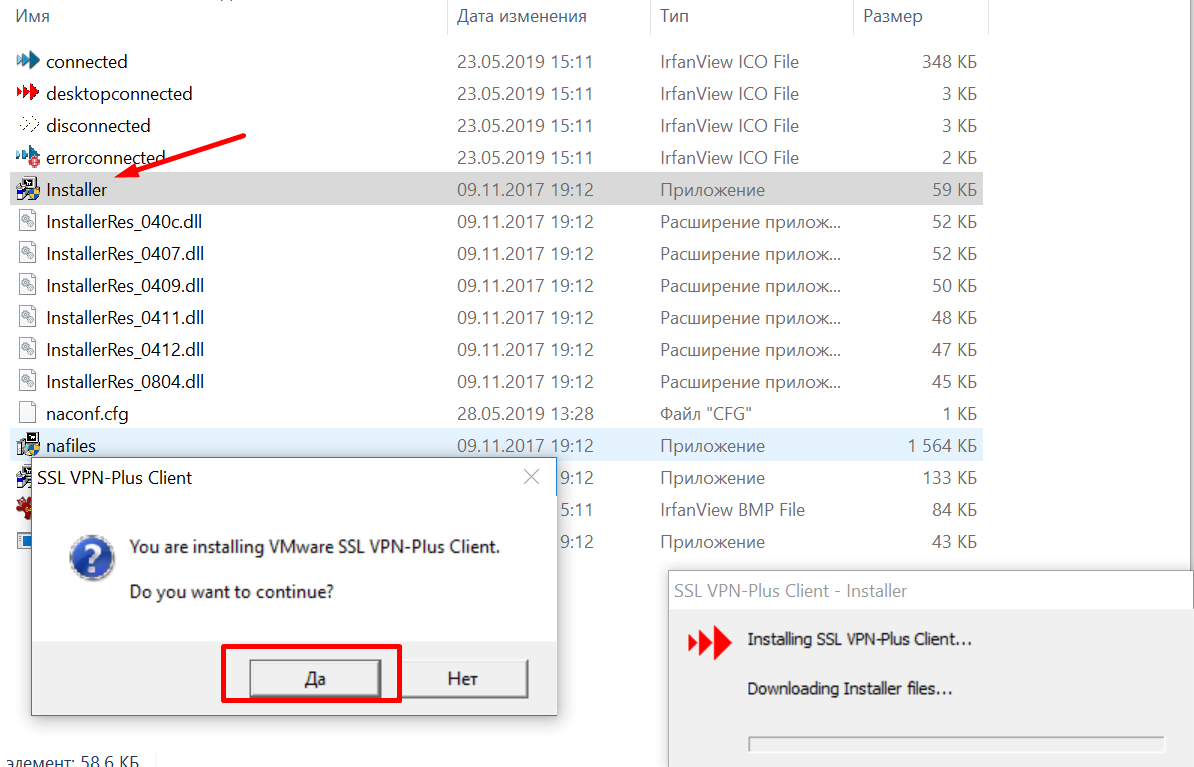
- Unpack the downloaded archive and run the installer.
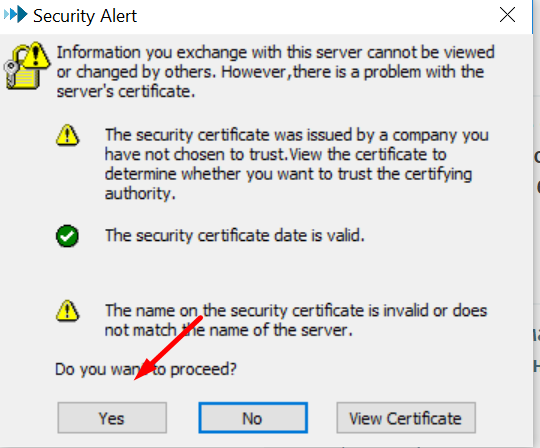
- After installation, launch the client, click Login in the authorization window.

- In the certificate verification window, select Yes.
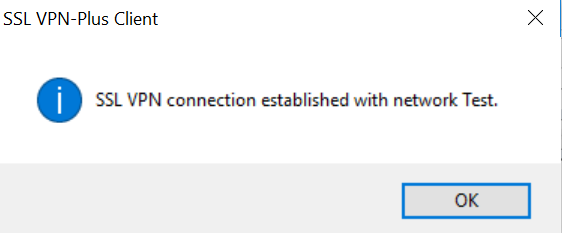
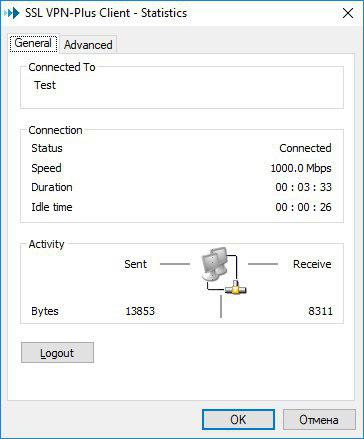
- Enter the credentials for the previously created user and see that the connection is completed successfully.

- Check the statistics of the VPN client on the local computer.

- In the Windows command line (ipconfig / all), we see that an additional virtual adapter has appeared and there is connectivity with the remote network, everything works:


- And finally - check from the console Edge Gateway.

L2 VPN
L2VPN is needed when you need to combine several geographically
distributed networks in one broadcast-domain.
This can be useful, for example, when migrating a virtual machine: when moving a VM to another geographic area, the machine will save the IP addressing settings and not lose connectivity with other machines that are in the same L2 domain with it.
In our test environment, we will connect two sites together, let's call them A and B, respectively. We have two NSXs and two equally created routable networks tied to different Edge. The machine A has the address 10.10.10.250/24, the machine B - 10.10.10.2/24.
- In vCloud Director, go to the Administration tab, go to the VDC we need, go to the Org VDC Networks tab, and add two new networks.
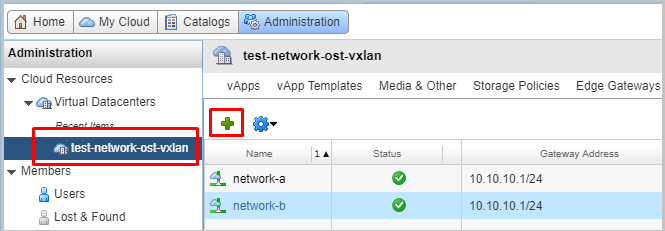
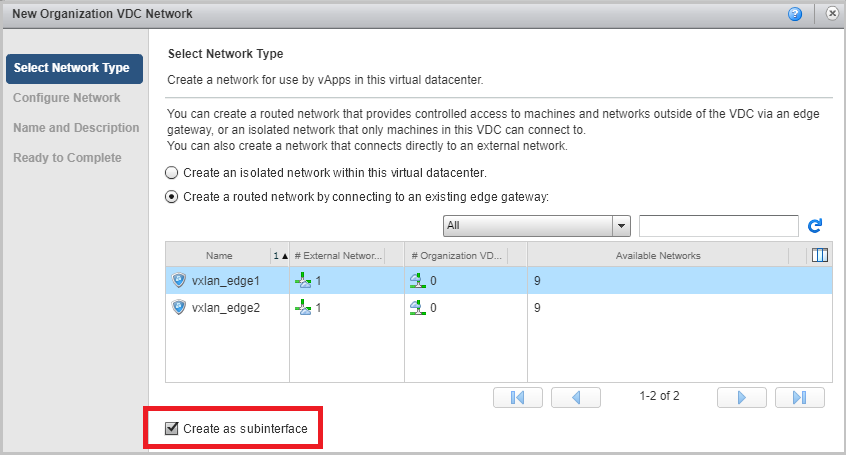
- Select the type of network routed and bind this network to our NSX. We put the Create as subinterface checkbox.
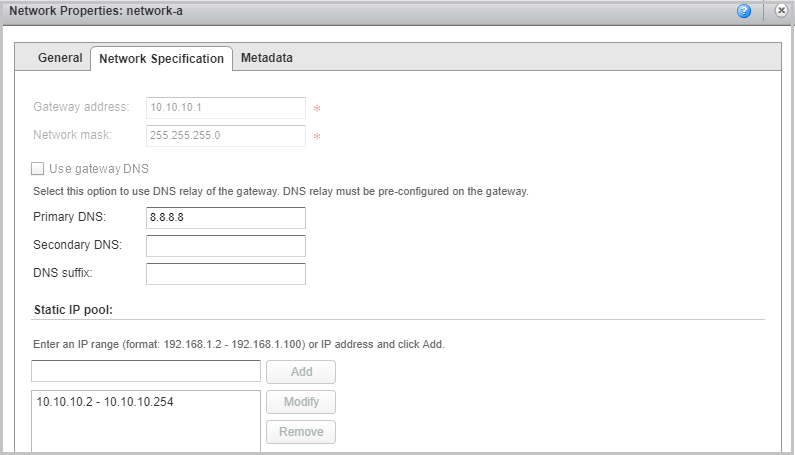
- As a result, we should have two networks. In our example, they are called network-a and network-b with the same gateway settings and the same mask.

- We now turn to the settings of the first NSX. This will be the NSX to which Network A is attached. It will act as a server.
We return to the interface NSx Edge / Go to the tab VPN -> L2VPN. We enable L2VPN, select the Server operation mode, in the Server Global settings we specify the external IP address of the NSX where the port for the tunnel will be listened to. By default, the socket will open on port 443, but it can be changed. Do not forget to choose the encryption settings for the future tunnel.
- Go to the Server Sites tab and add a feast.

- We include a feast, set the name, description, if necessary, set the user name and password. We will need this data later when setting up a client site.
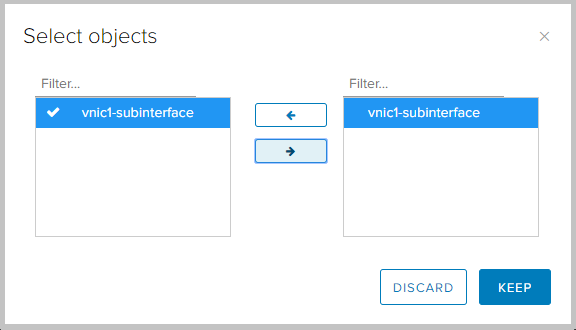
In Egress Optimization Gateway Address we set the gateway address. This is necessary in order to avoid a conflict of IP addresses, because the gateway of our networks has the same address. Then click on the button SELECT SUB-INTERFACES.
- Here we select the required subinterface. Save the settings.
- We see that the newly created client site appeared in the settings.

- We now turn to configuring the NSX from the client.
We go to the NSX side B, go to VPN -> L2VPN, turn on L2VPN, set L2VPN mode to client mode. On the Client Global tab, we set the address and port of the NSX A, which we indicated earlier as Listening IP and Port on the server side. You also need to set the same encryption settings so that they are consistent when you raise the tunnel.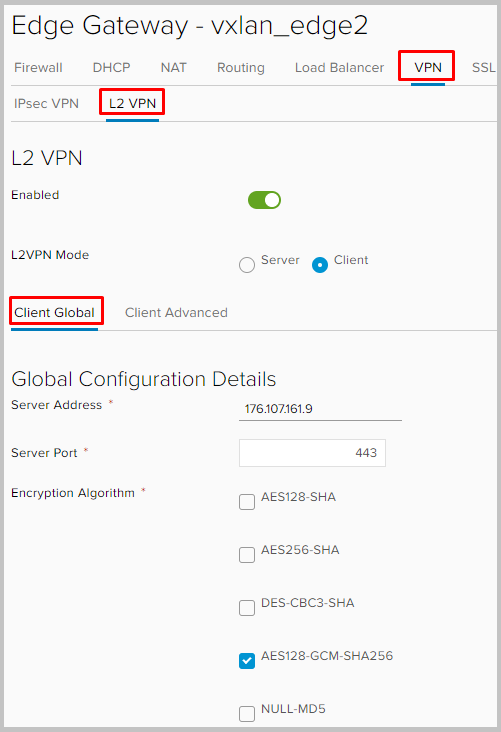
We scroll below, select the subinterface through which the tunnel will be built for L2VPN.
In Egress Optimization Gateway Address we set the gateway address. We set user-id and password. We select the subinterface and do not forget to save the settings.
- Actually, that's all. The client and server settings are almost identical, with the exception of a few nuances.
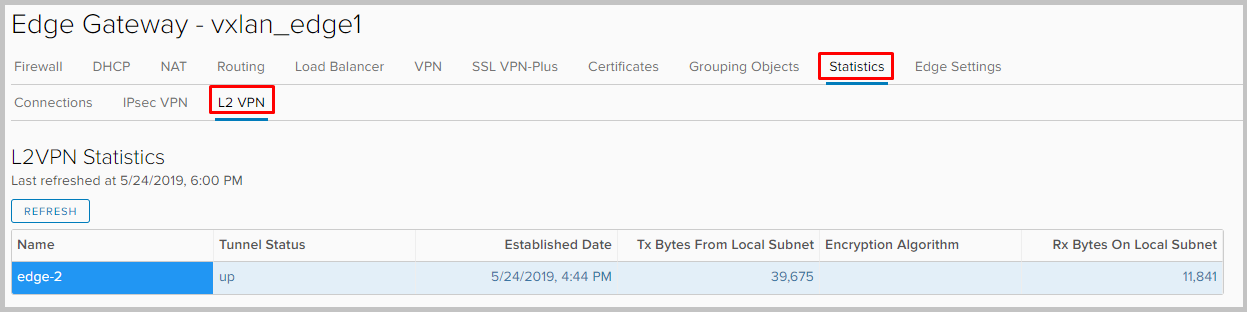
- Now we can see what our tunnel has earned by going to Statistics -> L2VPN on any NSX.
- If we now log into the console of any Edge Gateway, then we will see the addresses of both VMs on each of them in the arp-table.

I have everything about VPN on NSX Edge. Ask if something is left incomprehensible. This is also the last part of the NSX Edge series. We hope they were helpful :)
Source: https://habr.com/ru/post/454004/
All Articles