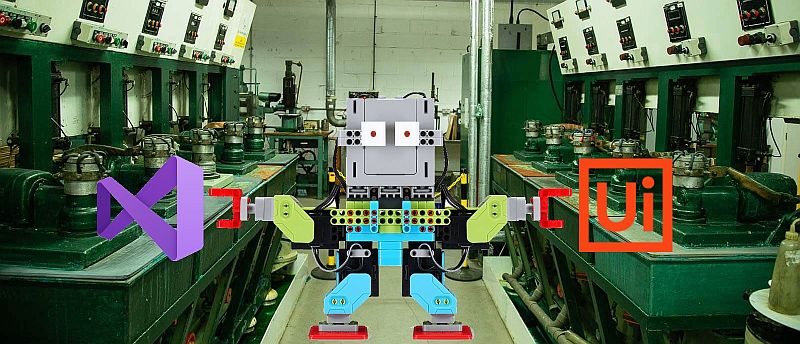
All Your Own: Tutorial on Creating New Actions for UiPath RPA
This article is a training material that allows you to walk through the process of creating and publishing a new component for the UiPath RPA platform. This is convenient in different cases, for example, for easy integration with the company's systems or in situations when the company wants to help employees who are not particularly versed in programming create their processes for robots. But, it seems to me, this technique works especially well for cases when you need to integrate your product into the robotization ecosystem, allowing users to configure the integration of internal processes in a couple of clicks. An example is a connector written by Abbyy for your Abbyy Flexicapture Distributed product. Another example is the company UiPath itself, which thus connected to its new ML computer vision module (Computer Vision in the package manager), PDF operations, etc.
Now in the app store UiPath Go! connectors for popular solutions, such as Salesforce or ServiceNow, have already started to appear, and, most likely, this trend is only gaining popularity.
So how do you start developing your own action?
NB In English, an action is an Activity, remember this if you need to google something.
If you do not want to do all the settings, you can try the sample code, taken step by step in this tutorial. It lies on GitLab . The code in the article is shortened and simplified, it is available on Yandex Disk
What we need before we start working:
- Visual Studio (the free version of VS Community Edition is perfect. When installing, you must select .NET Desktop Development or manually specify the following packages:
- NuGet Package Manager
- .NET Framework 4.6.1 targeting pack (4.6 is needed)
- C # and Visual Basic (you can write actions in any .NET language, but traditionally, C # or VB.NET is used). This tutorial will use C #.
- Windows Workflow Foundation
- UiPath Studio (and here, the same thing, free CE, you just need to fill out the UiPath Community Edition application form).
NB For the development of the action itself, we will not need it, but, of course, I want to see what we will do.
- NuGet Package Manager (comes bundled with VS 2017+ or downloaded from Nuget.org
We start to create
Create a project in VS
- Create a
C# Class Library (.NET Framework)projectC# Class Library (.NET Framework). Please note that variations on the theme (for example, C # Class Library (.NET Standard) ) do not suit us.

- We select a meaningful name for it (the usual format is <Developer> .UiPath.Activities. <Project name> ) and indicate that we want to use
.NET Framework 4.6.1.The NuGet Package NB ID should contain the word Activities. Since we want to take everything from VS, it is better to immediately call the project correctly in order to pick it up in NuGet.

- In the created project we create the following subfolders (this is an optional step, but it’s more convenient to work with action packages when you want to provide users with more than one action at a time and the number of files starts to accumulate)
- Activities (here we will have an activity code)
- Designer (here we will have the form of action boxes)
- Resources (here we will store pictures, icons and other necessary things)
- We rename the file Class1.cs which for us created in VS according to the name of our first activity and move it to the Activities folder.

Easy action creation and publishing
At this stage we have an empty project compiled into .dll . We now turn to creating the action itself.
NB Since UiPath supports several languages, we will need, at the end, to add localization, and slightly change what we are doing now, but let's start with what is necessary and sufficient.
- We need two
using:using System; using System.Activities; - We
CodeActivityour class fromCodeActivity:public class TutorialForHabr: CodeActivity {} - Set the input and output parameters:
public class TutorialForHabr: CodeActivity { public InArgument<Int32> Row { get; set; } public InArgument<Int32> Column { get; set; } public OutArgument<String> Cell { get; set; } }NB Action parameters are input
InArgument< >, outputOutArgument< >and mixed, allowing both receiving and receiving parametersInOutArgument< > - And the
Executemethod, which is the only method that we need to specify:protected override void Execute(CodeActivityContext context) { string colstr = ""; // Row Int32 row = Row.Get(context); // Column Int32 column = Column.Get(context); // Excel do { column--; //26 , Excel, , Z AA int modn = column % 26; colstr = (char)((int)'A' + modn) + colstr; //A Excel column /= 26; } while (column > 0); // Cell Cell.Set(context, colstr + row.ToString()); }
At this stage, we have a working action for UiPath that implements simple but necessary functionality.
We will publish it, and then we will move on to the second part and deal a little bit with "decorations".
Publish via NuGet
You can create a NuGet package through the GUG NuGet Package Manager or via the command line by calling nuget.exe pack . The pack command takes as input two basic parameters — the name of the project file .csproj or the name of the .nuspec file containing the package meta-information. The first option does not allow us, without additional manual modifications of the .json file, to set some important properties of the package, such as tags, license or URL of the repository, plus it does not allow to set an icon for the project that will be visible in the package manager.
In the second variant, we duplicate some properties of the package, which, nevertheless, could be automatically taken from Visual Studio.
Therefore, we will go along path 1.5, and create in the root of the project a file with the .nuspec extension (the name does not matter if such a file is one), which will contain information that cannot be obtained from .csproj and combine these two data sources.
<?xml version="1.0" encoding="utf-8"?> <package xmlns="http://schemas.microsoft.com/packaging/2011/08/nuspec.xsd"> <metadata> <id>$id$</id> <title>$title$</title> <version>$version$</version> <authors>$author$</authors> <owners>$author$</owners> <requireLicenseAcceptance>false</requireLicenseAcceptance> <licenseUrl>https://choosealicense.com/licenses/mit/</licenseUrl> <projectUrl>https://gitlab.com/ilyak/ilyak.uipath.activities</projectUrl> <iconUrl>http://www.uipath.com/hubfs/Logos/uipath-nuget-logo.png</iconUrl> <description>$description$</description> <copyright>$copyright$</copyright> <tags>UiPath,Activity,Excel</tags> </metadata> <files> <file src="bin\Debug\IlyaK.UiPath.Activities.TutorialForHabr.dll" target="lib\net461\IlyaK.UiPath.Activities.TutorialForHabr.dll" /> </files> </package> As you can see, the .nuspec structure is fairly obvious. If you are reluctant to mess with XML, you can create it through the visual editor of the NuGet Package Manager and save it in the project folder for future use. Variables of type $copyright are taken from the information contained in the .dll file, i.e. from visual studio.
Now we want to use our .nuspec so that with each build we get a new package. To do this, we go to Properties and go to the Build Events tab.
In the Post-build event command line write magic words
IF EXIST "$(ProjectDir)$(OutDir)*.nupkg" del "$(ProjectDir)$(OutDir)*.nupkg" nuget.exe pack "$(ProjectPath)" IF EXIST "$(ProjectDir)$(OutDir)*.nupkg" xcopy /Y "$(ProjectDir)$(OutDir)*.nupkg" "C:\Program Files (x86)\UiPath\Studio\Packages\" which, in Russian, mean
- Delete old packages in the folder where the build is created
- Create a new package using .csproj and .nuspec files
- Put it in the folder
C:\Program Files (x86)\UiPath\Studio\Packages\
What is the folder? This is a local package repository used by UiPath Studio. As soon as a new package appears there, it will automatically be available through the package manager and can be added to the robotic processes.

NB The path to the local repository can be changed through the settings of UiPath Studio, so that it is convenient to copy files there if there is a problem with permissions.

That's all, congratulations!
NB Please note that Smart Studio itself has created a category for our action, using dots as nesting levels, and put spaces before the capital letters in the name of the action.
The next part of the article will be about "beautiful": how to make a visual interface for an action, assign an icon and localize texts.
Do seriously
Attributes
In order for our action to work, the first part is enough. But it would be desirable, that we could choose a category, that hints, etc. were shown.
For this we need attributes. There are attributes that are suitable for the action itself, and for its parameters:
[Category (" , ")] [DisplayName (" ")] [Description (" ")] And there are those who need only the parameters:
[RequiredArgument] // [DefaultValue(1)] // Localization
Unfortunately, there is one subtlety with attributes: in the Russian version of UiPath Studio, the names of the action categories and the categories of their properties are also translated. Accordingly, if we set the [Category("Input")] attribute for the input parameter, it will be displayed correctly in the English version, but in the Russian version it will fall into its own separate Input category, and not into the standard Input category. The same goes for actions; in the Russian version, App Integration becomes Application Integration .
So we need to make text constants in language-dependent resources and use them from there.
To do this, create a magical file Localization.cs, containing functions for localizing attributes
using IlyaK.UiPath.Activities.TutorialForHabr.Properties; using System; using System.ComponentModel; namespace IlyaK.UiPath.Activities.TutorialForHabr { [AttributeUsage(AttributeTargets.Assembly | AttributeTargets.Module | AttributeTargets.Class | AttributeTargets.Struct | AttributeTargets.Enum | AttributeTargets.Constructor | AttributeTargets.Method | AttributeTargets.Property | AttributeTargets.Field | AttributeTargets.Event | AttributeTargets.Interface | AttributeTargets.Parameter | AttributeTargets.Delegate | AttributeTargets.ReturnValue | AttributeTargets.GenericParameter)] public class LocalizedCategoryAttribute : CategoryAttribute { public LocalizedCategoryAttribute(string category) : base(category) { } protected override string GetLocalizedString(string value) { return Resources.ResourceManager.GetString(value) ?? base.GetLocalizedString(value); } } [AttributeUsage(AttributeTargets.Property | AttributeTargets.Class)] public class LocalizedDisplayNameAttribute : DisplayNameAttribute { public LocalizedDisplayNameAttribute(string displayName) : base(displayName) { } public override string DisplayName { get { return Resources.ResourceManager.GetString(DisplayNameValue) ?? base.DisplayName; } } } public class LocalizedDescriptionAttribute : DescriptionAttribute { public LocalizedDescriptionAttribute(string displayName) : base(displayName) { } public override string Description { get { return Resources.ResourceManager.GetString(DescriptionValue) ?? base.Description; } } } } He will allow us to replace the design
[Category("Name") on
[LocalizedCategory(nameof(Resources.CategoryName))] for this mechanism to work, we must:
- Create resource files for the languages into which we are going to translate, in our case, this is
Resources.resxandResources.ru.resxin theResourcesfolder ( Add -> New Item -> Resource File ). Make sure that the Access Modifier value for resources is in Public . - Add to class file actions
using IlyaK.UiPath.Activities.TutorialForHabr.Properties; // + .Properties And put the corresponding attributes to the class and all parameters.
[LocalizedCategory(nameof(Resources.AppIntegrationExcel))] [LocalizedDisplayName(nameof(Resources.TutorialForHabrName))] [LocalizedDescription(nameof(Resources.TutorialForHabrDescription))] public class TutorialForHabr : CodeActivity { [LocalizedCategory(nameof(Resources.Input))] [LocalizedDisplayName(nameof(Resources.RowName))] [LocalizedDescription(nameof(Resources.RowDescription))] public InArgument<Int32> Row { get; set; } [LocalizedCategory(nameof(Resources.Input))] [LocalizedDisplayName(nameof(Resources.ColumnName))] [LocalizedDescription(nameof(Resources.ColumnDescription))] public InArgument<Int32> Column { get; set; } [LocalizedCategory(nameof(Resources.Output))] [LocalizedDisplayName(nameof(Resources.CellName))] [LocalizedDescription(nameof(Resources.CellDescription))] }- In order for the library with Russian resources to get into the NuGet package, you need to add another line to the .nuspec file
<files> <file src="bin\Debug\IlyaK.UiPath.Activities.TutorialForHabr.dll" target="lib\net461\IlyaK.UiPath.Activities.TutorialForHabr.dll" /> <file src="bin\Debug\ru\**" target="lib\net461\ru\" /> </files>
Designer
In order for our action to look beautiful in the process and allow users to enter data without getting into properties, we need to add a UI. This is done through a file in XAML format, which, using Visual Studio, can be edited in a special interface, but some will still have to be fixed by hand. I will provide a template from which to start, and then you should study the Microsoft documentation .
- Put in the
Resourcesfolder icon for the action. In the properties of the Build Action set to Resource (not Embedded Resource ) - Create a new Activity Designer in the
Designerfolder ( Add -> New Item -> Activity Designer ) and call it TutorialForHabr
<sap:ActivityDesigner x:Class="IlyaK.UiPath.Activities.TutorialForHabr.Designer.TutorialForHabrDesigner" xmlns="http://schemas.microsoft.com/winfx/2006/xaml/presentation" xmlns:x="http://schemas.microsoft.com/winfx/2006/xaml" xmlns:s="clr-namespace:System;assembly=mscorlib" xmlns:resource="clr-namespace:IlyaK.UiPath.Activities.TutorialForHabr.Properties" xmlns:sap="clr-namespace:System.Activities.Presentation;assembly=System.Activities.Presentation" xmlns:sapc="clr-namespace:System.Activities.Presentation.Converters;assembly=System.Activities.Presentation" xmlns:sapv="clr-namespace:System.Activities.Presentation.View;assembly=System.Activities.Presentation"> <sap:ActivityDesigner.Resources> <ResourceDictionary> <sapc:ArgumentToExpressionConverter x:Key="ArgumentToExpressionConverter" /> </ResourceDictionary> </sap:ActivityDesigner.Resources> <DockPanel Width="200"> <Grid> <Grid.ColumnDefinitions> <ColumnDefinition Width="70"></ColumnDefinition> <ColumnDefinition Width="130"></ColumnDefinition> </Grid.ColumnDefinitions> <Grid.RowDefinitions> <RowDefinition></RowDefinition> <RowDefinition></RowDefinition> </Grid.RowDefinitions> <TextBlock Grid.Row="0" Grid.Column="0" Text="{x:Static resource:Resources.RowName}" VerticalAlignment="Center" HorizontalAlignment="Right" Margin="0,0,5,0"></TextBlock> <sapv:ExpressionTextBox Grid.Row="0" Grid.Column="1" OwnerActivity="{Binding Path=ModelItem}" ExpressionType="{x:Type s:Int32}" HintText="{x:Static resource:Resources.RowDescription}" Expression="{Binding Path=ModelItem.Row, Converter={StaticResource ArgumentToExpressionConverter},ConverterParameter=In, Mode=TwoWay}"/> <TextBlock Grid.Row="1" Grid.Column="0" Text="{x:Static resource:Resources.ColumnName}" VerticalAlignment="Center" HorizontalAlignment="Right" Margin="0,0,5,0"></TextBlock> <sapv:ExpressionTextBox Grid.Row="1" Grid.Column="1" OwnerActivity="{Binding Path=ModelItem}" ExpressionType="{x:Type s:Int32}" HintText="{x:Static resource:Resources.ColumnDescription}" Expression="{Binding Path=ModelItem.Column, Converter={StaticResource ArgumentToExpressionConverter},ConverterParameter=In, Mode=TwoWay}"/> </Grid> </DockPanel> <sap:ActivityDesigner.Icon> <DrawingBrush> <DrawingBrush.Drawing> <ImageDrawing> <ImageDrawing.Rect> <Rect Location="0,0" Size="32,32" ></Rect> </ImageDrawing.Rect> <ImageDrawing.ImageSource> <BitmapImage UriSource="/IlyaK.UiPath.Activities.TutorialForHabr;component/Resources/Tutorial_32x32.png"></BitmapImage> </ImageDrawing.ImageSource> </ImageDrawing> </DrawingBrush.Drawing> </DrawingBrush> </sap:ActivityDesigner.Icon> </sap:ActivityDesigner> This is how we set the localized label:
<TextBlock Grid.Row="0" Grid.Column="0" Text="{x:Static resource:Resources.RowName}" VerticalAlignment="Center" HorizontalAlignment="Right" Margin="0,0,5,0" /> , and this is the input field. ExpressionType sets the field type, HintText - a hint (gray text) for it, Expression associates the field value with our action
<sapv:ExpressionTextBox OwnerActivity="{Binding Path=ModelItem}" Grid.Row="0" Grid.Column="1" ExpressionType="{x:Type s:Int32}" HintText="{x:Static resource:Resources.RowDescription}" Expression="{Binding Path=ModelItem.Row, Converter={StaticResource ArgumentToExpressionConverter},ConverterParameter=In, Mode=TwoWay}" /> NB Pay attention to the BitmapImage tag at the end of the file. So we set the picture for the icon with reference to the resource file. This is a very fragile functionality and sometimes you have to tinker with it.
the results should be like this:

- Create the DesignerMetata class in the Activities folder.
using System.Activities.Presentation.Metadata; using System.ComponentModel; namespace IlyaK.UiPath.Activities.TutorialForHabr.Design { public class DesignerMetadata : IRegisterMetadata { public void Register() { AttributeTableBuilder attributeTableBuilder = new AttributeTableBuilder(); attributeTableBuilder.AddCustomAttributes(typeof(TutorialForHabr), new DesignerAttribute(typeof(Designer.TutorialForHabrDesigner))); MetadataStore.AddAttributeTable(attributeTableBuilder.CreateTable()); } } } - Run the build
- And update the package in UiPath Studio.
NB In order for you to succeed, it is necessary that the version of the new package was different from the version of the old one. The easiest way to do this is with a plug-in to Visual Studio, such as the Build Version Increment Add-In . Or update the version manually.
Here is the final view of our action, with an icon and input fields:
Conclusion
I hope that I managed to show that creating even fully-formed actions for the UiPath is not so long. I would very much like this article to be useful to you and served as a good start for writing new and wonderful actions for UiPath. And when you create it - do not forget to publish it on UiPath Go!
Additional materials
')
Source: https://habr.com/ru/post/453510/
All Articles