AirSelfie 2 Power Edition - Vyalik's camera. Or not?
Working on the tale "Vitya in the Country of Lodyrantia," a wonderful children's writer O.I. Romanchenko probably herself dreamed of such a camera, which “everything is all by itself”. Has her dream come true, although not at all in the way she imagined it, or is it quite the opposite?
AirSelfie 2 Power Edition is a device that is perhaps even more interesting than that described in the fairy tale. There the camera went, but did not fly. And it was not so miniature - about the size of a fourth iPhone and about three times thicker. But the first thing that meets the user is a rather large and weighty box with an almost Orwellian slogan:
')

On the back - the parameters, including the weight of 80 grams. Only the drone itself, of course:

From it comes a thick cardboard "briefcase", closing on a magnet:

In the pocket on the lid - instruction, warranty card and two cards all with the same slogan:

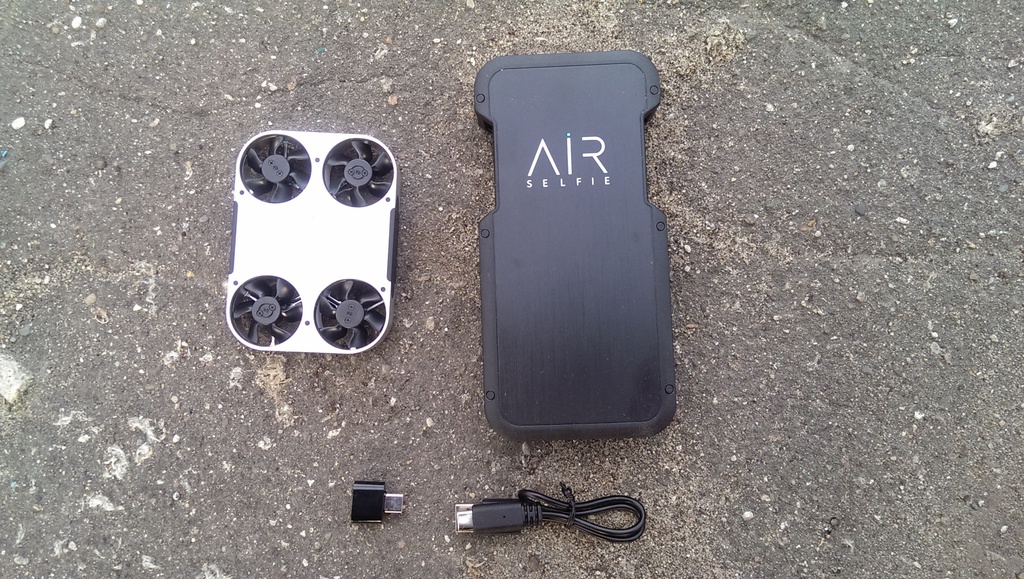
We take out the shock absorber, which contains the drone, and see the heaviest item in the kit. Powerbank at 10 Ah.

And from the compartment in the shock absorber, we remove the bag with the Type-C cord and the adapter from it to the usual large USB.
All this can be used in the following ways:
- Charge powerbank from BP with cord
- Charge the power bank drone with the same cord
- Charge the drone from the power bank, placing the first in the second
- Charge the phone from the power bank through the adapter and its cord
The third is the most interesting, because it is done like this:

We are not afraid, we push in completely:

The whole secret is in another Type-C, deep down, see?

It will take half an hour, after which you can fly for five minutes. We turn over the drone and see the lower chamber, the ultrasonic range finder and the power button:

The lower camera is not designed for shooting, but for orientation in space on the principle of an optical mouse, only computing power is not an example anymore. The range finder determines the height. We press on the button, but it is not pressed. Along with it goes the board with a camera and a rangefinder. This is normal, there is an excellent shock absorber. You just need to press a little harder, and the power will turn on. But it's still too early to fly. You need to download the application, which is called - AirSelfie2:

Click on "Ready to connect" and find that the drone is an access point:

Enter the password exactly like this:

Now you can choose one of three modes. The first time you need to choose the easiest. Use only indoors, until you bring all the actions to automatism. Fly over surfaces that reflect ultrasound well. Smooth surfaces reflect best, carpets worst of all, everything else is in the middle. And one more thing. The device blows down no worse than a domestic fan. Not outdoor, but desktop exactly. A4 paper sheets fly apart cheerfully, even if the drone hangs above them at a height of more than a meter! And what do the lower camera and range finder see, can you imagine?
After selecting the mode, the application shows a series of hints:


And then, finally, the device begins to transmit FPV, but it will not even think of flying until you order it. By the way, you can take pictures with the engine stopped.

To fly the drone, put it on the palm of the lower camera and rangefinder down, hold strictly horizontally, and on the screen of the smartphone hold the start button for three seconds. The engines start, slightly flip the device up, their momentum increases, and the flight begins. We had to take off the drone in flight from the side with a phone with a bad camera, because on that, which was a good one, the application worked at that time:


And here is the side camera with which the device takes pictures:

We also land the drone on the palm, again holding it strictly horizontally and precisely under the drone. We hold the same button (now it is the stop button), the device smoothly goes down and the engines are turned off.
It is important to train yourself when managing to look not at the drone, but at the FPV. It’s like your remote flying eyes. It is much easier to manage this way. Once you have mastered, you can try two modes of automatic following the face, just do not forget that here, as in “Tesla”: this is not an autopilot, it doesn’t replace a person.
Other modes of operation of the application. View taken pictures, transfer them from the device’s internal memory (16 GB) to a smartphone:

View the training video, instructions and FAQ:

Watch the video necessarily, it shows the correct methods of launching from the palm and landing on it. The instruction is the same as on paper, as well as in PDF on the site:

FAQ:

Settings section:

It has a calibration function, before launching it, put the drone on a strictly horizontal table, slightly lifting the devices shown in the figure, then start the calibration, and while it is being calibrated, we do not move it:

The device automatically imposes its logo on the pictures. The macro mode, as we see, is not provided (but not needed), as well as autofocus and flash:


And this is especially for fans of EXIFs:

Do not pay attention to the width and height prescribed in the EXIF, in fact, the resolution is 4032x3024.
So did the dream of a children's writer come true? Yes and no. Freely, without thinking, photographing this device is possible only after some preparation. But after mastering all the nuances of this flying camera will be an extension of your eyes, seemingly natural. Which you will just watch without thinking about the mechanics. A compact, stylish device with a high-quality camera will be appreciated by users, who often publish photos on LJ, Instagram, and others.
As before, any competent blogger with a fairly large portfolio can participate in testing products from the “Dadzhet” company assortment. And you can get a ten percent discount on the AirSelfie 2 Power Edition by using the promotional code "selfie" by clicking on the link .
Source: https://habr.com/ru/post/452546/
All Articles