The speaking prefix to the washing machine which is not breaking a guarantee

Having acquired a washing machine with a seemingly mechanical control, the author and his blind wife Sue soon realized that they were mistaken. Instead of the command device, there was an encoder, the absolute position of which, for obvious reasons, is not related to the selected program. Proven technique - sticking tactile tags - no longer acted. It is unlikely that the author is familiar with the magazine "Young Technician", which means that he came to this decision independently - read the status of the photoresistors located around the LED encoder knob.
The video shows the essence of the problem, but it is already clear to those who know what an encoder is:
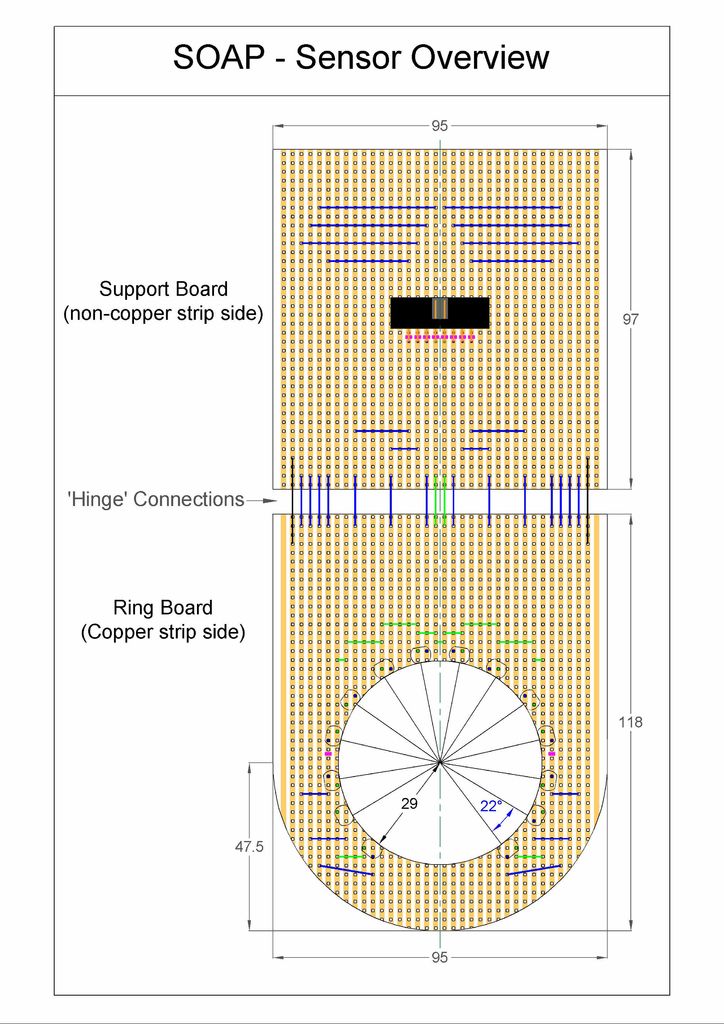
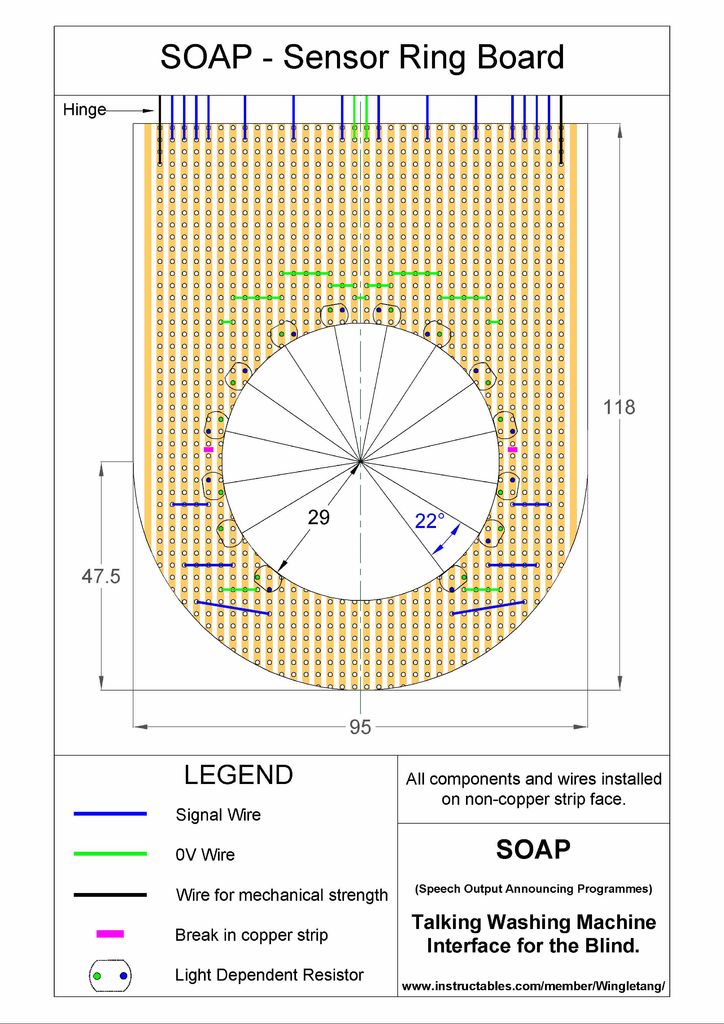
So, a device is born called SOAP - Speech Output Announcing Programs. For convenience, it is divided into two blocks. The first one contains fourteen photoresistors located around the ring, its design depends on the geometry of the front panel of the machine. The second is actually the "govorilka", the design of which is unchanged. Between themselves, they are connected by a train. Interference into the washing machine does not occur, the warranty is not lost.
')
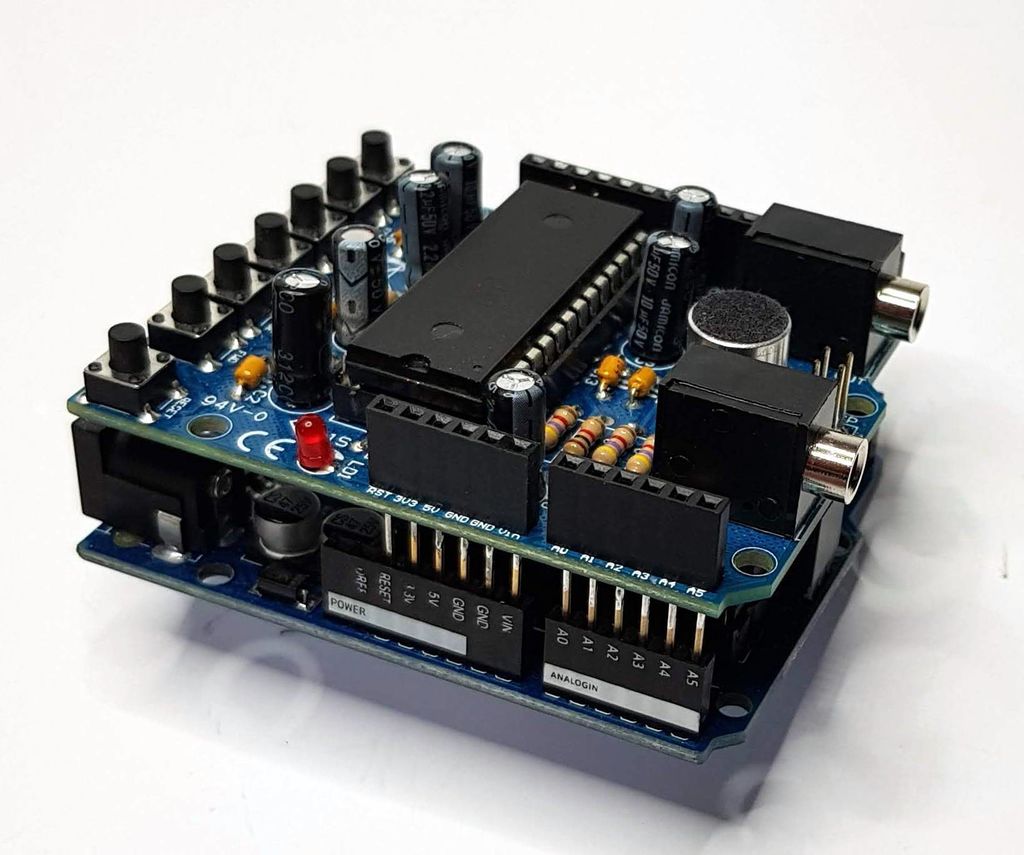
The device diagram is shown below. Connections to the shield for storing sound bites are not shown, as it is simply mounted on an Arduino clone like any other shield. The number of photoresistors is equal to the number of programs on the machine. Pull-up resistors require selection in such a way that when the LED is on in the car, the voltage on the photoresistor is less than 3 V, and when it is off, it is more.

The device is powered by “Krona” through a latching button and a stabilizer located on an Arduino-compatible board. It is more convenient, of course, to feed from the power bank past this stabilizer, especially if such a board is chosen where it is not.
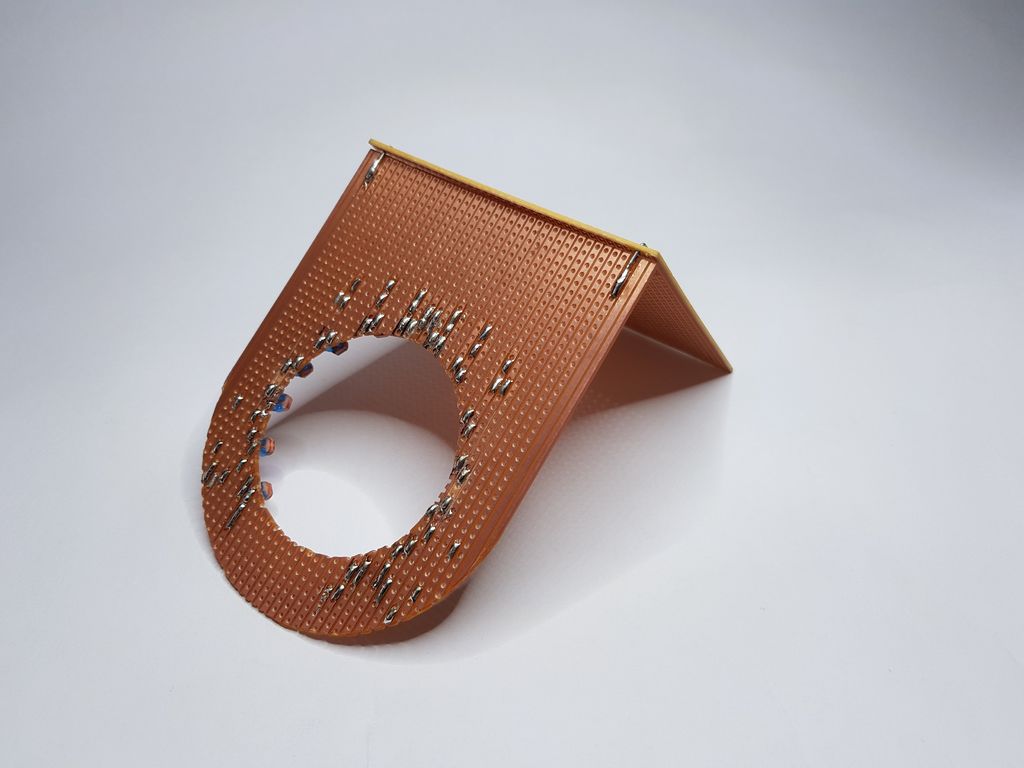
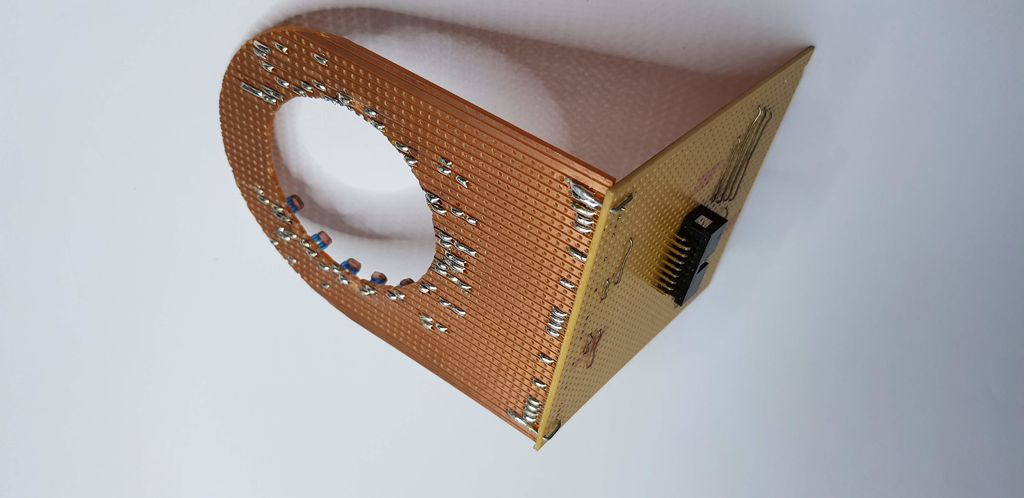
Without cases and hoods, the device looks like this:

The loop contains 16 conductors, of which 14 go to the photodiodes, and the remaining 2 - to the common wire.
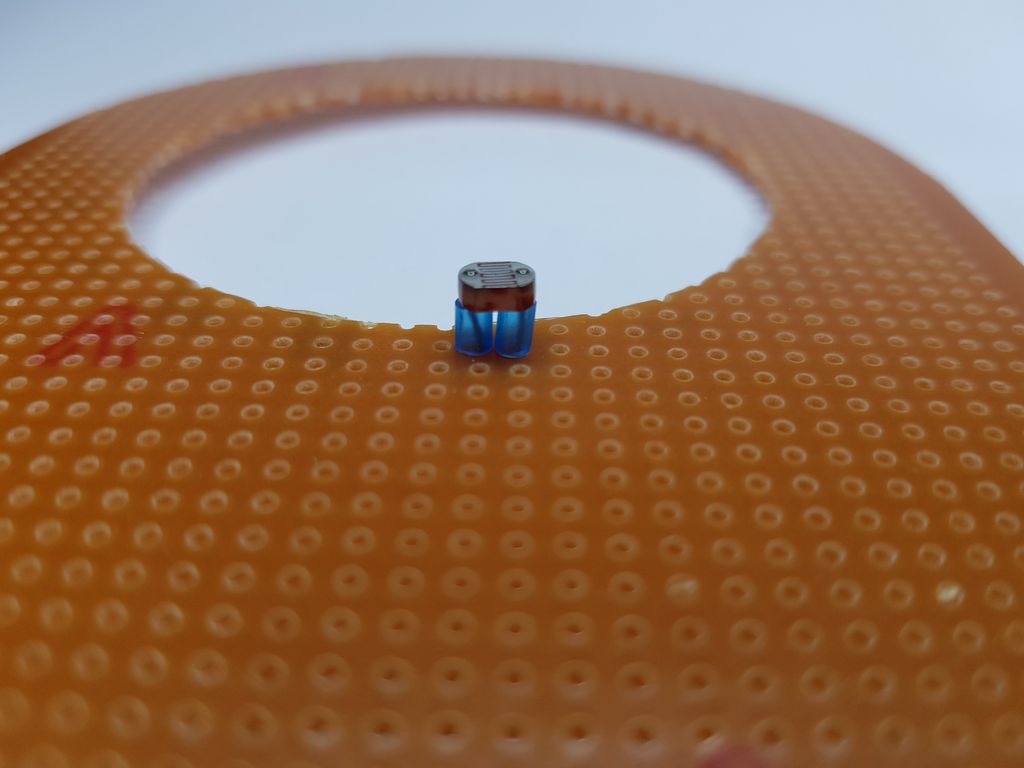
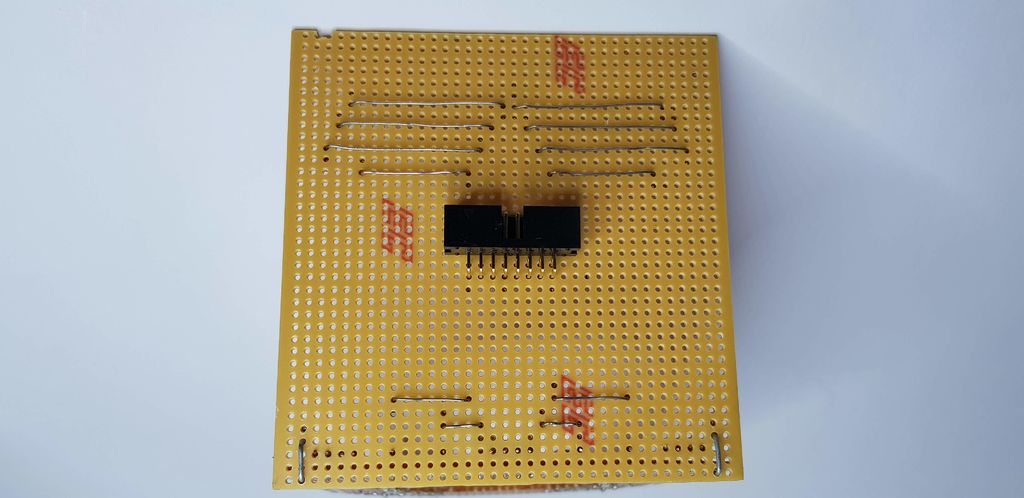
For the sensor, it is necessary to cut two parts from the standard breadboard according to the drawing, then install photoresistors, jumpers and a connector (16 terminals in 2 rows):
The result of the assembly ...
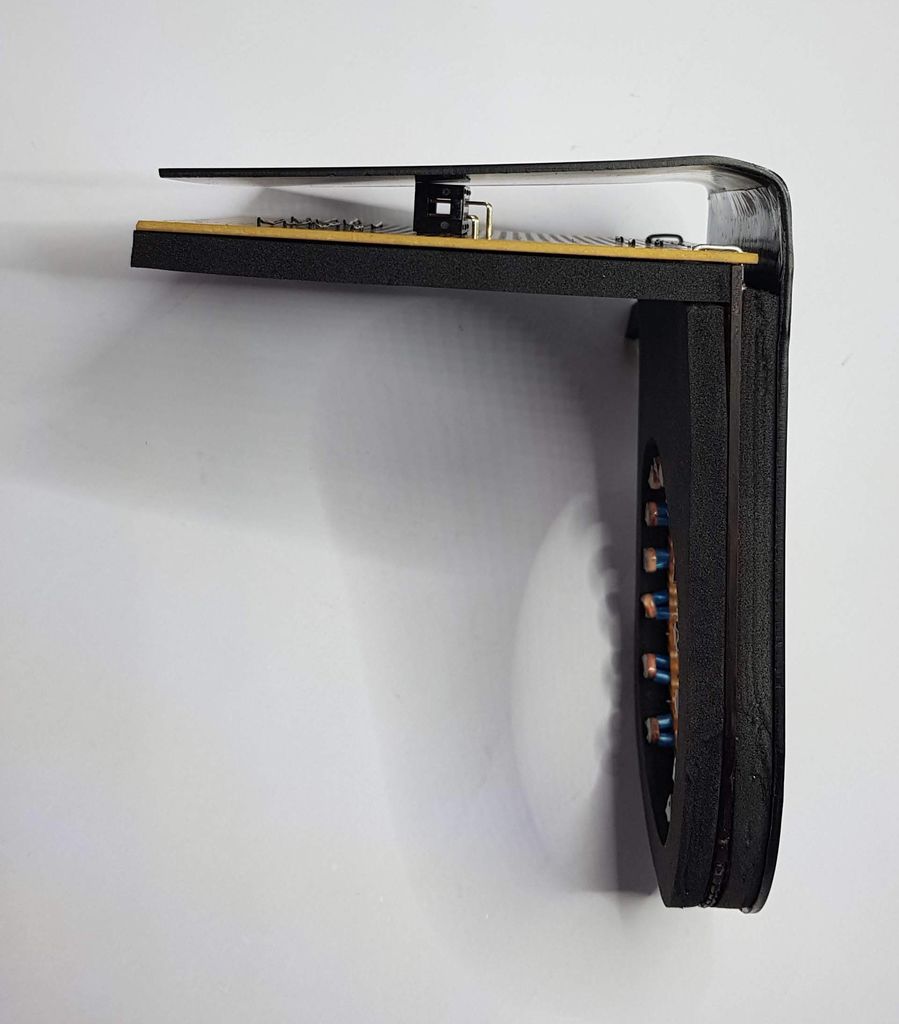
... pasted over with a soft, opaque material from the mouse pad, behind them, as well as with a thin black plastic sheet:

The following shows the methods of cutting rounding on the board with photoresistors and the holes in it:


In the drawing: blue - signal jumpers, green - jumpers connected to the common wire, black - jumpers, giving mechanical rigidity, lilac - cut printed conductors, ovals - photoresistors. Photoresistors and jumpers must be soldered on the side opposite the printed conductors.
Put the tubes on the conclusions of the photoresistors before soldering:

On the drawing of the board with the connector designations are the same:

Ready fee:
Two boards connected together:
The scheme of pasting boards porous material and thin plastic:

Details before gluing:

After:
Now we add tape from the sides:

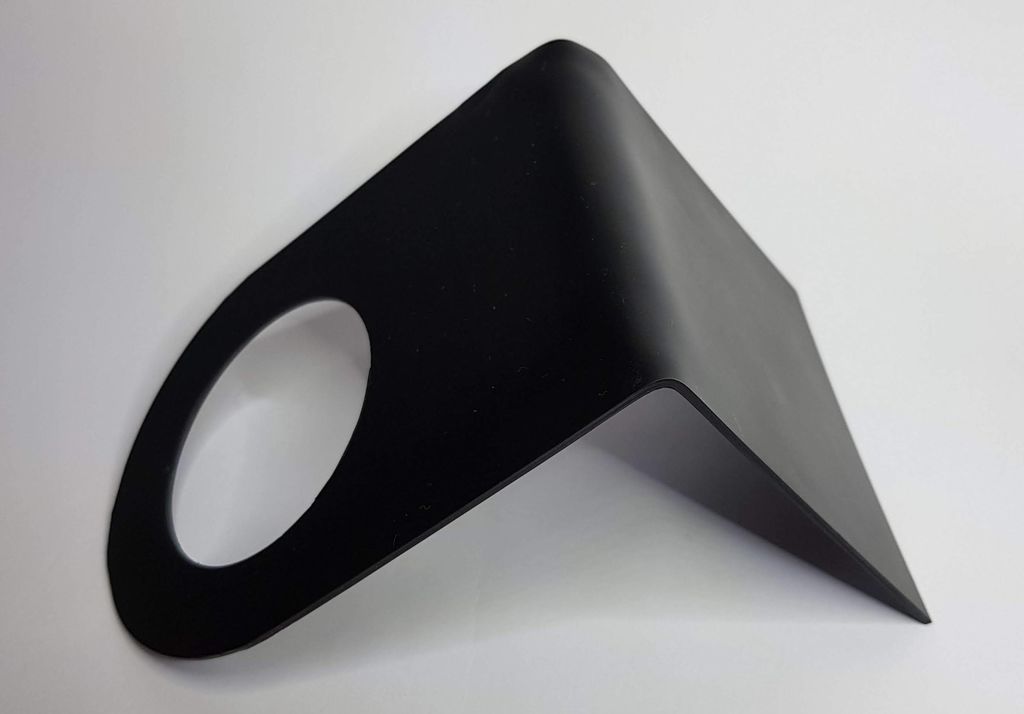
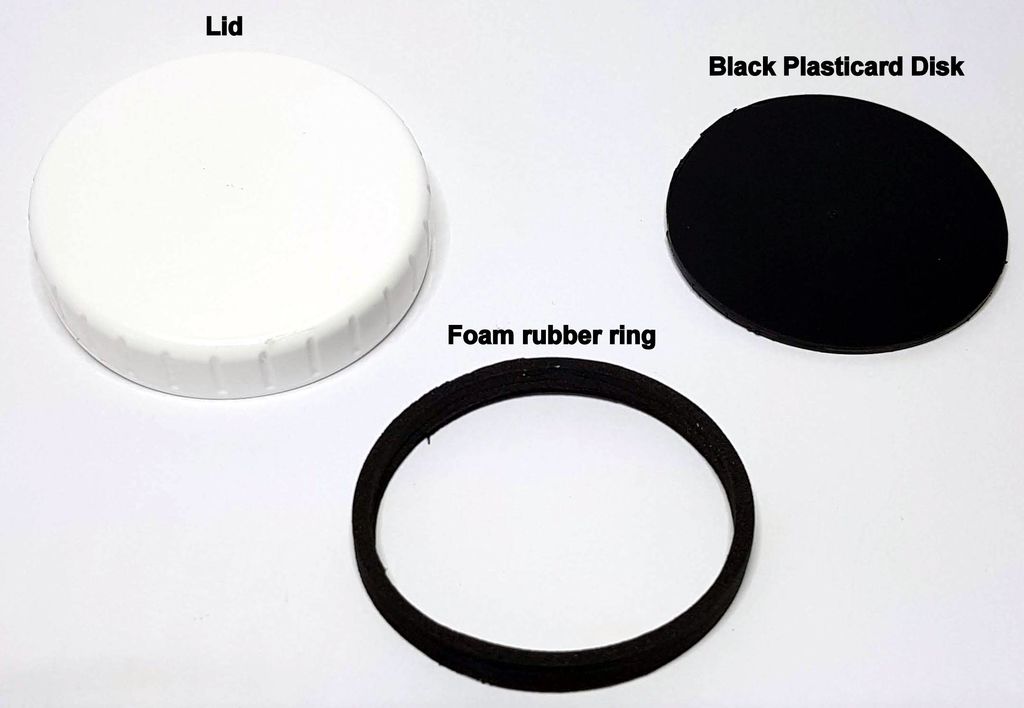
An outer handle consisting of a lid, a ring (porous material) and a disk (thin plastic sheet) will be put on the encoder knob:


The test board can operate in one of two modes:
- only the cable from the block with photoresistors is connected - it is possible to measure their resistance in the presence and absence of light
- only the Arduino cable is connected - you can simulate a decrease in the resistance of the photoresistors and check whether this leads to playing sound bites
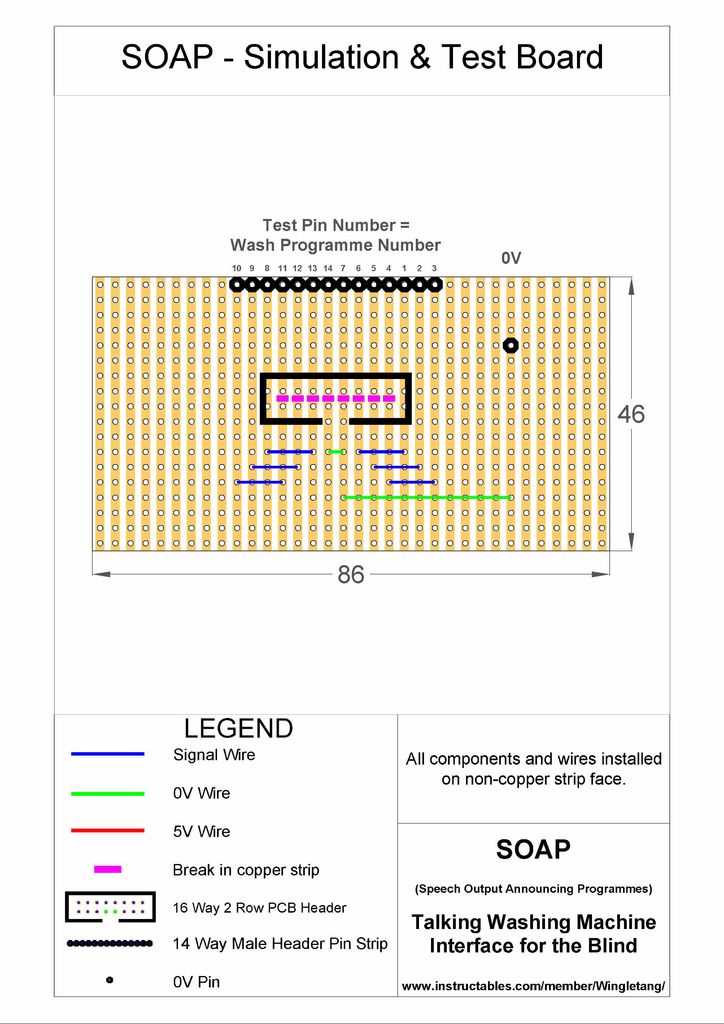
Wearing the first unit on the washing machine, it is necessary to connect its cable to the test board and, switching the encoder modes, measure the resistance of the illuminated photoresistors, thereby determining their variation of parameters. The table shows the results obtained by the author and the results of the selection of pull-up resistors:

As can be seen from the table, the method of selection is simple: the value of the pull-up resistor should be somewhat greater than the resistance of the illuminated photoresistor. If the LEDs in the washing machine are overloaded and will lose brightness over time, in the future a new selection of pull-up resistors may be required.
After tuning, it is necessary to replace the test board with a transition board, into which the selected pull-up resistors are soldered, and connect both cables to it:

Now you can collect the "talk":
It is necessary to record phrases corresponding to the washing modes in the sound sample storage board. For this:
- connect the dynamic head as shown in the drawing:
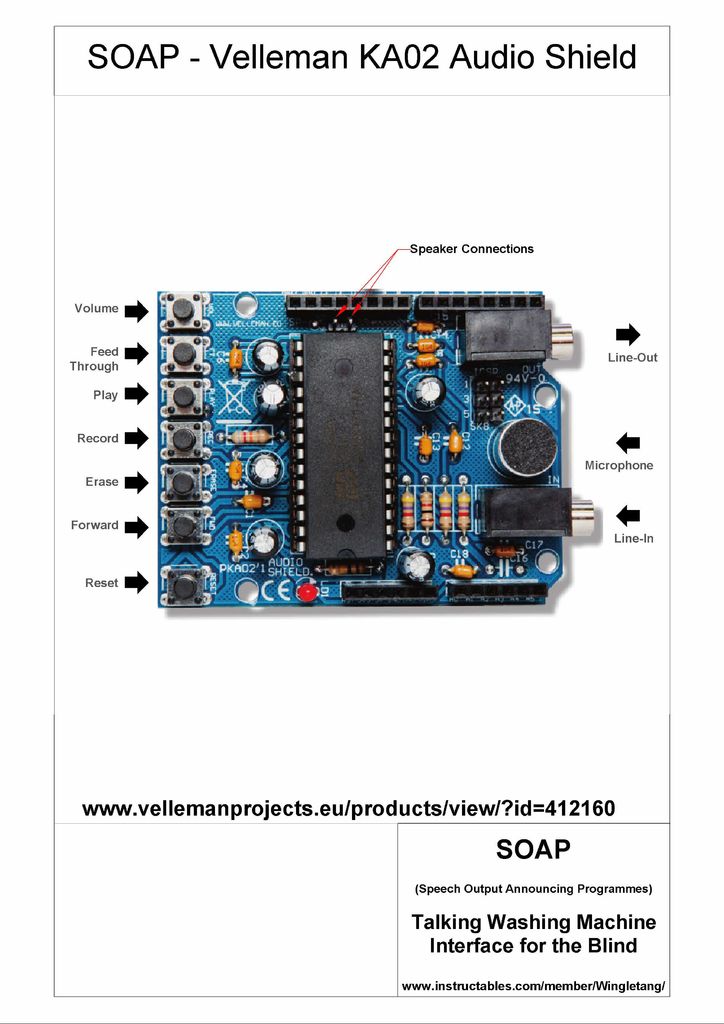
- put the board on the Arduino or its clone and apply power:
- by holding the play button, transfer the card to the recording mode and utter a phrase corresponding to the first mode, for example: “one - wash cotton”
- release the button
- short press on it to make the board play the recorded phrase
- if you don't like it, overwrite it
- Press the “forward” button to go to the second cell
- write the phrase corresponding to the second mode, for example: “two - economical washing of cotton”
So write down all fourteen phrases, remembering that the total should be no more than one minute, so do not make the fragments too long.
The next task is to correct the addresses of the beginning and end of the fragments:

The sketch needed for this is taken from the Velleman site and slightly reworked. It needs to be poured into the Arduino, and then in the serial port monitor enter the number 1. The first phrase will be sounded. If its beginning and end are defined correctly, nothing needs to be done; if it is wrong, correct the corresponding addresses in the sketch (lines 14 and 15) and fill it again. Enter the number 2 and do the same with the second fragment, this time the correction is subject to lines 18 and 19. The fragment numbers are hexadecimal, that is, instead of 10 in the monitor of the serial port, you must enter the letter a, instead of 11 - the letter b, and so on.
The adjusted sketch to save - the addresses from it must be transferred to the working sketch . Here, each of the lines (from 14 to 27) contains both addresses - both the beginning and the end of the corresponding fragment.
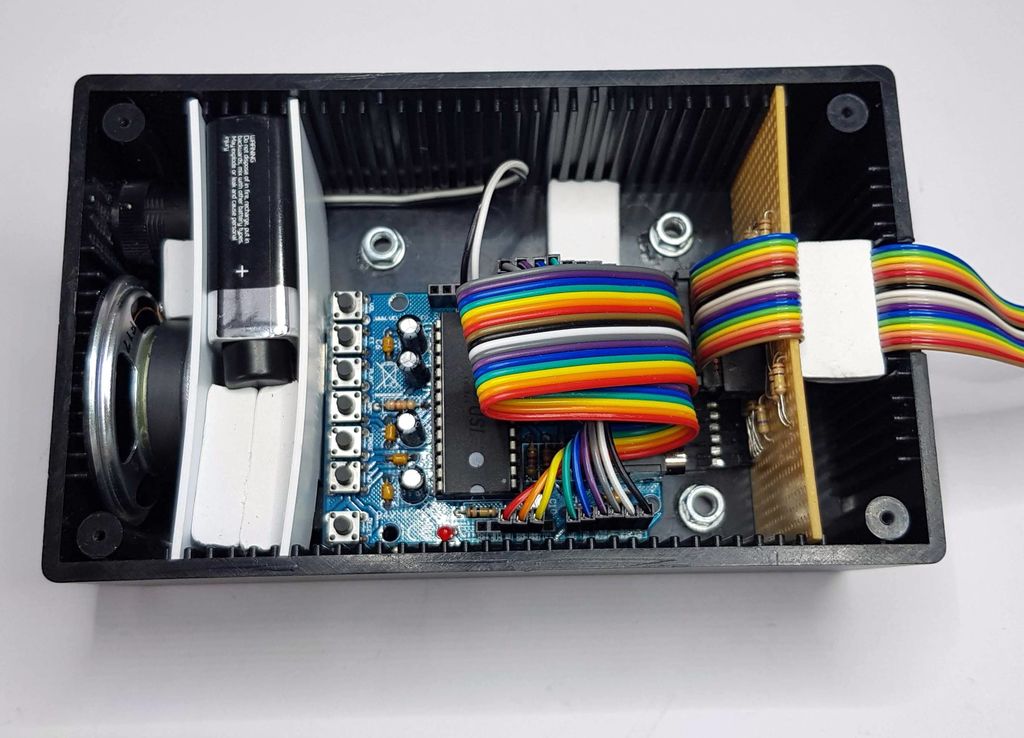
Now you can make holes in the gossip case for the button with fixation, dynamic head and cable:


Put the boards back in place:

And close the case:
However, if you wish, you can first temporarily replace the transition board with a test one and listen to all the fragments, imitating the operation of the photoresistors:

As long as the jumper is in place, the fragment will sound every three seconds.
Having returned the transition board, we install the block with photoresistors on the washing machine:

And check how everything works:
Nuts in the housing are not provided by chance. They allow you to fix the block, pre-drilled holes in the bottom. Immediately after selecting the mode of the machine, the power of the talker must be turned off. The result of observance of this rule: a year has passed, and the battery did not have to change even once.
Source: https://habr.com/ru/post/450546/
All Articles