Beginner Compose Docker Tutorial
The author of the article, the translation of which we are publishing today, says that it is intended for those developers who want to study Docker Compose and are going to create their first client-server application using Docker. It is assumed that the reader of this material is familiar with the basics of Docker. If this is not the case, you can take a look at this series of materials, at this publication, where the fundamentals of Docker are reviewed along with the basics of Kubernetes, and at this article for beginners.

Docker Compose is a tool included with Docker. It is designed to solve problems associated with the deployment of projects.
While learning the basics of Docker, you might have come up with the creation of simplest applications that work autonomously, independent of, for example, from external data sources or from certain services. In practice, such applications are rare. Actual projects usually include a whole set of collaborative applications.
')
How do you know if you need to use Docker Compose when you deploy a project? In fact - very simple. If several services are used to make this project work, then Docker Compose may be useful to you. For example, in a situation where they create a website that, in order to perform user authentication, needs to connect to the database. Such a project may consist of two services - the one that provides the website, and the one that is responsible for maintaining the database.
The Docker Compose technology, if it is simplified to describe it, allows, with the help of a single command, to launch multiple services.
Docker is used to manage the individual containers (services) that make up an application.
Docker Compose is used to simultaneously manage multiple containers that are part of an application. This tool offers the same features as Docker, but allows you to work with more complex applications.
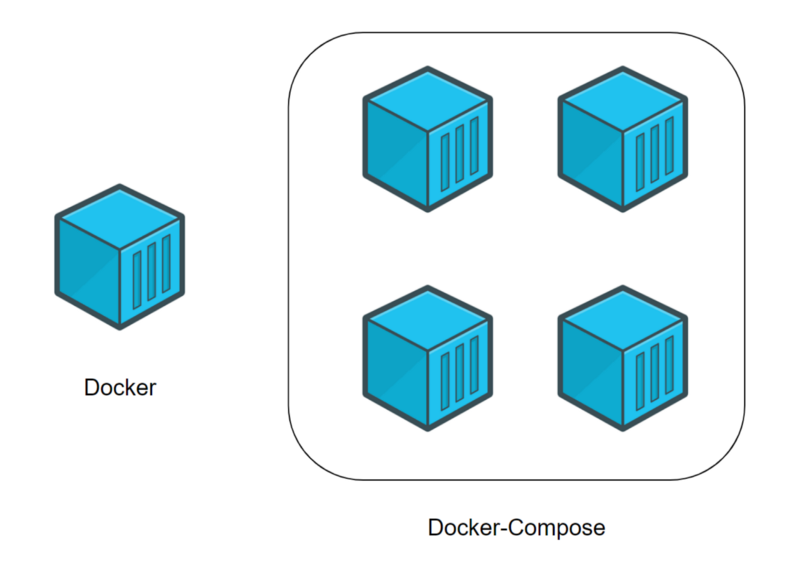
Docker (separate container) and Docker Compose (multiple containers)
Docker Compose is, in capable hands, a very powerful tool that allows you to very quickly deploy applications that have a complex architecture. Now we will look at an example of the practical use of Docker Compose, the analysis of which will allow you to evaluate the advantages that the use of Docker Compose will give you.
Imagine that you are a developer of a web project. This project includes two websites. The first allows business people to create, just a few mouse clicks, online shopping. The second is aimed at customer support. These two sites interact with the same database.
Your project is becoming more popular, and it turns out that the capacity of the server on which it runs is no longer enough. As a result, you decide to transfer the entire project to another machine.
Unfortunately, you didn't use something like Docker Compose. Therefore, you will have to transfer and reconfigure services one by one, hoping that you will not forget anything in the process of this work.
If you use Docker Compose, then transferring your project to a new server is an issue that is solved by executing several commands. In order to complete the transfer of the project to a new location, you only need to perform some settings and upload a backup copy of the database to the new server.
Now that you know what we're going to use Docker Compose for, it's time to create your first client / server application using this tool. Namely, we are talking about the development of a small website (server) in Python, which can produce a file with a piece of text. This file is requested from the server by a program (client), also written in Python. After receiving the file from the server, the program displays the text stored in it on the screen.
Pay attention to the fact that we are counting on the fact that you own the basics of Docker, and on the fact that you already have the Docker platform installed.
Let's get to work on the project.
In order to build your first client-server application, I suggest starting with creating a project folder. It should contain the following files and folders:
As a result, the contents of the main folder of your project should look like this:
Here we are, in the process of creating the server, will touch on some basic things concerning Docker.
Go to the
Here’s what the contents of your
Add the following code to the
This code allows you to create a simple web server. It will give clients an
Add the following text to the
This text will be transmitted to the client.
Now we will create a simple
Now let's work on the client.
Creating the client part of our project, we will simultaneously recall some of the basics of Docker.
Go to the folder of your
As a result, your
Add the following code to the
Thanks to this code, the client application can download data from the server and display it on the screen.
As in the case of the server, we create a simple
As you can see, we have created two different projects: a server and a client. Each of them has its own
Here we are not trying to consider absolutely all the commands that can be used in
Here is the code to put in the
After all the necessary instructions
Now that the project is complete, it's time to start it. This step of our work corresponds to the step at which, when working with separate containers, the
After executing this command, the text loaded by the client from the server should appear in the terminal:
As already mentioned, the server uses computer port
Consider some commands that may come in handy when working with Docker Compose.
This command allows you to stop and delete containers and other resources created by the
This command displays service logs:
For example, in our project it can be used in this form:
With this command you can display a list of containers:
This command allows you to execute a command in a running container:
For example, it might look like this:
This command allows you to display a list of images:
We covered the basics of working with Docker Compose technology, the knowledge of which will allow you to use this technology and, if you wish, to begin to study it in more depth. Here is the repository with the project code that we reviewed here.
Dear readers! Do you use Docker Compose in your projects?

What is Docker Compose?
Docker Compose is a tool included with Docker. It is designed to solve problems associated with the deployment of projects.
While learning the basics of Docker, you might have come up with the creation of simplest applications that work autonomously, independent of, for example, from external data sources or from certain services. In practice, such applications are rare. Actual projects usually include a whole set of collaborative applications.
')
How do you know if you need to use Docker Compose when you deploy a project? In fact - very simple. If several services are used to make this project work, then Docker Compose may be useful to you. For example, in a situation where they create a website that, in order to perform user authentication, needs to connect to the database. Such a project may consist of two services - the one that provides the website, and the one that is responsible for maintaining the database.
The Docker Compose technology, if it is simplified to describe it, allows, with the help of a single command, to launch multiple services.
Difference between Docker and Docker Compose
Docker is used to manage the individual containers (services) that make up an application.
Docker Compose is used to simultaneously manage multiple containers that are part of an application. This tool offers the same features as Docker, but allows you to work with more complex applications.
Docker (separate container) and Docker Compose (multiple containers)
Typical Docker Compose usage scenario
Docker Compose is, in capable hands, a very powerful tool that allows you to very quickly deploy applications that have a complex architecture. Now we will look at an example of the practical use of Docker Compose, the analysis of which will allow you to evaluate the advantages that the use of Docker Compose will give you.
Imagine that you are a developer of a web project. This project includes two websites. The first allows business people to create, just a few mouse clicks, online shopping. The second is aimed at customer support. These two sites interact with the same database.
Your project is becoming more popular, and it turns out that the capacity of the server on which it runs is no longer enough. As a result, you decide to transfer the entire project to another machine.
Unfortunately, you didn't use something like Docker Compose. Therefore, you will have to transfer and reconfigure services one by one, hoping that you will not forget anything in the process of this work.
If you use Docker Compose, then transferring your project to a new server is an issue that is solved by executing several commands. In order to complete the transfer of the project to a new location, you only need to perform some settings and upload a backup copy of the database to the new server.
Developing a client-server application using Docker Compose
Now that you know what we're going to use Docker Compose for, it's time to create your first client / server application using this tool. Namely, we are talking about the development of a small website (server) in Python, which can produce a file with a piece of text. This file is requested from the server by a program (client), also written in Python. After receiving the file from the server, the program displays the text stored in it on the screen.
Pay attention to the fact that we are counting on the fact that you own the basics of Docker, and on the fact that you already have the Docker platform installed.
Let's get to work on the project.
▍1. Project creation
In order to build your first client-server application, I suggest starting with creating a project folder. It should contain the following files and folders:
- The
docker-compose.yml. This is the Docker Compose file, which will contain the instructions necessary to start and configure the services. - Folder
server. It will contain the files necessary for the operation of the server. - Folder
client. Here will be the files of the client application.
As a result, the contents of the main folder of your project should look like this:
. ├── client/ ├── docker-compose.yml └── server/ 2 directories, 1 file ▍2. Server creation
Here we are, in the process of creating the server, will touch on some basic things concerning Docker.
2a. Creating files
Go to the
server folder and create the following files in it:- File
server.py. It will contain the server code. - The
index.htmlfile. This file will contain a fragment of text that the client application should display. Dockerfilefile. This is a Docker file that will contain the instructions needed to create the server environment.
Here’s what the contents of your
server/ folder should look like: . ├── Dockerfile ├── index.html └── server.py 0 directories, 3 files 2b. Editing a Python file.
Add the following code to the
server.py file: #!/usr/bin/env python3 # python. # -. # - , Python. import http.server import socketserver # . handler = http.server.SimpleHTTPRequestHandler # , 1234. # , , docker-compose. with socketserver.TCPServer(("", 1234), handler) as httpd: # , . httpd.serve_forever() This code allows you to create a simple web server. It will give clients an
index.html file, the contents of which will later be displayed on a web page.2c. HTML file editing
Add the following text to the
index.html file: Docker-Compose is magic! This text will be transmitted to the client.
2d. Editing the Dockerfile file
Now we will create a simple
Dockerfile file that will be responsible for organizing the runtime environment for the Python server. As a basis of the created image we will use the official image intended for the execution of programs written in Python. Here are the contents of the Dockerfile: # , Dockerfile . # 'FROM'. # python ( DockerHub). # , , 'python', - 'latest'. FROM python:latest # , Python, 'server.py' 'index.html'. # , 'ADD'. # , 'server.py', , . # , '/server/', , . # '/server/'. ADD server.py /server/ ADD index.html /server/ # 'WORKDIR', , . # . # , , '/server/'. WORKDIR /server/ Now let's work on the client.
▍3. Customer creation
Creating the client part of our project, we will simultaneously recall some of the basics of Docker.
3a. Creating files
Go to the folder of your
client project and create the following files in it:- File
client.py. There will be a client code. Dockerfilefile. This file plays the same role as the similar file in the server folder. Namely, it contains a statement describing the creation of an environment for executing client code.
As a result, your
client/ folder at this stage should look like this: . ├── client.py └── Dockerfile 0 directories, 2 files 3b. Editing a Python file
Add the following code to the
client.py file: #!/usr/bin/env python3 # Python. # 'index.html' . # , Python. import urllib.request # 'http://localhost:1234/'. # , , 'http://localhost:1234'. # localhost , . # 1234 - , . fp = urllib.request.urlopen("http://localhost:1234/") # 'encodedContent' ('index.html'). # 'decodedContent' ( , ). encodedContent = fp.read() decodedContent = encodedContent.decode("utf8") # , ('index.html'). print(decodedContent) # . fp.close() Thanks to this code, the client application can download data from the server and display it on the screen.
3c. Editing the Dockerfile file
As in the case of the server, we create a simple
Dockerfile for the client, responsible for creating the environment in which the client Python application will run. Here is the code of the client Dockerfile : # , Dockerfile. FROM python:latest # 'client.py' '/client/'. ADD client.py /client/ # '/client/'. WORKDIR /client/ ▍4. Docker compose
As you can see, we have created two different projects: a server and a client. Each of them has its own
Dockerfile file. Until now, everything that happens does not go beyond the basics of working with Docker. Now we begin to work with Docker Compose. To do this, refer to the docker-compose.yml file located in the root folder of the project.Here we are not trying to consider absolutely all the commands that can be used in
docker-compose.yml . Our main goal is to make out a practical example that gives you a basic knowledge of Docker Compose.Here is the code to put in the
docker-compose.yml : # docker-compose . # "3" - . version: "3" # , docker-composes . # 1 = 1 . # , , ... # , , 'services'. services: # , . # , . # (): . # , . # . # , , 'server'. server: # "build" # Dockerfile, , # . # 'server/' , # Dockerfile. build: server/ # , . # "python ./server.py". command: python ./server.py # , 'server/server.py' 1234. # ( ), # . # 'ports'. # : [ ]:[ ] # 1234 # 1234 ( # ). ports: - 1234:1234 # (): . # 'client'. client: # 'client/ , # Dockerfile . build: client/ # , . # "python ./client.py". command: python ./client.py # 'network_mode' . # , 'localhost' . network_mode: host # 'depends_on' , , # , , . # , 'client' 'server'. depends_on: - server ▍5. Build project
After all the necessary instructions
docker-compose.yml been entered into docker-compose.yml , the project needs to be assembled. This step of our work resembles the use of the docker build , but the corresponding command relates to several services: $ docker-compose build ▍6. Launch of the project
Now that the project is complete, it's time to start it. This step of our work corresponds to the step at which, when working with separate containers, the
docker run command is executed: $ docker-compose up After executing this command, the text loaded by the client from the server should appear in the terminal:
Docker-Compose is magic! .As already mentioned, the server uses computer port
1234 to service client requests. Therefore, if you go to the browser at http: // localhost: 1234 / , it will display a page with the text Docker-Compose is magic! .Useful commands
Consider some commands that may come in handy when working with Docker Compose.
This command allows you to stop and delete containers and other resources created by the
docker-compose up : $ docker-compose down This command displays service logs:
$ docker-compose logs -f [service name] For example, in our project it can be used in this form:
$ docker-compose logs -f [service name] .With this command you can display a list of containers:
$ docker-compose ps This command allows you to execute a command in a running container:
$ docker-compose exec [service name] [command] For example, it might look like this:
docker-compose exec server ls .This command allows you to display a list of images:
$ docker-compose images Results
We covered the basics of working with Docker Compose technology, the knowledge of which will allow you to use this technology and, if you wish, to begin to study it in more depth. Here is the repository with the project code that we reviewed here.
Dear readers! Do you use Docker Compose in your projects?
Source: https://habr.com/ru/post/450312/
All Articles