How I draw illustrations for mathematics abstracts in Inkscape
In the last article I told you how to write notes on math on LaTeX in Vim. In this article, I’ll show you how pictures are created for these notes using Inkscape, and I’ll also tell you about my self-made hotkey manager.
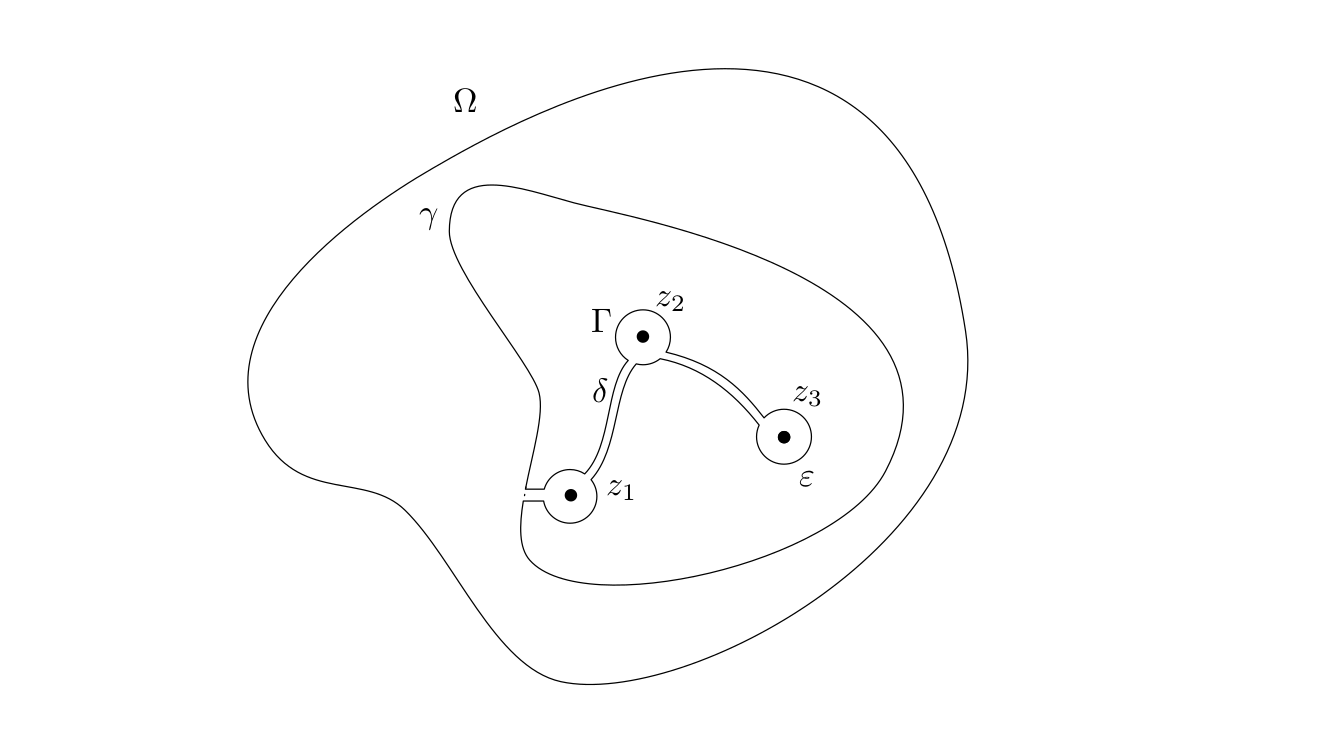
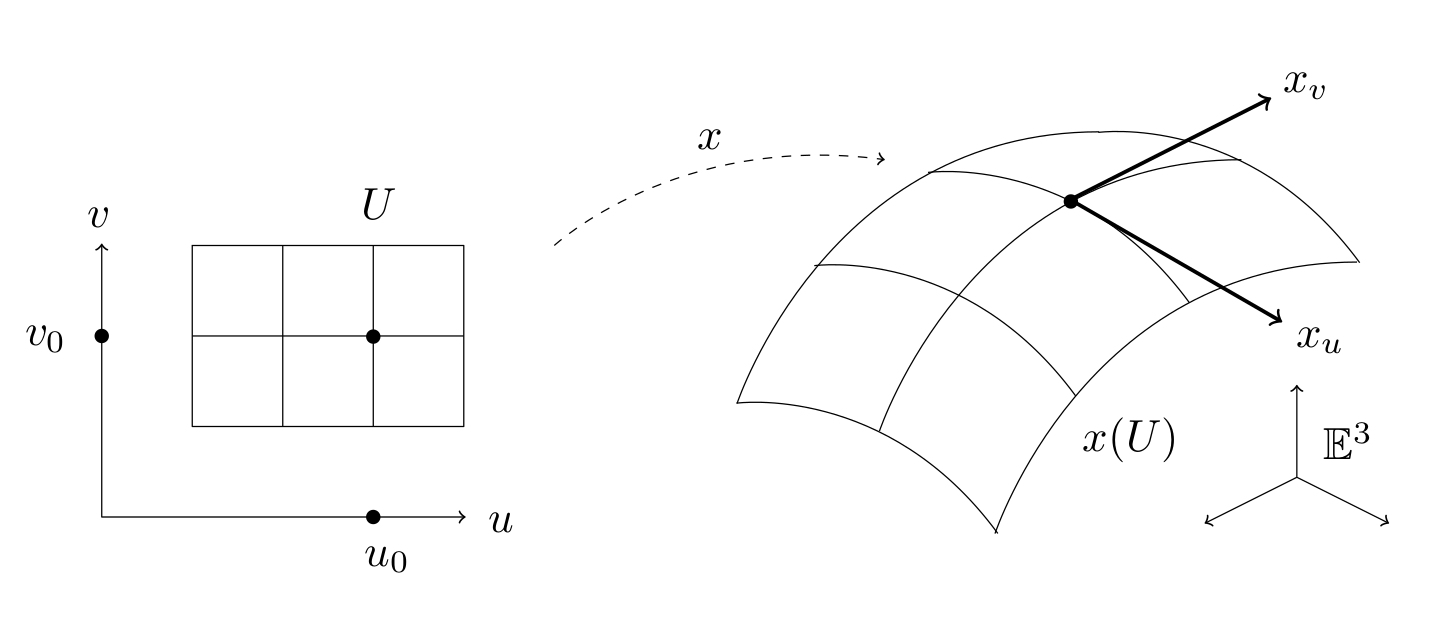
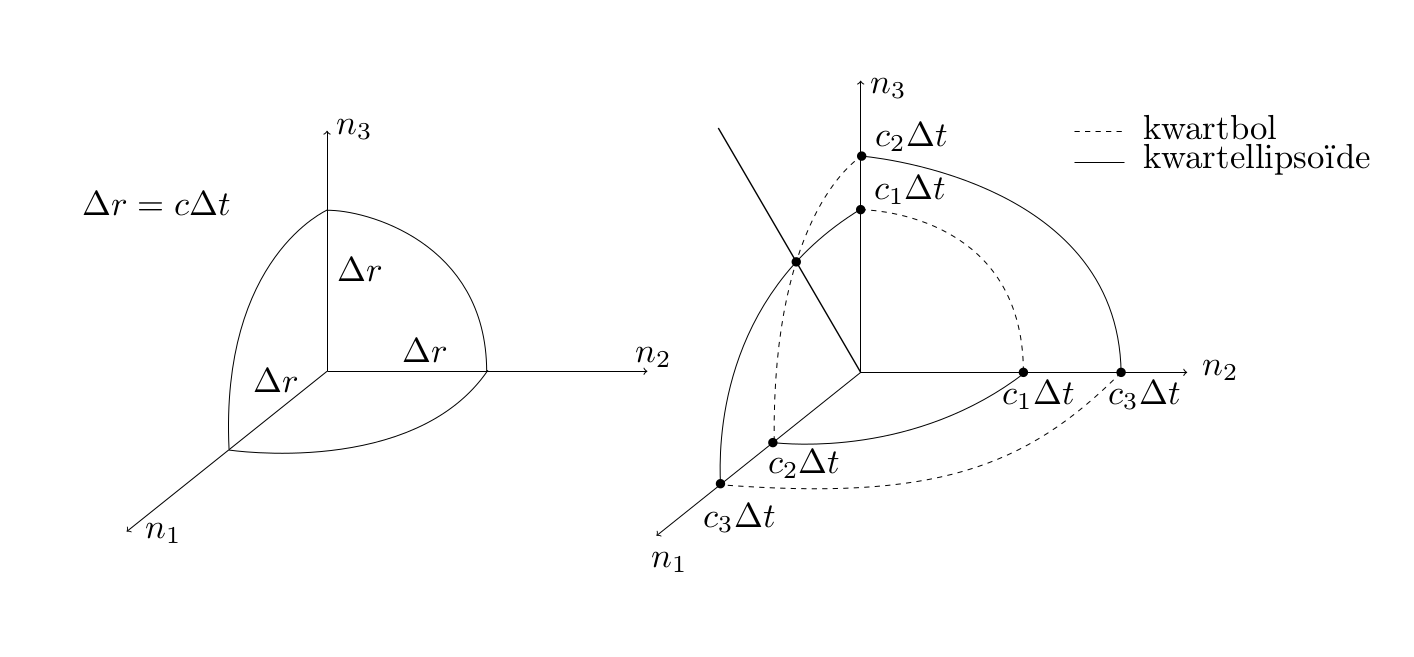
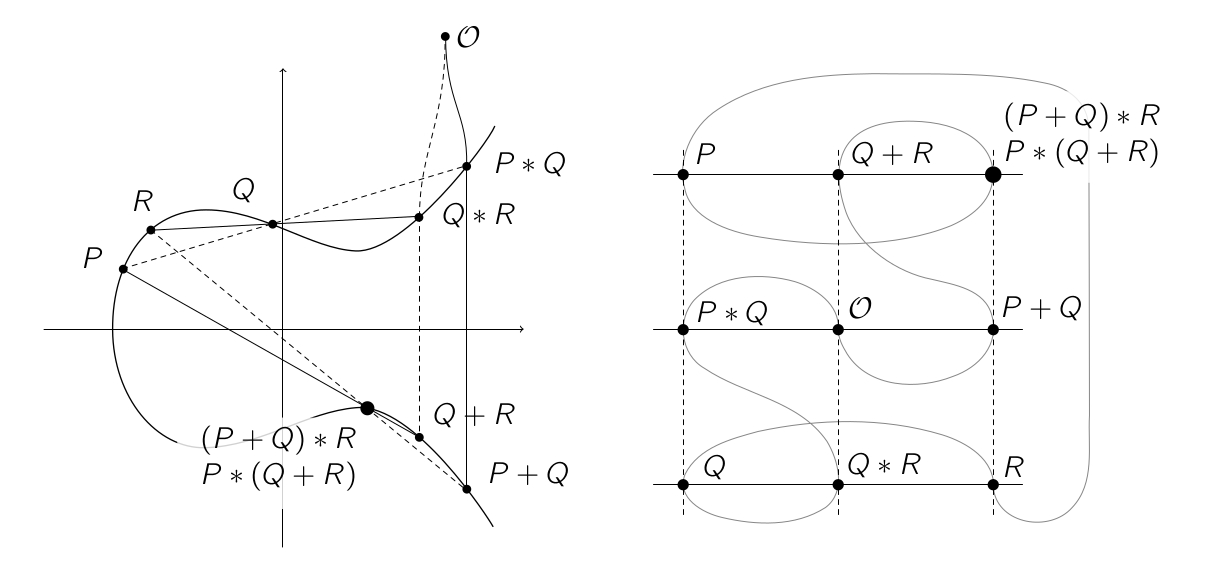
First, let me show examples of some of the drawings. They are made for complex analysis, differential geometry, electrodynamics and my bachelor thesis on elliptic curves. I drew them during the lecture - with the exception, of course, of my thesis - using Inkscape, so let's start with that.

')
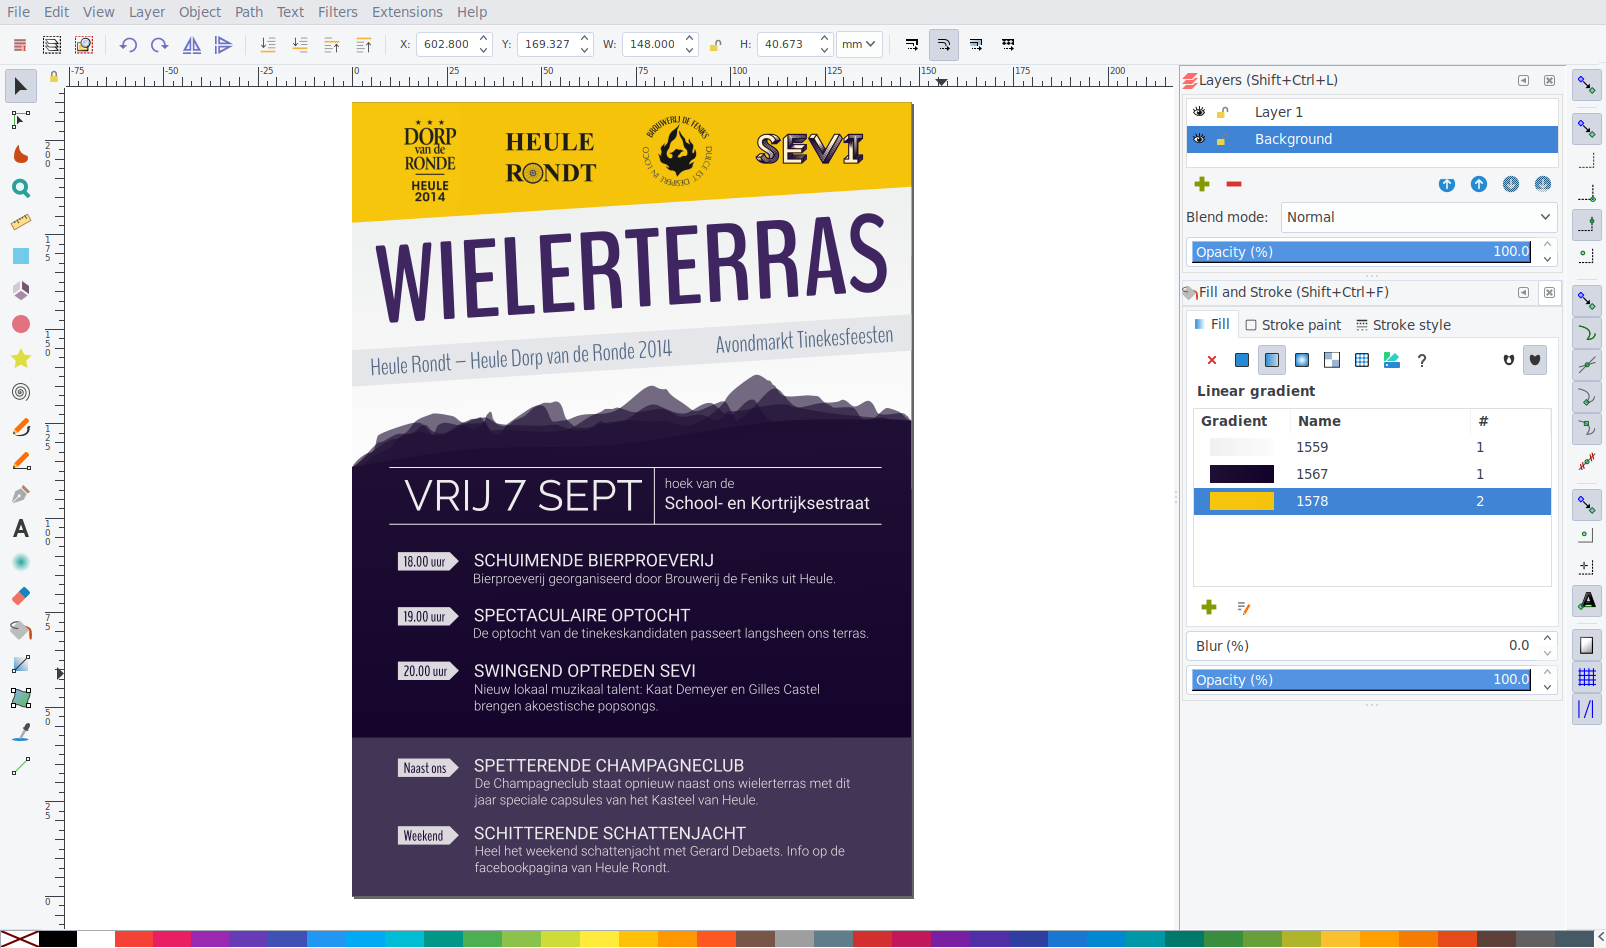
Inkscape is an open source vector graphics editor available for all major platforms. This is a free, but perhaps less functional alternative to Adobe Illustrator. It can be used to design flyers and logos, as in the image below, but it is also a powerful tool for drawing geometric shapes.
The most common solutions for adding images to LaTeX documents are TikZ, PSTricks and Asymptote. They have one thing in common: they all work on teams, that is, you simply write code that defines how to draw a shape. For example, the code TikZ:
displays such a picture:

The advantage of these packages is that drawing is very similar to programming: you can use variables, perform calculations, use
However, these advantages have to be paid for by the absence of visual feedback and low speed. Drawing complex shapes is inherently a graphical task and can be extremely time-consuming without a graphical interface. It is not possible to click and drag an object, draw a curve by hand, or drag a control point of a Bezier curve. Because of this, TikZ is much more complicated and slower than Inkscape. Although I sometimes use TikZ for complex drawings, but in most cases the benefits of Inkscape far outweigh the benefits of TikZ, especially if you are under time pressure during the lecture.
With this done, let's begin.
Like TikZ, Inkscape has the ability to display text in a drawing using LaTeX. For this, the editor exports figures to both pdf and LaTeX files. In the first picture with a separate text, and in the LaTeX file - the code necessary for the correct placement of the text. For example, you are working in Inkscape on this picture:
Riemann's theorem
To include this image in the LaTeX document, go to the File ›Save As menu, select 'pdf' as an extension, and then click Save , after which the following dialog box will appear:
Selecting 'Omit text in pdf and create LaTeX file' saves the drawing as pdf + LaTeX. To insert Inkscape images into a LaTeX document, you can add the following code to the preamble:
Assuming that the image is in the
After compiling the document you will see it:

As you can see, the text is visualized using LaTeX, which looks very nice. If you later decide to change the font, it will be updated accordingly:

Such a system allows you to draw in Inkscape, continuing to type text in LaTeX.
When I am writing a synopsis during a lecture, I need to add pictures on the fly without disrupting the flow, that is, not to waste time opening Inkscape, searching for the right catalog, entering LaTeX code to insert the figure manually, and so on. To avoid this, I added some keyboard shortcuts for managing images in Vim. For example, when I type a picture title and
Scheme in action:
When I want to edit a drawing, I
These hot keys allow you to add and open pictures on the fly. No need to remember that for each you need to specify pdf + LaTeX, choose the correct directory or write code to insert. Barrier to add a new pattern is much lower than if you do it manually. My script for managing images published on Github .
Having dealt with management, let's talk about how to actually draw shapes in Inkscape.
Although drawing in Inkscape is usually faster than in TikZ, it is still slower than drawing by hand. The process is accelerated with Inkscape's built-in keyboard shortcuts, but still not enough.
So I decided to program a self-made keyboard shortcut manager in Python that allows you to intercept all keyboard events before they reach Inkscape. So I have complete control over how each keystroke is interpreted, which gives more flexibility.
Let's start with the built-in keyboard shortcuts Inkscape. For example,
However, instead of the default labels
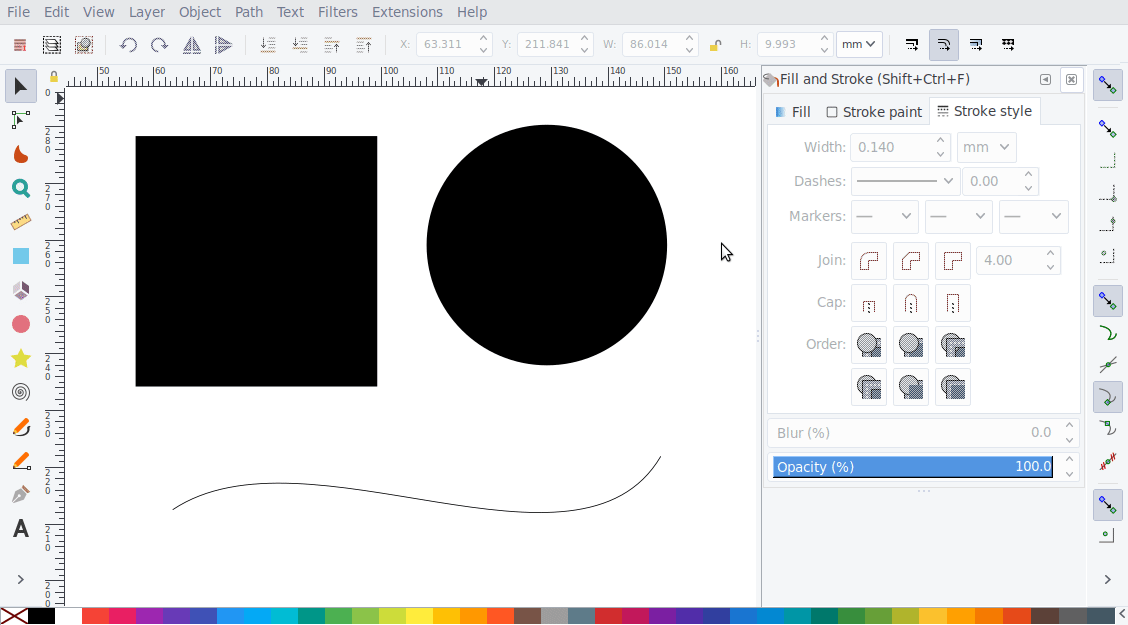
Style objects are the second most common thing I do in Inkscape. Styles for drawing shapes are pretty simple:
The combination of these parameters gives the following table of frequently used styles:
Since I use these styles very often, I want to do it quickly, but using the default combinations in Inkscape takes too much time. For example, you want to change the style of some objects as follows:

You have to press
This is where keyboard shortcuts come into play, which consist of two or more simultaneous keystrokes. For example, when I simultaneously press
Thus, each property corresponds to a key:
Some styles in this table correspond to only one key, for example, the style in the upper left corner: filling with gray without contour. This can be a problem, because pressing one
With such combinations, the previous problem is solved in a few taps:
Since the drawings often contain mathematical formulas, I want to use my snippets in Vim. To do this, I press
As I said, this text will be displayed by LaTeX when inserting a picture into a document. But sometimes I want to immediately display LaTeX, which can be done with
Both options have their advantages and disadvantages. Basically, I use the first method because the text is displayed in a LaTeX document. This means that the fonts always match and you can use macros defined in the preamble of the document. But there is a drawback: sometimes it is a little difficult to perform text positioning. Since you do not see the final result in Inkscape, it is sometimes necessary to switch from Inkscape to the pdf viewer and back to fine-tune the results.
Although the basic styles are sufficient in 90% of cases, sometimes you want to use a special style. For example, to draw diagrams for optics, it is useful to have glass and beam styles. To do this, you first need to create a style in Inkscape using the default combinations:
To save these styles, I select one of the objects and press
Now, when I select an object, press
In such a situation, failures are annoying when you enter too many characters: suppose that typing 'gl' will apply the style, but you typed 'gla' - and then

The last element of my settings is adding and saving objects, which is done with
As another example: pressing
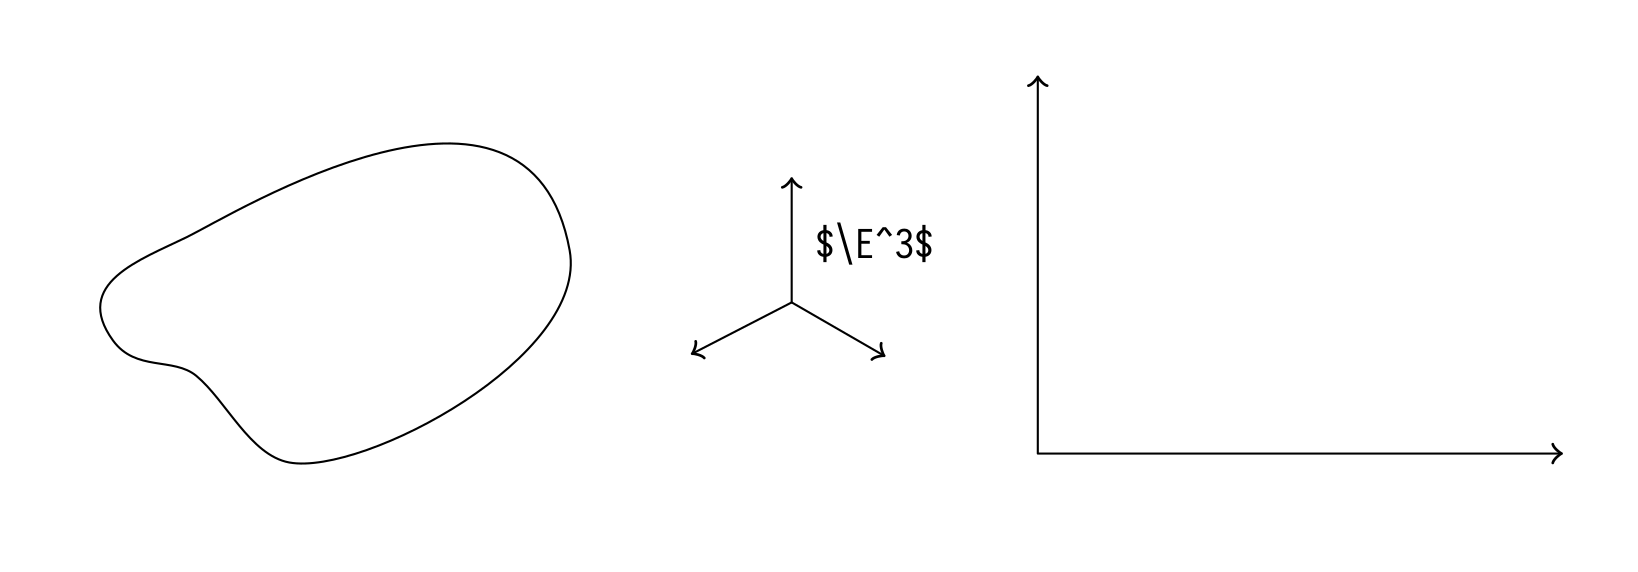
Some other examples: blobs and 2D, 3D axes, which I quite often use in complex analysis and differential geometry.
If you want to try it yourself, the script for managing images in Vim and the keyboard shortcut manager Inkscape are published on Github. Both scripts only work on Linux systems. The first should work out of the box, the second will probably require additional configuration.
With Inkscape, you can easily and quickly create illustrations for articles, books, and presentations. They look professional and fit well into the document. Although it is slower than drawing by hand, in most cases Inkscape is faster than TikZ. My keyboard shortcuts and a script for managing drawings in Vim further accelerate the work, allowing you to draw figures during lectures, keeping up with the lecturer.
Some examples
First, let me show examples of some of the drawings. They are made for complex analysis, differential geometry, electrodynamics and my bachelor thesis on elliptic curves. I drew them during the lecture - with the exception, of course, of my thesis - using Inkscape, so let's start with that.
')
What is Inkscape?
Inkscape is an open source vector graphics editor available for all major platforms. This is a free, but perhaps less functional alternative to Adobe Illustrator. It can be used to design flyers and logos, as in the image below, but it is also a powerful tool for drawing geometric shapes.
Why Inkscape?
The most common solutions for adding images to LaTeX documents are TikZ, PSTricks and Asymptote. They have one thing in common: they all work on teams, that is, you simply write code that defines how to draw a shape. For example, the code TikZ:
\begin{tikzpicture} \coordinate (A) at (1, 3); \draw[thick, ->] (0, 0) -- (A); \node[above right] at (A) {$A = (1, 2)$}; \end{tikzpicture} displays such a picture:
The advantage of these packages is that drawing is very similar to programming: you can use variables, perform calculations, use
for loops, and so on. In addition, pictures fit well into a document because all text is typed directly into LaTeX. This means that it is easy to type formulas, and if you later decide to change the font of the document, all the pictures will automatically change to match the new font.However, these advantages have to be paid for by the absence of visual feedback and low speed. Drawing complex shapes is inherently a graphical task and can be extremely time-consuming without a graphical interface. It is not possible to click and drag an object, draw a curve by hand, or drag a control point of a Bezier curve. Because of this, TikZ is much more complicated and slower than Inkscape. Although I sometimes use TikZ for complex drawings, but in most cases the benefits of Inkscape far outweigh the benefits of TikZ, especially if you are under time pressure during the lecture.
With this done, let's begin.
Embedding Inkscape drawings in a LaTeX document
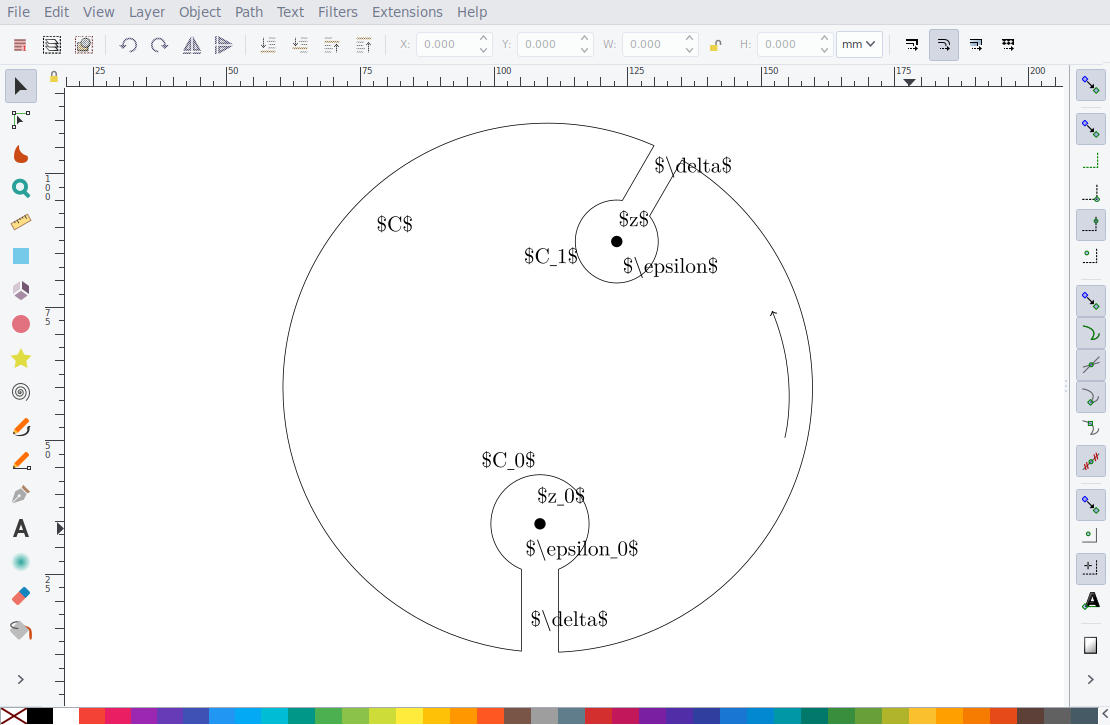
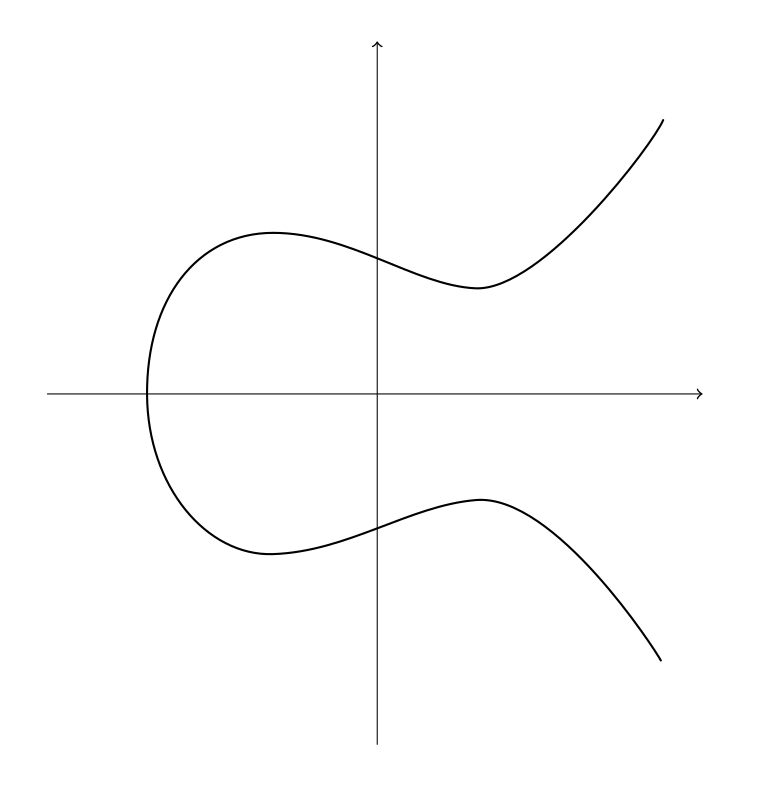
Like TikZ, Inkscape has the ability to display text in a drawing using LaTeX. For this, the editor exports figures to both pdf and LaTeX files. In the first picture with a separate text, and in the LaTeX file - the code necessary for the correct placement of the text. For example, you are working in Inkscape on this picture:
Riemann's theorem
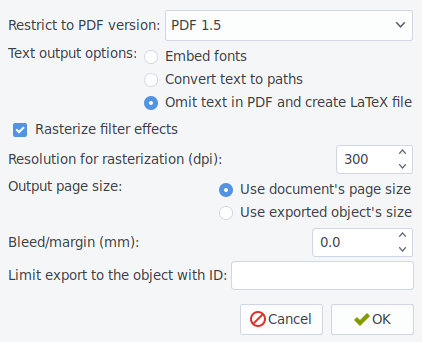
To include this image in the LaTeX document, go to the File ›Save As menu, select 'pdf' as an extension, and then click Save , after which the following dialog box will appear:
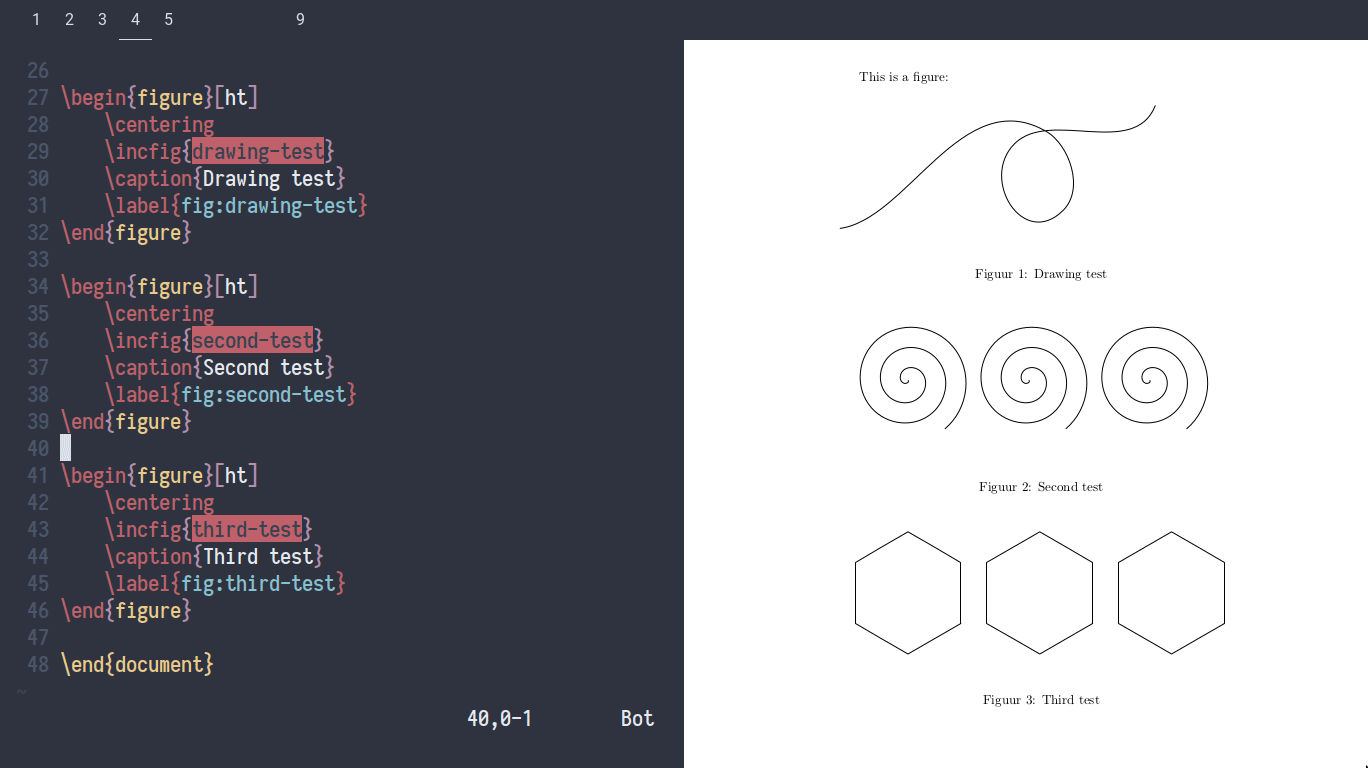
Selecting 'Omit text in pdf and create LaTeX file' saves the drawing as pdf + LaTeX. To insert Inkscape images into a LaTeX document, you can add the following code to the preamble:
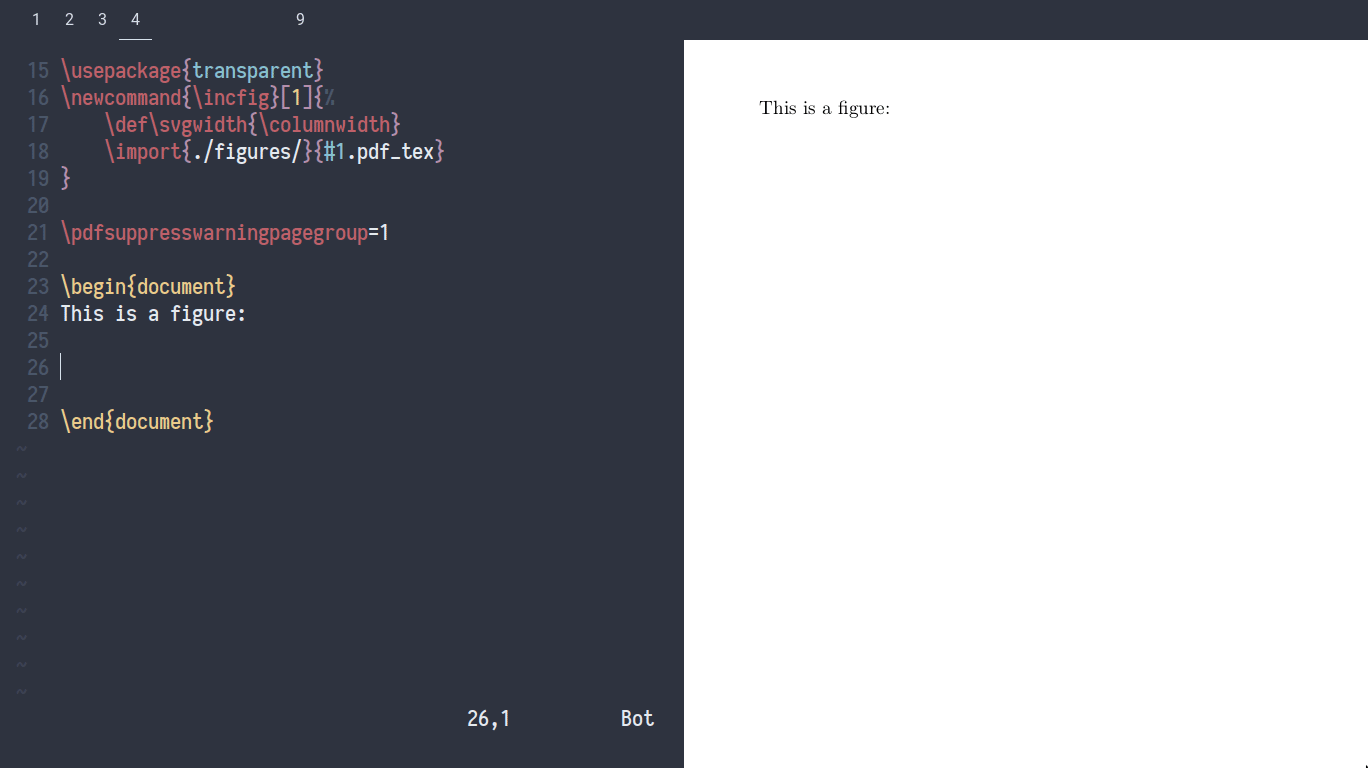
\usepackage{import} \usepackage{xifthen} \usepackage{pdfpages} \usepackage{transparent} \newcommand{\incfig}[1]{% \def\svgwidth{\columnwidth} \import{./figures/}{#1.pdf_tex} } Assuming that the image is in the
figures/riemmans-theorem.svg , you can insert it with a simple code: \begin{figure}[ht] \centering \incfig{riemmans-theorem} \caption{Riemmans theorem} \label{fig:riemmans-theorem} \end{figure} After compiling the document you will see it:
As you can see, the text is visualized using LaTeX, which looks very nice. If you later decide to change the font, it will be updated accordingly:
Such a system allows you to draw in Inkscape, continuing to type text in LaTeX.
Quickly create and insert images
When I am writing a synopsis during a lecture, I need to add pictures on the fly without disrupting the flow, that is, not to waste time opening Inkscape, searching for the right catalog, entering LaTeX code to insert the figure manually, and so on. To avoid this, I added some keyboard shortcuts for managing images in Vim. For example, when I type a picture title and
Ctrl+F , the following happens:- The script finds the catalog of pictures depending on the location of the LaTeX root file.
- It then checks if there is a drawing with the same name. If so, the script does nothing.
- If not, the pattern is copied to the
/figuresdirectory. - The current line with the title of the picture is replaced with the LaTeX code to insert it.
- A new drawing opens in Inkscape.
- Monitoring of files is configured in such a way that whenever you save a picture to an svg file by pressing
Ctrl+Sit is also saved as pdf + LaTeX. Thus, the annoying pdf save dialog that we discussed earlier no longer appears.
Scheme in action:
When I want to edit a drawing, I
Ctrl+F in normal mode. A selection dialog opens that allows you to search for pictures in the current document. After selecting it, it opens the drawing in Inkscape. When I save it, the embed code is copied to the clipboard. Thus, I can re-insert it if I deleted the source.These hot keys allow you to add and open pictures on the fly. No need to remember that for each you need to specify pdf + LaTeX, choose the correct directory or write code to insert. Barrier to add a new pattern is much lower than if you do it manually. My script for managing images published on Github .
Having dealt with management, let's talk about how to actually draw shapes in Inkscape.
Drawing
Although drawing in Inkscape is usually faster than in TikZ, it is still slower than drawing by hand. The process is accelerated with Inkscape's built-in keyboard shortcuts, but still not enough.
So I decided to program a self-made keyboard shortcut manager in Python that allows you to intercept all keyboard events before they reach Inkscape. So I have complete control over how each keystroke is interpreted, which gives more flexibility.
Drawing shapes
Let's start with the built-in keyboard shortcuts Inkscape. For example,
r activates the rectangle drawing tool, e draws ellipses, and so on. From the implementation point of view, this means that the combination manager will “play” these keyboard events, i.e., just send them to Inkscape.However, instead of the default labels
p for a pencil and b for Bezier curves, I use w and f , since it is a little more convenient to press them with my left hand if in the right mouse. In the spirit of combinations for the left hand, I also compared z for cancellation, Shift+z for deletion and x for switching the reference, which is usually assigned to hard-to-reach % .Key combinations for frequently used styles
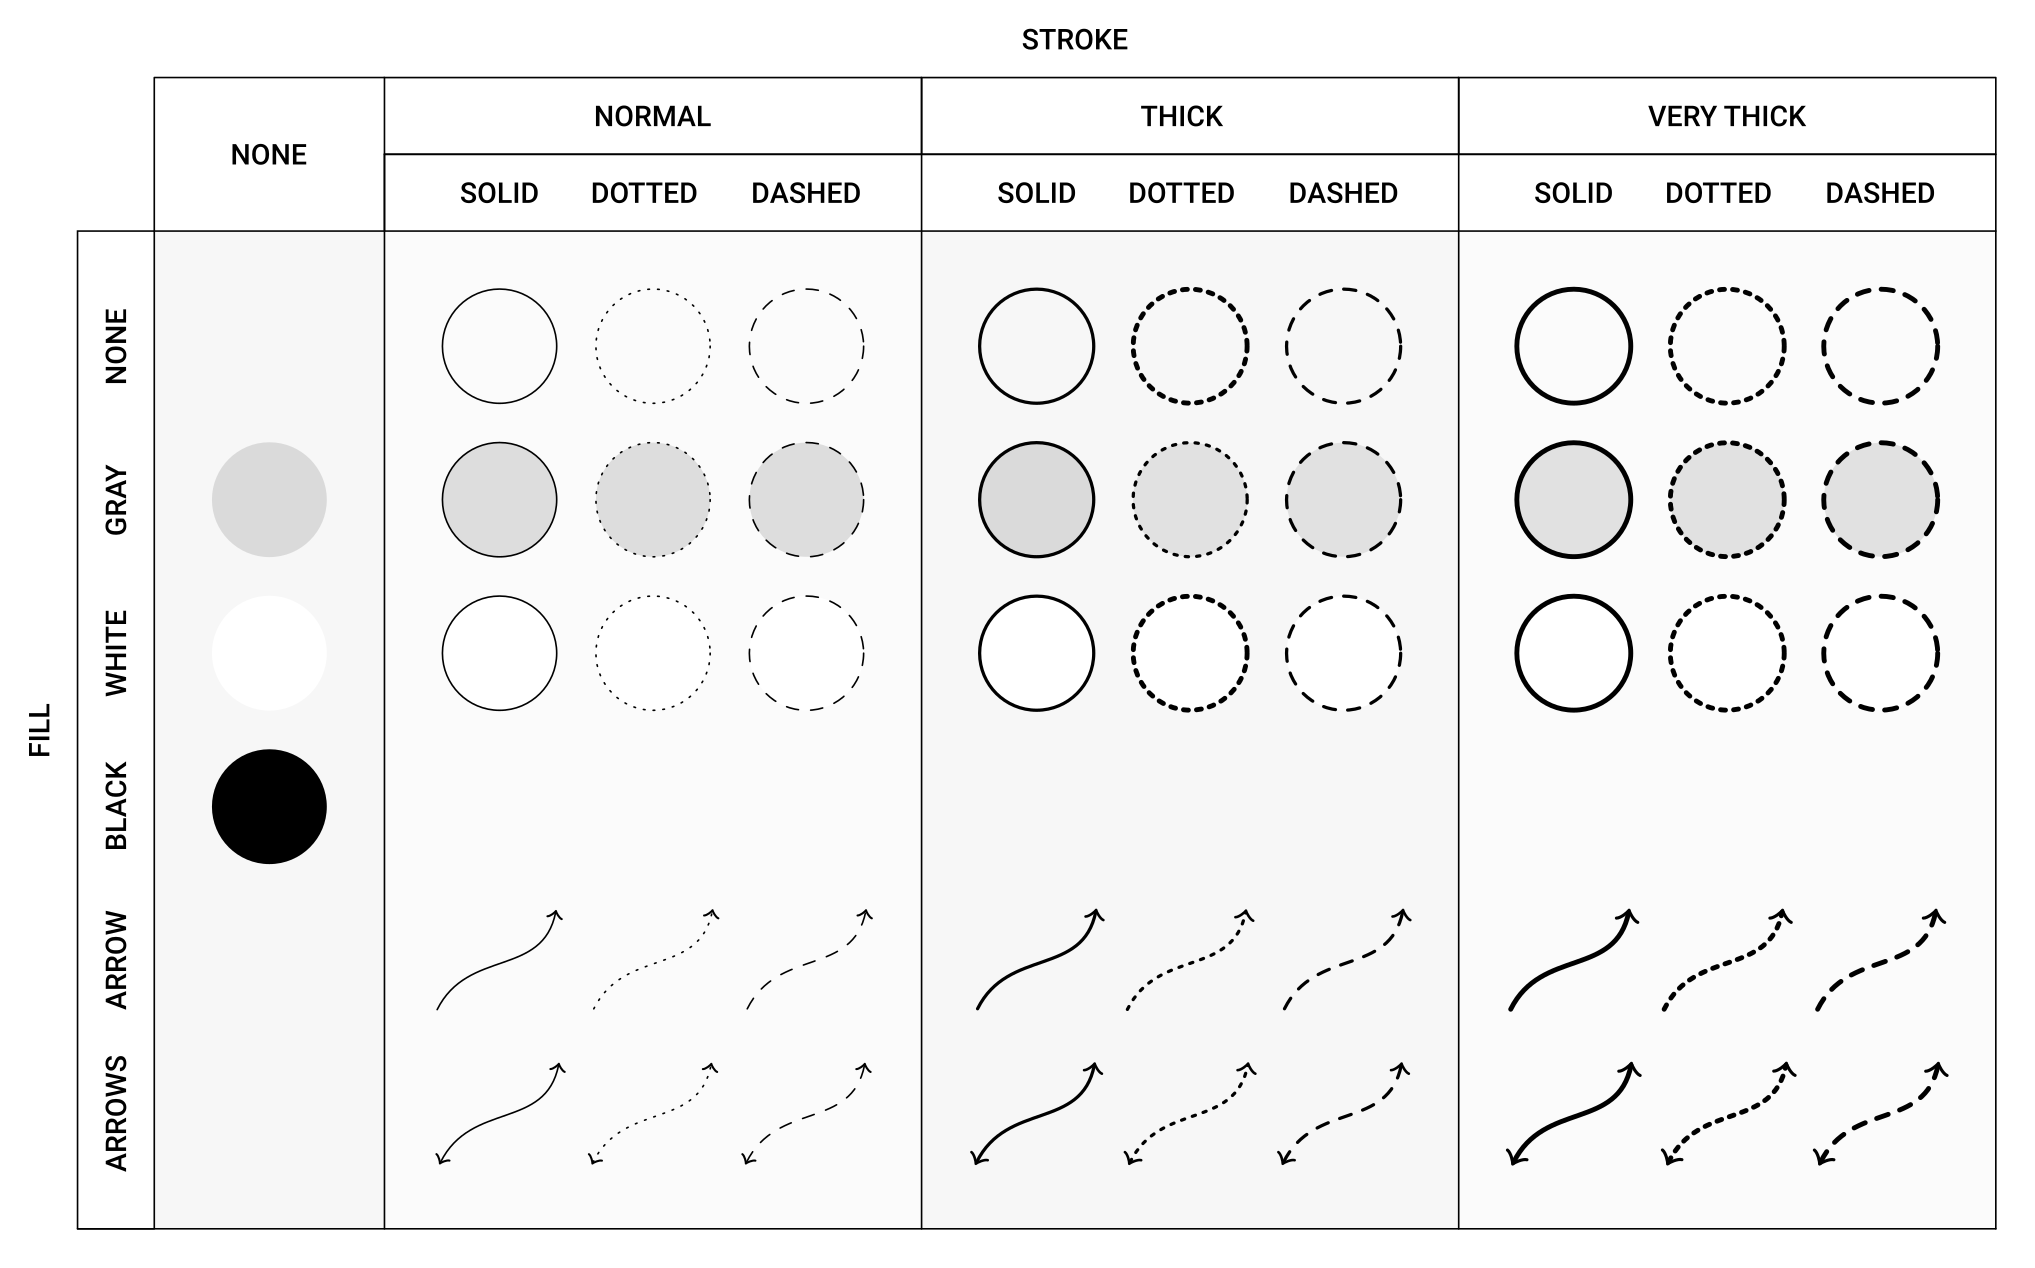
Style objects are the second most common thing I do in Inkscape. Styles for drawing shapes are pretty simple:
- Shapes like rectangles and circles are usually black, light gray, white or transparent, perhaps. with contour.
- Lines (including contours) are mostly solid, dashed or dotted. They can be (very) bold or normal width, and sometimes with an arrow on one or both sides.
The combination of these parameters gives the following table of frequently used styles:
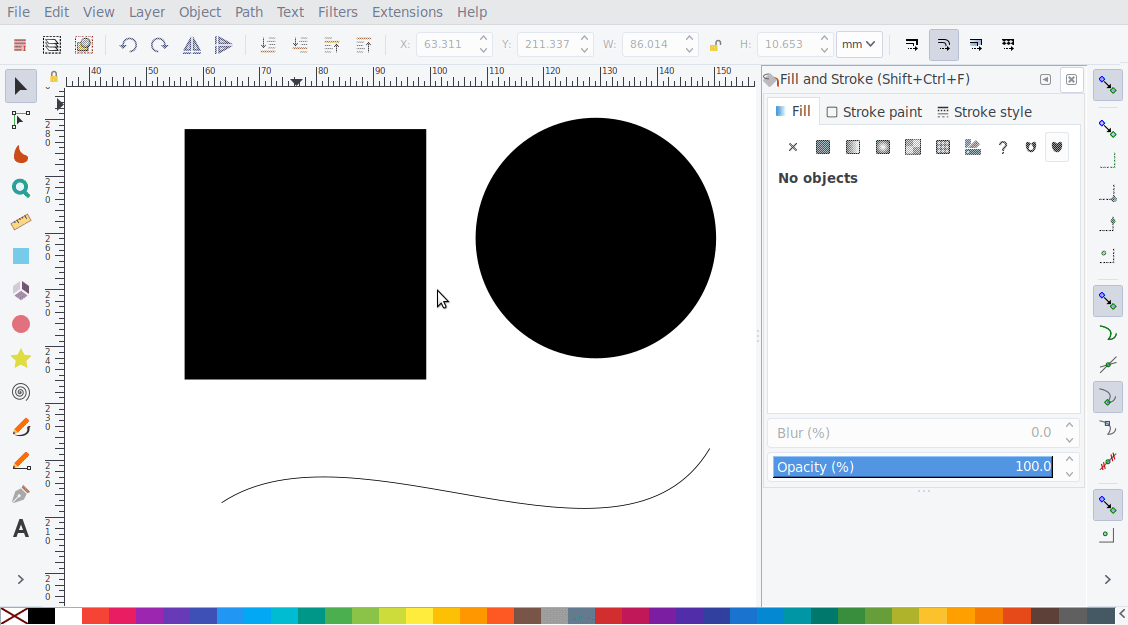
Since I use these styles very often, I want to do it quickly, but using the default combinations in Inkscape takes too much time. For example, you want to change the style of some objects as follows:
You have to press
Ctrl+Shift+F to open the style panel, and update the style of each object by clicking on it, because you cannot do this using the keyboard shortcuts in Inkscape. It is tiring. Ideally, I would like to perform such an operation in a split second.This is where keyboard shortcuts come into play, which consist of two or more simultaneous keystrokes. For example, when I simultaneously press
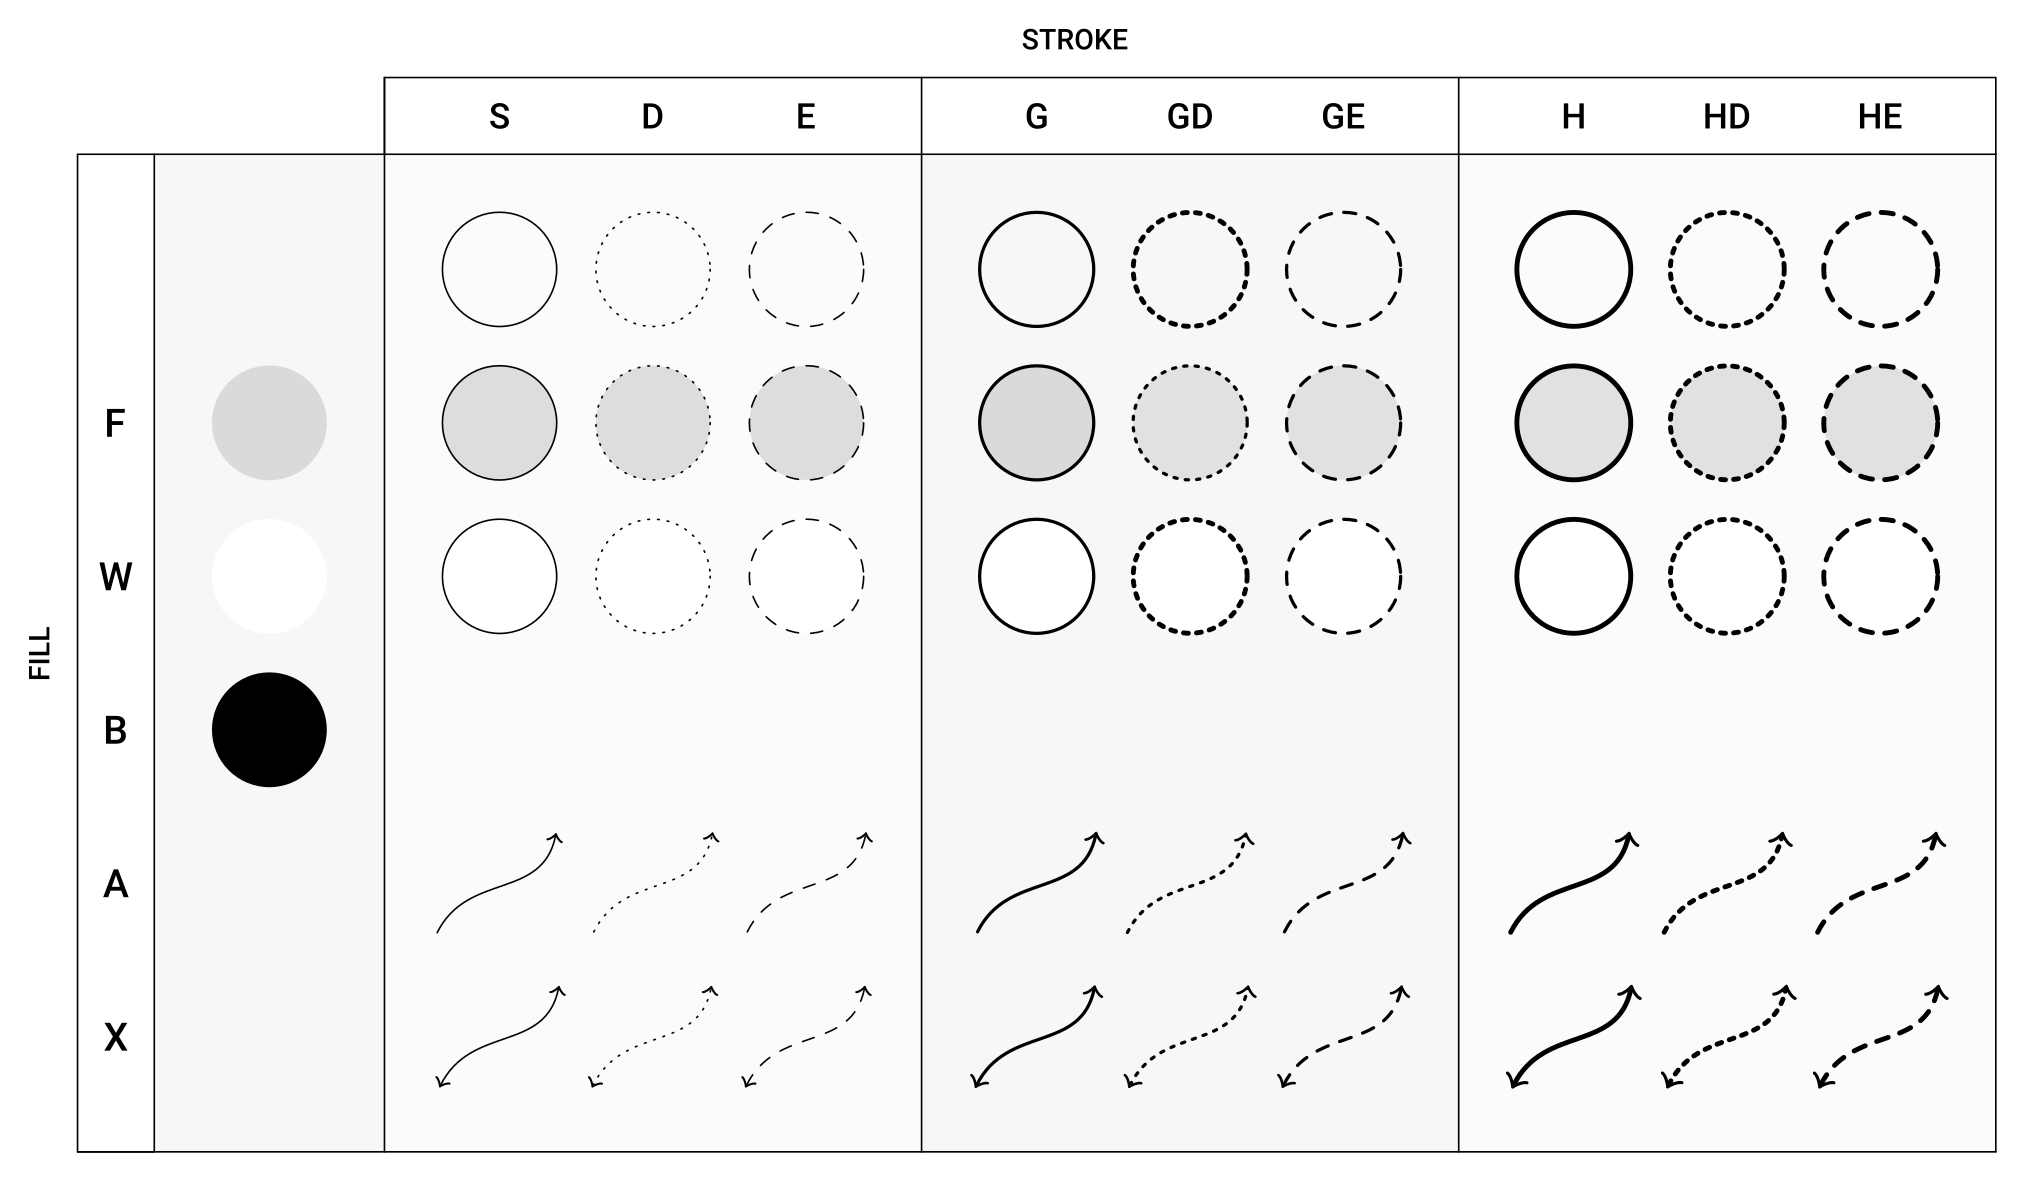
s and f , my combination manager will apply a solid outline and a gray fill to the current selection. When I need a bold outline, I press together s+f+g , where g means bold.Thus, each property corresponds to a key:
s denotes a normal contour, f - gray filling, g - thickness, a - arrow, d - points, e - dotted line, etc. Here is the complete table of possible options:Some styles in this table correspond to only one key, for example, the style in the upper left corner: filling with gray without contour. This can be a problem, because pressing one
f starts the Bezier curve tool. The solution is to press the + f , where the space character acts as a placeholder.With such combinations, the previous problem is solved in a few taps:
f+smakes the rectangle gray and adds a solid outline;f+h+emeans filling and bold dotteda+g+dadds an arrow and turns the line into a bold dotted line.
Adding text
Since the drawings often contain mathematical formulas, I want to use my snippets in Vim. To do this, I press
t , which opens a small Vim window where I enter the LaTeX code. After the release, the text fragment is inserted into Inkscape:As I said, this text will be displayed by LaTeX when inserting a picture into a document. But sometimes I want to immediately display LaTeX, which can be done with
Shift+T :Both options have their advantages and disadvantages. Basically, I use the first method because the text is displayed in a LaTeX document. This means that the fonts always match and you can use macros defined in the preamble of the document. But there is a drawback: sometimes it is a little difficult to perform text positioning. Since you do not see the final result in Inkscape, it is sometimes necessary to switch from Inkscape to the pdf viewer and back to fine-tune the results.
Preservation and use of rarer styles
Although the basic styles are sufficient in 90% of cases, sometimes you want to use a special style. For example, to draw diagrams for optics, it is useful to have glass and beam styles. To do this, you first need to create a style in Inkscape using the default combinations:
To save these styles, I select one of the objects and press
Shift + s . Then I enter the name of the new style, in this case 'glass', and press Enter to confirm. Now the style is saved, and later I can use it.Now, when I select an object, press
s and enter 'glass', the appropriate style will be applied to the object. However, there is no need to enter the full name, because the style is applied immediately if it is the only one that matches the characters entered. For example, if I have only one style, starting with 'g', inputting one of this letter is enough to apply the style. If you have multiple styles, you’ll have to type in 'gl' or even 'gla'.In such a situation, failures are annoying when you enter too many characters: suppose that typing 'gl' will apply the style, but you typed 'gla' - and then
a will be interpreted as another command. Therefore, the combination manager waits 500 ms before returning to default mode. This time is enough for a person to see that the style is applied and stop typing.Adding and saving objects
The last element of my settings is adding and saving objects, which is done with
a and Shift+a , respectively. For example, pressing a and typing 'ec' adds an elliptic curve:As another example: pressing
a and entering 'dg' adds a “keyhole”, a keyhole ('dg' is a mirror image of 'kh' on the keyboard). Using Ctrl+- shape you can subtract it from the given form:Some other examples: blobs and 2D, 3D axes, which I quite often use in complex analysis and differential geometry.
Code
If you want to try it yourself, the script for managing images in Vim and the keyboard shortcut manager Inkscape are published on Github. Both scripts only work on Linux systems. The first should work out of the box, the second will probably require additional configuration.
Conclusion
With Inkscape, you can easily and quickly create illustrations for articles, books, and presentations. They look professional and fit well into the document. Although it is slower than drawing by hand, in most cases Inkscape is faster than TikZ. My keyboard shortcuts and a script for managing drawings in Vim further accelerate the work, allowing you to draw figures during lectures, keeping up with the lecturer.
Source: https://habr.com/ru/post/450088/
All Articles