10 useful features of R, which you might not know
In R is full of a variety of functions. Below I will give ten of the most interesting of them, which many might not know. The article appeared after I discovered that my stories about some of the features of R that I use in my work are enthusiastically perceived by familiar programmers. If you already know all about this, then I apologize for the time spent. At the same time, if you have something to share - advise something useful in the comments.
Skillbox recommends: Practical course "Python-developer" .
We remind: for all readers of "Habr" - a discount of 10,000 rubles when writing to any Skillbox course on the promotional code "Habr".
Switch function
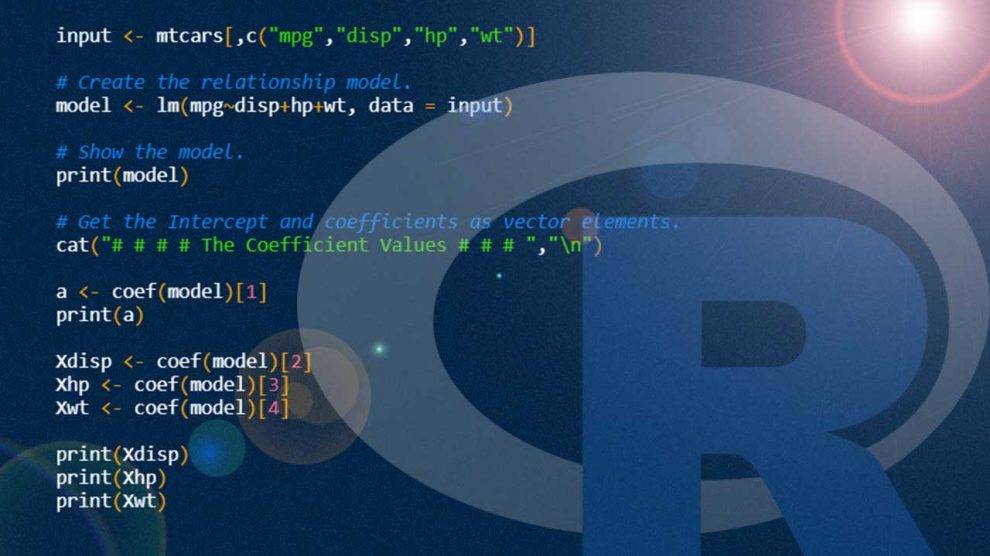
I really, really like switch (). In fact, this is a convenient abbreviation of the if statement when selecting a value in accordance with the value of another variable. I find this particularly useful when I write code that needs to load a specific set of data in accordance with the previous choice. For example, if there is a variable named animal and you need to select a specific data set depending on whether the animal is a dog, cat or rabbit, write this:
')
data <- read.csv (
switch (animal,
"Dog" = "dogdata.csv",
"Cat" = "catdata.csv",
"Rabbit" = "rabbitdata.csv")
)
This feature will be useful in Shiny-applications, where you need to load different datasets or environment files depending on one or several menu entry options.
Hot keys for RStudio
This hack is not so much for R as for RStudio IDE. Nevertheless, hotkeys are always very convenient, allowing you to save time when typing. My favorites are Ctrl + Shift + M for operator%>% and Alt + for operator <-.
To view all hotkeys, just press Alt + Shift + K in RStudio.
Flexdashboard package
When you need to quickly launch the Shiny control panel, there is nothing better than a dashboard package. It provides the ability to work with HTML shortcuts, which in turn make it easy to create sidebars, lines, and columns easily. There is also the ability to use the title bar, which allows you to place it on different pages of the application, leave icons, shortcuts on Github, email addresses and much more.
The package allows you to work within the framework of Rmarkdown, so that you can place all applications in one Rmd-file, and not distribute them to different servers and UI-files, as is done, for example, using shinydashboard. I use flexdashboard whenever I need to create a simple prototype control panel, before starting to work on something complicated. This feature allows you to create a prototype within an hour.
Req and validate functions in R Shiny
Development in R Shiny can confuse you, especially when you constantly get strange error messages that do not allow you to understand what is happening. But over time, Shiny develops and improves, more and more features appear here that allow you to understand the cause of the error. So, req () solves the problem with a "silent" error, when it is not at all clear what the matter is. With it you can display the user interface elements associated with previous actions. Let us explain by example:
output $ go_button <- shiny :: renderUI ({
# only display button if an animal input has been selected
shiny :: req (input $ animal)
# display button
shiny :: actionButton ("go",
paste ("Conduct", input $ animal, "analysis!")
)
})
validate () checks everything before rendering and allows you to display an error message - for example, that the user has uploaded the wrong file:
# get csv input file
inFile <- input $ file1
data <- inFile $ datapath
# render table only if it is dogs
shiny :: renderTable ({
# check that it is not a dog file
shiny :: validate (
need ("Dog Name"% in% colnames (data)),
“Dog Name column not found - did you load the right file?”
)
data
})
More information about all these features can be found here .
Storing your credentials for yourself in the system environment
If you plan to share the code where you need to enter access data, use the system environment in order to avoid placing your own credentials in Github or another service. Example of placement:
Sys.setenv (
DSN = "database_name",
UID = "User ID",
PASS = "Password"
)
Now you can log in using environment variables:
db <- DBI :: dbConnect (
drv = odbc :: odbc (),
dsn = Sys.getenv ("DSN"),
uid = Sys.getenv ("UID"),
pwd = Sys.getenv ("PASS")
)
It is even more convenient (especially if the data is often used by you) to set them as environment variables right in the operating system. In this case, they will always be available and do not have to specify them in the code.
Tidyverse automation with styler
A styler package can help clean the code. It has a lot of possibilities for automatically bringing the code style into tidyverse. All you need to do is run styler :: style_file () for your problem script. The package will do a lot (but not all) in order to restore order.
Parameterization of R Markdown documents
So, you have created an excellent document R Markdown, in which you analyze various facts about dogs. And then it occurs to you that it would be better to do the same work, but only with cats. No problem, you can automate the creation of cat reports with just one command. All you need to do is parameterize your R markdown document.
This can be done by setting the parameters for the YAML header in the specified document, and then the value parameters.
- title: "Animal Analysis"
author: "Keith McNulty"
date: "21 March 2019"
output:
html_document:
code_folding: "hide"
params:
animal_name:
value: Dog
choices:
- Dog
- Cat
- Rabbit
years_of_study:
input: slider
min: 2000
max: 2019
step: 1
round: 1
sep: ''
value: [2010, 2017]
---
Now you can write all the variables in the document code as params $ animal_name and params $ years_of_study. Then we use the Knit (or knit_with_parameters ()) dropdown menu and get the opportunity to choose parameters.

revealjs
The revealjs is a package that allows you to create great HTML presentations with embedded R-code, intuitive navigation, and a slide menu. HTML shortcuts allow you to quickly create a nested slide structure with different style options. Well, HTML will run on any device, so that the presentation can be opened on every phone, tablet or laptop. Information disclosure can be configured by installing the package and calling it in the YAML header. Here is an example:
- title: "Exporing the Edge of the People Analytics Universe"
author: "Keith McNulty"
output:
revealjs :: revealjs_presentation:
center: yes
template: starwars.html
theme: black
date: "HR Analytics Meetup London - 18 March, 2019"
resource_files:
- darth.png
- deathstar.png
- hanchewy.png
- millenium.png
- r2d2-threepio.png
- starwars.html
- starwars.png
- stormtrooper.png
---
The source code for the presentation is here , and <a href=su rpubs.com/keithmcnulty/hr_meetup_london'> the presentation is here.

HTML tags in R Shiny
Most programmers do not use all the advantages of HTML tags that are in R Shiny. But these are only 110 tags, which make it possible to create a short call for an HTML function or media playback. For example, recently I used tags $ audio to play a “winning” sound that warned the user about the completion of the task.
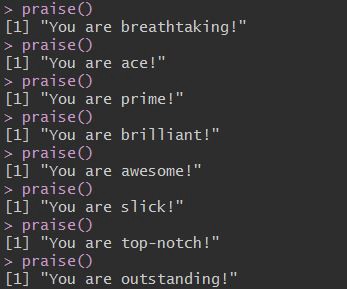
Package praise
It is very easy to use this package, but it is needed to display praise to the user. It seems strange, but in fact they like it.
Skillbox recommends:
- Two-year practical course "I am a web developer PRO" .
- Online course "C # developer" .
- Practical annual course "PHP developer from 0 to PRO" .
Source: https://habr.com/ru/post/449508/
All Articles