Adding UICollectionViews to a custom UITableViewCell which is made via Xib
I was surprised to find out how many obstacles there were to implementing a UICollectionView in a UITableViewCell. So this tutorial is here, I hope it will save you a lot of time.
Note: this tutorial is not for beginners. It assumes that you know about tableViews and creating custom cells with xib files.
Also, I do not describe anything about the visual component.
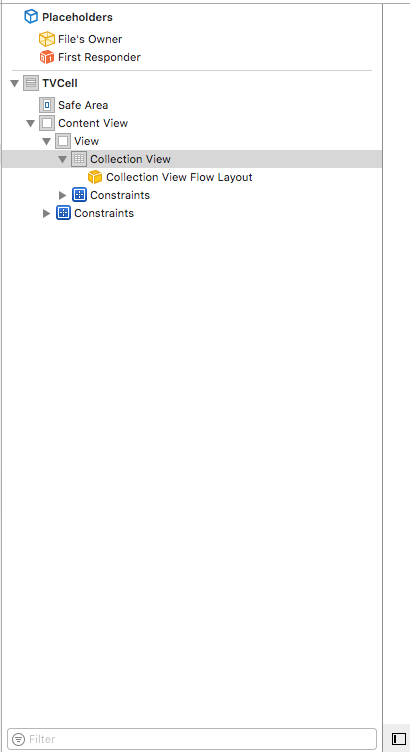
1) Add a UICollectionView to your TableViewCell Xib
')
It turns out that you need a separate file to house any cells in the collection view that you want to display. (When your UICollectionView is in a Xib file)
2) Add the UICollectionViewCell and Xib file to your project

You can do whatever you want in your collection cell Cell Cell Xib (add a label, image, etc.), for the purposes of this tutorial, we don’t touch it here.
Make sure you give your cell a resuableIdentifier.

3) Ensure that your TableViewCell UICollectionView Data Source and Delegate protocols comply.
Step 1: Go back to your tableViewCells Xib file.
Step 2: Drag and drop from your collectionView into 'File's Owner' and select the dataSource and then delegate.

Step 3: Drag and drop from your collectionView into your TableViewCell class and create an IBOutlet

Step 4: Ensure that your TableViewCell UICollectionView Data Source and Delegate protocols comply.
Explanation of the code:
Troubleshooting steps:
If you have questions, write in the comments.
If this helped you or will help in the future, put a Like.
I hope someone will save a lot of time.
Note: this tutorial is not for beginners. It assumes that you know about tableViews and creating custom cells with xib files.
Also, I do not describe anything about the visual component.
1) Add a UICollectionView to your TableViewCell Xib
')
- Drag the UICollectionView into your TableViewCell Xib
- Add constrains
- And find out that you cannot add CollectionViewCells to your newly added UICollectionView :)
It turns out that you need a separate file to house any cells in the collection view that you want to display. (When your UICollectionView is in a Xib file)
2) Add the UICollectionViewCell and Xib file to your project
You can do whatever you want in your collection cell Cell Cell Xib (add a label, image, etc.), for the purposes of this tutorial, we don’t touch it here.
Make sure you give your cell a resuableIdentifier.
3) Ensure that your TableViewCell UICollectionView Data Source and Delegate protocols comply.
Step 1: Go back to your tableViewCells Xib file.
Step 2: Drag and drop from your collectionView into 'File's Owner' and select the dataSource and then delegate.
Step 3: Drag and drop from your collectionView into your TableViewCell class and create an IBOutlet
Step 4: Ensure that your TableViewCell UICollectionView Data Source and Delegate protocols comply.
class TableViewCell: UITableViewCell, UICollectionViewDelegate, UICollectionViewDataSource { @IBOutlet weak var collectionView: UICollectionView! override func awakeFromNib() { super.awakeFromNib() // Initialization code self.collectionView.dataSource = self self.collectionView.delegate = self self.collectionView.register(UINib.init(nibName: "CollectionViewCell", bundle: nil), forCellWithReuseIdentifier: "collectionViewID") } override func setSelected(_ selected: Bool, animated: Bool) { super.setSelected(selected, animated: animated) // Configure the view for the selected state } func collectionView(_ collectionView: UICollectionView, numberOfItemsInSection section: Int) -> Int { return 15 } func collectionView(_ collectionView: UICollectionView, cellForItemAt indexPath: IndexPath) -> UICollectionViewCell { let cell = collectionView.dequeueReusableCell(withReuseIdentifier: "collectionViewID", for: indexPath as IndexPath) as! CollectionViewCell return cell } } Explanation of the code:
- Add a UICollectionViewDelegate and UICollectionViewDataSource to the class description
- Make a collectionView datasource and delegate = self in awakeFromXib
- Add the function numberOfItemsInSection
- Add the cellForItemAt function
- Create a cell with your reuseIdentifier as your custom cell.
Troubleshooting steps:
- Are my ids assigned and correct?
- Did I drag from my collectionView to Files Owner in your Xib file?
If you have questions, write in the comments.
If this helped you or will help in the future, put a Like.
I hope someone will save a lot of time.
Source: https://habr.com/ru/post/449478/
All Articles