HBrom control panel based on HMI from Advantech
Video: admin Habrom control panel. Allows you to adjust karma, rating, and ban users.
TL; DR: in the article I will try to create a comic Habrom control panel using the Webaccess / HMI Designer industrial interface development environment and the WebOP terminal.
The human-machine interface (English Human-machine interface, HMI) is a set of systems for human interaction with controlled machines. Usually this term is used for industrial systems in which there is an operator and control panel.
')
WebOP is a standalone industrial terminal for creating human-machine interfaces. Used to create production control panels, monitoring systems, control rooms, smart home controllers, etc. It supports direct connection to industrial equipment, can work as part of a SCADA system.
WebOP terminal - hardware
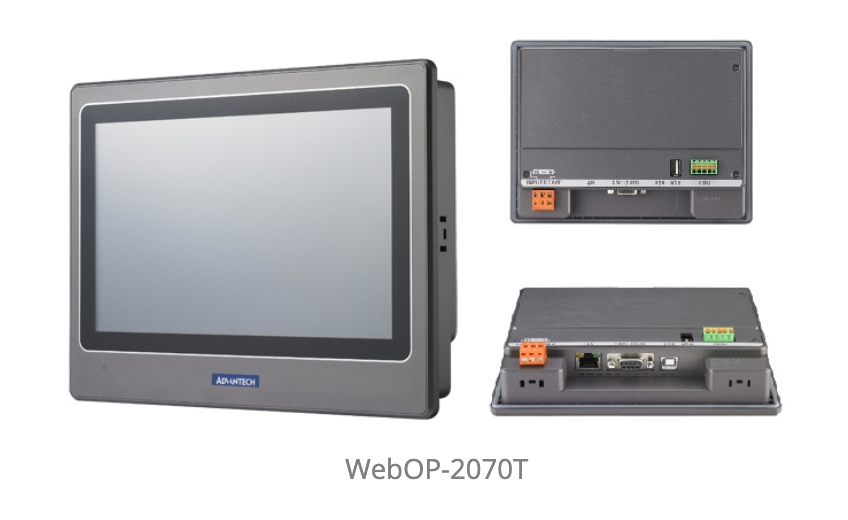 The WebOP terminal is a low-power computer based on an ARM processor, in a single package with a monitor and touchscreen, designed to launch a program with a graphical interface created in the HMI Designer. Depending on the model, the terminals have on board various industrial interfaces: RS-232/422/485, CAN bus for connecting to car systems, USB Host port for connecting additional peripherals, USB Client port for connecting the terminal to a computer, audio input and audio output , microSD card reader for non-volatile memory and transfer settings.
The devices are positioned as a budget replacement for all-in-one computers, for tasks that do not require powerful processors and resources of a full-fledged desktop computer. WebOP can operate as a stand-alone terminal for control and data input / output, paired with other WebOPs, or as part of a SCADA system.

WebOP terminal can connect directly to industrial devices
Passive cooling and IP66 protection
Due to the low heat generation, some WebOP models are made completely without active air cooling. This allows devices to be mounted on objects that are critical to the noise level, and reduces the amount of dust that falls inside the case.
The front panel is made without gaps and joints, has a level of protection IP66, and allows direct ingress of water under pressure.
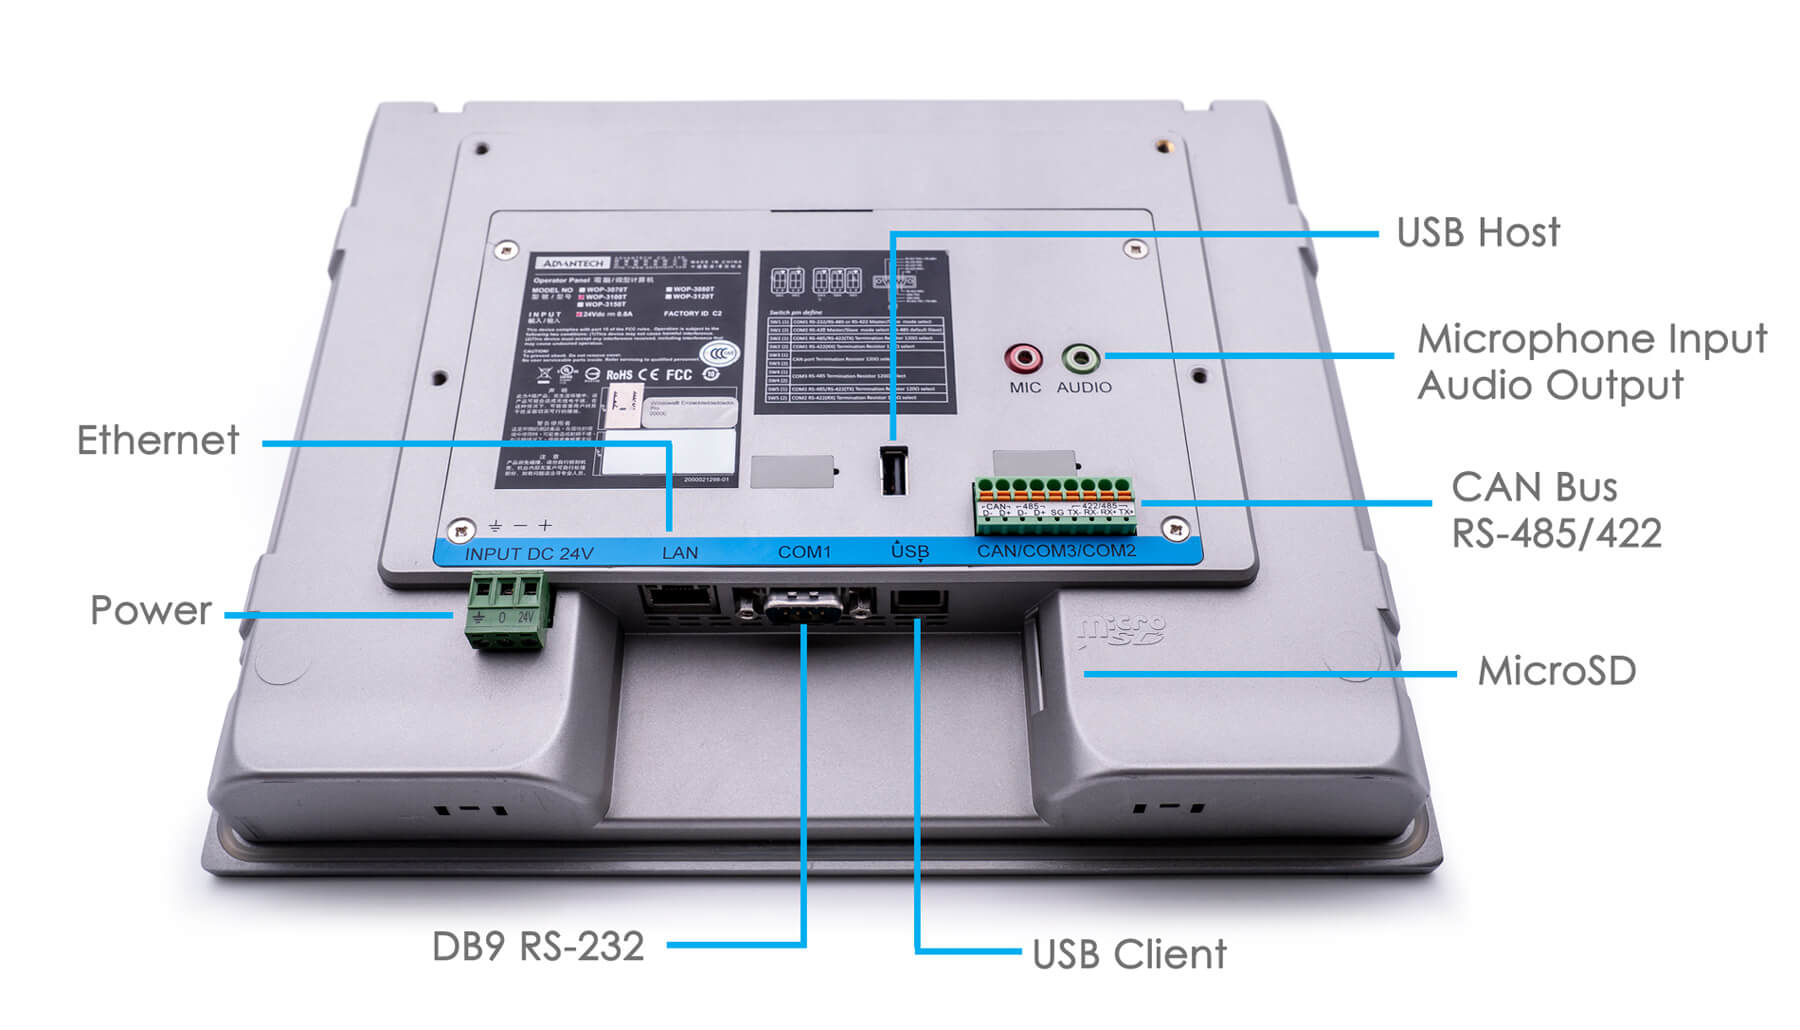
The back of the terminal WOP-3100T
Non-volatile memory
To prevent data loss, there is 128KB of non-volatile memory in WebOP, with which you can work the same way as with RAM. It can store meter readings and other critical data. In the event of a power failure, the data will be saved and restored after a reboot.
Remote update
The program running on the terminal can be updated remotely via an Ethernet network or via RS-232/485 serial interfaces. This simplifies maintenance, as it eliminates the need to bypass all terminals for software updates.
Webop models
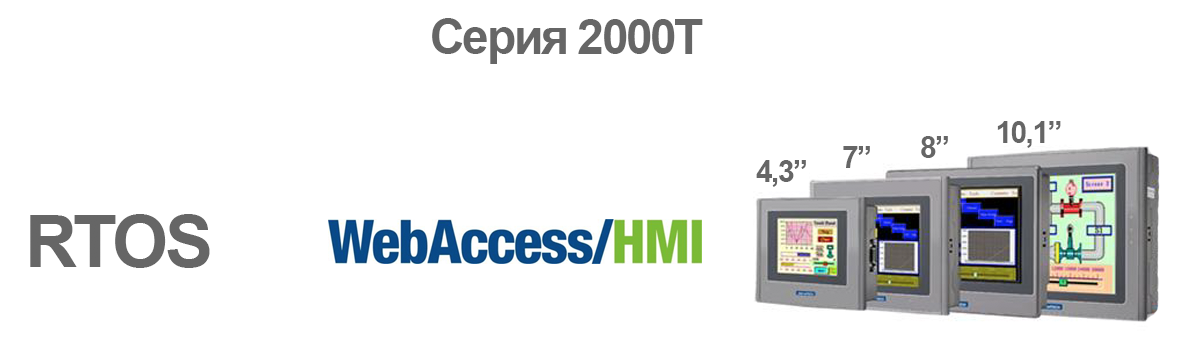
Series 2000T - the most affordable devices built on the basis of the real-time operating system HMI RTOS. The series is represented by WebOP- 2040T / 2070T / 2080T / 2100T models , with a screen diagonal of 4.3 inches, 7 inches, 8 inches and 10.1 inches, respectively.
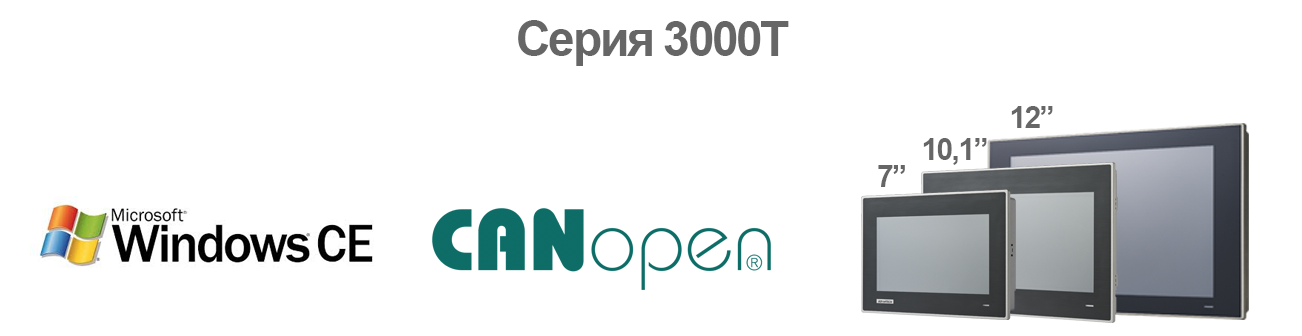
Series 3000T - more advanced models based on the operating system Windows CE. They differ from the 2000T series by a large number of hardware interfaces and have a CAN interface on board. The devices operate in an extended temperature range (-20 ~ 60 ° C) and have antistatic protection (Air: 15KV / Contact: 8KV). The line fully meets the requirements of the IEC-61000 standard, which allows the use of devices in semiconductor manufacturing, where static discharges are a problem. The series is represented by WebOP- 3070T / 3100T / 3120T , with a screen diagonal of 7 inches, 10.1 inches and 12.1 inches, respectively.
WebAccess Development Environment / HMI Designer
Out of the box, the WebOP terminal is just a low-power ARM computer on which you can run any software, but the whole essence of this solution is in the proprietary development environment of industrial WebAcess / HMI interfaces. The system consists of two components:
- HMI Designer - an environment for developing interfaces and programming logic. Works under Windows on a computer programmer. The final program is compiled into one file and transmitted to the terminal for runtime. The program is available in Russian.
- HMI Runtime - runtime to run the compiled program on the terminal. It can work not only on WebOP terminals, but also on Advantech UNO, MIC computers, and common desktop computers. There are versions of runtime under Linux, Windows, Windows CE.

Hello world - creating a project
Let's start creating a test interface for our Habrom control panel. I will run the program on the WebOP-3100T terminal running WinCE. First, create a new project in the HMI Designer. To run the program on WebOP, it is important to choose the correct model, the format of the final file will depend on it. In this step, you can also select the desktop architecture, then the final file will be compiled under the X86 runtime.

Creating a new project and choosing the architecture
The choice of the communication protocol by which the compiled program will be loaded into WebOP. At this step, you can select a serial interface, or specify the terminal IP address.

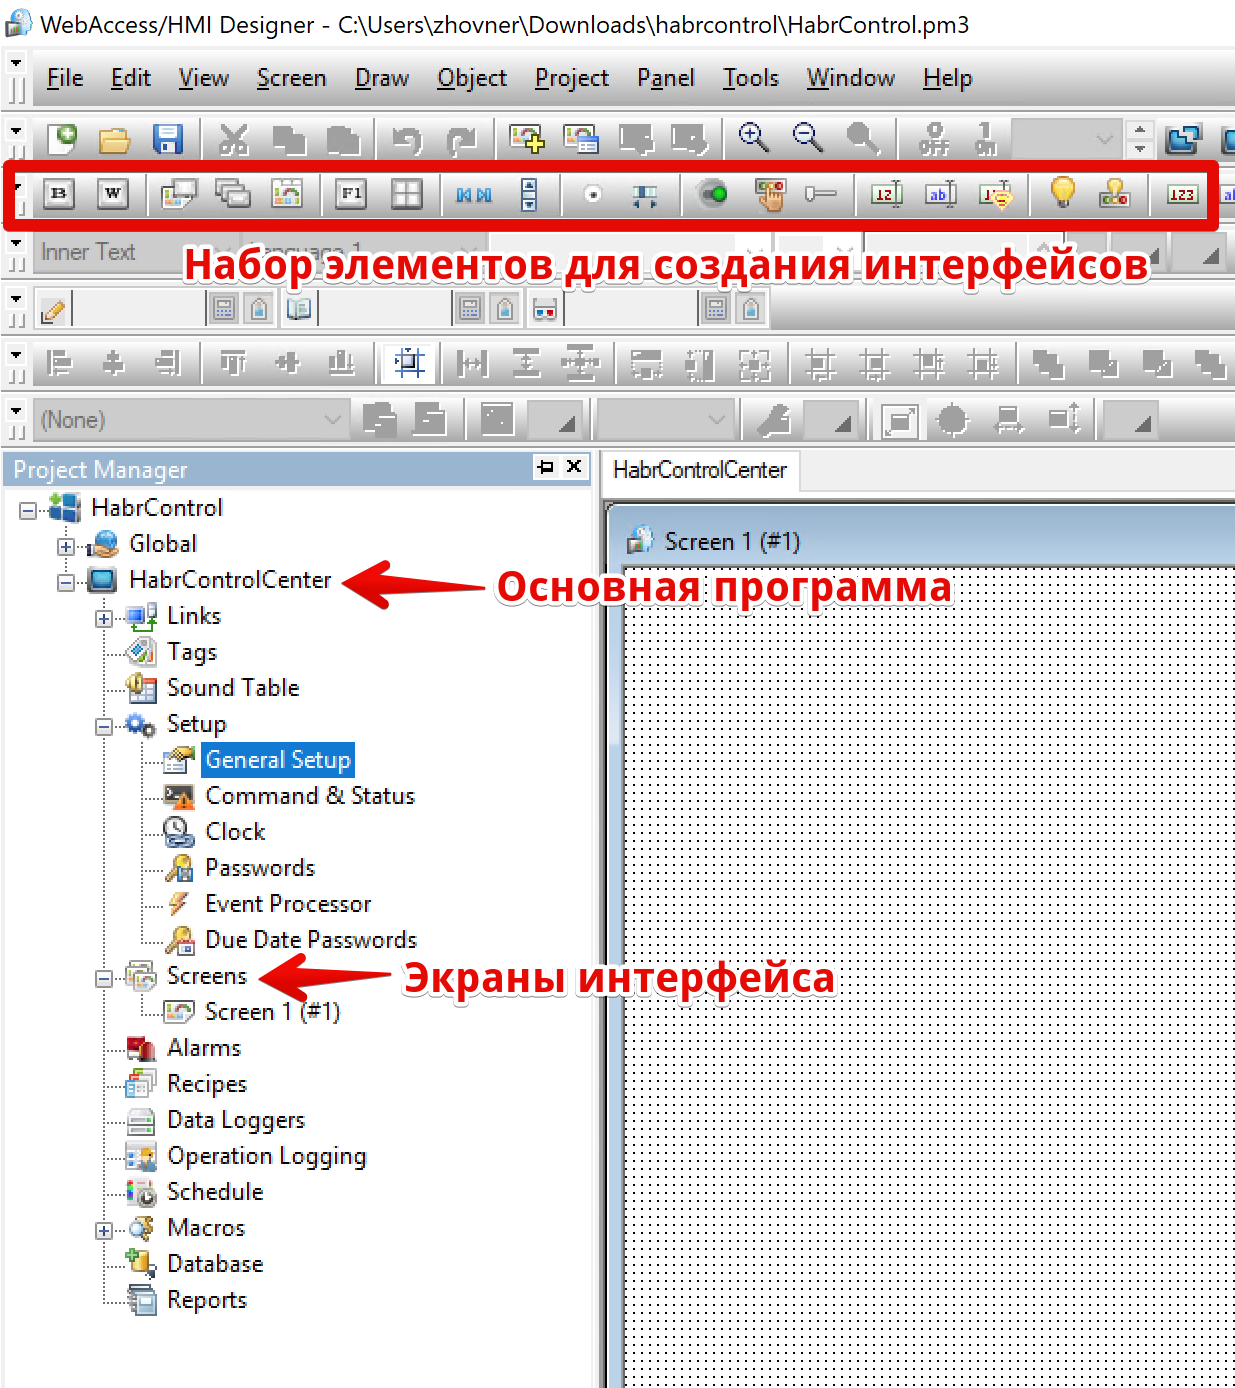
Interface to create a project. In the left part there is a tree diagram of the components of the future program. While we are only interested in the Screens item, these are directly screens with GUI elements that will be displayed on the terminal.
To begin with, we will create two screens with the text “Hello World” and the ability to switch between them using buttons. To do this, we will add a new Screen # 2 screen, and on each screen we will add a text element and two buttons to switch between screens (Screen Buttons). Each button is set to switch to the next screen.
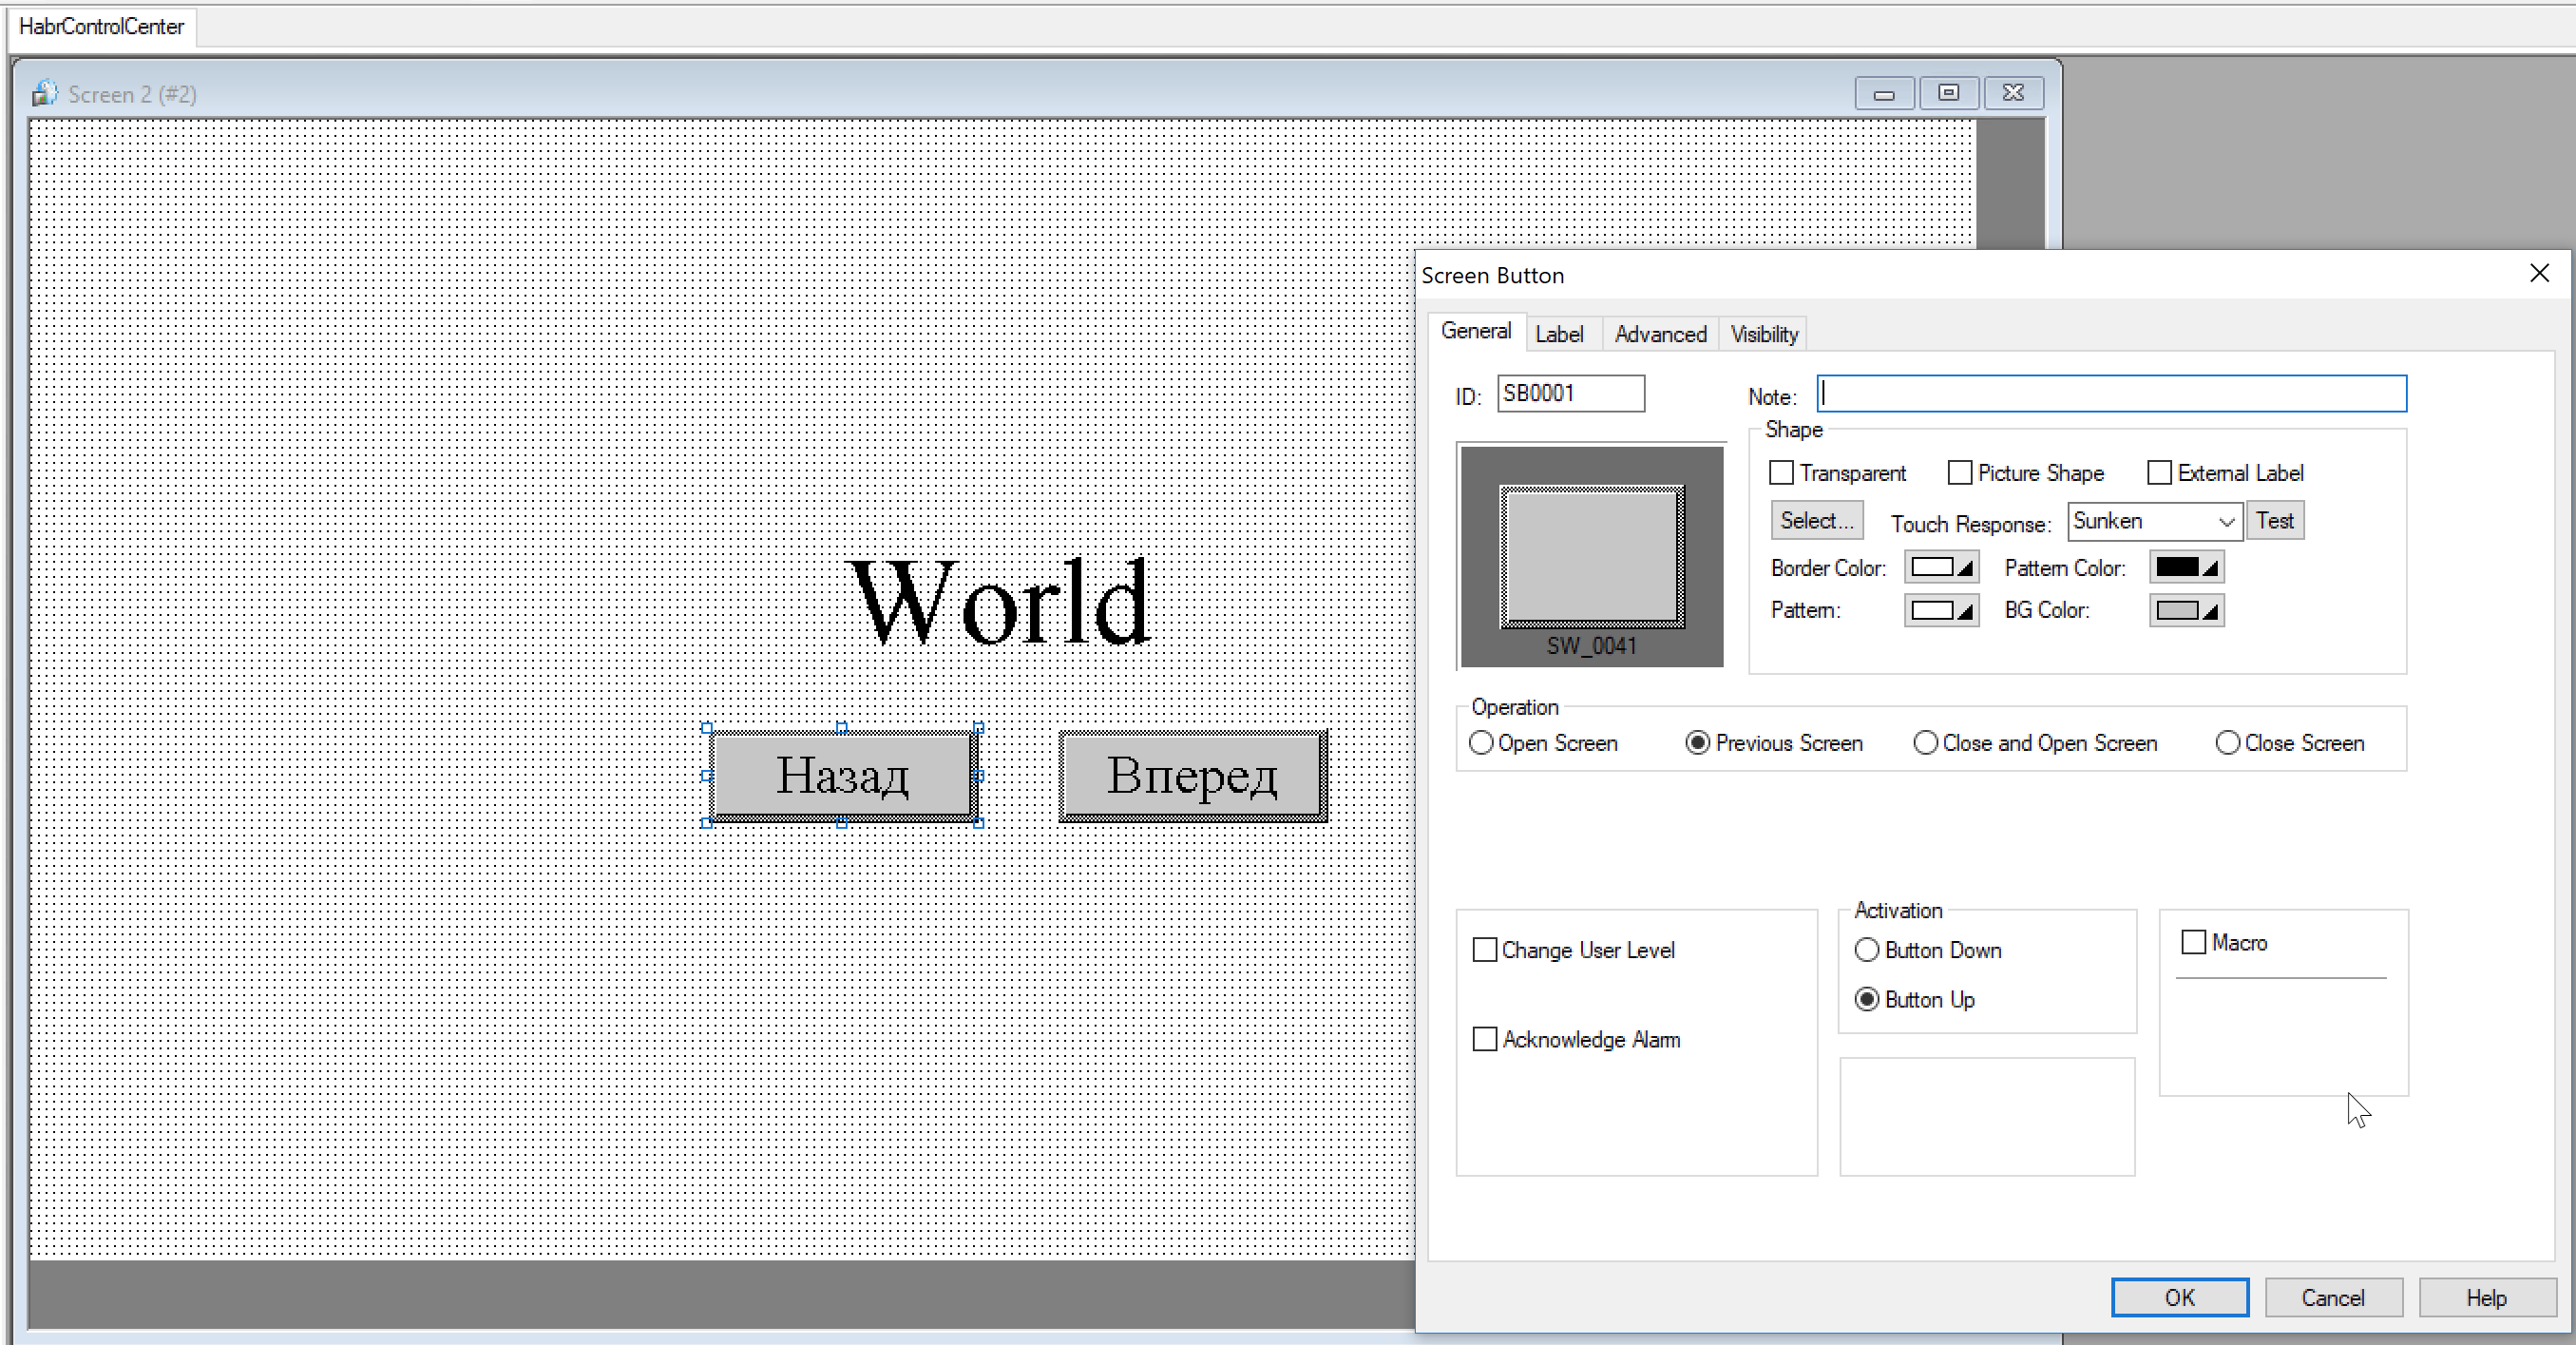
Interface settings button to switch between screens
The “Hello World” program is ready; now you can compile and run it. At the compilation stage there may be errors in case of incorrectly specified variables or addresses. Any error is considered fatal, the program will be compiled only in the absence of errors.
The environment provides the ability to simulate the terminal so that you can debug the program on the computer locally. There are two types of simulation:
- Online simulation - all external data sources specified in the program will be used. These can be CCO or devices connected via serial interfaces or Modbus TCP.
- Offline simulation - simulation without the use of external devices.
While we have no external data, we use offline simulation, having previously compiled the program. The final program will be located in the project folder, with the name ProjectName_Program Name.px3

The program launched in the simulation can be controlled by the mouse cursor just as it would happen on the touchscreen of the WebOP terminal. We see that everything works as planned. Fine.
To download the program to the physical terminal, simply click the Download button. But since I did not configure the terminal connection to the development environment, you can simply transfer the file using a USB flash drive or microSD memory card.

The program interface is intuitive, I will not begin to disassemble each graphic block. Creating backgrounds, shapes, text will be clear to anyone who has used programs similar to Word. Creating a graphical interface does not require programming skills, all elements are added by dragging the mouse onto the form.
Work with memory
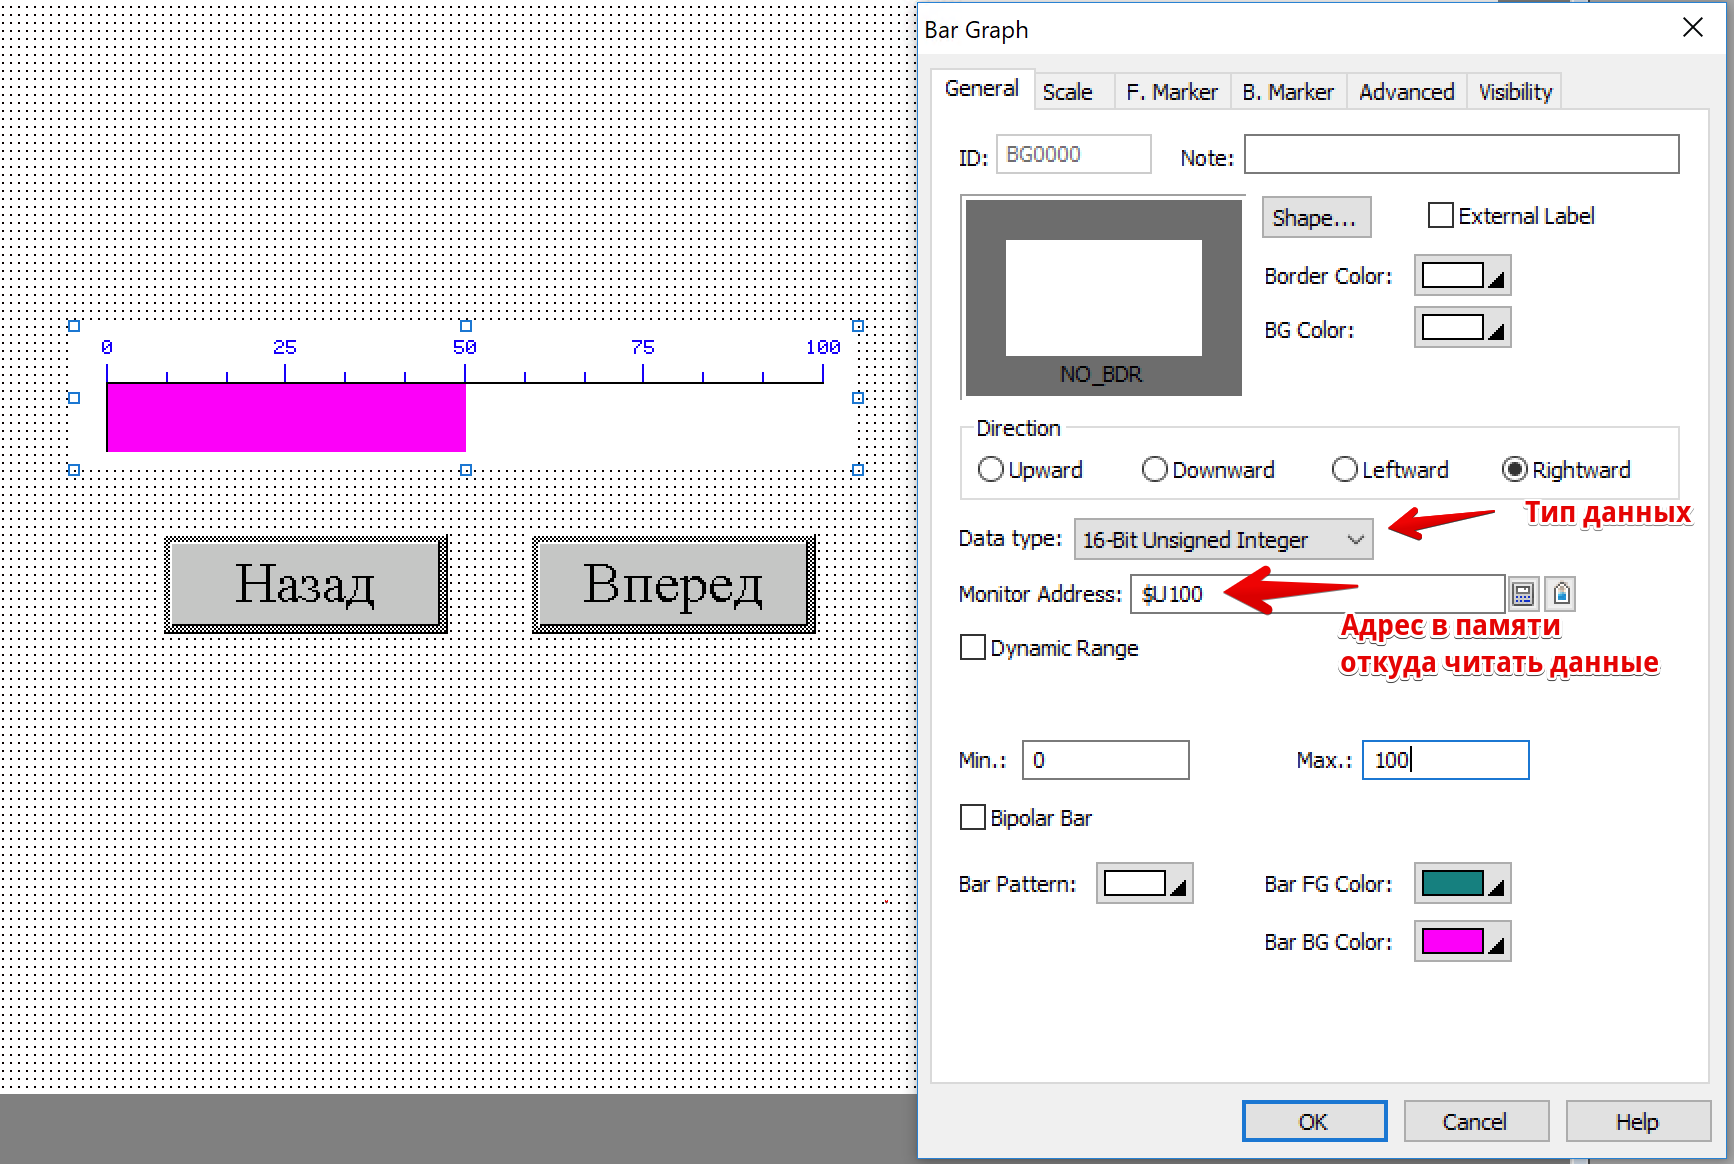
Now, when we are able to create graphic elements, we will study the work with dynamic content and scripting language. Create a bar chart with the display of data from the variable U $ 100 . In the chart settings, select the data type: 16-bit integer, and the range of values of the chart: from 0 to 10.
The program supports scripting in three languages: VBScript, JavaScript and its own language. I will use the third option, because for it there are examples in the documentation and automatic syntax help right in the editor.
Add a new macro:

We write simple code to gradually change the data in a variable that can be traced in the diagram. We will add 10 to the variable, and reset it when it is greater than 100.
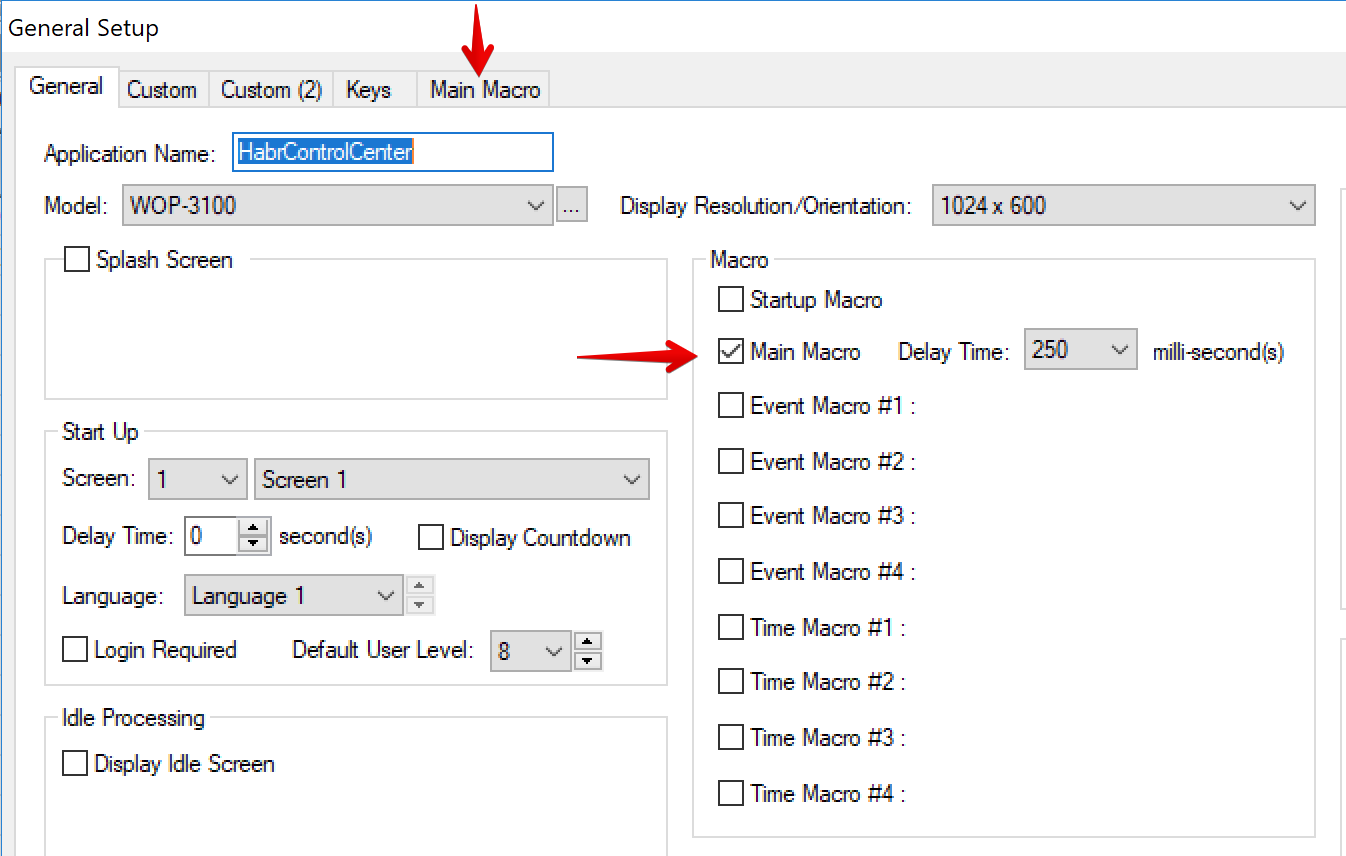
$U100=$U100+10 IF $U100>100 $U100=0 ENDIF To run the script in a loop, set it in the General Setup settings as Main Macro, with a run interval of 250ms.
Compile and run the program in the simulator:
At this stage, we learned to manipulate the data in memory and display it in a visual form. This is already enough to create a simple monitoring system, receiving data from external devices (sensors, controllers) and writing them into memory. Different data display units are available in the HMI Designer: in the form of circular dials with arrows, various charts, graphs. Using JavaScript scripts, you can implement the download of data from external sources via HTTP.
Habrom control panel
Using the acquired skills, let's make a comic interface of the Habrom control panel.
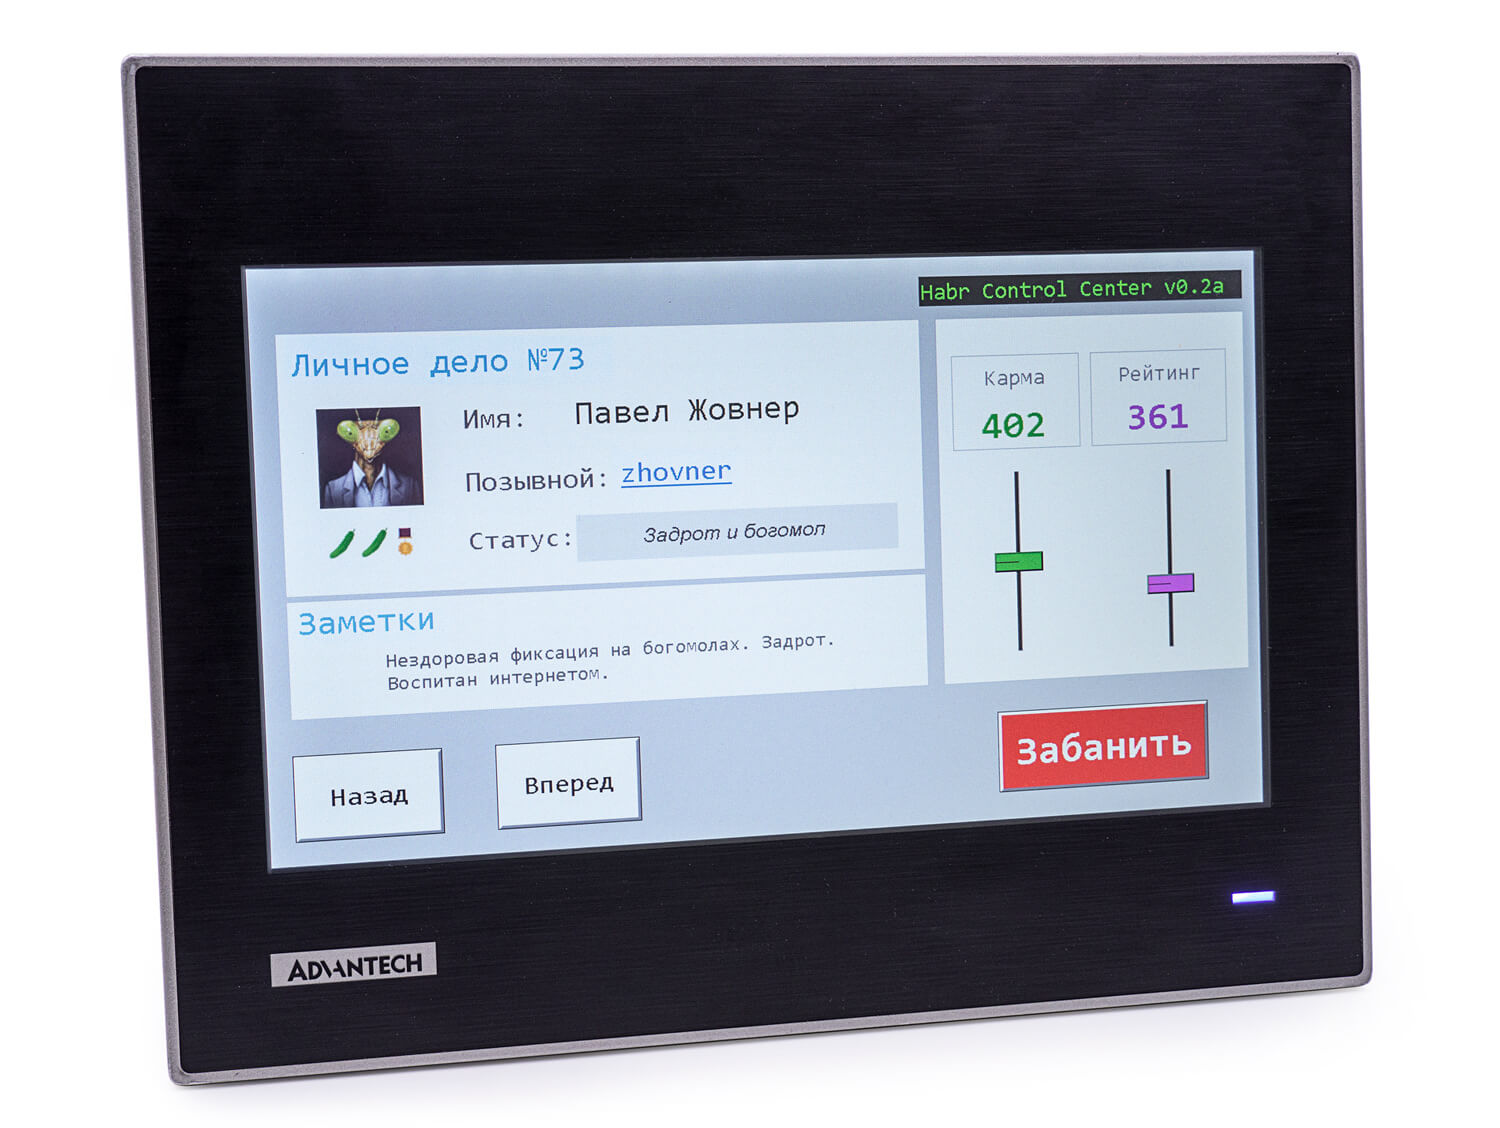
Our remote should be able to:
- Switch user profiles
- Store data karma and rating
- Change karma and rating values with sliders
- When you click the “banned” button, the profile should be marked as banned, the avatar should be changed to strikethrough
Each profile will be displayed on a separate page, so we will create a page for each profile. Karma and rating will be stored in local variables in memory, which will be initialized using Setup Macro when the program is started.

The picture is clickable
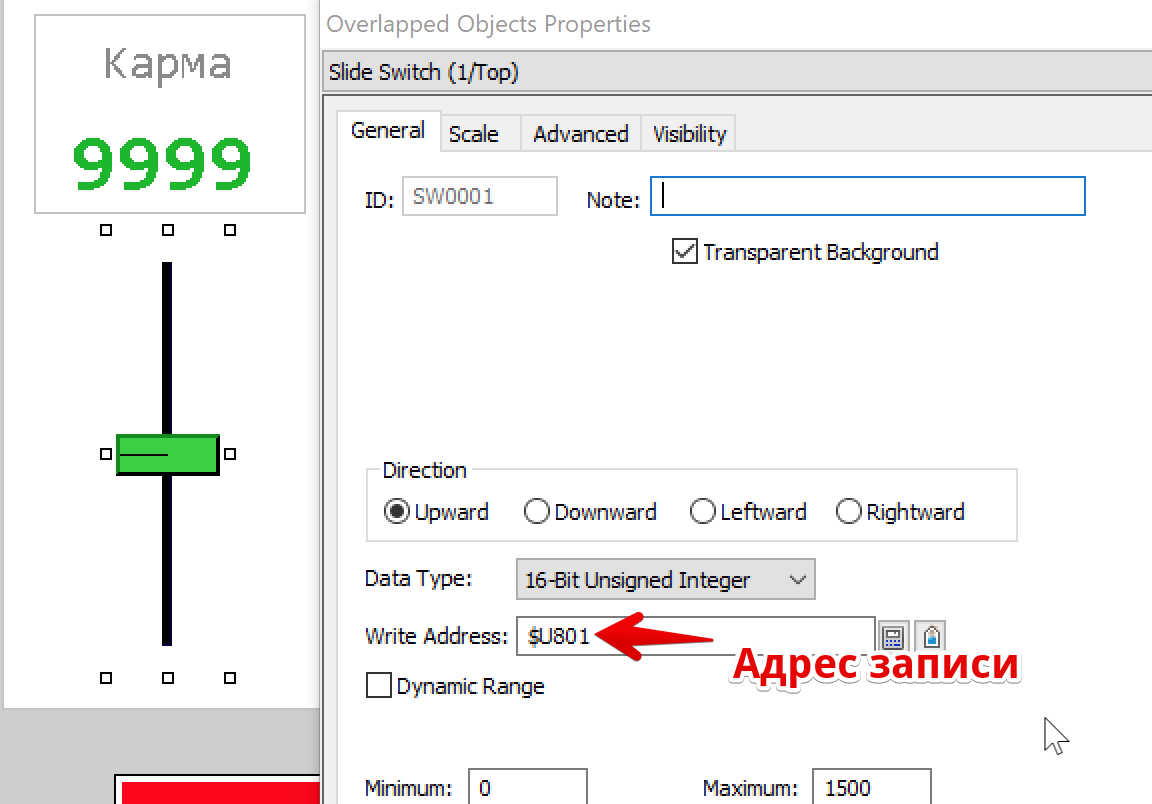
Adjusting karma and rating
To adjust the karma we will use the slider (Slide Switch). As a record address, specify the variable that is initialized in the Setup Macro. We will limit the range of the slider values from 0 to 1500. Now, as the slider moves, new data will be recorded in memory. In this case, the initial state of the slider will correspond to the values of the variable in memory.
To display the numerical values of karma and rating we will use the element Numeric display. The principle of its operation is similar to the diagram from the example program “Hello World”; we simply indicate the address of the variable in the Monitor Address.
Button "ban"
The "ban" button is implemented using the Toggle Switch element. The principle of data storage is similar to the examples above. In the settings you can choose a different text, color or image, depending on the state of the button.
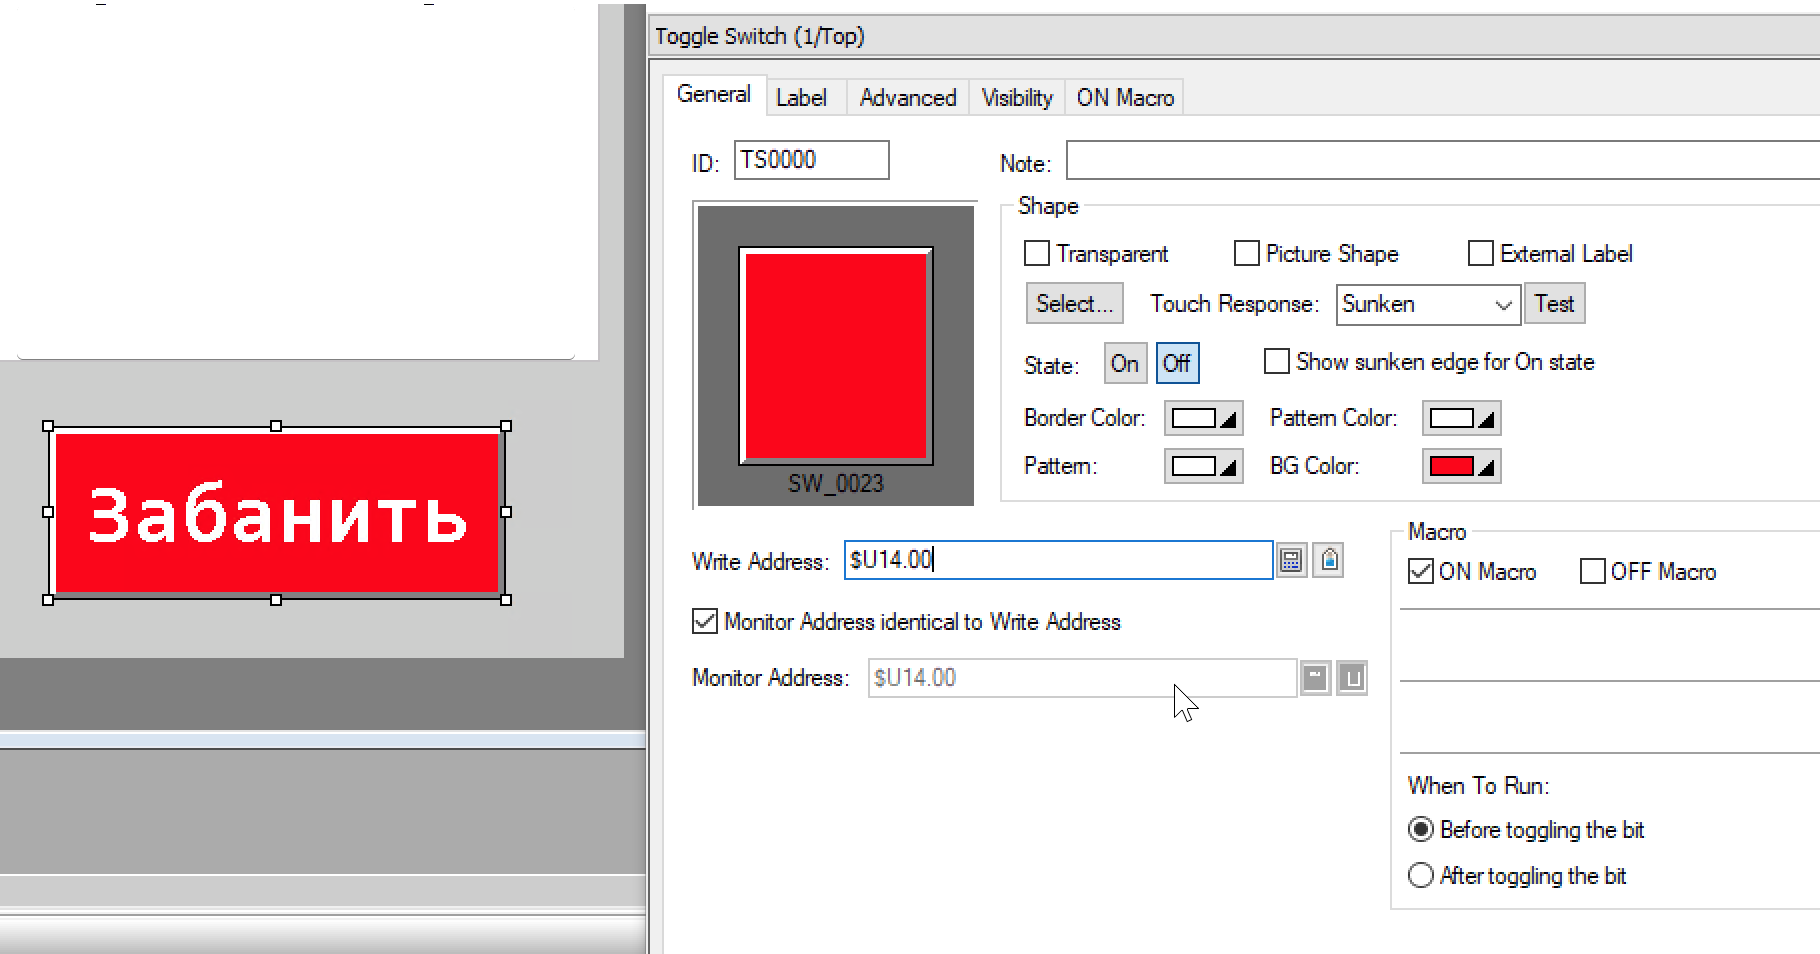
At the time of pressing the button, the avatar should be crossed out in red. This is easily accomplished using the Picture Display block. It allows you to set several images associated with the state of the Toggle Switch button. For this, the block indicates the same address as the block with the button, and the number of states. Similarly, the picture is configured with nameplates under the avatar.
Conclusion
Overall, I liked the product. Earlier, I had experience using a tablet on Android for similar tasks, but developing an interface for it is much more complicated, and browser APIs do not allow full access to the peripherals. One WebOP terminal can replace a bundle of Android-tablet, computer and controller.
HMI Designer, despite the archaic design, is content advanced. Without much programming skills, you can quickly jot down a working interface. The article does not cover all graphic blocks, which are very numerous there: animated pipes, cylinders, graphs, toggle switches. It out of the box supports many popular industrial controllers, contains database connectors.
Links
WebAccess / HMI Designer and Runtime can be downloaded here.
→ Sources of Habrom control panel project
Source: https://habr.com/ru/post/449408/
All Articles