Buildroot - part 2. Creating the configuration of your board; use external tree, rootfs-overlay, post-build scripts
In this section, I consider some of the customization capabilities that I needed. This is not a complete list of what buildroot offers, but they are quite working and do not require intervention in the buildroot files themselves.
Using the EXTERNAL mechanism for customization
The previous article dealt with a simple example of adding its own configuration, by adding the board's defconfig and necessary files directly to the Buildroot directory.
But this method is not very convenient, especially when updating buildroot. To solve this problem, there is an external tree mechanism. Its essence is that in a separate directory you can store directories of board, configs, packages and others (for example, I use the patches directory to impose patches on packages, more details in a separate section) and buildroot will add them to those in its directory.
Note: you can overlay several external trees at once, there is an example in the buildroot manual
Create a directory my_tree, located next to the buildroot directory and transfer our configuration there. The output should receive the following file structure:
[alexey@alexey-pc my_tree]$ tree . ├── board │ └── my_x86_board │ ├── bef_cr_fs_img.sh │ ├── linux.config │ ├── rootfs_overlay │ └── users.txt ├── Config.in ├── configs │ └── my_x86_board_defconfig ├── external.desc ├── external.mk ├── package └── patches 6 directories, 7 files As you can see, in general, the structure repeats the buildroot structure.
The board directory contains files specific to each board in our case:
- bef_cr_fs_img.sh is a script that will be executed after building the target-filesystem, but before packaging it into images. In the future we will use it.
- linux.config - kernel configuration
- rootfs_overlay - directory for overlay over target-file system
- users.txt - file with description of users created
The configs directory contains defconfig and our boards. We have only one.
Package - catalog with our packages. Buildroot initially contains descriptions and build rules for a limited number of packages. Later we will add the icewm window manager and the graphical login manager to the Slim system.
Patches - allows you to conveniently store your patches for different packages. More in a separate section below.
Now we need to add the description files of our external-tree. Three files are responsible for this: external.desc, Config.in, external.mk.
external.desc contains the actual description:
[alexey@alexey-pc my_tree]$ cat external.desc name: my_tree desc: My simple external-tree for article The first line is the name. In the future, buildroot create a variable $ (BR2_EXTERNAL_MY_TREE_PATH) , which should be used when configuring the assembly. For example, the path to the file with users can be specified in the following way:
$(BR2_EXTERNAL_my_tree_PATH)/board/my_x86_board/users.txt The second line is a short, human-readable description.
Config.in, external.mk - files for the description of the added packages. If you do not add your packages, you can leave these files empty. For now, we'll do it.
Now we have our external tree ready, containing our board's defconfig and the files it needs. Go to the buildroot directory, specify the use of external-tree:
[alexey@alexey-pc buildroot]$ make BR2_EXTERNAL=../my_tree/ my_x86_board_defconfig # # configuration written to /home/alexey/dev/article/ramdisk/buildroot/.config # [alexey@alexey-pc buildroot]$ make menuconfig In the first command, we use the argument BR2_EXTERNAL = .. / my_tree / , which indicates the use of the external tree. You can specify several external-tree at the same time for use. It is enough to do this once, after which a file output / .br-external.mk is created that stores information about used external-tree:
[alexey@alexey-pc buildroot]$ cat output/.br-external.mk # # Automatically generated file; DO NOT EDIT. # BR2_EXTERNAL ?= /home/alexey/dev/article/ramdisk/my_small_linux/my_tree BR2_EXTERNAL_NAMES = BR2_EXTERNAL_DIRS = BR2_EXTERNAL_MKS = BR2_EXTERNAL_NAMES += my_tree BR2_EXTERNAL_DIRS += /home/alexey/dev/article/ramdisk/my_small_linux/my_tree BR2_EXTERNAL_MKS += /home/alexey/dev/article/ramdisk/my_small_linux/my_tree/external.mk export BR2_EXTERNAL_my_tree_PATH = /home/alexey/dev/article/ramdisk/my_small_linux/my_tree export BR2_EXTERNAL_my_tree_DESC = My simple external-tree for article Important! In this file the paths will be absolute!
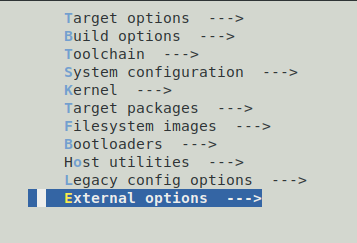
External options item appeared in the menu:
This submenu will contain our packages from our external-tree. This section is now empty.
Now it is more important for us to rewrite the necessary paths to use the external-tree.
Please note that in the Build options → Location to save buildroot config section, there will be an absolute path to the saved defconfig. It is formed when specifying extgernal_tree usage.
Also in the section System configuration fix the path. For a table with created users:
$(BR2_EXTERNAL_my_tree_PATH)/board/my_x86_board/users.txt In the Kernel section, change the path to the kernel configuration:
$(BR2_EXTERNAL_my_tree_PATH)/board/my_x86_board/linux.config Now at assembly our files from our external-tree will be used. When moving to another directory, updating buildroot we will have a minimum of problems.
Adding root fs overlay:
This mechanism allows you to easily add / replace files in the target-file system.
If the file is in root fs overlay, but not in the target, it will be added
If the file is in root fs overlay and in target, it will be replaced.
First, set the path to root fs overlay dir. This is done in System configuration → Root filesystem overlay directories:
$(BR2_EXTERNAL_my_tree_PATH)/board/my_x86_board/rootfs_overlay/ Now let's create two files.
[alexey@alexey-pc my_small_linux]$ cat my_tree/board/my_x86_board/rootfs_overlay/etc/hosts 127.0.0.1 localhost 127.0.1.1 my_small_linux 8.8.8.8 google-public-dns-a.google.com. [alexey@alexey-pc my_small_linux]$ cat my_tree/board/my_x86_board/rootfs_overlay/new_file.txt This is new file from overlay The first file (my_tree / board / my_x86_board / rootfs_overlay / etc / hosts) will replace the / etc / hosts file in the finished system. The second file (cat my_tree / board / my_x86_board / rootfs_overlay / new_file.txt) is added.
We collect and check:

Execution of customization scripts at different stages of system assembly
Often you need to perform some actions inside the target-filesystem before it is packaged into images.
This can be done in the System configuration section:

The first two scripts are executed after building the target-file system, but before packaging it into images. The difference is that the fakeroot script runs in the context of fakeroot, which simulates the work of the root user.
The last script is executed after the creation of system images. You can perform additional actions in it, for example, copy the necessary files to an nfs server or create an image of your device firmware.
As an example, I will create a script that will write the version and build date in / etc /.
First, I will indicate the path to this file in my external-tree:

And now the script itself:
[alexey@alexey-pc buildroot]$ cat ../my_tree/board/my_x86_board/bef_cr_fs_img.sh #!/bin/sh echo "my small linux 1.0 pre alpha" > output/target/etc/mysmalllinux-release date >> output/target/etc/mysmalllinux-release After assembly, you can see this file in the system.
In practice, the script can become large. Therefore, in a real project I went a more advanced way:
- Created a directory (my_tree / board_my_x86_board / inside_fakeroot_scripts) in which the scripts for execution are located, with sequence numbers. For example, 0001-add-my_small_linux-version.sh, 0002-clear-apache-root-dir.sh
- I wrote a script (my_tree / board_my_x86_board / run_inside_fakeroot.sh) that goes through this directory and sequentially executes the scripts that lie in it
- I specified this script in the settings of the board in the System configuration -> Custom scripts to run inside the environment ($ (BR2_EXTERNAL_my_tree_PATH) /board/my_x86_board/run_inside_fakeroot.sh)
')
Source: https://habr.com/ru/post/449348/
All Articles