Improving the effectiveness of manual testing on VueJS

Today I propose to raise the issue of manual testing projects on VueJS .
Regardless of the level of automation of testing processes, there is almost always a tester's live communication with a future release. Naturally, it should be comfortable and efficient.
')
In our projects at VueJS, we implemented simple but effective solutions that made life easier for our testers. I want to share them with you.
VueJS has a wonderful architectural feature - components. A component is a self-sufficient functional module that is designed in a separate file with a .vue extension for projects on VueJS. The VueJS application itself is a collection of such modules.
In fact, it can be said that changing a single component leads to a change in a single file. What is the basis of the proposed solution.
Idea
The idea is very simple - to visualize to the tester the components in which there were changes from the past release of / dev or the parent brunch (it is believed that the project has a repository). This will allow the tester to more effectively and efficiently test, focusing precisely on those components that have undergone changes and not waste time on a complete regression.
Implementation
Because Since a component is a separate file, it is enough to get the differences between the current commit and the target, the one with which we compare to identify all the modified components. Make it simple, like this:
git diff --no-commit-id --name-only -r 'origin/dev' Here we get the differences between the current comit and the 'origin / dev' branch as a list of changed files.
It remains the case for small things - to visualize the tester with these changes in the project.
Magic
In this case, comes to the aid webpack , which makes it possible to collect the project in different modes. We created for ourselves the “testing” mode, which became a fork of the standard “dev” mode (application template vue-cli) with the necessary modifications. In particular, we added a list of modified files:
git.diffs.js
const exec = require('child_process').exec; var changedComponents = []; // exec("git fetch", function(error, stdout, stderr) { if (error) { throw error; } // fetch console.log("\ngit fetch\n"); console.log(stdout); // dev exec("git diff --no-commit-id --name-only -r 'origin/dev'", function (error, stdout, stderr) { if (error) { throw error; } // diff console.log("\ngit diff --no-commit-id --name-only -r 'origin/dev'\n"); console.log(stdout); stdout.split("\n").map(function (file) { if (file.slice(-4) == '.vue' && (file.substring(0, 15) == 'src/components/' || file.substring(0, 11) == 'src/kernel/' )) { changedComponents.push('"' + file + '"'); } }); }); }); module.exports = changedComponents; And expanded the env this list:
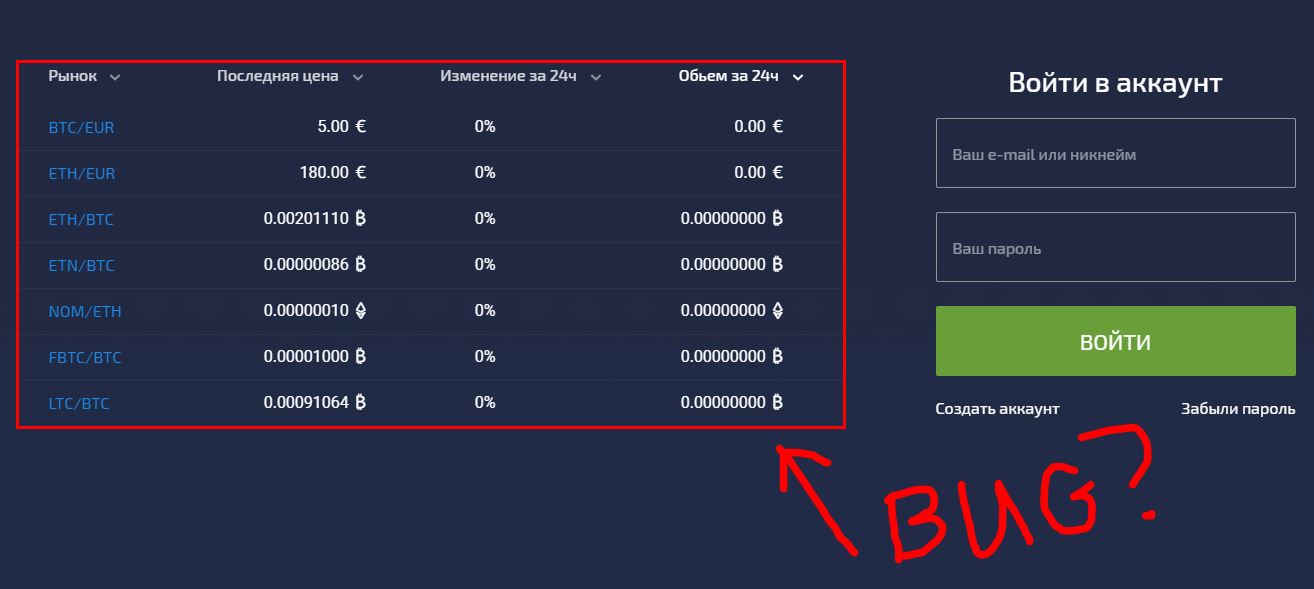
env.CHANGED_COMPONENTS = require('./git.diffs') Thus, we “threw” the entire list of changes to the project and now were able to use it at runtime at our discretion. In particular, they have implemented a global impurity, which checks whether a component is included in the list of changes, and if so, it encircles it with a red frame.
export default { install (Vue, options) { let oldStyle = null; Vue.mixin({ mounted () { if (this.isCodeChanged) { setInterval(() => { if (this.$el) { if (store.state.system.isTesting()) { if (!oldStyle) { oldStyle = this.$el.style.border ? this.$el.style.border : 'empty'; } this.$el.style.border = 'solid 3px #f00'; } else { if ((!oldStyle || !oldStyle.length || oldStyle === 'empty') && this.$el.style) { this.$el.style.removeProperty('border'); } else { this.$el.style.border = oldStyle; } } } }, 300); } }, computed: { vueComponentName () { return this.$options.__file; }, isCodeChanged () { return window.$testing.CHANGED_COMPONENTS.indexOf(this.$options.__file) >= 0; } } }); } }; Notice that the code has a store.state.system.isTesting () sign that turns on or off a visual demonstration of the modified component. It allows the tester to arbitrarily turn off the display of the component's selection in order to test the layout.
In fact, we have a lot of similar features. To manage them, we created a specialized page where the tester can configure the test environment online. It is also available in the “testing” build mode by direct route / testing.
As a result, the modified component looks like in the picture at the beginning of the article.
Behind the scenes
Of course, in addition to the components that are rendered, there may be changes in the service components. To ensure that nothing escapes the tester’s eyes, we display the complete list of changed files in the browser console at startup. It also displays information about the build time, build mode, current release, etc.
Source: https://habr.com/ru/post/449064/
All Articles