Mozilla WebThings - gateway setup
Mozilla's WebThings Gateway is software for gateways used in smart home systems that will allow you to directly monitor and control smart devices over the Internet without intermediaries.
This guide assumes that you have already raised the gateway by following the getting started guide .
I. Introduction
Congratulations! You have decided to establish your own personal gateway for your smart home. In this tutorial, we will review the “Mozilla WebThings Gateway”. It's about version 0.8. Further, for simplicity, we will simply say “gateway”.
The gateway allows you to directly control and monitor the devices of your home via the Internet. Unlike many other smart gateways and smart devices from the IoT world, your data will not be stored or processed in the clouds. Everything stays in your home, at your gateway. In most cases, this gateway can replace your purchase of a separate gateway for each brand. And instead of using different applications for different brands, you can manage everything through a single web interface of your gateway.
In this guide, we will talk about setting up a gateway, connecting smart devices, creating automation rules, and experimenting with voice and text control, and give some useful tips.
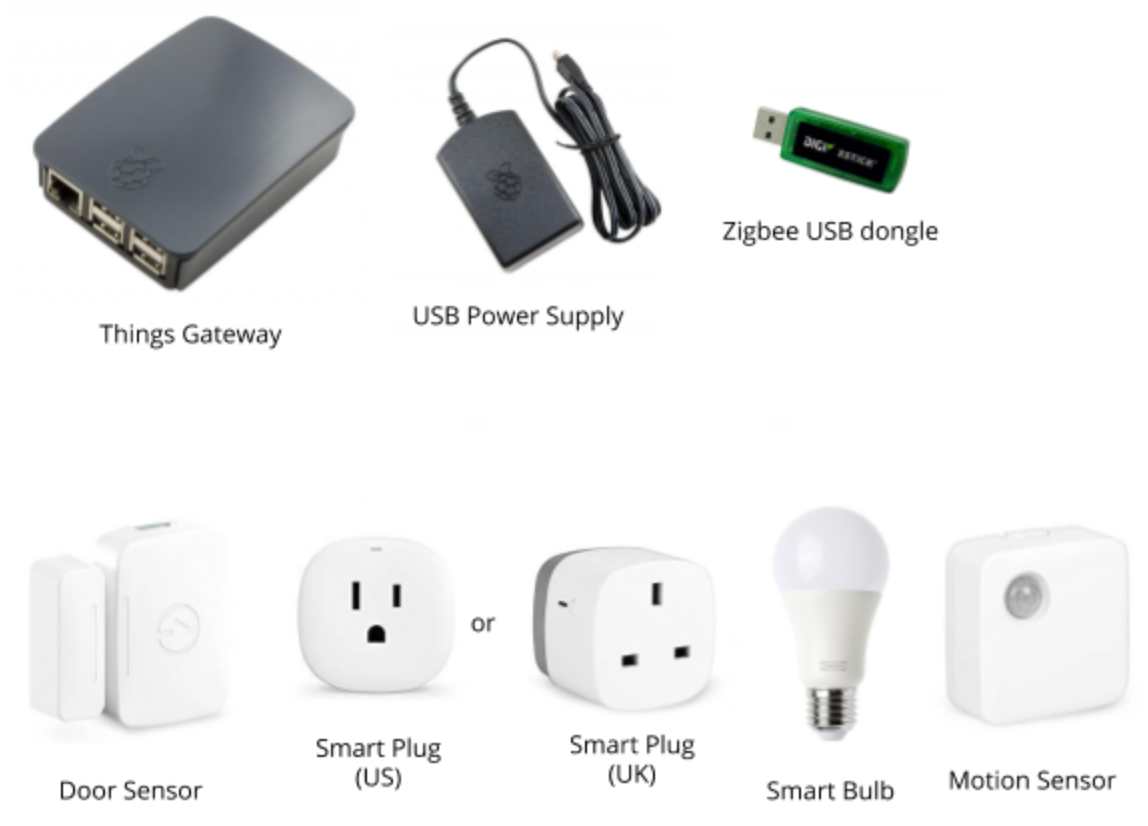
Below you see a typical set of devices for a smart home. In the first row are the Raspberry Pi, the power supply for it, and the Zigbee USB adapter. In the second row are the door opening sensor, smart power adapter, smart light and motion sensor.
Ii. Control from a smartphone
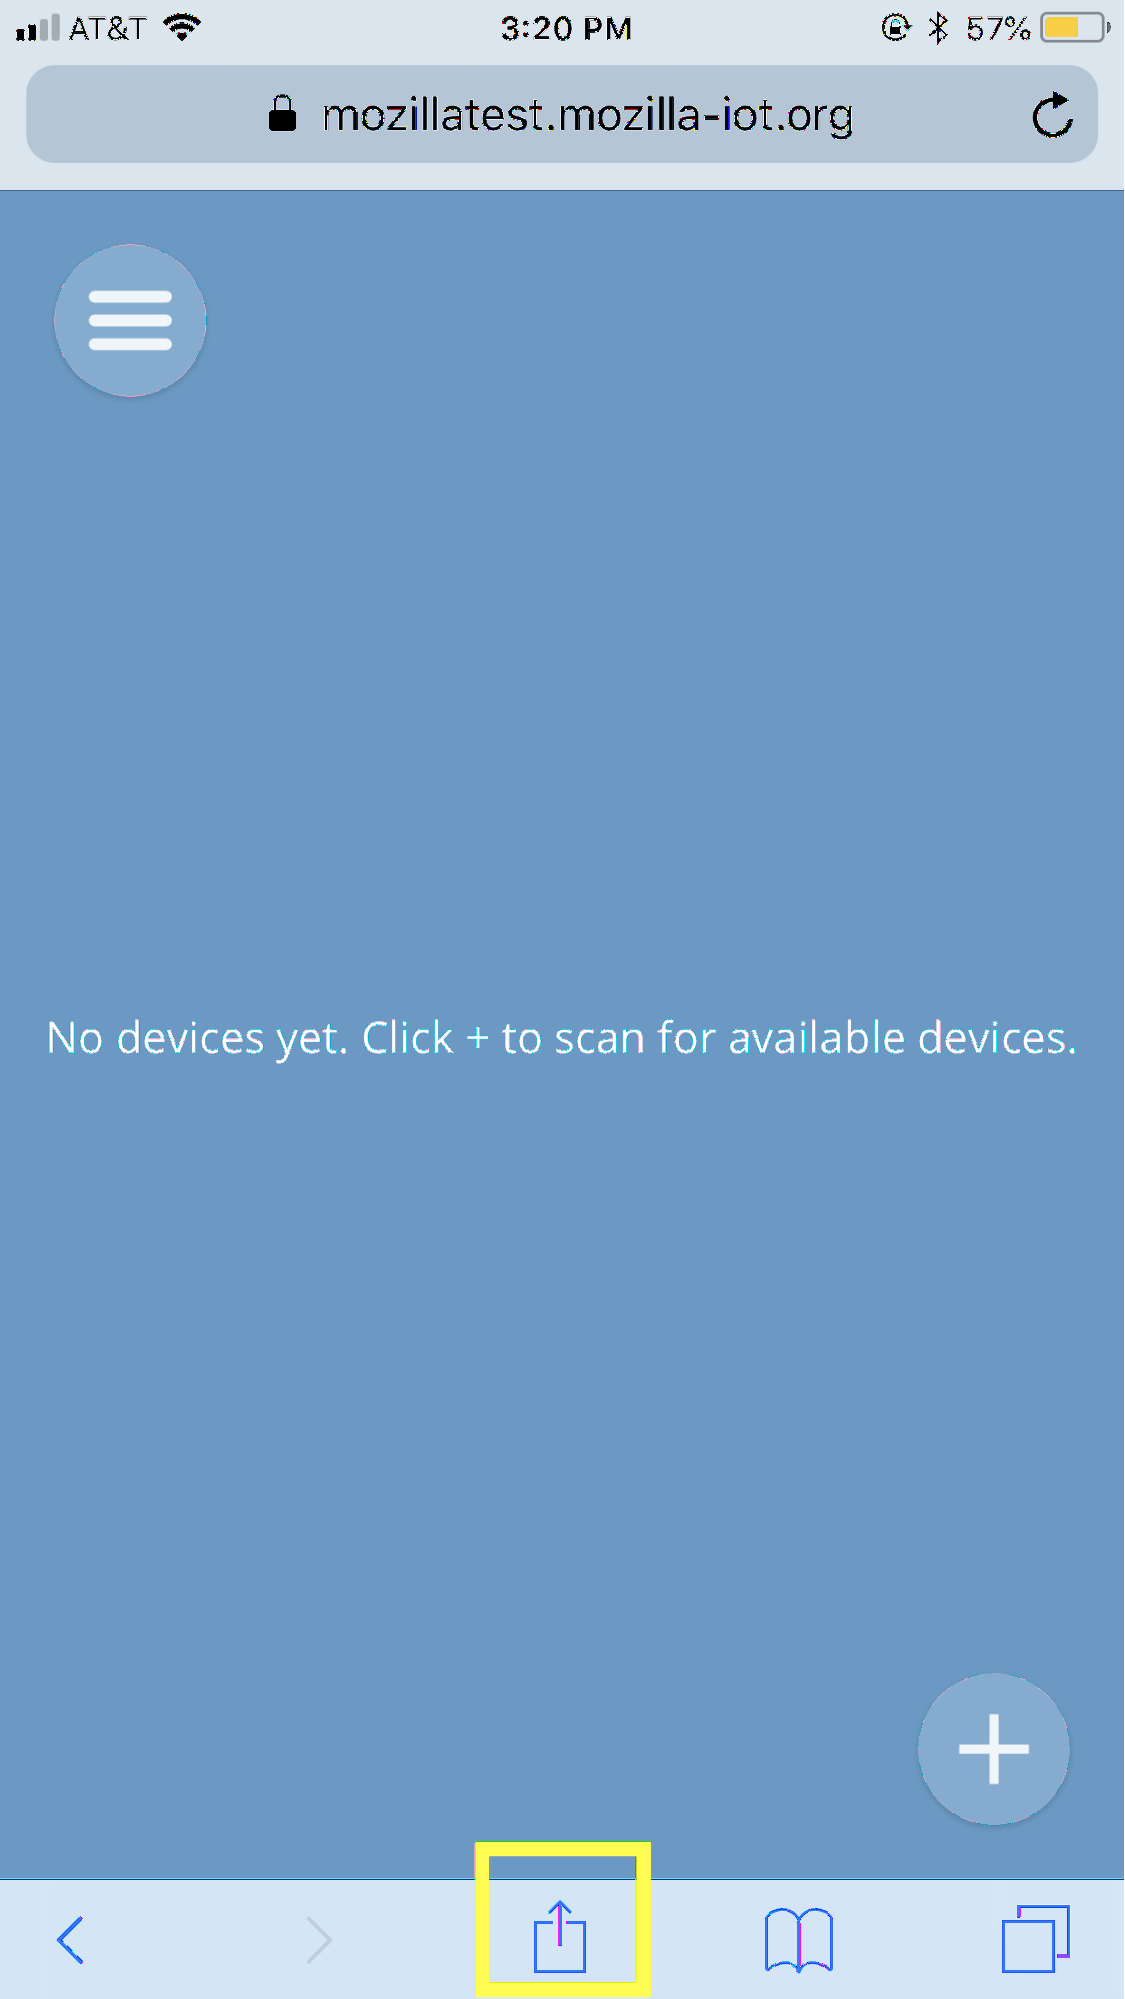
There is no single application for the gateway. Simply open the link to the gateway page through the browser of your smartphone, and all its functions will be available to you.
If you are using a Mozilla tunneling service, the link will look like [your_subdomain] .mozilla-iot.org.
Bookmark the address on your smartphone to quickly access the gateway control. You can also save Things Gateway as a web application on the main screen of your smartphone or tablet.
On Android:
- In Firefox: Click the "Add to Home Screen" icon to the right of the address bar.
- In Chrome: Select "Add to Home Screen".
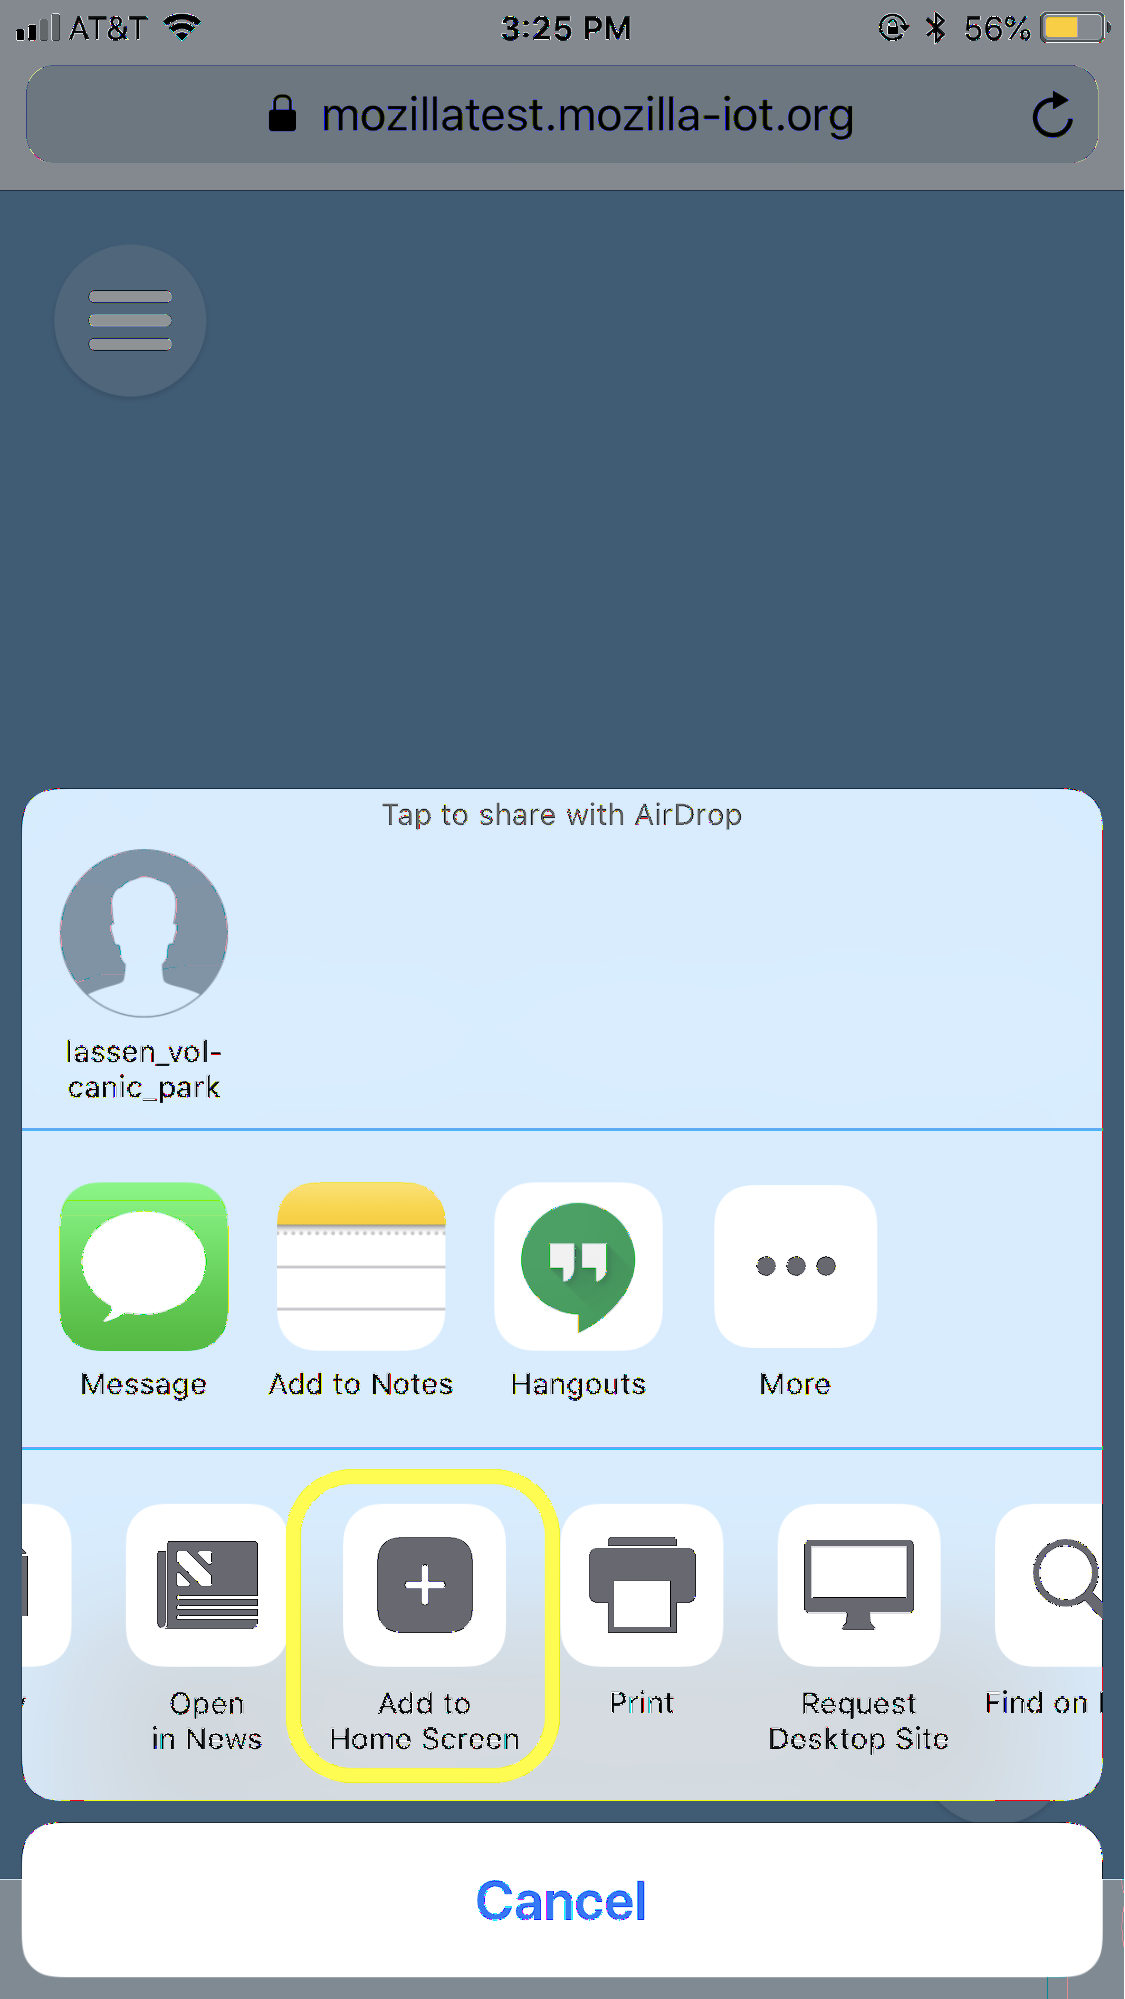
On iOS:
- In Safari: tap the share icon and then select “Add to Home Screen”.
- (In Firefox and Chrome browsers on iOS, the function of displaying applications on the home screen is not yet available.)
Iii. Connecting smart home devices
Search and add devices
Take the device that you are going to connect to the gateway. Usually for Zigbee and Z-Wave devices you need to do the following:
- Light bulbs: install it in the cartridge and make sure that you supply power to it (as a rule, the light bulb ready to be connected is lit)
- Socket or adapter: plug it into power
- Other devices: turn on and / or connect to power
- Devices on batteries (sensors, buttons, thermometers): remove the sticker from the battery compartment, or insert the battery
Tip: Some devices are already attached to the controller or proprietary gateway. Follow the manufacturer's instructions to reset to factory settings before connecting to the Mozilla gateway. Look for details in the appendix to this article or on the wiki.
We recommend adding devices to the gateway one by one.
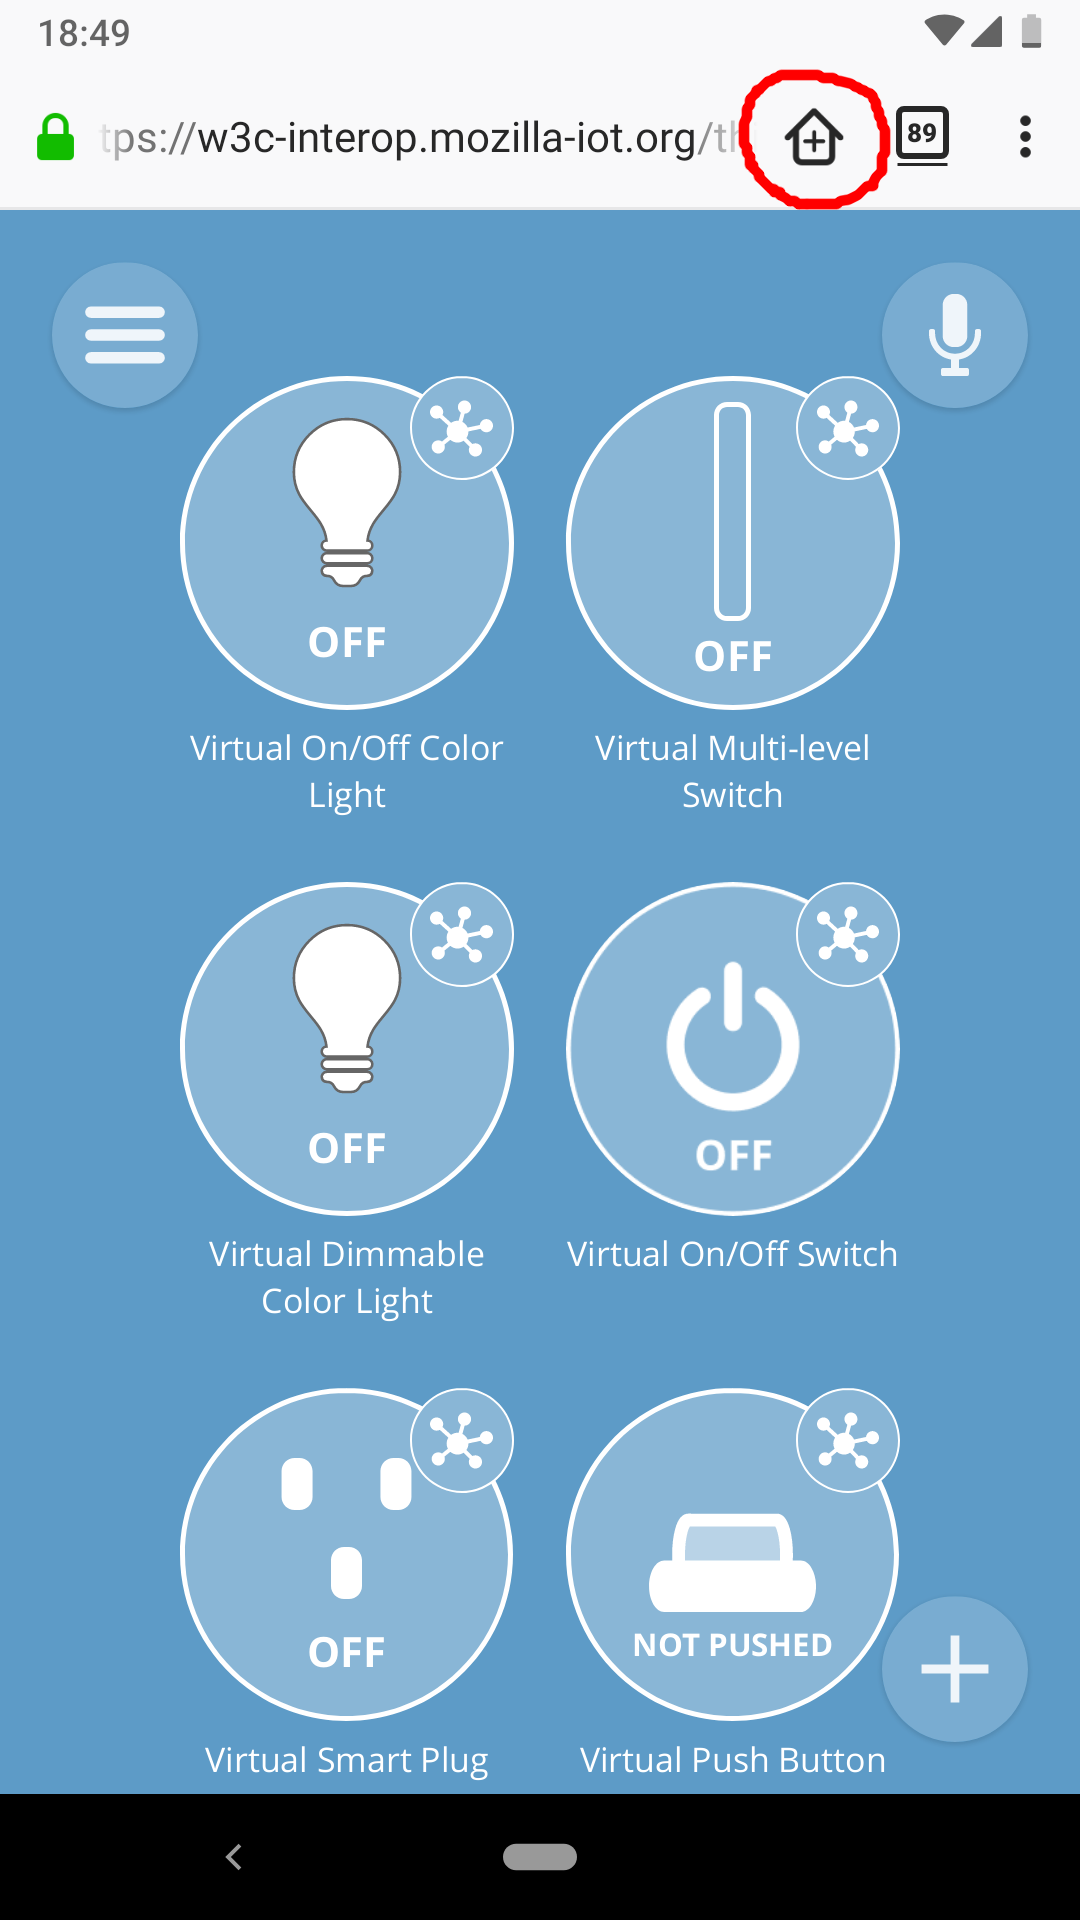
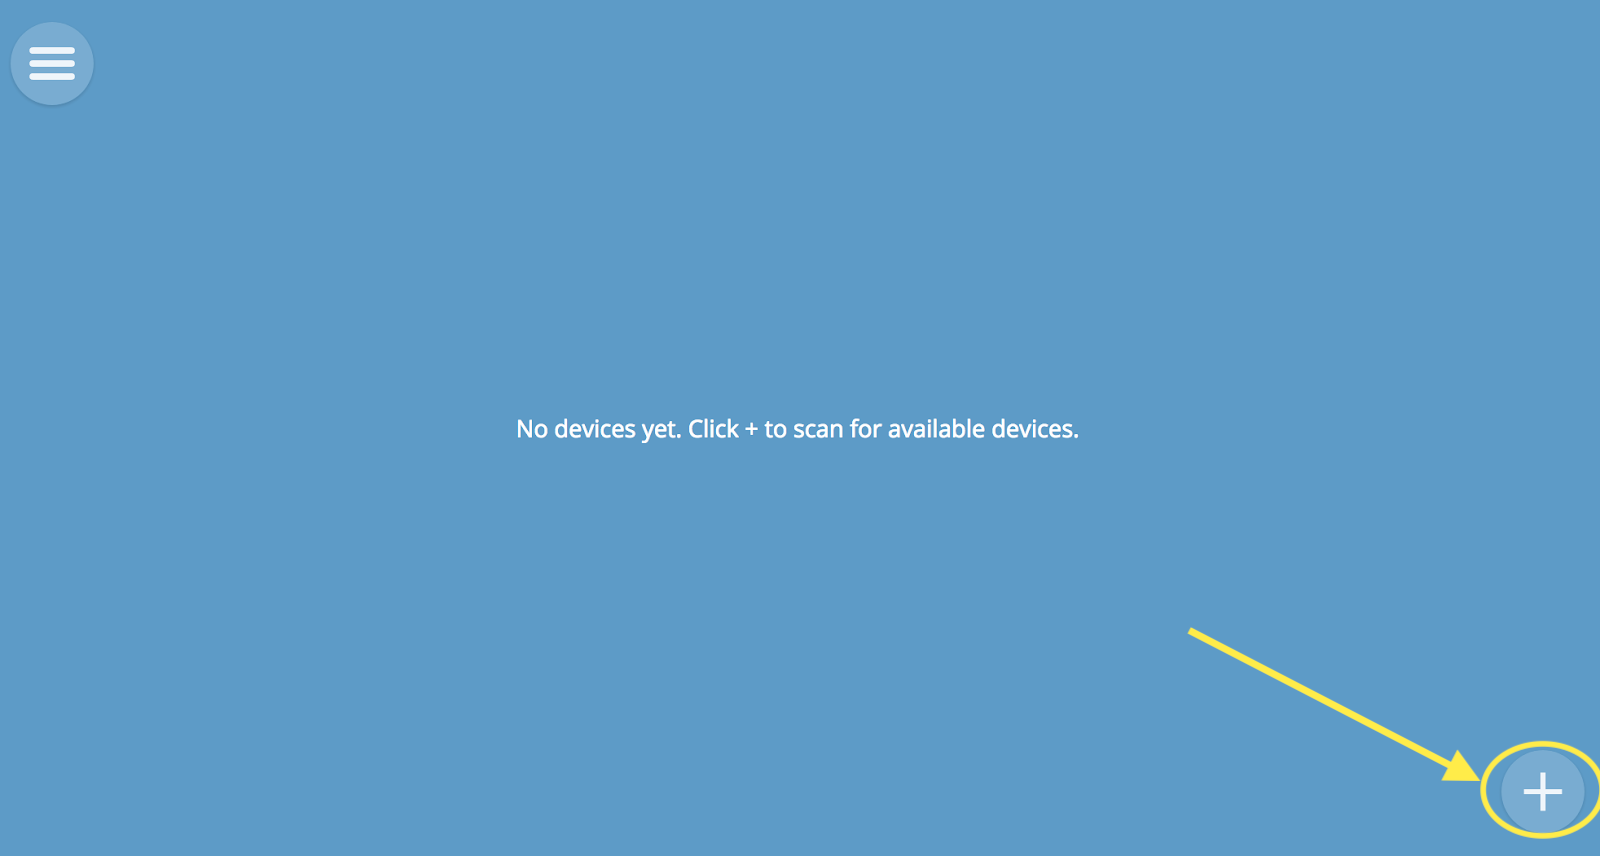
On the Things main page, select ![]() button in the bottom right. The gateway will search for unconfigured devices nearby.
button in the bottom right. The gateway will search for unconfigured devices nearby.
When the device is detected, it will appear on the Things page. Give it a name and click “Save” to add it, and “Done” when you are done.
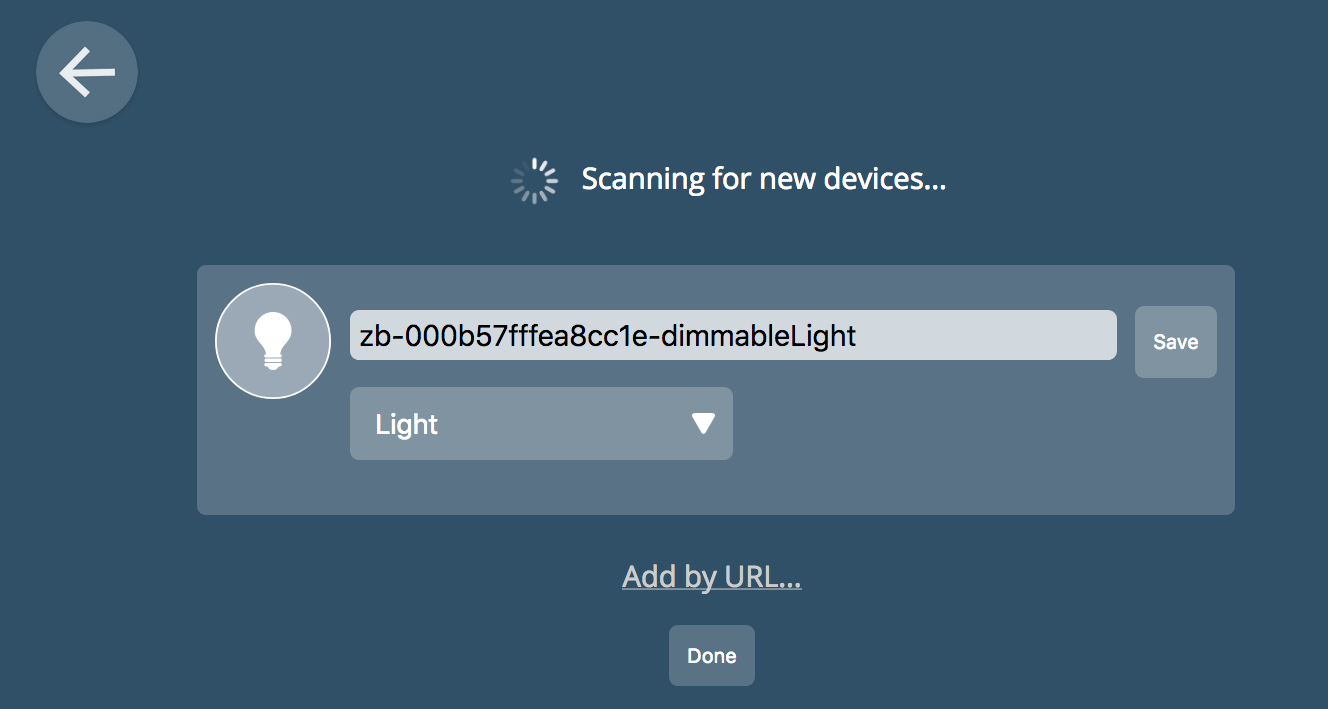
Tip : Use a catchy name to always understand what this device is. For example, "Light in the bedroom." If in the future you want to use the voice assistant to control the device, give it a simple name in English.
Repeat these steps for each of your smart devices. Turn on and scan one device at a time so as not to get confused.
Device management
First, let's see what features the device has, how to monitor it and how to control it. In the next section, we will create rules for automation and device interaction.
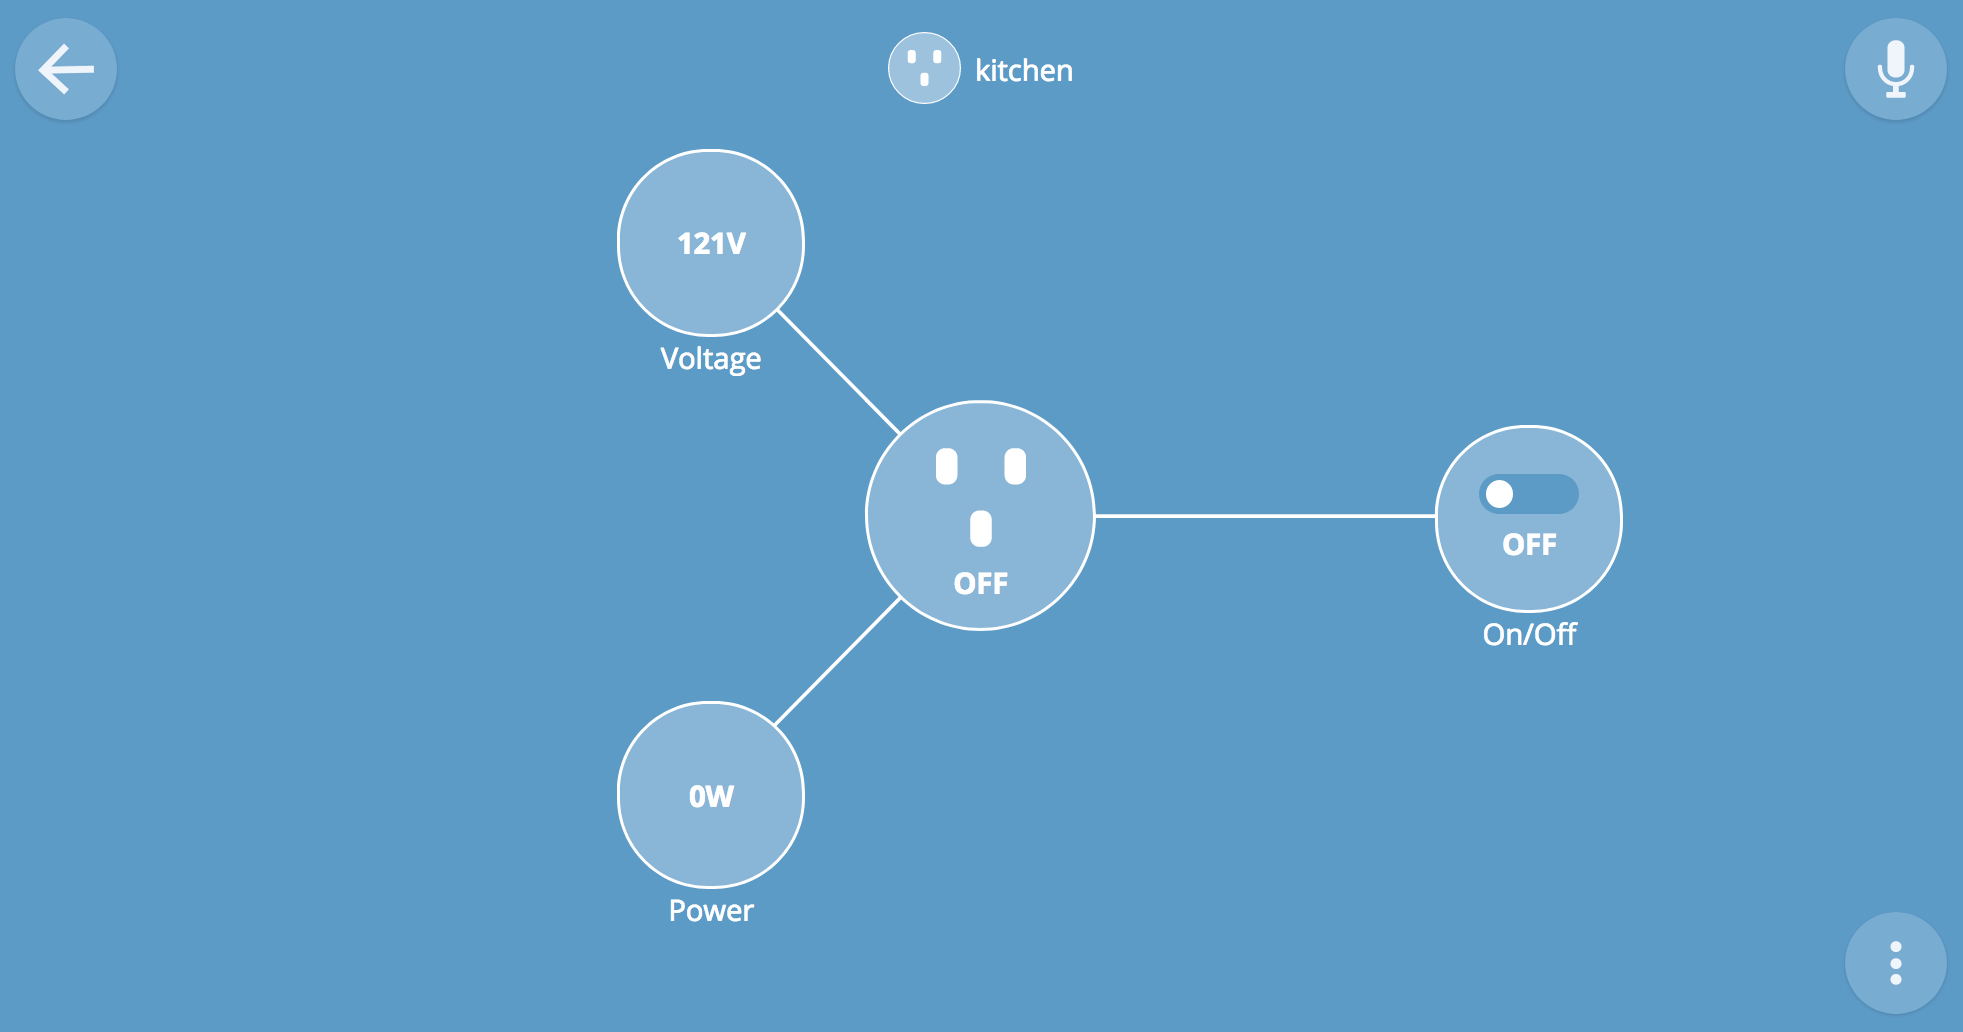
Devices are displayed on the Things and Floorplan pages. Simply click on the device's icon to switch its status — for example, turn the light bulb on or off. The screen also shows the current state of devices - for example, door opening sensors or motion sensors.

To see the details or control the device more finely, click on the icon ![]() in the upper right corner of the device icon. A page will open with details.
in the upper right corner of the device icon. A page will open with details.
To rename or delete a device, press ![]() in the lower right.
in the lower right.

Iv. Automation
When devices are connected to the gateway, you can proceed to create automation rules. Let's try to create a simple rule.
Rule creation
Go to the “Rules” page from the main menu. Click ![]() in the lower right to create a new rule. The basic logic for the rules: If (A), then (B) If necessary, instead of “if” you can use “bye” (while), combine incoming conditions from several sources (A), and also perform several actions at the output (B ).
in the lower right to create a new rule. The basic logic for the rules: If (A), then (B) If necessary, instead of “if” you can use “bye” (while), combine incoming conditions from several sources (A), and also perform several actions at the output (B ).
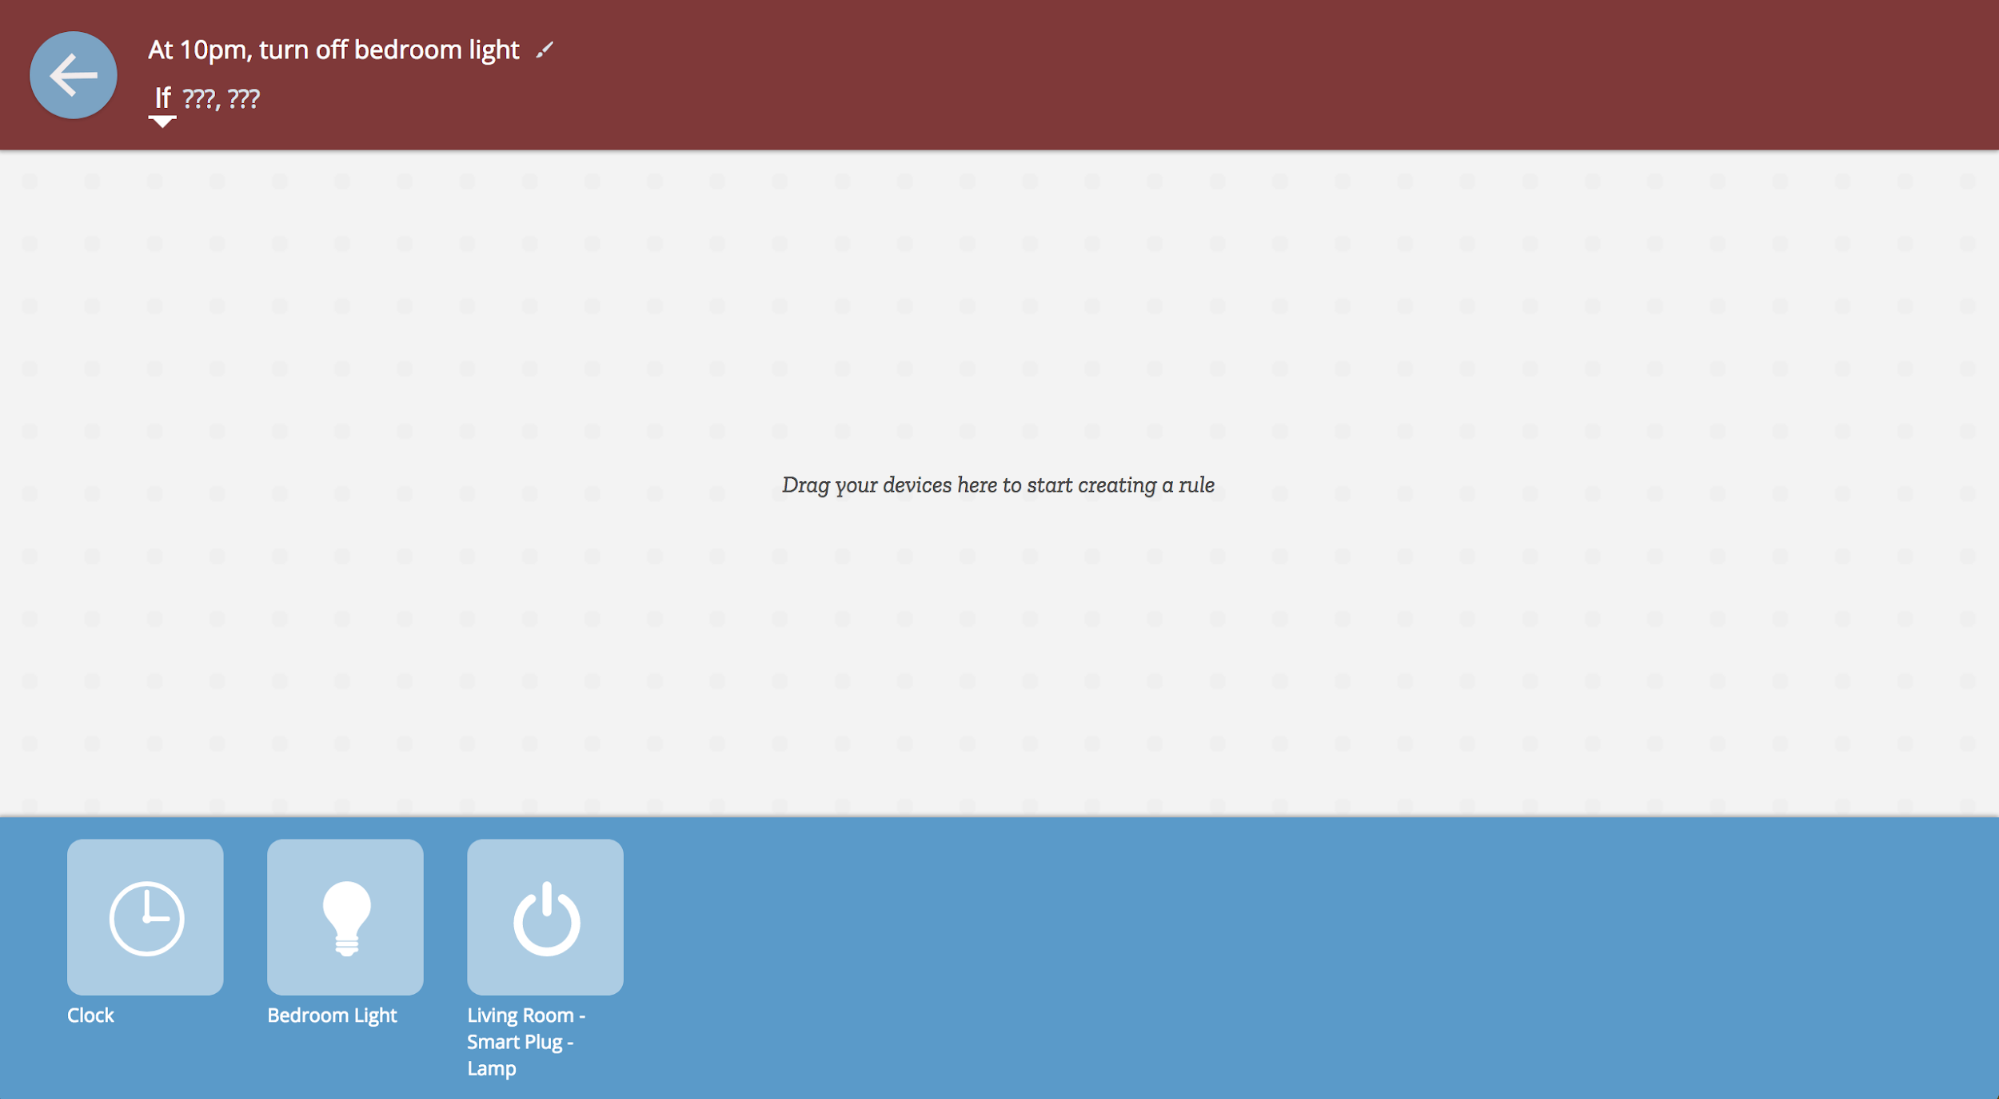
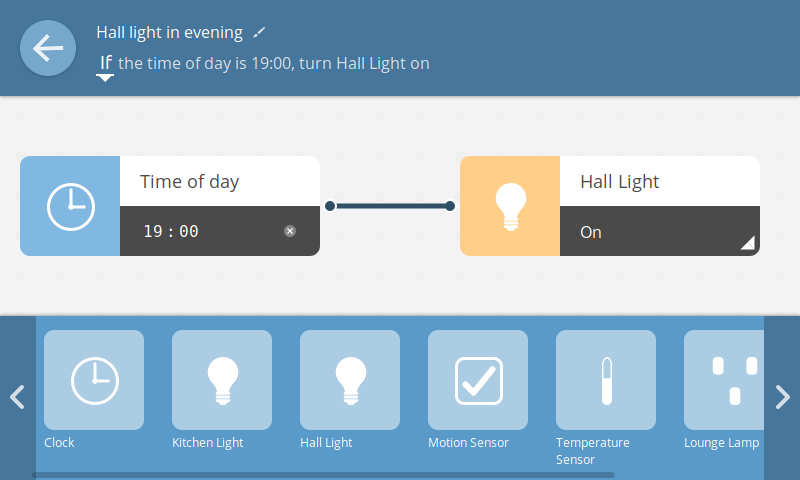
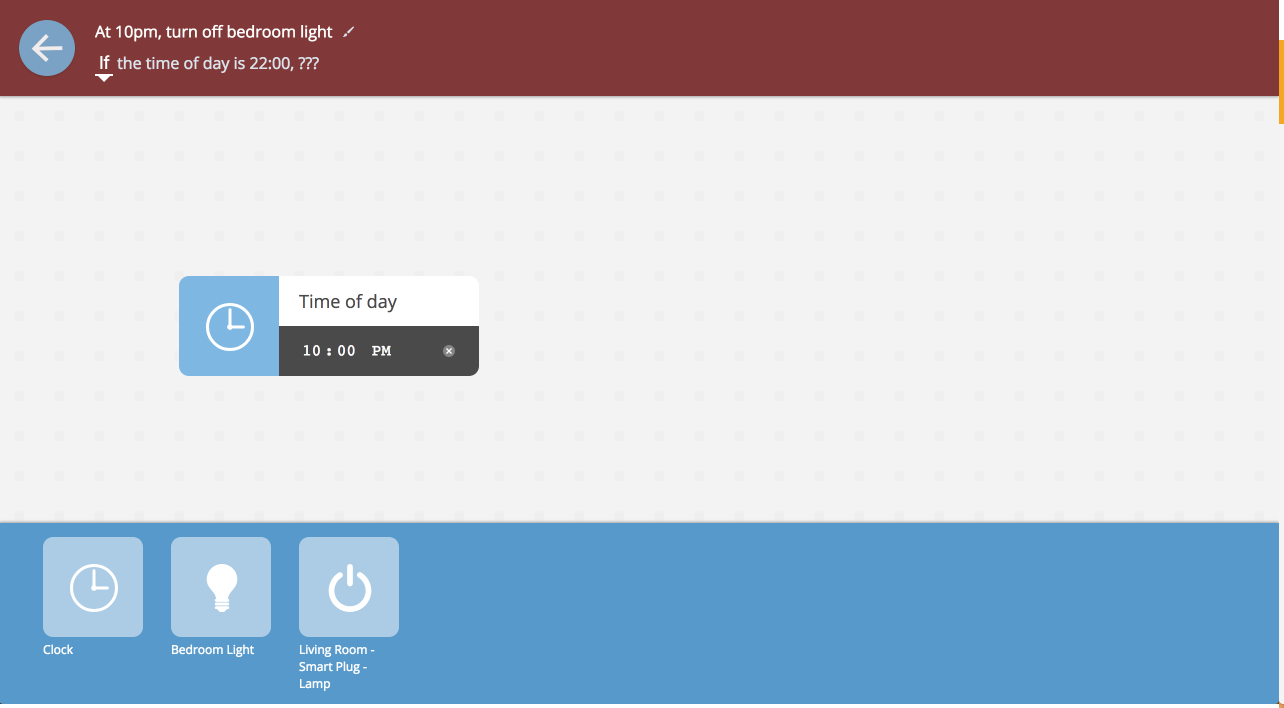
Let's start with a simple one: at the entrance (A) there will be time. Drag the “clock” from the bottom of the screen to the left side of the rules. Suppose we want the action to happen at 10:00 pm Set the clock to 10pm.
Now we select the output: a smart light bulb called “Light in the bedroom”. Drag the light bulb you want to turn off at 10:00 pm to the right side of the rules.
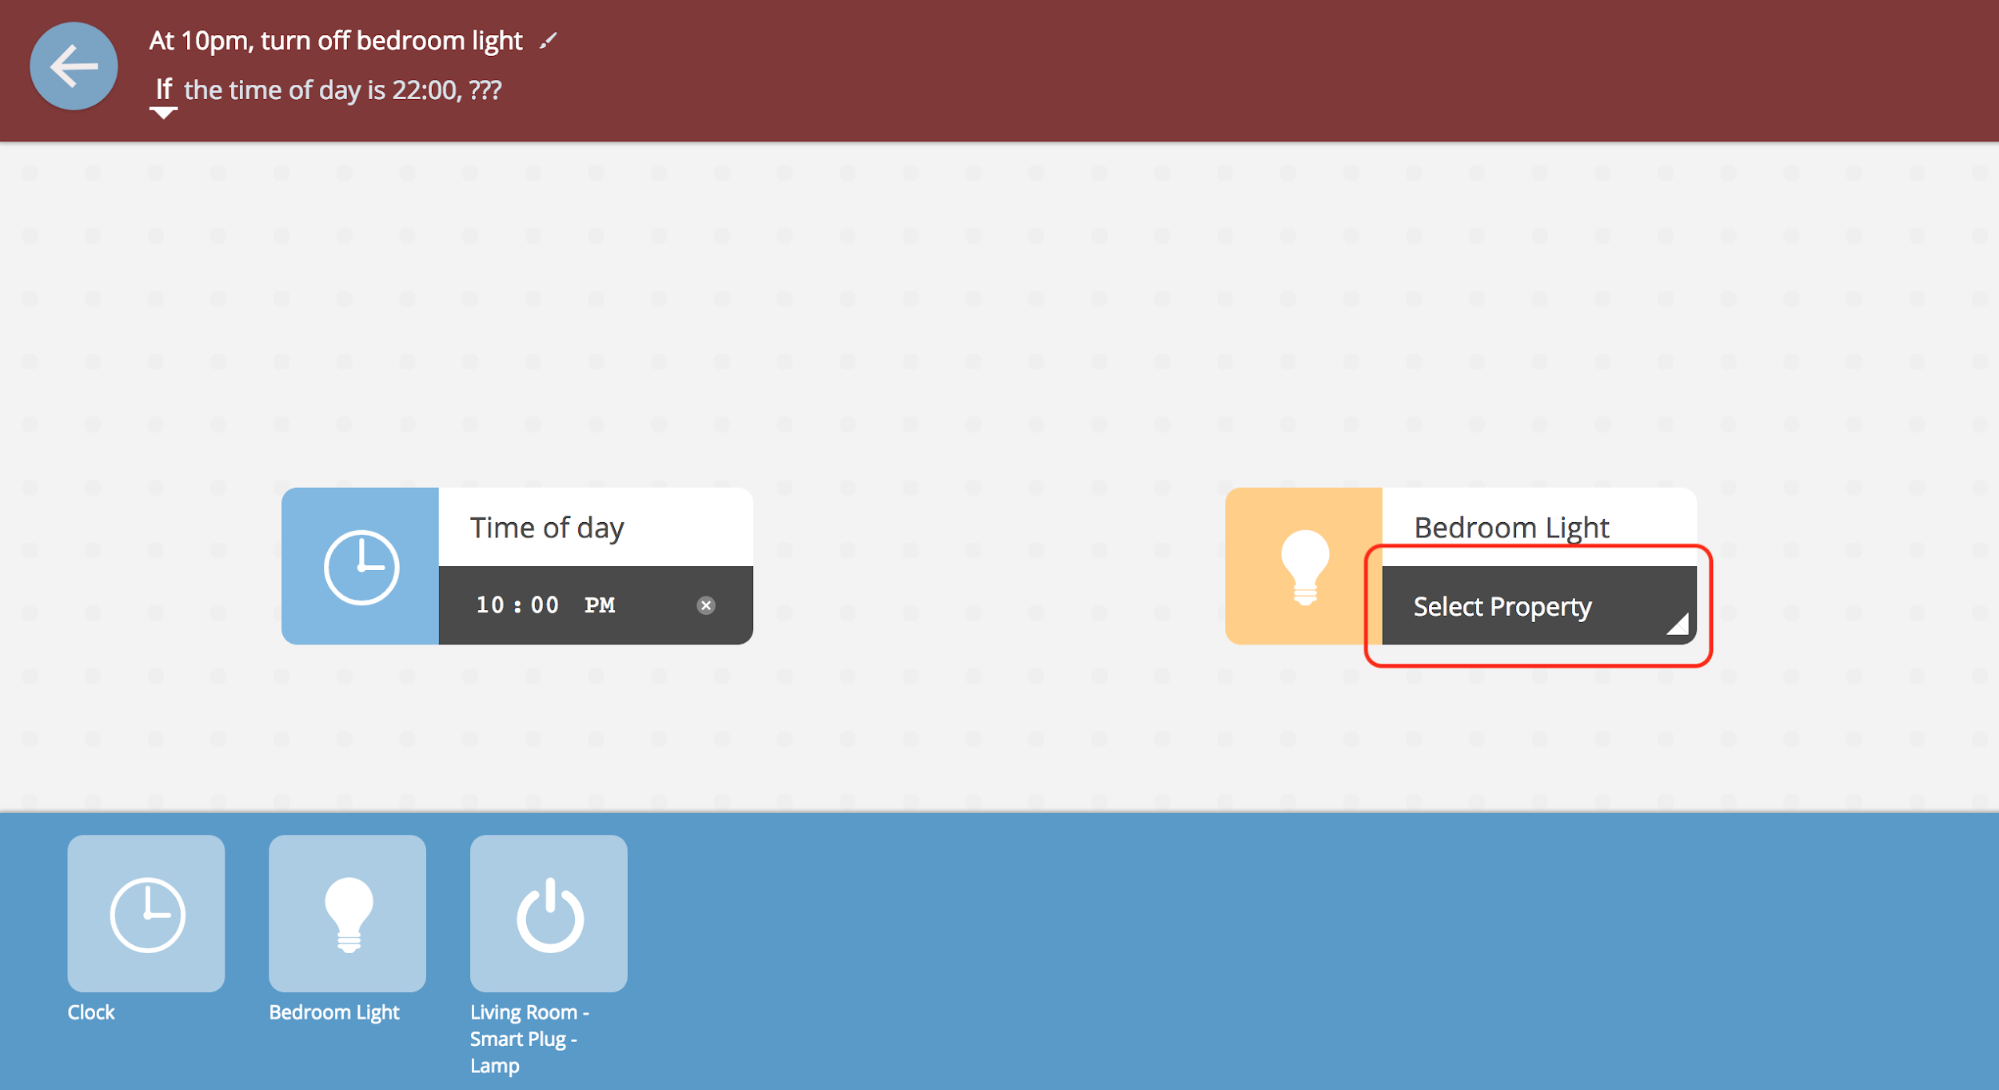
To execute the rule, select the desired property of the light bulb that you want to set at 22:00. In this example, we want to change the state of the light bulb to “Off” at “10pm”. Open the light bulb menu and select “Off”. The clock and the light bulb are now connected by a virtual black line, and the condition “if2 under the rule name is updated to display the logic of the rule.
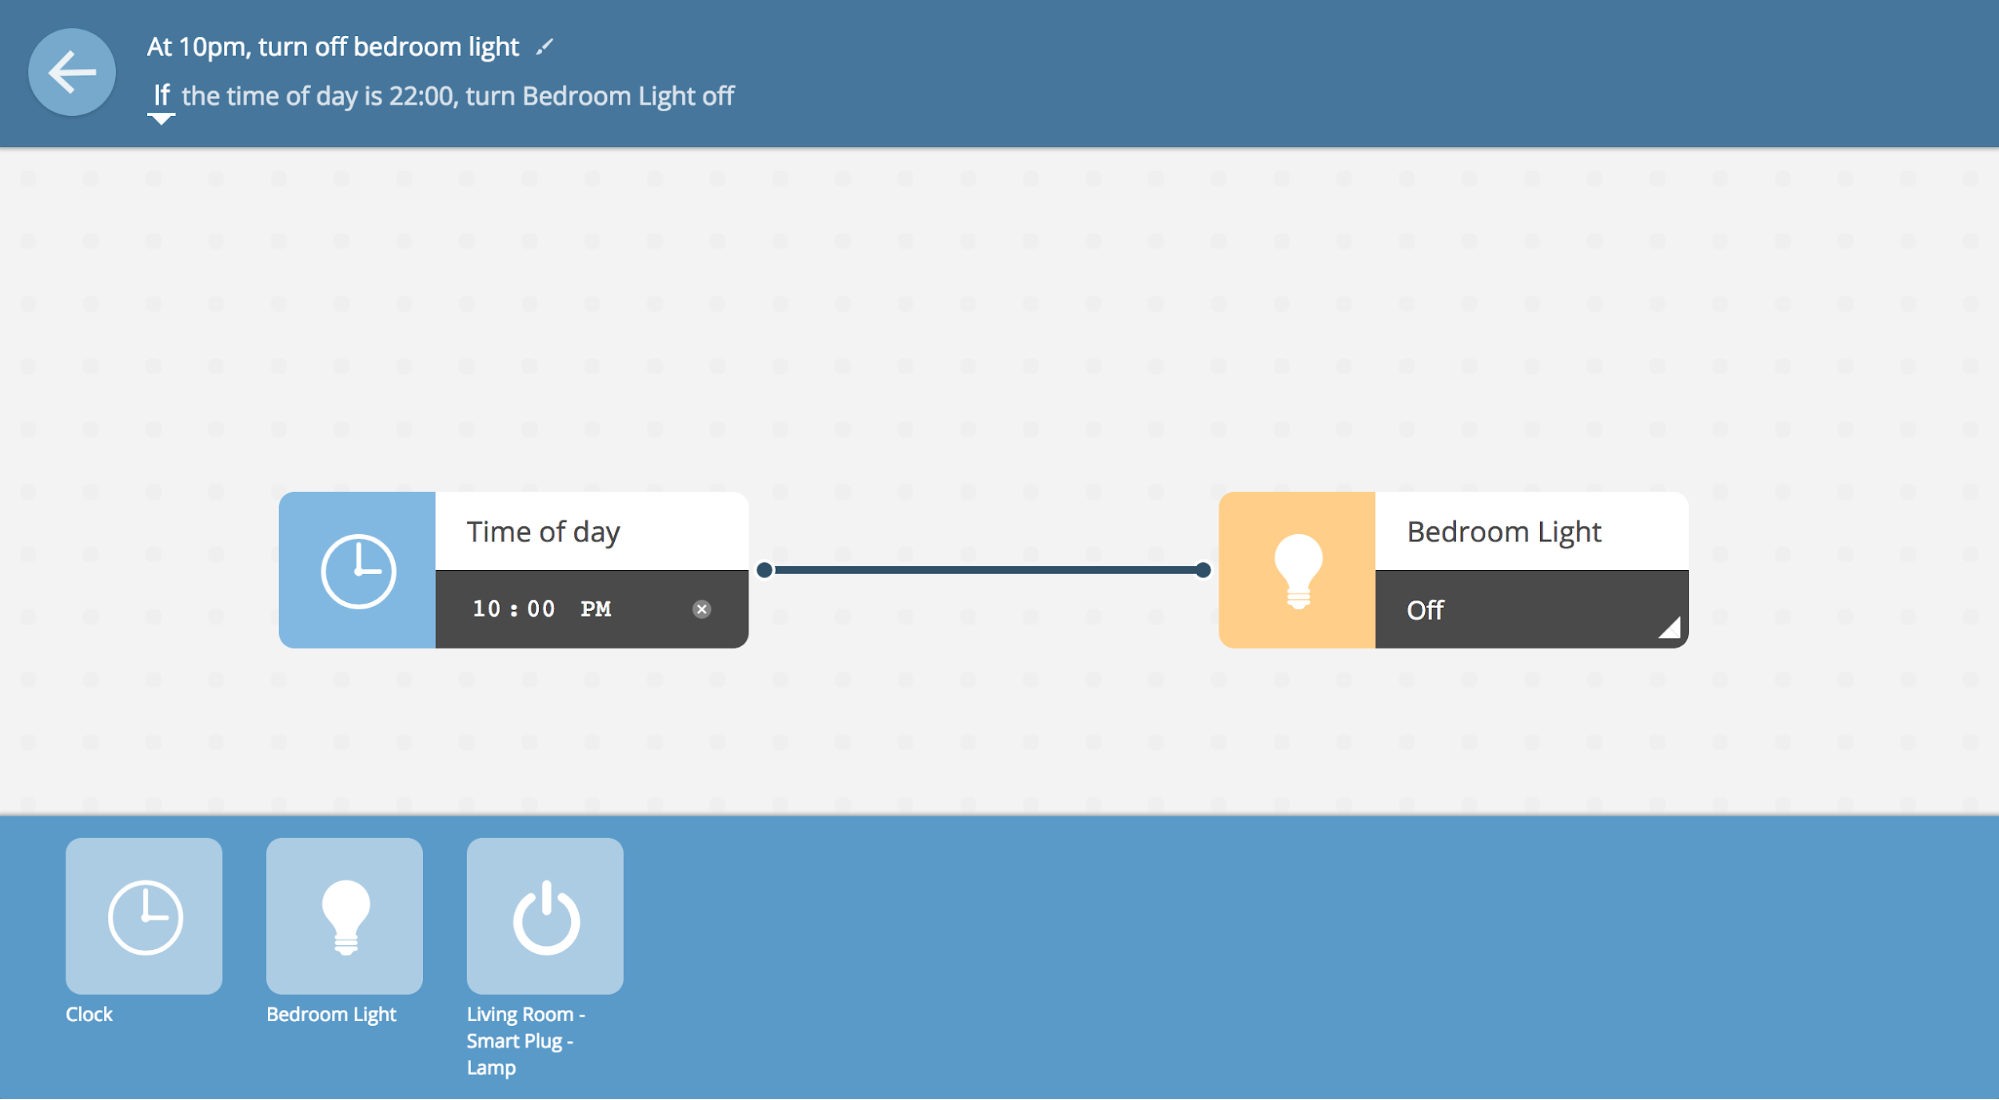
Click on the pencil icon in the lower left corner next to the “Rule Name” to change the name of this rule. You can, for example, call it "Turning off the lights in the bedroom at 22:00". For time based rules, the “if” logic is appropriate. For other situations, for example, to turn on the light only when the door is open, you can change the logic to “bye”. If you need to combine several input parameters, you can use the logical conditions "and" / "or".
Click the back arrow in the upper left corner of the Rules (next to the name) to save the rule and return to the main page of all rules.
Rule management
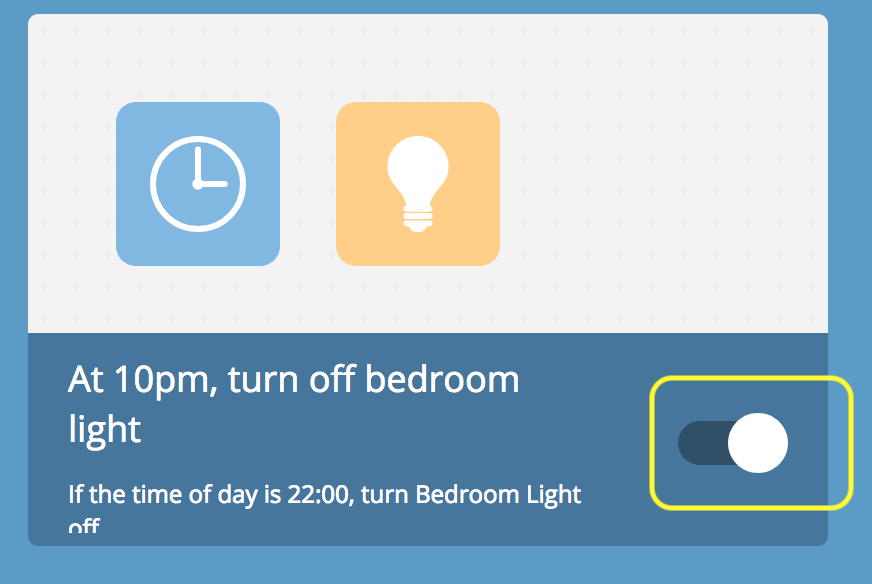
On the Rules main page, each rule is represented as a rectangle.
- View / edit You can view the rule by hovering the cursor over the middle of the rectangle and pressing the “Edit” button.

- Switching You can turn off the rule by moving the toggle switch to the left position (it will turn gray). You can turn the rule back on by moving the toggle switch to the right position (it will turn white).
- Deleting To delete a rule permanently, hover the cursor over the rule rectangle, and click on the “X” button in the upper right corner.

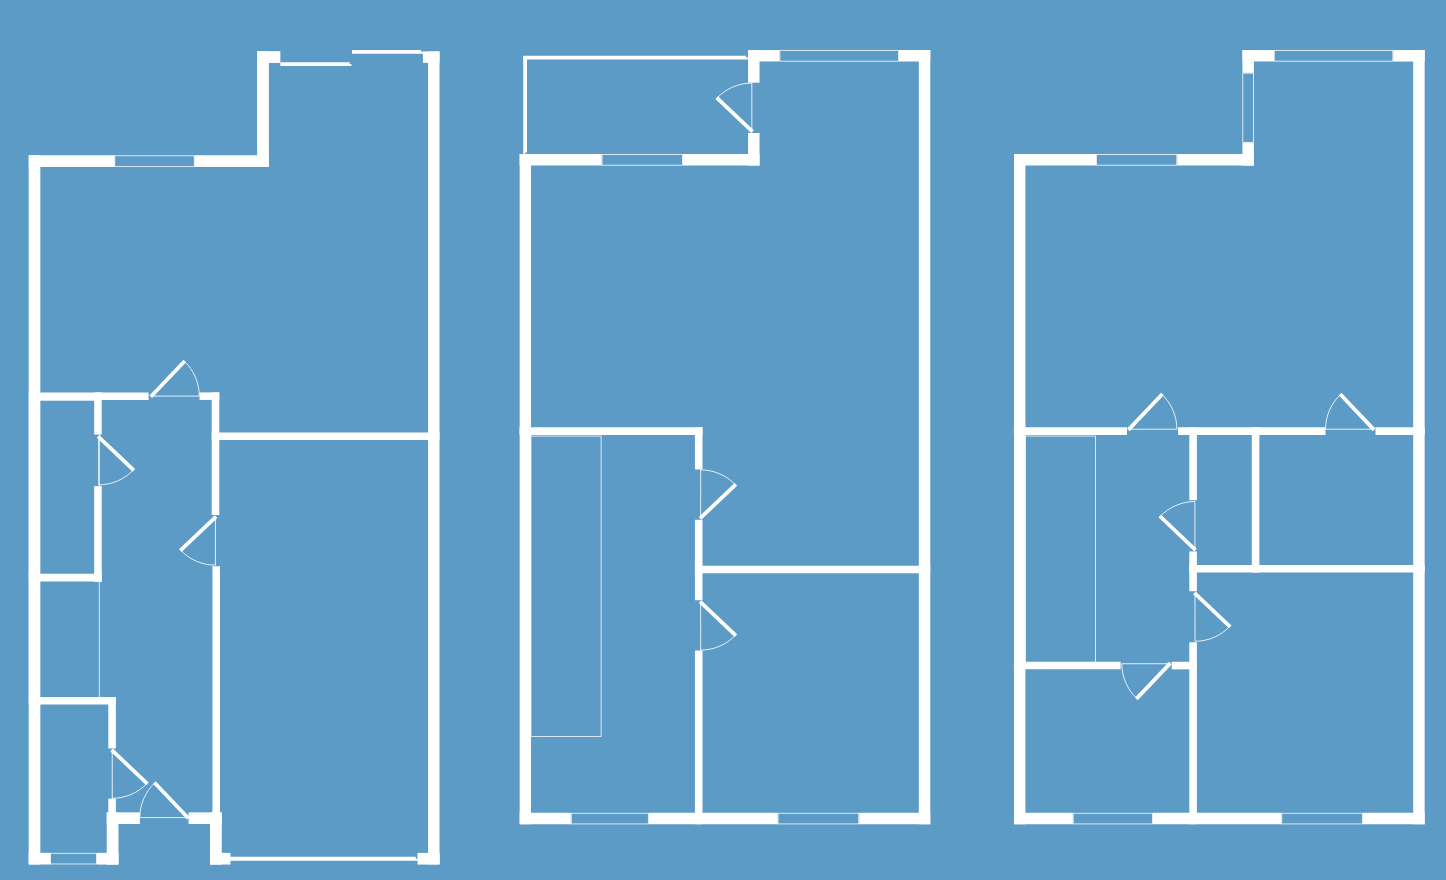
V. Device Layout
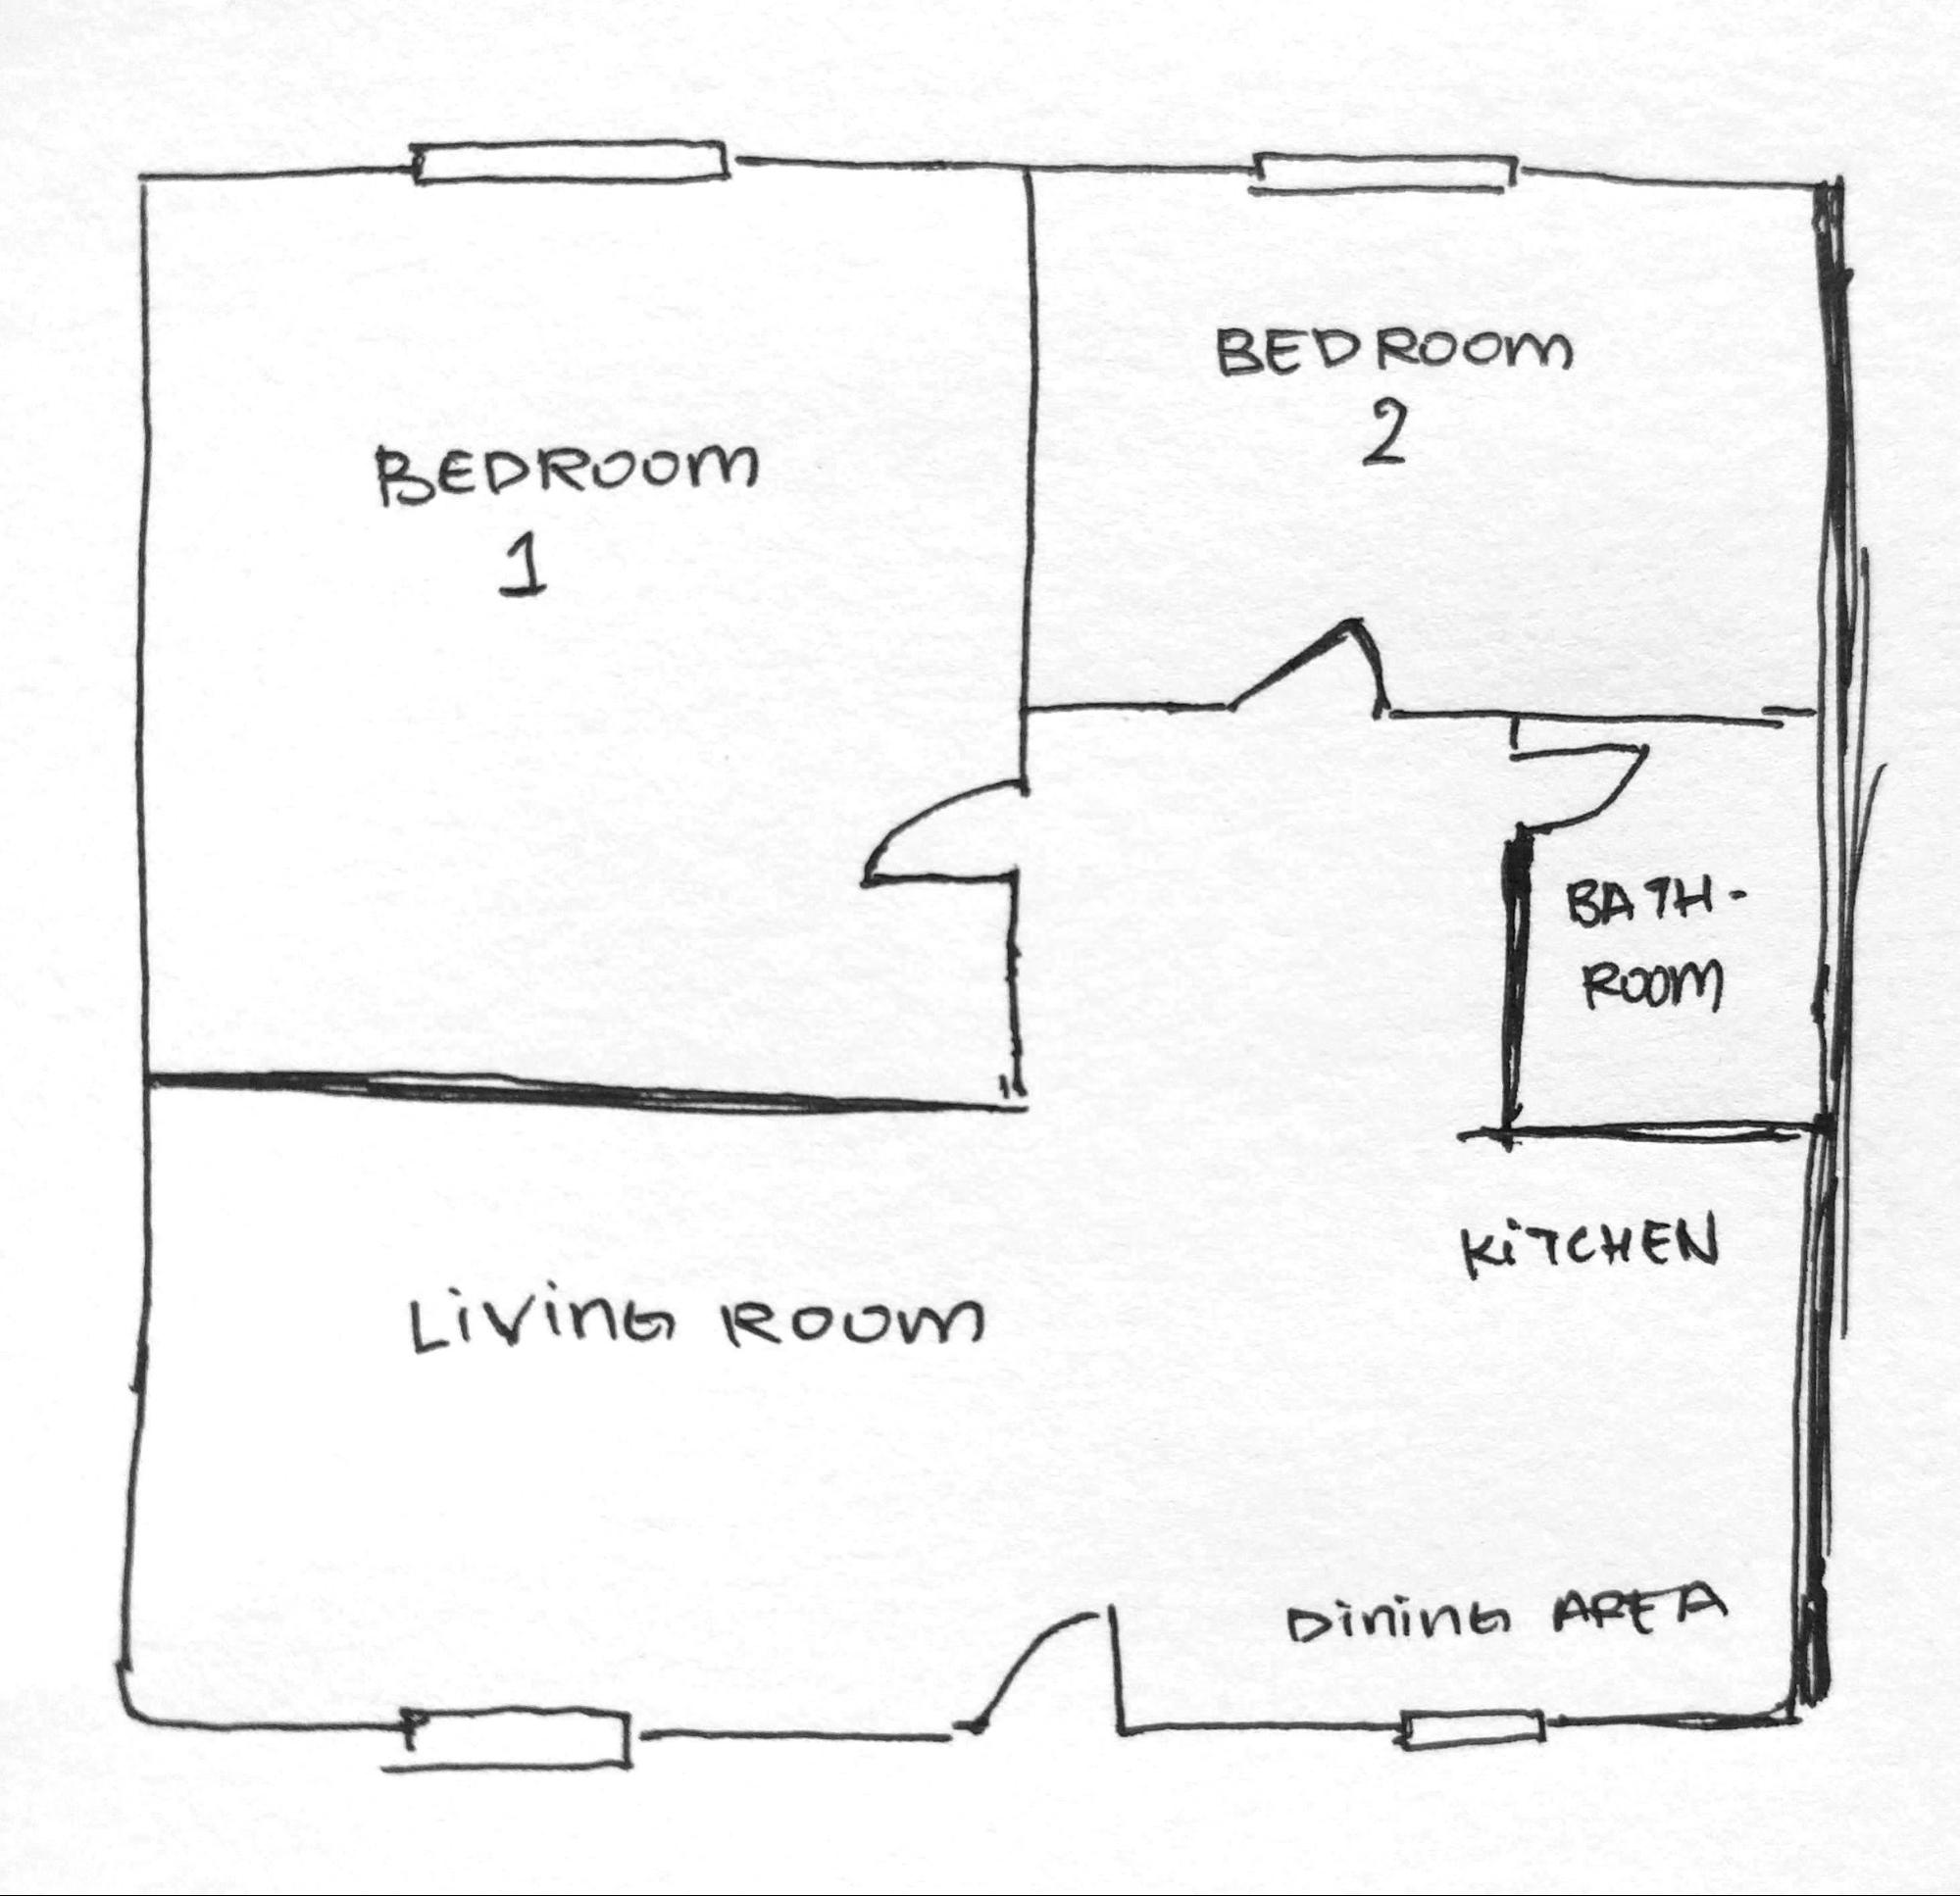
The floor plan allows you to visualize the location of devices in space. It shows all your devices from the Things page, but allows you to tie them to a specific place on the diagram of your house. Here you can also click on the device to switch its status, as well as on the Things page. However, to view the details of the device, you need not just click on it, but press and hold.
Creating a room map
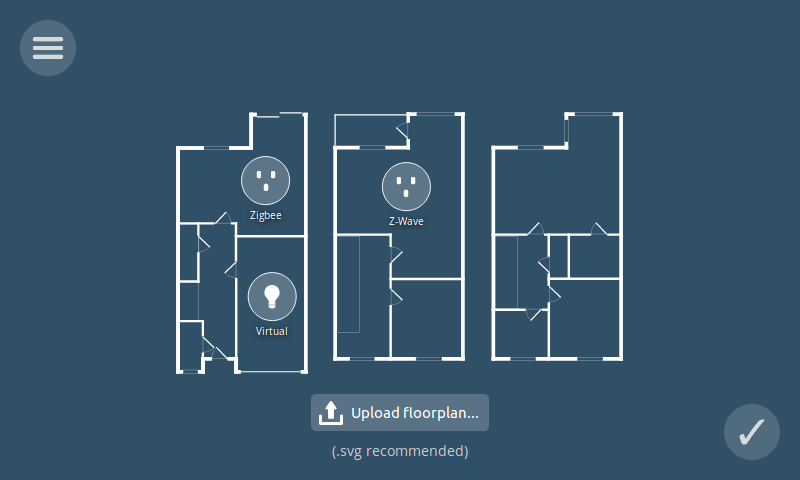
Draw a plan of your house and save it as a picture. This can be a drawing in a graphic editor, or a photo of a drawing by hand. If you are photographing a plan on a smartphone, you can download it directly to the gateway via the web interface on your smartphone.
Tip : Vector SVG format with a transparent background (created, for example, in InkScape or Sketch), will look neat and minimalist.
Loading circuit
Click on the icon ![]() in the lower right corner of the room layout page to switch to edit mode. Click on the “upload image” button that appears and select the image with the scheme.
in the lower right corner of the room layout page to switch to edit mode. Click on the “upload image” button that appears and select the image with the scheme.
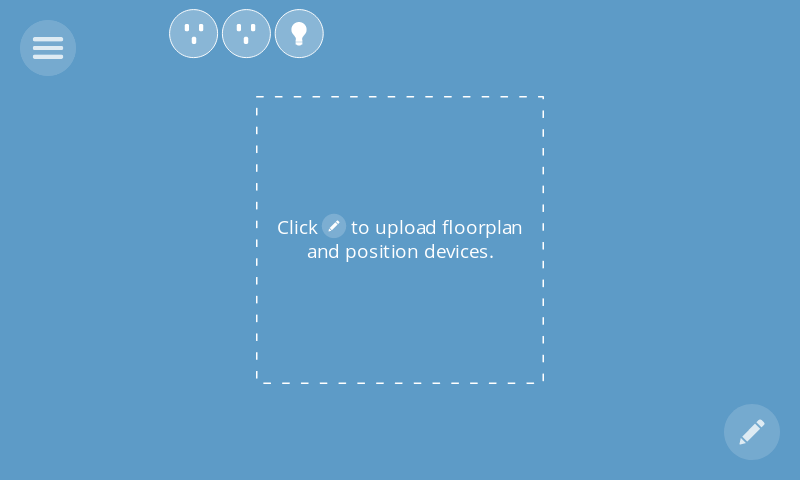
After the image is uploaded, you will remain in edit mode, and you can move the device icons from the top of the page directly to the diagram. When done, click on the checkbox ![]() in the lower right.
in the lower right.
Vi. Addons: new gateway features
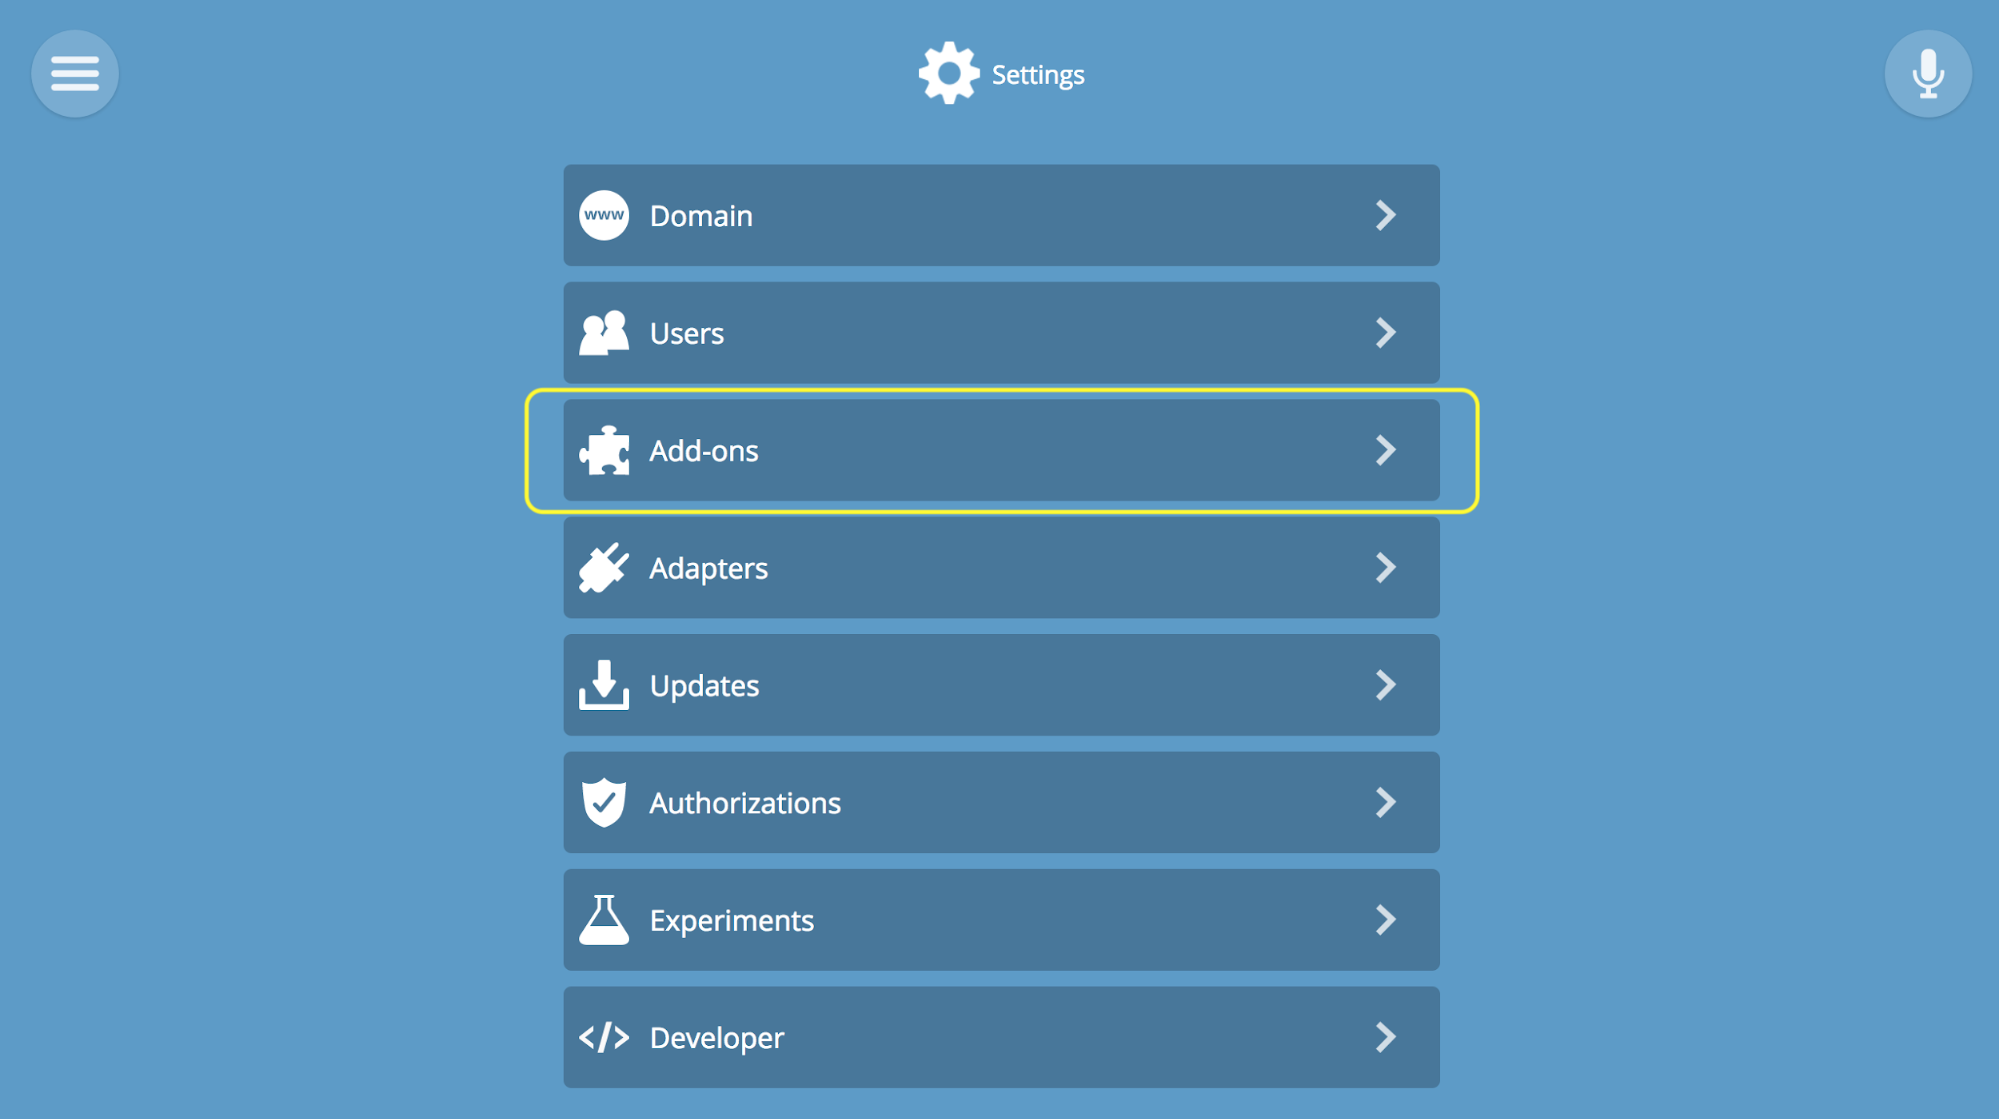
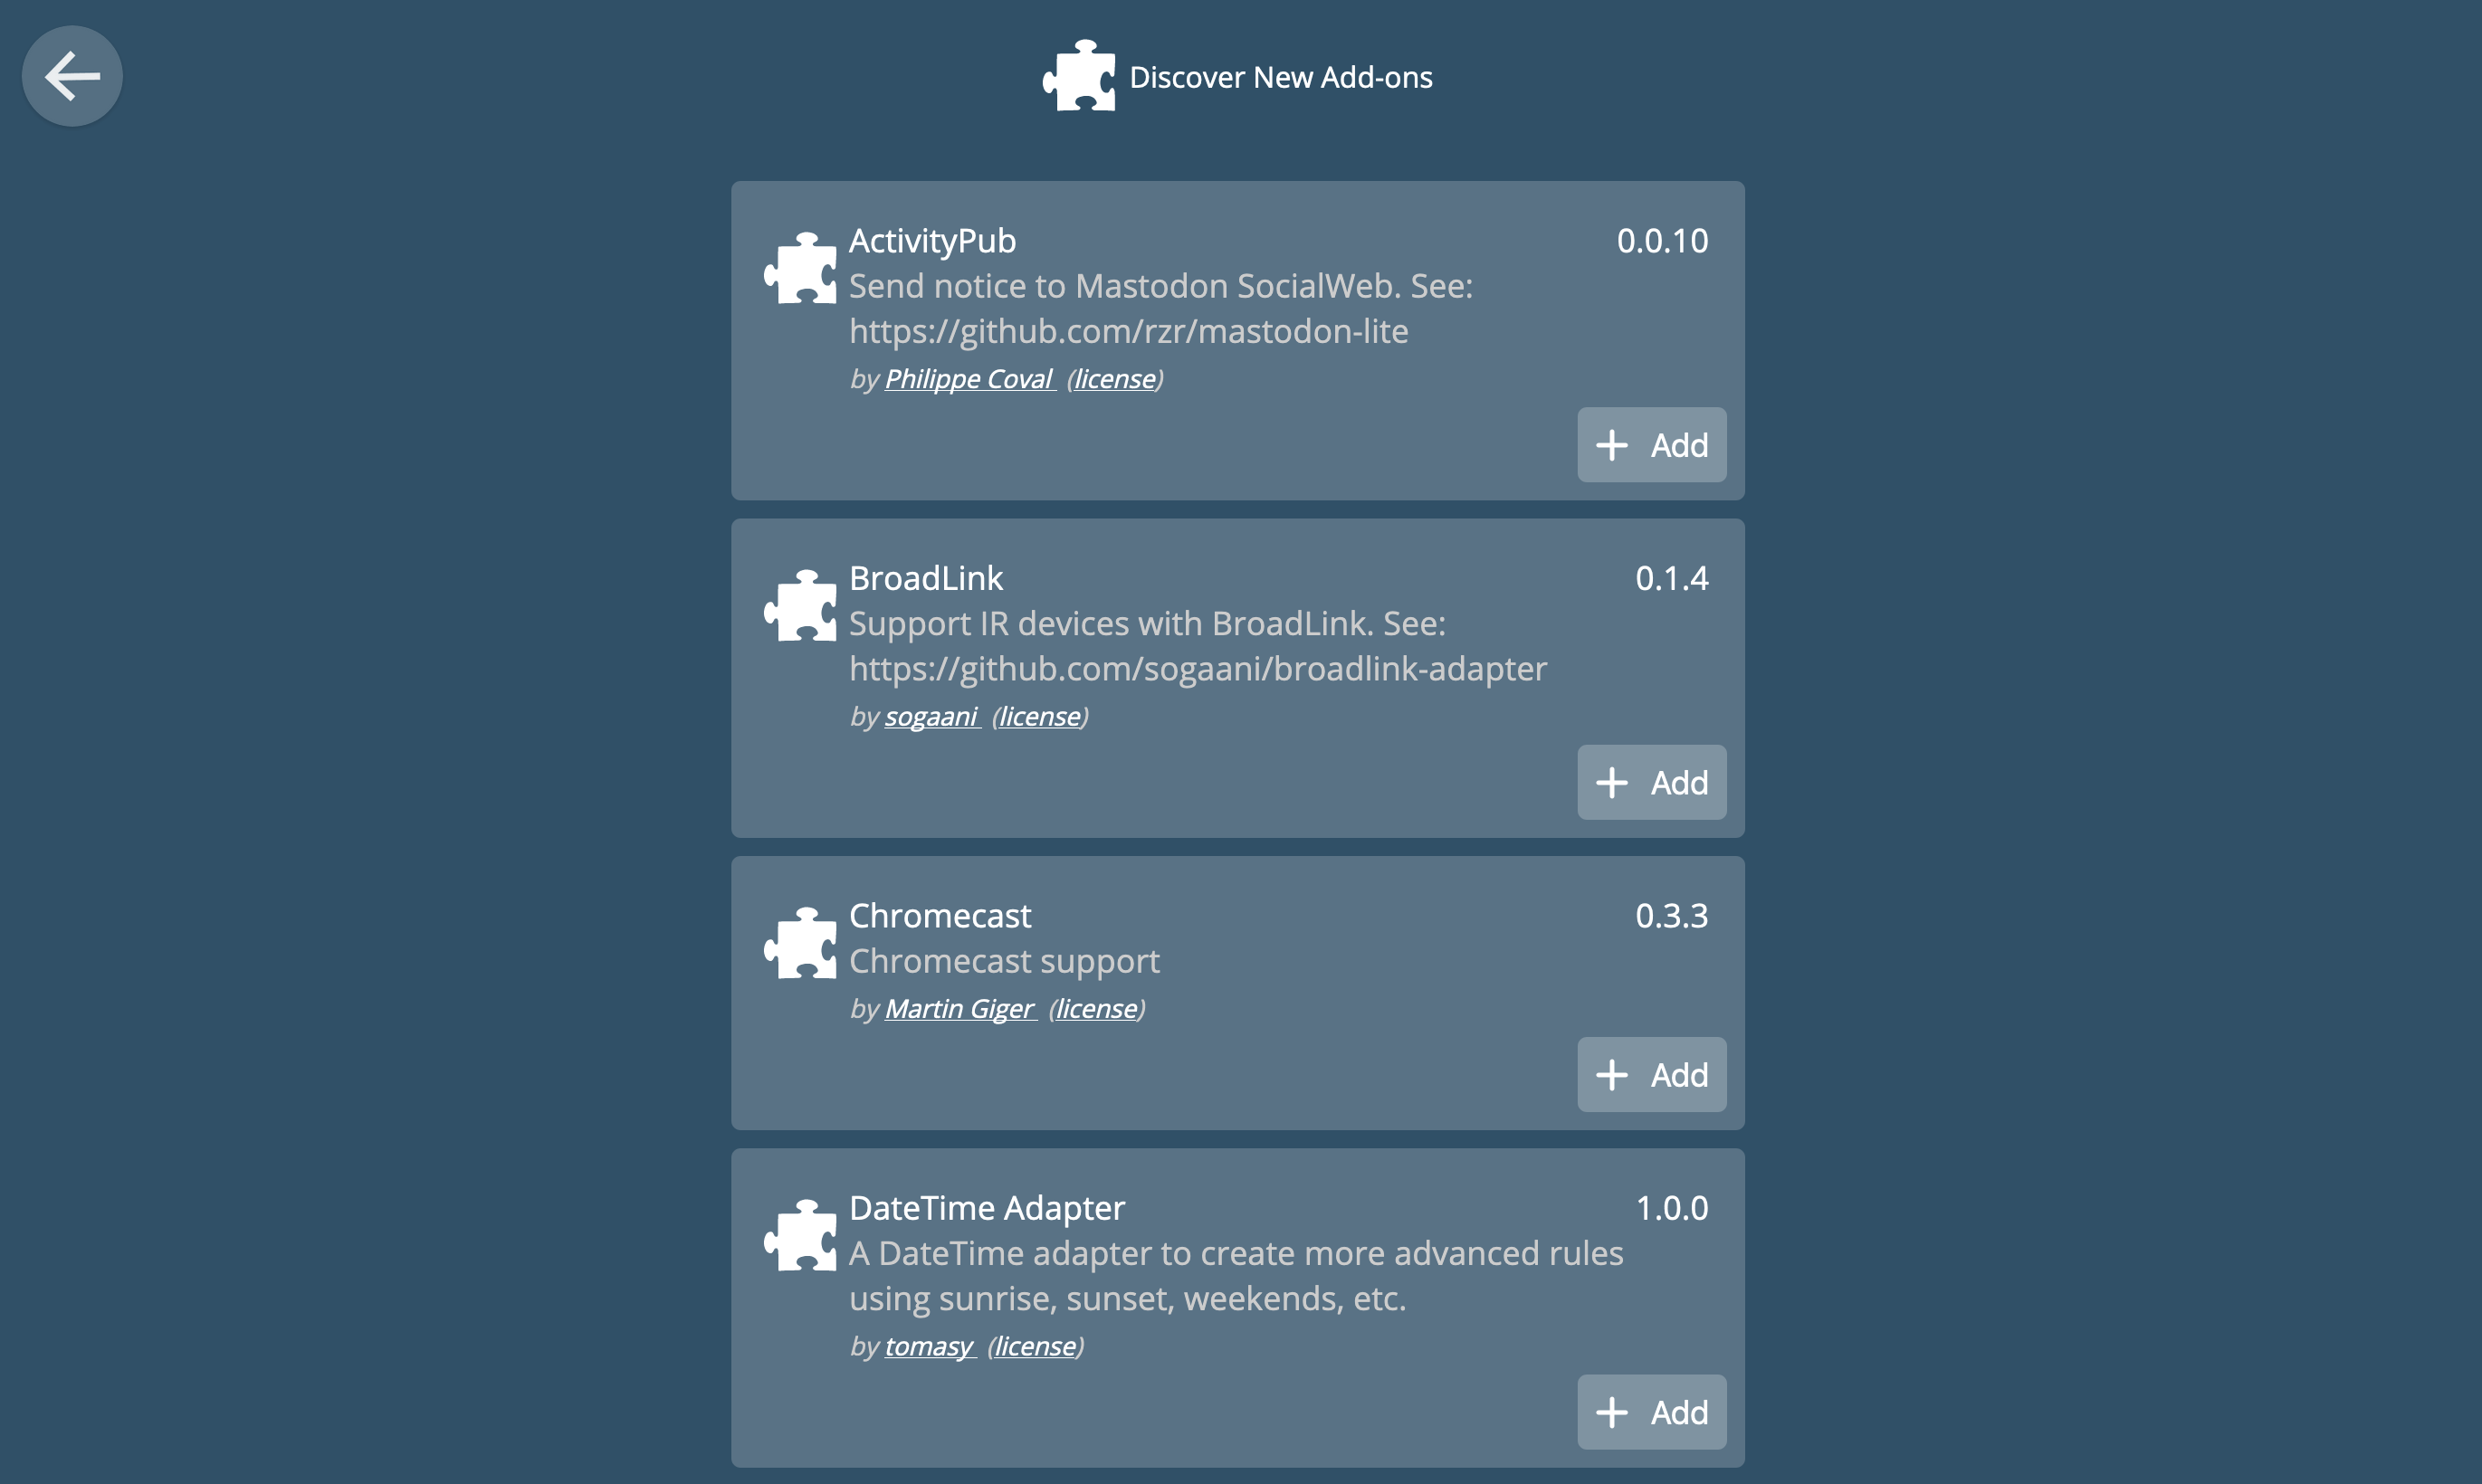
In the gateway there is support for add-ons that expand its capabilities. By default, Web Thing, Zigbee and Z-Wave add-ons are already installed so that you can start working with many devices without additional settings. But if this is not enough for you, you can add support for other brands or devices by installing appropriate add-ons. Addons are located on the Add-on page in Settings (Settings).
Install addons as needed
On the settings page, select Add-Ons.
To add-ons, click on the (+) button in the lower right corner, select the one you need from the list, and click “+ Add”. For example, if you have devices that are compatible with TP-Link or HomeKit, you simply install add-ons for these brands, and then follow the usual procedure for connecting the device to the gateway.
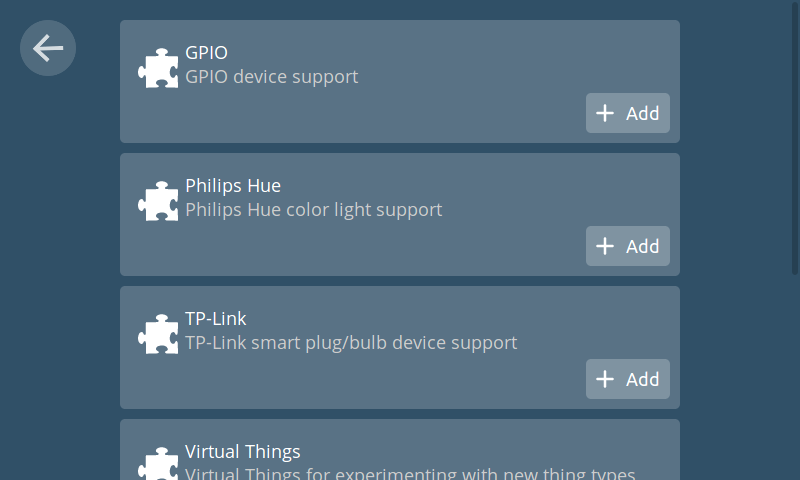
New addons will be developed gradually. If you do not find a suitable add-on now, try to look here after a while. You can send a request for support for additional devices through the Issues tab on the gateway development site.
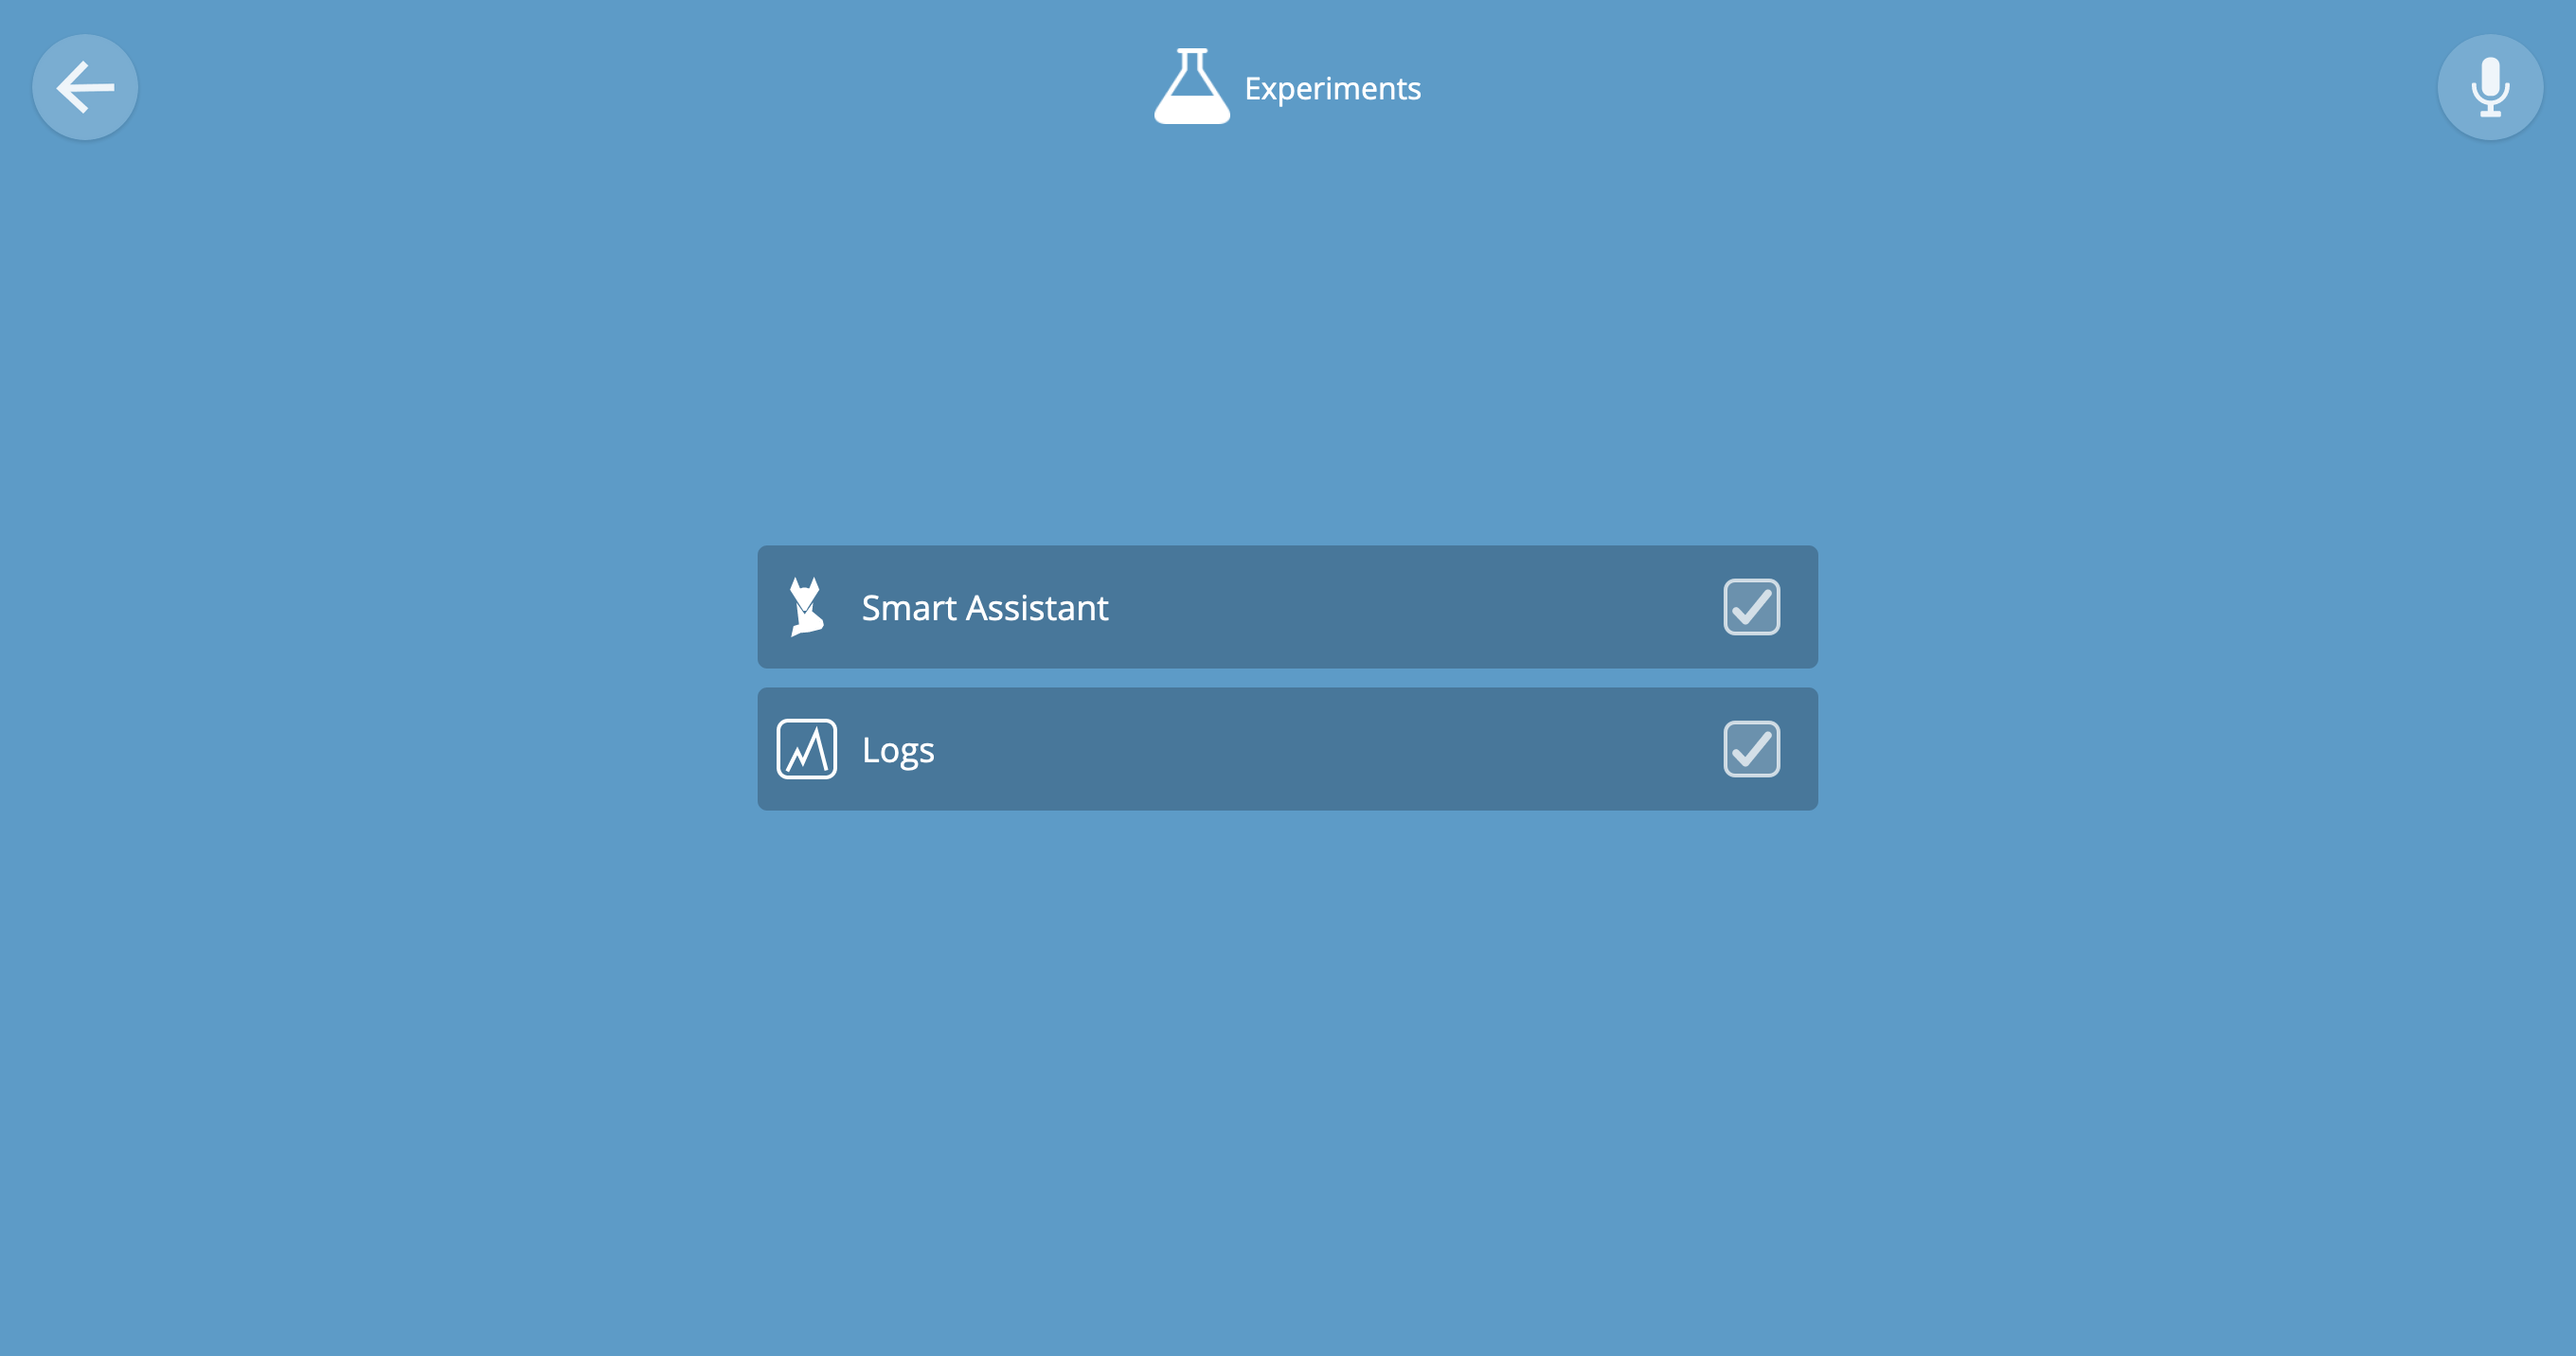
VII. Experimental functions
You can try new experimental features, such as voice-activated Smart Assistant or logging Logging events. They are available on the Experiments page.
Enable voice control and logging
In the Settings menu, select Experiments, and then click on the appropriate item - Smart Assistant or Logging.
Using Smart Assistant
Once enabled, it will be available from the main menu of the gateway. He can control the house with your voice or text commands. Commands are the same for voice and text input.
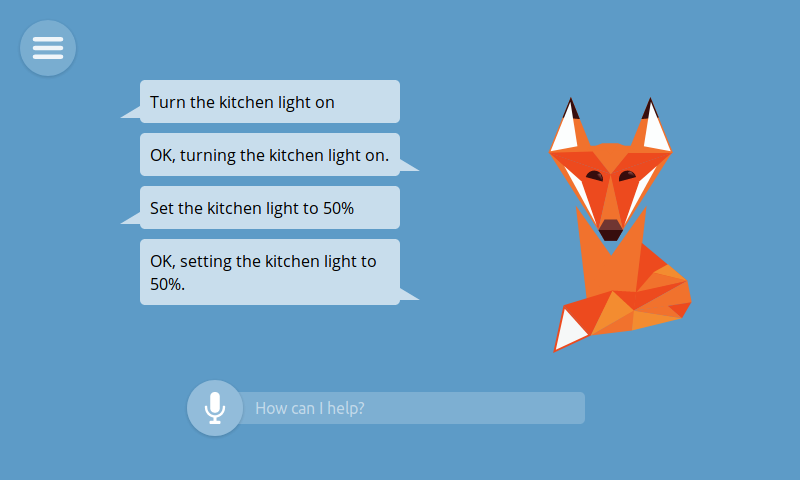
The web interface shows text commands and voice commands translated into text, as well as the result of command execution. If the command was recognized incorrectly, try again. Speak into the microphone of your computer loudly and clearly.
You can give a command like “Turn the kitchen light on” (English “turn on the light in the kitchen”), and the assistant will ask you for confirmation. So far, he understands only simple commands for turning the devices on and off, setting the level, color and temperature of the lighting. Commands are recognized only in English.
When you first click on the microphone icon, the browser will ask for permission to access it. Check "Remember my choice" and click "Allow".
In version 0.8, voice recognition is performed through a Google server, so the recordings will be sent to the cloud. From there, the text that the gateway processes is returned. If you enter commands as text, no data will be sent to the Google servers.
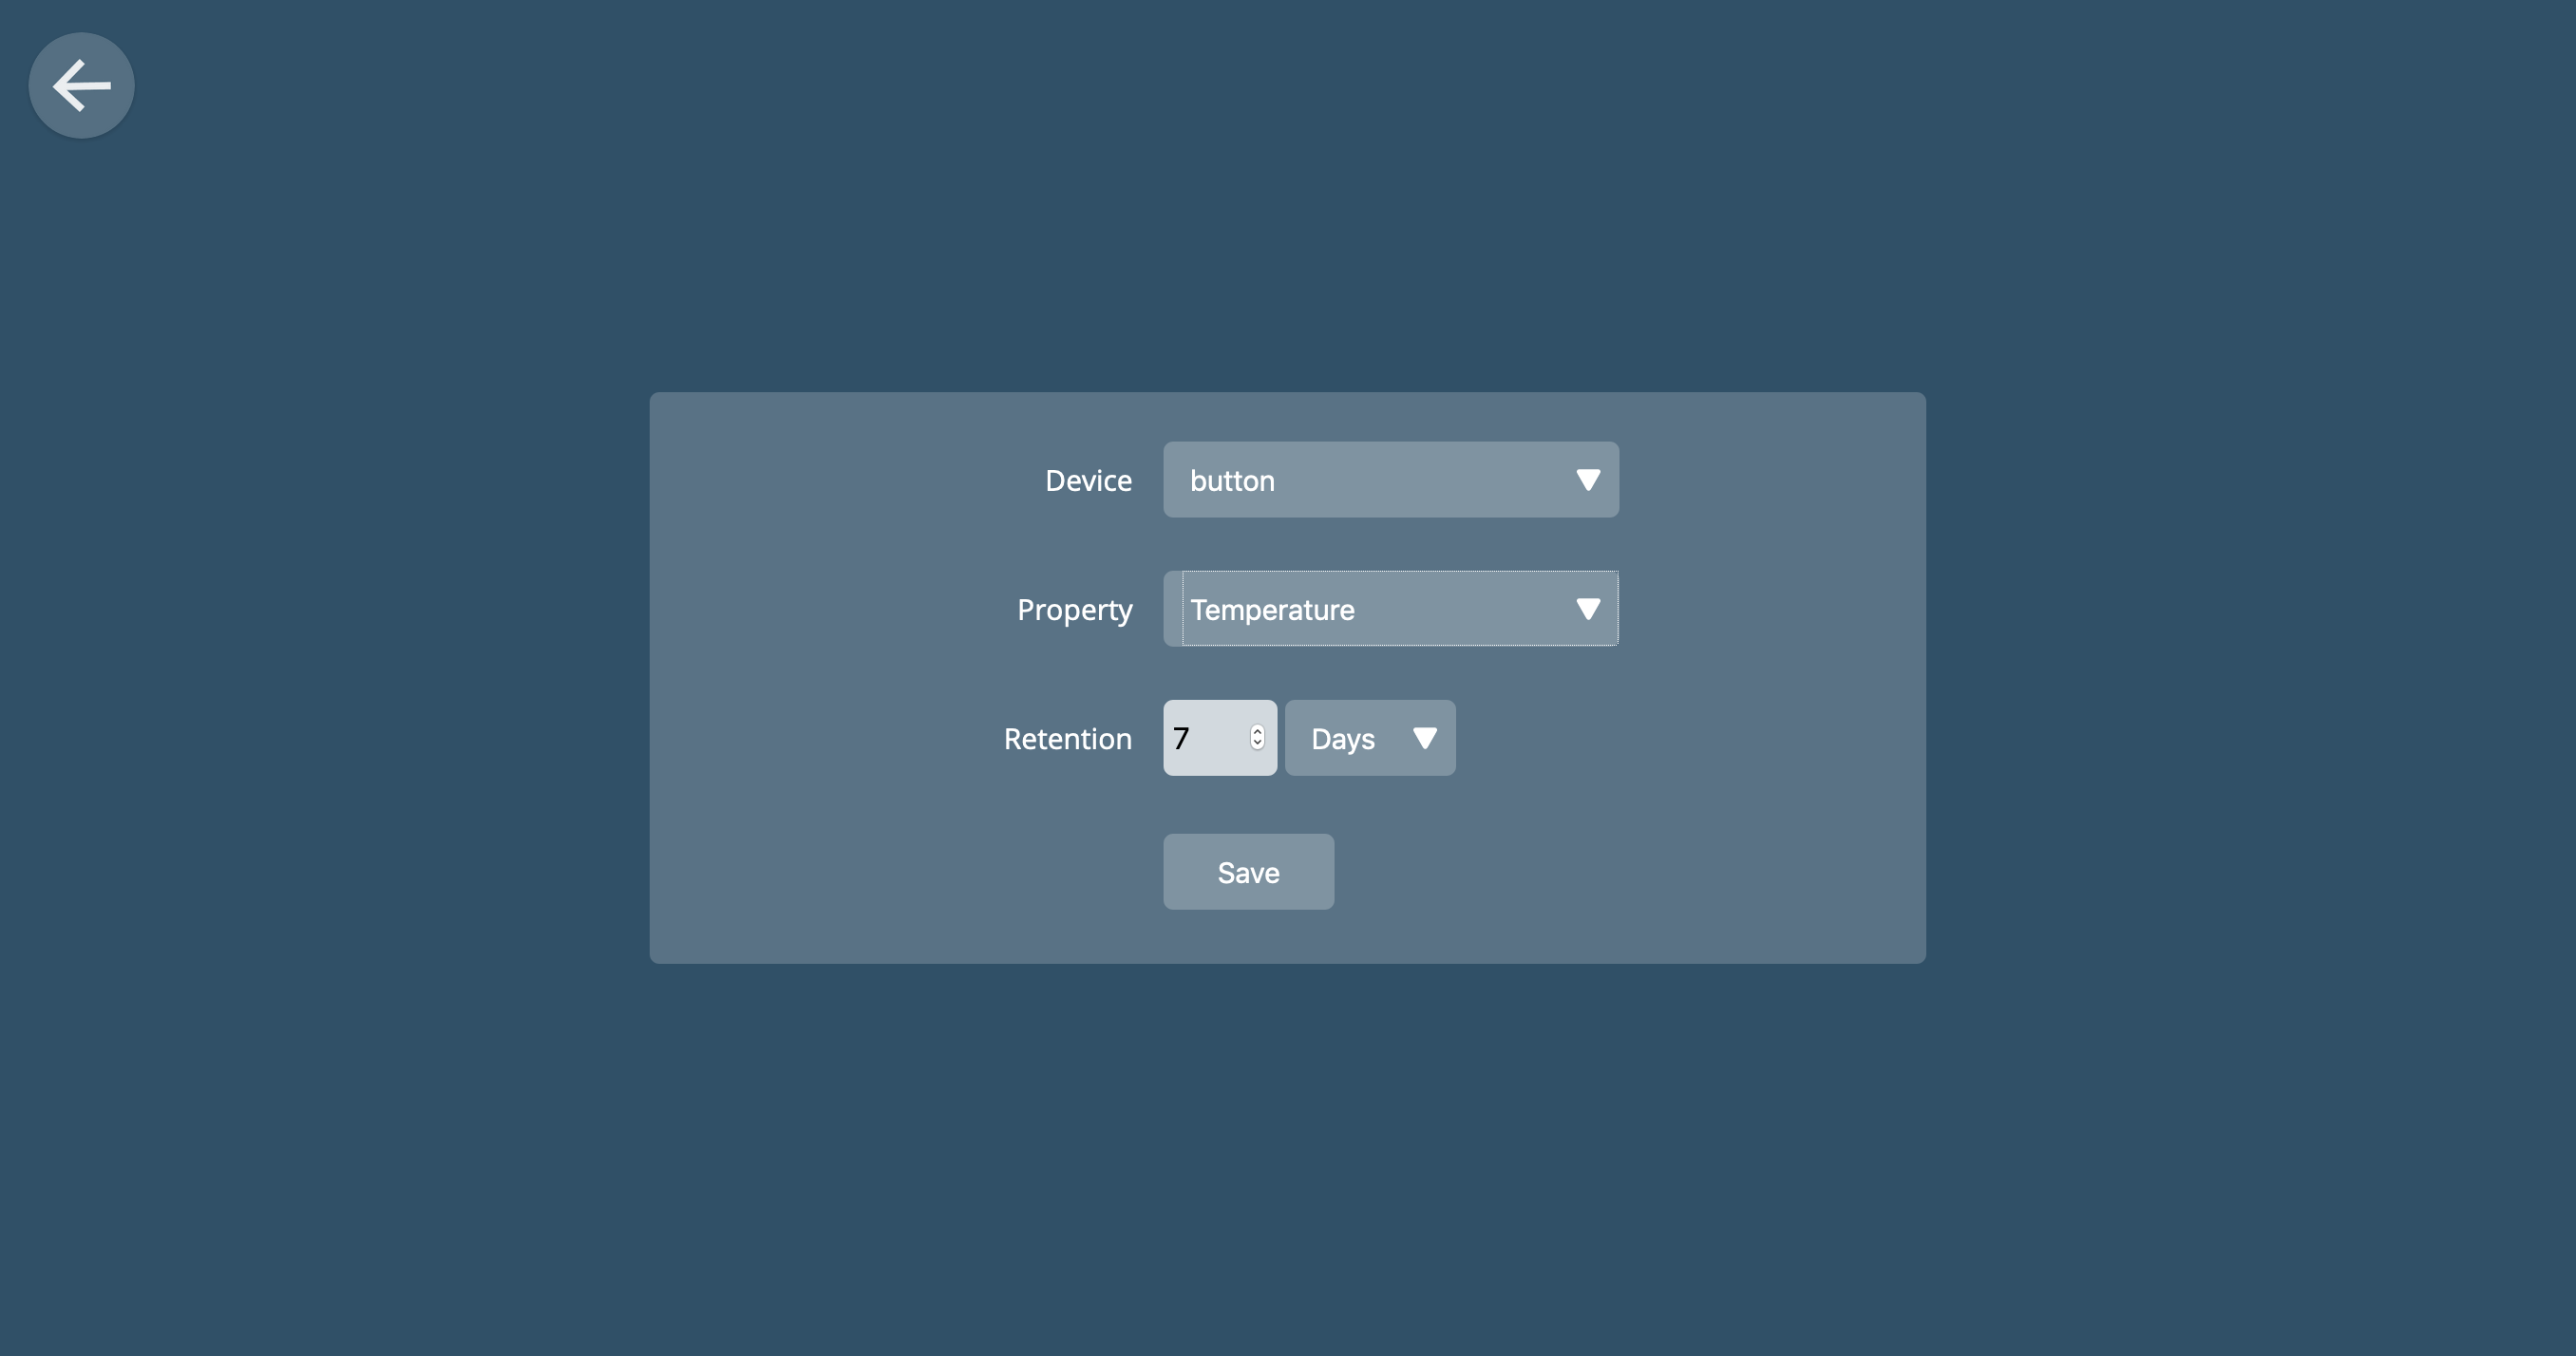
Journaling
Once enabled, it will be available in the main menu. All devices whose events can be logged will be displayed on the configuration page, which can be accessed by clicking the (+) icon in the lower right corner. Select the device that you want to journal, and then select the property to log, and the period to store the log.
Viii. Additional settings
On the Settings page you can find other settings and parameters.

Domain
By default, the local domain name is called gateway.local, but you can change it to your liking.

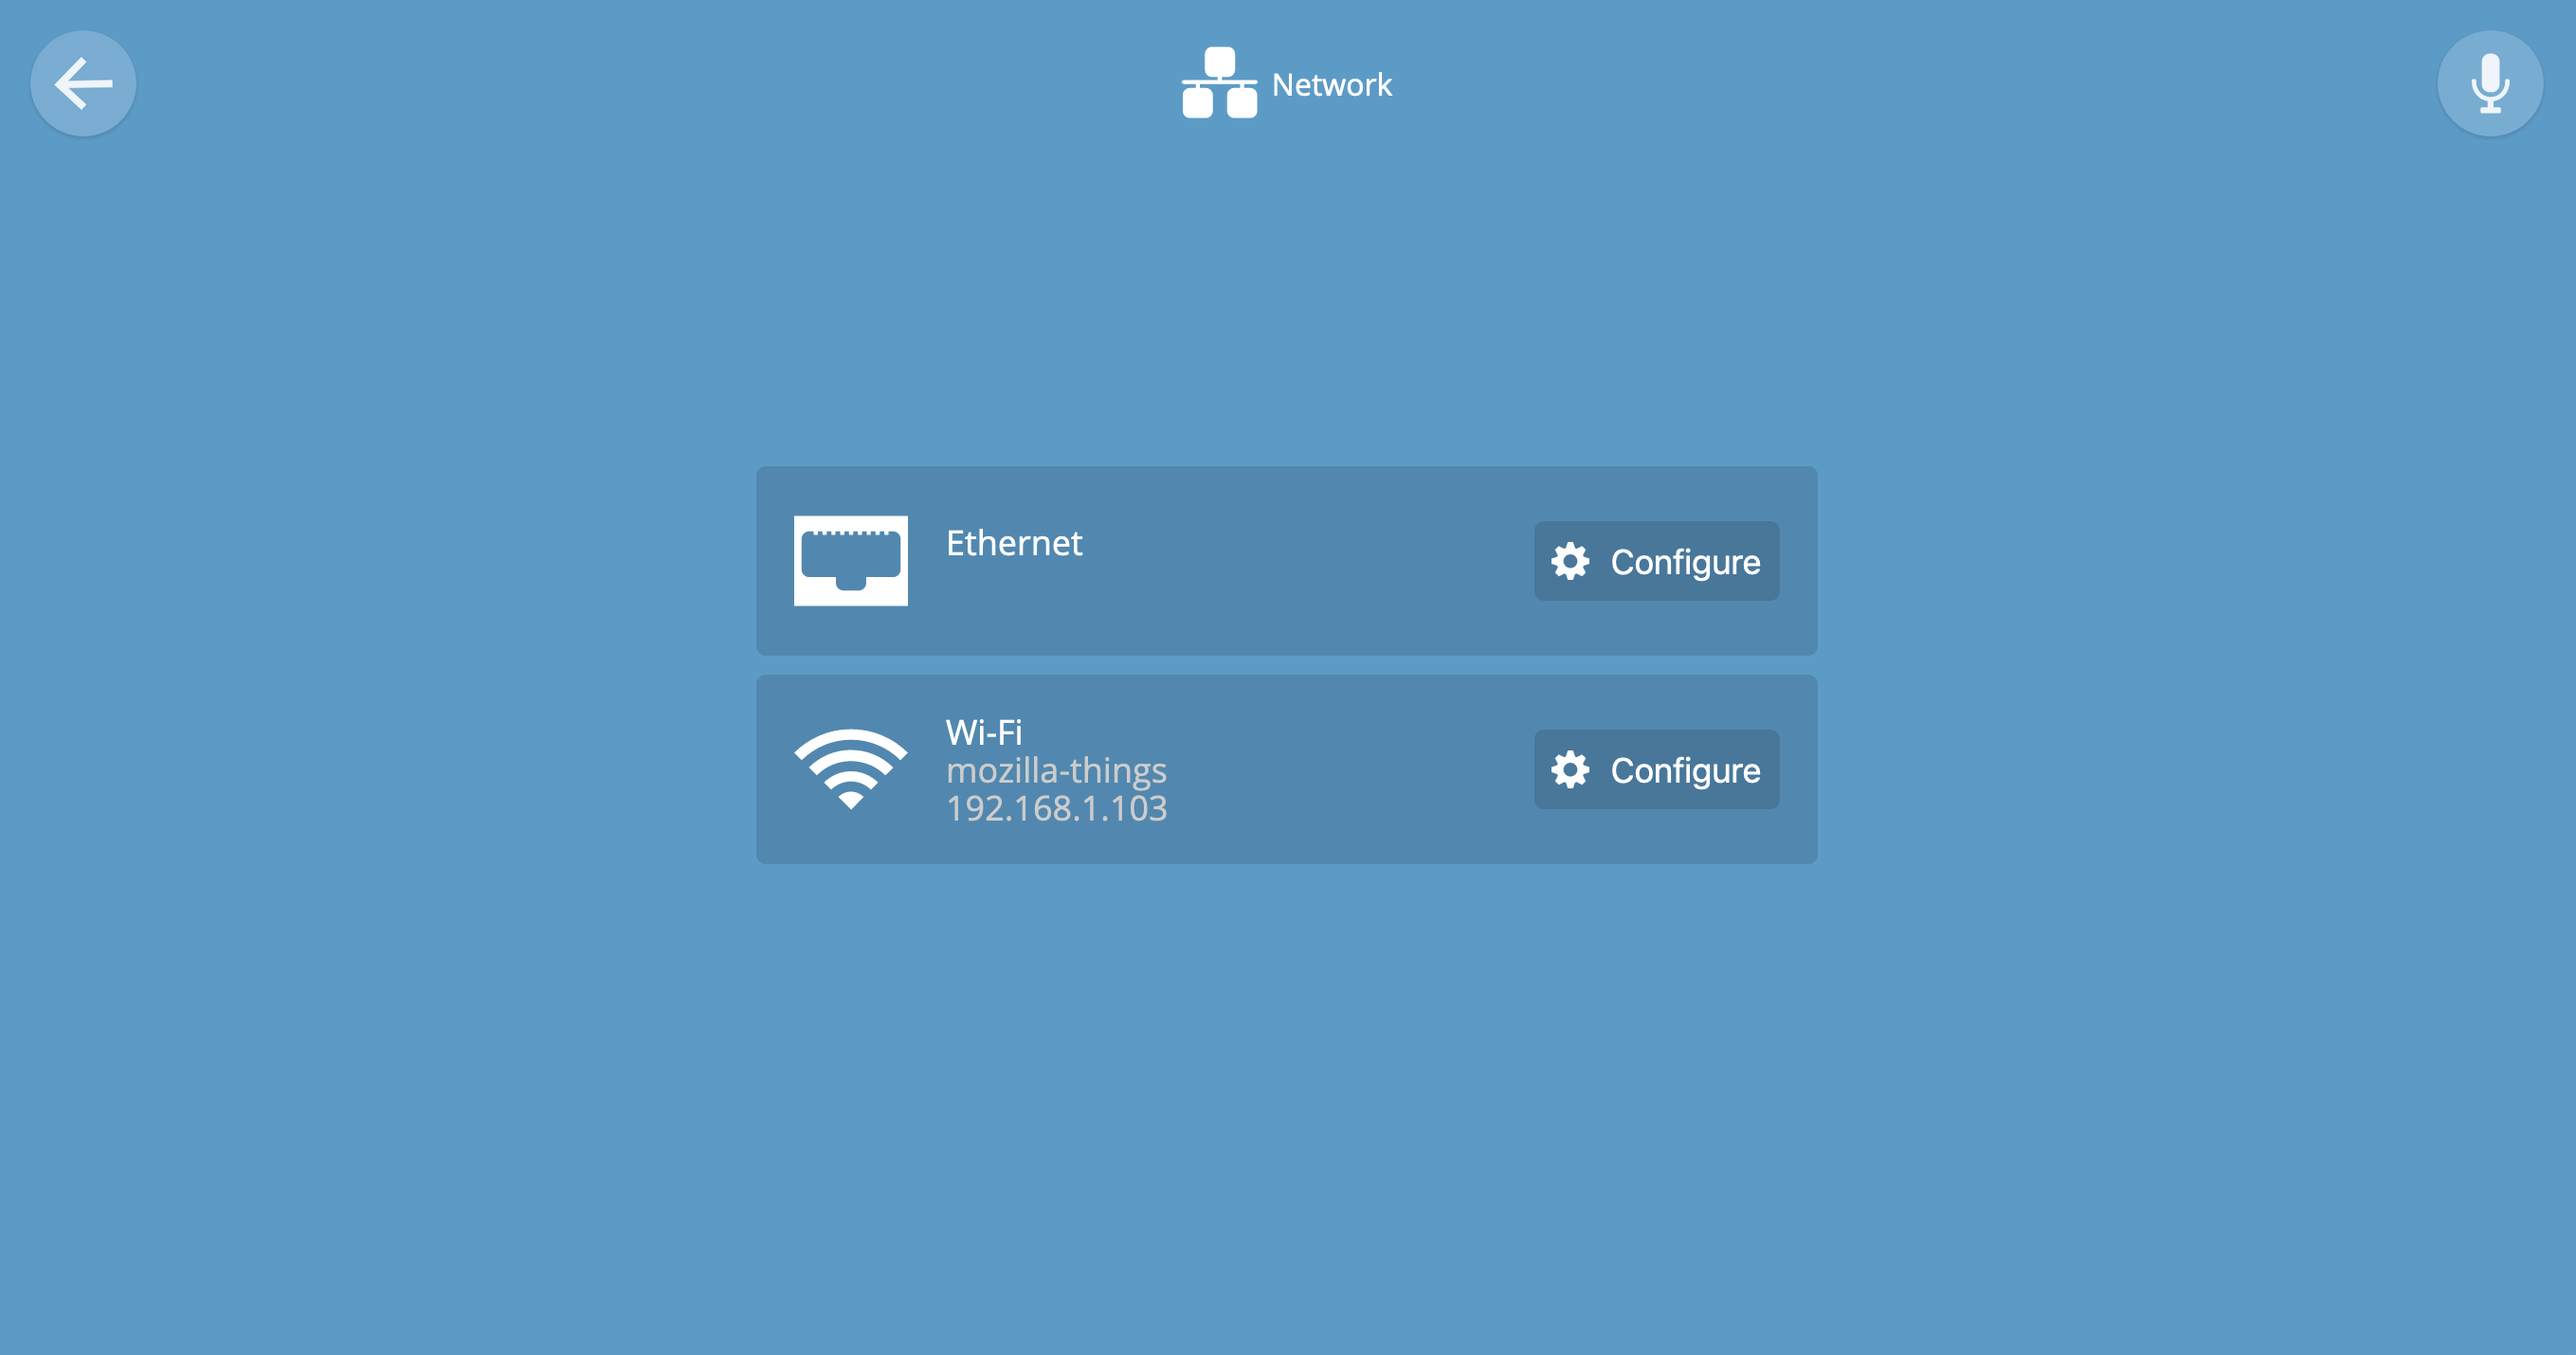
Network
The gateway on the Raspberry Pi can connect to your home network via Wi-Fi or Ethernet. The network configuration page displays the current mode. Here you can make network settings. Be careful, as incorrect settings may disconnect the gateway from the network, and you will lose access to its web interface.
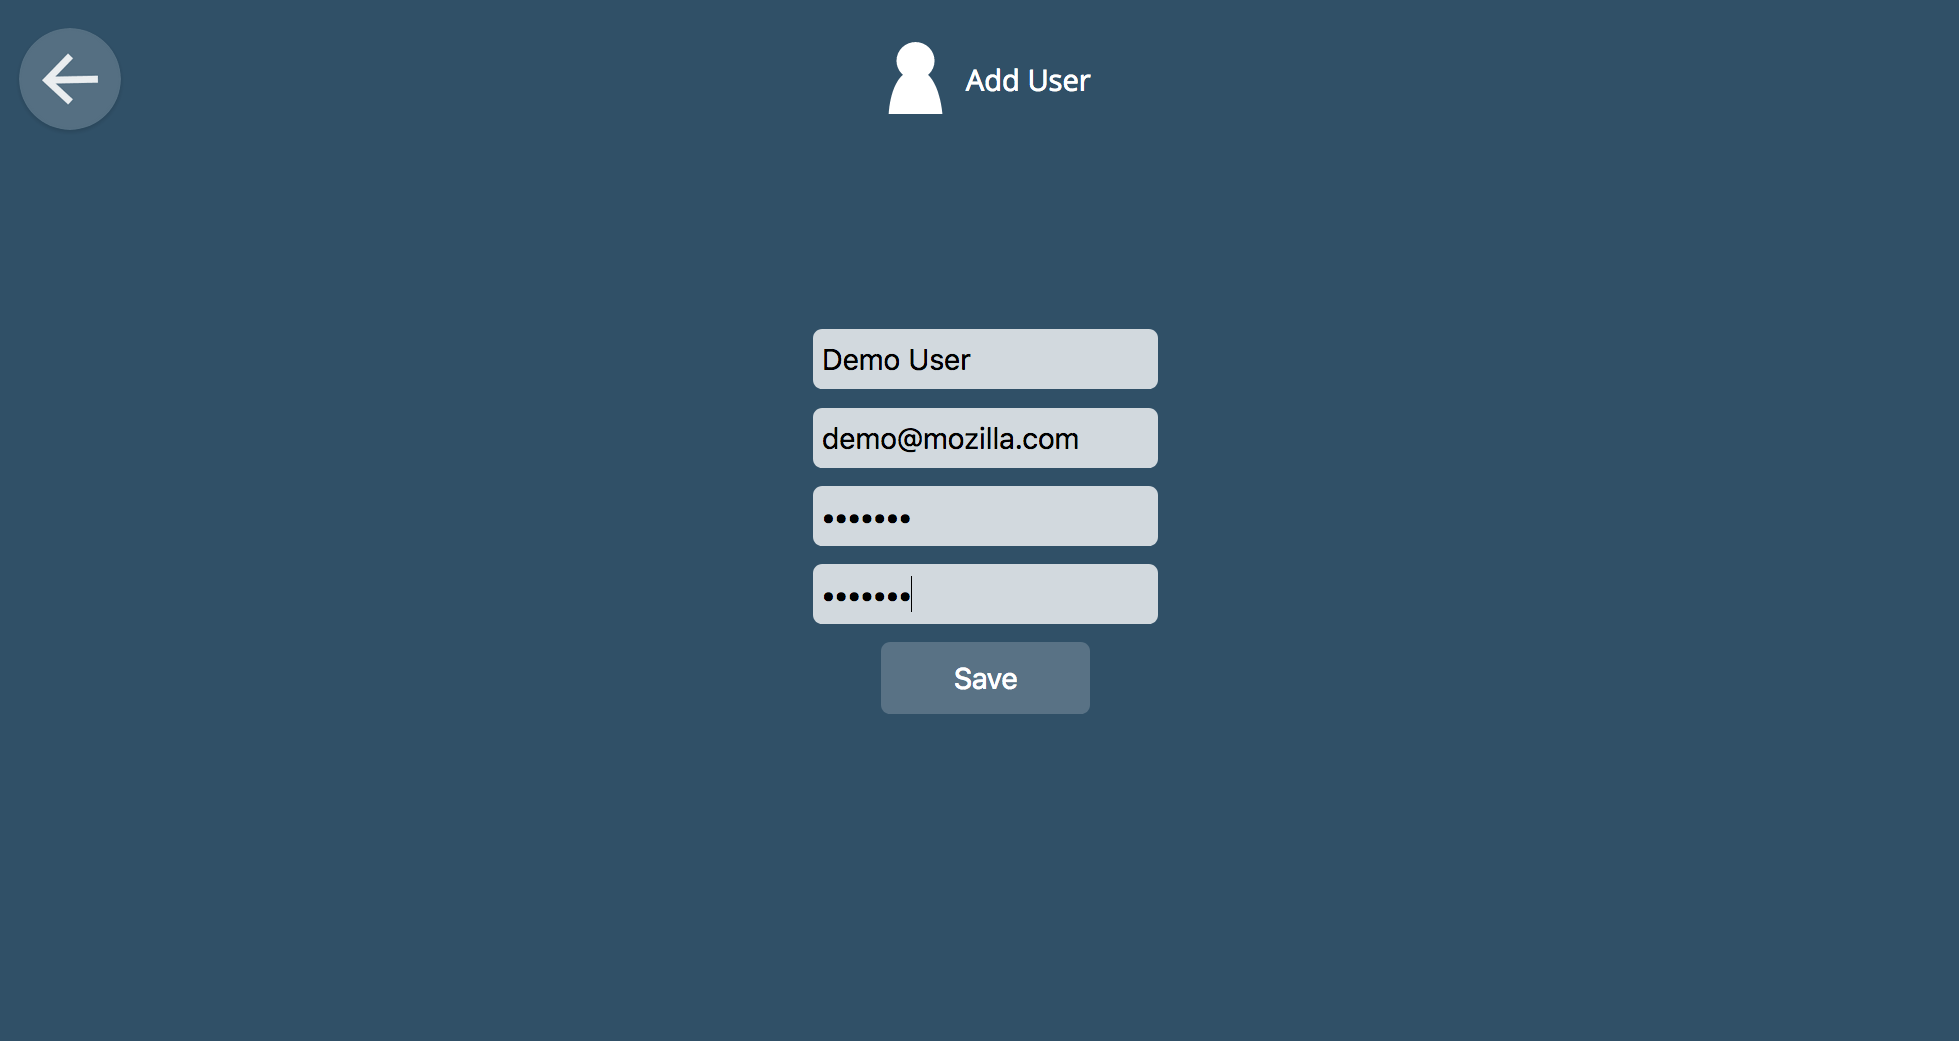
Users
You can add multiple users with different logins and passwords to control the gateway and devices. For now, all users will have equal rights, but in future versions of the gateway there will be distinctions.
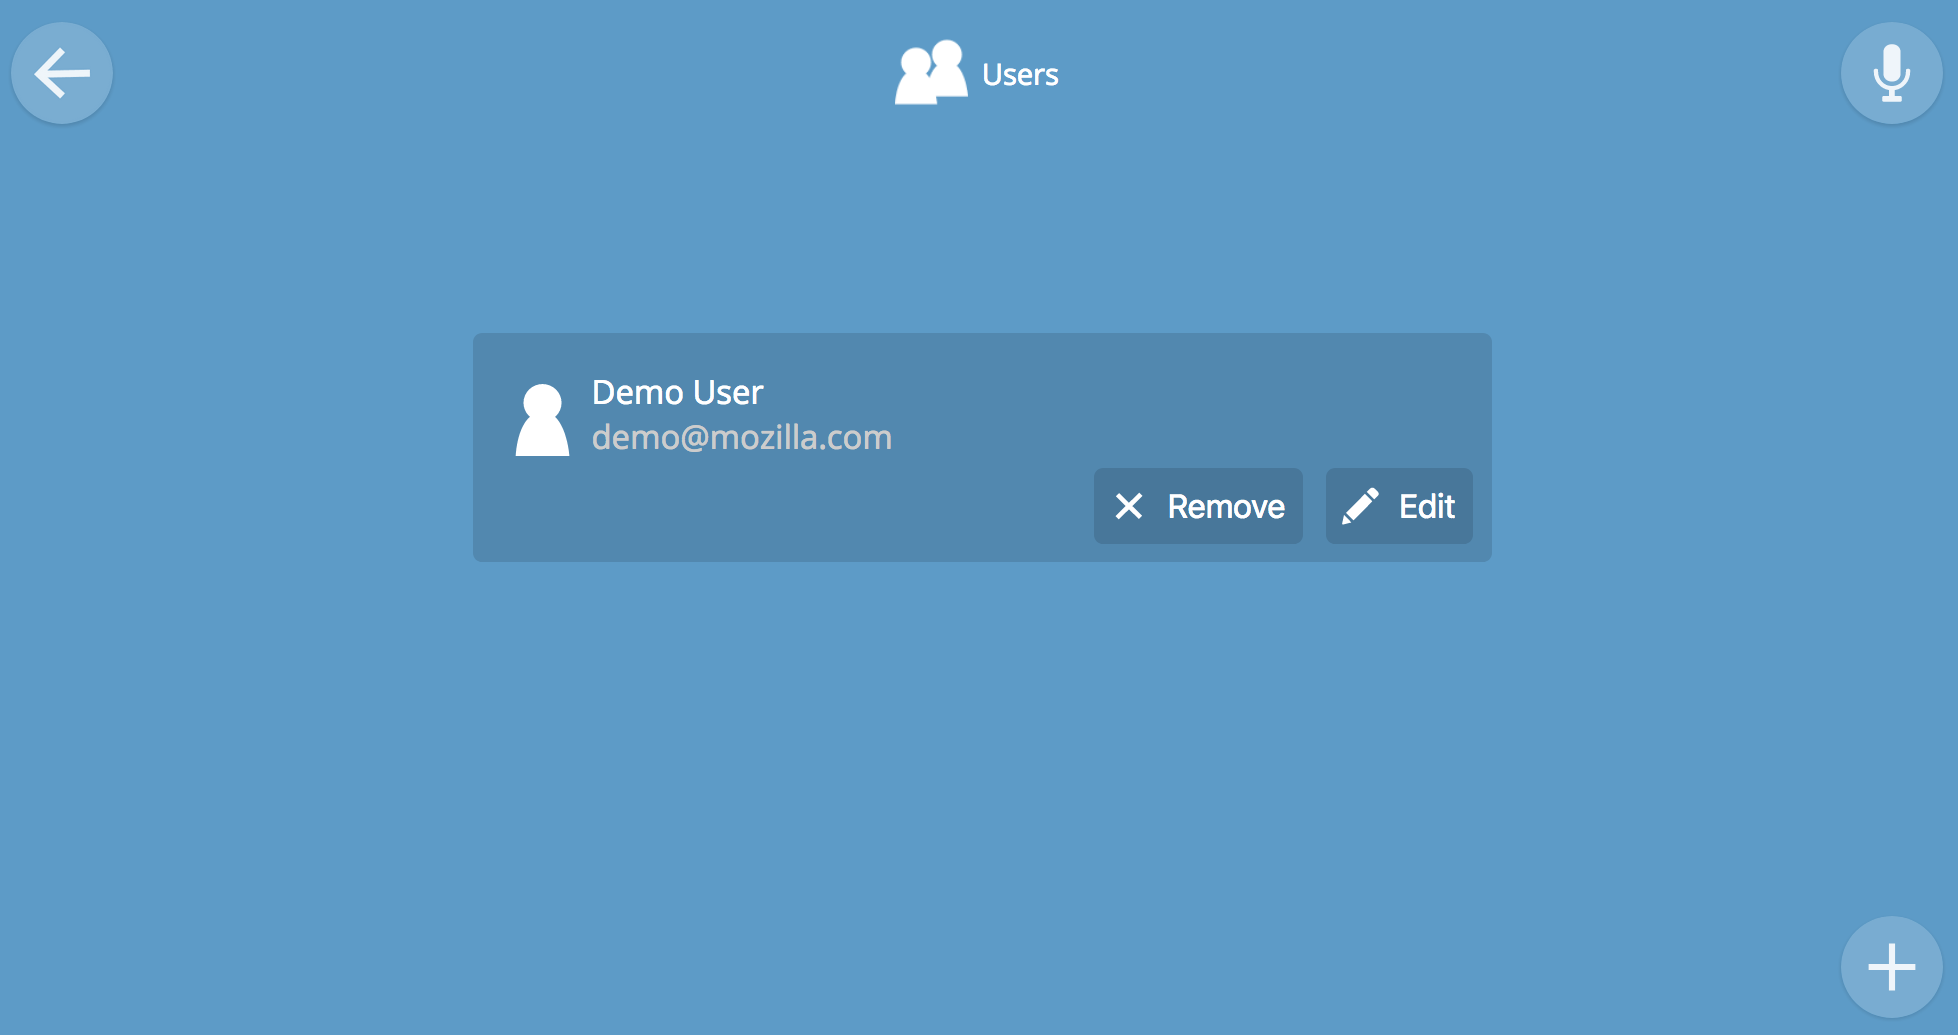
Click on (+) to add more accounts.
Addons
The gateway supports a unique addon framework that allows you to associate proprietary and non-standard devices with the gateway. By default, only three add-ons are installed, the rest can be added manually. Add-ons are updated independently of the main gateway code, so they can be updated at any time.
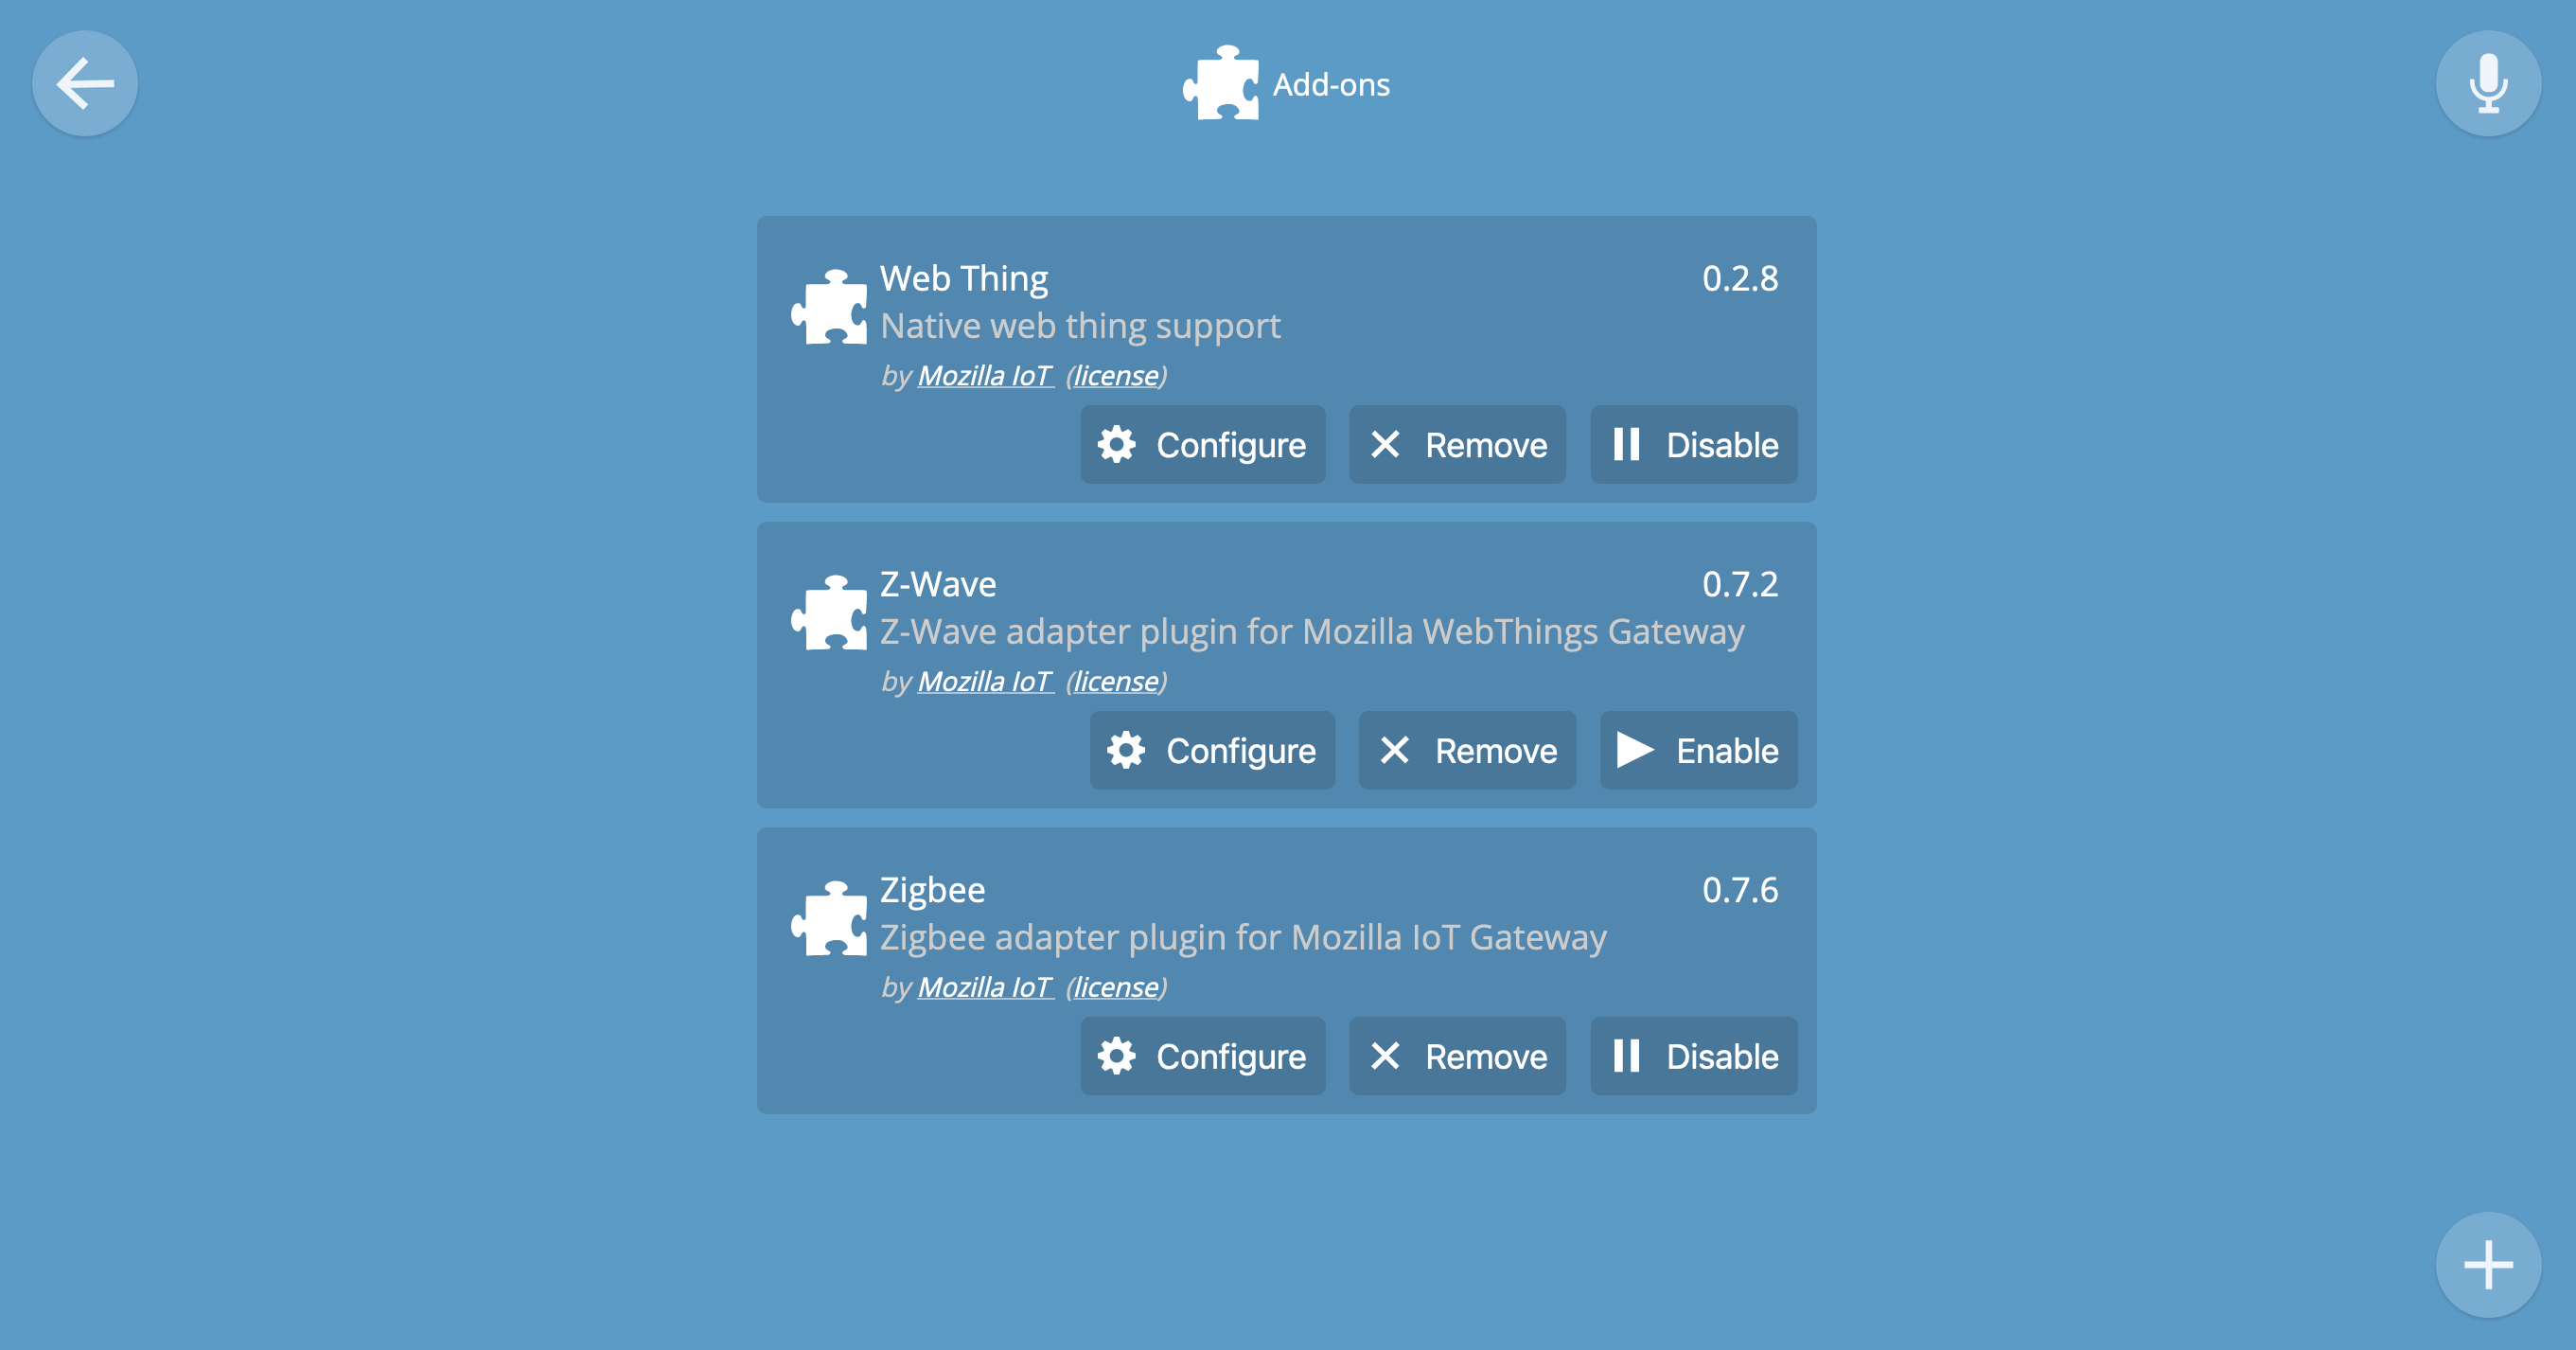
Click (+) to install optional addons.
Some add-ons require configuration to work (for example, Pulse, Weather, ONVIF). Others work immediately after installation (for example, Virtual Things).

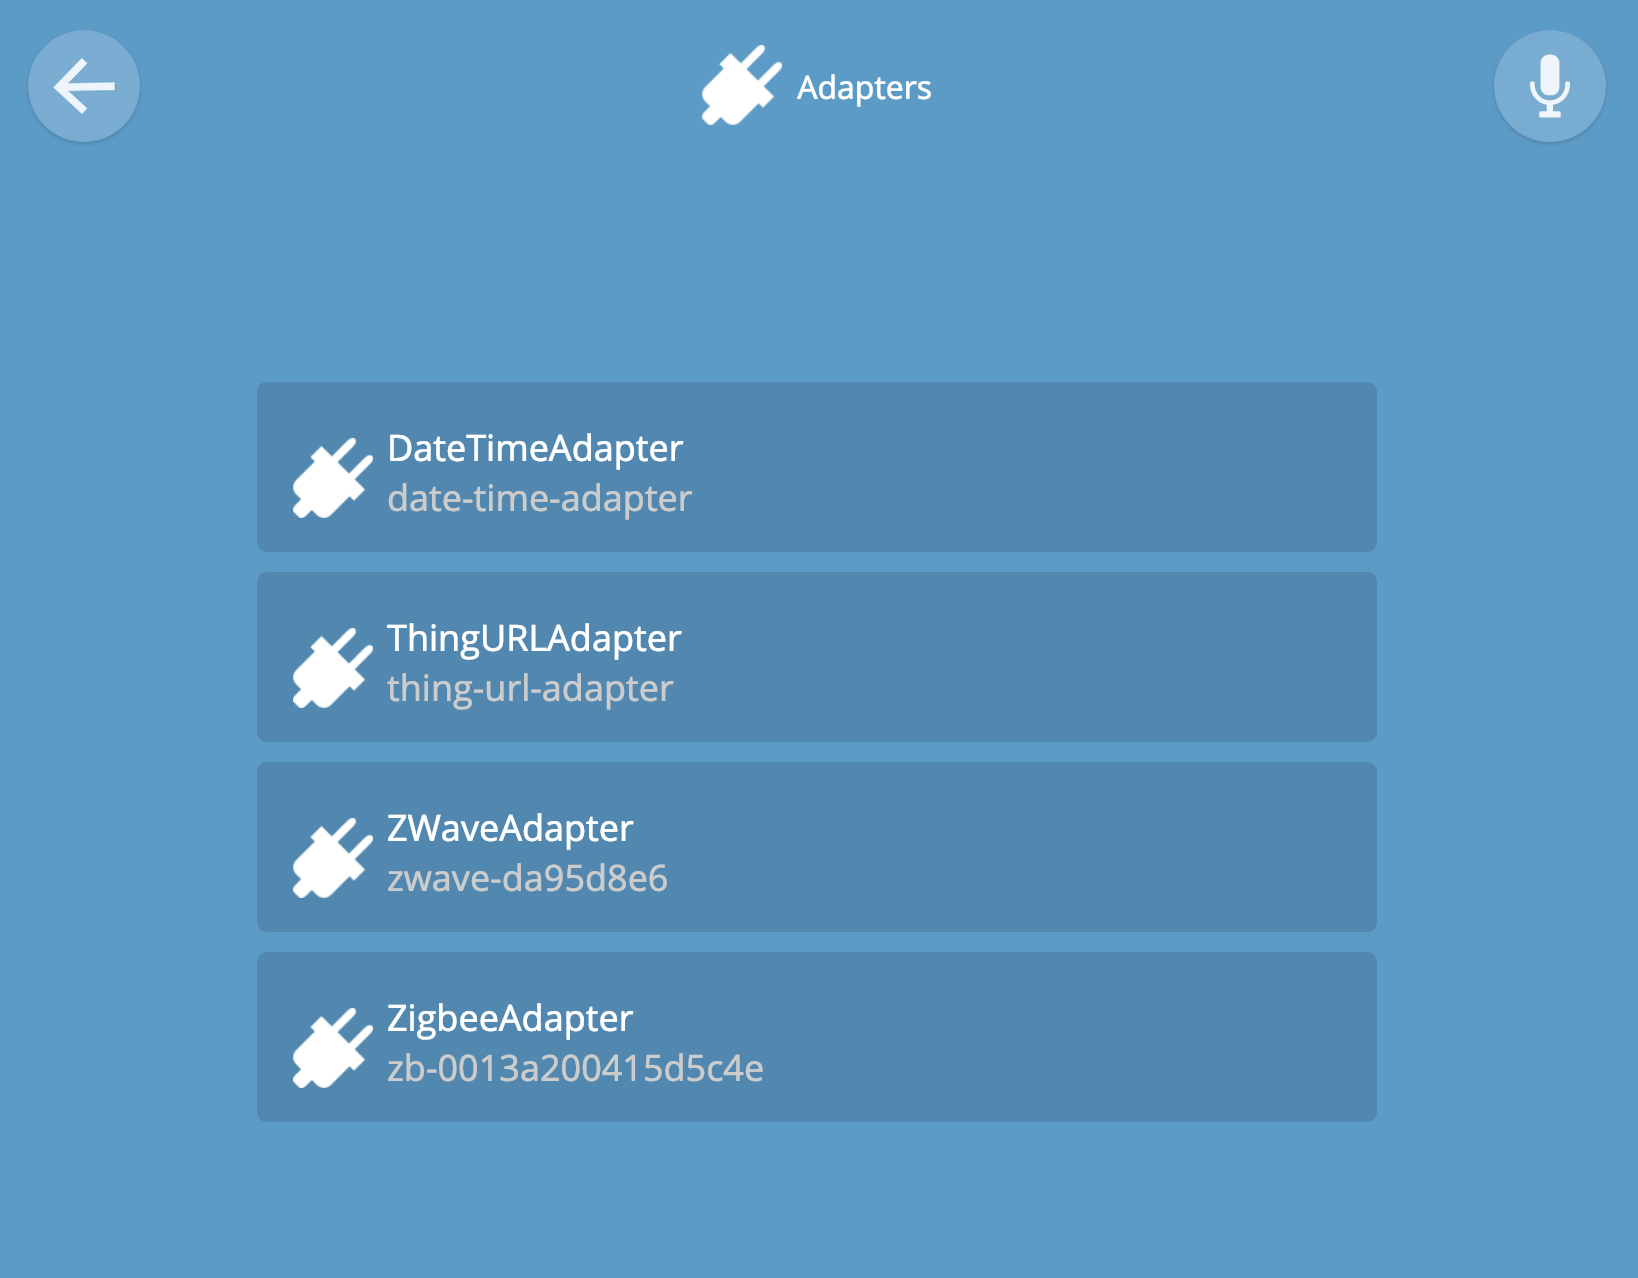
Adapters
The Adapters page shows installed and active addons. Go to the Add-ons page to add or remove adapters from this page.
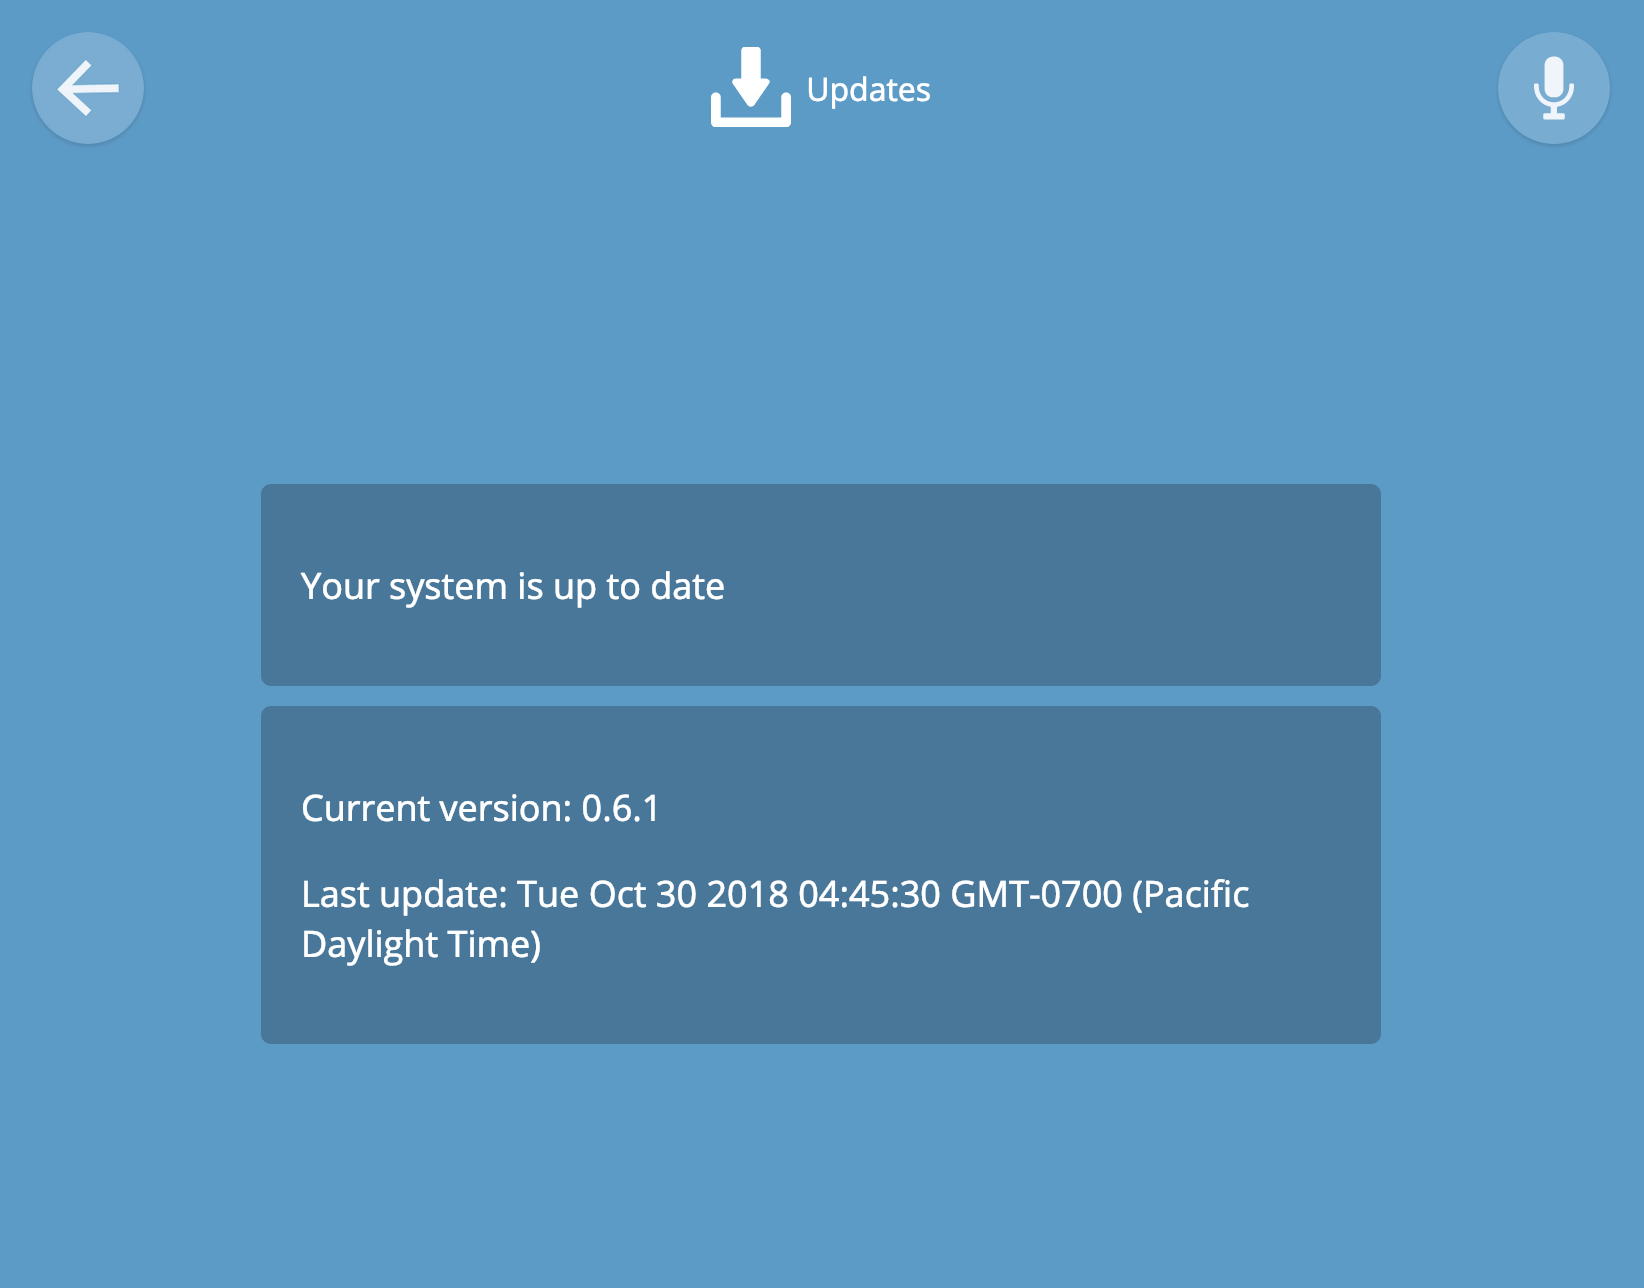
Updates
If the gateway is connected to the Internet, it will be updated to stable releases automatically. New versions are released about once a quarter.
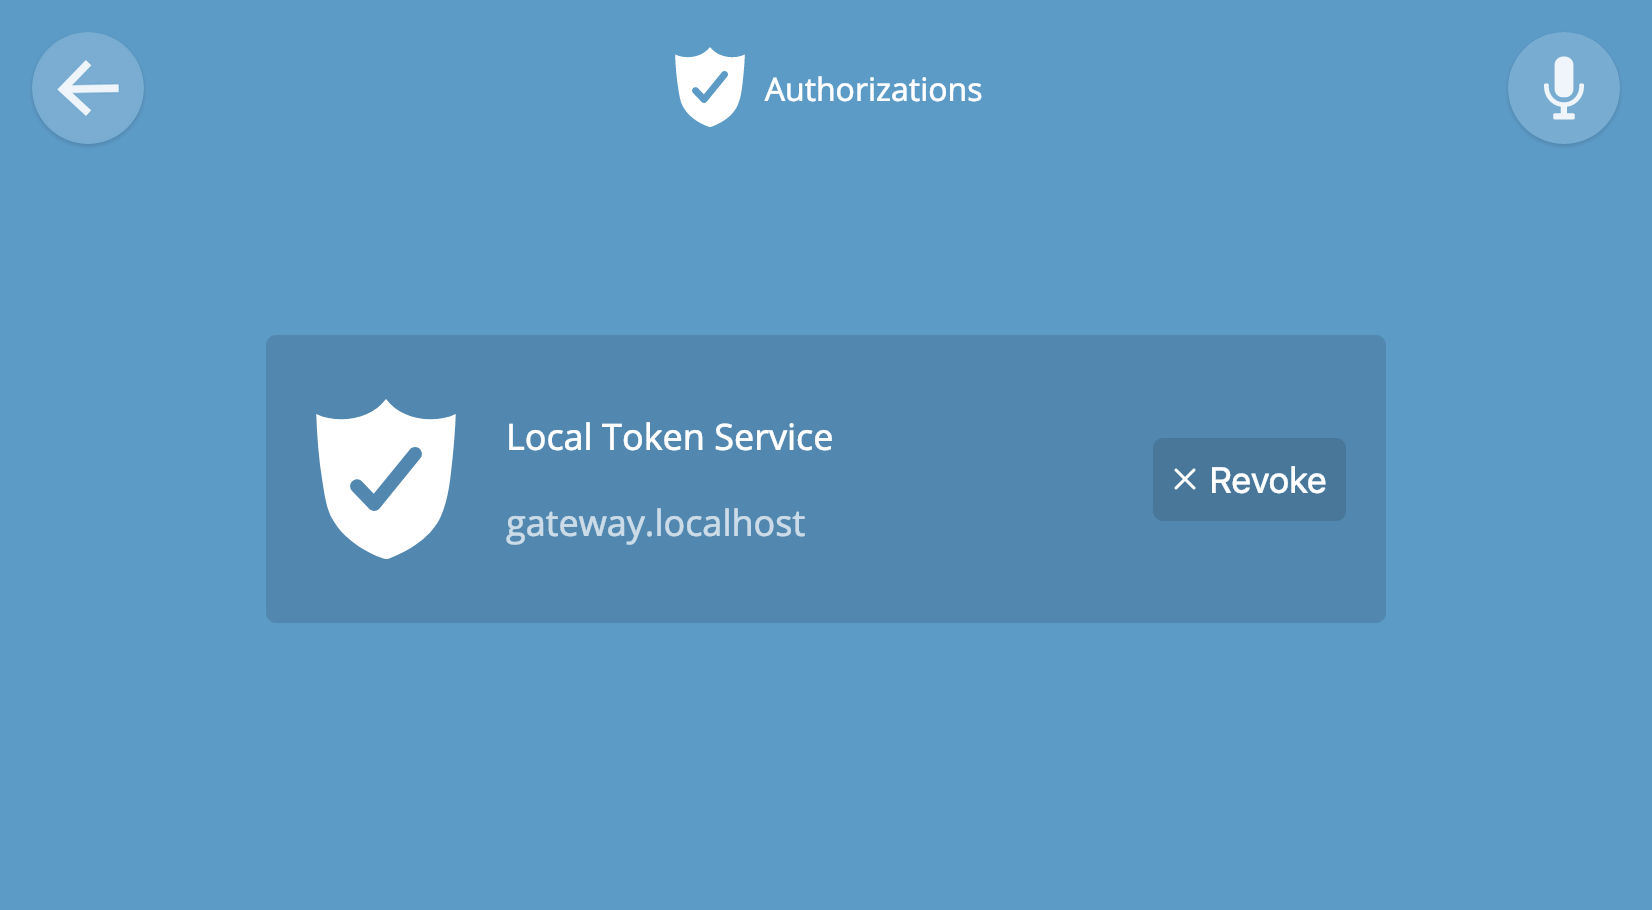
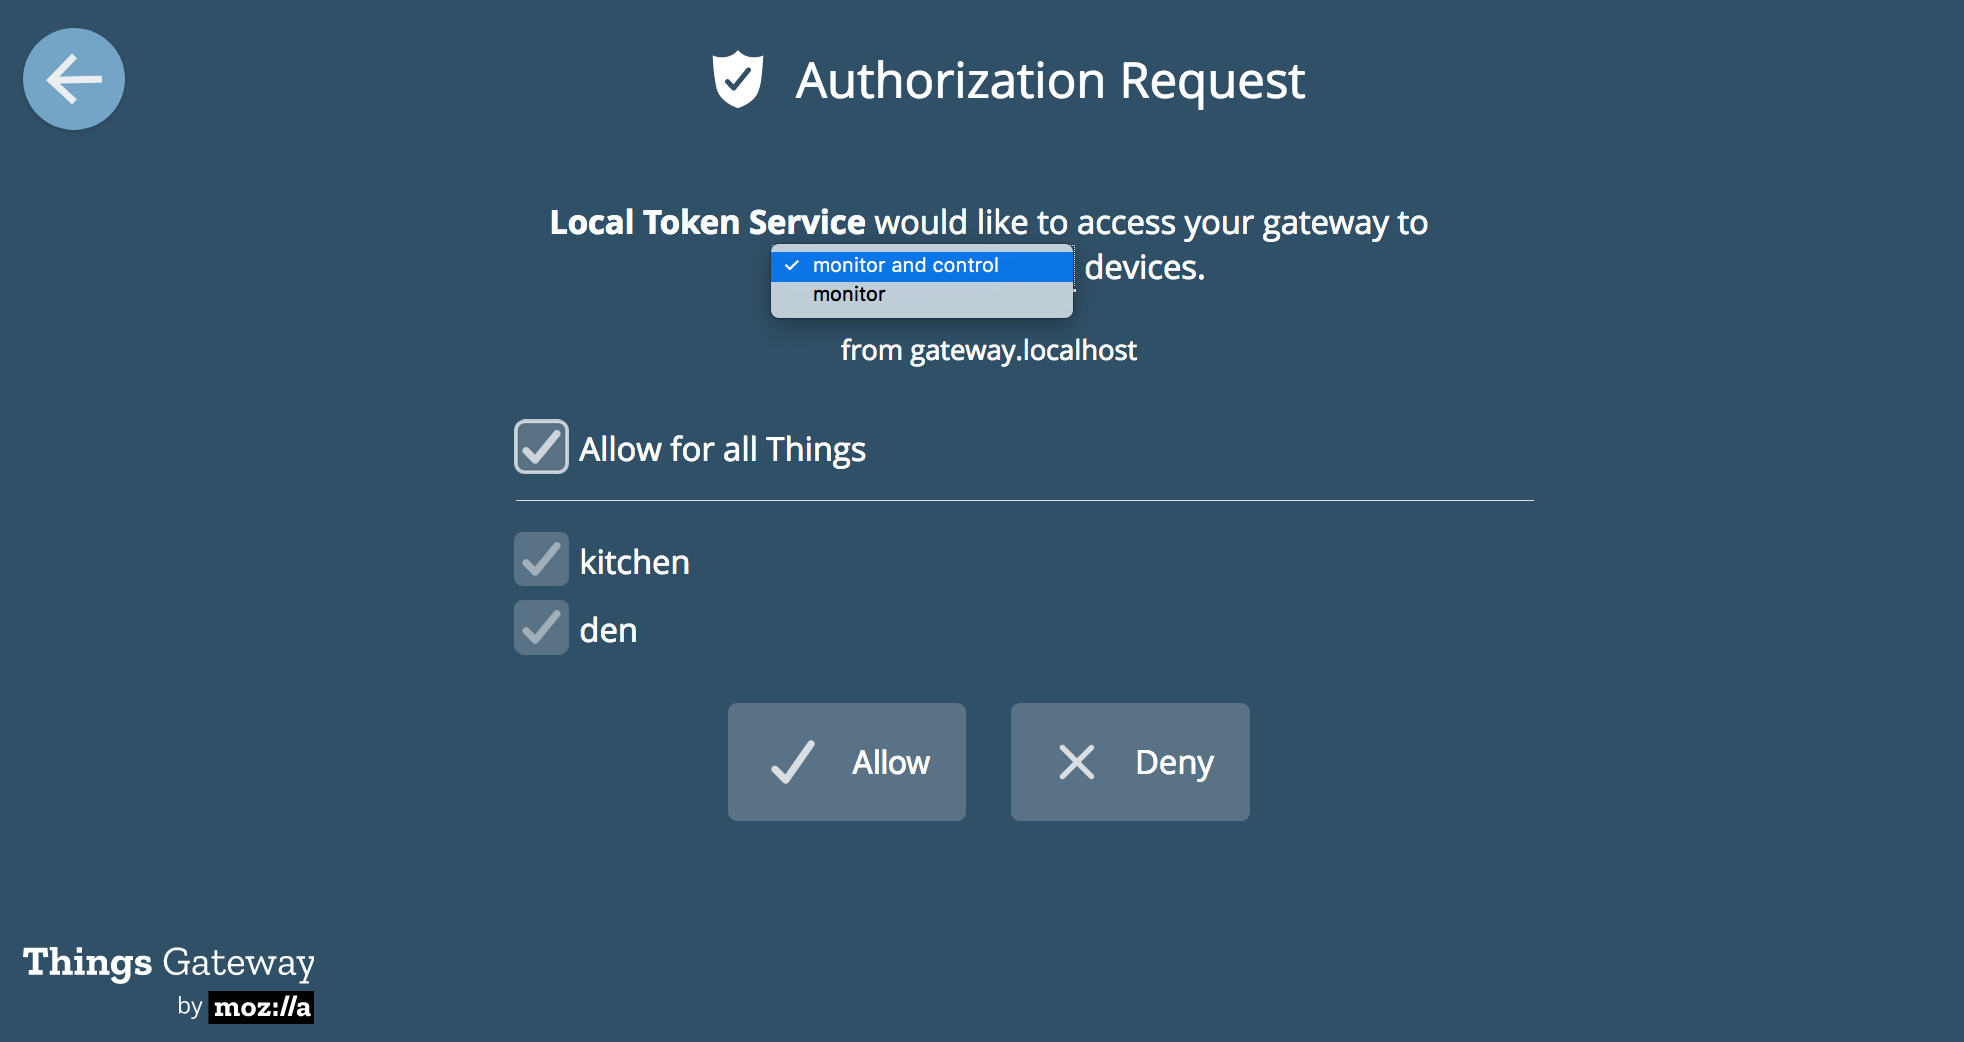
Authorization
Authorization is enabled in Settings via Developer -> Create local authorization. This page displays the current authorization status.
Developer
On the Developer page, you can enable SSH to connect directly to the Raspberry Pi console. The default login is pi, the password is raspberry. If you decide to enable SSH, we recommend immediately changing the password to access the console. This can be done with the command $ passwd and follow the instructions.
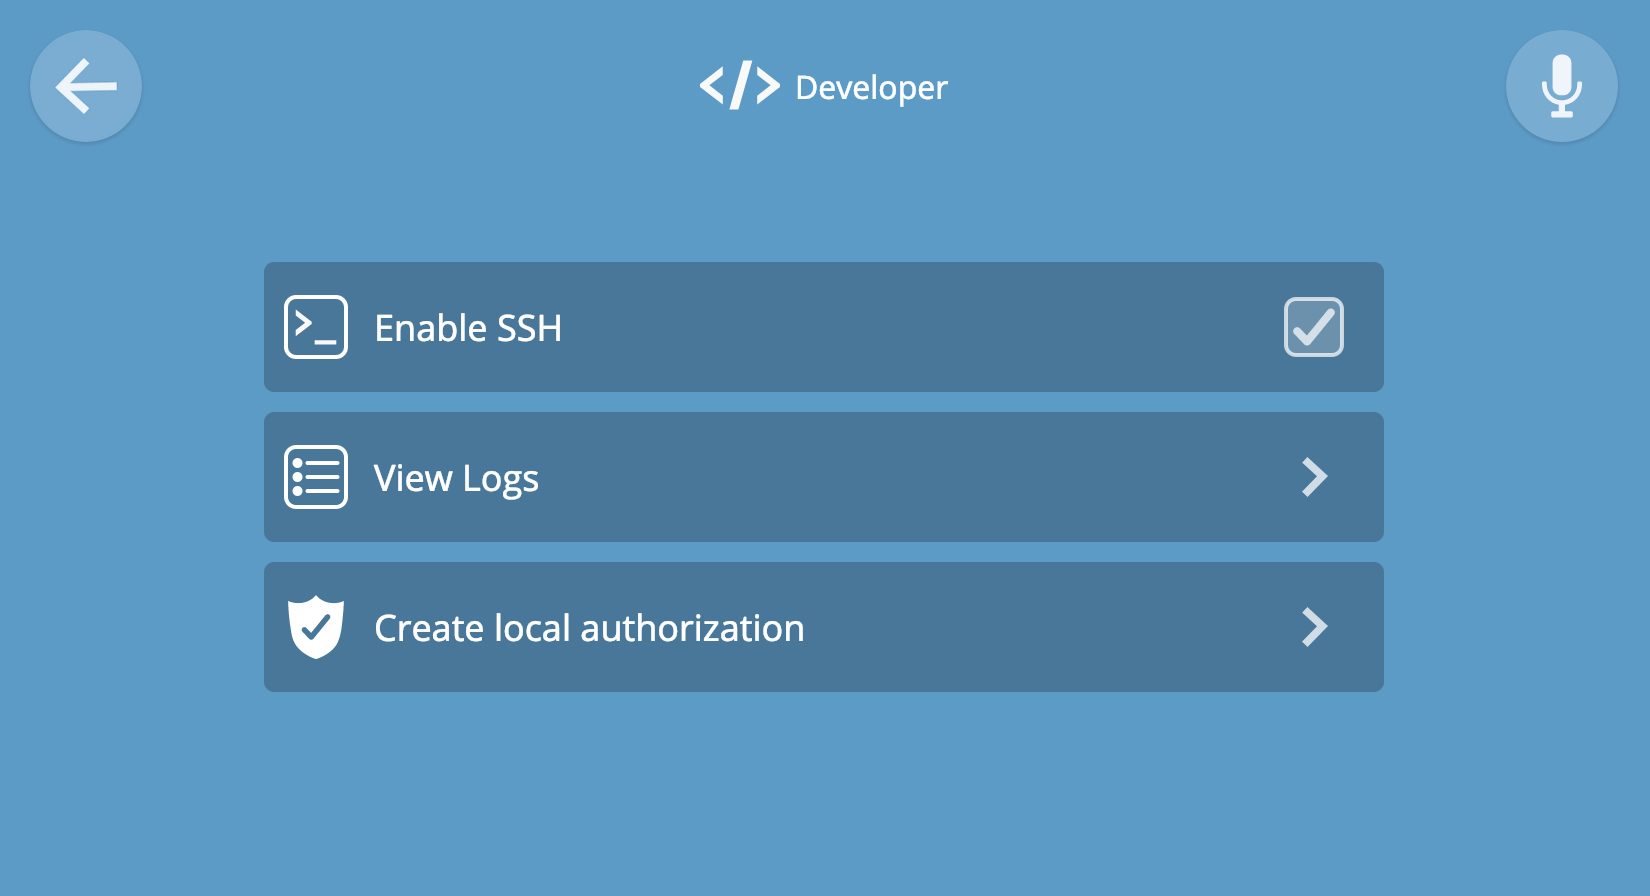
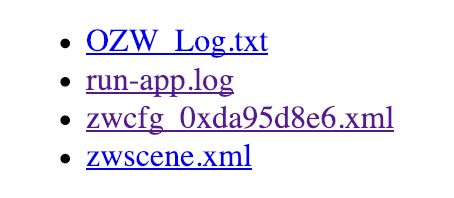
Click “View Logs” to view raw logs in the browser.
Click “Create local authorization” to create a secure web token that can be used in third-party applications or in your development tools.
Ix. Support
Subscribe to our IoT Discourse forum (https://discourse.mozilla.org/c/iot), or write an email to iot@mozilla.com. You can also join the Mozilla #iot IRC channel, or write about the problem on github .
Addition: Tips for binding and unlinking
To add or untie a device is usually enough manufacturer's instructions. Here we list some tips that can be useful in difficult situations. Some devices have a button to enable device binding to the gateway. On others, there is a button that needs to be held for a few seconds to reset to factory settings. Some devices require several sequential on-off, double-pressing a button and other tricks. Unfortunately, there is no universal instruction. On the wiki-page of supported devices, you can try to find instructions that will suit your case.
')
Source: https://habr.com/ru/post/448654/
All Articles