See the data? Not. So I do not see, but they are. We destroy data on SSD-drives, and even restore the speed
Each of us faced a situation when it was necessary to restore the data, whether it is something not particularly important or, on the contrary, critical for achieving certain goals. But few users asked themselves the question: “What if someone recovers my personal data on my drive?” - and this is the right question! Today we will talk about the method of deleting data Secure Erase, as well as learn about its advantages and disadvantages.
But, to begin with, we will clarify the situation. This material is focused on ordinary (no matter - novice or advanced) users who decided for one reason or another to permanently delete data from it or try to restore the speed performance of the drive, if they began to drop noticeably to noticeably lower performance than stated. , SLC caching and other “official” reasons for speed reduction in this case we do not consider, since these are hardware features of the drives). The essence of the problem that Secure Erase can solve may lie in the fact that the drive began to work slowly - write and read data. There can be a lot of reasons, and some of them are related to the hardware component, and some - to the software component. Solid state drives are strikingly different in maintenance from classic HDDs, so simply deleting data or formatting the drive doesn’t really mean resetting the cell - they need to be cleared before recording, which slows down the process of recording new data. In theory, there should be no such problems, because there is a TRIM — a command to clear the data marked for deletion in the cells with a simple system so that we will not notice. This command works only with SATA 2.5 ”and M.2 drives. For drives connected to the PCIe bus (M.2 or PCIe on the motherboard) there is an analogue - Deallocate. But it happens that these functions are disabled for any reason - OS error, user error in configuring the disk through third-party software, using non-standard OS assemblies with unknown software components. And soon the disk will begin to work noticeably slower, which will be visible even “by eye” without any benchmarking performance measurements.
And a couple of words for those who consider this material a guide to actions within organizations where data deletion is necessary as a class. To protect information that is critical, both for serious organizations that fear for data integrity, and for public sector enterprises working with state secret information, data carriers should, as a rule, use protection complexes (software and / or hardware), built on cryptographic data protection using domestic GOST 28147-89, satisfying regulatory and regulatory documents of regulators. The thing is that in Russia at the moment there is no really effective algorithm for completely removing data from solid-state drives, and GOST P50739-95 is focused on HDD (HDD in common) for this is not quite suitable. We will find patience - about ours and not our standards a little later. It was necessary to tell this without fail, but with the terrible wording in this material we set off. Well, or almost :)
')
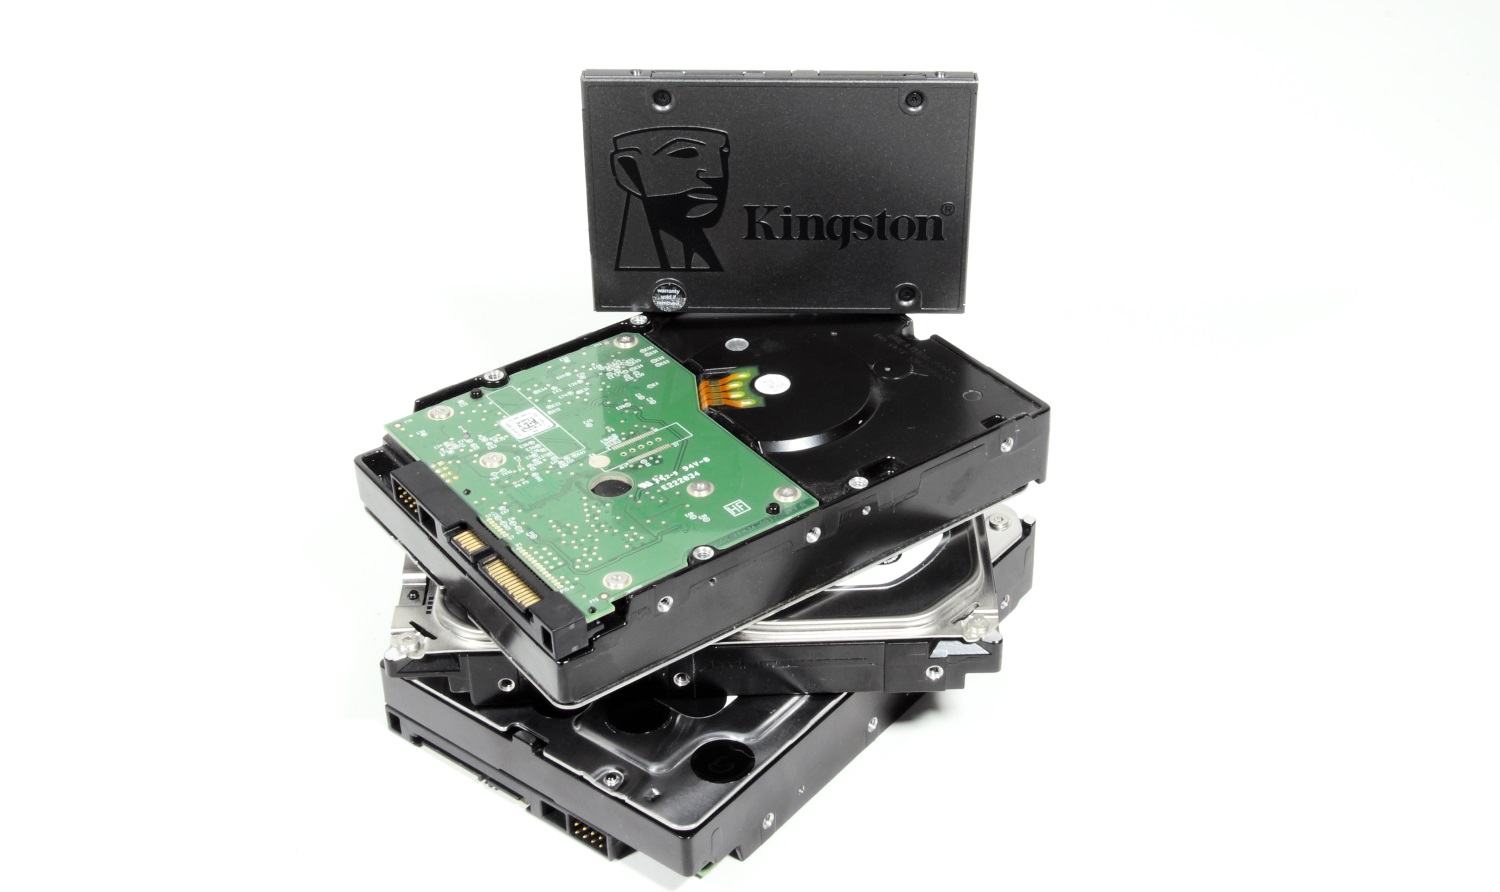
Any of us once thought, and perhaps thinks now, that by pressing the "Delete" button and then "Empty Trash", the selected files will be deleted. But in fact, this is not exactly the case and now we will explain why. HDD algorithms are built in such a way that when you delete a file, the operating system actually removes the link to it from the file system table. It is as if to remove the shortcut from the desktop - in this case, the program or game remains in place and you can still access it. Yet, at the request of parents, did you delete the CS label or another favorite game with the phrase “everything, game is deleted”? So here - the file remains physically on the media, but until a new one is written in its place. Although even after this information can be recovered by examining the magnetic fields on the disk surface, but this is a completely different story ... As you already guessed, the safe erasing of HDD was very simple - absolutely every sector of the hard disk was overwritten with zeros and ones, and their combinations were very many times. With that, the more - the better! This procedure takes a long time. A lot of time. That is why this method is not suitable for instantaneous and irrevocable deletion of data, if suddenly a group of capture comes to you. Radical methods like instant physical destruction are needed here ... Not the point, this is not the point.
With SSD everything is completely different. Unlike HDD, SSD has more complex data distribution algorithms. One example of how the data is left untouched is related to managing it in the SSD. This was done to ensure that the wear of memory cells was at least approximately uniform, because they have a limited “lifespan”. When you edit a document and save changes, they do not overwrite the original data. Instead, SSDs write new content to an empty data block, and then update the logical map to indicate the new location. This leaves a place where the raw data on the SSD is marked as free, but the actual data remains intact. Over time, data marked as free can be deleted, but until then it can be recovered. Actually, this is also the reason for the slowdown of consumer drives, as mentioned above. The way the flash controller manages the distribution of the data does not greatly guarantee that the method used in erasing the HDD will completely overwrite all the SSD memory cells.
Secure Erase is recognized by the National Institutes of Standards and Technology (NIST) as an effective and secure way to meet legal data reinstatement requirements.
ATA Secure Erase is part of the ANSI ATA specification. In cases of its correct implementation, erases the entire contents of the disk at the hardware level, rather than using software tools.
ATA Secure Erase (SE) is designed for controllers in the SSD. The SSD controller resets all memory cells, making them empty. In fact, this method restores the SSD to the factory state, not only deleting data, but also returning the original performance. When implemented correctly, this standard will handle all memory, including service areas and protected sectors.
Domestic GOST P50739-95 recommends erasing information by completely rewriting sectors. At the same time, it does not specify how many times it is required to do this, and, as we have already said, this method is not entirely effective, because data can be restored with special equipment. Yes, and it is again relevant for HDD - what to do, if we do not have time abroad for new technologies, then we have it all the more. True, questions of such importance, in fact, are not quickly resolved - who worked with the FSB or, at least, FSTEC, perfectly understand what they mean. And the matter is not in bureaucracy or someone's unwillingness, but in the fact that it is required to achieve the most useful result, which is very, very difficult. And expensive.
NAVSO P-5239-26 Wipe Method - the most common standard in the world for disposal comes from the US Department of Defense. The execution algorithm is as follows:
- first pass - the specified character is written (for example, zero);
- the second pass - the return data is written (zero is replaced by one);
- the third pass - writing a random sequence.
This method minimizes the residual magnetization and makes it possible to restore the spec. means extremely problematic. Yeah, it's not about SSD anymore, right?
German standard VSITR . The execution algorithm runs in 7 complete rewrite cycles:
- write 0;
- write 1;
- write 0;
- write 1;
- write 0;
- write 1;
- write random data.
It turns out that at this point in time specifically for solid-state drives normative documents do not exist or they are not available to the public.
It would seem that SSD drives have a non-trivial system of work, so the complete data destruction scheme should also not be the easiest. But in fact, this is not the case at all. In any SSD there is a controller that is the “brain” of the drive. He does not just tell the system where to write the data, but also skillfully encrypts the information passing through it, and keeps the key in himself. If you delete (more precisely, replace) this key, then all information will turn into a disorderly set of ones and zeros - it will be impossible to decipher it in any way (at least until such computing powers and tools are created that will allow you to choose this key ). Just one simple enough action by the user can solve the problem of secure data erasure. This method is the fastest and efficient.
If you combine the two methods (replacing the key and resetting the cells), you get the perfect algorithm for obtaining a completely sterile disk in the state of its maximum performance. This, firstly, solves the problem that we raised at the very beginning of the article, and, secondly, it can help us to answer the question about the degree of wear of the drive. It is important to note that some disks with built-in encryption when receiving a secure wipe command can perform only one algorithm — this depends on the manufacturer’s controller configuration. If you "reset" your SSD and compare the actual performance with the declared one, then you will get an answer to this question. This procedure will not affect the wear of the disc, which is very important. Note that these actions are designed specifically for analyzing the state of the disk, but a long-term increase in the read / write speed will not be possible due to the nature of SSD drives - the situation may depend on both the drive model and the controller firmware. And be sure to note that not all drives support encryption. In this case, the controller simply resets the cells.
All of the above information described working with magnetic disks based on ATA / SATA interfaces, as well as SSD based on SATA - 2.5 ”or M.2 interface devices, which are the most common on the market today. But the modern high-speed interface NVMe is something else. SSDs with this interface can be made in the form of M.2 cards and PCI-Express cards (similar to small video or sound cards - for someone you like). The NVM Express Interface (NVMe) is a specification of the logic device interface for accessing non-volatile memory connected via the PCI Express bus. NVM acts as an initializer for non-volatile memory, which is usually flash memory in the form of SSD. NVM Express, as a logical device interface, was designed from the ground up to maximize the benefit of low latency and internal parallelism of flash-based storage devices, reflecting the parallelism of modern processors, platforms and applications. Disks of this type do not support standard commands, but since, as mentioned earlier, the problem is not new, the developers took this into account when designing such drives, so all (or almost all) SSDs have in their arsenal a command to run Secure Erase algorithms.
By the way, the latest NVMe specification adds new commands that can clear every disk nanometer (bus cache, etc.). The only problem is the software, which should be able to work with disks of this type.
Specifications, algorithms, complex names, this, of course, is very interesting. But we want to erase your disk! What do I need to do?
Let's start with the sad. Sad for Mac OS users. The problem is that for the most part none of the utilities produced by manufacturers of solid-state drives that support the Secure Erase Unit or Format NVM, does not work on a Mac, so for this procedure you will have to connect your drive to a system running Windows, Linux or Dos.
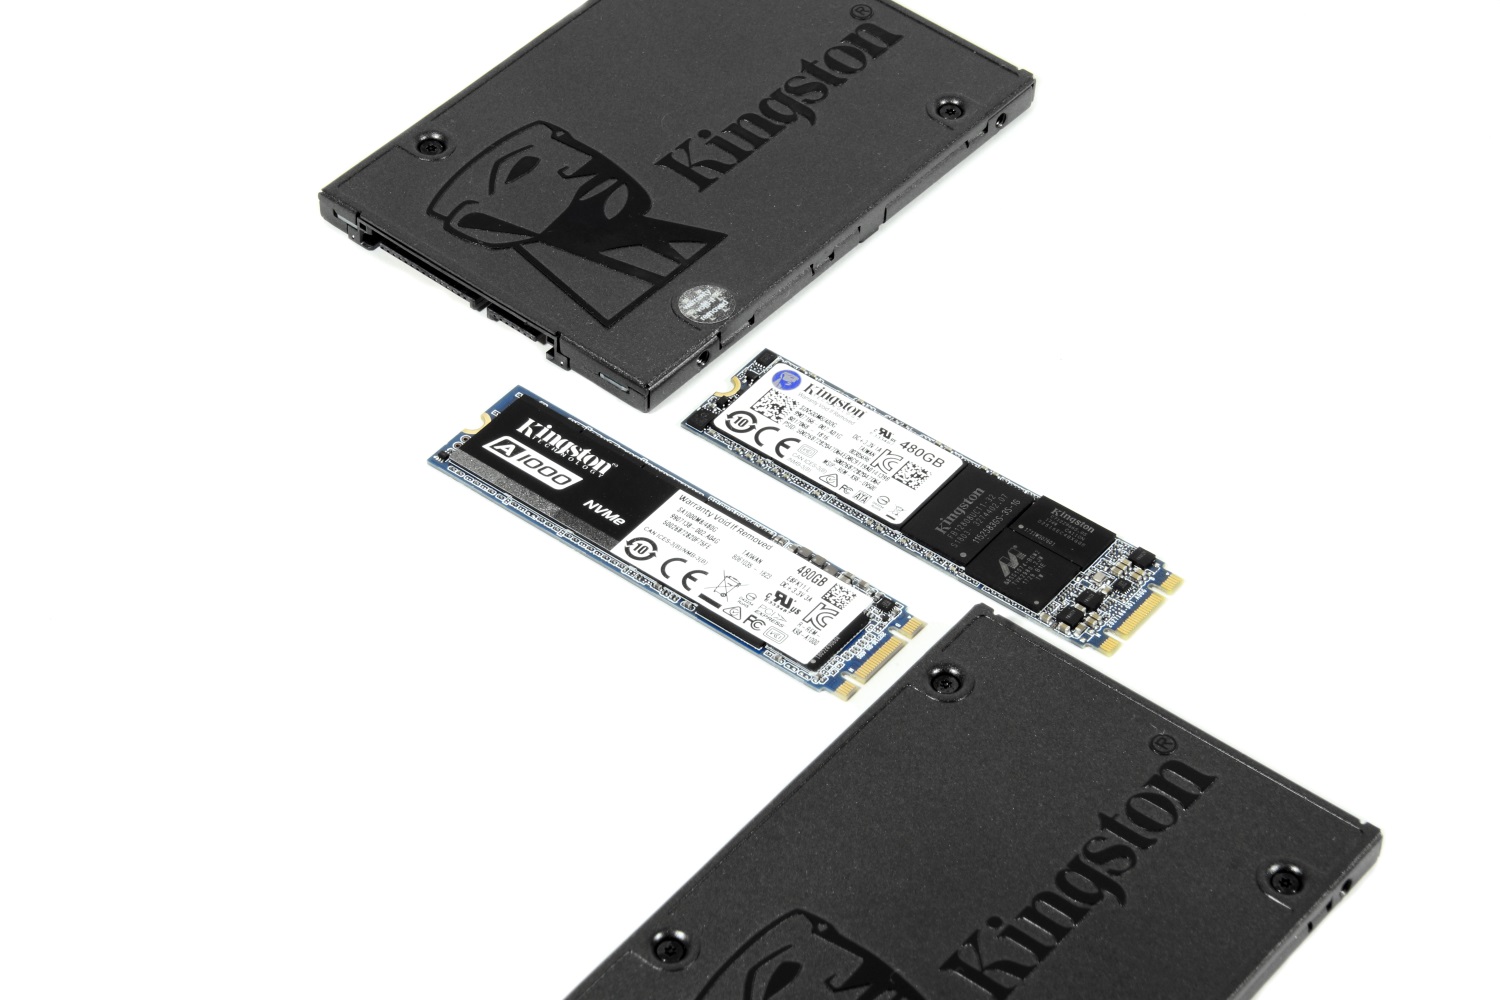
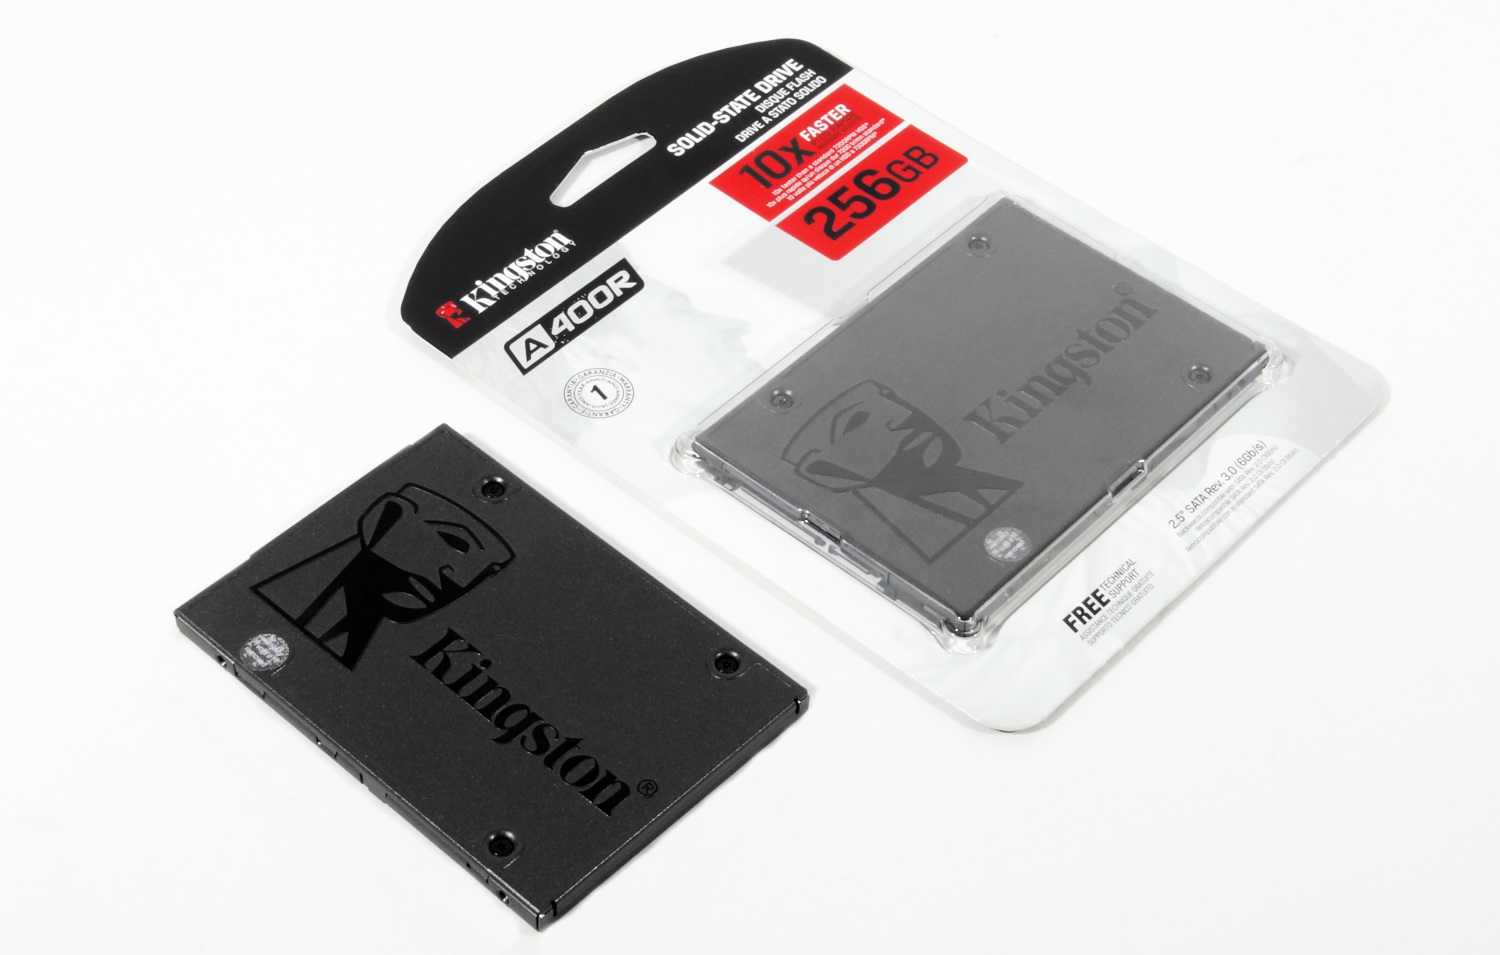
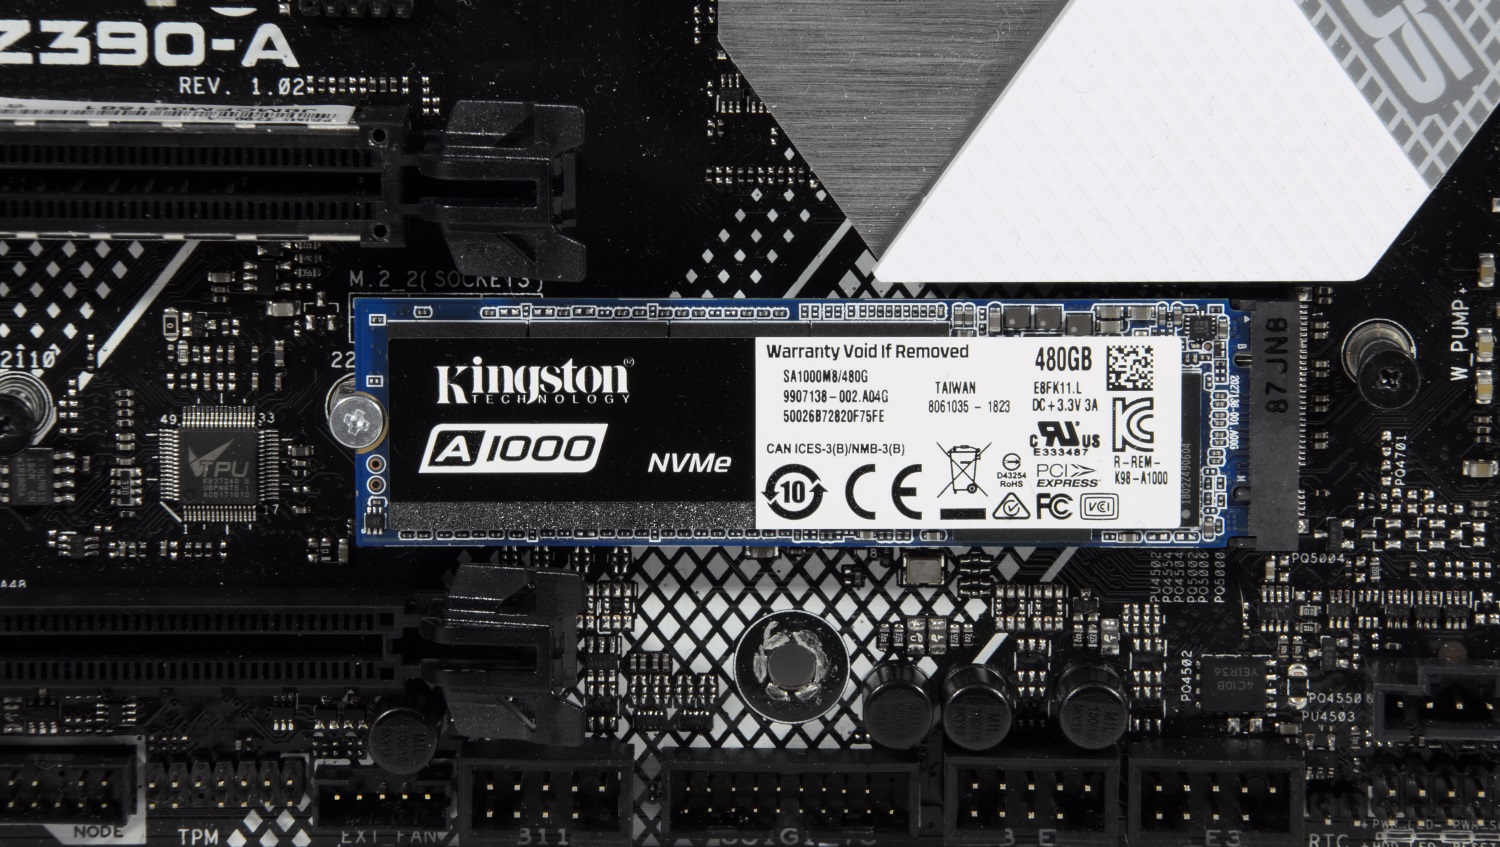
All major SSD manufacturers provide utilities for working with their solutions, and you can find them on the official websites. You can also use free and paid solutions, which are also suitable for deleting data, but function on the basis of the standards mentioned above, since no one except the SSD developers knows the hardware component so that it can work properly, and also create a universal tool for all existing SSDs . For example, we take Kingston UV500 and A1000 drives , which have SATA and NVMe interfaces, respectively.
First, add that cleaning the drive from the operating system running on it will not work. Actually, it is logical and not surprising. But you never know ...
To demonstrate the processes of deleting and restoring data, prepare test A1000. Leave it a set of photos, videos and different software in the archives, and in the form of executable files.
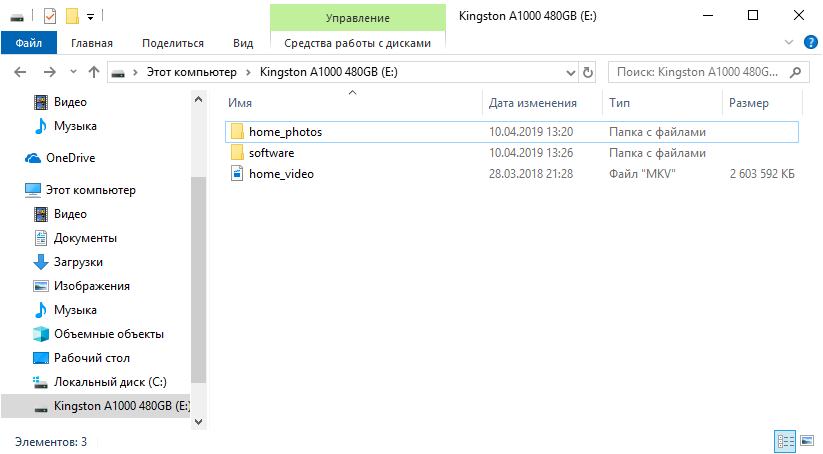
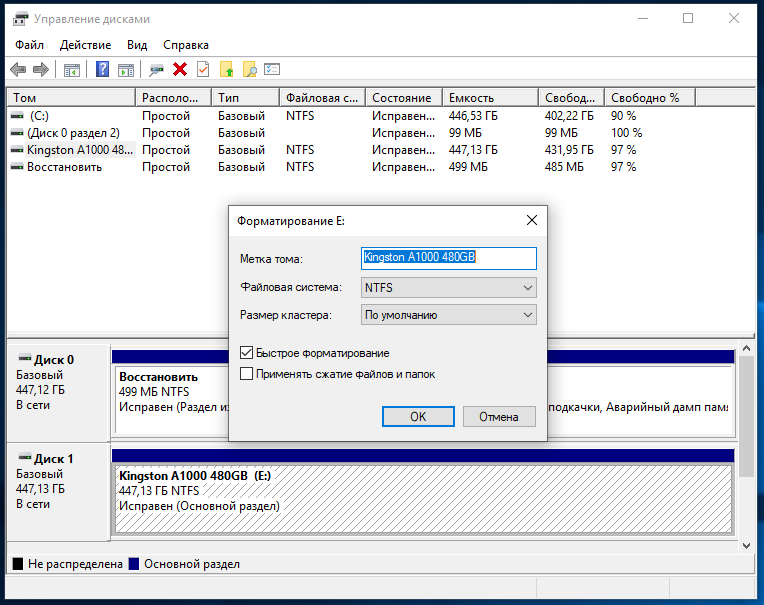
What do users usually do when they want to “delete” data from the disk? For example, before selling it. Correctly, format it with default settings.
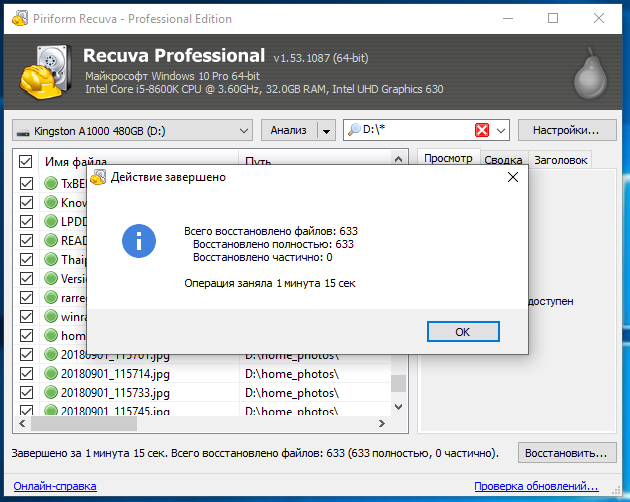
And what can the new owner of the drive do? That's right again - check your purchase for all sorts of interesting. As you can see, the data is in excellent condition!

And it took very little time to restore them (if both drives are fast):
Now many people know that you need to delete the data correctly. This can be done in several ways, but there are some limitations. For example, in Windows 8 and newer, solid-state drives work in such a mode that it will just not work out Secure Erase. If you can still deal with 2.5 ”drives (to remove the“ lock ”, you must disconnect the power cable from the drive when the system is turned on with the operating system loaded, and connect it after a few seconds), then you will not be able to do this with M.2 solutions. Similarly with NVMe M.2 SSD. Kingston has an SSD Manager program that has all the necessary functionality to monitor the status of drives or their maintenance, including Secure Erase. Actually, when used in Windows 10, the program tells us what to do to unlock the drive and permanently delete the data stored on it.

You can use the system with Windows 7 - everything should work correctly in it, unless, of course, an incomprehensible “build” from craftsmen is used with an unknown extent to which the working drivers of the SATA motherboard controller are. Another option if the Secure Erase feature in Kingston SSD Manager is not available regardless of your actions - use a USB docking station to connect your drive. Then immediately no problems - the function is available without any problems. The drive is visible in the system.

Here we need to select a connected drive, click the Secure Erase button and enter the last 4 characters of our drive's serial number.
The process does not take much time, so you can soon start using the disk again.

Another option to run Secure Erase is from the BIOS of motherboards, if such functionality is implemented by their manufacturer. Usually, the program is in the appropriate section. For example, some board models do not have this feature.

But in quite a few models the program is ready to help you:

In it we see a list of connected drives and their status.
To get Ready status for SATA drives, you need to disconnect and power them up without turning off the system's general power supply, which we said earlier. Then you need to restart the SSD Secure Erase utility. We see that the status has changed to Ready.

For NVMe disks, you need to select a sector size before performing the cleanup.
And then we will be asked whether we want to clean the drive.
And again - and really? After all, the process is irreversible.
After some time, the task will be completed. It remains only to turn off or reboot the system, and the drive will be in the "as from the store."

Now on the drive to find nothing happens.

Even if you use the function of in-depth analysis.

Now consider an option that can be used if you do not have a system with Windows 7 or a motherboard with built-in stripping program. Refer to the free software. Restore the speed of the drive in this way will not work (or will, but not as if it were the "same" Secure Erase), but no one will recover your data.
The first program is Secure Eraser from ASCOMP Software. Its interface is as simple as possible. First we add files and folders to the list for deletion.

Then select the algorithm for deleting data.
And run the uninstall process. It remains only to wait for some time, which depends on the amount of data to be deleted and the selected algorithm.

After completion of the removal process, the program displays a report on the work done.
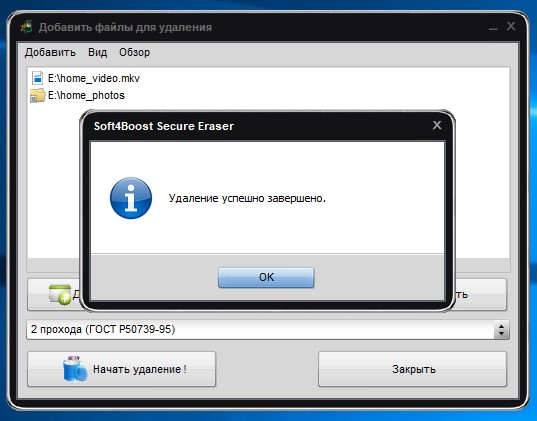
Another program is Soft4Boost Secure Eraser. This is an extremely easy to use program, where you are required a minimum of actions. First, select the files and folders that we want to destroy.

Then the data deletion algorithm
And it remains only to start the process and wait for it to end.
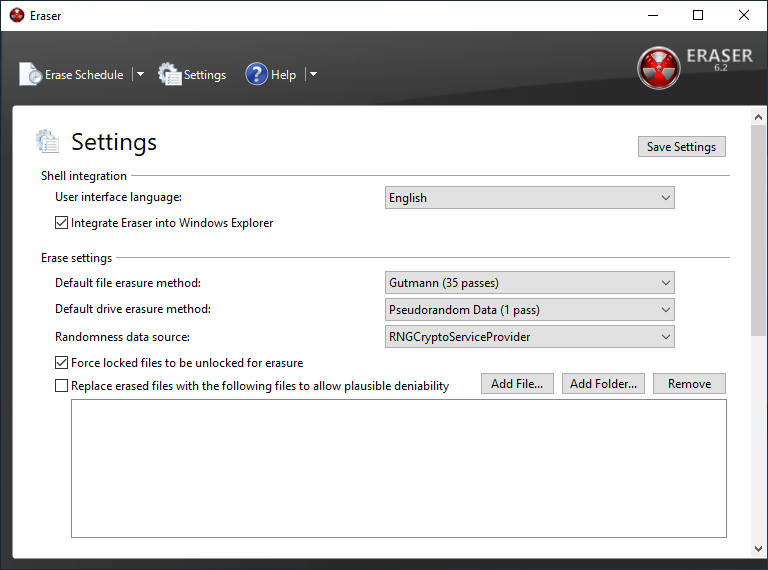
And get acquainted with another program - Eraser . This program has a fairly rich set of features, such as cleaning partitions or disks as a whole, cleaning unallocated space on a disk, certain files or folders, and creating a schedule for all of the above.
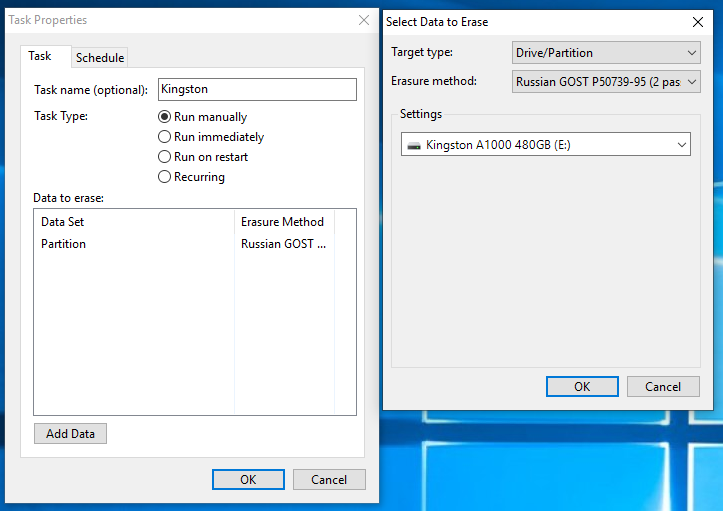
To delete data, you need to create a task with certain parameters.

We created a task to delete data from the entire drive. For example, this is relevant before selling SSD.
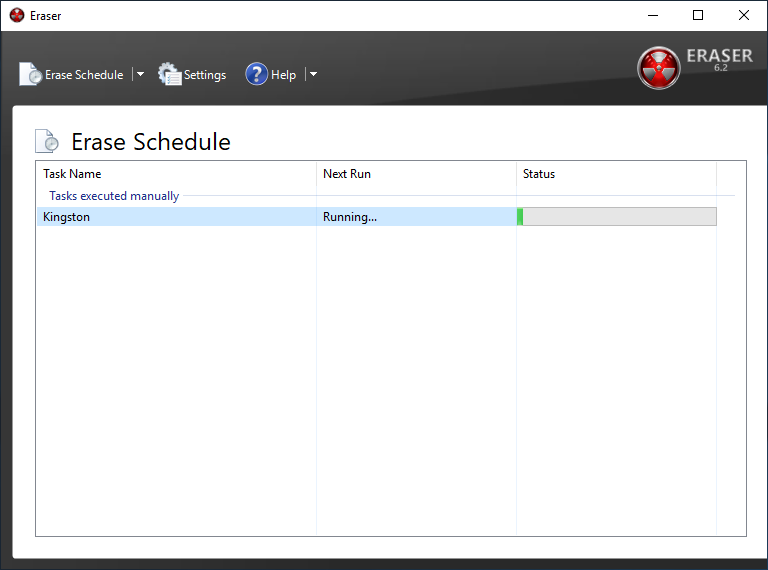
The speed of the cleaning process varies depending on the method chosen. But no option is fast. But there's nothing you can do - time is needed to completely destroy the data.
And, nevertheless, we will very briefly review one more program, but the Secure Erase function is available only in its paid version. This is AOMEI Partition Assistant . The program has the richest functionality for working with drives, but we are only interested in the disk cleaning function. It is noteworthy that in Windows 10 (as well as 8 or 8.1) this function is not available, which is confirmed by the corresponding pop-up window.

The program also allows you to delete data in accordance with the selected algorithm, after which it will be impossible to restore them.

Actually, nothing. Now you can be calm - your personal data stored on the drive cannot be recovered. And the speed indicators of the disk will be restored to practically declared (they will never be perfect, no matter how cool). A possible performance degradation in the future is expected, if the problem with TRIM / Deallocate is not solved. Therefore, even though Secure Erase is an effective way, it only removes the symptoms, but the disease remains. Be sure to check for new firmware for the drive, drivers for the motherboard, or use a “clean” operating system, and not an assembly from the craftsmen. In addition, it is recommended to use software developed by the manufacturer to work with the drive, otherwise there will again be a chance to “break” something, especially if you climb into settings such as enabling or disabling service functions like TRIM, which some “promoted” tools allow network.
And today we have seen a few points. The first: the safest and fastest method of deleting data is to use proprietary software from the manufacturer. Windows 8 / 8.1 / 10, in which this functionality is unavailable or is available after dancing with a tambourine, spoil the whole raspberry, but you can find a solution, which we told about. Secondly, the use of the Secure Erase function built into the motherboard is completely justified. Everything is easier here - no restrictions, a few mouse clicks or keystrokes on the keyboard and the disk is pretty virgin. And the third: the use of third-party software to delete data. This is not exactly what the essence of the Secure Erase function at the controller / firmware level is, but the result will be approximately identical. True, with a markedly increased task completion time, namely, cleaning. This method is not suitable for restoring the speed of the drive instead of the TRIM command or the first two methods, and only allows you to permanently destroy information. Delete your personal data correctly and sleep well!
For more information about HyperX and Kingston products, please visit the company websites.
But, to begin with, we will clarify the situation. This material is focused on ordinary (no matter - novice or advanced) users who decided for one reason or another to permanently delete data from it or try to restore the speed performance of the drive, if they began to drop noticeably to noticeably lower performance than stated. , SLC caching and other “official” reasons for speed reduction in this case we do not consider, since these are hardware features of the drives). The essence of the problem that Secure Erase can solve may lie in the fact that the drive began to work slowly - write and read data. There can be a lot of reasons, and some of them are related to the hardware component, and some - to the software component. Solid state drives are strikingly different in maintenance from classic HDDs, so simply deleting data or formatting the drive doesn’t really mean resetting the cell - they need to be cleared before recording, which slows down the process of recording new data. In theory, there should be no such problems, because there is a TRIM — a command to clear the data marked for deletion in the cells with a simple system so that we will not notice. This command works only with SATA 2.5 ”and M.2 drives. For drives connected to the PCIe bus (M.2 or PCIe on the motherboard) there is an analogue - Deallocate. But it happens that these functions are disabled for any reason - OS error, user error in configuring the disk through third-party software, using non-standard OS assemblies with unknown software components. And soon the disk will begin to work noticeably slower, which will be visible even “by eye” without any benchmarking performance measurements.
And a couple of words for those who consider this material a guide to actions within organizations where data deletion is necessary as a class. To protect information that is critical, both for serious organizations that fear for data integrity, and for public sector enterprises working with state secret information, data carriers should, as a rule, use protection complexes (software and / or hardware), built on cryptographic data protection using domestic GOST 28147-89, satisfying regulatory and regulatory documents of regulators. The thing is that in Russia at the moment there is no really effective algorithm for completely removing data from solid-state drives, and GOST P50739-95 is focused on HDD (HDD in common) for this is not quite suitable. We will find patience - about ours and not our standards a little later. It was necessary to tell this without fail, but with the terrible wording in this material we set off. Well, or almost :)
')
Why data is not deleted immediately?
Any of us once thought, and perhaps thinks now, that by pressing the "Delete" button and then "Empty Trash", the selected files will be deleted. But in fact, this is not exactly the case and now we will explain why. HDD algorithms are built in such a way that when you delete a file, the operating system actually removes the link to it from the file system table. It is as if to remove the shortcut from the desktop - in this case, the program or game remains in place and you can still access it. Yet, at the request of parents, did you delete the CS label or another favorite game with the phrase “everything, game is deleted”? So here - the file remains physically on the media, but until a new one is written in its place. Although even after this information can be recovered by examining the magnetic fields on the disk surface, but this is a completely different story ... As you already guessed, the safe erasing of HDD was very simple - absolutely every sector of the hard disk was overwritten with zeros and ones, and their combinations were very many times. With that, the more - the better! This procedure takes a long time. A lot of time. That is why this method is not suitable for instantaneous and irrevocable deletion of data, if suddenly a group of capture comes to you. Radical methods like instant physical destruction are needed here ... Not the point, this is not the point.
With SSD everything is completely different. Unlike HDD, SSD has more complex data distribution algorithms. One example of how the data is left untouched is related to managing it in the SSD. This was done to ensure that the wear of memory cells was at least approximately uniform, because they have a limited “lifespan”. When you edit a document and save changes, they do not overwrite the original data. Instead, SSDs write new content to an empty data block, and then update the logical map to indicate the new location. This leaves a place where the raw data on the SSD is marked as free, but the actual data remains intact. Over time, data marked as free can be deleted, but until then it can be recovered. Actually, this is also the reason for the slowdown of consumer drives, as mentioned above. The way the flash controller manages the distribution of the data does not greatly guarantee that the method used in erasing the HDD will completely overwrite all the SSD memory cells.
Standards, standards, standards ... Are they relevant?
Secure Erase is recognized by the National Institutes of Standards and Technology (NIST) as an effective and secure way to meet legal data reinstatement requirements.
ATA Secure Erase is part of the ANSI ATA specification. In cases of its correct implementation, erases the entire contents of the disk at the hardware level, rather than using software tools.
ATA Secure Erase (SE) is designed for controllers in the SSD. The SSD controller resets all memory cells, making them empty. In fact, this method restores the SSD to the factory state, not only deleting data, but also returning the original performance. When implemented correctly, this standard will handle all memory, including service areas and protected sectors.
Domestic GOST P50739-95 recommends erasing information by completely rewriting sectors. At the same time, it does not specify how many times it is required to do this, and, as we have already said, this method is not entirely effective, because data can be restored with special equipment. Yes, and it is again relevant for HDD - what to do, if we do not have time abroad for new technologies, then we have it all the more. True, questions of such importance, in fact, are not quickly resolved - who worked with the FSB or, at least, FSTEC, perfectly understand what they mean. And the matter is not in bureaucracy or someone's unwillingness, but in the fact that it is required to achieve the most useful result, which is very, very difficult. And expensive.
NAVSO P-5239-26 Wipe Method - the most common standard in the world for disposal comes from the US Department of Defense. The execution algorithm is as follows:
- first pass - the specified character is written (for example, zero);
- the second pass - the return data is written (zero is replaced by one);
- the third pass - writing a random sequence.
This method minimizes the residual magnetization and makes it possible to restore the spec. means extremely problematic. Yeah, it's not about SSD anymore, right?
German standard VSITR . The execution algorithm runs in 7 complete rewrite cycles:
- write 0;
- write 1;
- write 0;
- write 1;
- write 0;
- write 1;
- write random data.
It turns out that at this point in time specifically for solid-state drives normative documents do not exist or they are not available to the public.
The more complex the system, the easier it is to break it.
It would seem that SSD drives have a non-trivial system of work, so the complete data destruction scheme should also not be the easiest. But in fact, this is not the case at all. In any SSD there is a controller that is the “brain” of the drive. He does not just tell the system where to write the data, but also skillfully encrypts the information passing through it, and keeps the key in himself. If you delete (more precisely, replace) this key, then all information will turn into a disorderly set of ones and zeros - it will be impossible to decipher it in any way (at least until such computing powers and tools are created that will allow you to choose this key ). Just one simple enough action by the user can solve the problem of secure data erasure. This method is the fastest and efficient.
If you combine the two methods (replacing the key and resetting the cells), you get the perfect algorithm for obtaining a completely sterile disk in the state of its maximum performance. This, firstly, solves the problem that we raised at the very beginning of the article, and, secondly, it can help us to answer the question about the degree of wear of the drive. It is important to note that some disks with built-in encryption when receiving a secure wipe command can perform only one algorithm — this depends on the manufacturer’s controller configuration. If you "reset" your SSD and compare the actual performance with the declared one, then you will get an answer to this question. This procedure will not affect the wear of the disc, which is very important. Note that these actions are designed specifically for analyzing the state of the disk, but a long-term increase in the read / write speed will not be possible due to the nature of SSD drives - the situation may depend on both the drive model and the controller firmware. And be sure to note that not all drives support encryption. In this case, the controller simply resets the cells.
Features of cleaning SSD with interface NVM Express
All of the above information described working with magnetic disks based on ATA / SATA interfaces, as well as SSD based on SATA - 2.5 ”or M.2 interface devices, which are the most common on the market today. But the modern high-speed interface NVMe is something else. SSDs with this interface can be made in the form of M.2 cards and PCI-Express cards (similar to small video or sound cards - for someone you like). The NVM Express Interface (NVMe) is a specification of the logic device interface for accessing non-volatile memory connected via the PCI Express bus. NVM acts as an initializer for non-volatile memory, which is usually flash memory in the form of SSD. NVM Express, as a logical device interface, was designed from the ground up to maximize the benefit of low latency and internal parallelism of flash-based storage devices, reflecting the parallelism of modern processors, platforms and applications. Disks of this type do not support standard commands, but since, as mentioned earlier, the problem is not new, the developers took this into account when designing such drives, so all (or almost all) SSDs have in their arsenal a command to run Secure Erase algorithms.
By the way, the latest NVMe specification adds new commands that can clear every disk nanometer (bus cache, etc.). The only problem is the software, which should be able to work with disks of this type.
When you need to erase everything. But how?
Specifications, algorithms, complex names, this, of course, is very interesting. But we want to erase your disk! What do I need to do?
Let's start with the sad. Sad for Mac OS users. The problem is that for the most part none of the utilities produced by manufacturers of solid-state drives that support the Secure Erase Unit or Format NVM, does not work on a Mac, so for this procedure you will have to connect your drive to a system running Windows, Linux or Dos.
All major SSD manufacturers provide utilities for working with their solutions, and you can find them on the official websites. You can also use free and paid solutions, which are also suitable for deleting data, but function on the basis of the standards mentioned above, since no one except the SSD developers knows the hardware component so that it can work properly, and also create a universal tool for all existing SSDs . For example, we take Kingston UV500 and A1000 drives , which have SATA and NVMe interfaces, respectively.
First, add that cleaning the drive from the operating system running on it will not work. Actually, it is logical and not surprising. But you never know ...
To demonstrate the processes of deleting and restoring data, prepare test A1000. Leave it a set of photos, videos and different software in the archives, and in the form of executable files.
What do users usually do when they want to “delete” data from the disk? For example, before selling it. Correctly, format it with default settings.
And what can the new owner of the drive do? That's right again - check your purchase for all sorts of interesting. As you can see, the data is in excellent condition!
And it took very little time to restore them (if both drives are fast):
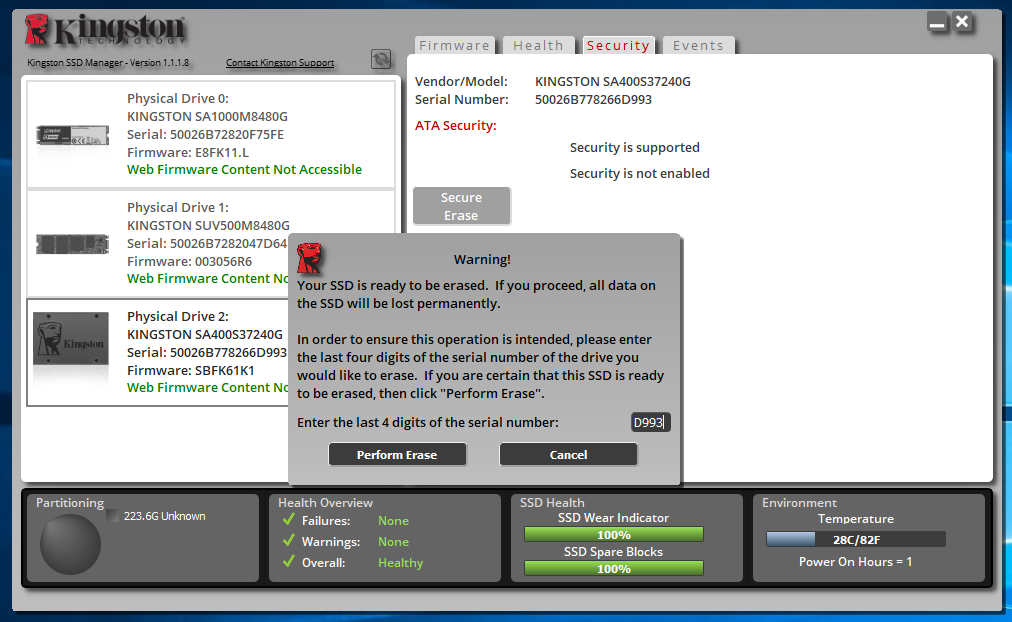
Now many people know that you need to delete the data correctly. This can be done in several ways, but there are some limitations. For example, in Windows 8 and newer, solid-state drives work in such a mode that it will just not work out Secure Erase. If you can still deal with 2.5 ”drives (to remove the“ lock ”, you must disconnect the power cable from the drive when the system is turned on with the operating system loaded, and connect it after a few seconds), then you will not be able to do this with M.2 solutions. Similarly with NVMe M.2 SSD. Kingston has an SSD Manager program that has all the necessary functionality to monitor the status of drives or their maintenance, including Secure Erase. Actually, when used in Windows 10, the program tells us what to do to unlock the drive and permanently delete the data stored on it.
You can use the system with Windows 7 - everything should work correctly in it, unless, of course, an incomprehensible “build” from craftsmen is used with an unknown extent to which the working drivers of the SATA motherboard controller are. Another option if the Secure Erase feature in Kingston SSD Manager is not available regardless of your actions - use a USB docking station to connect your drive. Then immediately no problems - the function is available without any problems. The drive is visible in the system.
Here we need to select a connected drive, click the Secure Erase button and enter the last 4 characters of our drive's serial number.
The process does not take much time, so you can soon start using the disk again.
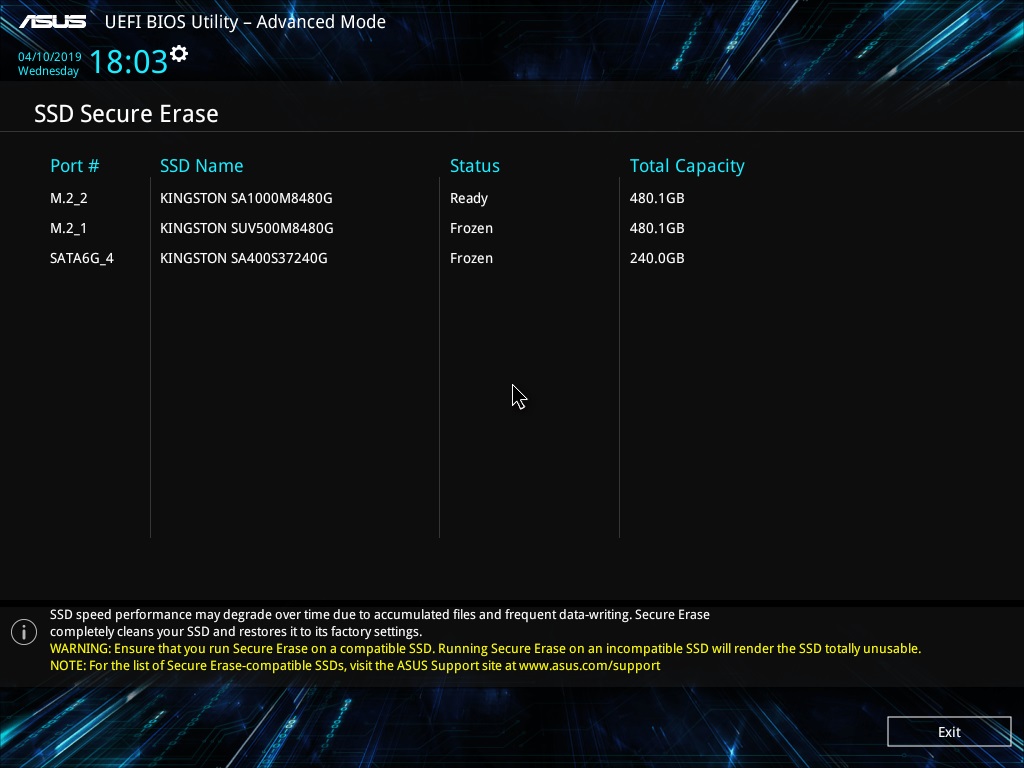
Another option to run Secure Erase is from the BIOS of motherboards, if such functionality is implemented by their manufacturer. Usually, the program is in the appropriate section. For example, some board models do not have this feature.
But in quite a few models the program is ready to help you:
In it we see a list of connected drives and their status.
To get Ready status for SATA drives, you need to disconnect and power them up without turning off the system's general power supply, which we said earlier. Then you need to restart the SSD Secure Erase utility. We see that the status has changed to Ready.
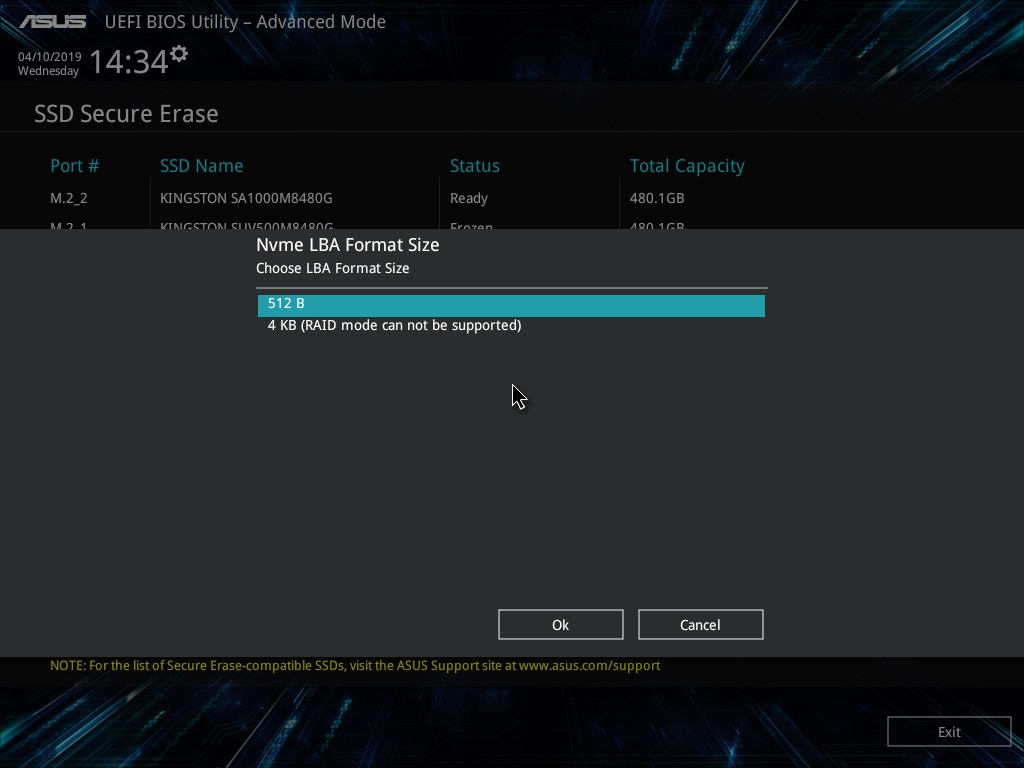
For NVMe disks, you need to select a sector size before performing the cleanup.
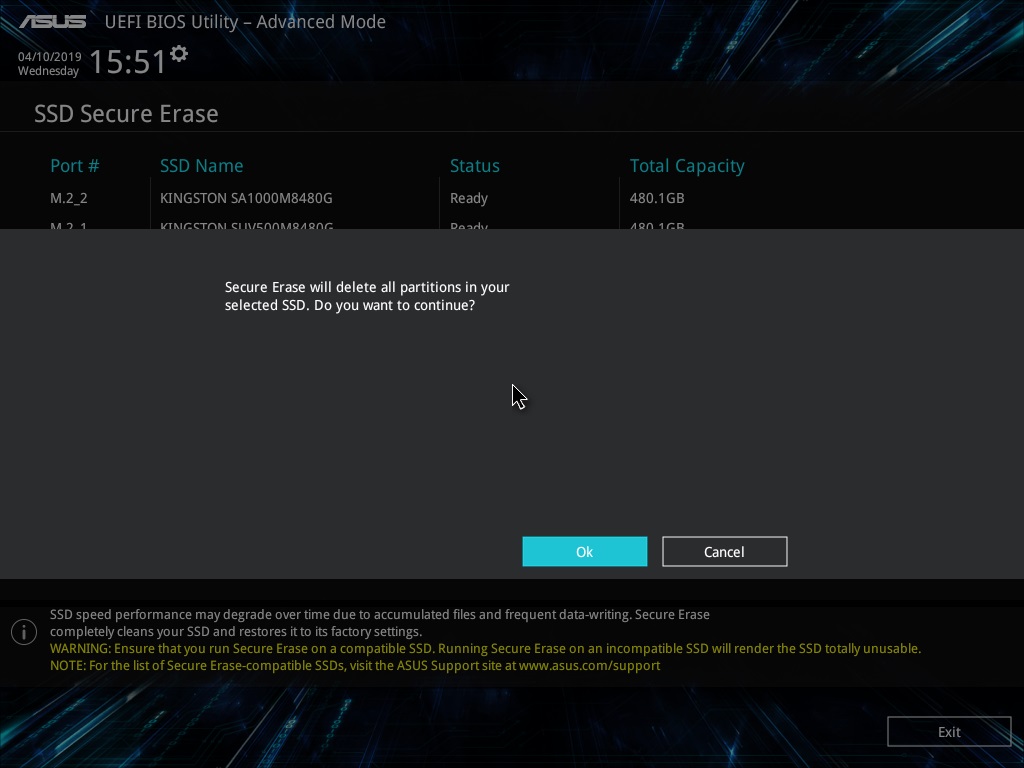
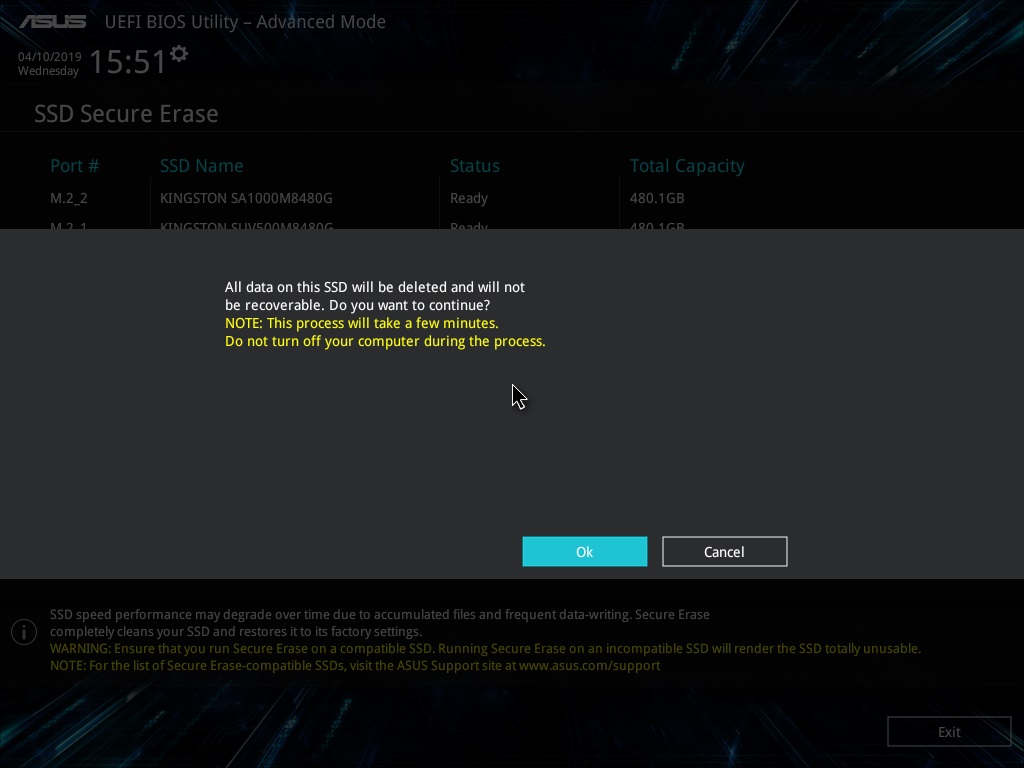
And then we will be asked whether we want to clean the drive.
And again - and really? After all, the process is irreversible.
After some time, the task will be completed. It remains only to turn off or reboot the system, and the drive will be in the "as from the store."
Now on the drive to find nothing happens.
Even if you use the function of in-depth analysis.
Now consider an option that can be used if you do not have a system with Windows 7 or a motherboard with built-in stripping program. Refer to the free software. Restore the speed of the drive in this way will not work (or will, but not as if it were the "same" Secure Erase), but no one will recover your data.
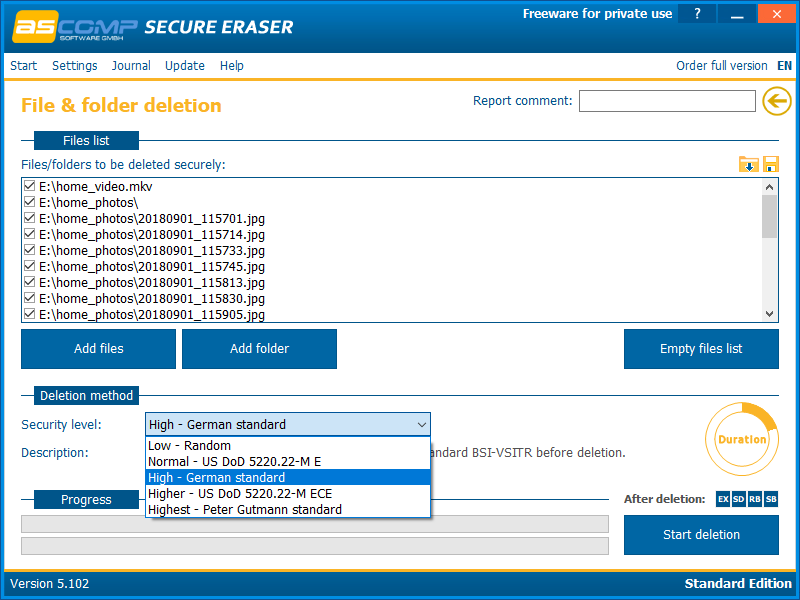
The first program is Secure Eraser from ASCOMP Software. Its interface is as simple as possible. First we add files and folders to the list for deletion.
Then select the algorithm for deleting data.
And run the uninstall process. It remains only to wait for some time, which depends on the amount of data to be deleted and the selected algorithm.
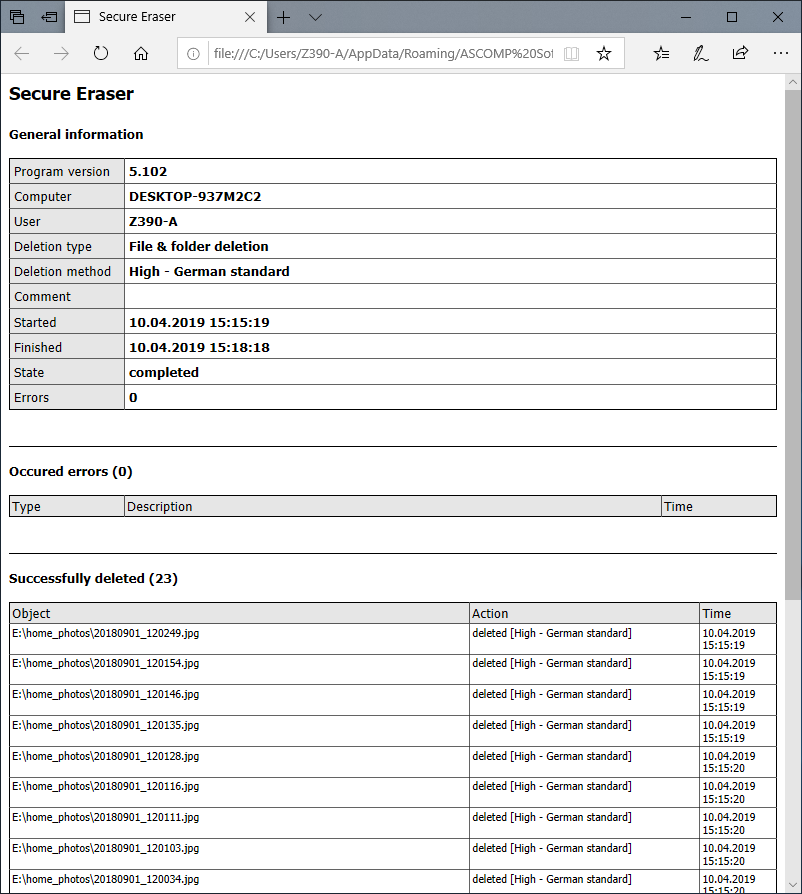
After completion of the removal process, the program displays a report on the work done.
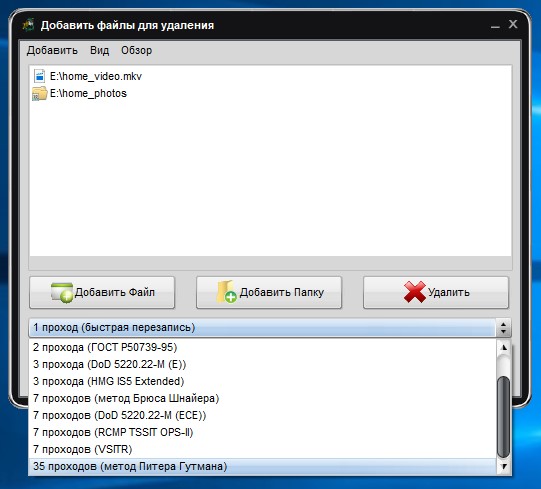
Another program is Soft4Boost Secure Eraser. This is an extremely easy to use program, where you are required a minimum of actions. First, select the files and folders that we want to destroy.
Then the data deletion algorithm
And it remains only to start the process and wait for it to end.
And get acquainted with another program - Eraser . This program has a fairly rich set of features, such as cleaning partitions or disks as a whole, cleaning unallocated space on a disk, certain files or folders, and creating a schedule for all of the above.
To delete data, you need to create a task with certain parameters.
We created a task to delete data from the entire drive. For example, this is relevant before selling SSD.
The speed of the cleaning process varies depending on the method chosen. But no option is fast. But there's nothing you can do - time is needed to completely destroy the data.
And, nevertheless, we will very briefly review one more program, but the Secure Erase function is available only in its paid version. This is AOMEI Partition Assistant . The program has the richest functionality for working with drives, but we are only interested in the disk cleaning function. It is noteworthy that in Windows 10 (as well as 8 or 8.1) this function is not available, which is confirmed by the corresponding pop-up window.
The program also allows you to delete data in accordance with the selected algorithm, after which it will be impossible to restore them.
What's next?
Actually, nothing. Now you can be calm - your personal data stored on the drive cannot be recovered. And the speed indicators of the disk will be restored to practically declared (they will never be perfect, no matter how cool). A possible performance degradation in the future is expected, if the problem with TRIM / Deallocate is not solved. Therefore, even though Secure Erase is an effective way, it only removes the symptoms, but the disease remains. Be sure to check for new firmware for the drive, drivers for the motherboard, or use a “clean” operating system, and not an assembly from the craftsmen. In addition, it is recommended to use software developed by the manufacturer to work with the drive, otherwise there will again be a chance to “break” something, especially if you climb into settings such as enabling or disabling service functions like TRIM, which some “promoted” tools allow network.
And today we have seen a few points. The first: the safest and fastest method of deleting data is to use proprietary software from the manufacturer. Windows 8 / 8.1 / 10, in which this functionality is unavailable or is available after dancing with a tambourine, spoil the whole raspberry, but you can find a solution, which we told about. Secondly, the use of the Secure Erase function built into the motherboard is completely justified. Everything is easier here - no restrictions, a few mouse clicks or keystrokes on the keyboard and the disk is pretty virgin. And the third: the use of third-party software to delete data. This is not exactly what the essence of the Secure Erase function at the controller / firmware level is, but the result will be approximately identical. True, with a markedly increased task completion time, namely, cleaning. This method is not suitable for restoring the speed of the drive instead of the TRIM command or the first two methods, and only allows you to permanently destroy information. Delete your personal data correctly and sleep well!
For more information about HyperX and Kingston products, please visit the company websites.
Source: https://habr.com/ru/post/448624/
All Articles