The easiest way to make a chat in the iOS application
Hello! Every time when designing and designing a chat, I had a question: “Is it possible to simplify it somehow?”. Next week I have to make up a big chat for the application, so thoughts about the relief of the layout began to appear again in my head. A little after sitting and poking the possibilities of AutoLayout, I found a way to simplify the layout process and further work to the maximum. When solving such problems, UICollectionView is often used, but this time we will use UITableView.
First you need to create and properly configure UITableView. I prefer to do this with code:
The important point here is to set the rowHeight and determine estimatedRowHeight.
Now we come to the most interesting part - making up the cell! Create a new file, it should be a subclass of UITableViewCell, do not forget to tick the "Also create XIB file". The layout process is divided into steps to make it easier.
')
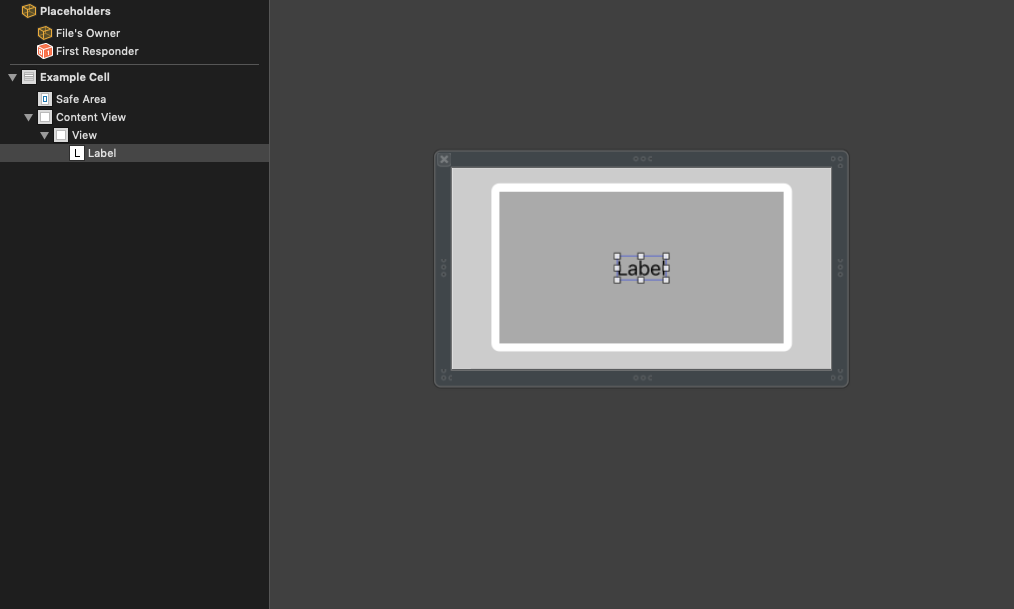
Drag a new UIView into a cell and place any backgroundColor, and then drag a new UILabel onto this view. Now in the Attributes Inspector for this UILabel it is necessary to set 0 in the Lines field. This will allow the cell to have multiple lines of text. It should turn out like this:
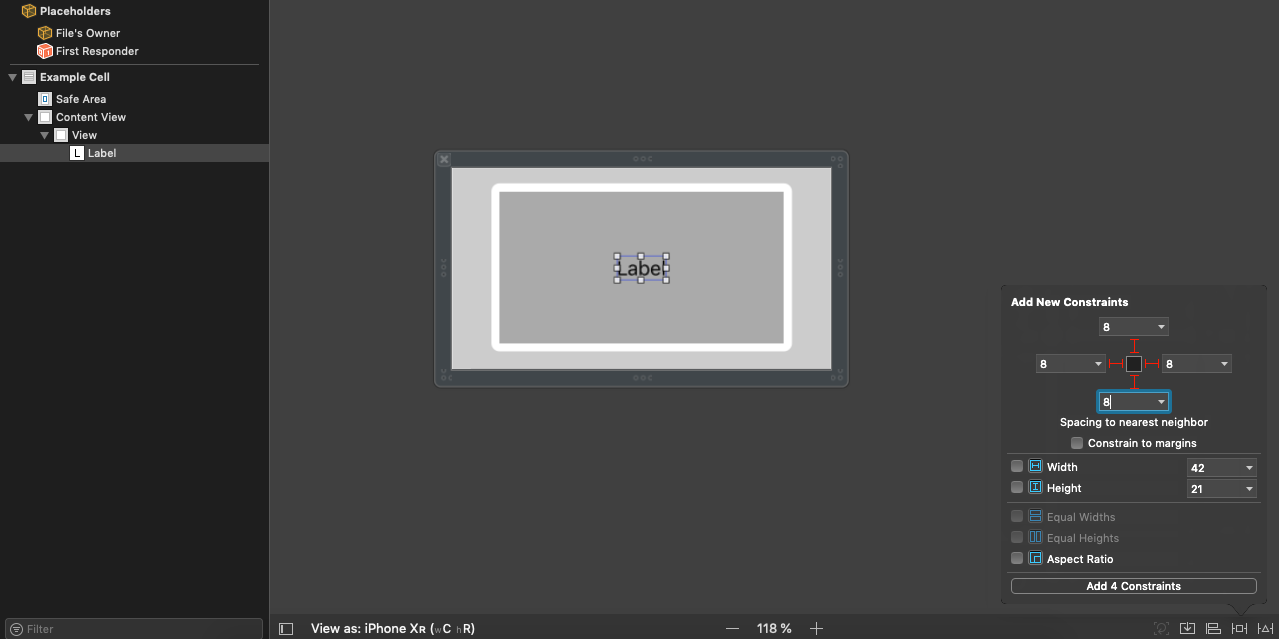
Now you need to attach the edges of the label to the edges of its superview with a small indent.
And now pure magic! Hook the left, top and bottom edges of the gray view to the corresponding edges of the cell, then, in a separate step, create a constraint from the right edge of the gray view to the right edge of the view cell. Now select the newly created account and open the Attributes Inspector for it. You should set “Greater Than or Equal” in the Relation field, and insert a number in the Constant field, for example, 60. This constraint will limit the maximum width of the message bubble.

Go to the last part. Create a height height for the message bubble, then put “Greater Than or Equal” in the Relation and any value in the Constant field. The value of Constant will be the minimum size of the bubble in height, it depends on the font size and indents. Now create an IBOutlet for the label and bubble in the cell class.
It remains only to fill the UITableViewDataSource methods and register our cell:
After that, it remains only to create and return our cell:
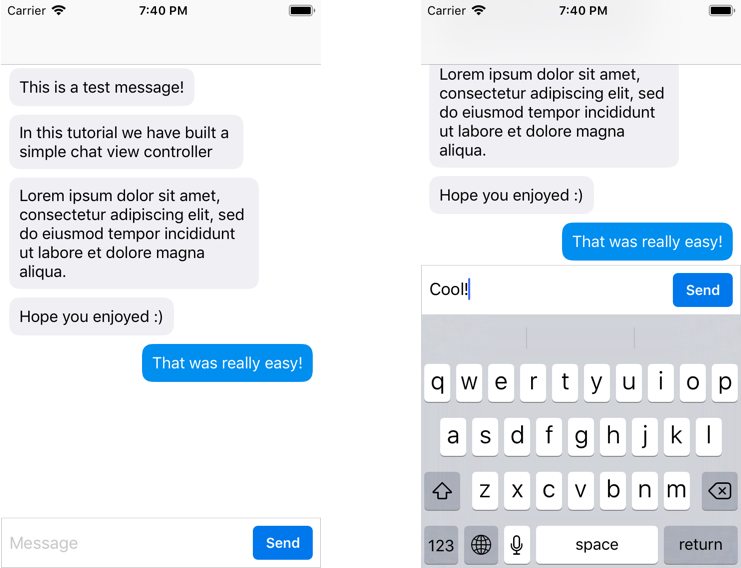
You just have to create the same cell for outgoing messages and round the corners of the bubble. Agree, the method is as simple as possible. There is no need to make any calculations of the height and width of this very “bubble”, we just need to delegate this work to AutoLayout. This is what a plus or minus finished project looks like:
That's all! Hope you enjoyed it!
Step One: Preparing the UITableView
First you need to create and properly configure UITableView. I prefer to do this with code:
tableView = UITableView() tableView.delegate = self tableView.dataSource = self tableView.rowHeight = UITableView.automaticDimension tableView.estimatedRowHeight = 44.0 tableView.translatesAutoresizingMaskIntoConstraints = false view.addSubview(tableView) tableView.topAnchor.constraint(equalTo: view.topAnchor).isActive = true tableView.leftAnchor.constraint(equalTo: view.leftAnchor).isActive = true tableView.rightAnchor.constraint(equalTo: view.rightAnchor).isActive = true tableView.bottomAnchor.constraint(equalTo: view.bottomAnchor).isActive = true The important point here is to set the rowHeight and determine estimatedRowHeight.
Step Two: Cell Creation
Now we come to the most interesting part - making up the cell! Create a new file, it should be a subclass of UITableViewCell, do not forget to tick the "Also create XIB file". The layout process is divided into steps to make it easier.
')
Drag a new UIView into a cell and place any backgroundColor, and then drag a new UILabel onto this view. Now in the Attributes Inspector for this UILabel it is necessary to set 0 in the Lines field. This will allow the cell to have multiple lines of text. It should turn out like this:
Now you need to attach the edges of the label to the edges of its superview with a small indent.
And now pure magic! Hook the left, top and bottom edges of the gray view to the corresponding edges of the cell, then, in a separate step, create a constraint from the right edge of the gray view to the right edge of the view cell. Now select the newly created account and open the Attributes Inspector for it. You should set “Greater Than or Equal” in the Relation field, and insert a number in the Constant field, for example, 60. This constraint will limit the maximum width of the message bubble.
Go to the last part. Create a height height for the message bubble, then put “Greater Than or Equal” in the Relation and any value in the Constant field. The value of Constant will be the minimum size of the bubble in height, it depends on the font size and indents. Now create an IBOutlet for the label and bubble in the cell class.
Step three and last: put it all together
It remains only to fill the UITableViewDataSource methods and register our cell:
tableView.register(UINib(nibName: "ExampleCell", bundle: nil), forCellReuseIdentifier: "incomingMessage") After that, it remains only to create and return our cell:
let cell = tableView.dequeueReusableCell(withIdentifier: "incomingMessage", for: indexPath) cell.messageLabel.text = "This is a test message" return cell Conclusion
You just have to create the same cell for outgoing messages and round the corners of the bubble. Agree, the method is as simple as possible. There is no need to make any calculations of the height and width of this very “bubble”, we just need to delegate this work to AutoLayout. This is what a plus or minus finished project looks like:
That's all! Hope you enjoyed it!
Source: https://habr.com/ru/post/448416/
All Articles