Writing a telegram bot in python using the telebot library
Lyrical digression
Bots today are a multifunctional tool for both business and entertainment. Personally, I think that they have a future. Of course, after reading this article, you will not be able to create large projects, but to become interested and start is completely.
Installation and Setup
To get started, let's download the python itself. You can do this on the official website . Do not forget to tick add to PATH during installation! After installing python, we need a good code editor. JetBrains comes to the rescue with its free PyCharm . We are already close, it remains to download the telebot library. To do this, go to the command line and write:
pip install telebot If everything went well, we can continue!
VPN
I think everyone knows about the blocking telegram in Russia and the only solution as always remains vpn. I personally recommend Windscribe , because they give you 2 GB. traffic completely free!
')
Bot Father
In the search for a telegram, we find Bot Farher'a and create our bot using the / newbot command. Then enter the name and username. Please note that the username must end in bot!
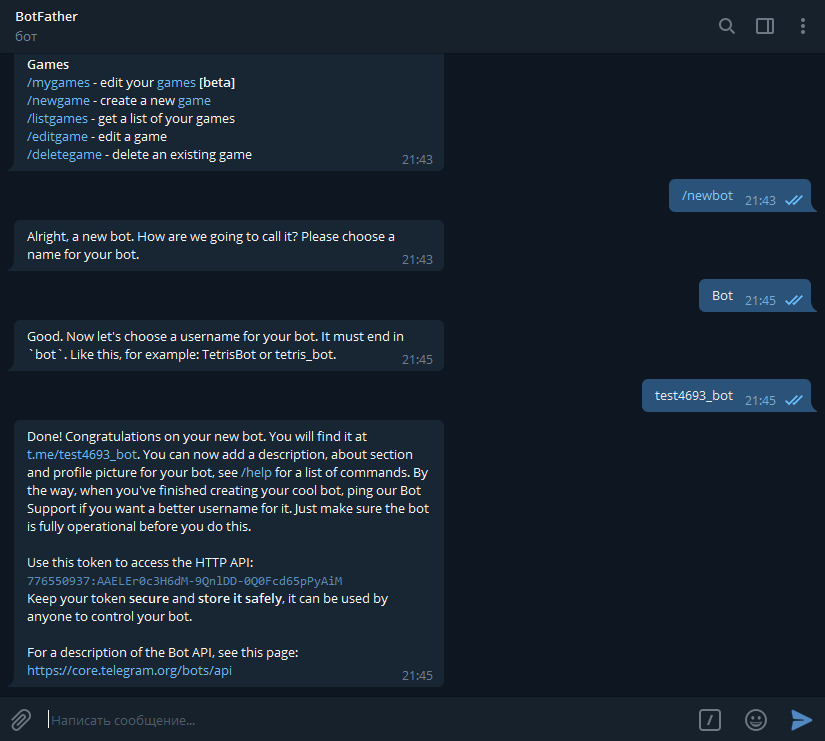
As you see, we were given a special api token with which you can control your bot (in my case it is: 776550937: AAELEr0c3H6dM-9QnlDD-0Q0Fcd65pPyAiM ). You can remember your token, but I recommend writing it down.
Code
The time has come that everyone has been waiting for. Open PyCharm and create a new project.

Here I recommend to put everything as I have (the name, of course, you can change). After creating the project, let's create a file that contains our code. Right click on the folder with your project, then New → Python File. Great, let's start writing code. Import the telebot library using:
import telebot Now you need to create a bot variable. In fact, the variable name can be anything, but I'm used to writing bot.
bot = telebot.TeleBot(' ') Let's write a decorator bot. Message_handler (), with the help of which our bot will rerogate to the / start command. To do this, in parentheses we write commands = ['start']. As a result, we should have this:
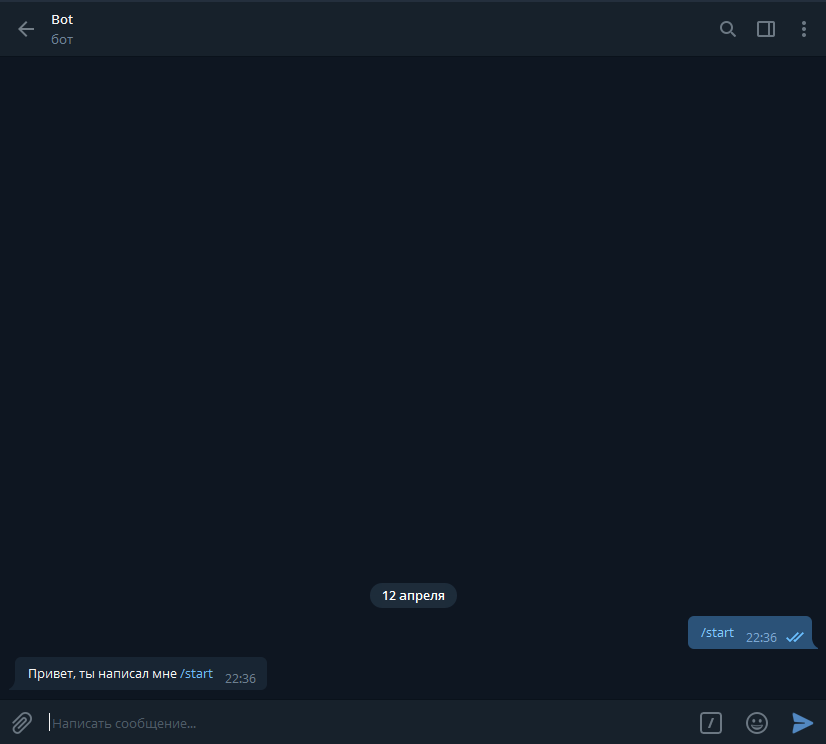
@bot.message_handler(commands=['start']) If you try to start your bot (PCM-> Run), then nothing will work out for you. First, at the end of the code we need to register bot.polling (). This is necessary so that the bot does not turn off immediately, but works and checks if there is a new message on the server. And secondly, if our bot will check for messages, it will still not be able to answer anything. It's time to fix it! After our decorator, we create the start_message function, which will take the message parameter (the name of the function can be any). Next, let's implement the sending of the message from the bot itself. In the function, write bot.send_message (message.chat.id, 'Hi, you wrote / start'). See what you should get:
import telebot bot = telebot.TeleBot('776550937:AAELEr0c3H6dM-9QnlDD-0Q0Fcd65pPyAiM') @bot.message_handler(commands=['start']) def start_message(message): bot.send_message(message.chat.id, ', /start') bot.polling() Check it out ...
Great, our bot is working! That he responded not only to commands, but also to messages, we will create a new decorator bot. Message_handler (), and in round brackets we will write content_types = ['text']. In general, there are many types of content, for example, location, photo, audio, sticker, etc. But we need to respond to the text, right? Therefore, we create the function send_text, which takes the message parameter. In the function we write the condition:
@bot.message_handler(content_types=['text']) def send_text(message): if message.text == '': bot.send_message(message.chat.id, ', ') elif message.text == '': bot.send_message(message.chat.id, ', ') If the text of the message is "Hello", the bot responds "Hello, my creator", and if the text of the message is "Bye", the bot will reply "Farewell, creator". Here I think everything is clear. But you probably wondered, and if the user says “hello”, well, or “send”, how to be in this situation? It's simple enough! In the condition, after the message.text write the function .lower (), and in the text replace all capital letters with lowercase. Now our bot responds not only to “hello”, but also to “PreveT”, and even “PRIVET”.
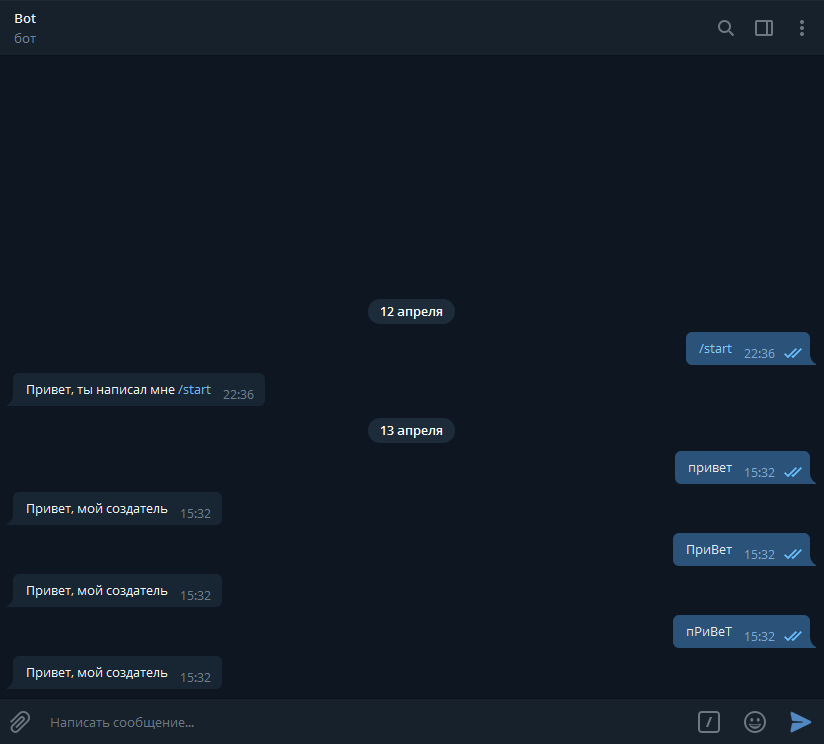
Here is what you should get:
import telebot bot = telebot.TeleBot('776550937:AAELEr0c3H6dM-9QnlDD-0Q0Fcd65pPyAiM') @bot.message_handler(commands=['start']) def start_message(message): bot.send_message(message.chat.id, ', /start') @bot.message_handler(content_types=['text']) def send_text(message): if message.text.lower() == '': bot.send_message(message.chat.id, ', ') elif message.text.lower() == '': bot.send_message(message.chat.id, ', ') bot.polling() Well, we figured out the text, but how to send a sticker for example? It's simple! Each sticker has its own id, so if we know the id, we can send it. There are two ways to get the sticker id. The first (simple) - through a special bot "What's the sticker id?"
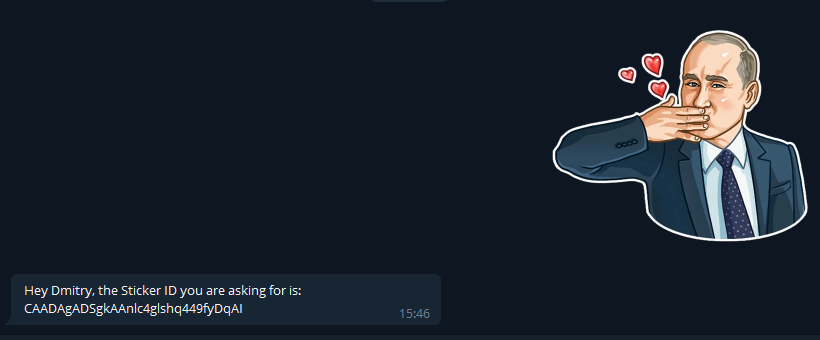
Well, the second way, for those who are not looking for easy ways. Create a new decorator bot. Messages_handler (), that's just in the brackets we write content_types = ['sticker']. Then everything is as usual. We create a function that accepts the message parameter, but in it we write print (message). Run the bot.
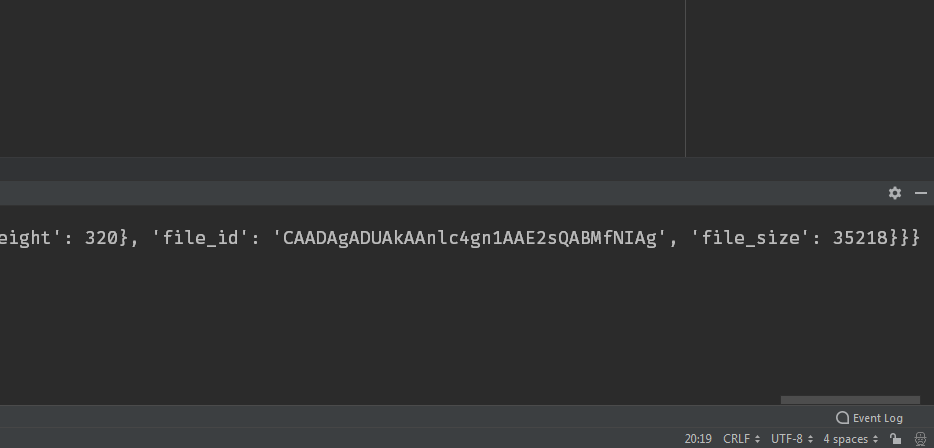
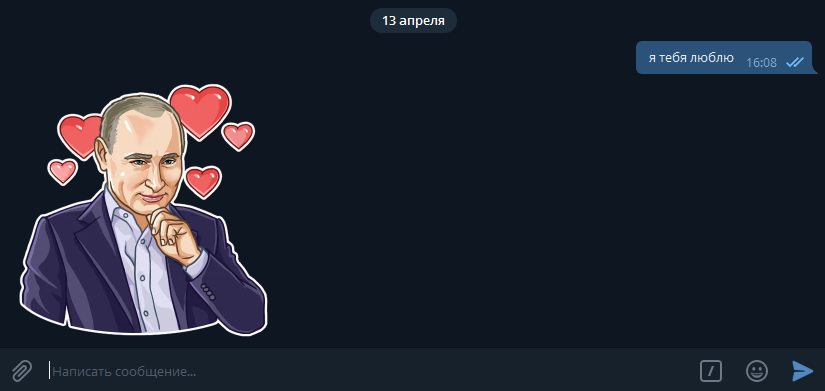
See, as soon as I sent the sticker, it immediately output the information to the console, and at the very end there will be our sticker id (file_id). Let's make sure that when the user sends the bot “I love you”, the bot responded with a sticker. It is not necessary to create a new decorator, we just add the condition that existed before. But instead of bot.send_message (), we will write bot.send_sticker (), and instead of the text, we write the sticker id.
Congratulations, everything turned out! I think how to send audio, photos, and geolocation, you figure it out. I want to show you how to make the keyboard that the bot will show you at startup. This will be more difficult to do. Create a keyboard1 variable in which we write telebot.types.ReplyKeyboardMarkup (). This function calls the keyboard. Next, create rows, but remember that rows can be no more than 12! To create them, write keyboard1.row (). Write down what you want in round brackets, personally I will write “Hello” and “Bye”. Now, to call the keyboard, we add reply_markup = keyboard1 to the function of sending a message at the start. Here's what you should get:
keyboard1 = telebot.types.ReplyKeyboardMarkup() keyboard1.row('', '') @bot.message_handler(commands=['start']) def start_message(message): bot.send_message(message.chat.id, ', /start', reply_markup=keyboard1) Run the bot ...
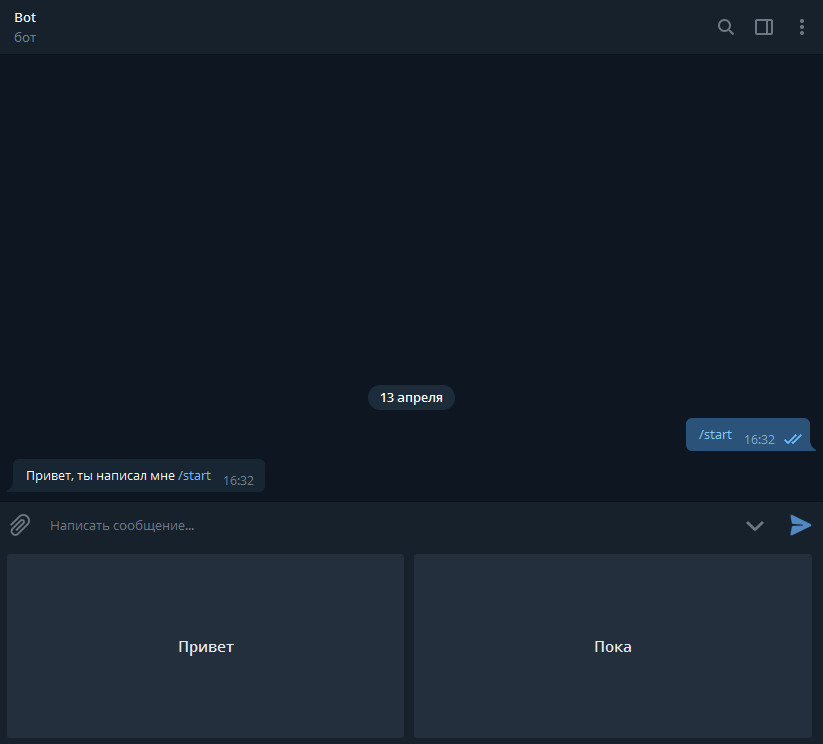
You see that the keyboard is kind of big. To fix this, you just need to set True in the ReplyKeyboardMarkup (). Well, if you want the keyboard to hide as soon as the user clicks on it, write another one True. Read more about what these True mean to you in the official documentation .
keyboard1 = telebot.types.ReplyKeyboardMarkup(True, True) Well, that's all! Of course, this is not all possible bots in the telegram, but I showed you the main features. Thanks for attention.
Source:
import telebot bot = telebot.TeleBot('< >') keyboard1 = telebot.types.ReplyKeyboardMarkup() keyboard1.row('', '') @bot.message_handler(commands=['start']) def start_message(message): bot.send_message(message.chat.id, ', /start', reply_markup=keyboard1) @bot.message_handler(content_types=['text']) def send_text(message): if message.text.lower() == '': bot.send_message(message.chat.id, ', ') elif message.text.lower() == '': bot.send_message(message.chat.id, ', ') elif message.text.lower() == ' ': bot.send_sticker(message.chat.id, 'CAADAgADZgkAAnlc4gmfCor5YbYYRAI') @bot.message_handler(content_types=['sticker']) def sticker_id(message): print(message) bot.polling() Source: https://habr.com/ru/post/448310/
All Articles