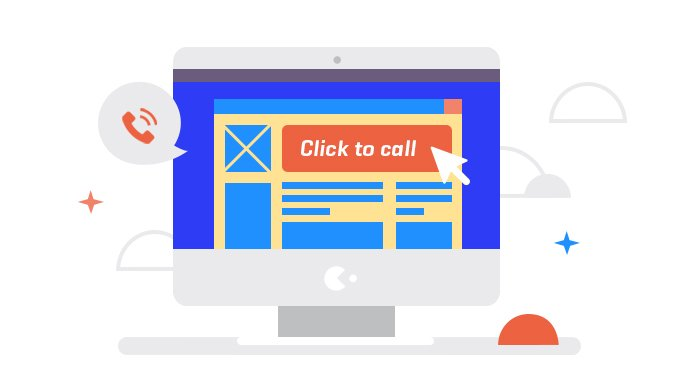
Phoned! How to build your Web-dialer for an hour

Friends, today I want to talk to you about calls. For some, this is a completely new topic. For others, it's pure fan at the level of “would I have to get my Skype?”. For the third - a sudden need for life. The last option is our option.
In this article, I will show you a small, but very viable example of implementation that will allow you to make your own WEB dialer literally on the knee of several dozen lines of javascript and call a friend directly from the browser.
Pro technologies and protocols

The year is 2019, and to our joy there is already a ready-made tool for implementing R eal- T ime C ommunication (RTC) for the web, namely WebRTC . A few years ago he was in active development. The API is still being finalized, but de facto technology has become the standard and is supported in most popular browsers. In this article, we will not dwell on the technology itself; you can read more on the developers website or search for articles on Habré. For example, here .
But before we start, I want to clarify a couple of points.
- First, WebRTC runs on top of the protocol stack, and even for p2p communication, you need some kind of server through which your clients can find and make friends with each other. Our example will use the SIP protocol, about which you can read more, for example, here .
- You will need a server with support for all of the above good - like FreeSwitch or Asterisk.
These things are left out of the article. We assume that you are as lucky as we are and you already have tuned VoIP telephony at your disposal.
Well, the longest part of the article is over, let's code!
Impose a page
')
First we need a page from which we will call, fields for entering login, password, phone number and a couple of buttons. In its simplest form, it will look something like this:
<div class="container"> <div class="input-group mb-6"> <div class="input-group-prepend"> <span class="input-group-text">Login</span> </div> <input id="loginText" type="text" class="form-control"> <div class="input-group-prepend"> <span class="input-group-text">Password</span> </div> <input id="passwordText" type="password" class="form-control"> <button id="loginButton" type="button" class="btn btn-primary" onclick="login()">Login</button> <button id="logOutButton" type="button" class="btn btn-primary d-none" onclick="logout()">LogOut</button> </div> <div class="input-group mb-6 d-none" id="callPanel"> <input id="callNumberText" type="text" class="form-control" placeholder="Call number"> <button id="callNumberButton" type="button" class="btn btn-success" onclick="call()">Call</button> <button id="hangUpButton" type="button" class="btn btn-danger d-none" onclick="hangUp()">Hang Up</button> </div> <audio id="localAudio" autoPlay muted></audio> <audio id="remoteAudio" autoPlay></audio> <audio id="sounds" autoPlay></audio> </div> Audio elements will “send” and “receive” the sound, well, for beauty, sounds will play the sounds of the dialer.
The UI is ready, you can’t reproach the UX, let's make it work.
We fasten JSSIP

Let's use the library in which everything that is required is already implemented - JSSIP . You can see the documentation: everything is described in some detail and there is even a ready-made example of implementation. That is, we practically do not need to do anything - just to simplify everything as much as possible and figure out what's what.
After entering the login / password (must be registered on your telephony server), you need to login to the server. We do this:
socket = new JsSIP.WebSocketInterface("wss://webrtcserver:port/ws"); _ua = new JsSIP.UA( { uri: "sip:" + this.loginText.val() + "@webrtcserver", password: this.passwordText.val(), display_name: this.loginText.val(), sockets: [socket] }); Along the way, you can subscribe to the events of connecting and connected and do something useful there. But let's go straight to the registration event:
his._ua.on('registered', () => { console.log("UA registered"); this.loginButton.addClass('d-none'); this.logOutButton.removeClass('d-none'); this.loginText.prop('disabled', true); this.passwordText.prop('disabled', true); $("#callPanel").removeClass('d-none'); }); Here we just need to change the statuses of the buttons: show what you need, hide the unnecessary. And if suddenly something went wrong with the login, spit error in the log:
this._ua.on('registrationFailed', (data) => { console.error("UA registrationFailed", data.cause); }); This is enough for login. It remains to make a street organ with
this._ua.start ();
If the server is specified correctly and your username / password is accepted, the field for entering the telephone and the Call button will appear.
For razlogin need to call this._ua.stop (), everything is simple.
Make a call
Now - the most important thing: you need to call the entered number.
this.session = this._ua.call(number, { pcConfig: { hackStripTcp: true, // , rtcpMuxPolicy: 'negotiate', // , multiplexing. . iceServers: [] }, mediaConstraints: { audio: true, // video: false }, rtcOfferConstraints: { offerToReceiveAudio: 1, // offerToReceiveVideo: 0 } }); Please note: we explicitly enable multiplexing, this setting must be enabled on your server. In the case of an asterisk, this is rtcp_mux = yes in the sip.conf settings.
Further interaction is based on callbacks, in which we must ensure the direction of the audio-video stream to the corresponding element of the page and send the necessary messages in the correct order to the server.
// this.session.on('progress', () => { console.log("UA session progress"); playSound("ringback.ogg", true); }); // this.session.on('connecting', () => { console.log("UA session connecting"); playSound("ringback.ogg", true); // , let peerconnection = this.session.connection; let localStream = peerconnection.getLocalStreams()[0]; // Handle local stream if (localStream) { // Clone local stream this._localClonedStream = localStream.clone(); console.log('UA set local stream'); let localAudioControl = document.getElementById("localAudio"); localAudioControl.srcObject = this._localClonedStream; } // , peerconnection.addEventListener('addstream', (event) => { console.log("UA session addstream"); let remoteAudioControl = document.getElementById("remoteAudio"); remoteAudioControl.srcObject = event.stream; }); }); // , , this.session.on('failed', (data) => { console.log("UA session failed"); stopSound("ringback.ogg"); playSound("rejected.mp3", false); this.callButton.removeClass('d-none'); this.hangUpButton.addClass('d-none'); }); // , this.session.on('ended', () => { console.log("UA session ended"); playSound("rejected.mp3", false); JsSIP.Utils.closeMediaStream(this._localClonedStream); this.callButton.removeClass('d-none'); this.hangUpButton.addClass('d-none'); }); // , this.session.on('accepted', () => { console.log("UA session accepted"); stopSound("ringback.ogg"); playSound("answered.mp3", false); }); In general, everything is quite logical. While we dial ['progress'] - we play the dial-up sounds. In our example, we play our own sound, but as pvsur rightly noted, it can also be received from the called party and hear the answer of the autoinformer like "leave a message after the beep", if it will.
As soon as they phoned ['accepted'] - we play a sound answered. As soon as the subscriber answers the call, we will receive its audio stream and insert it into the remoteAudio ['connecting' and 'addstream'] element.
At the end of the call we make a closeMediaStream. You can relax.
A little bit about the operation
Two things were discovered during testing.
- In chrome at the beginning of dialing there was a delay of a few seconds, which was very annoying. We found out from the logs that he went to the ice server, which was absolutely not required, since we have our own server. Therefore, in the config for JSSIP, we simply removed them, and immediately became prettier. See pcConfig.iceServers and pcConfig.hackStripTcp.
- On our asterisk the WSS protocol is configured with encryption for SIP. This is required by the browser when used on an HTTPS site. But the asterisk uses WS based on the contact parameters in which the JSSIP library contains a hard-coded WS descriptor. At the same time, library developers point to standards in which there really are no requirements for this. And colleagues from Aster stubbornly do not want to fix anything. In general, a dead end. Well, at this time we find in the source code the line this._configuration.contact_uri = new URI (...), change the transport: 'ws' to transport: 'wss' and continue to enjoy life.
In general, the example is ready, you can take and call. No need to install any softphones or develop your own. No need to steam with the deployment of this software on client cars. Just open the browser and call.
Another library allows you to dial additional numbers in tone mode. That is, you can easily call, for example, the call center of the bank and get to the desired item on the voice menu. To do this, simply run the following command:
this._call.sendDTMF('. ') About fakapy

There were a few moments that really made you nervous.
I left this part outside the scope of the article, but in addition to outgoing calls we also had to accept incoming calls. And for some time I had to squat with an incoming call, which came and immediately stopped. Everything was decided by the rtcpMuxPolicy setting already mentioned above and the inclusion of multiplexing on the asterisk, but we have been stupid for quite some time.
And there are also problems with dialing yourself - when a call and a call are made on the same machine. I don’t remember exactly, but the connection was successfully installed, there were no errors and no sound either :) Time was running out, so we scored on this special effect. But keep in mind that test incoming calls better on a separate wheelbarrow.
Conclusion
Finally, we would like to note that we tested the work of the JSSIP + Asterisk bundle at our call center, everything works fine, at least in chrome, which suits us completely. The main thing is to allow the browser access to media devices and to register users on the dialer server.
You can see the finished example on the githaba .
useful links
Pro webrct
About SIP: tyts , tyts
About Asterisk
Jssip library
Source: https://habr.com/ru/post/448266/
All Articles