Amateur holography - silver halide photographic materials
The first part is about holography in general and photopolymer materials.
The previous article dealt with holography in general and the first-step set from Litiholo based on photopolymer holographic materials. Now it is the turn to deal with silver halide-based photographic materials that have a much higher sensitivity (and therefore fewer problems with the main enemy of holography - vibration). They are common among both amateurs and professionals, they can be made independently, their main drawback is the need for chemical processing, but this is not so difficult, as will be shown later in the text.
Currently, both abroad and on the territory of the former USSR, halogen-silver holographic photographic materials of two manufacturers are mainly used: the Russian JSC Slavich and the French Ultimate Holography. Both organizations produce the whole range of photographic materials and chemical reagents for their processing, the most interesting for amateurs (at the initial stage, until copying schemes and color holography are mastered) monochrome photographic materials on glass suitable for Denisyuk's scheme with continuous laser radiation, this is PFG-03M Slavich and U08M at Ultimate Holography. The former have a significantly lower price, are well studied, and the compositions of the optimal mixtures for chemical processing are known for them. The latter have the best declared characteristics, sensitization to different wavelengths to choose from, programmed color shift of the image to a shorter wavelength region, are stored longer (stated 6-9 months for PFG-03M and more than 5 years for U08M), but processing is recommended for them in branded developer and bleach, the composition of which is not advertised. About domestic PFG-03M it goes on and goes.
')
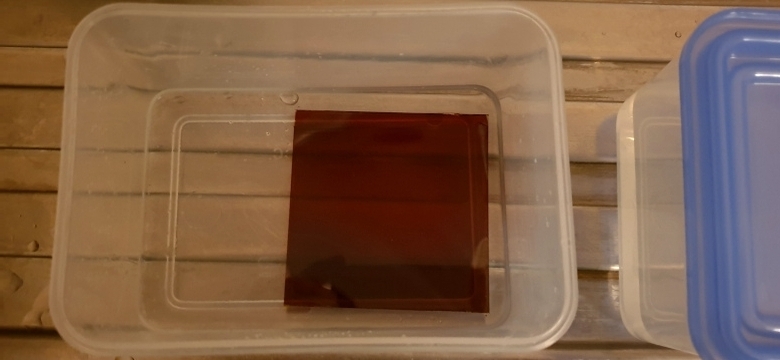
PFG-03M are high-resolution holographic plates designed to record reflective holograms, and they are also well suited for transmissive holograms. They are a layer of gelatins with a thickness of 7 μm, containing silver halide crystals, a sensitizing dye and other additives, on an optical glass with a thickness of 2.65 mm. The stated diffraction efficiency is not less than 40%, the resolution is not less than 5,000 lin./mm , the holographic sensitivity at 633 nm is not less than 2 mJ / cm 2 , the maximum spectral sensitization is 635 nm. Have a warranty period of storage in the refrigerator 6-9 months. After the expiration of the storage period, they can also be used, but over time, they increase sensitivity, noise level, darkening after manifestation in not exposed places, and the veiling process begins (starts at the edges and moves towards the center with time).
By the way, only silver halide photographic materials are suitable for pulsed shooting due to the same high sensitivity. So the holographic sensitivity of the PFG-03M for a continuous 633nm laser is estimated to be no more than 2 mJ / cm 2 (in practice, even 0.5 mJ / cm 2 is often found), for U08M 0.09-0.12 mJ / cm 2 is declared, for photo materials optimized for pulse imaging sensitivity is even higher. But the sensitivity of the plates from Litiholo is declared as 20 mJ / cm 2 for 635 nm, while bichromated gelatin is practically insensitive to the red region of the spectrum, and the rather complex composition of MBDCG requires about 50 mJ / cm 2 .
It was decided not to use what is included in the package from Litiholo, but to make everything from scratch, with a new laser and good vibration resistance.
So, the steps of manufacturing a silver halogram:
The previous article dealt with holography in general and the first-step set from Litiholo based on photopolymer holographic materials. Now it is the turn to deal with silver halide-based photographic materials that have a much higher sensitivity (and therefore fewer problems with the main enemy of holography - vibration). They are common among both amateurs and professionals, they can be made independently, their main drawback is the need for chemical processing, but this is not so difficult, as will be shown later in the text.
Currently, both abroad and on the territory of the former USSR, halogen-silver holographic photographic materials of two manufacturers are mainly used: the Russian JSC Slavich and the French Ultimate Holography. Both organizations produce the whole range of photographic materials and chemical reagents for their processing, the most interesting for amateurs (at the initial stage, until copying schemes and color holography are mastered) monochrome photographic materials on glass suitable for Denisyuk's scheme with continuous laser radiation, this is PFG-03M Slavich and U08M at Ultimate Holography. The former have a significantly lower price, are well studied, and the compositions of the optimal mixtures for chemical processing are known for them. The latter have the best declared characteristics, sensitization to different wavelengths to choose from, programmed color shift of the image to a shorter wavelength region, are stored longer (stated 6-9 months for PFG-03M and more than 5 years for U08M), but processing is recommended for them in branded developer and bleach, the composition of which is not advertised. About domestic PFG-03M it goes on and goes.
')
PFG-03M are high-resolution holographic plates designed to record reflective holograms, and they are also well suited for transmissive holograms. They are a layer of gelatins with a thickness of 7 μm, containing silver halide crystals, a sensitizing dye and other additives, on an optical glass with a thickness of 2.65 mm. The stated diffraction efficiency is not less than 40%, the resolution is not less than 5,000 lin./mm , the holographic sensitivity at 633 nm is not less than 2 mJ / cm 2 , the maximum spectral sensitization is 635 nm. Have a warranty period of storage in the refrigerator 6-9 months. After the expiration of the storage period, they can also be used, but over time, they increase sensitivity, noise level, darkening after manifestation in not exposed places, and the veiling process begins (starts at the edges and moves towards the center with time).
By the way, only silver halide photographic materials are suitable for pulsed shooting due to the same high sensitivity. So the holographic sensitivity of the PFG-03M for a continuous 633nm laser is estimated to be no more than 2 mJ / cm 2 (in practice, even 0.5 mJ / cm 2 is often found), for U08M 0.09-0.12 mJ / cm 2 is declared, for photo materials optimized for pulse imaging sensitivity is even higher. But the sensitivity of the plates from Litiholo is declared as 20 mJ / cm 2 for 635 nm, while bichromated gelatin is practically insensitive to the red region of the spectrum, and the rather complex composition of MBDCG requires about 50 mJ / cm 2 .
It was decided not to use what is included in the package from Litiholo, but to make everything from scratch, with a new laser and good vibration resistance.
So, the steps of manufacturing a silver halogram:
- If you want to do it seriously, you should start with the optical table, which will be the classic sandbox scheme on a rubber chamber.
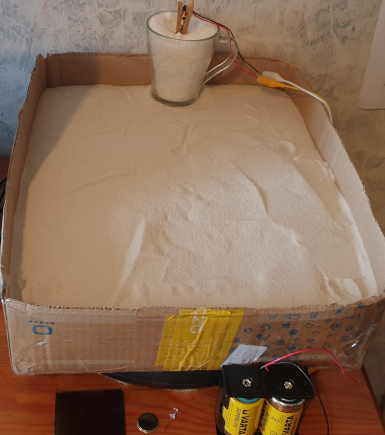
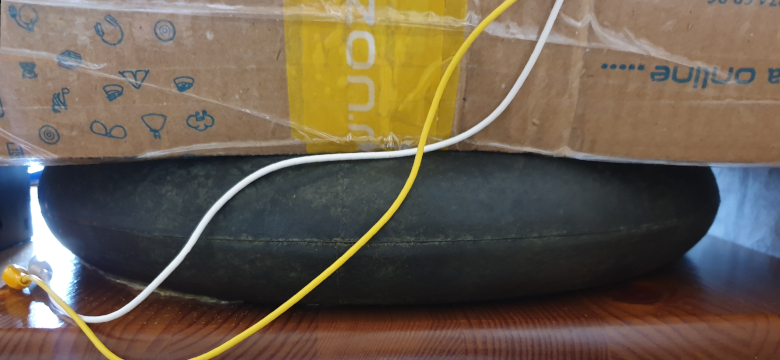
There are other configurations that can be found in literary sources and on specialized sites (see the list of sources in the previous article ), most of them are based on the principle of isolation from vibrations coming from the floor (camera) and absorption of the natural vibrations of optical elements of the optical circuit ( sand). This design is one of the simplest of which is suitable for a small working area. On a stable table located away from windows, heating systems and other drafts, and objects that create vibration, a slightly inflated rubber chamber is placed from a small wheel (about 30 cm in diameter), a box is placed on it (I have a cardboard one, but better from something denser) in which 10-15 kg of pure dry fine quartz sand is poured (for example, for aquariums). The optical scheme is assembled directly on the surface of the sand, using sand it is also convenient to fix the elements of the scheme by digging it into it. It is important that the sand is dry and does not stick to what will be installed on it, it is also important to ensure that the sand does not get on the optics, quartz easily scratches the glass. The laser, if it is of low power (<5 mW), can be fixed in a clothespin, which can be inserted into a glass with the same sand.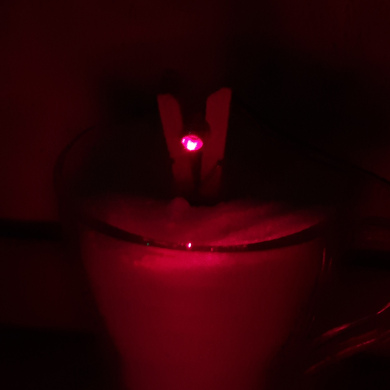
- A laser module purchased on Aliexpress with a declared power of 5 mW, a wavelength of 650nm and power from 3V (search query “4mm laser module 650nm 5mw”) was used as a laser. There may be strong differences from instance to instance between modules, so you should buy a few different laser modules and choose the ones that will show the greatest coherence length and stability at maximum power (see previous article ). You need to choose modules with the most massive case, with active elements on the board and a housing laser diode, ideally if there is a variable resistor on the board for precise current setting. Power should be provided from capacious batteries or batteries that can power the laser for several hours without noticeable voltage drop. A lens is removed from the module itself to produce a diverging beam.
- A laser power meter is also needed, which will be needed to calculate the optimal exposure and to control the uniformity of illumination, which should not differ by more than 30% in the center and on the periphery of the photographic material. In the simplest case, you can use a large-area silicon photodiode with a microammeter, such as a FD-7k, or a photodiode with a built-in amplifier like the OPT101 and a voltmeter. For them, you can find graphs by which you can determine the illumination and conversion factors for different wavelengths. But it is better to purchase a special calibrated power meter for lasers, for example, Coherent Laser Check (more expensive and rarely found), Sanwa LP1 (cheaper and widespread).
- It is also necessary to take care of non-actinic lighting (which will not noticeably affect non-developed photographic material), fortunately, the sensitivity of holographic photographic materials is much lower than that of photographic materials for classic photography, therefore a small amount of light from the street lamp falling through the curtains on the windows is not particularly damage, and during the procedure of chemical treatment is quite possible to do with such a gloomy lighting. But during installation of the photoplate and other related circuit elements it is good to have a sufficient level of illumination, the blue LED from the Litiholo kit does not fit, the PFG-03M have noticeable sensitivity in the blue area, green lighting is needed, the closer to 500nm the better. You can pick up the corresponding LED, it will be even better than the lamp with a light filter recommended in some sources, the brightness of the lighting should be provided to the minimum necessary when the lighting does not need to be turned off. I used a “smart” LED lamp, choosing the most appropriate shade and setting the minimum brightness.
- Silver halide photographic materials, as mentioned above, require chemical treatment. In the course of which the latent image formed during the exposure (silver halide crystals irradiated with light, at which points of free metallic silver appeared) is amplified many times and an already visible image is obtained, since the developer basically restores the halide crystals with such metallic points. For PFG-03M manufacturer recommends so-called. GP-3 physical developer. You can also try another physical developer that contains fewer corrosive and toxic compounds and does not produce ammonia OD-1 . Physical developers, unlike the chemical ones used in classical photography, form particles of metallic silver that are completely different in character and shape, which are necessary for the formation of an interference pattern, and the holograms themselves are obtained t. amplitude and phase. Physical developers contain special components that dissolve non-exposed silver halide granules with subsequent deposition of metallic silver on exported ones, i.e. almost all silver from the photo material remains in it, and spherical silver particles are formed - reflecting light, and not threadlike - absorbing. An alternative, recommended by some authors, and rejected by others (I remind you that we are talking only about PFG-03M) is the development process by chemical developers followed by bleaching, these are JD-4 and SM-6 + PBU-Amidol kits. Due to the bleaching process, metallic silver is converted back to silver halide crystals, which have a refractive index other than gelatin, and so-called. phase holograms with a theoretically significantly greater diffraction efficiency, and hence brightness. However, PFG-03M photographic plates are not intended for treatment with bleaching, they have relatively little silver for this (1.6 g / m 2 , whereas for bleaching PFG-01, they have 3.3 g / m 2 ) and the resulting hologram after bleaching should not be noticeably brighter. I used the manufacturer recommended GP-3 developer from a ready-made set of chemical compounds.
For its manufacture (for 1 l of solution) you will need:
0.2 g methylphenidone ;
5 g of hydroquinone ;
100 g of anhydrous sodium sulfite (not to be confused with sulfide d ohm!);
25 g of sodium hydroxide (caustic soda, caustic soda);
45 g of ammonium rodanide (ammonium thiocyanate).
Reagents can be purchased at many chemical reagent stores, or in the same place as photographic plates. If the solution is not made from a ready-made set, then in addition to distilled water and some dishes, you will also need a scale; for this, common Chinese scales for jewelry with an accuracy of 0.01 g are well suited.
To prepare the solution, you will need two chemical glasses (or something similar, there is a lot of space for the flight of fancy), in each we pour about 400 ml of water (you can not measure water with measuring glasses, but just weigh it, it will be even more accurate) water must be used distilled, it is sold in car dealerships. You should also wear goggles and gloves, all utensils should be glass, and a spoon for mixing glass or plastic. Sodium hydroxide is gradually added to the first beaker with active stirring, the solution heats up noticeably, then methylphenidone. In the second glass, we first dissolve about 10 g of sodium sulfite, and then the entire hydroquinone, after its dissolution, add the remaining sodium sulfite, and after it all the ammonium rodanide. After dissolving ammonium rodanide, we merge the solutions together and bring the volume to 1 l with water. Then the solution is filtered through a piece of cotton, placed in a funnel, and let stand for 2 hours. The resulting developer should be stored in the refrigerator, it is suitable for use until it turns yellow (a month or more). It is very important to follow this recipe, otherwise a precipitate may fall out and the developer will be spoiled.
The resulting solution is a concentrate, and the working solution is prepared immediately before use in a ratio of 15 ml of concentrate and 400 ml of water. Therefore, if it is not planned to produce many holograms at once, then it is possible to divide the quantities of all reagents into two and prepare 500 ml of the basic solution, from which you can get up to 13 liters of the developer working solution.
In the case of non-use of the bleaching procedure after development, it is recommended to carry out a fixation procedure, during which the silver halides granules remaining in the emulsion will be removed. Any thiosulfate photographic fixer (fixer) is suitable for this, for example, just 150 g of sodium thiosulfate crystalline hydrate ( sodium hyposulfite, sodium sulphate) per 1 liter of distilled water, after mixing, let the solution stand for 2 hours. In the presence of sediment, turbidity or flakes, the resulting solution can be periodically filtered through a piece of cotton wool inserted into the funnel and stored at room temperature for a long time, the used solution can be returned back to the tank to the rest, it is exhausted very slowly. - So, the reagents have been prepared, baths are still needed for chemical processing, sudochki from the supermarket are suitable for this. Naturally, all utensils in contact with chemical reagents should not be further used for food and drink.
The next step will be the assembly of the optical scheme :
For transmissive holograms: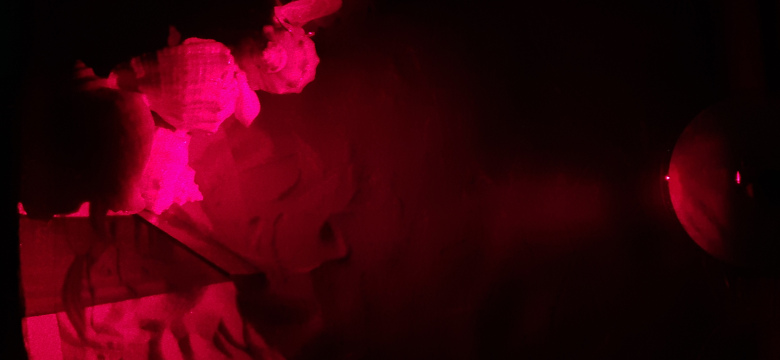
For reflective holograms: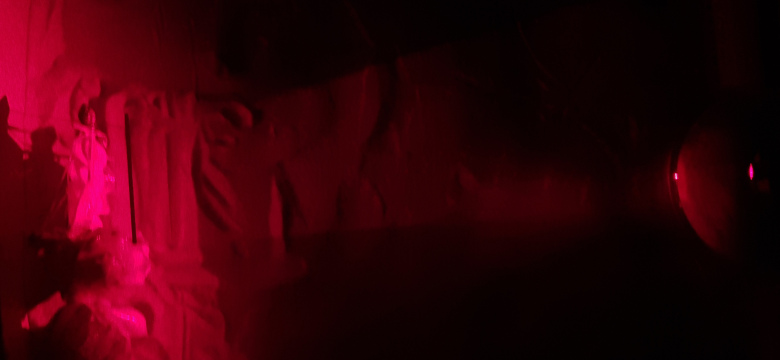
The laser beam should fall on the photoplate at an angle close to the Brewster angle for this type of material, for glass it is about 56 °, in practice, for ease of illumination, this angle is made approximately equal to 45 °. This is done to minimize internal reflections in the photographic plate, which can spoil the image, causing strips similar to wood, while the light beam itself should be polarized and correctly oriented, the correct orientation can be determined by rotating the laser around its axis and observing the reflection from the glass, It is necessary to achieve minimal reflection. It is also absolutely necessary to close the ends of the photographic plate on which the laser light hits an opaque material, otherwise the image will have defects in the form of horizontal stripes, as in the photo below.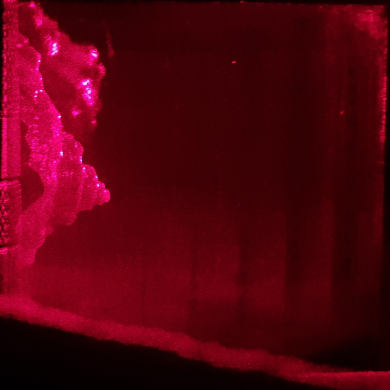
Next, you need to determine the optimal duration of exposure, for this you have to use several photoplates. To begin with, for the chosen scheme we determine the illumination on the surface of the photographic plate, setting the photosensitive element in place of the plate, at that all lighting should be turned off. For this I used the Sanwa LP1 with a diameter of the sensitive element of 0.9 cm, the power was 39.9 mW (it is necessary not to forget about the correction factors depending on the wavelength). The area of the circle is calculated by the formula π * d 2/4, which will be 3.14 * 0.92 / 4 = 0.64 cm 2 , and the illumination, respectively, will be 39.9 / 0.64 = 62.3 μW / cm 2 . Having accepted the sensitivity of PFG-03M 500 mJ / cm 2 , the required exposure will be equal to 500 / 62.3 = 8 s. The real optimal exposure should be found experimentally; to do this, you need to make several holograms with different exposures based on theoretical, for example 5, 10, 15, 20 s, while finding the brightest area you can cycle with a smaller discreteness, for example already 1 second. It is also important to remember that insufficient exposure affects the brightness of the image to a much lesser extent than excessive exposure. To determine the optimal exposure, it is not necessary to use one plate for each period of time, you can cut them or simply block the laser beam of light with an opaque material and gradually open it, the main thing is not to touch the optical table and circuit elements. My brightest holograms were obtained with an exposure of 15 s, which means that the holographic sensitivity of my records is about 1 mJ / cm 2 .
Sensitivity may differ from batch to batch and change significantly during storage, so this procedure should be carried out for all new photographic materials and after several months of their storage. And the exposure time to recalculate when any change in the optical scheme.
Next, the exposure is done similarly with photopolymer plates, collect the optical scheme, warm up the laser, overlap the beam, set the photographic plate (emulsion to objects), turn off the light, give time for stabilization, produce exposure for the required time, overlap the beam, and send the plate to the chemical processing. To determine on which side of the plate the emulsion is on it, you need to breathe, the side with the emulsion does not mist over, but it is strictly forbidden to touch the emulsion, it is slightly hardened (very soft) and will be irretrievably damaged by touch. This is one of the reasons why it is better to work in gloves, other reasons are the use of toxic and corrosive chemical solutions and the sharp edges of photoplates. It is better to continue to work in the dark, or in low green light, which is also in the absence of need, it is better to turn it off.
The exposed photographic plate is lowered into the developer's solution with the emulsion side up, the height of the solution above the plate must be at least 1 cm, the solution temperature is 19-21 ° C, the processing time for GP-3 is 10 minutes, during the development it is necessary to sometimes shake the bath for a uniform process . According to other recommendations, the development time is 5-8 minutes. at 17-18 ° C, here you need to experiment and select the optimal time for a specific temperature, copies of records, recording schemes to obtain the most vivid holograms. By the way, everything works out, although it is clearly not optimal and at 25 ° C, it is not worth raising the temperature, there is already a risk of damaging or washing off the emulsion layer altogether, you may have to cool the solutions in summer. Then the plate is washed with running water for at least a minute and placed in a fixer solution, only then you can turn on an ordinary bright white light. Spent the same developer pours out, it can not be reused. The plate should be light brown in color, initially slightly colored and bluish. If the color of the plate is yellow, then there is either too little exposure, or you need to increase the development time. If the color of the plate is black, then it is either too long exposure, or you need to reduce the development time (or reduce the temperature of the solution), or the plates are damaged. It is enough to fix it for 3 minutes, then another washing with cool running water for 5-10 minutes, then the plate should be rinsed with distilled water. The main processing is over, but the image will still not be visible, due to the swelling of the emulsion it is in the infrared region, the hologram needs to be dried. This can be done slowly, for which, before drying, the hologram is lowered into a weak aqueous solution of detergent, ideally a special wetting agent for a photograph, such as Kodak Photo-Flo, and placed on the edge on a paper napkin until completely dry. It is extremely important that the runoff of water and the drying process take place evenly, otherwise the appearance of stains on the image is inevitable. The quickest way is to use alcohol; in the case of ethyl alcohol, you can use both 96% rectified directly and 50%, 80% and 96% solutions sequentially, in order to save ethyl alcohol. In each solution, it is necessary to withstand a hologram for a minute constantly shaking the bath. After a 96% solution, the plate is likewise placed on an edge on an absorbing surface and remains there until it is completely dry, after some time a visible image will begin to appear for reflective holograms. Then the surface from the emulsion side is painted with black spray paint or glued with a black matte film, the hologram is ready.
There is also information that it is possible to dry in 50% isopropyl alcohol , I myself used ethyl, but I can say that pure isopropyl alcohol irreversibly spoils the hologram without diluting it with water, the image appears only in places where on the surface of the hologram at the time of immersion there was water in the alcohol.
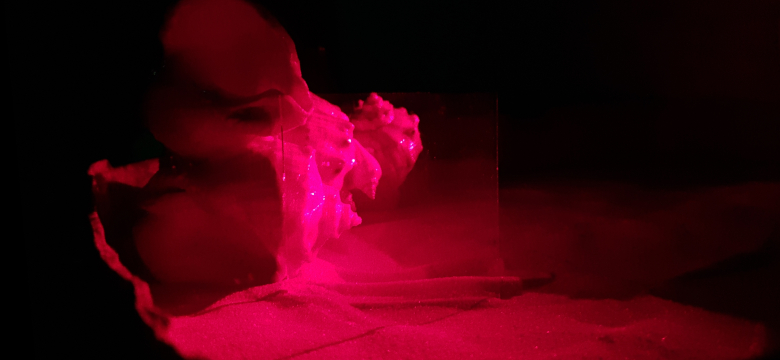
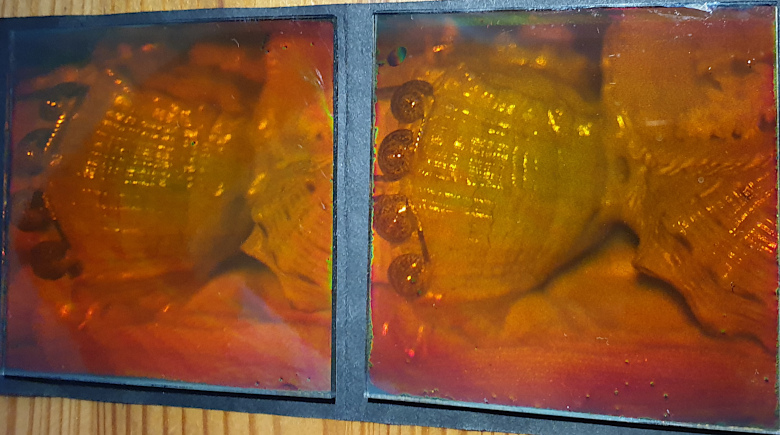
I will give a few photos of the resulting holograms:
Reflective holograms.
Three angles of one not very deep hologram, but still it is quite difficult to focus the camera.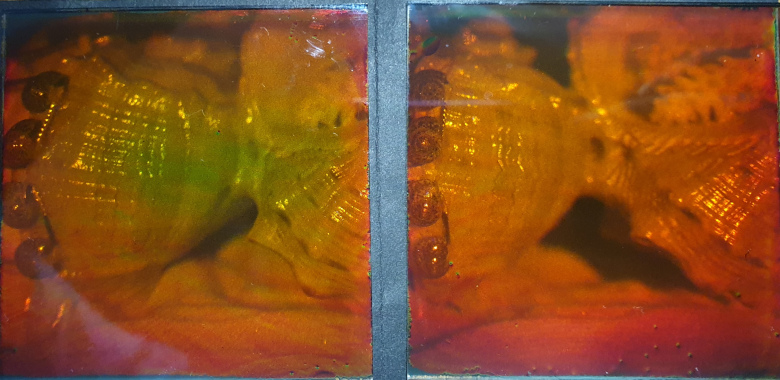

This photo is clickable.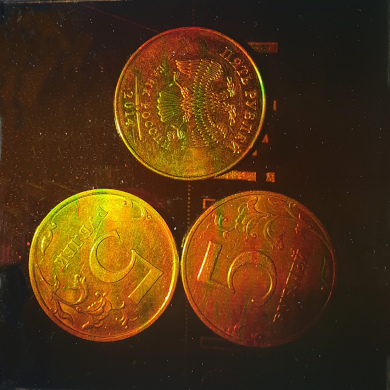
Sand and sun.
Skipping holograms.
The first view. In reality, the image has a sharpness across the depth, you can see the limitation of the classic photo and a good length of laser coherence.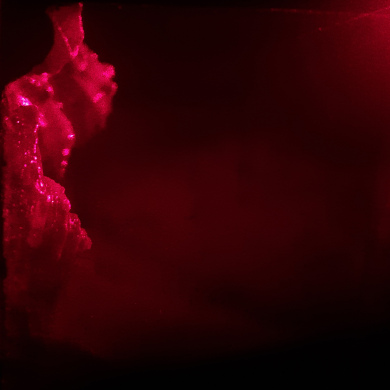
The second view of the same object.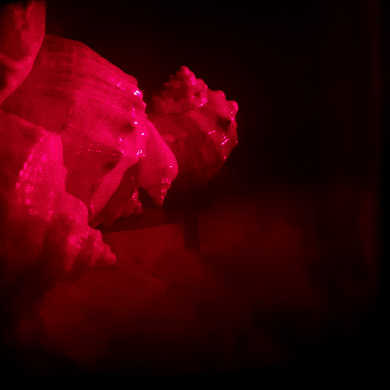
As it turns out in practice, everything is not as difficult and scary as some sources describe it, and it is rather difficult to illuminate (spoil with light) holographic materials, and the exposure time can vary within rather wide limits, and the temperature need not be maintained with an accuracy of 0.5 ° C, and from the vibrations in the high-rise building of the metropolis can be sufficiently eliminated, and the laser can be chosen suitable from cheap. In general, at least some image is not obtained, you can only completely failing to provide adequate vibration resistance or at times violating other recording and processing parameters. But to obtain the most vivid holograms, it is nevertheless necessary to select the optimal parameters of all processes, and then strictly observe them, control the temperature, and measure time with high accuracy. T. o. there is a huge field for creativity and research, for example, the selection of optimal formulations and chemical processing modes for various types of holograms, recording and manifestation conditions.
As usual, any questions, suggestions and comments are welcome!
Source: https://habr.com/ru/post/448050/
All Articles