Response to "Easel for microcontroller programmer"
What would catch her? So, okay, ... and now turn ... next ... first turn ... stop, then you need to solder the test output under the oscilloscope ... but where did the first board go? What are you? (The untranslatable play on words follows using local idiomatic expressions).
Yes, we are stillboiling using LUT , dirty LUT.
In this post, I summarize some of theordeals of the experience of organizing a workplace, namely, brackets for holding electronic boards during soldering and debugging.
')
Usually, one device is one board. But in my practice, even one board at a certain stage is 2-3 boards. And there is nothing to say about cases when you have to do an interface with a couple of other devices, and they, in turn, are also not always represented by a single board.
It all began in the hungry student years. It was necessary to solder, and there were no devices, as there was no money to buy them.
Flexible holder from a desk lamp, clamp-clothespin from the nearest hardware store, "cold welding", half an hour and a three-story mat. After working for 5 minutes, I realized that the design is convenient in principle, but there are several nuances that negate all the efforts:
I don’t remember what happened next, but for 2-3 years I didn’t have to touch the soldering iron either at home or at work, and because of the uselessness of this device I was lying idle, honestly collecting 3 kg of dust per year. Got it just for the photo.
The question arose again when there were prospects on the horizon to pick up the main heating tool of any electrician / electronics engineer / sadist (underline the necessary). At this point, it was decided to select from the hard earned 2 tr. (like, so much then cost) and buy from Uncle Liao a vice on the hinge. Made by Vise on the hinge with a sucker paid-sent-received.
These clutches help me for quite a long time and of the available options, in my opinion, this was the best solution. But again there were nuances:
Vice and currently serve faithfully. Again, from the available options for home use, in my opinion this is the best. By the way, one of the advantages, in contrast to the Chinese tripods with a magnifying glass, is the ability to work with a file or file.
The story continued when, after another change of job, I turned from a microcontroller programmer into an electronics engineer (in our village, and this did not happen). The company, though zahberovalo, but on the remnants of the empire remained a lot of interesting "pieces of iron".
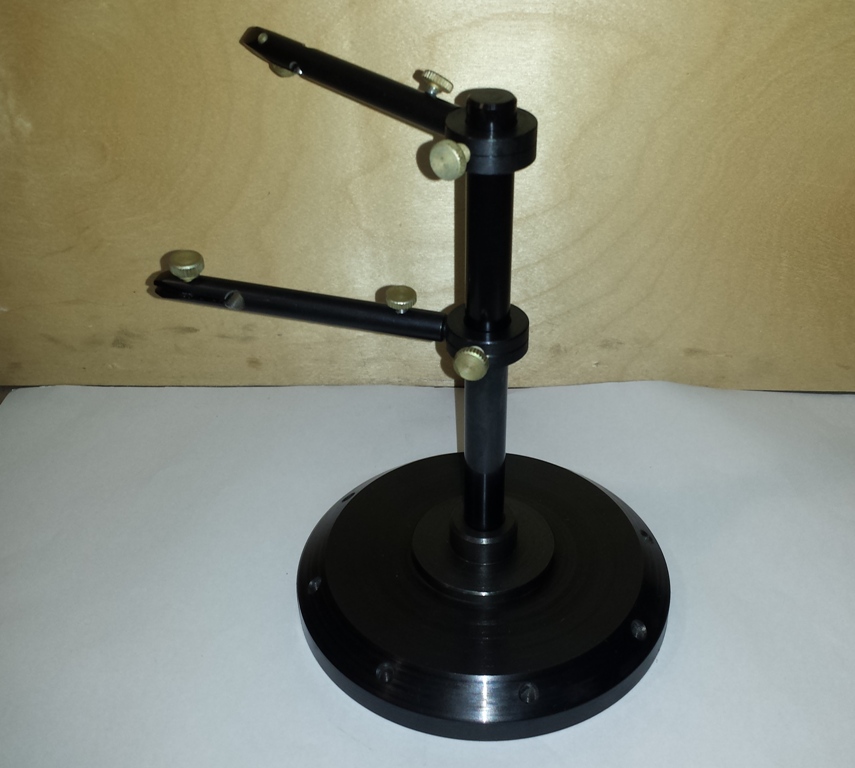
It was decided, based on the good old technology, to make an adaptation that meets our needs, namely:
To my happiness, there is an assistant who, without further ado and with healthy enthusiasm, embarked on the realization of my ideas in the drawings, which were later transferred to the appropriate department. Comrades from the department sighed at the sight of the provided drawings, then twisting a finger at their heads about certain moments (we are still engaged in electronics, and not metalworking), in turn, too, with a healthy enthusiasm, began to perform the task.
The result, as expected, turned out to be positive, and within 3 days from the start of use a second such tripod was made for the second workplace. There’s probably only one minus: it’s not very convenient to solder boards larger than 50x50 mm.
I do not post drawings for 2 reasons:
You say: “Yes, and where is DIY?” Yes, the production was carried out by a very good turner and on a lathe for metal, electro-erosion treatment was also used (not a cheap thing at all). Almost all parts are buried or galvanized. All screws were machined specifically. But hand on heart, I will say - I think that most of these operations can be done manually, or not done at all without any loss in functionality. Instead of the unique cogs, it is possible to use ordinary galvanized hex. Burning does not, in principle, affect flight performance. Beautiful, hardened machined on a turning axis, bushings and rings can be safely changed to “Chinese studs and nuts made of steel 3 clay”. But will it be worth your attention?
Yes, we are still
In this post, I summarize some of the
')
Usually, one device is one board. But in my practice, even one board at a certain stage is 2-3 boards. And there is nothing to say about cases when you have to do an interface with a couple of other devices, and they, in turn, are also not always represented by a single board.
It all began in the hungry student years. It was necessary to solder, and there were no devices, as there was no money to buy them.
Attention! People with an atrophied sense of humor are better not to look under the spoiler.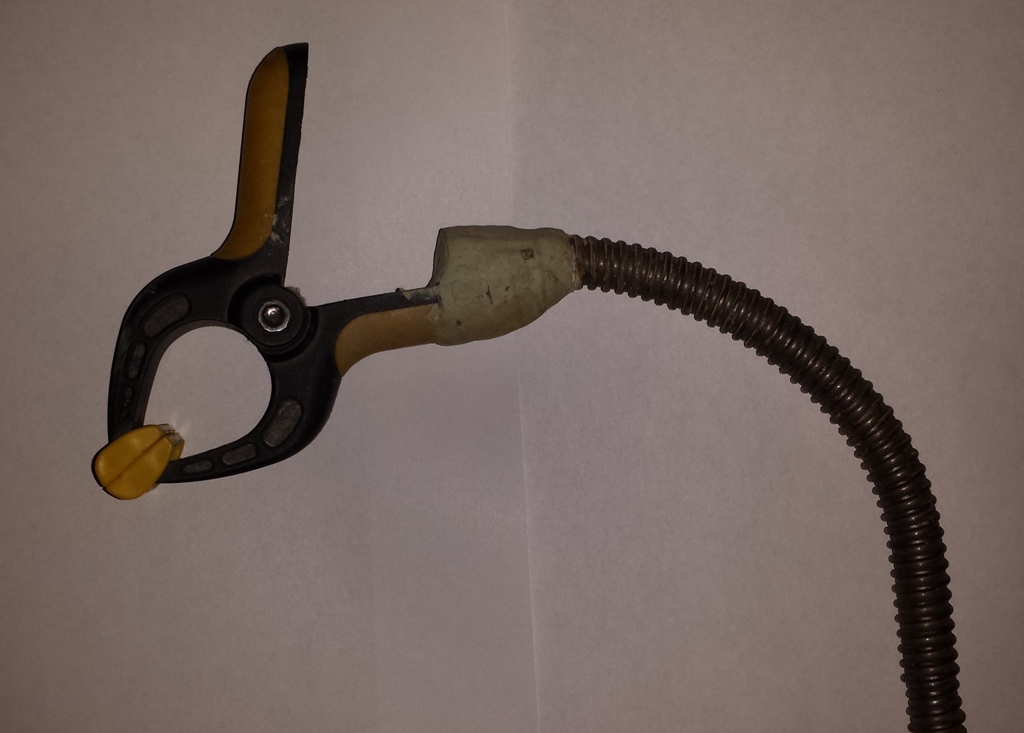
Flexible holder from a desk lamp, clamp-clothespin from the nearest hardware store, "cold welding", half an hour and a three-story mat. After working for 5 minutes, I realized that the design is convenient in principle, but there are several nuances that negate all the efforts:
- flexible holder too flexible. When pressing a component or pulling it out of the board, the entire structure slowly falls or rises;
- Although the plastic clothespin was the smallest available, it was still too rough. Small fee can not hold. Also, plastic tends to melt when touched with a soldering iron (who would have thought);
- clothespin one.
I don’t remember what happened next, but for 2-3 years I didn’t have to touch the soldering iron either at home or at work, and because of the uselessness of this device I was lying idle, honestly collecting 3 kg of dust per year. Got it just for the photo.
The question arose again when there were prospects on the horizon to pick up the main heating tool of any electrician / electronics engineer / sadist (underline the necessary). At this point, it was decided to select from the hard earned 2 tr. (like, so much then cost) and buy from Uncle Liao a vice on the hinge. Made by Vise on the hinge with a sucker paid-sent-received.
Such vice on the Internet over 9000 !!!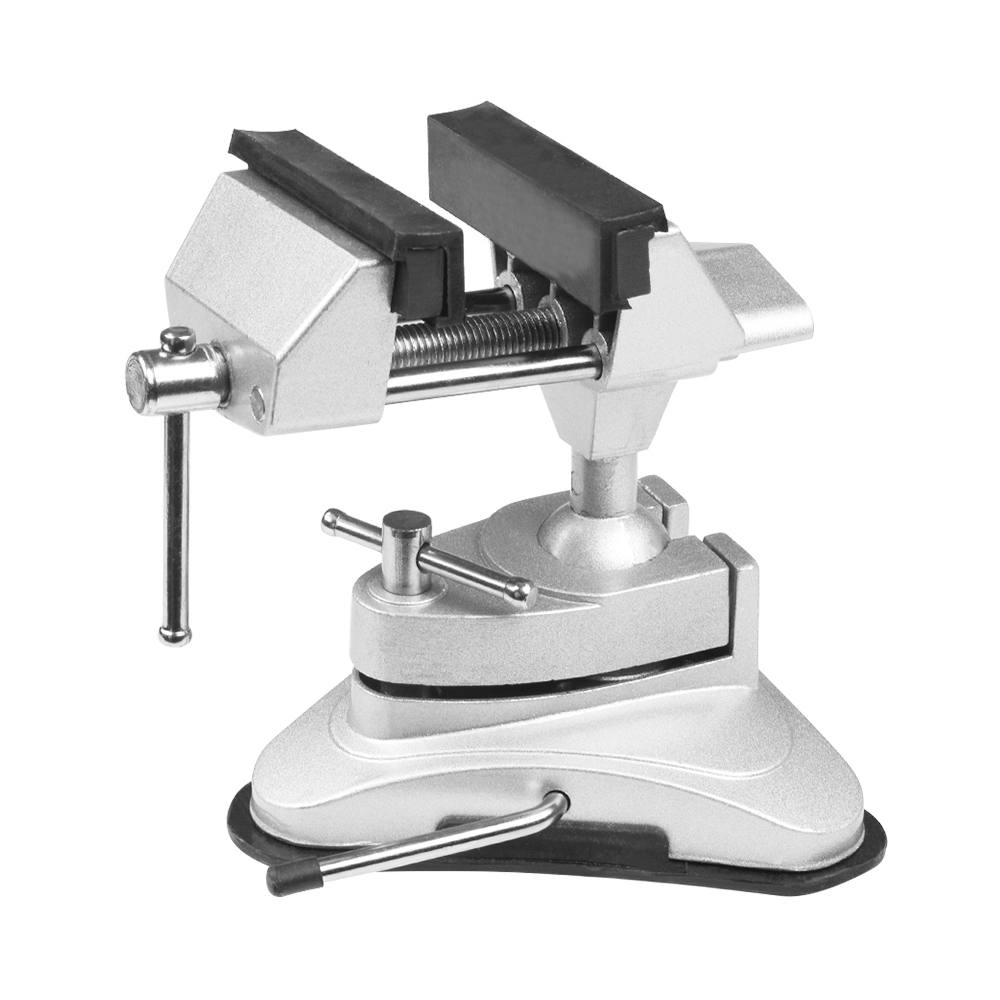
These clutches help me for quite a long time and of the available options, in my opinion, this was the best solution. But again there were nuances:
- the choice fell on a vice with a sucker not just like that. Putting the vice deeper on the table, you can put his elbows on his hands, which gives a certain ease of installation. But the sucker stubbornly refused to suck for more than 5 minutes, and if the grip was strongly inclined, then they simply turned over under their own weight. I do not know, skis do not go skiing ...
- for mounting one board is normal, you can also apply the force during disassembly, but still the tool is rather coarse and you can not pinch the shawl;
- sizes. They occupy a lot of space on the table;
- still only one board.
Vice and currently serve faithfully. Again, from the available options for home use, in my opinion this is the best. By the way, one of the advantages, in contrast to the Chinese tripods with a magnifying glass, is the ability to work with a file or file.
The story continued when, after another change of job, I turned from a microcontroller programmer into an electronics engineer (in our village, and this did not happen). The company, though zahberovalo, but on the remnants of the empire remained a lot of interesting "pieces of iron".
Any specialized clamps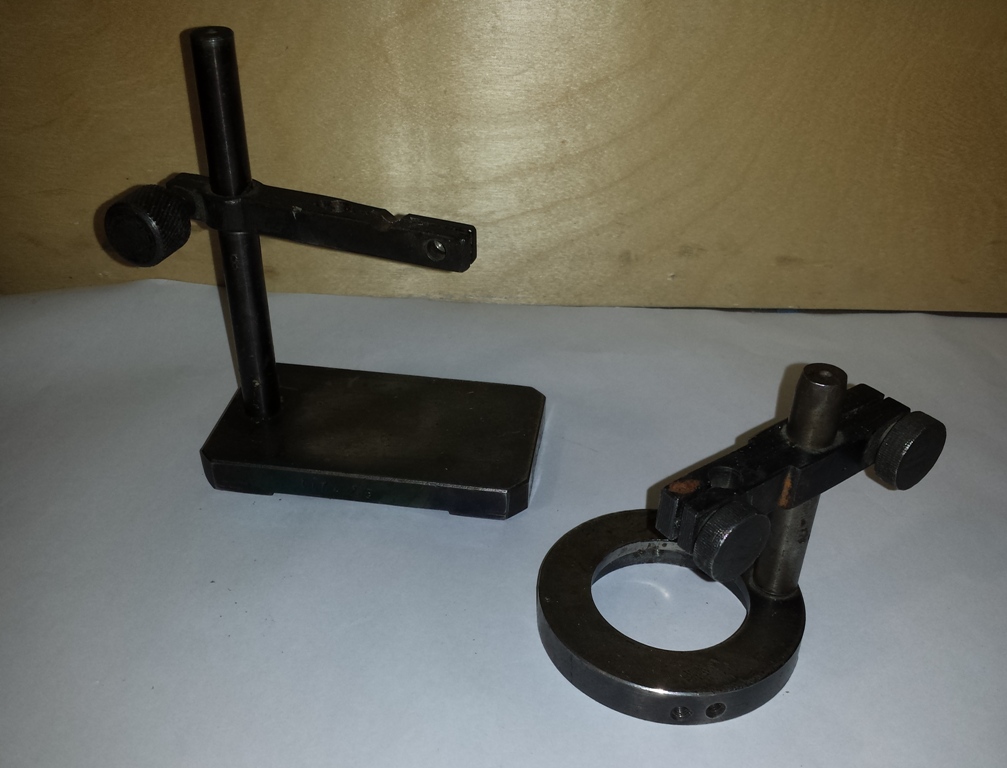
It was decided, based on the good old technology, to make an adaptation that meets our needs, namely:
- satisfy the need to hold multiple boards at once;
- the ability to fix the board a small size;
- the ability to gain access to both the top and bottom sides of the board without unnecessary gestures;
- a lot of weight so that during debugging everything suddenly everything does not start leaving the table under the weight of several wires from a multimeter (s) or an oscilloscope.
- it is desirable to do only turning and drilling in its production, since there is no free access to other equipment, and this may delay our small project. (The very moment when you can minus the lathe in DIY).
To my happiness, there is an assistant who, without further ado and with healthy enthusiasm, embarked on the realization of my ideas in the drawings, which were later transferred to the appropriate department. Comrades from the department sighed at the sight of the provided drawings, then twisting a finger at their heads about certain moments (we are still engaged in electronics, and not metalworking), in turn, too, with a healthy enthusiasm, began to perform the task.
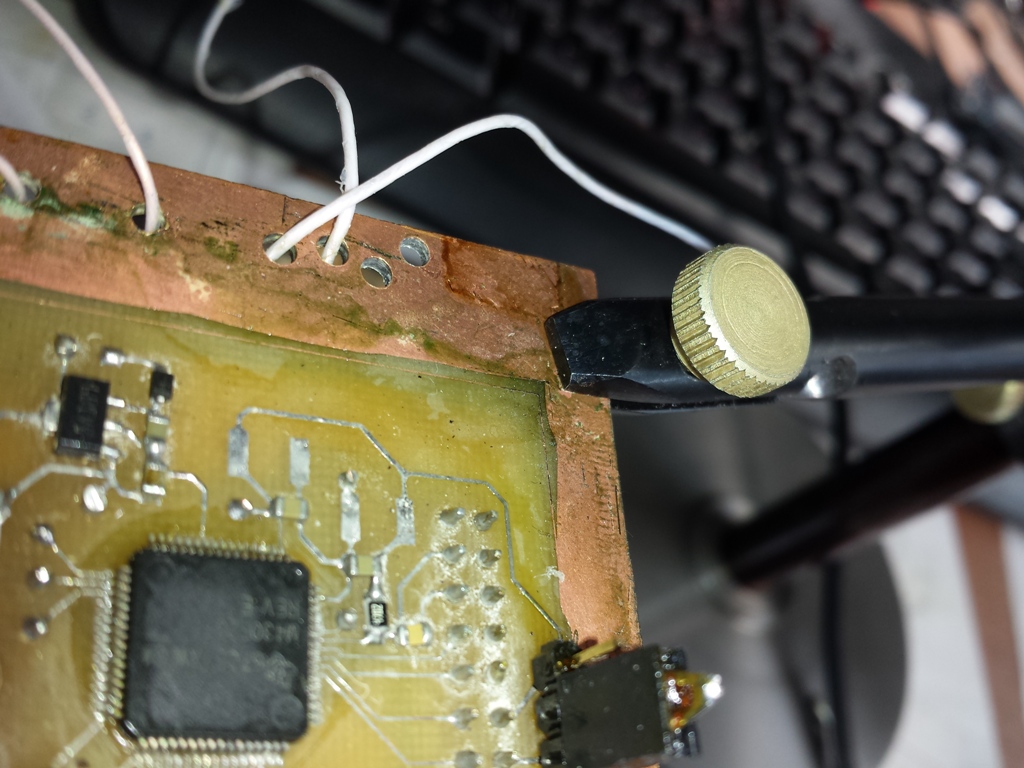
The resulting tripods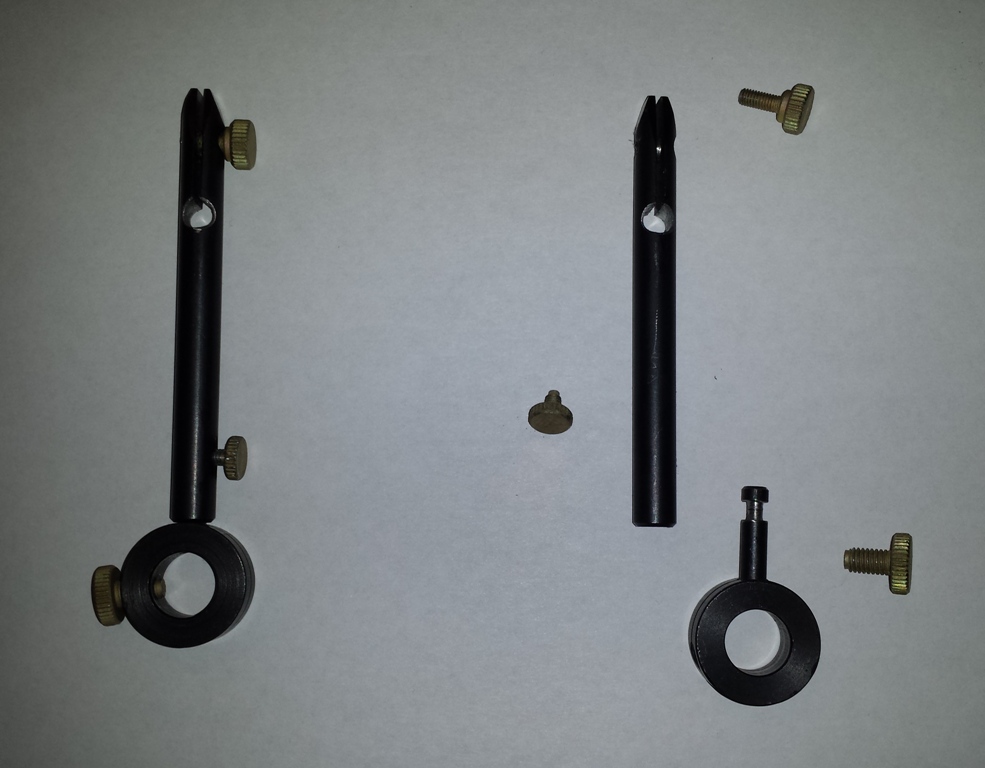
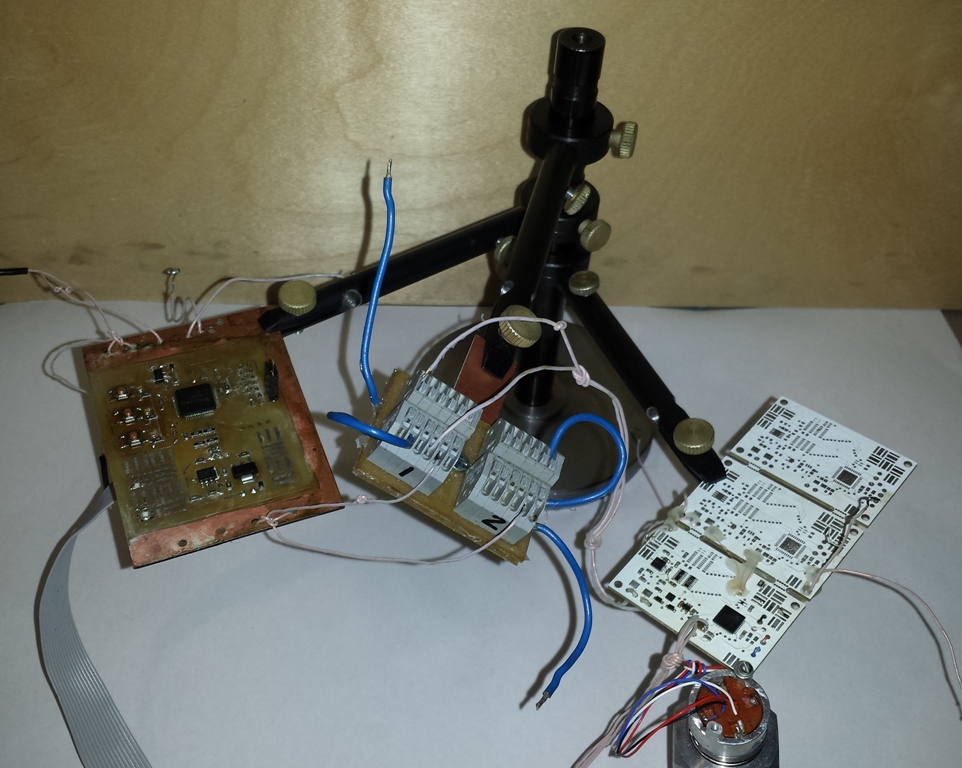
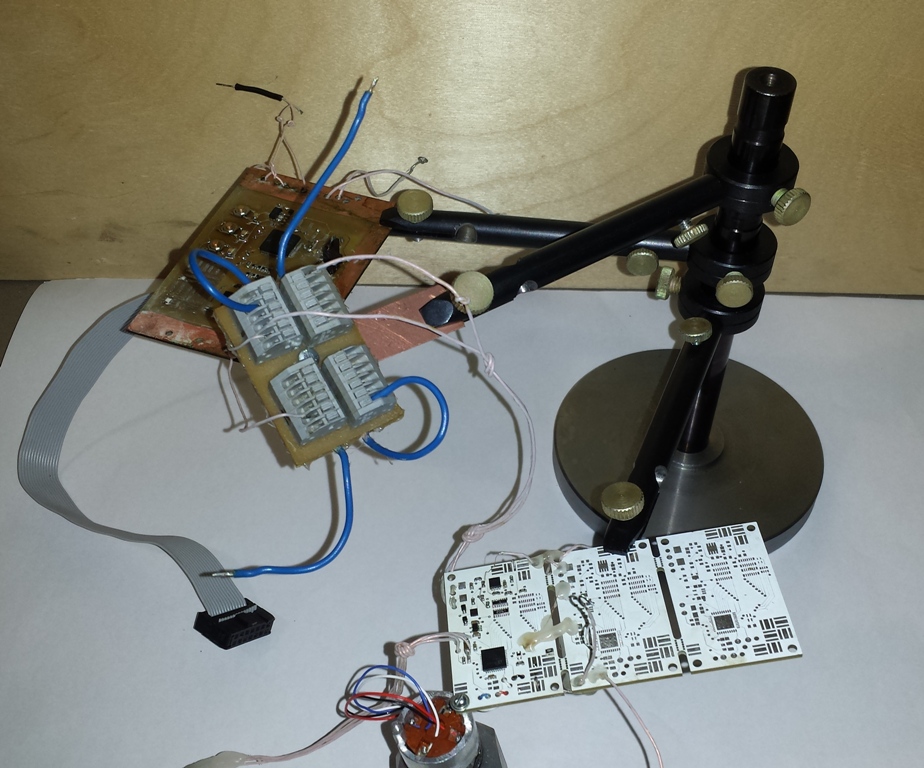
The result, as expected, turned out to be positive, and within 3 days from the start of use a second such tripod was made for the second workplace. There’s probably only one minus: it’s not very convenient to solder boards larger than 50x50 mm.
I do not post drawings for 2 reasons:
- despite the fact that it was made for me, the drawings do not belong to me;
- frankly, there is no special value in them. If someone thinks to implement something like that, he will still have to re-calculate everything for his tasks.
You say: “Yes, and where is DIY?” Yes, the production was carried out by a very good turner and on a lathe for metal, electro-erosion treatment was also used (not a cheap thing at all). Almost all parts are buried or galvanized. All screws were machined specifically. But hand on heart, I will say - I think that most of these operations can be done manually, or not done at all without any loss in functionality. Instead of the unique cogs, it is possible to use ordinary galvanized hex. Burning does not, in principle, affect flight performance. Beautiful, hardened machined on a turning axis, bushings and rings can be safely changed to “Chinese studs and nuts made of steel 3 clay”. But will it be worth your attention?
Source: https://habr.com/ru/post/448004/
All Articles