Cat under the hood. Part 2

Hello! In the last part, we talked about existing solutions for “orchestrating” parallel tasks of “breaking hashes” into hashcat.
In this part, we continue to talk about the project Hashtopolis. Consider the preparation of components of the web environment on the server. Let us analyze the main parameters of the server and the Hashtopolis agent.
Install and configure Hashtopolis
For its work, the Hashtopolis server wants the following components from you:
- Apache2 / nginx
- 64-bit PHP 7.0+ and modules: php-gd modules, pear, php-curl
- MySQL 5.x + UZ with full access to the application database
Hashtopolis has support for nginx, to work with which you need to configure blocking access to all subdirectories "/ hashtopolis" containing the .htaccess file. In this article, we look at installing Hashtopolis with an Apache2 web server (because LAMP).
')
XAMPP can also be used to familiarize yourself with the project; on version 5.6.40, we all “took off” without any problems. The material from this article is useful in configuring Hashtopolis on XAMPP.
Under the spoiler, a little bit about the Hashtopolis Docker image:
Installing Hashtopolis in docker
Several images of the “hashtopolis server” were found in the Docker Hub, however, only one generated at least some trust: hub.docker.com/r/kpeiruza/hashtopolis
The author was not lazy and added a description on the “installation” of hashtopolis in Docker. Setting details and container are described in detail. Important note - when setting up a port-mapping (for example, 'docker run ... -p 80:80'), consider the features of your OS and the need to access the web server on Hashtopolis host agents.
The process of setting up the web application itself is described later in our article.
Installation in LAMP
The version of the project that we used: Hashtopolis 0.10.1
For the operation of the Hashtopolis server, a host with the following configuration was enough for us:
- 1 CPU
- 1GB RAM
- 25 GB drive
We recommend installing phpMyAdmin, Adminer or another equivalent to work with the DBMS. Thus, in case of problems with the functionality of Hashtopolis, troubleshooting can be done without leaving the browser.
In the process of installing software on our LAMP server, we used instructions from the Hashtopolis project wiki (https://github.com/s3inlc/hashtopolis/wiki/Server-Prerequisites):
- sudo apt update && sudo apt upgrade
- sudo apt install mysql-server
- sudo apt install apache2
- sudo apt install libapache2-mod-php php-mysql php php-gd php-pear php-curl
- sudo apt install git
- sudo apt install phpmyadmin
If the interactive configuration wizard was not launched during the installation of the mysql packages, the following command should be executed: mysql_secure_installation.
Thus, using the "interactive wizard" will set the password for access to the database.
Then you need to create a user in MySQL and the database to which this user will have read / write access.
Moving on to installing the Hashtopolis server.
You can clone the Hashtopolis source code from the git-repository of the project. We acted according to the instructions and cloned the repo, and from the “hashtopolis” directory we transferred “src” recursively to the “www”:
- git clone github.com/s3inlc/hashtopolis.git
- cd hashtopolis / src
- sudo mkdir / var / www / hashtopolis
- sudo cp -r * / var / www / hashtopolis
- sudo chown -R www-data: www-data / var / www / hashtopolis
Set the “KeepAliveTimeout” directive to 10 milliseconds, as recommended by the developers. Rationale:
In the case of the client needs to be updated,Our free translation: “In order to use TCP sessions in a client implemented in Python, the session timeout in the web server configuration must be set higher than the“ status update ”value of the agent.
Open the Apache2 configuration file with any (favorite) editor (in our system, the path to the file "/etc/apache2/apache2.conf") and change the value of the "KeepAliveTimeout" directive from 5 to 10.
If necessary, add to the web server configuration alias to the folder with Hashtopolis (if the directory was created in a directory other than "/ var / www / html"). We also add the “AllowOverride All” directive to allow the use of .htaccess files in child directories.
We just in case added the “ServerSignature Off” and “ServerTokens Prod” directives to the configuration file "/etc/apache2/apache2.conf" followed by restarting the apache2 service, and also specified the allowed IP addresses to access the "phpMyAdmin" directive " Allow from 1.2.3.4/28 "in the config" /etc/apache2/conf-enabled/phpmyadmin.conf ". Allow access from any address to Hashtopolis or limit locahost / PrivateIP-space - depends on the specific setup. In our case, access is allowed from any IP, as you better decide this moment.
It would be a good idea to restrict access to the hashtopolis directory. We went in a simple and fast way - to access the "/ hashtopolis" directory, the web client must pass Basic-Authentication.
Install the apache-utils package (if not done before). From the utilities at this stage, you will need to "htpasswd". Create a file and user login:
sudo htpasswd -c /etc/apache2/.htpasswd kraud After entering the password, the user will be added to the .htpasswd file, you can check it with the command "cat /etc/apache2/.htpasswd". Adding users is carried out by a similar command without the "-c" key.
Next, we configure access to the web application directory by adding directives to the “apache2 / sites-available / 000-default.conf” config. This resulted in the following “directory” config:
Alias /hashtopolis "/var/www/hashtopolis" <Directory /var/www/hashtopolis> AuthType Basic AuthName "Restricted Content" AuthUserFile /etc/apache2/.htpasswd Order allow,deny Allow from all AllowOverride All Require valid-user </Directory> Please note that when using “Basic-Auth”, you must additionally add parameters to the configuration of the Hashtopolis agent (file "\ hashtopolis_agent_dir \ config.json"):
{ "url": "http://1.2.3.4/hashtopolis/api/server.php", "voucher": "", "token": "token", "uuid": "d54de86f-3942-4127-af63-f257c45b66cd", "debug": false, "auth-user": "kraud", "auth-password": "password" } About agent Hashtopolis later.
You must also create a new database for the Hashtopolis application and the MySQL user with access to this database. There is something that someone like - in PMA or in the console to create the base - it should not be difficult. Save the database name and credentials in the notes - they will be needed later.
As a result of these steps, the installation page of the Hashtopolis web application should load at the following URL: http: // <server_ip> / hashtopolis:
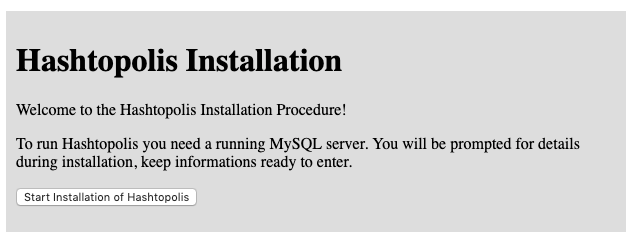
If this does not happen, the problem is probably in permissions to the "/ var / www / hashtopolis" directory, or in the configuration of the web server (for example, an error in "Alias"). It is worth checking the URL http: // <server_ip> /hashtopolis/src/index.php or http: // <server_ip> /hashtopolis/src/install/index.php
Then, the form “DB Connection” will be loaded on which you will need to fill in the parameters for connecting to the DBMS, the name of the database (for example, 'hashtopolis') and the credentials of the user to access it. If the connection is correctly established, the following form will open with a single “Continue” button - click on it. If everything is OK, the following form “Create Admin User” will open - here we specify the credentials given by the administrator of the Hashtopolis web application:

After clicking the “Create” button, if the form has been processed, a document will be displayed correctly confirming the successful installation and recommendations:
- Make sure that the permissions on the "./install" directory are correct, or delete this directory
- Check the contents of the file "./install/.htaccess" (should be "Order deny, allow \ nDeny from all")
- When a request sent to "./install" should return status code 403
After all the steps performed, the Hashtopolis authentication form should be downloaded to the http: // <server_ip> / hashtopolis / URL:
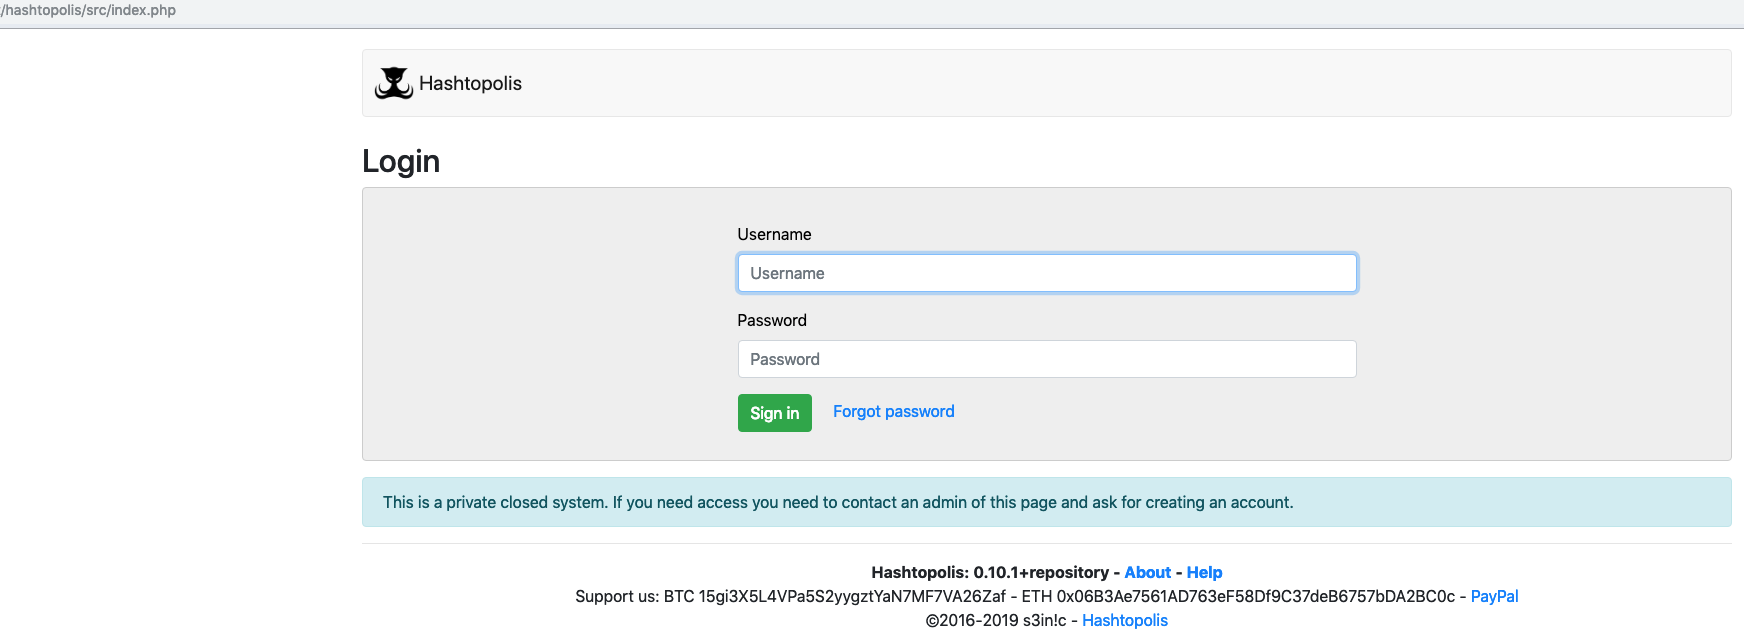
Further (optional) configure the use of HTTPS, security certificate connection - we will omit this stage. Go to setting up the Hashtopolis agent.
Agent installation
Agents are directly involved in the task of “hacking hashes” - agents of the 'hashcat' or another cracker are started on the host agents. The dialogue between the Hashtopolis server and the agents takes place via HTTP / HTTPs.
The agent can be installed on systems running Windows / Linux / MacOS X. In the current version of Hashtopolis, only the Python agent is supported.
The .Net version of the Hashtopolis agent is no longer supported.
We already had a host on Windows 10, which we used to “crack hashes” using 'hashcat'. Therefore, we decided not to change anything, but to take a ready-made working system for connecting to Hashtopolis.
On the Windows system, you must first install the Python 3 interpreter. Do not forget to install the “Add Python 3.x to PATH” option when installing (example below):

Then, you need to download the hastopolis.zip archive from the Hashtopolis server, or otherwise deliver the archive file to the agent host.
To download agent files from the server, click on “New Agent” from the “Agents” drop down menu. Further we get to the section "Add new agent" where the download button - "Download" will be contained.

Also, in the “Add new agent” section you will see the URL for connecting the agent and the button for creating a voucher (you must click “Create”).
In our case, the archive was saved in the “C: \ hashtopolis” directory, which will then be the working directory of the agent.
For the convenience of working with the agent (viewing the magazine, copy / paste, etc.) we use the PowerShell session. The agent is started by the command:
> python.exe .\hashtopolis.zip The agent is started in debug mode using the "-d" option.
> python3.exe .\hashtopolis.zip -d You can disable debugging by editing the config file "config.json" with the string "debug": false ".
Help for additional arguments of the agent's command launch can be obtained using the "-h" option:
Hashtopolis agent commands
> python.exe. \ hashtopolis.zip -h
usage: python3 hashtopolis.zip [-h] [--de-register] [--version]
[--number-only] [--disable-update] [--debug]
[--voucher VOUCHER] [--url URL]
Hashtopolis Client v0.4.0
optional arguments:
-h, --help show this help message and exit
--de-register client server automatically
--version show version information
--number-only when using --version show only the number
--disable-update disable retrieving auto-updates
server
--debug, -d enforce debugging output
--voucher VOUCHER voucher to use to register
--url URL URL to Hashtopolis client API
After initialization, the agent will ask the URL of the Hashtopolis server (you can copy it from the “Add new agent” section): “Please enter the url of the Hashtopolis installation:”
Note: the agent script should always work in the background. There is a component hashtopolis-runner which starts the agent when multicast messages are received from the server. Runner runs only on linux hosts. Read more here: github.com/s3inlc/hashtopolis-runner
If the URL is entered correctly and the agent was able to connect, then a message will be received asking for a voucher: “No token found! Please enter a voucher to register your agent: "
The agent will issue a confirmation if the voucher code is correct and will go to the task waiting mode:
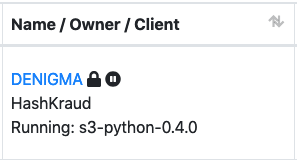
Successfully registered! Collecting agent data... Login successful! Hashtopolis Server version: 0.10.1 () Client is up-to-date! No task available! In the “Agents” section, a new agent will be added to the table, with information about the system: Host name, GPU / CPU and other information:

In the “C: \ hashtopolis” directory, the file “config.json” with the agent configuration and the log file “client.log” will be created. Additional parameters (for example HTTP proxy) can be added manually according to the instructions: github.com/s3inlc/hashtopolis-agent-python
It was not possible to find information about the rotation of the logs or the maximum size of the log, judging by the source of the agent, the entire stdout from the terminal is also written to the file, no restrictions or checks were found.
We recommend that you immediately go to the agent settings in the Hashtopolis web interface — all you need to do is click on the host name (in the screenshot above, this is “DENIGMA”). It is better to install the “Trust agent with secret data” bird and also specify the owner (“Owner”):

Customize cracker binaries
The section “Crackers / Cracker Biniaries” presents the parameters of the hacker's executable files, the default section contains “hashcat 5.1.0”. If it is necessary to use another version of hashcat for any specific tasks, click "Add Version / Binary" (release list: github.com/hashcat/hashcat/releases ). Fill in all fields in the form and click “Create binary”:

Be careful when filling out the form, in particular, avoid the “spaces” in the “Download URL”, in the “Binary Base Name” field specify “hashcat” - the agent's script will add the missing parts in the name of the executable file. So we added an additional set of executable files for version 4.1.0. You can make changes by clicking on the name of the cracker in the “Name” column.
As a result of this “setting” when creating a new task (“Tasks / New Tasks”), it will be possible to select the hashcat version.

In the “Crackers” section you can also add another type of cracker, more about working with the “generic cracker” here .
When you start a task in the local directory “crackers” on the agent's host, the 7z-archive specified in the “Download URL” will be unpacked into the folder with the ID number of the cracker

If this version of the cracker was “installed” earlier - the archive will not be re-downloaded.
Create a task for hacking
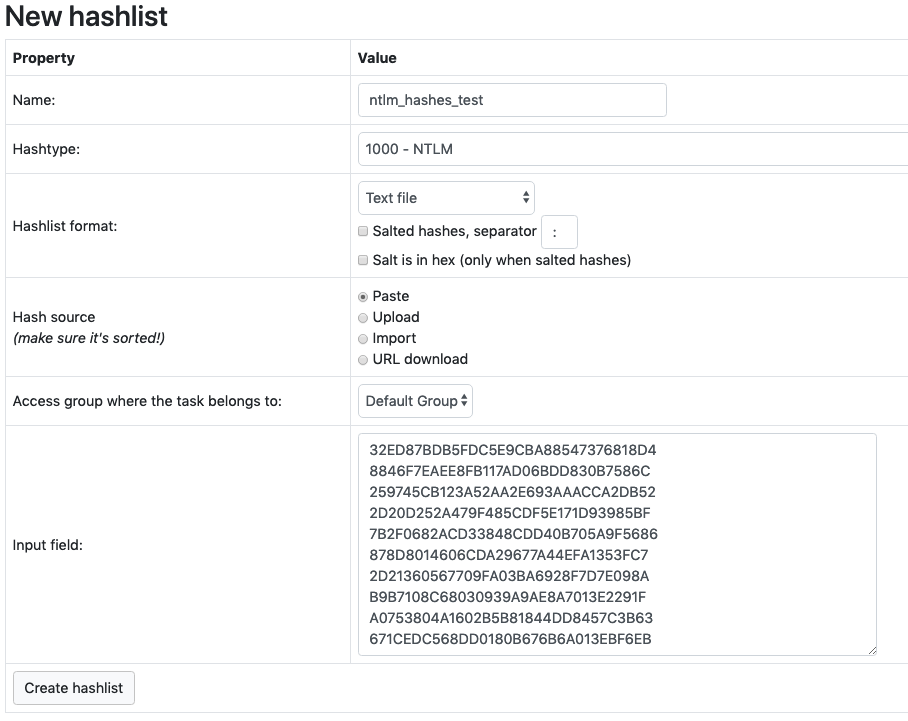
We set up an agent and can’t wait to check it out. In order to start “hacking hashes” you need to create a list of hashes (or “Hash list”), and then specify it in the task. To create a list in the Hashtopolis web interface, click “Lists” and select “New hashlist” from the drop-down menu. On our projects, we regularly encounter NTLM / NetNTLM hashes - we will practice on them. We will use any online service and generate NTLM hashes. Then, set the remaining parameters of the list and click “Create hashlist”:
An important point is that all the “hacked / not hacked” hashes can be seen in the created list, i.e. All data on the hashes are associated with the list, even tasks are associated with it. Therefore, be careful when deleting hash lists. And if for some reason the application modules cease to work, for example, the “notifications.php” module was turned off by us after deleting the task to which notifications were assigned - we had to write entries in the “NotificationSetting” table
Next, you need to add a dictionary, since we will be breaking the hashes with a “dictionary” selection (the key '-a0' in 'hashcat'). Go to the “Files” section (the “Wordlists” tab will be active), click the “Add file” button and select a local file, then click on “Upload files”. We can also use the download by URL, for example, download the dictionary from the "known" repository :

Now you can begin the tasks for the agent. From the main menu of Hashtopolis, select "Tasks / New task". Next, fill out the form:
- Enter the name of the task in the parameter "Name"
- Select the hash list in the “Haslist” parameter
- Mark the dictionary from the list “Wordlists” on the right - the name of the dictionary will be automatically substituted in the field “Command line” or: Specify the path to the dictionary in the format ".. \ path \ to \ file \% filename%"
- In the field "Command line" enter the startup parameters hashcat, for example "-a0"
- Priority is relevant when there are many tasks.
- “Task notes” is used for notes, they will not be available outside of Hashtopolis
- You can select a color for the task, which it will be marked in the task list (menu "Task / Show tasks")
The remaining parameters are left by default, we click “Create task”. After that, a new task will appear in the task list:

As can be seen from the table, no agent (s) has been assigned to the “NTLM_test_crack” task. You can assign an agent either from the “Agent details” menu in the “Assignment:” parameter, or select the agent from the list in the task properties and click the “Assign” button:

Immediately after that, the agent will start “moving” - instructions will be given:
- Download “cracker binaries” (by default hashcat.net/files/hashcat-5.1.0.7z ). If files exist and the version is the same - the archive will not be downloaded.
- Download the dictionary file (if the “wordlist” of the hashtopolis server is specified)
- Run a short performance test
- Start “hacking hashes”
In this case, the console will display information about the stages of preparation of the GPU, the selection process, system performance in the "H / s", etc.
As a result of the task launch and its execution, the status of the “hash list” will be updated. Selected passwords can be viewed by clicking on the number opposite to “Cracked:” in the “Tasks” table, or in the “Hash details” section:

If an agent encounters errors during the execution of tasks, the status of this agent will be changed and you will need to manually activate it. To “activate” the agent again, you need to put a bird next to the “Activity” parameter in the agent settings. “Paused” status looks like this:
To prevent the agent from stopping due to errors, you need to change the “Cracker errors” parameter to one of the “Keep agent running” options (the agent will work, but errors can either be recorded in the log or rejected):

Tail
Thanks for attention! In the next section, we’ll tell you about setting up notifications in Hashtopolis.
Source: https://habr.com/ru/post/446922/
All Articles