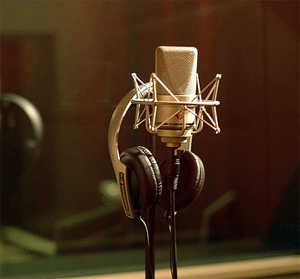
Acapella recording and processing

The human voice in the song is most critical for listening comprehension, and therefore it should sound as natural as possible. Most sound engineers agree that it is necessary to record vocals in such a way as to minimize its subsequent processing, and this, of course, is correct. But you can only implement this in a professional studio with good (preferably lamp) equipment. Is it possible to do without this expensive equipment, but at the same time as close as possible to the studio sound quality? Can! This is what we are going to do now.
At least two people participate in the vocal recording (as in sex). And one of them must be more experienced than its partner (s). That is, either the vocalist can work well with the microphone (sing more quietly, louder, move in or out at the right time), or the sound engineer can work adequately with the faders on the remote.
Initially, vocals are written in mono mode , with parameters: 16 bit / 44.1 kHz , to a level not exceeding -3 dB (this is a minus). This figure was found to be optimal in order not to raise the volume too much after recording, but also so that unwanted overloads do not occur when the input signal level is too high.
So, the vocal part is recorded and saved in a separate * .wav file. Now we need to properly handle it and mix it with the soundtrack. To do this, we open the audio file with vocals in any music editor, where this miracle will take place (I personally feel closer to the Steinberg Cubase SX2 ), and proceed.
')
- The first thing to do after recording with vocals is to equalize its volume. No matter how professional the “partners” are, the vocalist cannot sing constantly with the same loudness, at some point he moved away from the microphone too much, at some point he approached, etc. etc. all this should be aligned and brought to a common indicator. This task is well handled by a compressor ( Waves RComp, Waves C1, or Multiband Compressor in Adobe Audition ). It should be noted here that you should not blindly trust the factory presets of these compressors, even though they are fitted very high quality, but nevertheless you have to work with pens.
- Next - equalization. Equalization is one of the most difficult and time consuming tasks in vocal processing, and without exaggeration it is the most important. Many sound engineers argue that the equalizer can never be a plus. This allegedly introduces phase distortion in the original signal. Perhaps they are right, but we are with you, not for the Golden Gramophone, we are trying, we do the main thing beautifully. So, we can use almost any parametric equalizer with a linear cutoff and an assigned frequency of the bands. It should be remembered that the basic frequencies of the human voice range from 300 Hz to 2 kHz . I emphasize: the main ones . To make good vocals you need to work with frequencies that lie far beyond this spectrum. Here is an approximate vocal equalization scheme:
200 Hz.
Zoom in to add fullness to vocals.
3000 Hz.
Zoom in to emphasize the purity and rigidity of the vocal part.
Reduce to emphasize aspiration, soft backing vocals.
Reduce if you need to mask the harmonic disorder of the vocals.
5000 Hz.
Zoom in for legible vocals.
7000 Hz
Zoom when working with "sluggish" vocals.
Reduce to reduce the energy of whistling consonants.
10,000 Hz.
Zoom to brighten vocals.
Reduce to reduce the energy of whistling consonants.
15,000 Hz
Zoom in to brighten vocals (sound with aspiration).
- The next stage is panning. Since the vocals are always written in mono, it should be scattered slightly through the channels. For this, special tools are commonly used, such as: Waves S-1 or Blue Tubes Stereo Imager . Here you can not bother much, and choose ready-made presets, since they are represented in abundance in these products.
- "Warming" vocals. For this purpose, tube gain emulators and exciters are used. Steinberg Magneto, Steinberg DaTube, RSO ExTreme Punch 3 (imitation tape recording). The Blue Tubes Equalizers Pack has a nice tube amplifier. The fact is that the lamp gives a warmer and softer sound than the figure, and if you go to make a beautiful Lead Vocal, then these effects are mandatory attributes.
- Well, the final stage is reversion and sharing. Of the reverters personally, I would advise Waves True Verb in my opinion - the best reverter of those that I used. Well, you can impose any task, because there are no special differences in them.
Here is the approximate (recommended) vocal processing scheme in the mix process. I want to add one more, very important detail: everything that you do with sound is done only by ear, you can only trust in your own ears (well, test gauges). And one more thing: if you have good (read: almost studio) monitors, then it is best to use them when mixing, rather than headphones.
Source: https://habr.com/ru/post/44668/
All Articles