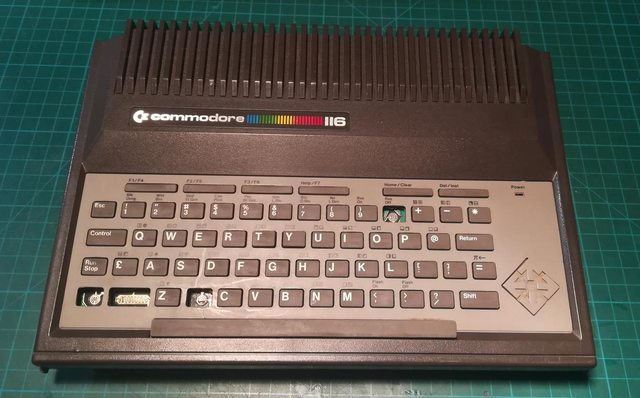
Making replicas of missing keys for a Commodore 116 rubber keyboard
From the translator: the article is very long, and it describes a long but quite ordinary repair of the brutally harassed Commodore 116 computer with the restoration of printed tracks and the soldering of missing components. An extraordinary way to make replicas of keys, pulled out of the "rubber" keyboard. The method can also be useful when repairing the original ZX Spectrum and modern flexible keyboards.
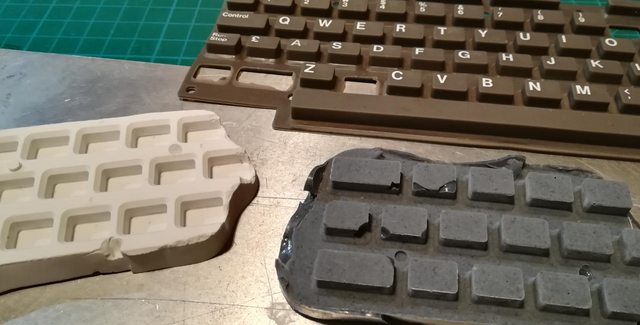
Before:
')
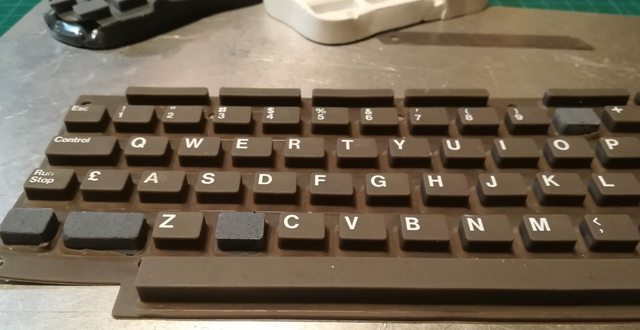
After:

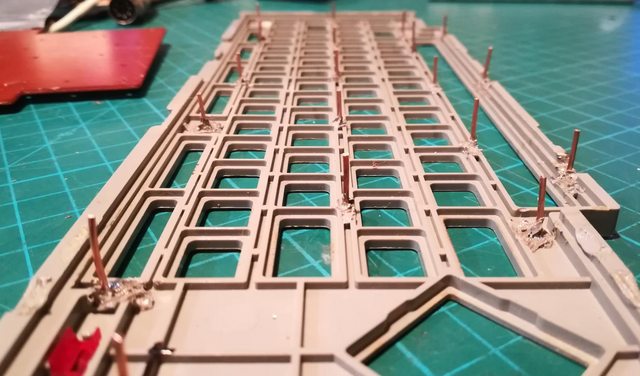
The board with keyboard pads in the Commodore 116 is held by plastic pins, which after assembly are melted with a soldering iron. If the keyboard requires repair, the melted parts of the pins are removed with nippers, instead of them metal racks are melted into the plastic. After repair and assembly of the keyboard they are bent. All is good, but the previous repairman heated the racks to too high a temperature, causing the plastic around to black.
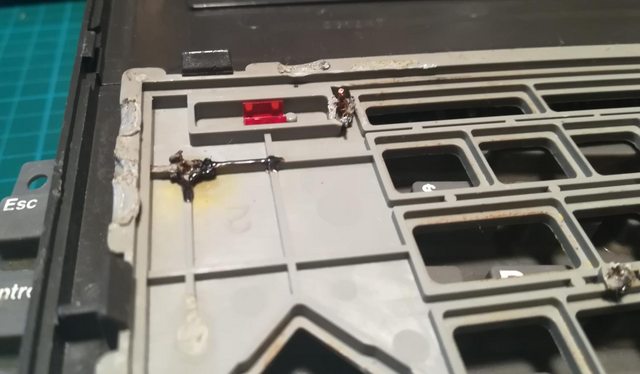
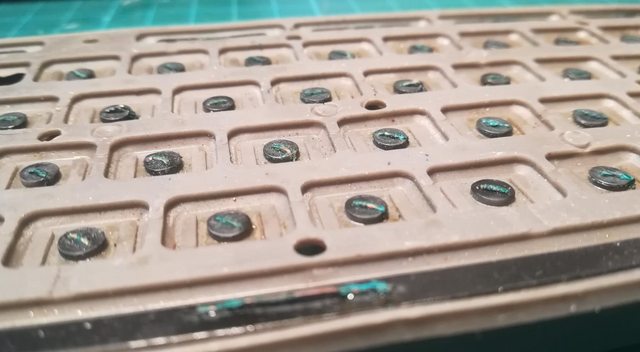
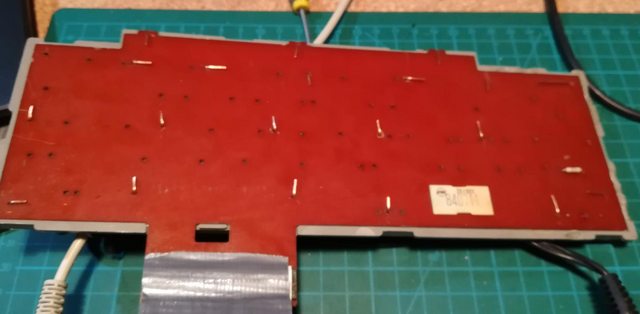
On the board, there are traces of sandpaper harassment, and on the rubber sheet, the conductive “patches” that have lost conductivity are inserted into the brackets, which first worked, but then also lost conductivity from corrosion.

But the most important thing is this. If all the tasks related to the repair of the board are familiar to the electronics engineer and are completely solvable, then here ...

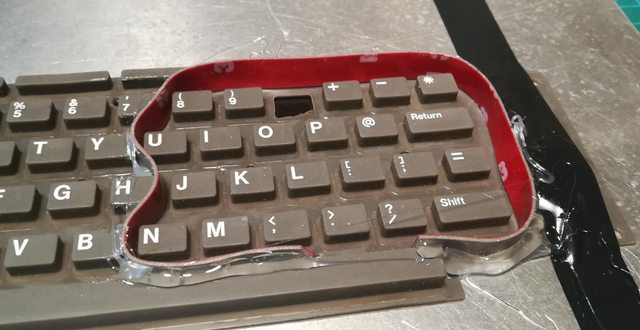
But the author has found a way out. On the reverse side, he taped a rubber sheet with tape keys.
From a thick porous adhesive tape I made a side and glued it with a glue gun.
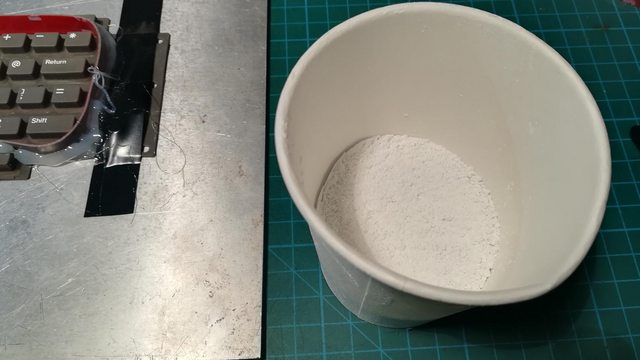
Prepared plaster and poured.
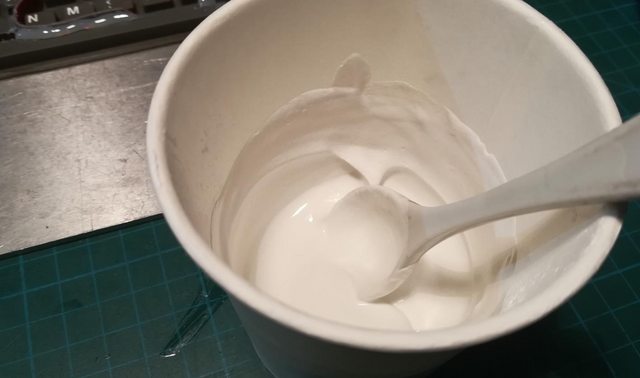

When the plaster hardened, it turned out that a section with an opening from a torn key had hit the perimeter of the rim, and due to the wrong method of pouring there were a lot of air bubbles. Also, the author forgot to clean the keys, and all the dirt from them was transferred to the cast.
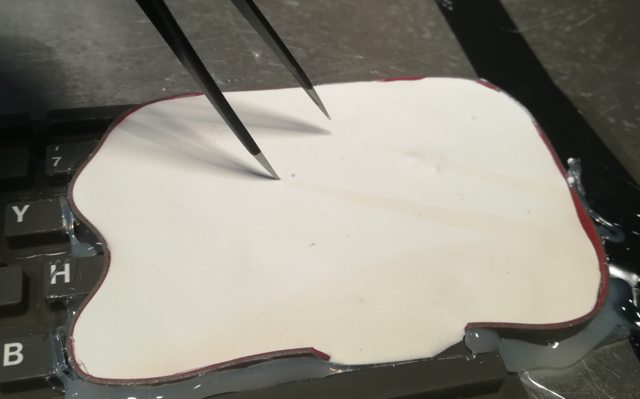
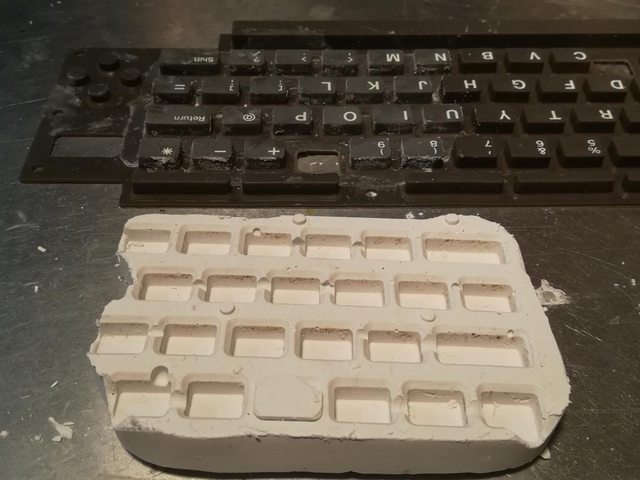
What was the wrong way to fill, and what - the right, the author does not specify, but the second attempt was a success. Among other things, the side was redesigned so that the area with the hole from the torn key was outside it.

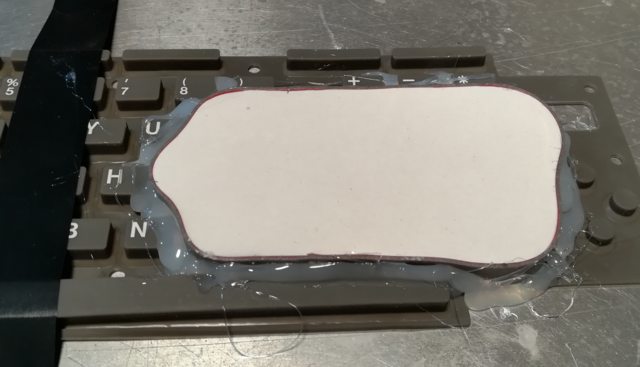

Plaster mold with a side glued to the metal sheet.
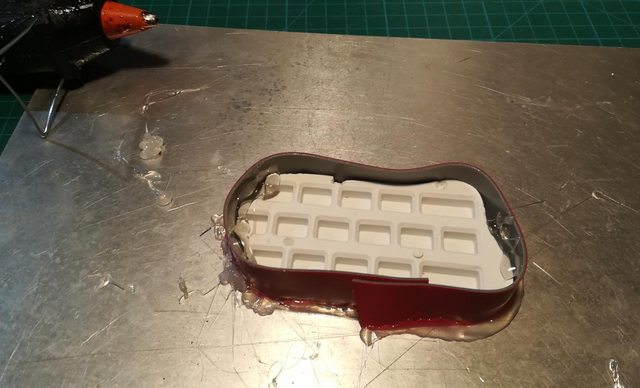
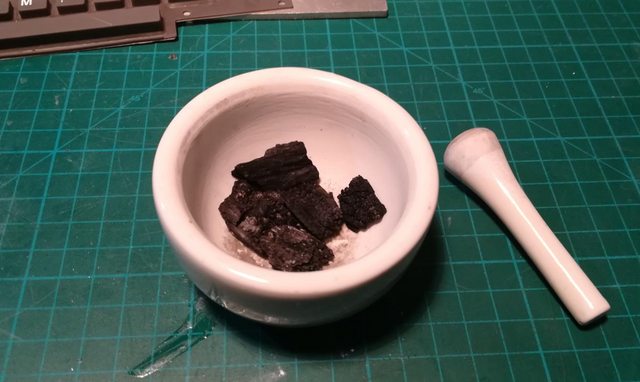
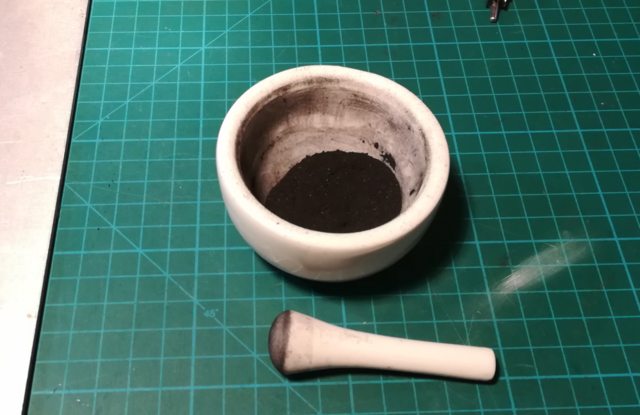
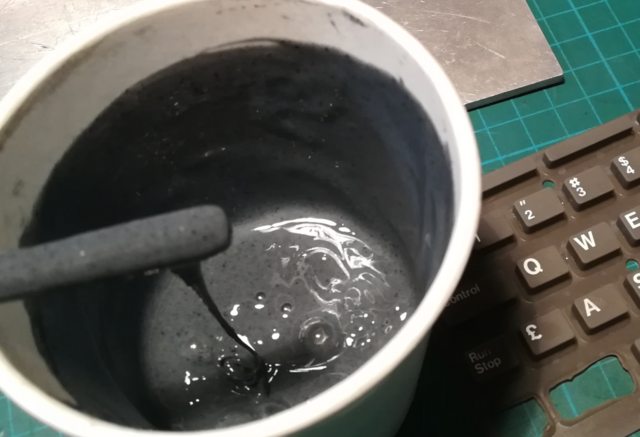
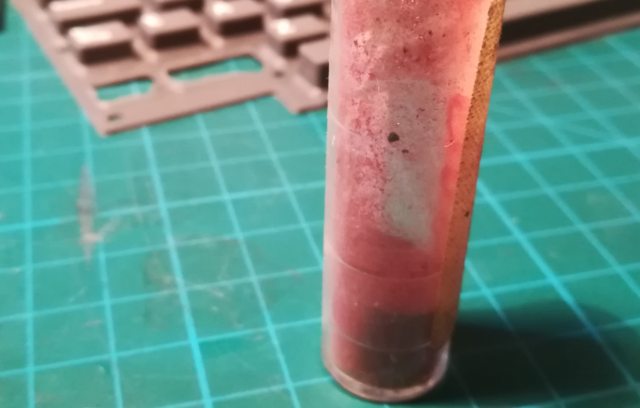
New keys will be made of molding silicone. The author turned out to be meticulous and decided to repeat the color of the original keys, for which he first added charcoal for charcoal to the silicone, then fluorescein. It turned out not very much, but then the author realized that meticulousness should have some kind of limit, otherwise you can experiment for a very long time, and poured the silicone into the mold.
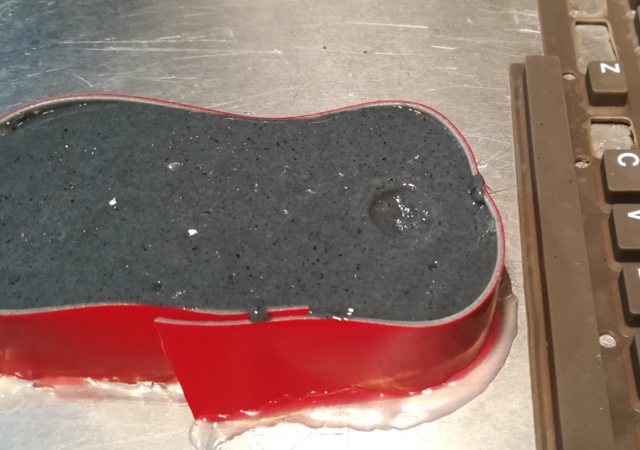
That's what happened.
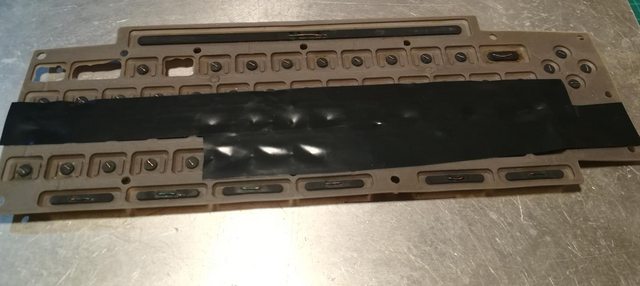
The keys are cut (there are a lot of spare ones in case they are needed suddenly) and placed in their places.

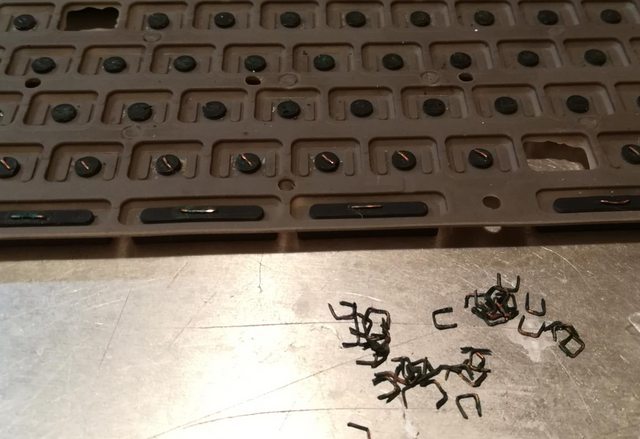
Staples are removed, instead of them "patches" are glued from the set for repair of consoles. Superglue did not work, the same silicone helped.

Glue the "penny" to the homemade keys, as we see, also turned out. It is very important that the grooves on the back of the sheet are the same as the other keys.

The board was also restored to sandpaper, but not the same as the previous repairman, but very small.

And re-varnished in places where there are no sites.
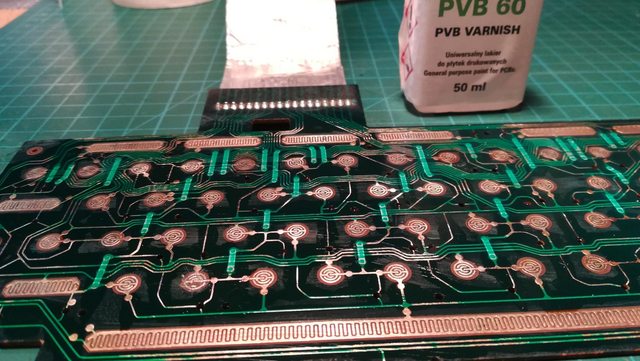
This is followed by the repair of the cable and the restoration of the tracks on the keyboard board, which are also quite ordinary. And new racks are soldered to the plastic:

Now they are bent:
A little more work on the train, and everything is collected:
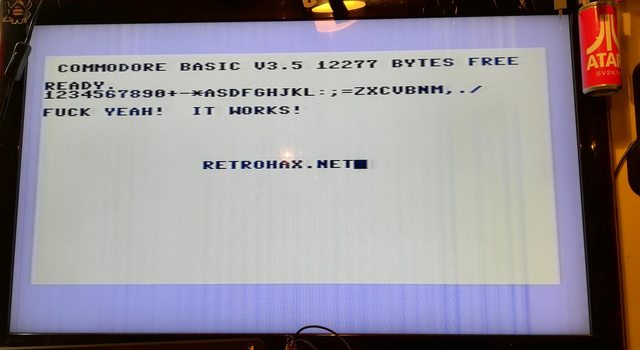
And working:
PS Attention, when repairing the Commodore 116, it is important to change the thermal paste on the heat sink - just like in a modern (or not) laptop.
You can try silk screen printing to restore the inscriptions on the keys, but even without this, it turned out very nice and neat. And another Commodore 116 is back in the ranks.
Before:
')
After:
The board with keyboard pads in the Commodore 116 is held by plastic pins, which after assembly are melted with a soldering iron. If the keyboard requires repair, the melted parts of the pins are removed with nippers, instead of them metal racks are melted into the plastic. After repair and assembly of the keyboard they are bent. All is good, but the previous repairman heated the racks to too high a temperature, causing the plastic around to black.
On the board, there are traces of sandpaper harassment, and on the rubber sheet, the conductive “patches” that have lost conductivity are inserted into the brackets, which first worked, but then also lost conductivity from corrosion.
But the most important thing is this. If all the tasks related to the repair of the board are familiar to the electronics engineer and are completely solvable, then here ...
But the author has found a way out. On the reverse side, he taped a rubber sheet with tape keys.
From a thick porous adhesive tape I made a side and glued it with a glue gun.
Prepared plaster and poured.
When the plaster hardened, it turned out that a section with an opening from a torn key had hit the perimeter of the rim, and due to the wrong method of pouring there were a lot of air bubbles. Also, the author forgot to clean the keys, and all the dirt from them was transferred to the cast.
What was the wrong way to fill, and what - the right, the author does not specify, but the second attempt was a success. Among other things, the side was redesigned so that the area with the hole from the torn key was outside it.
Plaster mold with a side glued to the metal sheet.
New keys will be made of molding silicone. The author turned out to be meticulous and decided to repeat the color of the original keys, for which he first added charcoal for charcoal to the silicone, then fluorescein. It turned out not very much, but then the author realized that meticulousness should have some kind of limit, otherwise you can experiment for a very long time, and poured the silicone into the mold.
That's what happened.
The keys are cut (there are a lot of spare ones in case they are needed suddenly) and placed in their places.
Staples are removed, instead of them "patches" are glued from the set for repair of consoles. Superglue did not work, the same silicone helped.
Glue the "penny" to the homemade keys, as we see, also turned out. It is very important that the grooves on the back of the sheet are the same as the other keys.
The board was also restored to sandpaper, but not the same as the previous repairman, but very small.
And re-varnished in places where there are no sites.
This is followed by the repair of the cable and the restoration of the tracks on the keyboard board, which are also quite ordinary. And new racks are soldered to the plastic:
Now they are bent:
A little more work on the train, and everything is collected:
And working:
PS Attention, when repairing the Commodore 116, it is important to change the thermal paste on the heat sink - just like in a modern (or not) laptop.
You can try silk screen printing to restore the inscriptions on the keys, but even without this, it turned out very nice and neat. And another Commodore 116 is back in the ranks.
Source: https://habr.com/ru/post/446676/
All Articles