"Well, again, the weather station"? Not quite
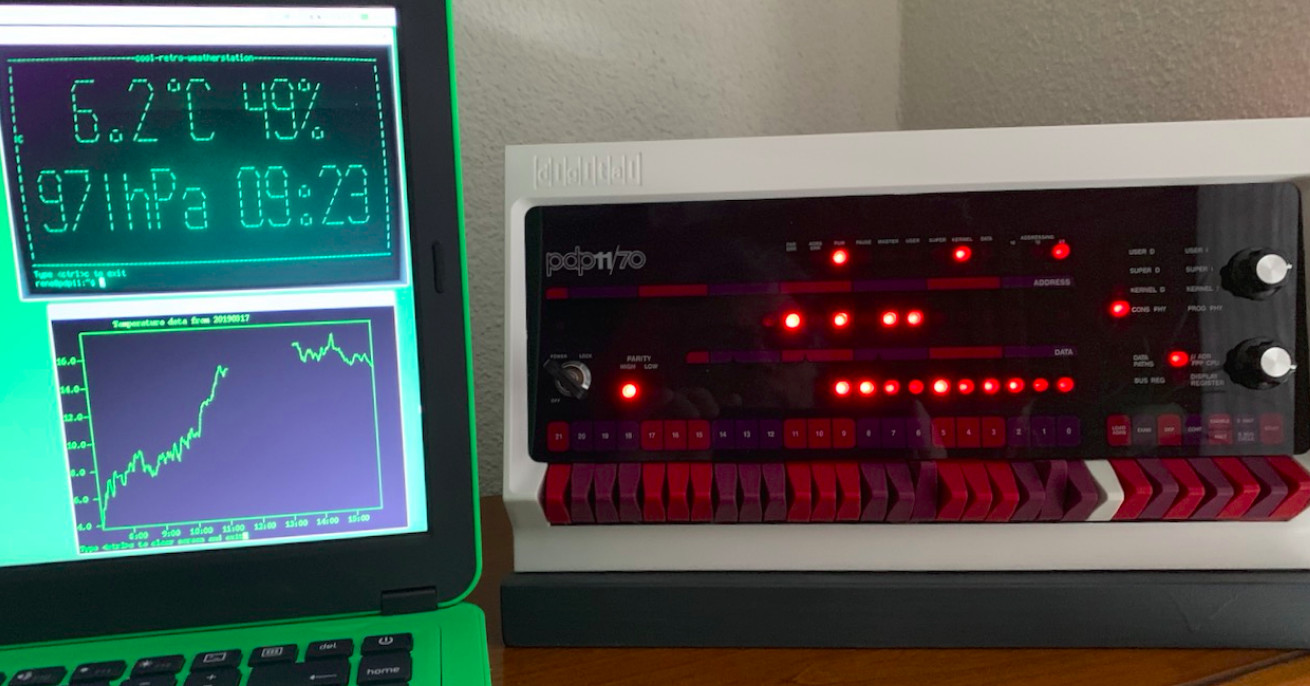
The proposed weather station is based on a home-made PIDP11 computer consisting of a “raspberry” with a PDP-11 emulator and a case with a front panel with active LEDs and switches. But despite this, the Malinka has enough unoccupied GPIOs to connect a pressure and temperature sensor.
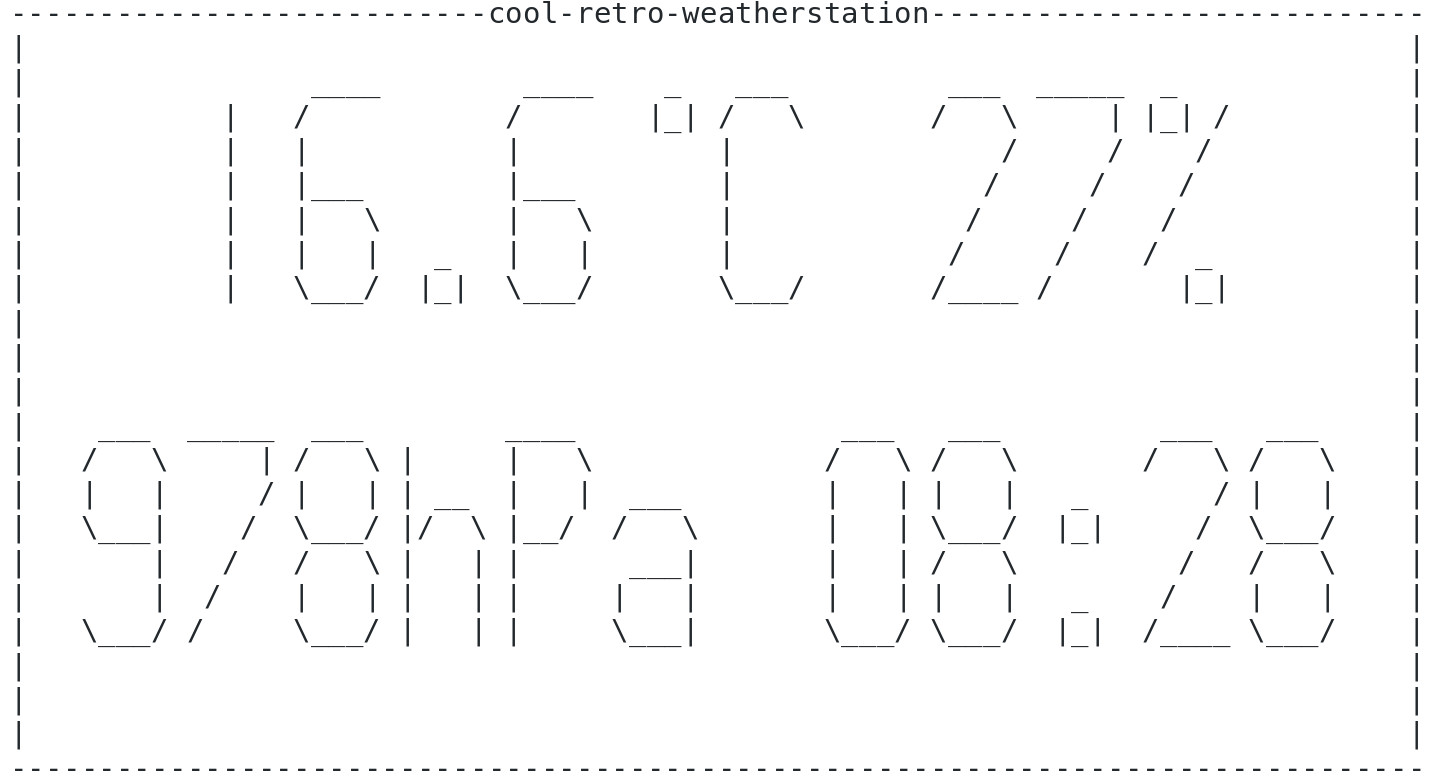
The emulator runs OS 2.11BSD, in which the weather station software “rotates”. The data is output to two terminal emulators. One of them - cool-retro-term - displays text information in large print using ASCII-art. The second, a Tektronix 4010 graphics terminal emulator with a memory tube, displays pressure and temperature changes.
')
The BME280 sensor connection method is described here :
| | GPIO | | Raspberry Pi | | ------------+--------------+-------------- VCC | 3,3 | P1-01 GND | | P1-06 SCL | SCL I2C | P1-05 SDA | SDA I2C | P1-03 The OLED display shown in the photo below is connected in parallel to the sensor, but it is assigned another address on the I 2 C bus. If you prefer, you can not install the display at all. The author also installed a button for the OS to shut down correctly before turning off the power.

To make the device work, you first need to add a new user to the new user launched in the 2.11BSD emulator:
Log in as root user. Enter the vipw command to start the vi editor with the / etc / passwd file
Put the line in the file:
firstname::201:20:fullname:/home/firstname:/bin/tcsh where firstname and fullname are short and full usernames.
Exit the editor, create a home folder for the user:
cd /home mkdir firstname chown firstname firstname Copy the files .login and .cshrc in this folder '
cd /home/user cp .* /home/firstname cd /home/firstname chown firstname .* Enter vi .login and edit the command line prompt, changing the corresponding line to:
set prompt='%n@%m:%c$ ' Exit the editor. Log out with the logout command, change the password to the new user with the passwd command under the root, now you can log in with the login and password of the new user.
After that, you need to make the date and time in the system set automatically when loading, so (for the information below, the author thanks Jason Vanick and Johnny Billquist):
First set up the network and make sure ping is working. Then just before the ntpt line in the /etc/rc.local file put the line:
ntp -sf pool.ntp.org Change the last line in the /etc/ntp.conf file to:
server pool.ntp.org You can select any other NTP server. To set the time zone, check the list of belts in the / usr / share / zoneinfo file and find the name of your belt there. Log in as root and enter the commands:
cd /etc mv localtime localtime.old ln -s /usr/share/zoneinfo/timezone localtime The next operation is to install and configure a program that will allow the 2.11BSD command line running in the emulator to forward the Raspbian command line running on a real "raspberry" like this :
In Raspbian, enter the following command as root:
sudo apt-get install rsh-server Create a .rhosts file in your home folder with the following contents:
bsd_ip_address bsd_user_name where bsd_ip_address is the IP address of the virtual machine with 2.11 BSD, and bsd_user_name is the username of 2.11 BSD, which can execute commands on a real Malinka, for example:
192.168.1.99 rene Set permissions for this file, otherwise it will not work:
chmod 600 .rhosts Go to the emulator, enter 2.11 BSD as the root user and edit / etc / hosts - add the line:
remote_ip_address remote_full_name remote_nick_name where remote_ip_address is the real Malinka IP address, and remote_full_name and remote_nick_name are her domain name and alias, for example:
192.168.1.103 pizerow.home.lan pizerow Log in with the previously specified name (bsd_user_name) and check if everything worked:
rsh remote_nick_name -l pi -n “ls” You have just executed the ls command on the real “raspberry” from the emulator. If, instead, a password entry form appeared in front of you, then something went wrong.
Now try something more complicated. Enter the command:
rsh remote_nick_name -l pi -n “cat /sys/class/thermal/thermal_zone0/temp” In the rtest folder of this repository, there is a small C program that shows how to use popen to obtain information from a particular program and process it so that it can get human-read output in 2.11BSD:
rene@pdp11:rtest$ rtest **************************************************** * The CPU temperature on the pizerow is 42.2 deg C * **************************************************** rene@pdp11:rtest$ You have just seen in the emulator the temperature of the real processor on which this emulator is spinning.
Download the Python script from the weather / sensor folder of this repository.
Make sure the script works correctly in remote pizerow and place it in the / home / pi / bin folder
Run cool-retro-term and emulator, login to 2.11BSD as the newly created user and enter the commands:
mkdir weather cd weather In one way or another (for example, using FileZilla), drag files from the weather / BSD repository folder to the weather folder of the OS running in the emulator. Enter the weather command, and the program will pull the data from the sensor and display it in this form:
rene@pdp11:weather$ weather Contacting remote sensor... Data received, analyzing ... ************************************** The sensor reports the following data: Temperature 7.0 C Pressure 969.8 hPa Humidity 66.8 % ************************************** rene@pdp11:weather$ If everything worked, create a folder dats in the ~ / weather folder, where weather2 will be able to store a log:
cd cd weather mkdir data weather2 weather2 will start every day in the ~ / weather / data folder of the file with the name corresponding to the date, and every minute add the data line to it. And it will continuously output the following to the terminal, updating the screen also once a minute:

Well, weather3 works the same way, it only displays time and pressure. To move the cursor, it uses the curses library.
Try also to display the same temperature and pressure values on previous days, and also write a script to get a weather forecast based on this data. Successes!
Appendix 1 - installation and configuration of cool-retro-term
Appendix 2 - Installing and Configuring the Tektronix 4010 Graphics Terminal Emulator
Source: https://habr.com/ru/post/446370/
All Articles