My home automation system. Creating an operating system image
Prologue
Installing the system on a Raspberry Pi 2.3
I will describe the easiest, in my opinion, a way for beginners.
')
All the action will take place in Ubuntu 18.04.
For reference, the command is the “man” command + the necessary command.
Or the necessary command with the key - help
1. Install the operating system Raspbian Stretch Lite on the microSD card.
MicroSD card must be 10 class and capacity of 8 gigabytes.
Insert the SD card into the computer and enter the command:

In the example, the map is defined as mmcblk0, then I will use this name.
Then, to clear the card from the previously recorded information (then we will make a disk image), you need to erase it with the command:
This command requires superuser rights, for this you need to add the keyword "sudo" at the beginning. Here and further, I quote commands without sudo . When entering commands, use autocompletion (Tab key) this is needed to control the correctness of entering commands and file paths. While the command is running, you can download a fresh distribution of the operating system.
Download from here: raspberrypi.org
We need Raspbian Stretch Lite. Unpack the downloaded zip, we need a file with the img extension - this is the disk image that we will copy to the card. So, if we have a disk image and the dd command is completed, then go ahead.
Copy the image to the map:
after completion, enter the command:
We take out the card and insert it back.
Create an empty file on the boot disk of our map:
This is necessary in order to run on the Raspberry ssh server.
The card must be safely removed, inserted into the Raspberry, connected to a wired network and powered. If there is no power supply for 2 apmers, then you can power it from a computer with USB3. When you first boot the system will increase the size of the disks to the size of the card, it will take some time.
In order to find out the IP address of our RPi, you can use the “arp-scan” utility. If it is not installed - set:
We learn the name of our network card:
or

I have a wifi card named wlp1s0.
Run arp-scan:
I need RPi with IP 192.168.0.114 address assigned by DHCP and can be any.
Go to RPi via ssh:
you need to enter yes when you first identify, then enter the password of user pi - raspberry .
If we managed to go to Raspberry, enter the command:
This command turns off RPi.
You need to insert the card into the computer again. Now we need the program "gparted", if it is not installed - set:
We start gparted, we need to change the size of the mmcblk0p2 disk, leave at the end of the unpartitioned area 300-500 megabytes or 2-3% of the map size, this is necessary in order for our image to fit on cards from different manufacturers, and they can vary in size. The result should be something like this:
After you finish working with gparted, you can make a backup of the map so that in case of problems in further experiments you can have a ready image.
Now we can always restore our disk with the command:
As a result, we have a microSD card with a ready-to-work operating system and its backup copy.
2. Configure Raspbian Stretch Lite.
Go to RPi for ssh. To configure static wired network and wifi addresses, add the following settings to the end of the /etc/dhcpcd.conf file:
interface eth0
static ip_address = 192.168.0.10 / 24
static routers = 192.168.0.1
static domain_name_servers = 8.8.8.8, 8.8.4.4
interface wlan0
static ip_address = 192.168.0.10 / 24
static routers = 192.168.0.1
static domain_name_servers = 8.8.8.8, 8.8.4.4
With these settings, RPi will have the same IP over a wired or wifi network.
Wifi configuration file - /etc/wpa_supplicant/wpa_supplicant.conf
Add the following settings to it:
network = {
ssid = "NAME"
psk = "PASS"
}
Where NAME and PASS are the name and password from the wifi network. If you do not know in advance where to use our RPi, then the name and password can be entered later.
Add tasks to the cron program
When you first start you will need to select a text editor, nano - will be the most familiar.
In order for the schedules to work, we will add the following settings:
PATH = / usr / sbin: / usr / bin: / sbin: / bin
SHELL = / bin / bash
And the tasks themselves, we will record the time of each download and the duration of continuous work, it will be useful information in the future.
reboot sleep 60 && date >> my-reboot.txt
@weekly uptime >> my-uptime.txt
To exit the key combination Ctrl + x, Y, Enter
Setting the time zone is done with the command:
To increase the SD card resource, you can stop logging and delete the swapfile:
(I think this should reduce the likelihood of failure of the SD card or data corruption in case of sudden shutdowns of RPi during operation):
Installation programs:
For homekit2mqtt, you need to install nodejs:
Checking the installed version
Install node-red:
Run:
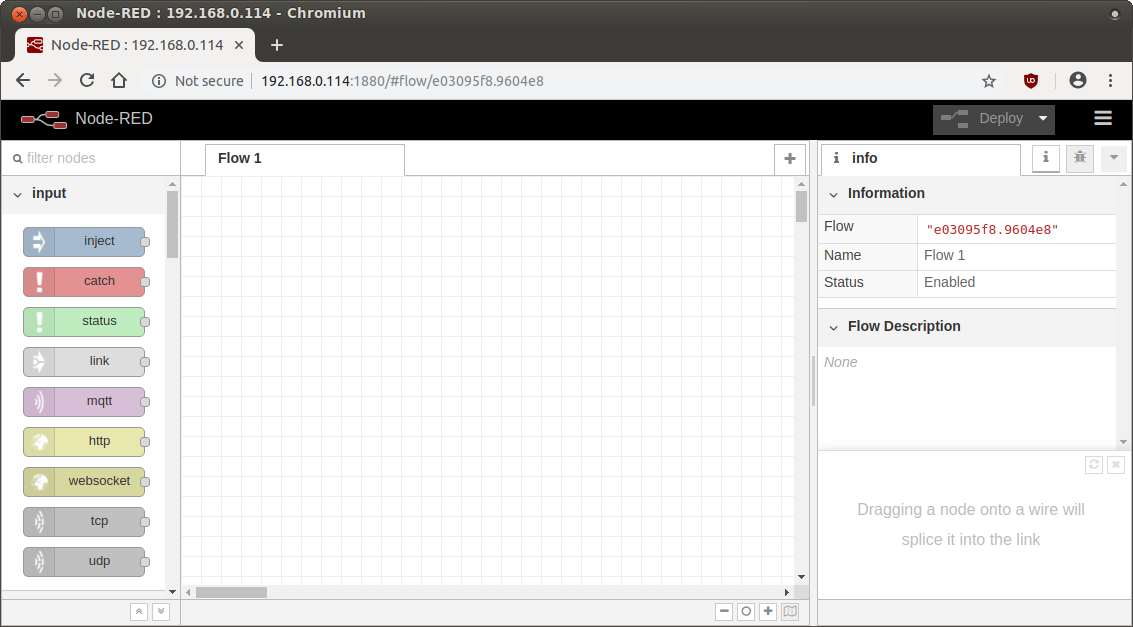
In the address bar of the browser, type the IP address RPi 192.168.0.10:1880
Finish the node-red press Ctrl + c, go to the directory .node-red
And install packages for node-red, they may be needed for testing, configuration and communication of various devices.
Back to the home directory
Install homekit2mqtt:
You can try running homekit with the command
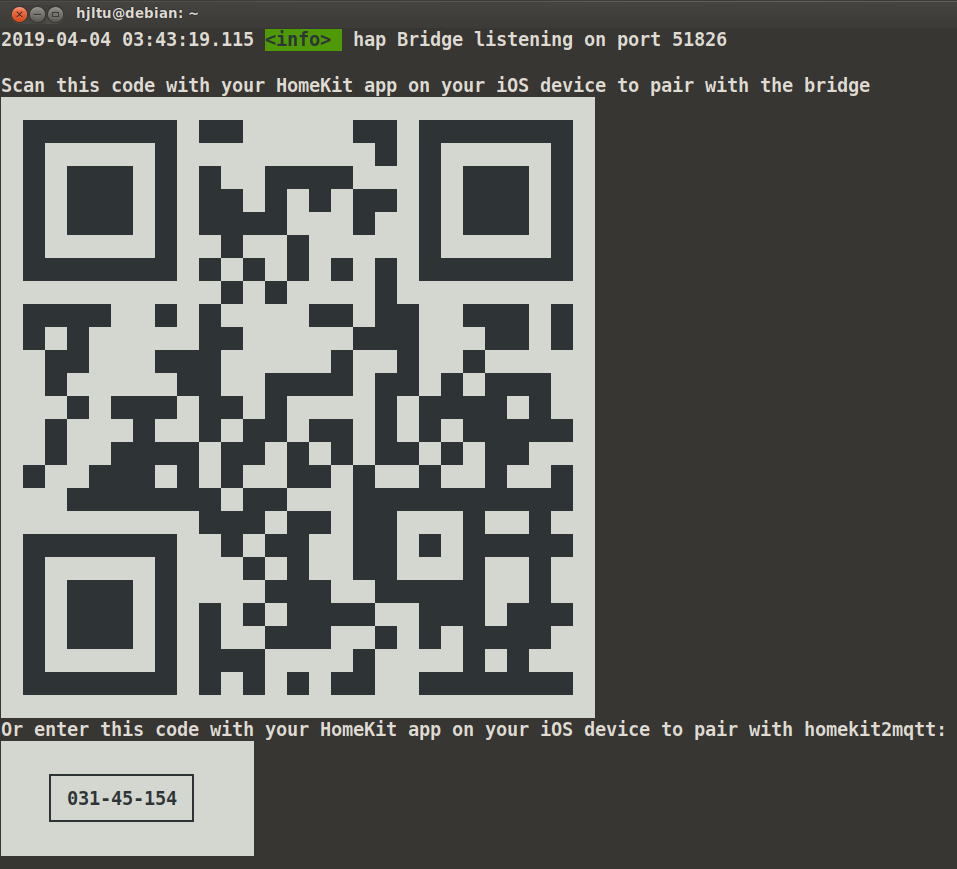
It will start with the default settings and you can add a new device in the Home application on your iPhone or iPad.
User password pi will keep the current one.
Now that everything is installed and verified, you need to backup our SD card in the same way as before. Now everything is ready to install the automation system.
Installing the system on a Raspberry Pi 2.3
I will describe the easiest, in my opinion, a way for beginners.
')
All the action will take place in Ubuntu 18.04.
For reference, the command is the “man” command + the necessary command.
man ls Or the necessary command with the key - help
ls --help 1. Install the operating system Raspbian Stretch Lite on the microSD card.
MicroSD card must be 10 class and capacity of 8 gigabytes.
Insert the SD card into the computer and enter the command:
lsblk In the example, the map is defined as mmcblk0, then I will use this name.
Then, to clear the card from the previously recorded information (then we will make a disk image), you need to erase it with the command:
dd if=/dev/zero of=/dev/mmcblk0 This command requires superuser rights, for this you need to add the keyword "sudo" at the beginning. Here and further, I quote commands without sudo . When entering commands, use autocompletion (Tab key) this is needed to control the correctness of entering commands and file paths. While the command is running, you can download a fresh distribution of the operating system.
Download from here: raspberrypi.org
We need Raspbian Stretch Lite. Unpack the downloaded zip, we need a file with the img extension - this is the disk image that we will copy to the card. So, if we have a disk image and the dd command is completed, then go ahead.
Copy the image to the map:
dd if=/path/to/raspbian.img of=/dev/mmcblk0 bs=4M status=progress after completion, enter the command:
sync We take out the card and insert it back.
Create an empty file on the boot disk of our map:
touch /media/$USER/boot/ssh This is necessary in order to run on the Raspberry ssh server.
The card must be safely removed, inserted into the Raspberry, connected to a wired network and powered. If there is no power supply for 2 apmers, then you can power it from a computer with USB3. When you first boot the system will increase the size of the disks to the size of the card, it will take some time.
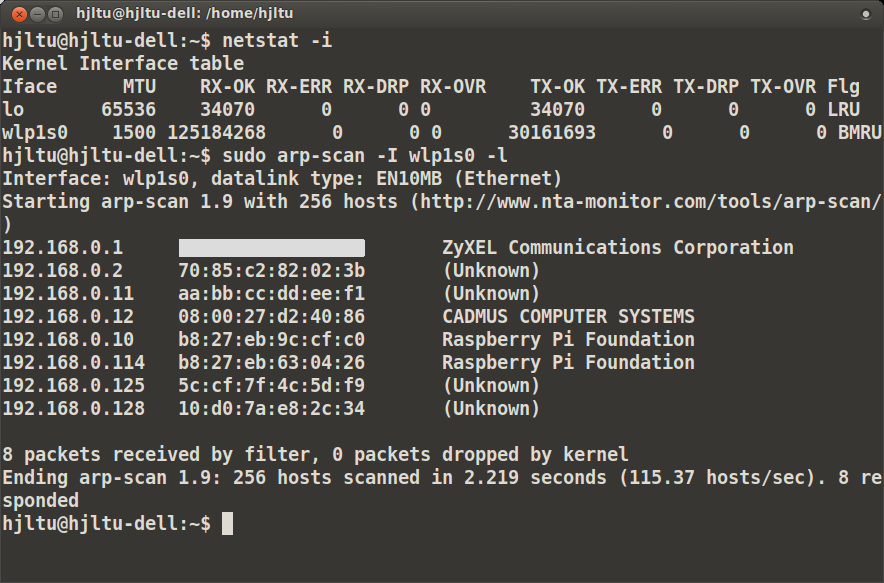
In order to find out the IP address of our RPi, you can use the “arp-scan” utility. If it is not installed - set:
apt install arp-scan We learn the name of our network card:
ip a or
netstat -i I have a wifi card named wlp1s0.
Run arp-scan:
arp-scan -I wlp1s0 -l I need RPi with IP 192.168.0.114 address assigned by DHCP and can be any.
Go to RPi via ssh:
ssh pi@192.168.0.114 you need to enter yes when you first identify, then enter the password of user pi - raspberry .
If we managed to go to Raspberry, enter the command:
init 0 This command turns off RPi.
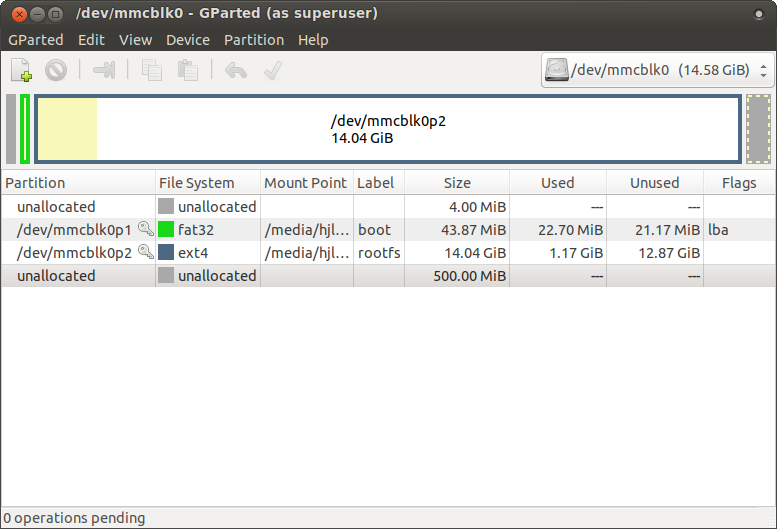
You need to insert the card into the computer again. Now we need the program "gparted", if it is not installed - set:
apt install gparted We start gparted, we need to change the size of the mmcblk0p2 disk, leave at the end of the unpartitioned area 300-500 megabytes or 2-3% of the map size, this is necessary in order for our image to fit on cards from different manufacturers, and they can vary in size. The result should be something like this:
After you finish working with gparted, you can make a backup of the map so that in case of problems in further experiments you can have a ready image.
dd if=/dev/mmcblk0 | bzip2 > raspbian.bz2 Now we can always restore our disk with the command:
bzcat raspbian.bz2 | dd bs=4M of=/dev/mmcblk0 As a result, we have a microSD card with a ready-to-work operating system and its backup copy.
2. Configure Raspbian Stretch Lite.
Go to RPi for ssh. To configure static wired network and wifi addresses, add the following settings to the end of the /etc/dhcpcd.conf file:
interface eth0
static ip_address = 192.168.0.10 / 24
static routers = 192.168.0.1
static domain_name_servers = 8.8.8.8, 8.8.4.4
interface wlan0
static ip_address = 192.168.0.10 / 24
static routers = 192.168.0.1
static domain_name_servers = 8.8.8.8, 8.8.4.4
With these settings, RPi will have the same IP over a wired or wifi network.
Wifi configuration file - /etc/wpa_supplicant/wpa_supplicant.conf
Add the following settings to it:
network = {
ssid = "NAME"
psk = "PASS"
}
Where NAME and PASS are the name and password from the wifi network. If you do not know in advance where to use our RPi, then the name and password can be entered later.
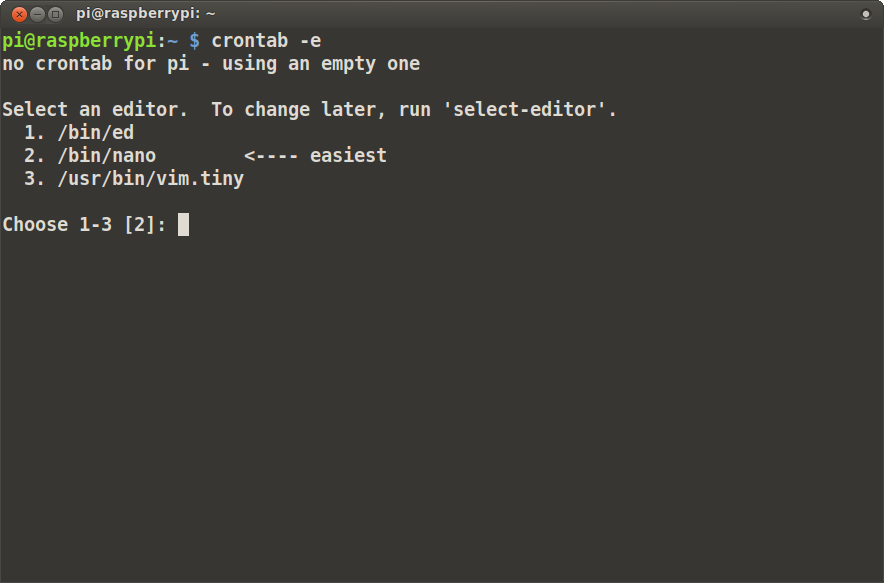
Add tasks to the cron program
crontab -e When you first start you will need to select a text editor, nano - will be the most familiar.
In order for the schedules to work, we will add the following settings:
PATH = / usr / sbin: / usr / bin: / sbin: / bin
SHELL = / bin / bash
And the tasks themselves, we will record the time of each download and the duration of continuous work, it will be useful information in the future.
reboot sleep 60 && date >> my-reboot.txt
@weekly uptime >> my-uptime.txt
To exit the key combination Ctrl + x, Y, Enter
Setting the time zone is done with the command:
dpkg-reconfigure tzdata To increase the SD card resource, you can stop logging and delete the swapfile:
(I think this should reduce the likelihood of failure of the SD card or data corruption in case of sudden shutdowns of RPi during operation):
apt update apt purge dphys-swapfile apt autoremove --purge apt install busybox-syslogd dpkg --purge rsyslog Installation programs:
apt install mosquitto mosquitto-clients sqlite3 libsqlite3-dev mc htop arp-scan vim supervisor python-pip python3-pip python-virtualenv python-dev pip install psutil paho-mqtt pip3 install psutil paho-mqtt For homekit2mqtt, you need to install nodejs:
curl -sL https://deb.nodesource.com/setup_8.x | sudo -E bash - apt-get install -y nodejs Checking the installed version
node -v nodejs -v Install node-red:
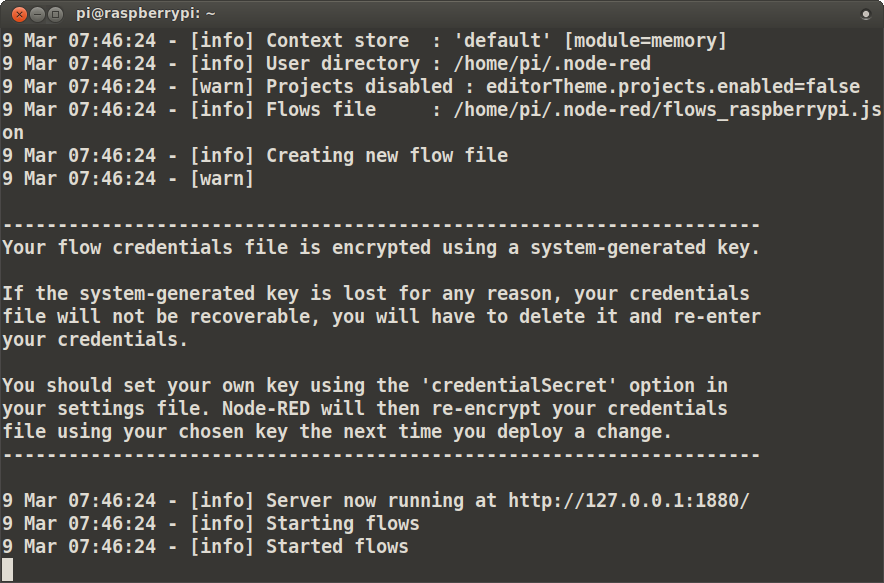
npm install -g --unsafe-perm node-red Run:
node-red In the address bar of the browser, type the IP address RPi 192.168.0.10:1880
Finish the node-red press Ctrl + c, go to the directory .node-red
cd .node-red And install packages for node-red, they may be needed for testing, configuration and communication of various devices.
npm i node-red-dashboard node-red-contrib-sonos node-red-contrib-knx node-red-node-serialport node-red-contrib-globalcache node-red-contrib-counter Back to the home directory
cd Install homekit2mqtt:
apt install libavahi-compat-libdnssd-dev npm install -g homekit2mqtt --unsafe-perm You can try running homekit with the command
homekit2mqtt It will start with the default settings and you can add a new device in the Home application on your iPhone or iPad.
User password pi will keep the current one.
Now that everything is installed and verified, you need to backup our SD card in the same way as before. Now everything is ready to install the automation system.
Source: https://habr.com/ru/post/446190/
All Articles