Termux step by step (Part 1)

When I first met Termux, and I was far from being a linuxoid, I had two thoughts in my head: “Utterly cool!” And “How to use it?”. Rummaging through the Internet, I did not find a single article fully allowing you to start using Termux so that it would bring more pleasure than crap. We will fix it.
To begin with, we will define what kind of animal this Termux is and what it can do. On the main page of WikiTermux (I recommend to check it out) it says that “Termux is a terminal emulator and a Linux environment”, i.e. having installed it we will receive quite efficient Linux terminal on the Android device. The undoubted advantage is the work in the virtual environment (much can be done without root), which makes it almost impossible to harm the Android file system. And with root, your options are limited only by fantasy (well, knowledge of the materiel).
For what, actually, I got to Termux'u? First, hacking, or rather the desire to understand it a bit. Secondly, the inability to use Kali Linux.
Here I will try to put together all the useful things I found on the topic. Understanding this article is hardly anything surprising, but those who only know the delights of Termux, I hope, will be useful.
For a better understanding of the material, I recommend repeating what I described is not a simple copy-paste but independently enter commands. For convenience, we will need either an Android device with a connected keyboard, or, as in my case, an Android device and a PC / Laptop (Windows) connected to the same network. Android is desirable with root, but not necessarily. Sometimes I point out something in brackets, usually, it will allow a better understanding of the material (if what is written in brackets is not entirely clear, then feel free to skip it, then in the process and as needed, everything will be explained).
Step 1
I will be banal and damn logical at the same time
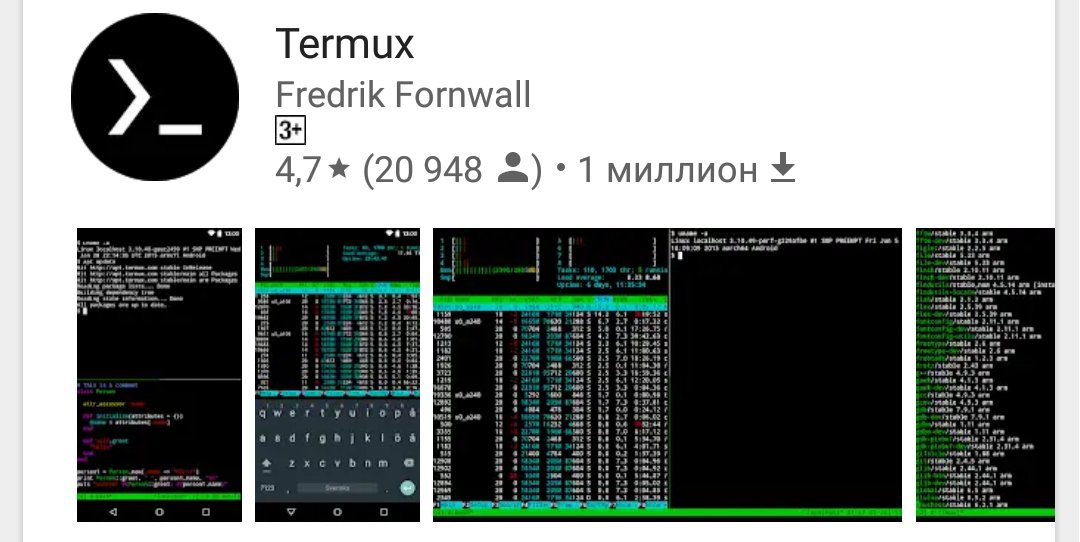
We put Termux with Google Play Market:
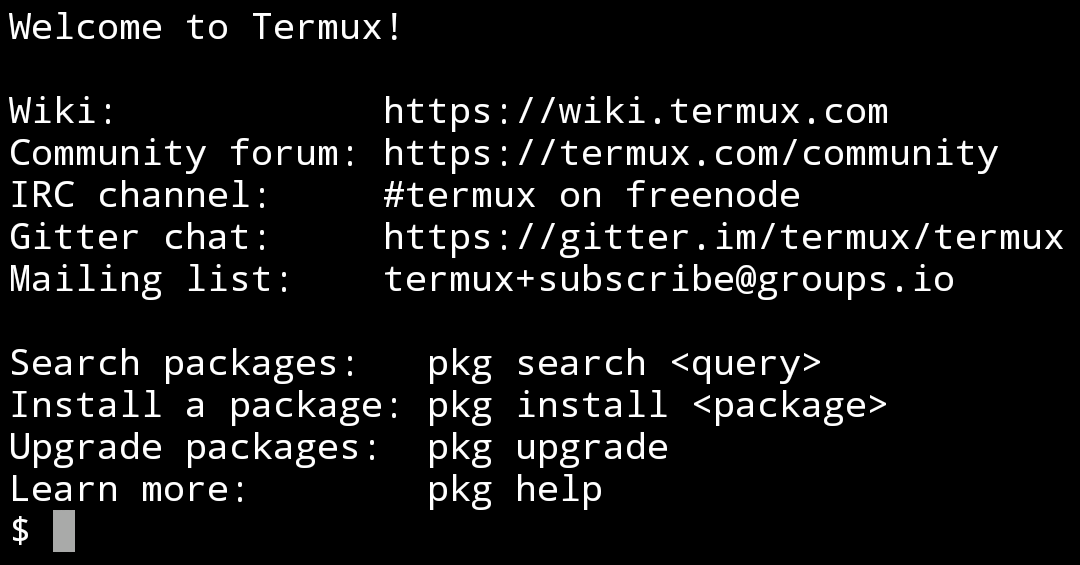
Open the installed application and see:
Next is to update the pre-installed packages. To do this, we enter two commands in order, in the course of which we agree with everything, entering Y:
apt update apt upgrade The first team we check the list of installed packages and look for those that can be updated, and the second update them. For this reason, the teams need to write in this sequence.
Now we have the most recent version of Termux.
Some more commands needed
ls # – cd # – , : : (~/storage/downloads/1.txt) cd dir1 # – dir1 cd ~/dir1 # – dir1 cd # cd ~ # - clear # – ifconfig # – IP, cat # – / ( ) : cat 1.txt # – 1.txt cat 1.txt>>2.txt # – 1.txt 2.txt ( 1.txt ) rm # - . , rm: -r # – . , . , -r rm. -i # – . -f # – , ; . : rm -rf mydir # – ( ) mydir. mkdir <> # – echo # – , '>' , '>>' : echo "string" > filename We look for more details on the UNIX commands on the Internet (no one has canceled self-development).
The key combination Ctrl + C and Ctrl + Z interrupts and terminates the execution of commands, respectively.
Step 2
Make your life easier
In order not to torture yourself unnecessarily by entering commands from the on-screen keyboard (in the “field” conditions, of course, there is no escape from this) there are two ways:
- Connect to the Android device a full keyboard in any convenient way.
- Take advantage of ssh. Simply put, you will have a Termux console running on your Android device on your computer.
I went the second way, although it is a bit complicated to set up, but everything will pay off with ease of use.
You need to install the ssh client program on the computer, I use the Bitvise SSH Client, and all further actions are performed in this program.
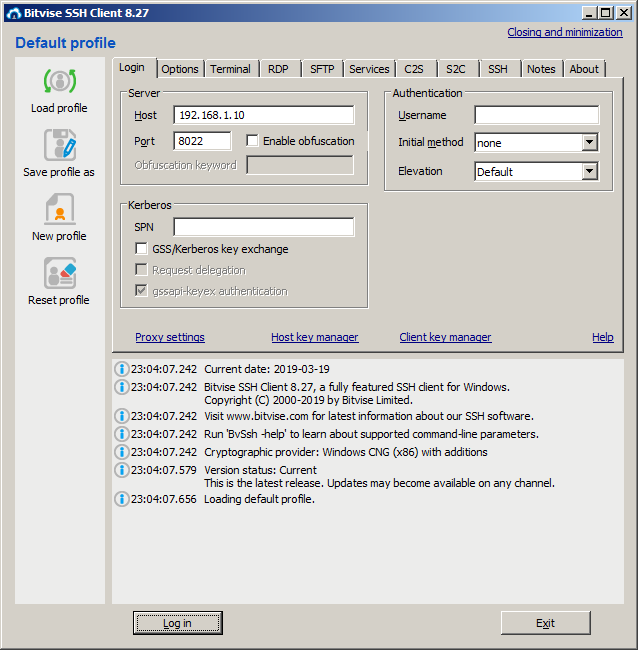
Since we will connect using the Publickey method using the key file, you need to create this file. To do this, in the Bitvise SSH Client program on the Login tab, click on the Client key manager in the opened window to generate a new public key and export it to the OpenSSH format to a file called termux.pub (in fact, any name can be used). The created file is placed in the internal memory of your Android device in the Downloads folder (this folder, and several more, Termux has easy access without root).
In the Login tab, in the Host field, enter the IP of your Android device (you can find out by entering the ifconfig command in Termux) in the Port field should be 8022.
Now we are going to install OpenSSH in Termux, for this we enter the following commands:
apt install openssh # , , 'y' pkill sshd # OpenSSH) termux-setup-storage # cat ~/storage/downloads/termux.pub>>~/.ssh/authorized_keys # - sshd # ssh Go back to the Bitvise SSH Client and click the Log in button. During the connection process, a window will appear in which we select Method - publickey, the Client key is the Passphrase (if you specified it when generating the key file).
In case of successful connection (if everything is done as it is written, it should connect without problems) a window will open.
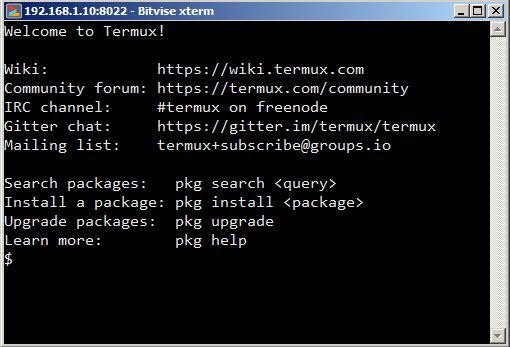
Now we can enter commands from a PC and they will be executed on your Android device. It is not difficult to guess what advantages it gives.
Step 3
Configure Termux, install additional utilities
First of all, let's install bash-completion (abbreviation, magic-tab, who calls as). The essence of the utility is that by entering commands you can press Tab to use auto-complete. To install we write:
apt install bash-completion # Tab Well, what a life without a text editor with code highlighting (if you suddenly want to read it, but it wants to). To install we write:
apt install vim # - 'apt i' Tab 'apt install'. Using vimʻom is not difficult to open the file 1.txt (if it does not exist, it will be created) we write:
vim 1.txt # 'i' # ESC # ':' # ':q!' – # ':w' – # ':wq' – Since we can now create and edit files, let us slightly improve the look and informativeness of the Termux command line. To do this, we need to assign the value "[\ 033 [1; 33; 1; 32m]: [\ 033 [1; 31m] \ w $ [\ 033 [0m] [\ 033 [0m]" to the environment variable PS1 (if what it is and what it is eaten with, please here ). To do this, we need to add a line to the '.bashrc' file (it lies in the root and is executed each time the shell starts):
PS1 = "\[\033[1;33;1;32m\]:\[\033[1;31m\]\w$ \[\033[0m\]\[\033[0m\]" For simplicity and clarity, we use vim`om:
cd vim .bashrc Enter the string, save and exit.
You can add a line to a file in another way using the 'echo' command:
echo PS1='"\[\033[1;33;1;32m\]:\[\033[1;31m\]\w$ \[\033[0m\]\[\033[0m\]"'>>.bashrc # , # . # '>>' , # '>'. In the .bashrc file you can also enter alias, which are abbreviations. For example, we want to update and upgrade at once with a team. To do this, add the line to .bashrc:
alias updg = "apt update && apt upgrade" To add a string, you can use vim or the echo command (if you can't do it yourself, see below)
The syntax of alias is:
alias <> = "< >" So, add the abbreviation:
echo alias updg='"apt update && apt upgrade"' >> .bashrc Here are some more useful utilities.
Install via apt install
man - Built-in help for most commands.
man% commandname
imagemagick - Utility for working with images (converting, compressing, cropping). It supports many formats including pdf. Example: Convert all pictures from the current folder into one pdf and reduce their size.
convert * .jpg -scale 50% img.pdf
ffmpeg - One of the best audio / video converters. Instructions for use google.
mc - Two-pane file manager like Far.
There are still a lot of steps ahead, the main thing is that the movement has begun!
')
Source: https://habr.com/ru/post/444950/
All Articles