Integration of AppCenter and GitLab
Try it, hello!
I want to tell you about my experience in setting up GitLab and AppCenter integration via BitBucket.
The need for such integration has arisen in the course of setting up an automatic launch of UI tests for a cross-platform project on Xamarin. Detailed tutorial under the cut!
* I will make a separate article about automating UI testing in cross-platform conditions if the public is interested.
Similar material dug up only one article . Therefore, my article can help someone.
Task : Configure automatic launch of UI tests on AppCenter, despite the fact that our team uses GitLab as a version control system.
The problem was that AppCenter does not directly integrate with GitLab. As one of the solutions, a BitBucket bypass was chosen.
Steps
1. Create an empty repository on BitBucket
I see no need to describe it in more detail :)
2. Configure GitLab
We need that when push / merge to the repository, the changes are also poured into BitBucket. To do this, add the runner (or edit the existing .gitlab-ci.yml file).
At first we add commands to the before_scripts section.
- git config --global user.email "user@email" - git config --global user.name "username" Then we add the following command to the desired stage:
- git push --mirror https://username:password@bitbucket.org/username/projectname.git In my case, this is the file
before_script: - git config --global user.email "user@email" - git config --global user.name "username" stages: - mirror mirror: stage: mirror script: - git push --mirror https://****:*****@bitbucket.org/****/testapp.git We start the build, check that our changes / files are made on BitBucket.
* As shown, setting up SSH keys is optional. But, just in case, I will give the connection setup algorithm through SSH below
First you need to generate an SSH key. About this written many articles. For an example you can see here .
The generated keys look like this:
Next, you need to add the secret key as a variable on GitLab. To do this, go to Settings> CI / CD> Enviroment Variables. Add ALL the contents of the file in which you have saved the secret key. Let's call the variable SSH_PRIVATE_KEY.
* this file, unlike a public key file, will not have an extension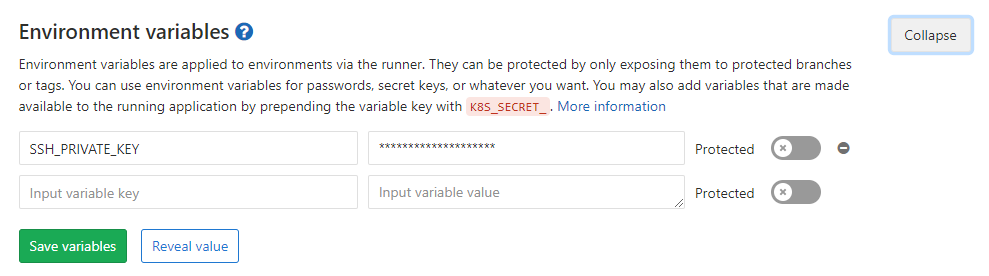
Great, then you need to add a public key on BitBucket. To do this, open the repository, go to Settings> Access Keys.
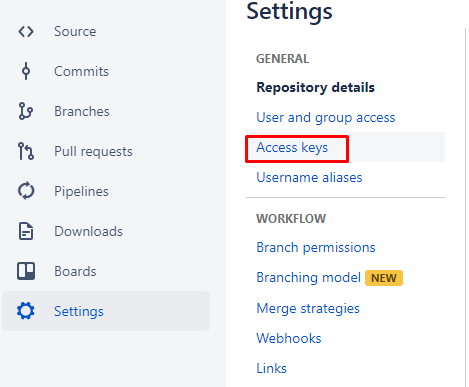
Here we gain Add Key and paste the contents of the file with the public key (the file with the .pub extension).
The next step is to use the keys in gitlab-runner. Use these commands, but specify your data instead of asterisks.
image: timbru31/node-alpine-git:latest stages: - mirror before_script: - eval $(ssh-agent -s) - echo "$SSH_PRIVATE_KEY" | tr -d '\r' | ssh-add - > /dev/null - mkdir -p ~/.ssh - chmod 700 ~/.ssh - ssh-keyscan bitbucket.org >> ~/.ssh/known_hosts - chmod 644 ~/.ssh/known_hosts - git config --global user.email "*****@***" - git config --global user.name "****" - ssh -T git@bitbucket.org mirror: stage: mirror script: - git push --mirror https://****:****@bitbucket.org/*****/*****.git 3. Configure AppCenter
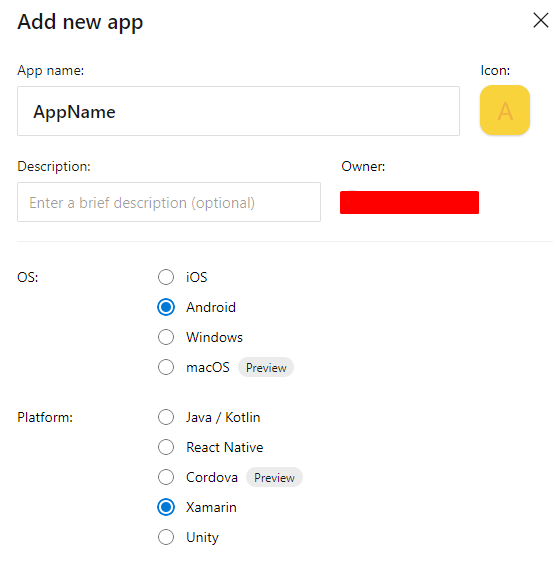
Create a new application on AppCenter.

Specify language / platform
Next, go to the Build section of the newly created application. We select there BitBucket and the repository created at stage 1.
Great, now you need to configure the build. To do this, find the gear icon

In principle, everything is intuitive. Choose a project and configuration. If necessary, we include the launch of tests after the build. They will start automatically.
Basically, that's all. It sounds easy, but naturally, everything will not go smoothly. Therefore, I will describe some of the errors that I encountered while working:
Occurs because the path to ssh-keygen.exe is not added to environment variables.
Option two: add C: \ Program Files \ Git \ usr \ bin to the Enviroment Variables (will apply after rebooting the machine), or launch the console from this directory.
To solve the problem, you need to unbind the BitBucket account from the AppCenter. Go to the wrong account BitBucket, go to the user profile.

Next, go to Settings> Access Management> OAuth

Click Revoke to unbind the account.

After that, you need to login under the correct BitBucket account.
* As a last resort, also clean the browser cache
Now go to the AppCenter. go to the Build section, click Disconnect BitBucket account

When the old account is untied, we bind the AppCenter again. Now to the desired account.
Use instead of the command
- eval $(ssh-agent -s) Team:
- ssh-agent In some cases, you have to either specify the full path to C: \ Program Files \ Git \ usr \ bin \ ssh-agent.exe, or add this path to the system variables on the machine where the runner is running
In my case, the problem arose due to the fact that I worked with several accounts. Decided to clear the cache.
')
Source: https://habr.com/ru/post/444136/
All Articles