Jenkins for Android build using Docker
Hello!
I work as an android developer, and not so long ago we faced some routine tasks on our project that we would like to automate. For example, we have 5 different flavor, for each of which you need to upload your build to the fabric, sometimes for different tasks several times a day. Yes, this task can be done with the help of gradle task, but I would like not to start this process on the developer's machine, but to do it in a centralized way. Or, for example, automatically upload a google play build to beta. Well, I just wanted to pick the CI system. What came out of it, and how we set it up, why there is a Docker, further in the article.
In my understanding, the whole task was divided into about two stages:
')
In this article I want to touch on the first point, and if this is interesting to anyone, then in the next article I will describe the process of setting tasks for the assembly in Jenkins itself.
On Habré there is already a wonderful article on this topic, but she’s already a couple of years old, and some things in her are slightly outdated (for example, sdkmanager), although she helped me a lot in the initial stages of what and how to do.
If you look at the official Jenkins installation documentation , you will see three different ways to do it: run a ready docker image, download and run the war file, and also install the jenkins into the system (for example,
To begin with, if there is someone else not registered, I suggest registering (here at the time of writing this article there was a referral link, but after reading the rules I threw it out). After registration, you can google a promo code on the Internet, and get about 10 bucks to start.
After we need to start a new droplet. Select Droplets, and then Create Droplet .

Host system leave Ubuntu 18.04. It would be possible to choose an image with an already installed and configured Docker, but we will do everything ourselves. Since the build of android builds is still a resource-intensive business, we need to select a configuration for at least 20 bucks so that the builds are assembled normally and relatively quickly.
Choose a location closer to yourself (for example in Germany). Further two options as we will be connected to our virtual server. We can add ssh key or do without it. If in this place we do not indicate which key to use, then we will receive a password for the user root as an email.

Here we can change the server name, and complete the creation by clicking the Create button.
Now we go into the created droplet, and copy the ip address for yourself, for further connection and setup.
We need an ssh client. If you are working from under the Mac, then you can use the standard terminal, if from under Windows then we can use putty to work or use the Linux subsystem (only for Windows 10). I personally use the latter option, and it completely suits me.
Connect to our server with the following command
The console will offer you to save the key, agree with this. After connecting, create a new user for yourself, add it to the superuser (and give him the opportunity to use sudo without a password), copy him the key for ssh access and say that he is the owner of these files (otherwise it will not work). The username is changed to any convenient for you.
Disconnect from the root user with the command
And we will connect again with the help of the created new user.
After updating the system, and rebooting our server (if during the upgrade the system will ask you something, it is enough in this case to always choose default values).
The basic setup is complete. From the point of view of the combat system, it is not very secure, but as part of this, the article is completely appropriate.
To install Docker in our system we will use the official documentation . Since we have a newly installed system, we will skip this item, and if you have a system on which something has been running for a long time, on the recommendation of the Docker guys, delete possible old versions
Do not forget to first connect back via ssh to our server. The Docker installation itself is described in great detail in the documentation, I will give general commands to make it easier for you. What they do can be read there. First add the repository.
And then install Docker itself:
So that in the future we could call the docker commands without sudo prefix we will execute the following command (which is also carefully described in the instructions ).
After you need to restart (using the exit command and reconnecting to the server) in order for this to work.
Docker itself is installed, which we can check with the command
It loads a test image, runs it in a container. Container after launch prints an informational message and exits.
Congratulations, we finished the server preparation phase for work!
We will create a Docker image by writing your own Dockerfile. There are examples of how to do this correctly on the Internet a car and a small truck, I will show my ready-made version, and I will try to comment on it as much as possible. There is also a docker article with instructions on how to dockerfile correctly and canonically.
Create and open your Dockerfile for editing.
In it for an example, we will place contents of my Dockerfile
A few clarifications:
After the end of the writing of the Dockerfile, we need to turn it into a ready-made image for Docker, on the basis of which the containers will be created. This is done simply by the team.
where the
Yes, of course, we can use our ready-made image to launch the container, but if we need to do this on more than several devices, each time creating the Dockerfile and collecting the finished image from it will not be very convenient. And if we also update the contents of our Dockerfile, then it will be inconvenient to roll out changes across all the nodes. For these purposes, there is a public repository of Docker Hub images. It allows you not to collect an image each time, on each node, but simply download it from the public repository and use it equally on all machines. For example, the image that served as an example for this article is available in the repository by the name of osipovaleks / docker-jenkins-android , and further in the article we will work with it.
This article does not imply a detailed study of Docker Hub, we will not understand how to fill in our images there (although this is not very difficult) and what can be done with them further there, we will not understand that there may still be their own private or private repositories, In this all can be figured out on their own if needed.
You can launch the container in two ways.
Which startup option to use? Here you can choose your own, it is believed that Docker Compose is more like a tool to launch several containers at once, which are tied to each other, and if you need to run only one container, you can use just the
Now, after these sub-steps to start and configure the server, as well as launch the container with Jenkins, we can proceed to its initial setup
Take the ip address of our server, add to it the port 8080 specified by us and follow this link in the browser.
If before that everything was configured and started correctly, then we will see the following picture

For the first setup, we need to enter the password that the system generated during installation. To do this, we just need to look at the contents of the file
where the
in the console show about the following
The user ALexhha suggested a simpler option to read this password, without connecting to the container itself. The fact is that at the time of the launch of Jenkins itself, this password is shown in the logs. It turns out that all we need is to read the container logs. In our case, this is done with the following command:
where
************************************************** ***********
This option is a little easier and faster.
Copy it, paste it into the Administrator password field in the web interface and click Continue . On the next screen, select Install suggested plugins and install a set of default plug-ins.

After installing the plugins, create a user and click on Save and Finish
We agree with the section Instance Configuration, where we are offered to fill in the URL on which Jenkins will work (in our case we leave everything as it is)
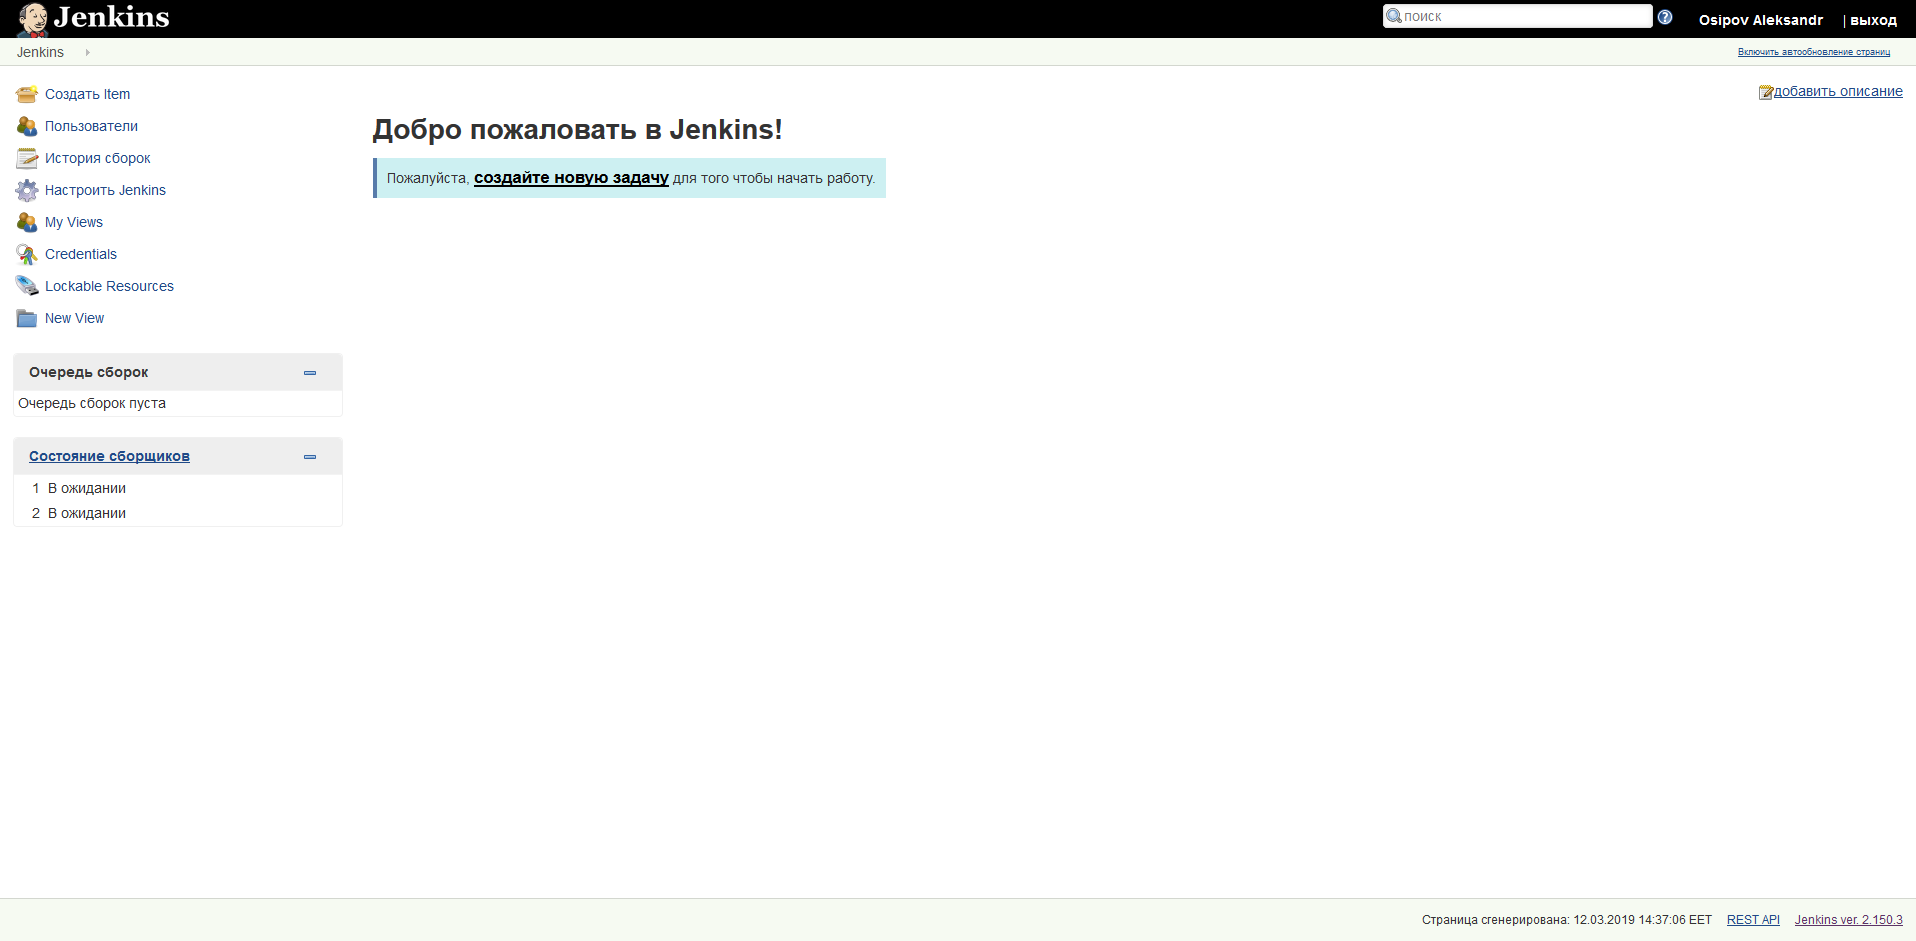
And on the next screen, click the cherished Start using Jenkins
So, we installed and launched Jenkins!
It is already quite possible to work with him, but in order to build our Android builds you will need to configure a few more items. Localization of Jenkins is associated with the chosen language of your browser, and of course the Russian translation is not completely finished, and we get a hell of a mixture of Russian and English. If you did exactly the same, and it makes you angry, then you can use a special plugin and install the default interface language. Well, or switch your browser to the English interface.
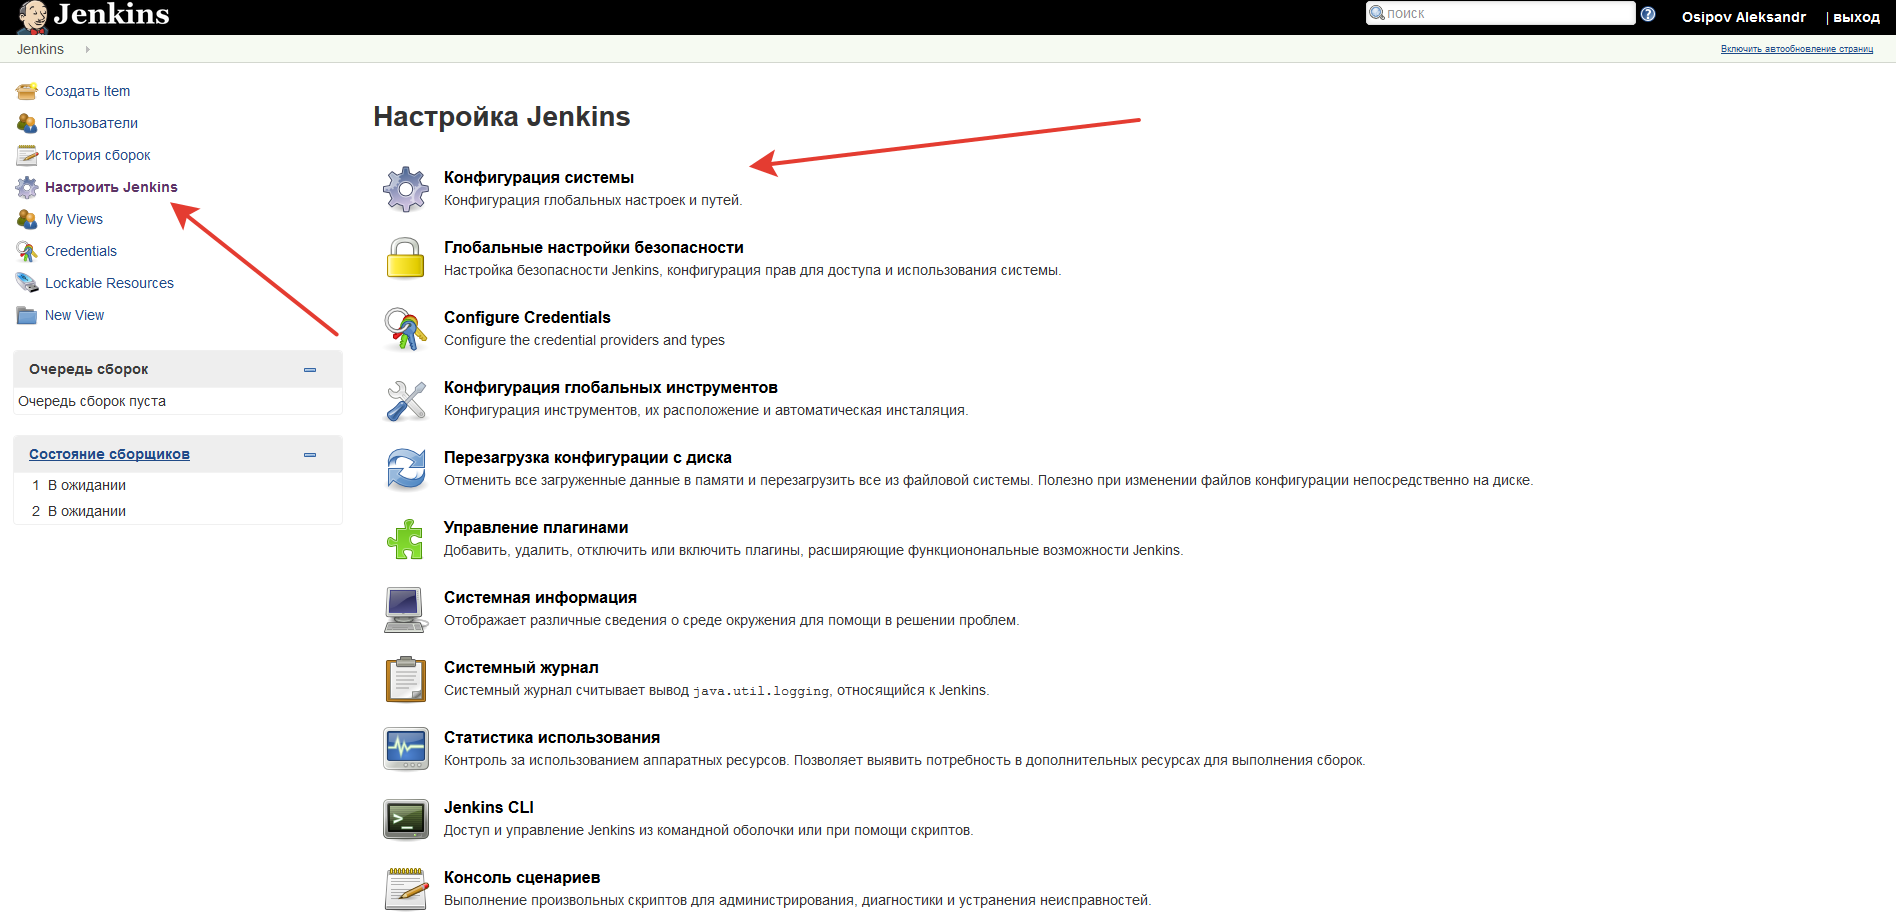
Let's go to the Jenkins settings and select the System Configuration item.
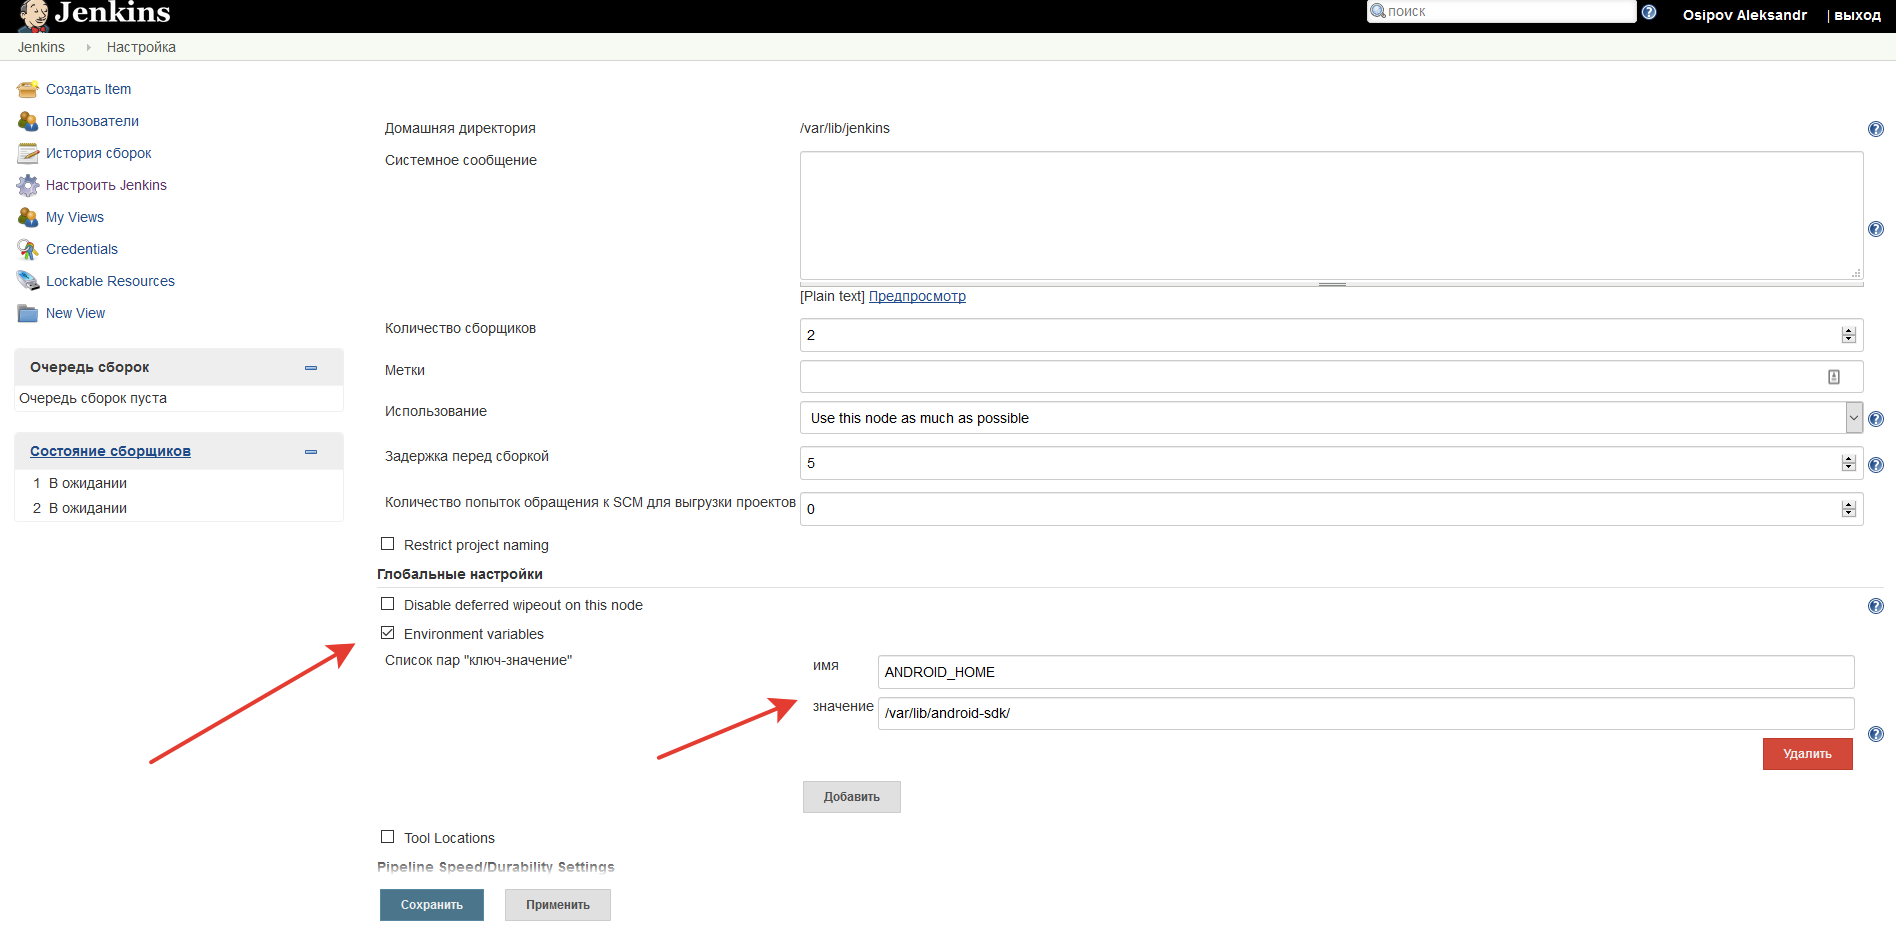
Check the Environment variables box and enter the ANDROID_HOME name in the field , and specify the / var / lib / android-sdk /(We indicated this data as a home directory for Android SDK storage in the Dockerfile).
Click on the Save button , exit the settings section and go to the section called Configuration of global tools .

Let's set up a section with JDK (where the JAVA_HOME variable was also filled in by us in the Dockerfile, and we can use its value here / usr / lib / jvm / java-8-openjdk-amd64 / ).

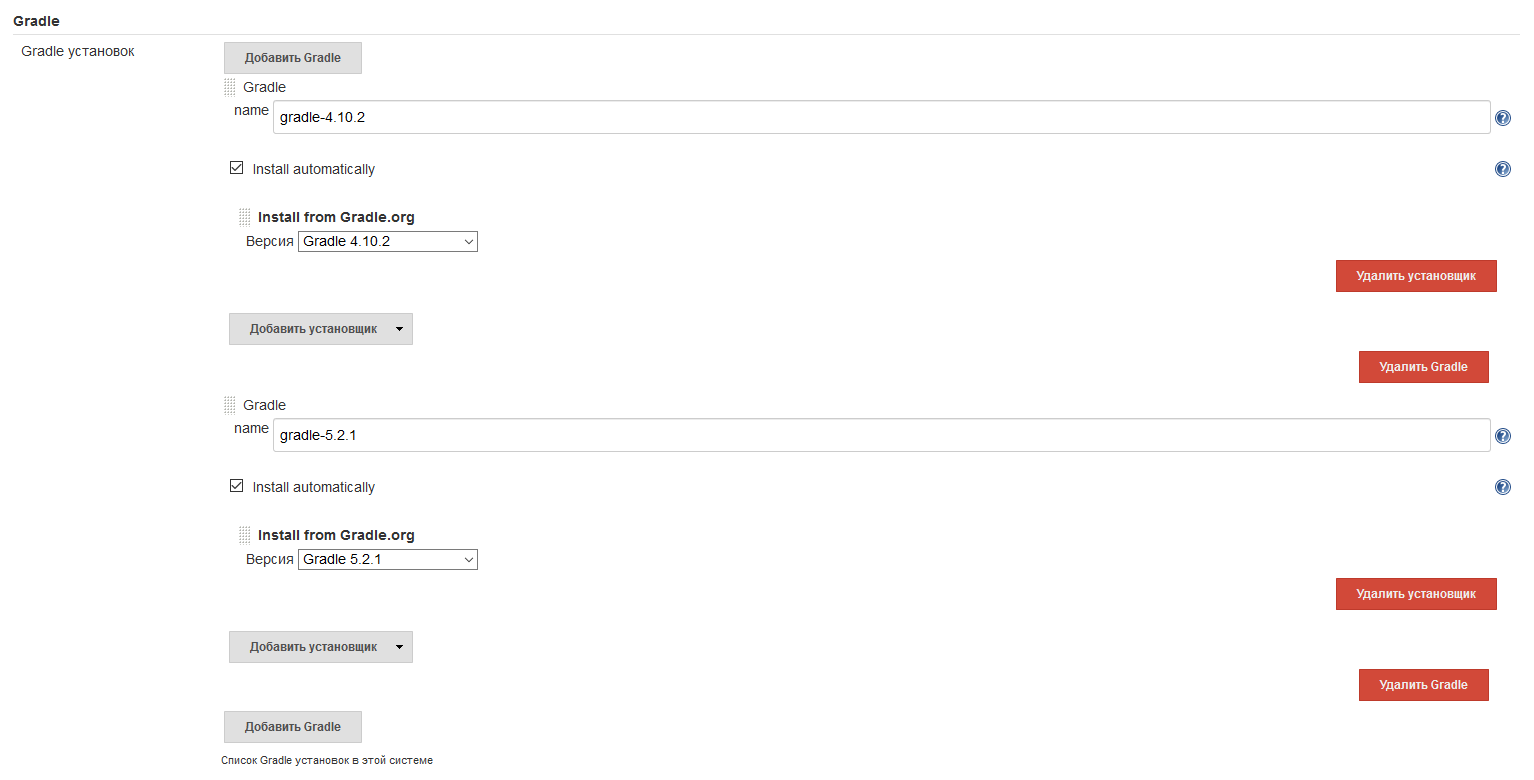
Also here we still need to fill out the section with Gradle. We select and install the Gradle version which is used in the projects that you will build using this CI system. You can have multiple versions. It is also possible not to set the Gradle variable at all if, for example, you have a gradlew in the repository, and you can collect it using it.
With this we can finish our first stage. The Jenkins system is fully operational and we can proceed to customize the build tasks themselves. Please note that the system has been customized for our needs and here it may not be what you need - for example, there is no android emulator for testing and NDK.
If this article will interest someone, then I will continue in the second part on the example of one or two tasks, I will describe the integration of Jenkins and Bitbucket (it is he, not Github, because there is easier with free private repositories, and articles on the Internet it is smaller, and probably more jokes), I will tell you how to make ssh the key of our container to make friends with the repository, about email notifications, as well as a few other features. In general, about everything that we have configured.
Please do not kick much, this is my first article on Habr. All good!
I work as an android developer, and not so long ago we faced some routine tasks on our project that we would like to automate. For example, we have 5 different flavor, for each of which you need to upload your build to the fabric, sometimes for different tasks several times a day. Yes, this task can be done with the help of gradle task, but I would like not to start this process on the developer's machine, but to do it in a centralized way. Or, for example, automatically upload a google play build to beta. Well, I just wanted to pick the CI system. What came out of it, and how we set it up, why there is a Docker, further in the article.
In my understanding, the whole task was divided into about two stages:
')
- Install and configure Jenkins yourself with the Android SDK
- Customize tasks inside Jenkins
In this article I want to touch on the first point, and if this is interesting to anyone, then in the next article I will describe the process of setting tasks for the assembly in Jenkins itself.
So, the point is the first installation and configuration of Jenkins system
On Habré there is already a wonderful article on this topic, but she’s already a couple of years old, and some things in her are slightly outdated (for example, sdkmanager), although she helped me a lot in the initial stages of what and how to do.
If you look at the official Jenkins installation documentation , you will see three different ways to do it: run a ready docker image, download and run the war file, and also install the jenkins into the system (for example,
apt-get install jenkins using ubuntu as an example). The first option is the most correct, because it does not carry any unnecessary settings and dependencies to our host system, and at any moment, even if something goes wrong, it is easy and simple to delete everything and start anew. But the standard docker image for jenkins contains some data that we do not need (for example, blueocean plugin) and do not contain the fact that we definitely need (for example, android sdk). It was decided to create our own docker image that will inside itself download and launch the war file, download and install android sdk, and also configure all the other settings that we need. In order to start it later, we will need a host system with docker installed. I suggest not to reinvent the wheel here and take advantage of DigitalOcean.Create and configure a virtual machine
To begin with, if there is someone else not registered, I suggest registering (here at the time of writing this article there was a referral link, but after reading the rules I threw it out). After registration, you can google a promo code on the Internet, and get about 10 bucks to start.
After we need to start a new droplet. Select Droplets, and then Create Droplet .
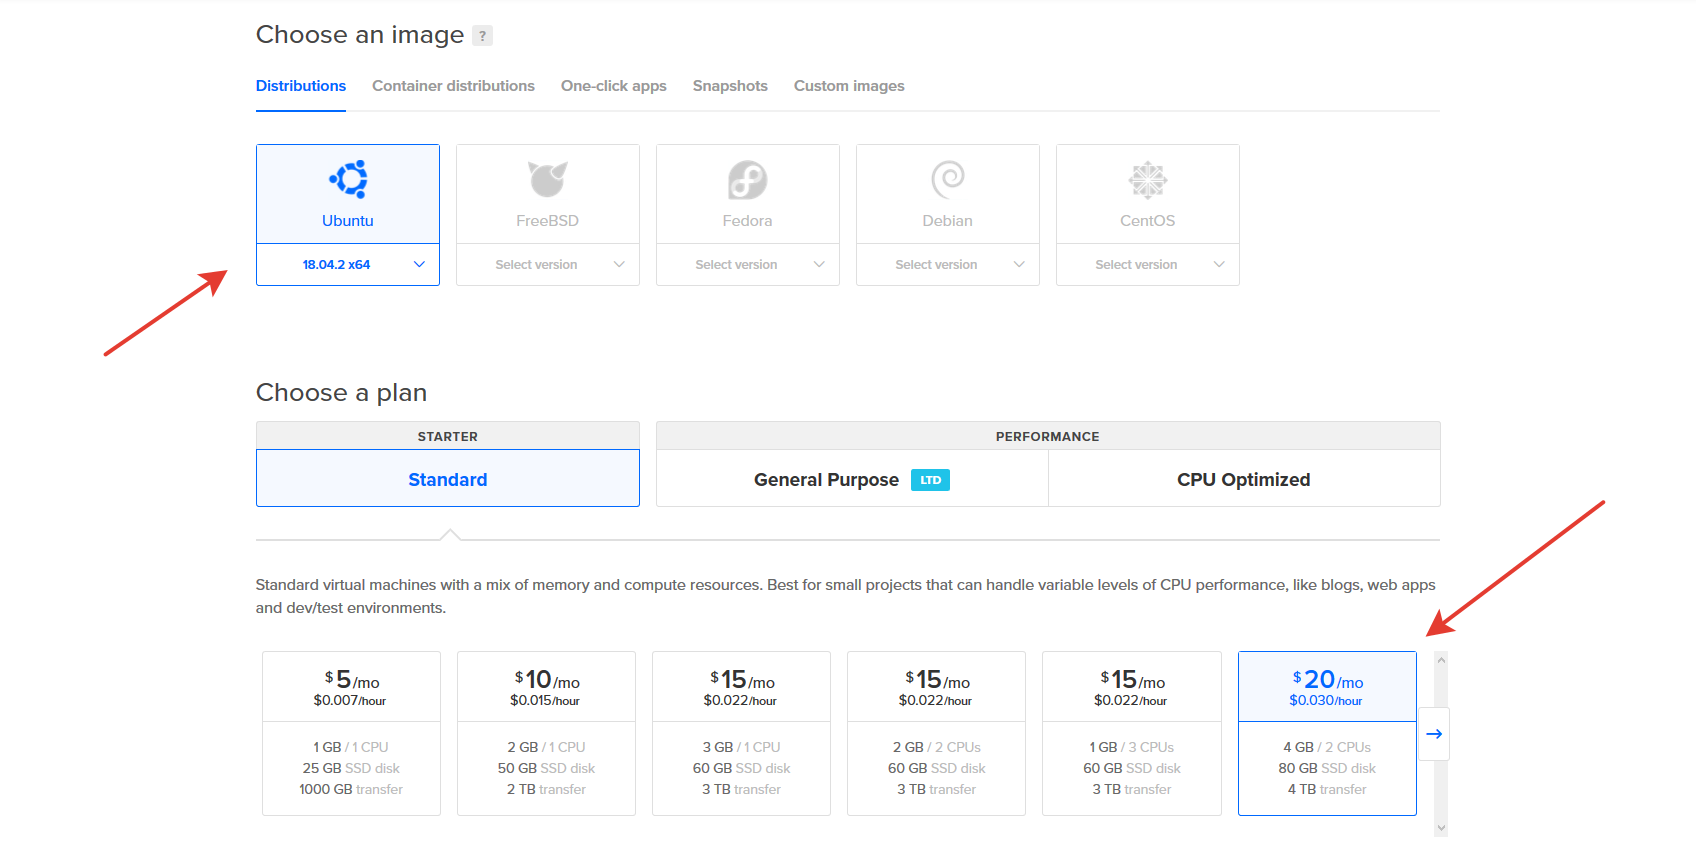
Host system leave Ubuntu 18.04. It would be possible to choose an image with an already installed and configured Docker, but we will do everything ourselves. Since the build of android builds is still a resource-intensive business, we need to select a configuration for at least 20 bucks so that the builds are assembled normally and relatively quickly.
Choose a location closer to yourself (for example in Germany). Further two options as we will be connected to our virtual server. We can add ssh key or do without it. If in this place we do not indicate which key to use, then we will receive a password for the user root as an email.
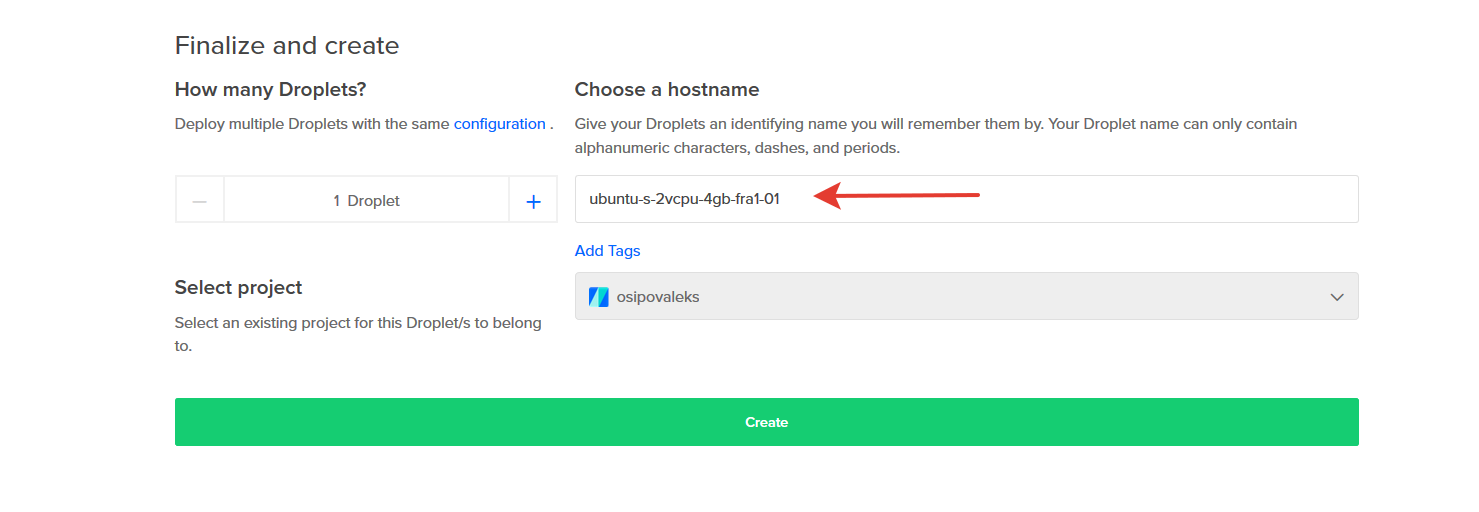
Here we can change the server name, and complete the creation by clicking the Create button.
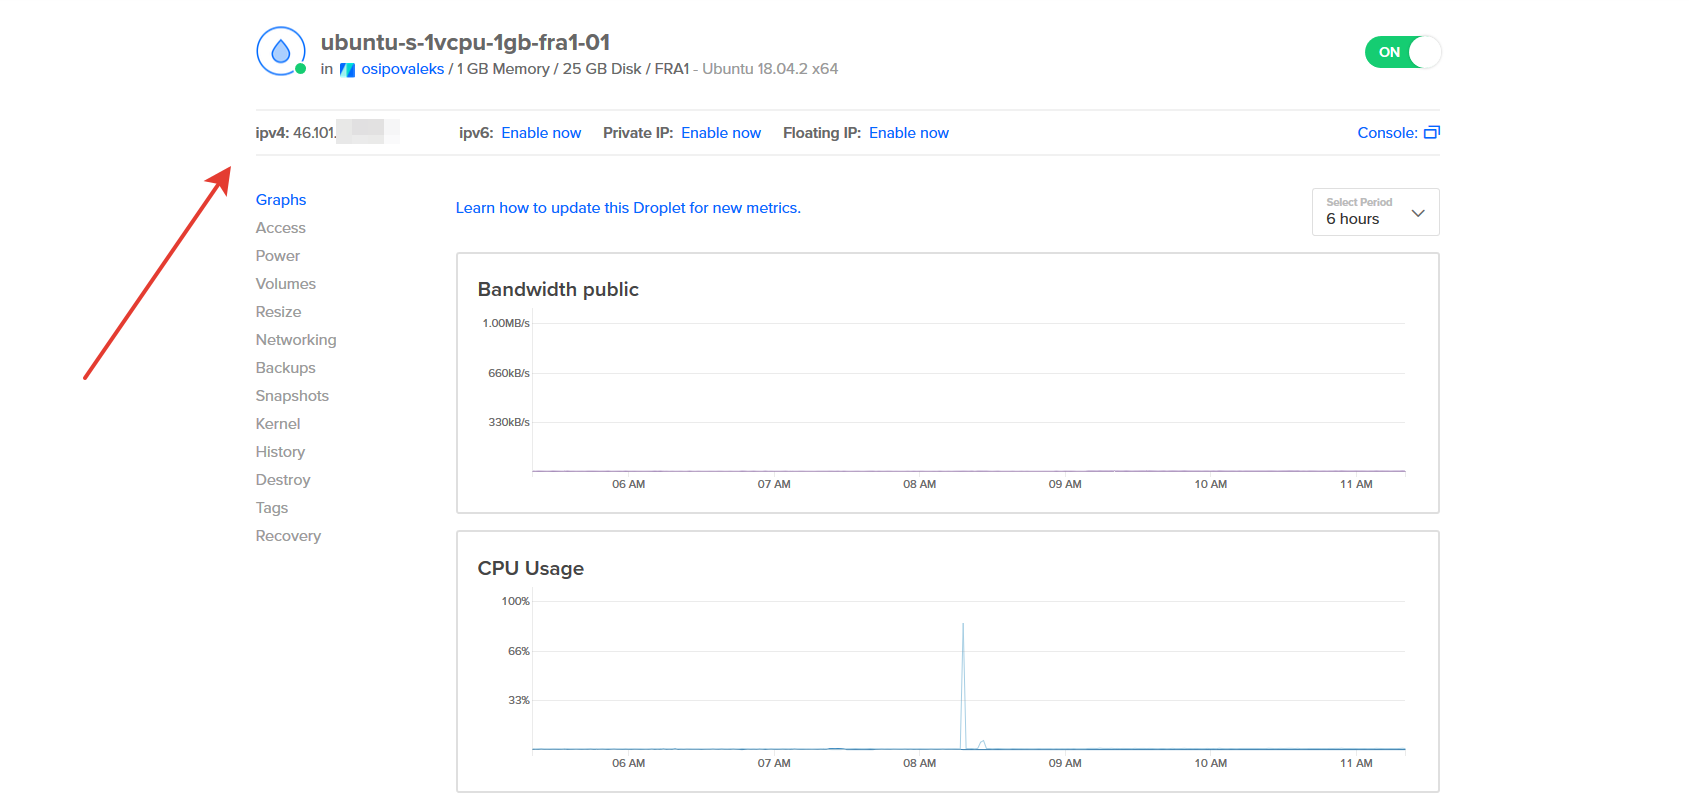
Now we go into the created droplet, and copy the ip address for yourself, for further connection and setup.
We need an ssh client. If you are working from under the Mac, then you can use the standard terminal, if from under Windows then we can use putty to work or use the Linux subsystem (only for Windows 10). I personally use the latter option, and it completely suits me.
Connect to our server with the following command
ssh root@YOUR_IP_ADDRESS The console will offer you to save the key, agree with this. After connecting, create a new user for yourself, add it to the superuser (and give him the opportunity to use sudo without a password), copy him the key for ssh access and say that he is the owner of these files (otherwise it will not work). The username is changed to any convenient for you.
useradd -m -s /bin/bash username \ && echo 'username ALL=(ALL) NOPASSWD:ALL' >> /etc/sudoers \ && mkdir /home/username/.ssh \ && cp /root/.ssh/authorized_keys /home/username/.ssh/authorized_keys \ && chown username:username -R /home/username/.ssh Disconnect from the root user with the command
exit And we will connect again with the help of the created new user.
ssh username@YOUR_IP_ADDRESS After updating the system, and rebooting our server (if during the upgrade the system will ask you something, it is enough in this case to always choose default values).
sudo apt update && sudo apt full-upgrade -y && sudo apt autoremove -y && sudo reboot The basic setup is complete. From the point of view of the combat system, it is not very secure, but as part of this, the article is completely appropriate.
Install Docker.
To install Docker in our system we will use the official documentation . Since we have a newly installed system, we will skip this item, and if you have a system on which something has been running for a long time, on the recommendation of the Docker guys, delete possible old versions
sudo apt-get remove docker docker-engine docker.io containerd runc Do not forget to first connect back via ssh to our server. The Docker installation itself is described in great detail in the documentation, I will give general commands to make it easier for you. What they do can be read there. First add the repository.
sudo apt update \ && sudo apt install -y apt-transport-https ca-certificates \ curl gnupg-agent software-properties-common \ && curl -fsSL https://download.docker.com/linux/ubuntu/gpg | sudo apt-key add - \ && sudo apt-key fingerprint 0EBFCD88 \ && sudo add-apt-repository "deb [arch=amd64] https://download.docker.com/linux/ubuntu $(lsb_release -cs) stable" And then install Docker itself:
sudo apt update && sudo apt install -y docker-ce docker-ce-cli containerd.io So that in the future we could call the docker commands without sudo prefix we will execute the following command (which is also carefully described in the instructions ).
sudo usermod -aG docker username After you need to restart (using the exit command and reconnecting to the server) in order for this to work.
Docker itself is installed, which we can check with the command
docker run hello-world It loads a test image, runs it in a container. Container after launch prints an informational message and exits.
Congratulations, we finished the server preparation phase for work!
Creating your own docker image
We will create a Docker image by writing your own Dockerfile. There are examples of how to do this correctly on the Internet a car and a small truck, I will show my ready-made version, and I will try to comment on it as much as possible. There is also a docker article with instructions on how to dockerfile correctly and canonically.
Create and open your Dockerfile for editing.
touch Dockerfile && nano Dockerfile In it for an example, we will place contents of my Dockerfile
My complete Dockerfile with comments
# . FROM ubuntu:18.04 # LABEL author="osipovaleks" LABEL maintainer="osipov.aleks.kr@gmail.com" LABEL version="1.0" LABEL description="Docker image for Jenkins with Android SDK" # , Jenkins ENV TZ=Europe/Kiev RUN ln -snf /usr/share/zoneinfo/$TZ /etc/localtime && echo $TZ > /etc/timezone # i386 ia32-libs RUN dpkg --add-architecture i386 # RUN apt-get update && apt-get install -y git \ wget \ unzip \ sudo \ tzdata \ locales\ openjdk-8-jdk \ libncurses5:i386 \ libstdc++6:i386 \ zlib1g:i386 # , RUN apt-get clean && rm -rf /var/lib/apt/lists /var/cache/apt # RUN locale-gen en_US.UTF-8 ENV LANG en_US.UTF-8 ENV LANGUAGE en_US:en ENV LC_ALL en_US.UTF-8 # Android Sdk ARG android_home_dir=/var/lib/android-sdk/ ARG sdk_tools_zip_file=sdk-tools-linux-4333796.zip RUN mkdir $android_home_dir RUN wget https://dl.google.com/android/repository/$sdk_tools_zip_file -P $android_home_dir -nv RUN unzip $android_home_dir$sdk_tools_zip_file -d $android_home_dir RUN rm $android_home_dir$sdk_tools_zip_file && chmod 777 -R $android_home_dir # environment ENV ANDROID_HOME=$android_home_dir ENV PATH="${PATH}:$android_home_dir/tools/bin:$android_home_dir/platform-tools" ENV JAVA_HOME=/usr/lib/jvm/java-8-openjdk-amd64/ # Android SDK RUN yes | sdkmanager --licenses # Jenkins ENV JENKINS_HOME=/var/lib/jenkins RUN mkdir $JENKINS_HOME && chmod 777 $JENKINS_HOME # jenkins, , RUN useradd -m jenkins && echo 'jenkins ALL=(ALL) NOPASSWD:ALL' >> /etc/sudoers USER jenkins WORKDIR /home/jenkins # war Jenkins RUN wget http://mirrors.jenkins.io/war-stable/latest/jenkins.war -nv CMD java -jar jenkins.war # EXPOSE 8080/tcp A few clarifications:
- In the beginning, there was a desire to use a more lightweight alpine instead of ubuntu, but there is no support for ia32-libs , which is required for building projects using the Android SDK.
- We install openjdk-8-jdk, and not the more lightweight openjdk-8-jdk-headless due to the fact that some Jenkins functions just need a complete system (for example, displaying the results of unit tests).
- It is necessary to set the locales, because on some projects, without them, the gradle assembly crashes without any clear errors and logs, and I spent a few days to get to the bottom of this reason (on the usual ubuntu which is not in docker, all the locales are filled by default) .
- We need to immediately accept all licenses from the Android SDK, so that during the build process Jenkins can independently install the components he needs (for example, the SDKs he needs for different versions of api). If necessary, later on inside the docker of the container you can manage the SDK using sdkmanager, for example,
sdkmanager --listallowssdkmanager --listto view all available and all installed components, andsdkmanager --install "platforms;android-26"installs the SDK for version 26 of api. - In general, it was possible not to start the user jenkins, and remain with the user root, but this is somehow not entirely correct, it was also possible for him not to give the superuser rights, but this is done in terms of convenience, if suddenly you need to install something at the stage of adjustment and debag.
- The basic image size turned out rather big (almost 800 mb), but in general I came to the conclusion that for me it is not very critical, and it is easier for me to download it in this form than to spend time searching for and removing packages that I don’t need.
After the end of the writing of the Dockerfile, we need to turn it into a ready-made image for Docker, on the basis of which the containers will be created. This is done simply by the team.
docker build -t jenkins-image where the
-t jenkins-image parameter is responsible for the name of your image, and the dot at the end of the command, says that the Dockerfile for the assembly should be searched inside this directory. The build process itself takes some time, and after the build in the console there should be a similar message.Successfully built 9fd8f5545c27Which tells us that our image has been successfully assembled, and we can proceed to the next step, namely the launch of our container
Successfully tagged jenkins-image: latest
Docker Hub and Ready Images
Yes, of course, we can use our ready-made image to launch the container, but if we need to do this on more than several devices, each time creating the Dockerfile and collecting the finished image from it will not be very convenient. And if we also update the contents of our Dockerfile, then it will be inconvenient to roll out changes across all the nodes. For these purposes, there is a public repository of Docker Hub images. It allows you not to collect an image each time, on each node, but simply download it from the public repository and use it equally on all machines. For example, the image that served as an example for this article is available in the repository by the name of osipovaleks / docker-jenkins-android , and further in the article we will work with it.
This article does not imply a detailed study of Docker Hub, we will not understand how to fill in our images there (although this is not very difficult) and what can be done with them further there, we will not understand that there may still be their own private or private repositories, In this all can be figured out on their own if needed.
Container run
You can launch the container in two ways.
- The first way is simple, using the
docker run, allows you to do this easily and quickly in the following way.docker run --name jenkins -d -it -v jenkins-data:/var/lib/jenkins -v jenkins-home:/home/jenkins -p 8080:8080 --restart unless-stopped osipovaleks/docker-jenkins-android
where theruncommand has the following parameters--name jenkinsis the name of the future container-d- run container in background-it- flags for working with STDIN and tty-v jenkins-data:/var/lib/jenkinsand-v jenkins-home:/home/jenkins— create (if not created) and patch special volume files onto the internal sections of the container, which will allow us to save our customized Jenkins even after re-creating container-p 8080:8080- we will zapapim the port of the host on the port of the container, so that we have access to the web interface (yes, this is the port that we specified in the Dockerfile)--restart unless-stopped- the option sets the container auto--restart unless-stoppedpolicy after the host is rebooted (in this case, auto-start if the container was not manually turned off)osipovaleks/docker-jenkins-androidis an image to deploy.
At the exit to the Docker console, we should display the id of the created container, as well as show information about how the image is loaded into the system (of course, if it is not loaded yet), something like thisUnable to find image 'osipovaleks / docker-jenkins-android: latest' locally
latest: Pulling from osipovaleks / docker-jenkins-android
6cf436f81810: Pull complete
987088a85b96: pull complete
b4624b3efe06: Pull complete
d42beb8ded59: Pull complete
b3896048bb8c: Pull complete
8eeace4c3d64: Pull complete
d9b74624442c: Pull complete
36bb3b7da419: Pull complete
31361bd508cb: Pull complete
cee49ae4c825: Pull complete
868ddf54d4c1: Pull complete
361bd7573dd0: Pull complete
bb7b15e36ae8: Pull complete
97f19daace79: Pull complete
1f5eb3850f3e: Pull complete
651e7bbedad2: Pull complete
a52705a2ded7: Pull complete
Digest: sha256: 321453e2f2142e433817cc9559443387e9f680bb091d6369bbcbc1e0201be1c5
Status: Downloaded newer image for osipovaleks / docker-jenkins-android: latest
ef9e5512581da66d66103d9f6ea6ccd74e5bdb3776747441ce6a88a98a12b5a4 - The second launch method involves writing a special compose file, where the run command is simply described using the YAML language, and launched using the Docker Compose.
For this we need to install it:sudo apt update && sudo apt install -y docker-compose
Next, create a directory for the project (this is important if you don’t care what the automatically created volumes for the container will be called) and go into itmkdir jenkinsProject && cd jenkinsProject
and inside we create the compose file ourselves and go into edit modetouch docker-compose.yml && nano docker-compose.yml
and put the following content into itversion: '3' services: jenkins: container_name: jenkins image: osipovaleks/docker-jenkins-android ports: - "8080:8080" restart: unless-stopped volumes: - "jenkins-data:/var/lib/jenkins" - "jenkins-home:/home/jenkins" volumes: jenkins-data: jenkins-home:
In it, perhaps, only the first line raises questions (version: '3') which indicates the version of the compose capabilities of the file, as well as a section with thevolumesblock which lists those used in this container
Run your container with the command:docker-compose up -d
where the-dflag also indicates that the creation and launch of the container will be performed in the background. As a result, Docker should show something like the following:Creating volume "jenkinsproject_jenkins-data" with default driver
Remember I said that the name of the created volumes will depend on the name of the project? Run the command:
Creating volume "jenkinsproject_jenkins-home" with default driver
Pulling jenkins (osipovaleks / docker-jenkins-android: latest) ...
latest: Pulling from osipovaleks / docker-jenkins-android
6cf436f81810: Pull complete
987088a85b96: pull complete
b4624b3efe06: Pull complete
d42beb8ded59: Pull complete
b3896048bb8c: Pull complete
8eeace4c3d64: Pull complete
d9b74624442c: Pull complete
36bb3b7da419: Pull complete
31361bd508cb: Pull complete
cee49ae4c825: Pull complete
868ddf54d4c1: Pull complete
361bd7573dd0: Pull complete
bb7b15e36ae8: Pull complete
97f19daace79: Pull complete
1f5eb3850f3e: Pull complete
651e7bbedad2: Pull complete
a52705a2ded7: Pull complete
Digest: sha256: 321453e2f2142e433817cc9559443387e9f680bb091d6369bbcbc1e0201be1c5
Status: Downloaded newer image for osipovaleks / docker-jenkins-android: latest
Creating jenkins ...
Creating jenkins ... donedocker volume ls
and we get this outputDRIVER VOLUME NAME
where we will see that despite the fact that the name for the volume was chosen
local jenkinsproject_jenkins-data
local jenkinsproject_jenkins-homejenkins-home, in reality the prefix was stuck to it from the name of the project and the name of the volume wasjenkinsproject _jenkins-home
Which startup option to use? Here you can choose your own, it is believed that Docker Compose is more like a tool to launch several containers at once, which are tied to each other, and if you need to run only one container, you can use just the
docker run .Now, after these sub-steps to start and configure the server, as well as launch the container with Jenkins, we can proceed to its initial setup
Initial Jenkins Setup
Take the ip address of our server, add to it the port 8080 specified by us and follow this link in the browser.
http://YOUR_IP_ADDRESS:8080/If before that everything was configured and started correctly, then we will see the following picture
For the first setup, we need to enter the password that the system generated during installation. To do this, we just need to look at the contents of the file
/var/lib/jenkins/secrets/initialAdminPassword . But this file is located inside our running container, and in order to read it, we need to attach to the container using the following command: docker exec -it jenkins /bin/bash where the
-it parameter is the same as when starting docker run , jenkins is the name of our container, and /bin/bash will launch /bin/bash for us in the container and give access to it. After that we can see the initial password for Jenkins: cat /var/lib/jenkins/secrets/initialAdminPassword in the console show about the following
91092b18d6ca4492a2759b1903241d2aThis is the password.
The user ALexhha suggested a simpler option to read this password, without connecting to the container itself. The fact is that at the time of the launch of Jenkins itself, this password is shown in the logs. It turns out that all we need is to read the container logs. In our case, this is done with the following command:
docker logs jenkins where
jenkins name of our container, and in the logs you can see the following:************************************************** ***********
************************************************** ***********
************************************************** ***********
Jenkins initial setup is required. An admin user has been created and a password generated.
Please use the following password to proceed to installation:
91092b18d6ca4492a2759b1903241d2a
This may also be found at: / var / lib / jenkins / secrets / initialAdminPassword
************************************************** ***********
************************************************** ***********
************************************************** ***********
This option is a little easier and faster.
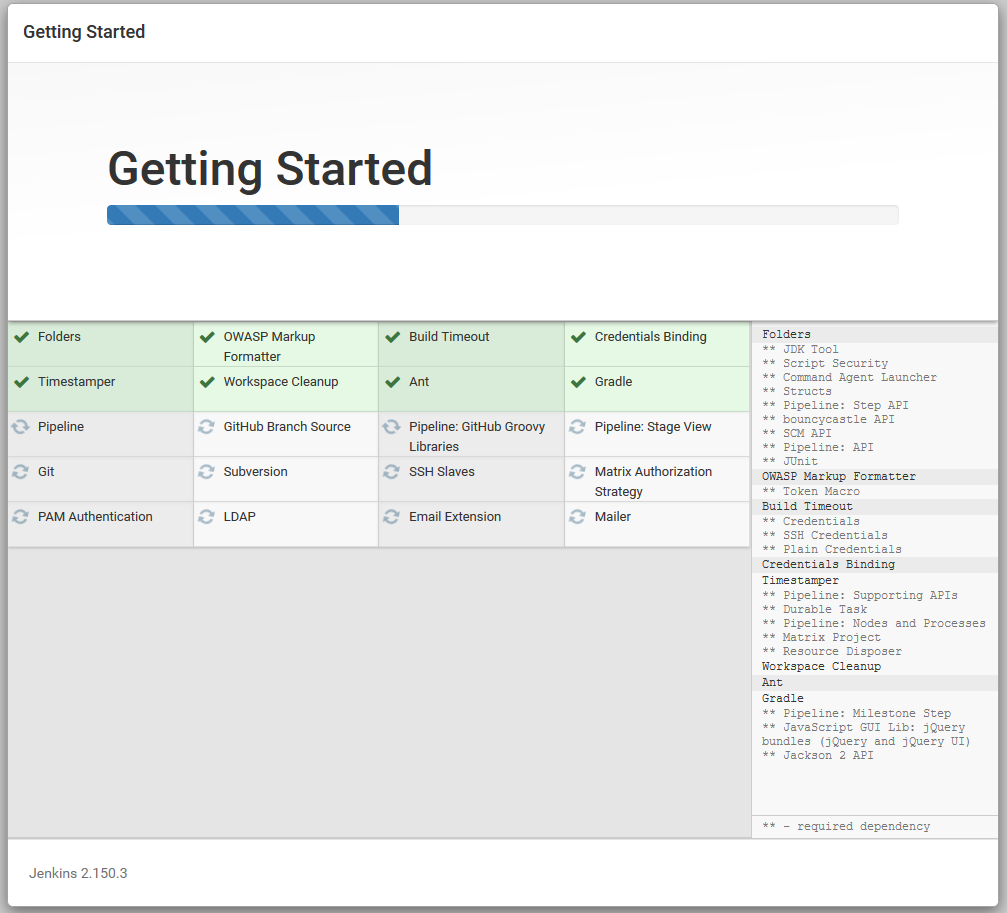
Copy it, paste it into the Administrator password field in the web interface and click Continue . On the next screen, select Install suggested plugins and install a set of default plug-ins.
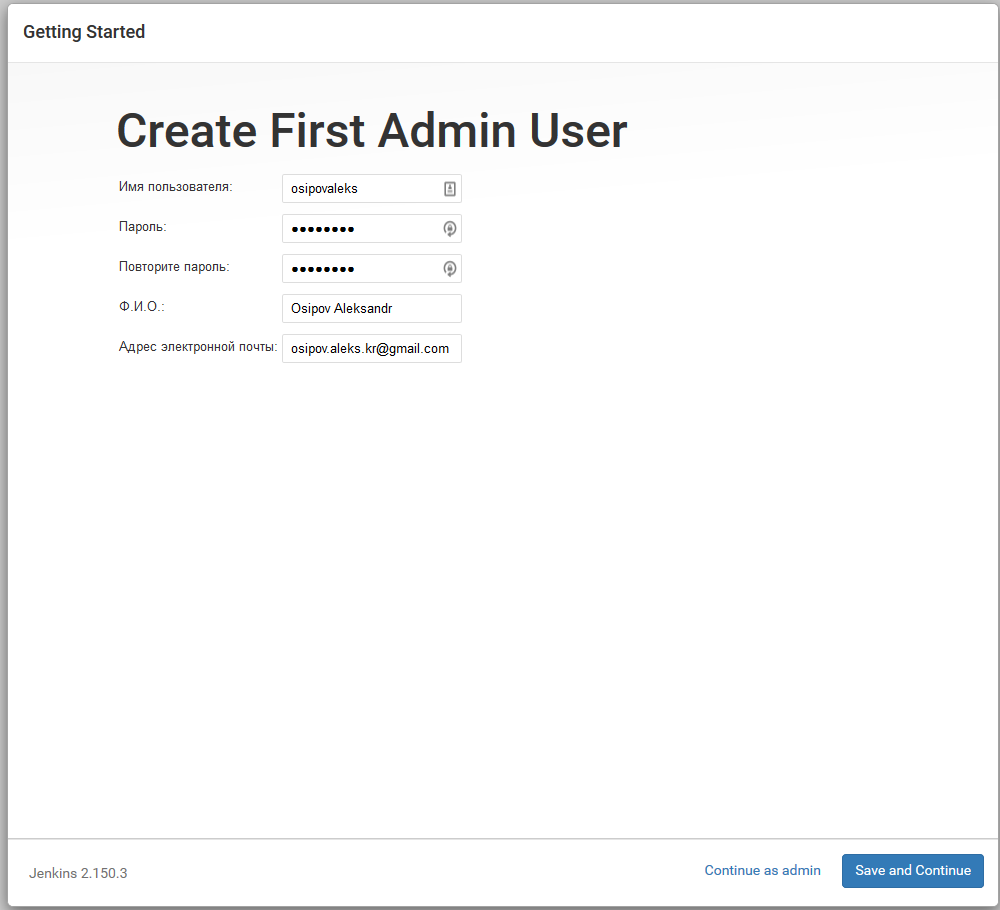
After installing the plugins, create a user and click on Save and Finish
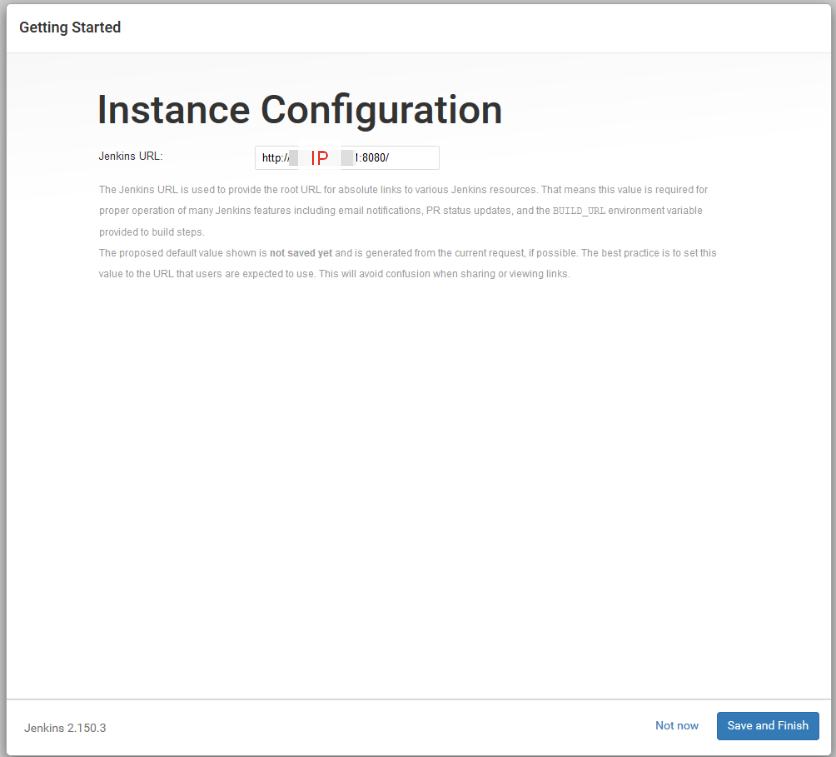
We agree with the section Instance Configuration, where we are offered to fill in the URL on which Jenkins will work (in our case we leave everything as it is)
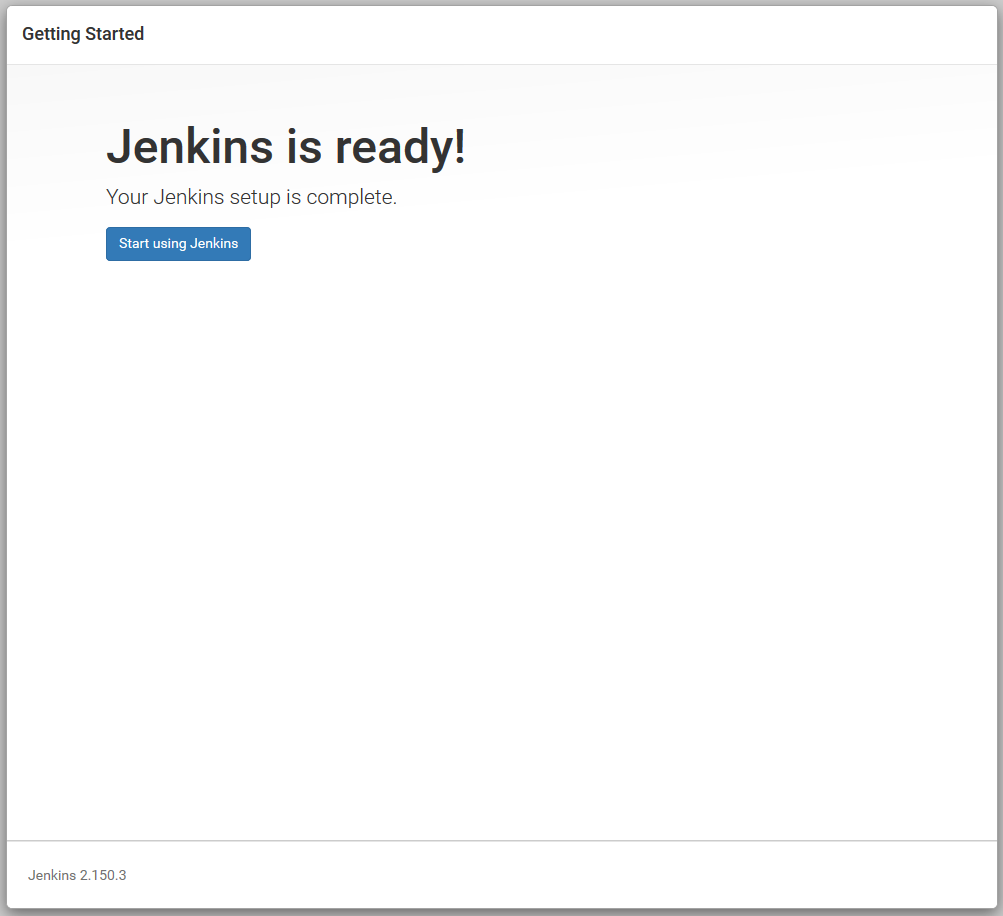
And on the next screen, click the cherished Start using Jenkins
So, we installed and launched Jenkins!
It is already quite possible to work with him, but in order to build our Android builds you will need to configure a few more items. Localization of Jenkins is associated with the chosen language of your browser, and of course the Russian translation is not completely finished, and we get a hell of a mixture of Russian and English. If you did exactly the same, and it makes you angry, then you can use a special plugin and install the default interface language. Well, or switch your browser to the English interface.
Let's go to the Jenkins settings and select the System Configuration item.
Check the Environment variables box and enter the ANDROID_HOME name in the field , and specify the / var / lib / android-sdk /(We indicated this data as a home directory for Android SDK storage in the Dockerfile).
Click on the Save button , exit the settings section and go to the section called Configuration of global tools .
Let's set up a section with JDK (where the JAVA_HOME variable was also filled in by us in the Dockerfile, and we can use its value here / usr / lib / jvm / java-8-openjdk-amd64 / ).
Also here we still need to fill out the section with Gradle. We select and install the Gradle version which is used in the projects that you will build using this CI system. You can have multiple versions. It is also possible not to set the Gradle variable at all if, for example, you have a gradlew in the repository, and you can collect it using it.
With this we can finish our first stage. The Jenkins system is fully operational and we can proceed to customize the build tasks themselves. Please note that the system has been customized for our needs and here it may not be what you need - for example, there is no android emulator for testing and NDK.
If this article will interest someone, then I will continue in the second part on the example of one or two tasks, I will describe the integration of Jenkins and Bitbucket (it is he, not Github, because there is easier with free private repositories, and articles on the Internet it is smaller, and probably more jokes), I will tell you how to make ssh the key of our container to make friends with the repository, about email notifications, as well as a few other features. In general, about everything that we have configured.
Please do not kick much, this is my first article on Habr. All good!
Source: https://habr.com/ru/post/443606/
All Articles