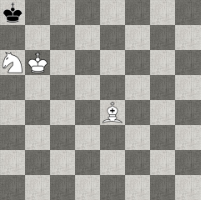
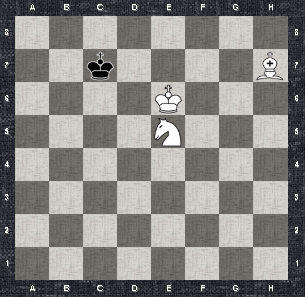
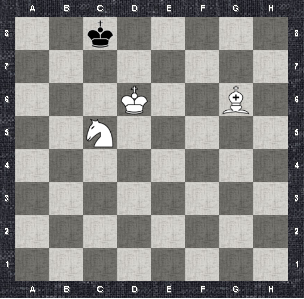
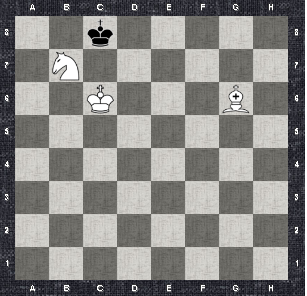
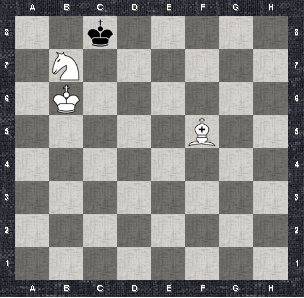
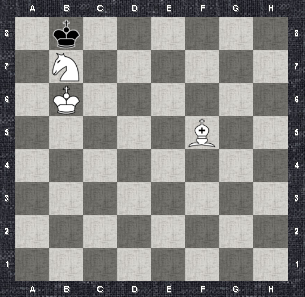
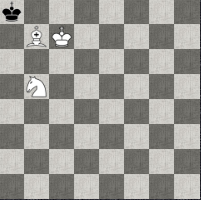
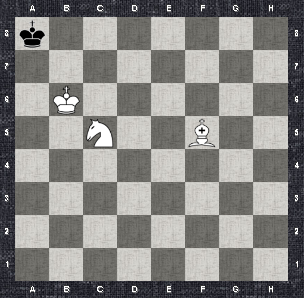
Mat elephant and horse
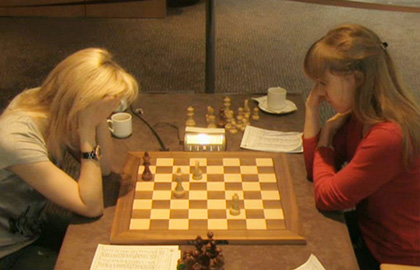
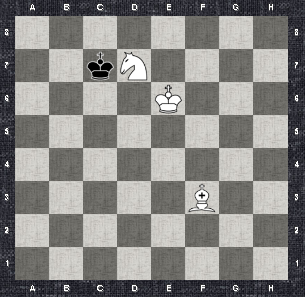
Ushenina (pictured on the left, playing white) - Girya (pictured on the right, playing black). Draw.
Women's Grand Prix, 4th round
May 6, 2013, Geneva
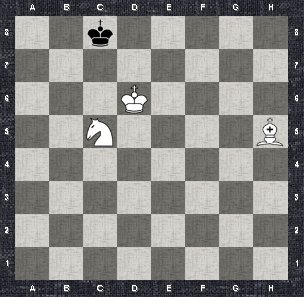
In 2013, the Russian grandmaster Olga Girya in a hopeless position, instead of giving up, used non-standard cheating .
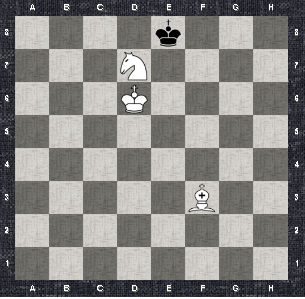
Having two pieces less, she found a witty way to achieve a draw with world champion (at that time) Anna Ushenina. Olga just exchanged everything that was possible and brought the game to the endgame “king + bishop + knight VS king”. A Ukrainian chess player unsuccessfully tried to mate the enemy king for fifty moves, after which the result of the game was declared a draw.
')
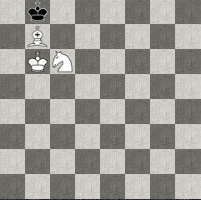
Insulting draw significantly influenced Ushenina's result in the tournament. She took 5-6 place, and the win would allow to split the bronze (3-5 place).
However, let's not be too strict with Anna. In a chess environment, it is considered that mate by an elephant and a knight can not be studied. The absolute majority of chess players never have such a balance of forces in their lives. In serious practice, the famous cases of this endgame can be counted on the fingers of one hand. In 1979, at the 47th USSR Championship, Yury Balashov successfully completed this quest (thanks to which, in the standings, he was on the same line as Kasparov). The bike is also known when the Kiev master Yevsey Polyak was unable to put this mate on the question of why he did not drive the king to the right angle, replied aphoristically: “I was driving, but for some reason he didn’t go there.”
How often this position is found in blitz - no statistics. But probably more often than in serious tournaments.
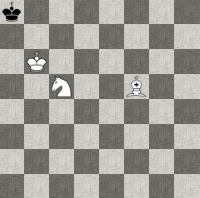
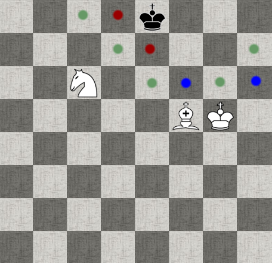
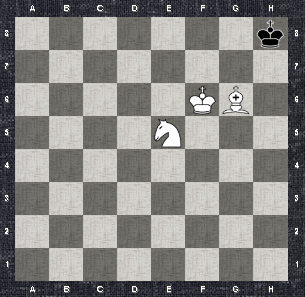
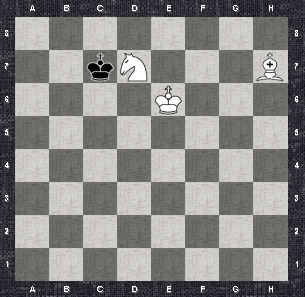
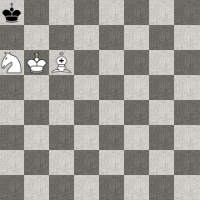
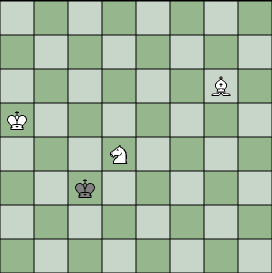
Grandmaster Grischuk (black) demonstrates an excellent knowledge of the TWIX method and mates elephant and horse to grand master Karjakin (white)
So is it worth it for a chess player to learn mate with an elephant and a horse or not? I think it is worth it and for what reasons:
- If a player participates in tournaments, he will not look stupid if this situation nevertheless arises.
- If a player likes to play blitz, then even reaching a material advantage in a couple of pieces can be an unpleasant surprise. An experienced rival may well exchange “all that is superfluous” and “run away for a draw” following the example of Olga Giri.
- Studying this endgame helps to understand the non-trivial principles of cooperation between an elephant and a horse . These two figures are so different that they are considered to interact poorly with each other. The legendary Tal was very fond of the “rook VS elephant + knight” and won quite a few spectacular games with such a balance of power (Mikhail Nekhemyevich preferred the rook at the same time). Formally, the rook has less material weight than two light pieces, but often dominates them, as the horse and the bishop often seem to exist in different dimensions.
- Learning to put this mat is much easier than it might seem. Many do not even try to study this ending, for they mistakenly believe that it needs to play, at least at the level of a candidate for the master of sports. And in fact, master third-grader.
- Checkmate with an elephant and a horse, especially in time trouble - brings great pleasure. I know what I'm talking about.
If you intend to learn how to mate with an elephant and a horse, then let's do it.
Tips for naked kings
In the case of this ending, the weaker side has excellent chances for a draw. You can rightly hope for:
- Pat This is the main danger when the opponent is already driven into the right angle and the checkmate is about to be expected. One wrong move and ...
- Rule of 50 moves. With the best play of both sides, the checkmate is placed somewhere in 30 moves, but you cannot expect a perfect game. This is especially true when pushing the king to the edge and into the corner. It is not easy, the king at the first opportunity breaks into the center of the board. If 5 dozen moves went on an aimless chase across the whole territory, then at the expiration of this limit the weaker side has the right to draw.

- Losing one of the figures. Quite unexpectedly, a situation may arise when a lonely king attacks both light pieces at once and one of them is inevitably lost. An elephant can protect a horse or a horse can protect an elephant - but at the same time these figures cannot simultaneously protect each other.
- 3-fold repetition of the position. The lonely king should return to the place where he was before at the first opportunity. It is possible that the owner of light pieces will have to return to previous positions in order not to let the king go to the center. If this “back and forth” happened 3 times in a row - a draw in your pocket.
- Delay of time the strongest side. Since this is a kind of deep endgame, it is possible that everything happens in the last seconds. At the same time, the strongest side has to think much more, since you need to build the right structure. If the owner of the clown box collapses on the clock, defeat, of course, will not be counted (although, if the opponent does not have a naked king, but there is at least a pawn, they will be counted), but you will not see victory.
- The inability of the opponent to mate the horse and the elephant. Perhaps the most important hope that allows you to get off the water. Because 99% of chess players have no idea how to win in this position (although you can learn in an hour).
The mat is placed in the corner of the same color as the elephant. Because the naked king in no case can not go there. Maximum program - try to be in the center.
If you can not keep in the center, then when pushing to the edge it is worth to rest and not go into corners.
If it is not possible to linger in the middle of the edge, then it is worth going to the corner opposite to the elephant's color. In this corner, the mat will turn out perhaps cooperative.
When the phrase “color of the elephant” is repeatedly mentioned in the article, it means not the color of the figure itself, but the color of the fields in which it moves. Elephants are distinguished not only as white and black, but also as white-field and black-field.
Another tip - at any opportunity attack light figures. Especially vulnerable horse, whose radius of action is not much higher than the royal. It should not run away from the horse and the elephant, and go to meet them.
Main steps
Even if the opponent follows all the above tips, if he plays correctly, he cannot avoid the mate. With the strongest resistance itself, the following stages of the matting process can be distinguished:
 | Stage 0Suppose the most difficult option is a mated king in the center of the board. |
 | Stage 1First of all, you need to push the king to any edge of the board. |
 | Stage 2Push the king into one of the corners. An experienced adversary will strive to the angle opposite to the color of the elephant. In this corner, mating is possible only if the matted king voluntarily helps with this. |
 | Stage 3If the enemy is not in that corner, then it does not matter. Knowing the TWIX method, one can easily forward the king to the same angle as the elephant's color. |
 | Stage 4After the king has been transferred to the desired angle (the color of the angle must match the color of the elephant), the checkmate is put. |
Repression
At first glance, the task of pushing from the center to the edge of the board and into the corner looks complicated, because the king, the elephant and the horse figure are not very strong and too different figures. It seems that they make up a rather weak and disorganized team and in their ranks a lone adversary will always find gaps through which he will deftly escape.
However, this impression changes dramatically if you mark the fields that a small squad control around the enemy king.

It turns out that, as a rule, an insurmountable barrier is formed for the enemy, who is forced to move backwards, receiving less and less room for maneuver.

In principle, one does not need to know any special secret techniques in order to drive a lonely enemy king to any corner with the joint efforts of a king, an elephant and a horse. It is enough just to tread carefully and systematically, cutting off chunk after chunk of free space.
However, a few tips and nuances can be voiced:
- Step on a broad front.
- Try to horse and elephant standing in the fields of the same color. When the horse stands on the black field - he controls the white fields, when the white one - black. Therefore, if an elephant and a horse are in the fields of the same color, they control both the white-field and dark-black areas of the board.
- Do not overlap an elephant with a horse or a king.
- Unlike a horse and an elephant, the king can control the fields of different colors at a time. By the way, of all the three figures available, it is the king who is the strongest.
- King - in the vanguard! It is better if the elephant and the horse stand at a respectful distance from the enemy monarch (so as not to be killed by him) and from there fire at the fields around him. And you need to attack the foe by your leader. Kings can not stand on neighboring cells, so feel free to act as king to meet your counterpart - he will be forced to retreat.

TWIX method
If the king is in the corner, it's not.
Generally speaking, the king can be immediately sent to the right angle, for example, using the triangle method (which we will not analyze here). This method, although it is the shortest in the number of moves, is rather complicated in execution, requires precise calculation in the options tree, and is rather suitable for computer players. Approximately, as the “algorithm of God” for the Rubik's Cube, it is well known that it is possible to assemble from any position in no more than 20 moves, but in practice it is easier to make it more understandable, although in a longer way.
And the chocolate method is for the lazy. The main thing is to drive into a corner, into which one — it does not matter, if anything — then it will be possible to translate using a completely transparent algorithm.
The name of the method is connected with the fact that first we build all the characters with the letter T , then the knight, which is zigzagging along the W- trajectory, protected by the king (moving strictly in a straight line in the form of the letter I ) and supported by the elephant (which, if not the edge always controls the two intersected diagonals in the shape of X ) escorts the king to the final destination.
Cell
To change the angle using the TWIX method, it is necessary that the fouled king first be in the corner opposite to the elephant's color. Then such a construction is constructed in the form of the letter T lying on its side. The TWIX method begins with the name from this position, when the victim is carefully transferred to another corner, where he gets a checkmate.
To create this T-shaped position, it is necessary not only to push the king into a corner (opposite to the elephant's color), but also temporarily put him in a “cage”. The “cage” looks like this (the horse was removed so that it does not interfere with the understanding of how the “cage” is arranged):
Of course, the “cell” can be in any corner of the board, no matter what color is the strongest and weakest side. This is just a private example showing the main point.
The black king cannot get out of the “cage”. The motionless king of the whites does not let him slip through the black fields, and the bishop controls the white fields. The black king has only 5 squares in the very corner where he can walk. If the black king tries to approach the elephant, the elephant simply goes to the other end of the white-field diagonal, and the black king remains in the “cage”.
While the doomed king is waiting for his part in the “cage,” the strongest side neatly brings the knight down and quietly builds the letter T , preparing the conditions for TWIX.
Shapes trajectories
To understand the TWIX method, it is necessary to figure out which way (and with what motives) each of the four pieces on the board make.
Hereinafter, we will assume that the strongest side are whites, their elephant is light-field. The fallen king was driven into the upper right corner (black) and should be transferred to the upper left corner. Of course, this is just a private example, but in the general case, it does not matter what color someone is and what corners it is about. The main thing - to realize the general principles.
Math king

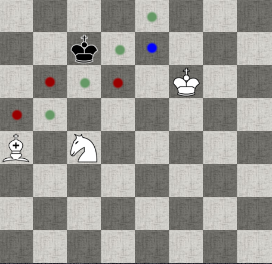
On the chart, gray and red dots mark all fields that the enemy can visit, if the TWIX method is implemented correctly and the king fails to escape.
The doomed king is driven to the place of execution along a narrow corridor (fields with gray dots) along the very edge of the board. The weakest side may try to break back into a safe corner, but the horse that controls the black fields and the elephant that controls the white fields, block his way back.
Having come to the corner, the black king will most likely try to slip out on the other side (fields with red dots). It is necessary to reorient the bishop in time and close the loophole (see below “Example: The elephant does not allow the king to slip out at the final stage”).
Horse (W)
This figure is the soul of the method, it is she who drives the opponent into a dull corner. His king and the elephant just help in this.
The horse carries out a rigidly defined trajectory in the form of the letter W.
This allows you to take black fields from right to left (black and right to left in this case), but the knight’s main task is to control the fields opposite to the elephant’s color and transfer the opponent’s shah pushers from one corner to the other direction. .
King of the best side (I)

The king, too, has a clearly defined path - to move strictly parallel to the enemy king, a step away from him. This path is reminiscent of the capital vowel I , lying on its side.
The main mission of the king is to support (protect) the horse, otherwise the opponent will approach the horse and eat it. Notice that the king and the horse do not interfere with each other's movement at all - the king moves only along the 6th rank, and the knight jumps from the 7th to the 5th and vice versa.
In addition, the king does not allow the opponent to slip out from the edge, going around to the right or left. The king of the strongest side should try to be opposite (or almost opposite) of the frown king.
Both the king and the knight of the strongest side should not deviate one iota from their routes; they must pass exactly the path shown in the two previous diagrams. It happens that you have to take a step back along the same trajectory, if one of the moves is made prematurely and you need to return, in order not to release the frown king.
Elephant (X)
Unlike a knight and a king, an elephant does not have a rigid sequence of moves. The main thing is not what fields the elephant walks, and what diagonal it currently controls.
When the elephant is not on the edge of the board and not in the corner, it controls the two crossed diagonals forming the letter X.
The task of the elephant is to hold white fields from a distance (if the elephant is light-square and need to be transferred from a black to white corner) on the edge of the board so that the king cannot return to a safe corner and, driven by a checker, went to the scaffold.
When the opponent comes to a matte corner, he may try to slip out on the other side. The task of the bishop (together with the horse who will control the fields opposite to the color of the bishop) in one move is to eliminate this possibility.
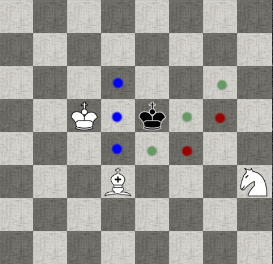
Example: The elephant does not allow the king to slip out at the final stage.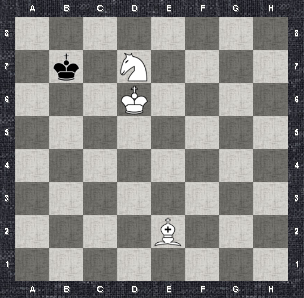
The black king is already in the frosted corner, but he is trying to get out through the white field a6 . The elephant switches to the a6-f1 diagonal and blocks the possibility of escape. The horse, protected by the king, does not allow to escape through the black field b6 .
The black king is already in the frosted corner, but he is trying to get out through the white field a6 . The elephant switches to the a6-f1 diagonal and blocks the possibility of escape. The horse, protected by the king, does not allow to escape through the black field b6 .
The auxiliary task of the bishop is to transfer the move to the opponent. A situation may arise when the knight and the king cannot walk along their rigidly defined trajectories (if this is done, the mute king breaks out of the encirclement). In this case, the elephant simply moves along the diagonal that it currently controls. The turn turns to black and they are forced to move again towards death.
Example: Passing a turn to an opponent.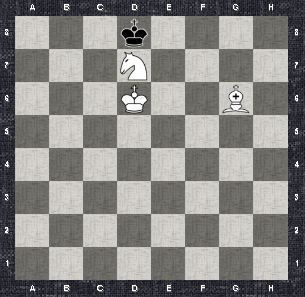
White's move in this position. You can not go white king - in this case, the black king breaks free.
As long as there is no point in riding a horse, the opponent will go to a safe corner through the move and White will also have to return to the starting position.
However, the waiting move by the bishop along the e8-h5 diagonal allows the transfer of the turn of turn.
1. g6-h5 ...
Black will have to move further to the left, and White will be able to continue theW-shaped movement with a knight.
1. ... Krd8-c8
2. d7-c5 ...
Now, black must either continue to move to a dull corner (2. ... Kcc8-b8) or try to return to the right safe corner, but then White completes the W-trajectory (2. ... Kpc8-d8 3. Kc5-b7 + and the black king still has to go left).
White's move in this position. You can not go white king - in this case, the black king breaks free.
As long as there is no point in riding a horse, the opponent will go to a safe corner through the move and White will also have to return to the starting position.
However, the waiting move by the bishop along the e8-h5 diagonal allows the transfer of the turn of turn.
1. g6-h5 ...
Black will have to move further to the left, and White will be able to continue the
1. ... Krd8-c8
2. d7-c5 ...
Now, black must either continue to move to a dull corner (2. ... Kcc8-b8) or try to return to the right safe corner, but then White completes the W-trajectory (2. ... Kpc8-d8 3. Kc5-b7 + and the black king still has to go left).
So, one more time the whole mechanism (whites checkmate with black, whites have a light-squared elephant).
The main spring is that the horse draws the letter W on the board. This is the best way to cut off the black king's black cells and drive the edges along the edge to the desired angle. The white king moves strictly parallel to the edge, thus protecting the knight. A white-white bishop from afar controls white fields and prevents the black king from breaking through. If necessary, the bishop also simply walks along a controlled diagonal if it is necessary to transfer the move to black.
An example of the TWIX method with a detailed explanation of the moves
This is an example of when blacks are protected as ingeniously as possible. Events may well develop in a slightly different sequence of moves, but all cases that may arise are dismantled here.
 | Let's start with the situation when the king is driven into a large cage. Before implementing the TWIX method, you first need to prepare the conditions for the initial T- shaped position. The king is locked in a corner, but he has 5 maneuver fields at his disposal. |
| 1. Ch5-g6 ... | |
|---|---|
 | With an elephant stroke, we reduce the size of the cage to the minimum; now the king has only three fields that he can walk. |
| 1. ... Krh8-g8 2. Ke5-f7 ... | |
 | The horse further restricted the black monarch, taking the corner. Now the mated king has only two fields. |
| 2. ... Krg8-f8 3. Cg6-h7 ... | |
 | Expel the black king from his comfort zone. The elephant blocked the ability to be near the corner. For the black king begins an unpleasant journey to the place of execution. Initial T ! It is important that in this position the turn of turn was behind the weak side. Twix mechanism comes into motion. |
| 3. ... Kff-e8 4. f7-e5 ... | |
 | The king is forced to take the first step towards ruin. The horse begins to draw the letter W. |
| 4. ... Cre8-d8 5. Crf6-e6 Cdd8-c7 | |
 | Black does not waste time trying to return to a safe corner (by 4. ... Kre8-f8, a white knight with a check would draw another line of the letter W - 5. Ke5-d7 + and the black king still has to go left: 5. ... Kff8-e8 6. Crf6-e6 ). Instead, blacks conceived to break into the left half of the board. The fact is that white pieces are forced to walk alternately, which slows down their joint movement. The black king manages to quickly outrun them and it seems that another move - and White will lose control of the situation. |
| 5. Ke5-d7 ... | |
 | White unabashedly continues to draw the letter W. The horse has now taken control of the black fields through which the black king could seep into the center. |
| 5. ... Kpc7-b7 6. Ch7-d3 ... | |
 | The white elephant switches to the other flank, prohibiting access to the white fields and preventing the escape attempt. |
| 6. ... Krb7-c6 7. Cd3-e2 ... | |
 | Could not slip through a6 , maybe it will work through c6 ? White waits these illusions with the expectant move of an elephant. |
| 7. ... Crc6-c7 8. Ce2-f3 ... | |
 | At 7. ... Krc6-b7 would follow 8. Kr6-d6 and the white king take the next step along their prescribed route. Therefore, the black king has so far returned to c7 , not letting the white king to d6 . Now it’s impossible for White to go king or knight, but the bishop’s move finally blocks the attempts to escape through the right flank. |
| 8. ... Kpc7-d8 9. Kpe6-d6 Kpd8-e8 | |
 | Maybe then black will be able to return to a safe corner? |
| 10.Cf3-h5 + ... | |
 | No, it will not work. The elephant is thrown back and controls the white fields. The horse controls black. |
| 10. ... Kpe8-d8 11. Kd7-c5 Kpd8-c8 | |
 | Black has to go left, and White continues to draw on the W board. |
| 12. Ch5-g6 ... | |
 | Thin moment! Now it is premature for White to go his own king, because blacks will rush into a safe corner and White will also have to go back: 12. Cdd6-c6 Cc8-d8. 13. Crc6-d6. Therefore, the neutral move of the bishop is the transfer of the move to black. |
| 12. ... Kpc8-d8 13. Kc5-b7 + Kpd8-c8 14. Kpd6-c6 ... | |
 | Now the attempt to break into a safe corner is not terrible, thanks to her whites just finished the letter W with a check. |
| 14. ... Kpc8-b8 15. Kpc6-b6 Kpb8-c8 16. Cg6-f5 + ... | |
 | Last attempt to tilt towards a safe angle. Like on the 10th move, the bishop and the knight do not give an opportunity to go back. |
| 16. ... Kpc8-b8 | |
 | Black transferred to the desired angle. It remains only to checkmate. |
Mat
You can checkmate in different ways (not all options are given):
We will analyze that matte construction, which organically arises from the final position of the TWIX method (third diagram). Of course, if the king was driven into a corner not by the TWIX method, but in a different way, this mat also prevents it from being used.
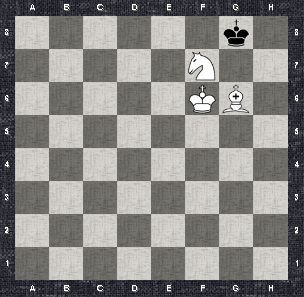
First of all, it is necessary that the mated king be in the “cage” and cannot escape from it while the strongest party regroup the figures for the final mate. Like the "cage" in a safe corner, it is built by the efforts of the king and the elephant (the horse is removed from the diagram to show only the "cage").
The black king has only two fields available and he cannot escape anywhere. While he shifts from a8 to b8 and back, White quietly brings the knight, who with the check drives the king to the very corner. Perhaps, on the diagonal you have to make an elephant move, if you want to transfer the turn of the turn to black, so that inadvertently there is no pat
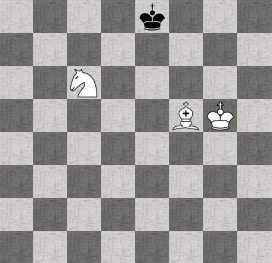
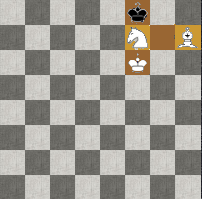
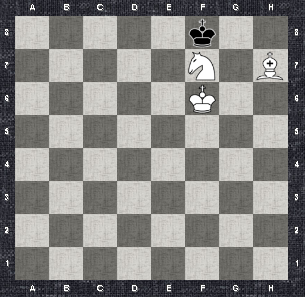
| Let's continue from the position where we stopped when we disassembled the TWIX method, step by step. The black king is already in a cage.It is necessary to transfer the knight to a6 (he must get there with the check) and when the black king retreats to the corner - checkmate with an elephant. |
| 17. b7-c5 Kpb8-8 | |
|---|---|
 | It is still premature to walk a horse, for 18. Kc5-a6 - Pat. It is necessary to pass the move of the bishop to black. |
| 18. Cf5-d7 Kpa8-b8 | |
 | The elephant, without removing control from its diagonal, makes a waiting move on it. The black king is now in the right field. |
| 19. Kc5-a6 + Kpb8-a8 20. Cd7-c6X | |
 | A knight with a check knocks the king into a corner, mates an elephant. |
Online training
By clicking on the diagram on the right, you can practice putting a checkmate on an elephant and a horse. The initial arrangement of the shapes is generated randomly. The author of the simulator of the game GlukKazan , all questions, complaints, thanks, suggestions and suggestions - to him :)
Source: https://habr.com/ru/post/443224/
All Articles