How I created Recycle! VR
In the previous article, we tried to create a basic scene in A-Frame to try out the basic concepts of the framework in practice. In this article, I would like to share my experience creating an A-Frame game - Recycle! VR. The project repository is available at the following link .
Recycling!?
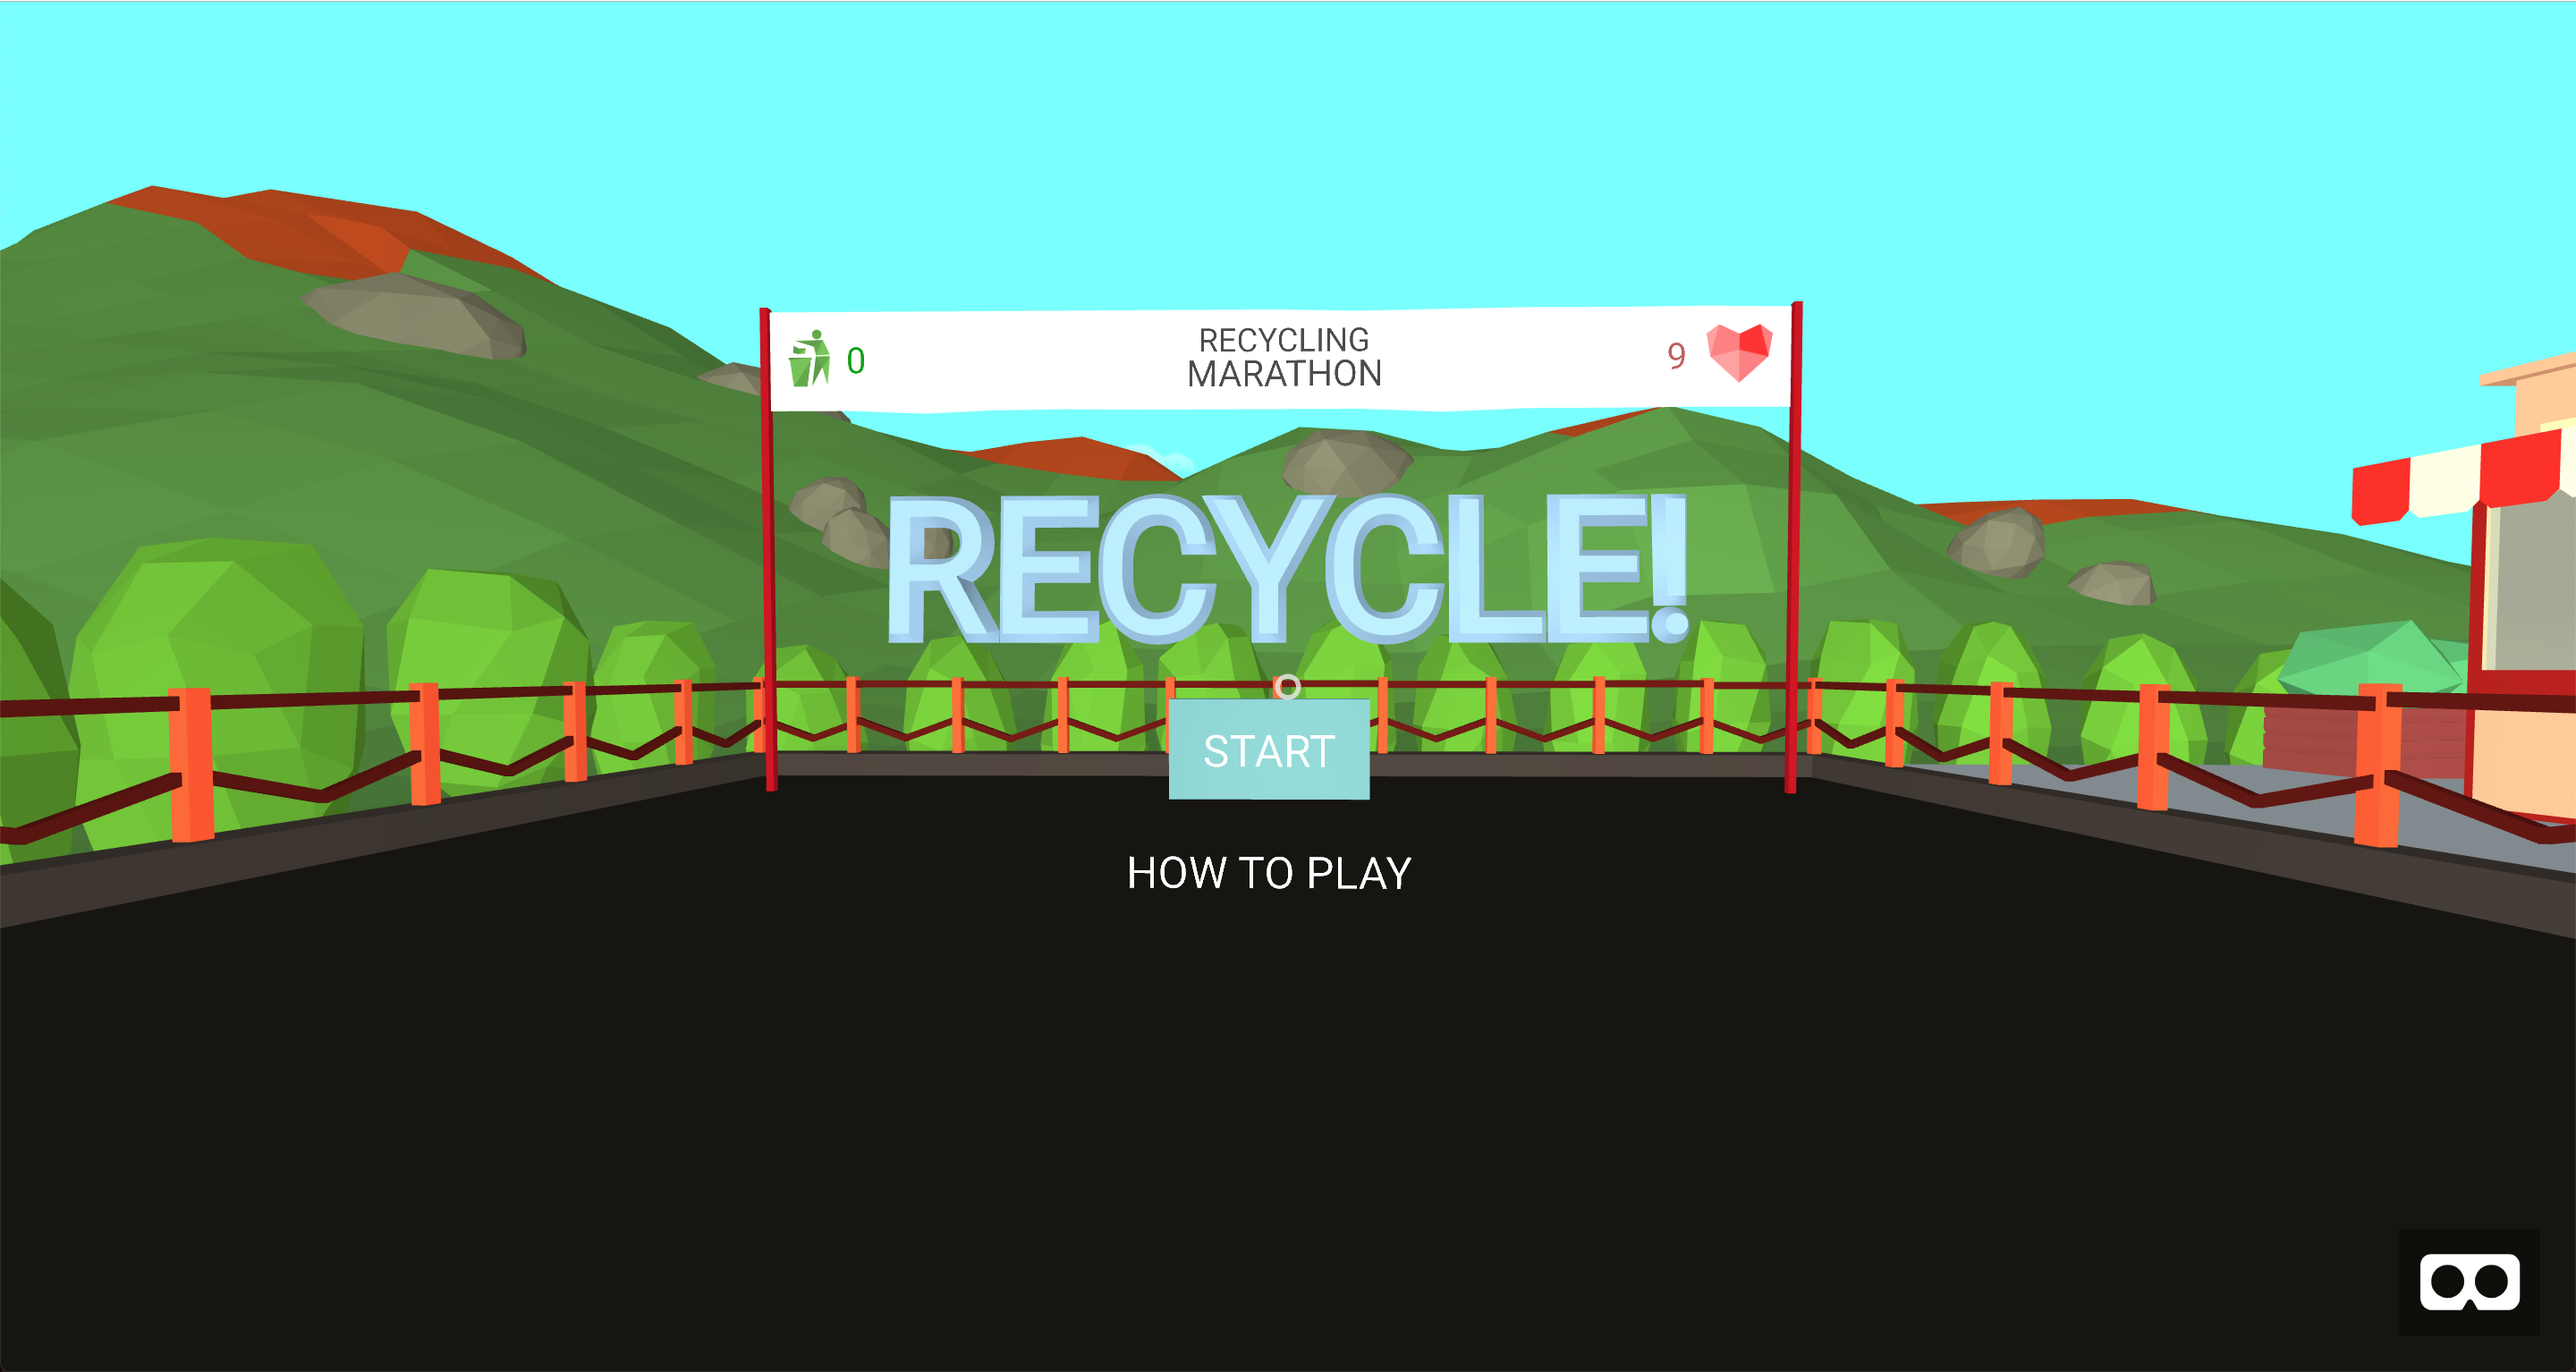
The idea of creating the game came almost as soon as I learned about Web VR. Although in general, I believe that games on the web will in any case yield to good projects even for mobile devices, not to mention personal computers and consoles. But, as it seems to me, the game is the most difficult test. I started thinking about what exactly I can do. I watched other projects and I was immediately struck by the opportunity to take something with the help of the controller. And since I’ve been associated with a organization for separate garbage collection for quite a long time, the answer came by itself. Recycling. We take the trash and throw it in the trash. What could be easier. But it turned out to be not so simple, this, in fact, will be discussed further.
Choosing a framework
At the time of the start of work on the game, I knew only about 2 more or less serious frameworks: React 360, A-Frame. Obviously, A-Frame was the most suitable for creating the game. Yes, now I know that there is also the PlayCanvas game engine, which also supports VR, but it's too late. Moreover, it turned out that A-Frame is also not bad for creating games.
')
Where to begin?
I began by studying the official examples of games from A-Frame developers. The benefit of such is not enough. A-Blast, A-Painter, Museum, Super Craft and now Gunters of Oasis. Of all the projects presented, I liked A-Blast most of all - a shooter in which you have to fight with the sweetest creatures in the universe. So I wanted to take this game as a template for my own. But it did not work out. And the cause was the structure of the game. It seemed to me that she was too cluttered and not thought out. Perhaps more is not needed, but I wanted to do something more convenient and easier to understand.
Structure
The A-Blast structure is just one entry point - the index.html file, which contains one scene with all assets, main game entities, management, and everything else.

As can be seen in the screenshot, in addition to the necessary components and systems (A-Frame uses the Entity Component System pattern) there are still bullets and enemies - essentially the same systems, but for some reason they have their own wrapper. In general, to say that this code is easy to understand. So I decided to think about how this code can be structured. The first idea is to break the stage into its component parts. Why would a router and templates be useful that would render one or another part of the scene? Looking for both the first and second (no, not five minutes), I did not find anything. Although I am a supporter of the rule, do not write bicycles, but this time I had to write my decision. Although, somewhere in 2-3 weeks I came across templates from Kevin Ngo. But it was late.
Router and Templates
And so, a-frame-router-templates comes onto the scene. What can he do? As mentioned above, his main task is to render the necessary parts of the game, for example, the title screen, the playing field, the game end screen, and so on. How to do it? In principle, you can find everything you need in the module documentation on github, but in short, we have the following:
<a-scene router> ... <!-- Routes --> <a-route id="start-screen" template="start-screen"></a-route> <a-route id="game-field" template="game-field"></a-route> <a-route id="game-over" template="game-over"></a-route> <a-route id="how-to-play" template="how-to-play"></a-route> <!-- End Routes --> ... <!-- Templates --> <a-template name="controls"></a-template> <!-- End Templates --> ... </a-scene> - We add the router component to the scene.
- Add a-route for each part of the application (scene's frames). One route for the initial screen, another for the playing field, etc.
- We render templates directly through a-templates
- If necessary, we change routes through
this.el.systems.router.changeRoute('game-field');
Note : this example refers to the scene code, so we can call the router system directly. - Set and connect templates, like this:
AFRAME.registerTemplate('game-field', ` <a-sub-assets> <a-asset-item id="glass" src="/assets/models/glass_bottle.gltf"></a-asset-item> ... <audio id="fail" src="/assets/sounds/fail.wav" preload></audio> </a-sub-assets> <a-template name="button" options="text: EXIT; position: 0 1 4; rotation: 0 180 0; event: stop-game"></a-template> <a-entity id="indicator" indicator visible="false" position="0 1 -2" text="align: center; width: 4; color: #00A105; value: -1" ></a-entity> <a-entity game-field-manager></a-entity> `);
Mark: a-sub-assets allow you to load assets as well as a-assets, but only with the difference that there is a default check there and if the asset is already added, it will not be added again when the route is changed.
Mark 2: It is normal to use templates only with the ES6 template string. Otherwise it may turn into “string” + var + “string”, not cool. Kevin, for example, has support for template engines. But why complicate things, isn't it?
Thus, you can create a convenient application structure that will contain the following: components, systems, templates, states, libs . Nothing extra and all on the shelves.
Object Manipulations
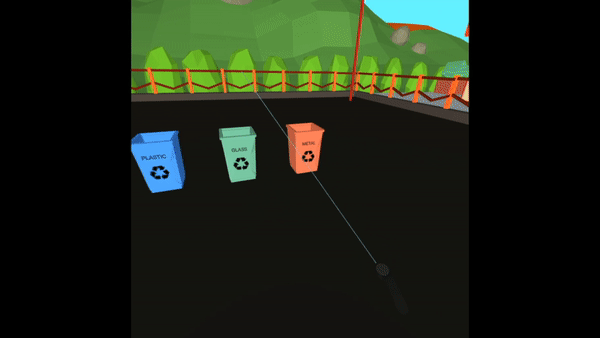
The very first task that had to be solved was the manipulation of objects. I needed a functional like grab - throw. Initially, I started thinking about how to create such a component from scratch. Purely at the philistine level, such thinking is permissible: we have a controller (in the case of a desktop it is a cursor), it has a position. We also have certain objects, for example cubes, they also have a position. Changing the position of the controller, we must change the position of the object. Simply? So, in general, yes, but it does not work. I will name a couple of moments from a very long list to convince you of this:
- The A-Frame cursor is a descendant of a-camera and has relative coordinates;
- The position of the controller is not enough, you need to take into account the orientation, distance to the object, the position of the camera (player);
- For objects with a physical body, this does not work at all, so the coordinates of the geometry are related to the coordinates of the body.
It is good that good Mr. Wil Murphy and his friends made a-frame-super-hands . In fact, this library contains all the necessary components:
- hoverable . Guidance. Point the controller or cursor at the object's collision zone (usually the entire object)
- grabbable : Capture. Grab an object using the appropriate button and drag it
- stretchable : Grabbing with both hands and stretching / squeezing
- draggable \ dropable : Essentially needed to determine the event “the item was thrown to a specific place”
You can find everything you need to set up and connect super-hands in the repository mentioned above. I just want to draw attention to a number of nuances:
- Create separate mixins for right and left hand. Separate components by device type. For example, the right hand, in addition to oculus-touch, vive-controls, windows-motion-controls, can still be oculus-go-controls and gear-vr-controls. Your left hand must be hidden for BP mobile helmets. Each controller must contain both mixin hands and a super-hands component. An example ;
- If you specified objects: .clsname for reycaster, do not forget to add it to each element of which can be taken using the controller, otherwise not one event for super-hands will not work. Of course, if colliderEvent: raycaster-intersection ;
- Dragging with the mouse projects 2d coordinates to the 3d world, so it’s best to use the cursor for the desktop.
Adding physics
Adding physics to a-frame is actually very simple. For this there is a special system . It is added to the scene and voila, the physics are already in your pocket.
<a-scene physics="debug: false"> <a-box dynamic-body position="0 1 -2"></a-box> <a-box id="floor" static-body></a-box> </a-scene> Marking : debug: true enables the ability to view physical bodies attached to the geometry. Convenient when you need to “describe” the object.
In fact, this is a wrapper for cannon.js , which does all the dirty work of comparing geometry and physical bodies for you. Again, about how this system works, you can find in the description of the repository. And I would like to dwell only on one moment that is important for my game.
I needed to make it so that by pressing the button to the trash a certain force was set (the more you hold the button clamped, the greater the force). As it turned out, this task is not so simple as it seems at first glance. So what's so complicated? - you will say, you do applyImpluse and voila. Not really ... It sets the rotation of the object along a vector attached to the center of the body. Using this method, we can only emulate Yula. Although if you set a vector with the correct angle to the plane, something like a push may turn out. But this is not what I needed.
As it turned out, I needed speed (velocities) when setting this parameter, the object begins its movement in a given direction. This direction is set by vector. And here begins the most interesting. How to find this vector? I found two options:
- Get the controller quaternion (or camera for the desktop), which describes its orientation in space. Create a vector V1 = <1,1,1>, multiply it by the force of the throw and apply orientation to all this.
const velocityVector = new THREE.Vector3(1,1,1); velocityVector.multiplyScalar(this.force); velocityVector.applyQuaternion(controllerQuaternion); this.grabbed.body.velocity.set(velocityVector.x, velocityVector.y, velocityVector.z); - Find the position of the controller (cursor) and the position of the object being dropped. Calculate the direction vector by two points. Normalize the vector. And multiply it by force.
const directionX = (trashPosition.x - zeroPosition.x); const directionZ = (trashPosition.z - zeroPosition.z); const vectorsLength = Math.sqrt(Math.pow(directionX, 2) + Math.pow(directionZ, 2)); const x = (directionX / vectorsLength) * this.force; const y = this.force; const z = (directionZ / vectorsLength) * this.force; this.grabbed.body.velocity.set(x , y, z );
I chose the second option because in it I can only count x and z. And you can set it yourself, since I needed a throw in an arc so that the trash thrown into the basket, despite the fact that the user holds the controller.
A few words about the model
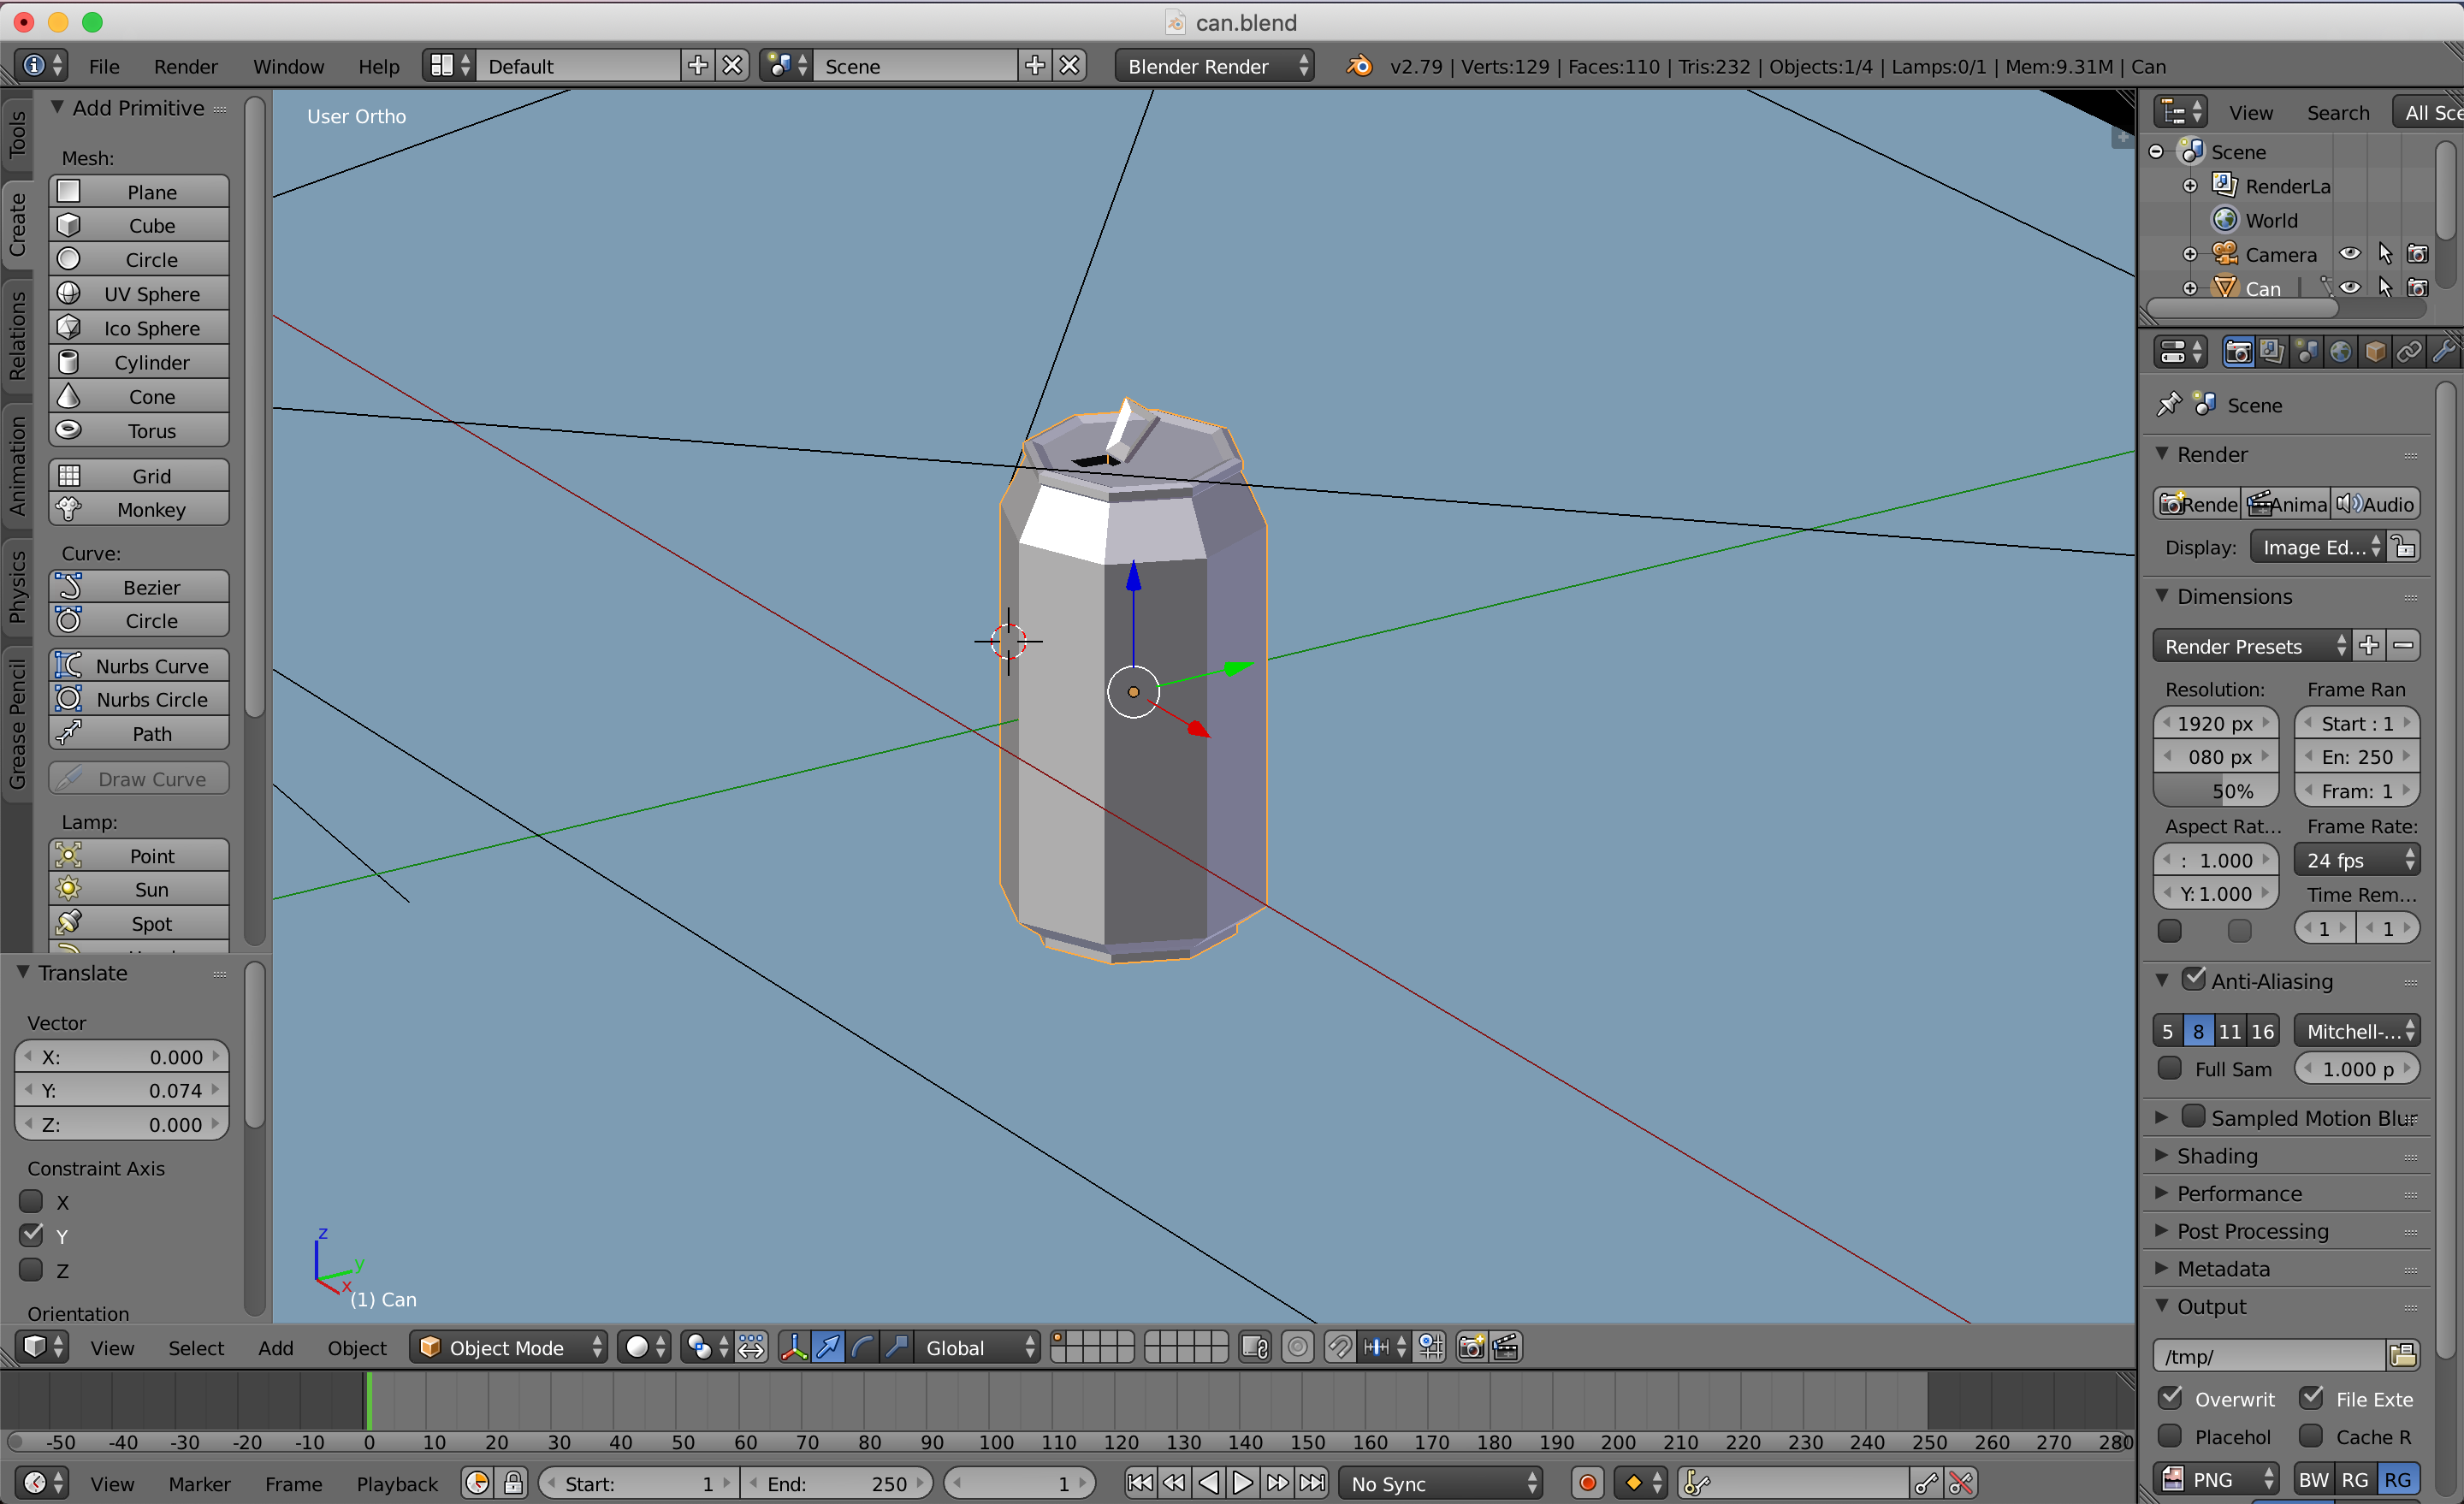
From the very beginning I decided to make a low-poly game. Although WebGL today is capable of rendering relatively complex scenes, its performance is still inferior to advanced libraries, such as DirectX, Vulkan, Mantle, etc. It also all depends on the performance of the user's device. Since I would like to focus on more affordable VR mobile helmets (Oculus Go, Gear VR), I think low-poly is one of the few solutions for creating a VR application or game. Although undoubtedly it all depends on the volume.
Okay, low poly is so low poly, and how to do it all? Everything is very simple, there is a good open source tool - Blender . Believe me, he is capable of much, but for simple tasks he is not quite a bad fit. There are a lot of training materials related to modeling in Blender and it is easy to find them. I just wanted to focus your attention on a number of points related to web development:
- Three-js exporter is outdated. You need to find and put the GLTF exporter . GLTF is a special format designed for the web. And yes, it is JSON.
- GLTF does not support Cycles Renderer so you have to use Blender Renderer. And this means that there will be no steep nodes, color transformations, metal bleach (can be done differently).
- You need to export only the selected item. You do not need extra cameras and lights? File> Export> gltf 2.0. In the left menu Export GLTF 2.0> Export selected only.
- We start the export from position <0, 0, 0> in Blender. It is better to scale there, in order not to use the scale component in a-frame later.
- If you draw an open space like in a recycle! VR, you need to add objects only where theoretically the player can look. Behind the houses behind the Recycle! there are a couple of trees and only in the place where the user can see them. You do not need to overload the scene.
- If you need to change the material of the model, you need to wait until it is loaded, get the model itself to pull all the nodes out of it (GLTF contains information not only about meshes)
e.detail.model.traverse((node) => { if (node.isMesh) { node.material.color = new THREE.Color(someColor); } });
Finally
Thank you all for your attention! Once again, the project repository is available at the following link . Anyone wishing to make something new in this game - you are welcome.
Source: https://habr.com/ru/post/443062/
All Articles