Installing Windows through Windows Deployment Services and Microsoft Deployment Toolkit
As it was written in one smart book - if your IT department does not have an automated installation of the operating system, then creating it may be the most important task you have ever performed.
For MDT to work, you must:
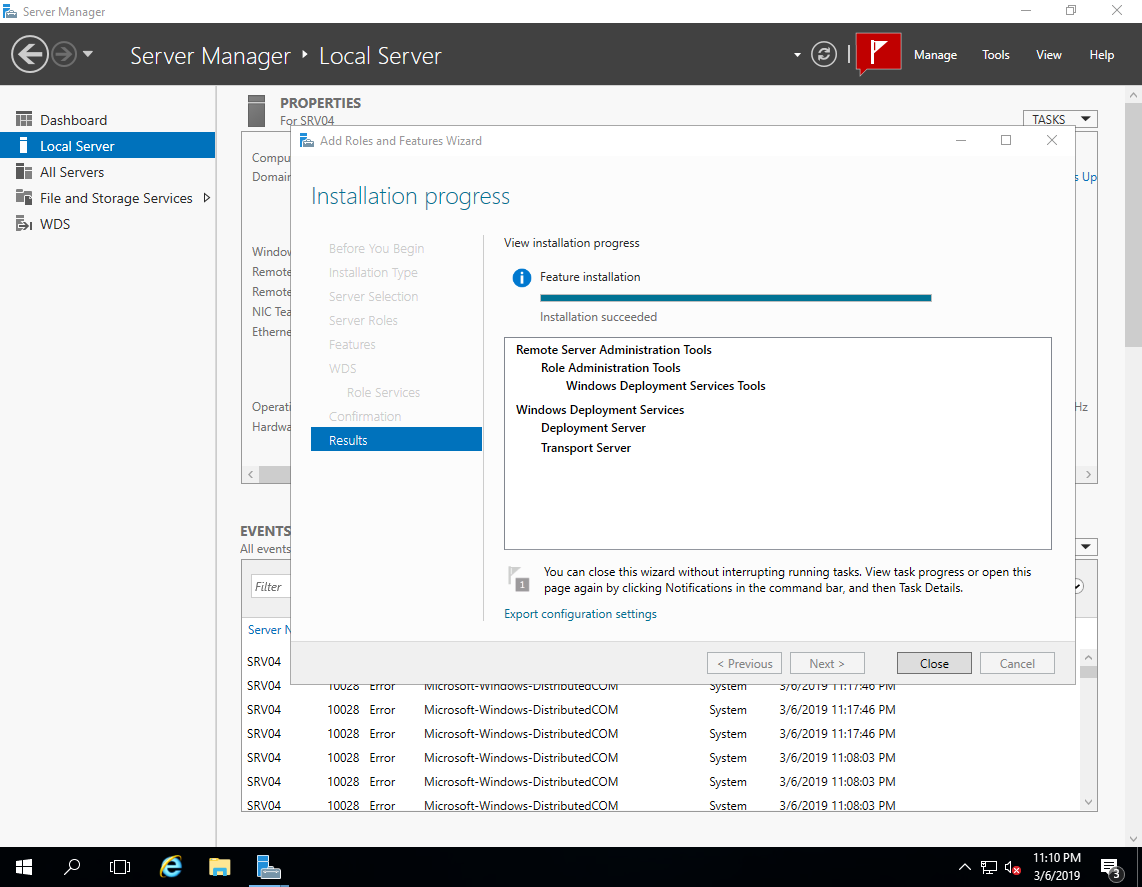
On the server, enable the WDS role.

')
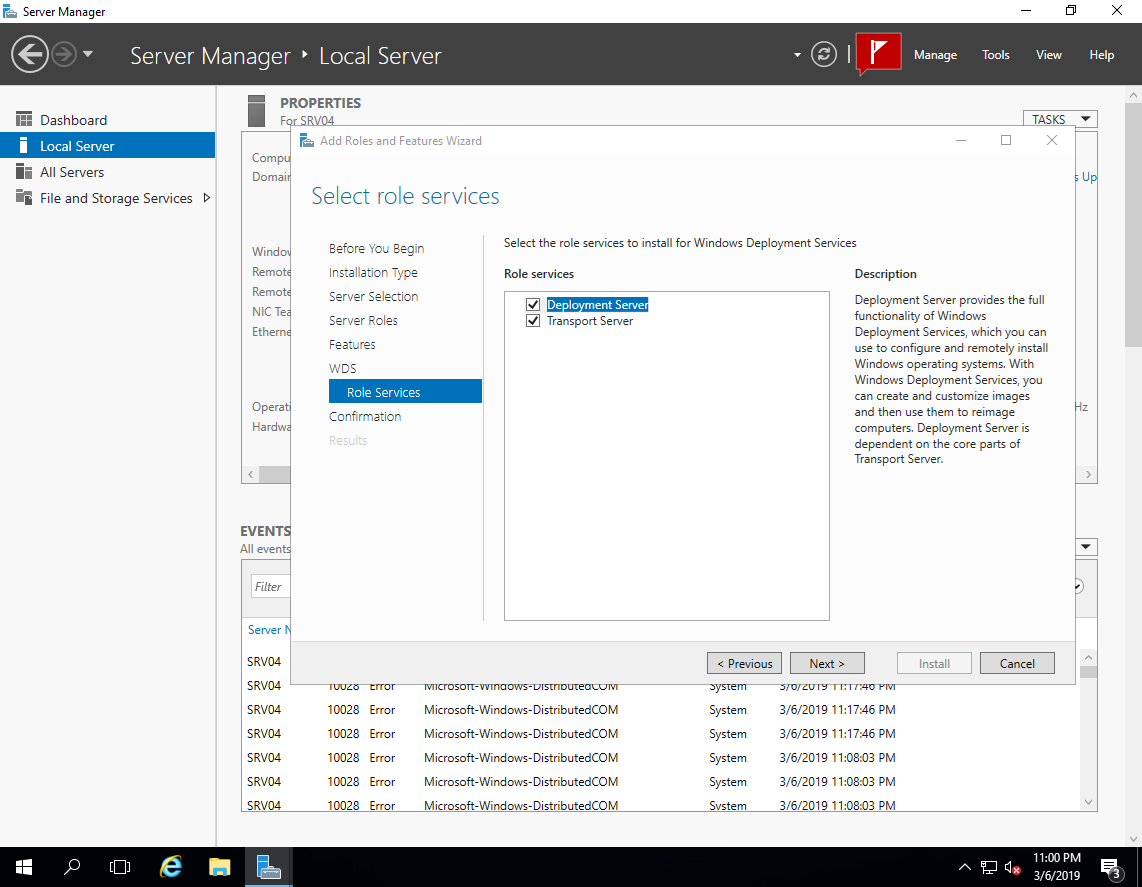
From the official site we download and install the Windows Assessment and Deployment Kit (ADK) :
1) Download the Windows ADK for Windows 10, version 1809 (possibly newer)
2) Download the Windows PE add-on for the ADK
Note for installation:

Also download and install the Microsoft Deployment Toolkit (MDT)
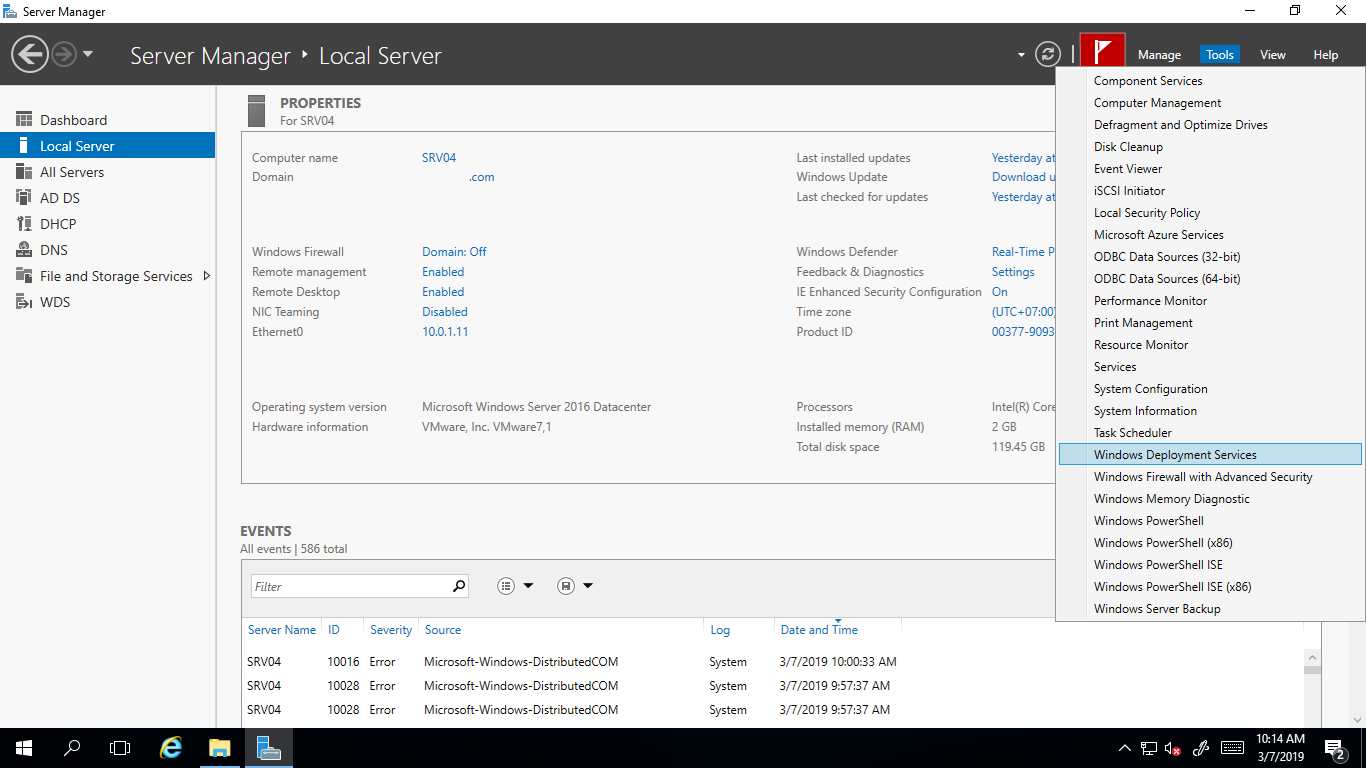
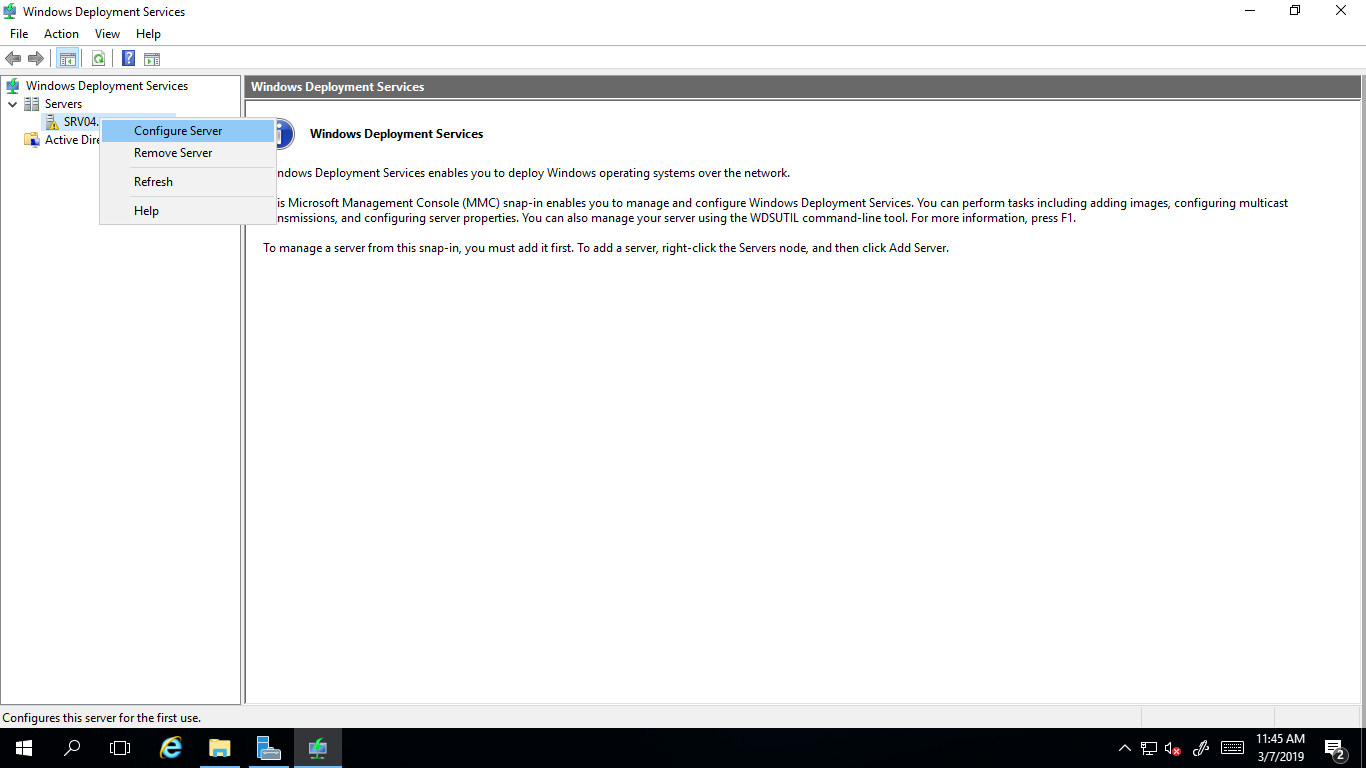
Open the WDS console
Run the configuration.
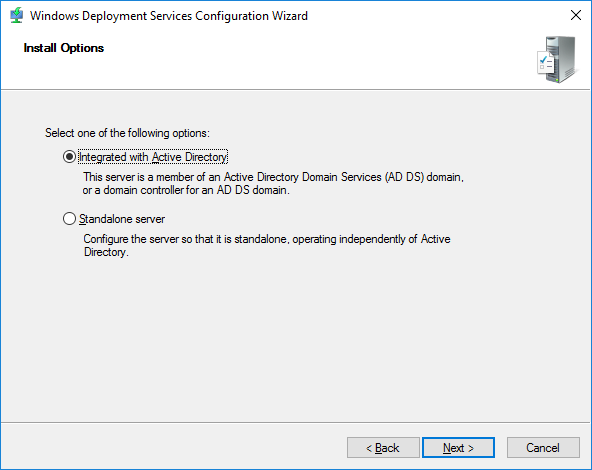
In the setup wizard, we select integration with the domain.
We set the WDS service folder.

In the next step, you can choose which computers the WDS server will respond to:

We complete the initial setup process. We have the following folder structure:
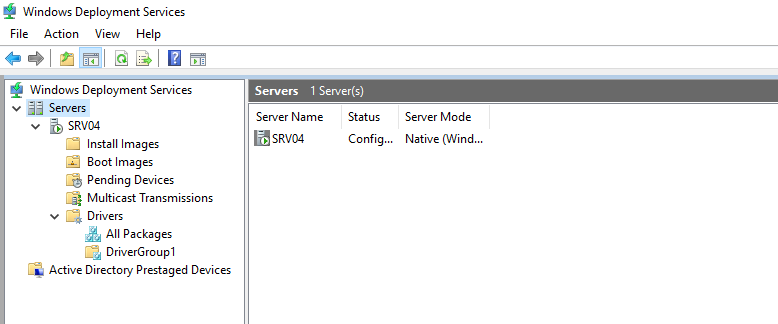
WDS we need only to connect and transfer images, so without a detailed explanation:
Install Images - installation images (do not use);
Boot Images - boot images (add created in MDT);
Pending Devices - devices appear requesting a connection if the option "requires administrator confirmation" is enabled.
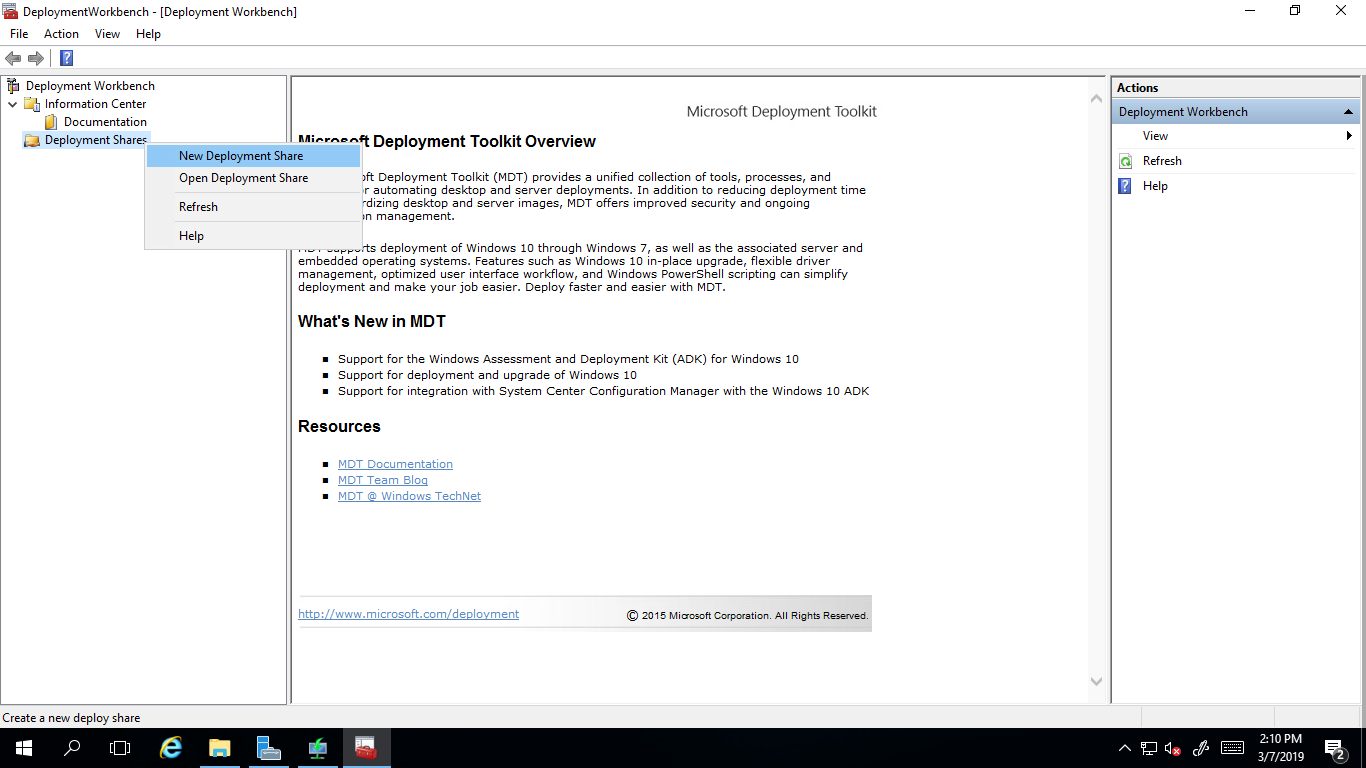
To configure MDT, launch its console. Microsoft Deployment Toolkit -> Deployment Workbench .

Add a new DeploymentShare . It will store all files for installation.

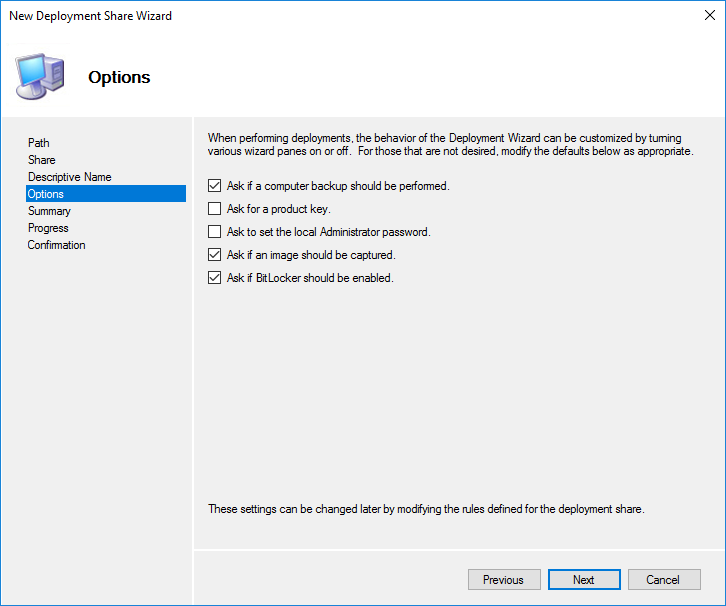
The following options relate to the installation process and can be changed later.
At the final stage, the creation process will start, which should be successful.
The shared folder E: \ DeploymentShare $ can be transferred to other servers by simple copying. Disconnection and connection is carried out in the MDT console.
Applications - applications that are installed on the operating system;
Operating Systems - operating systems available for the boot image;
Out-of-box drivers - drivers (.inf);
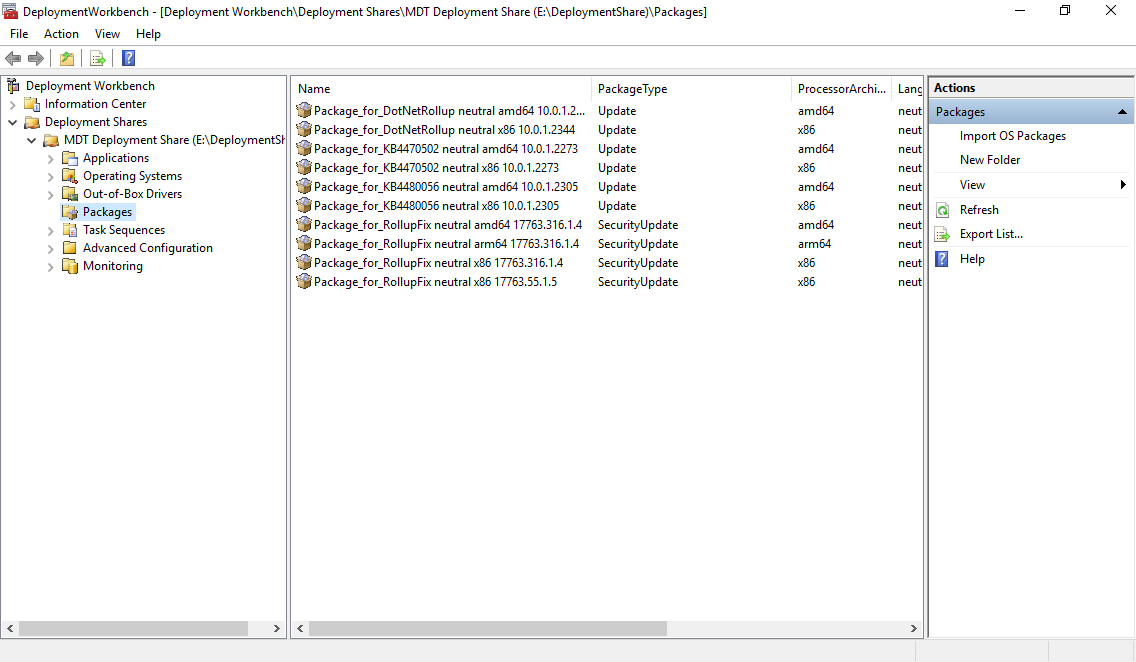
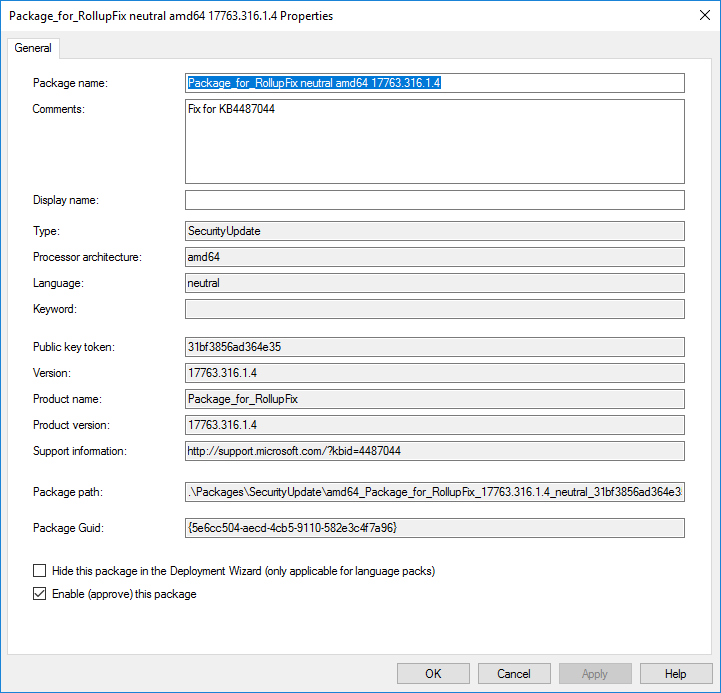
Packages - security update packages, service, language, etc. (.cab and .msu);
Task Sequences - installation task sequence;
Selection Profiles - logical grouping of content;
Linked Deployment Shares - other connected DeploymentShare from other servers;
Monitoring - when this option is enabled, the installation progress on clients is displayed.

Open the properties of our balls MDT Deployment Share . On the General tab, you can choose for which platforms to create .wim files from which you can later boot.
The Rules tab configures the MDT automation configuration files. The window itself displays the text of the file . \ Control \ CustomSettings.ini , and under the Edit Bootstrap.ini button, the file . \ Control \ Bootstrap.ini .
CustomSettings.ini - is located on the server and hides the steps of the installation menu, and also defines some installation parameters.
Bootstrap.ini is located in the boot image and defines the parameters for connecting to DeploymentShare.

. \ Control \ CustomSettings.ini
Time Zone List
. \ Control \ Bootstrap.ini
On the Windows PE tab , the creation of boot images is configured. You can disable the creation of a .wim file on the first tab, but select the file on the third .iso file if we need it. Now I left only the x64 platform. The second item Generate a Lite Touch bootable ISO image is needed if we need a bootable ISO file that we could write to a USB flash drive or disk and boot from it. Scratch space size - the size of the memory in megabytes allocated for scripts and installer commands.
On the Features tab, we can add any components to the boot image. On the Drivers and Patches tab, it is better to select the Selection profile with network drivers created especially for the boot image.
On the next Monitoring tab, we enable the option to start receiving logs from clients during the installation and display the status in the Monitoring folder.
In accordance with our security policy, we add permissions to reading the DeploymentShare $ directory and this is the end of the simple MDT configuration.

In the context menu of the Applications folder, select New Application .

Add Google Chrome.
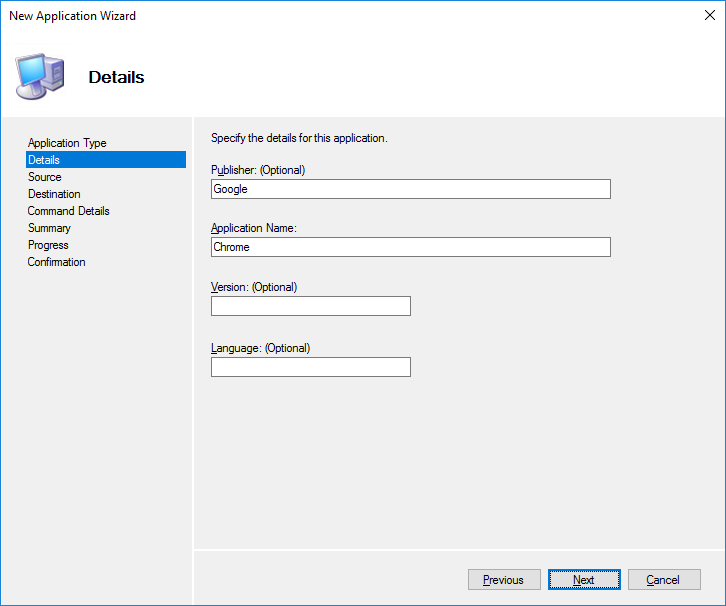
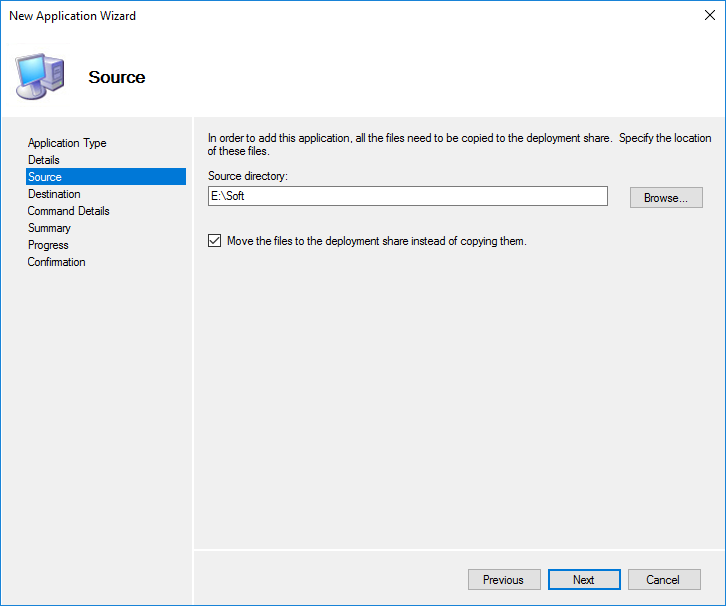
Download Standalone Enterprise on 64 bits and save to a separate temporary folder, for example, E: \ Soft . Specify where the program is located and select the option so that all the content has been moved to a new folder.
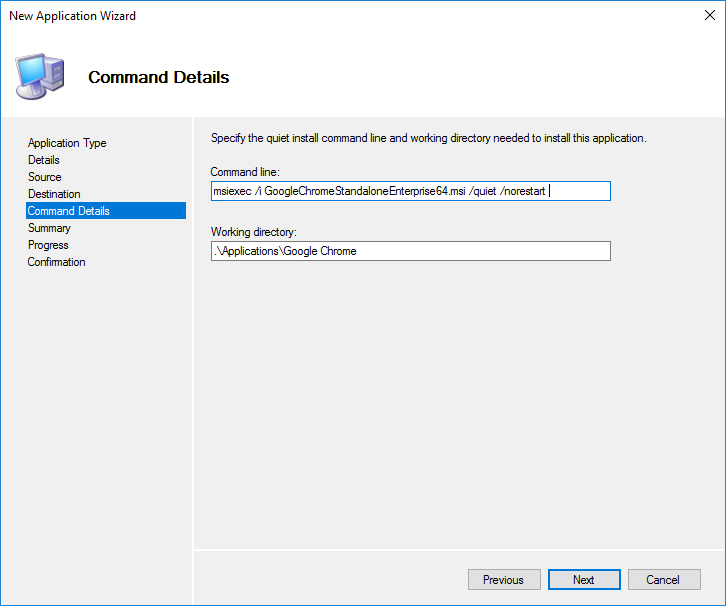
Next, we compose a command to silently install this application and fill in the appropriate field.

By analogy, we add all the software we need.
When switching to the properties of an imported application on the General tab, you can edit previously filled parameters, hide from the application selection list during installation (if you want to install through a task, for example) and disable this application in MDT altogether if you want to exclude its use in the installation but do not want delete (for example, testing or updating).
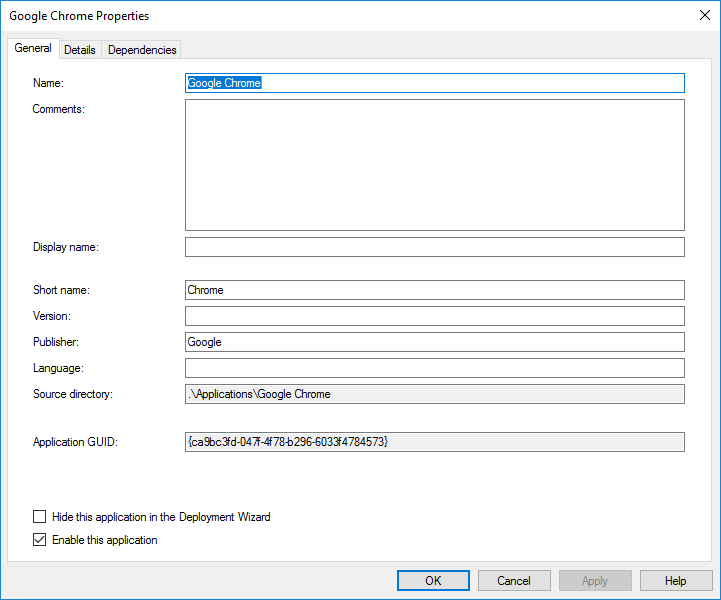
On the Details tab, you can change the settings you have made, make it necessary to reboot after installation and allow launching only on the selected platforms.
The last tab Dependencies shows the dependencies. If the application needs some additional installation, then their order is indicated here. Only after installing the dependencies will install the main application. The software specified in the list must be imported in advance.
Add operating system to the folder Operating Systems . I have a .wim file with Windows 10 Pro x64.


Rename to a more convenient look.

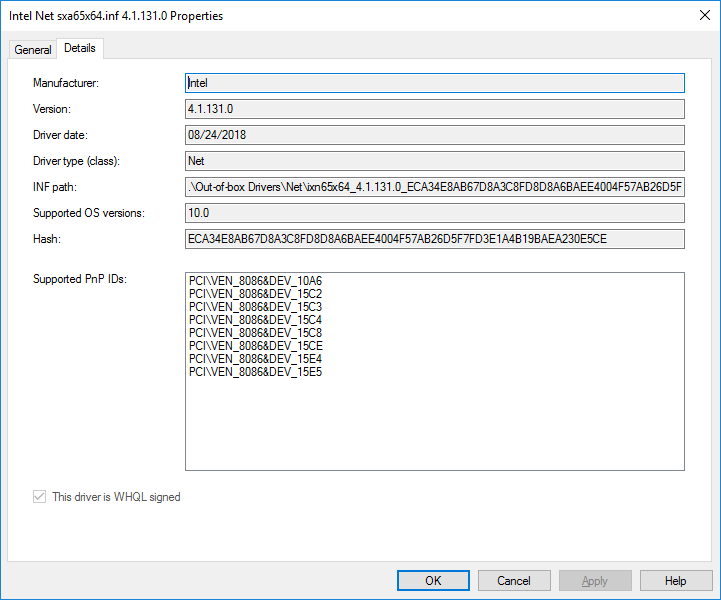
For example, import drivers for Intel network cards. It should immediately be noted that any archives must be unpacked. MDT automatically searches for the specified .inf files in the specified directory.


It is advisable to create subfolders for the separation of manufacturers and models of computer equipment. We should also highlight the drivers for network cards and disks for the boot image using Selection Profiles .
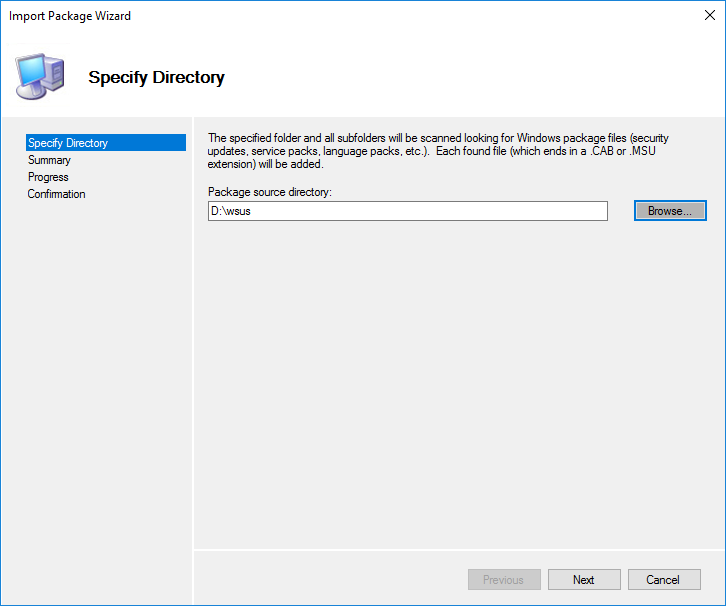
If there is WSUS , then you can point to the folder with its location and all packages will be found automatically (from the found ones, sort by Selection Profiles ). If not, you must manually download the packages and specify their location.
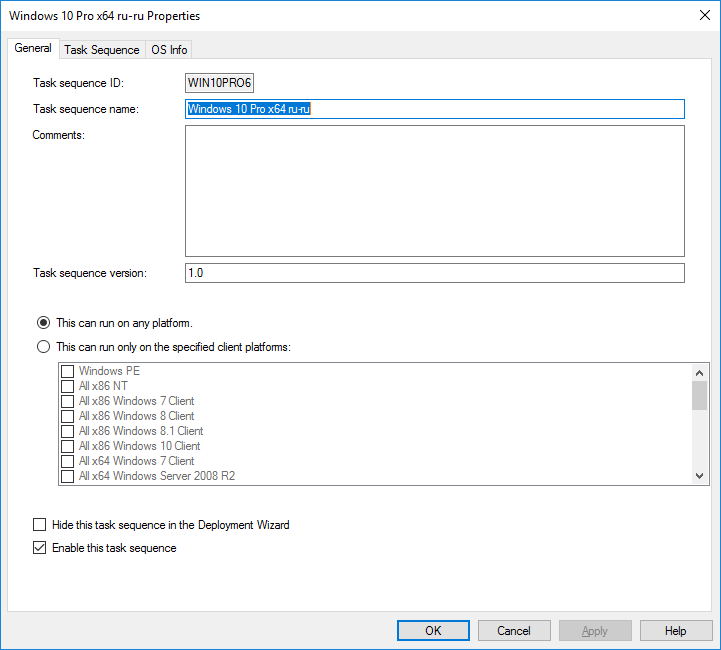
Task Sequences is a task sequence for installation. You can add, remove, or change installation steps. On the first page when adding is set ID and the name.

A template is selected.

The choice of operating system from previously added.

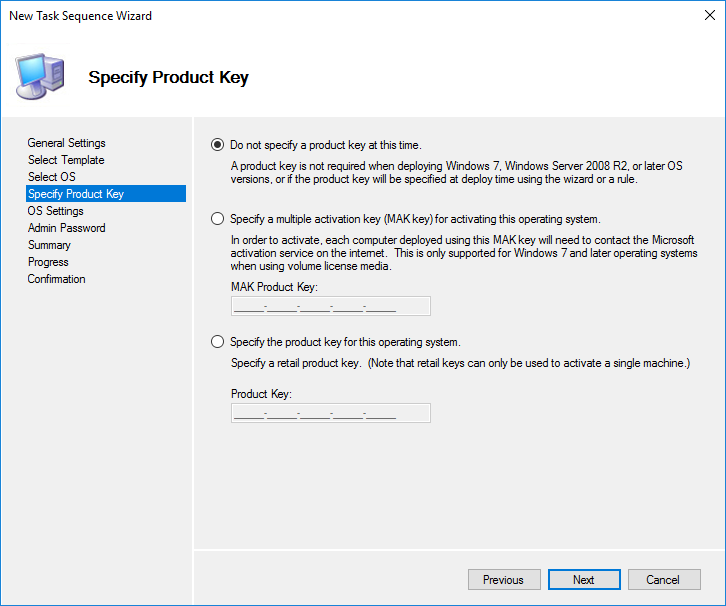
Enter license keys. The key will be specified after or during installation, therefore it is not specified.
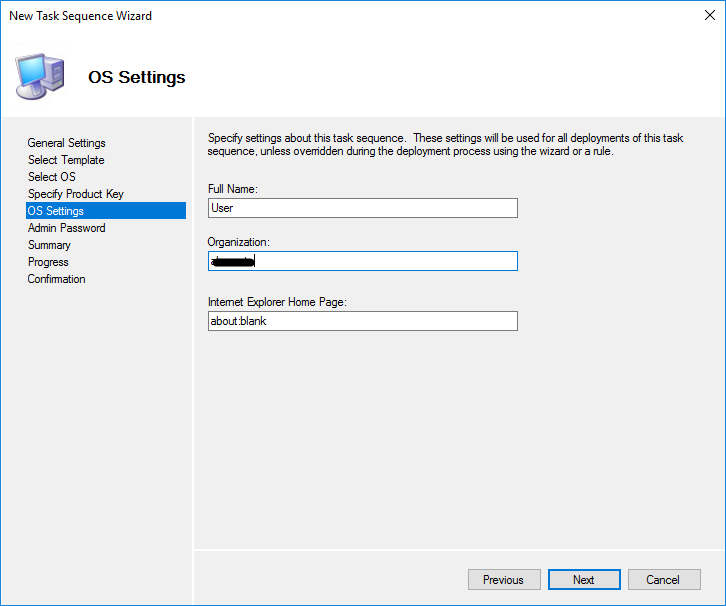
Enter user name and organization name.
The password of the future local administrator.

After creation, you can similarly view its properties and make changes.
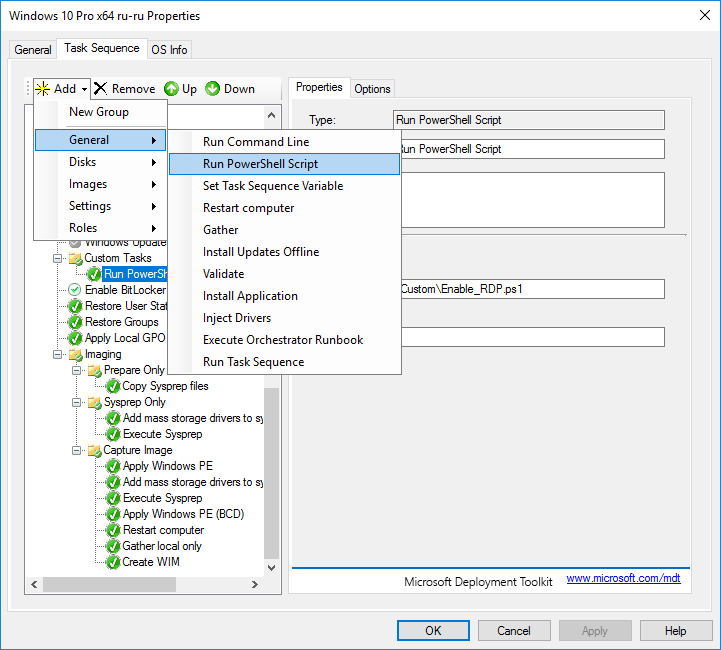
The Task Sequence tab describes the entire installation process. The sequence must be changed to fit your needs.

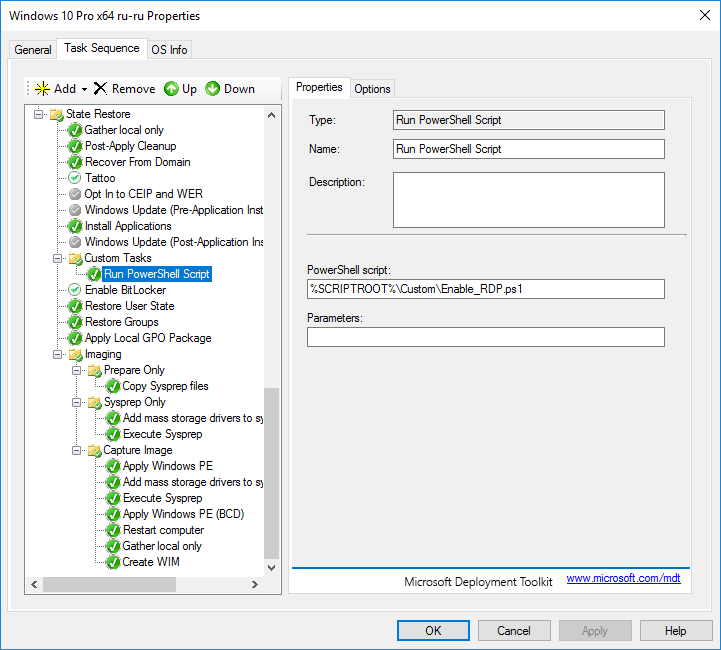
For example, I will add a script that includes the ability to connect via RDP. it is disabled by default after installation.
A script on the Enable_RDP.ps1 PowerShell was created in the folder . \ Scripts \ Custom :
Next, select the desired place in this order and add a new item.
On the Options tab, we can disable the execution of this step and enable the continuation of the installation if an error occurs at this step. In the same place additional necessary conditions for performance of this step are added.
I recommend to study in more detail the capabilities of different types of tasks. After you finish editing the sequence, you can start creating boot images.
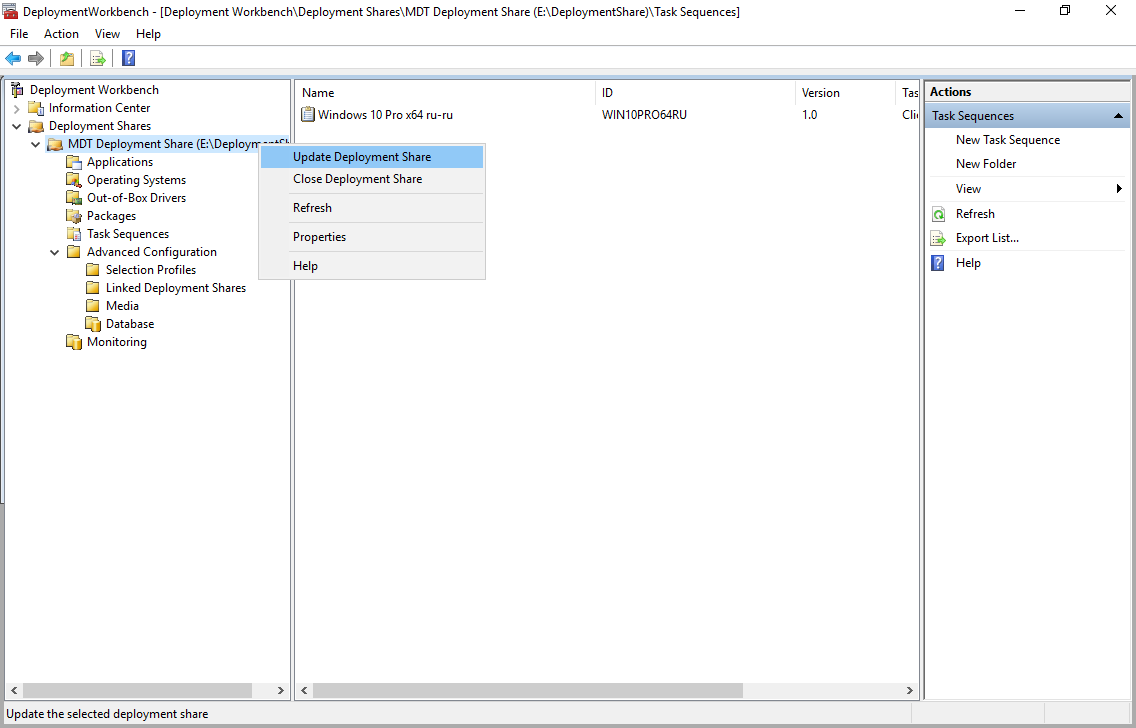
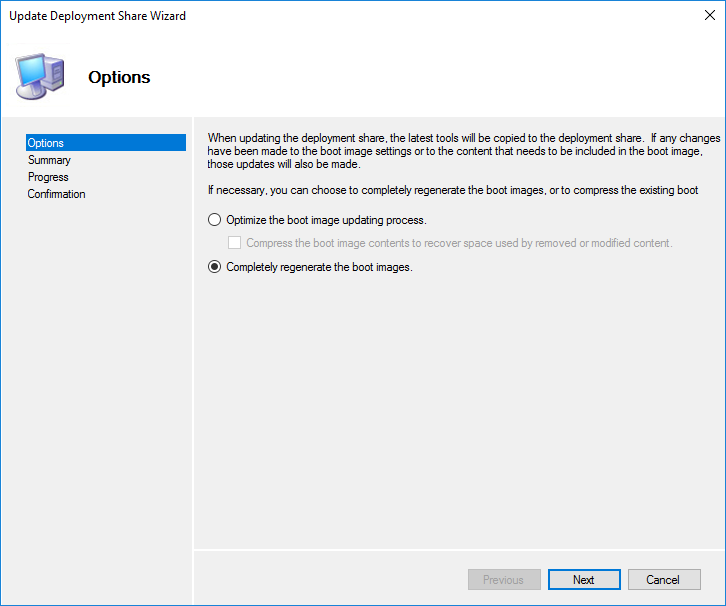
To create images, select the second item.
You must perform the update DeploymentShare after:
Go to the WDS console and add the created boot image to the Boot Images folder. WDS copies this image to its working directory.

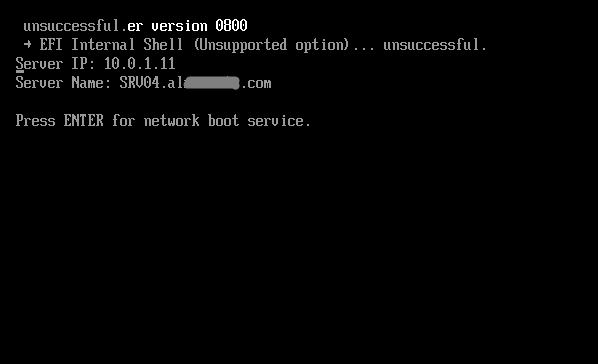
We configure on the test computer network boot. WDS server is automatically detected. By default, the computer waits for F12 to continue the download. This setting is changed in the properties of the WDS server on the Boot tab.
Most of the settings have been defined in the configuration files, it remains to fill in the missing. Select the available Task Sequences.

Set the computer name.
This setting allows you to save user profiles. We have a clean installation, so leave as is.
You can and restore from anywhere.
Choose the necessary software.

Further installation is done automatically.
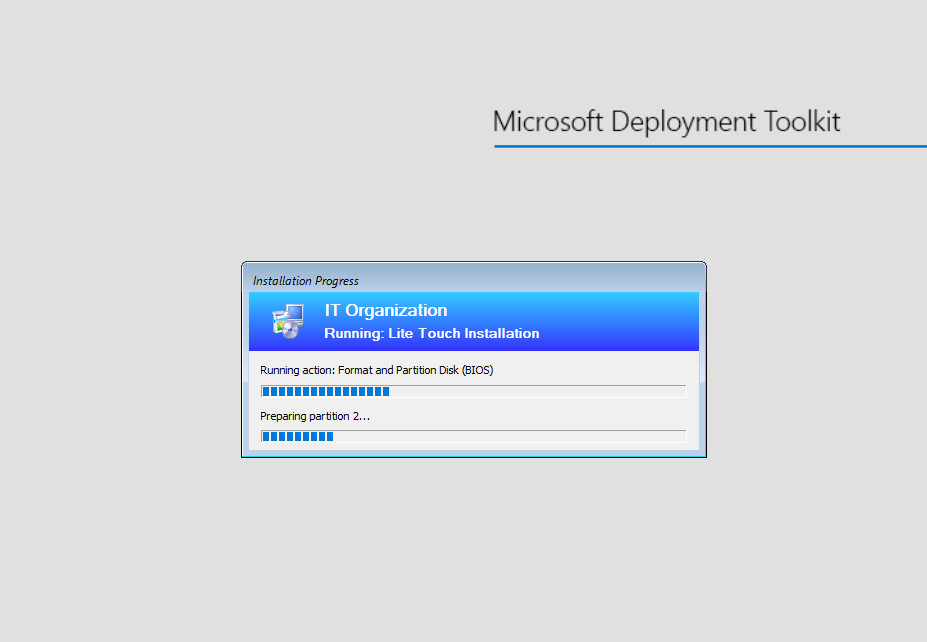
With monitoring enabled, the progress of the installation process can be monitored via the console.

In the end, having spent a couple of minutes of our time (not counting the installation) on booting over the network and entering the remaining settings, we get a ready-to-work operating system that meets our requirements. The complexity of the final result is determined in advance, therefore, it does not make much sense.
The obvious advantages of automation:
Full official MDT documentation
For MDT to work, you must:
- WDS
- Windows ADK
- Powershell
- .net Framework
- DHCP
Plan
- Add a Windows Deployment Services (WDS) role to the server;
- Download and install the necessary components on the server;
- Launch and configure WDS;
- Launch and configure MDT;
- Import applications;
- Import installation images;
- Import drivers;
- Import packages;
- Creating tasks;
- Testing.
Add Windows Deployment Services (WDS) Role to Server
On the server, enable the WDS role.
')
Download and install the necessary components on the server
From the official site we download and install the Windows Assessment and Deployment Kit (ADK) :
1) Download the Windows ADK for Windows 10, version 1809 (possibly newer)
2) Download the Windows PE add-on for the ADK
Note for installation:
- Deployment Tools
- Imaging And Configuration Designer
- Configuration Designer
- User State Migration Tools
Also download and install the Microsoft Deployment Toolkit (MDT)
Starting and configuring WDS
Open the WDS console
Run the configuration.
In the setup wizard, we select integration with the domain.
We set the WDS service folder.
In the next step, you can choose which computers the WDS server will respond to:
- Do not respond to anyone - you can turn off the server while setting up or testing, for example, so that users do not receive possible conflicts during installation.
- Answer only known computers - the list is compiled in the console and if there is no entry for the computer address, it will not be able to work with the server.
- Answer all clients - all computers will receive the answer. If you set the checkbox below, when accessing unknown devices (not recorded earlier) in the console, a record appears that a certain computer with a specific address requests a connection. You can reject or accept and the process will continue. Later these settings can be changed in the WDS console.
We complete the initial setup process. We have the following folder structure:
WDS we need only to connect and transfer images, so without a detailed explanation:
Install Images - installation images (do not use);
Boot Images - boot images (add created in MDT);
Pending Devices - devices appear requesting a connection if the option "requires administrator confirmation" is enabled.
Running and configuring MDT
To configure MDT, launch its console. Microsoft Deployment Toolkit -> Deployment Workbench .
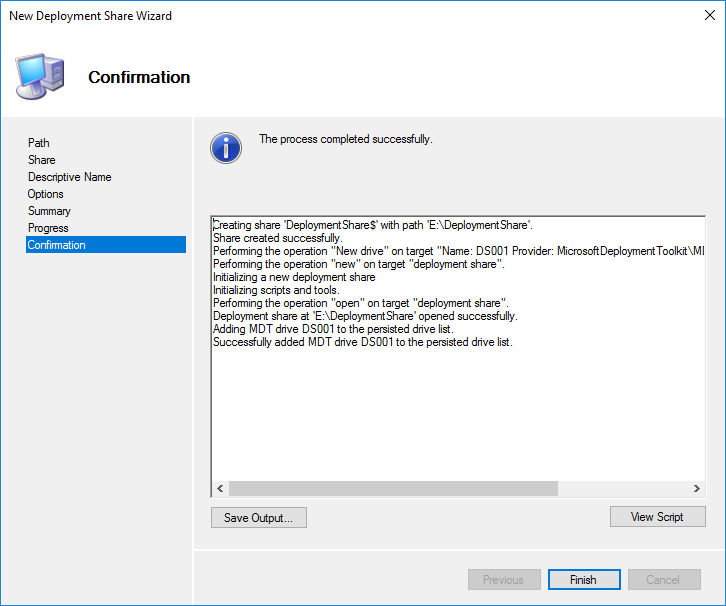
Add a new DeploymentShare . It will store all files for installation.
The following options relate to the installation process and can be changed later.
At the final stage, the creation process will start, which should be successful.
The shared folder E: \ DeploymentShare $ can be transferred to other servers by simple copying. Disconnection and connection is carried out in the MDT console.
Applications - applications that are installed on the operating system;
Operating Systems - operating systems available for the boot image;
Out-of-box drivers - drivers (.inf);
Packages - security update packages, service, language, etc. (.cab and .msu);
Task Sequences - installation task sequence;
Selection Profiles - logical grouping of content;
Linked Deployment Shares - other connected DeploymentShare from other servers;
Monitoring - when this option is enabled, the installation progress on clients is displayed.
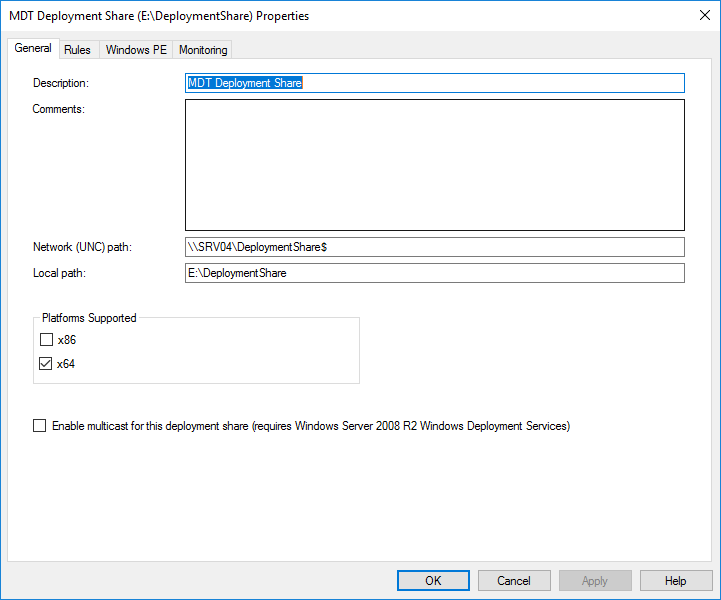
Open the properties of our balls MDT Deployment Share . On the General tab, you can choose for which platforms to create .wim files from which you can later boot.
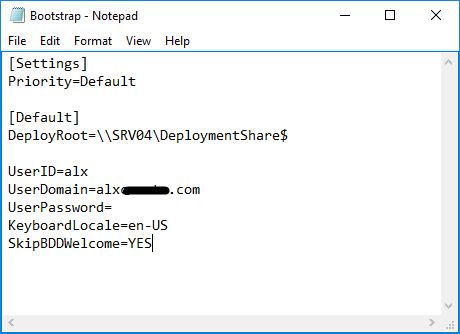
The Rules tab configures the MDT automation configuration files. The window itself displays the text of the file . \ Control \ CustomSettings.ini , and under the Edit Bootstrap.ini button, the file . \ Control \ Bootstrap.ini .
CustomSettings.ini - is located on the server and hides the steps of the installation menu, and also defines some installation parameters.
Bootstrap.ini is located in the boot image and defines the parameters for connecting to DeploymentShare.
. \ Control \ CustomSettings.ini
OSInstall=Y // JoinDomain=alx*.com // DomainAdmin=alx - DomainAdminDomain=alx*.com // DomainAdminPassword= // AdminPassword= // HideShell=YES // Shell SkipUserData=NO // ( ) TimeZoneName=N. Central Asia Standard Time // SkipTimeZone=YES // UILanguage=ru-RU // UserLocale=ru-RU // SkipLocaleSelection=YES // SystemLocale=ru-RU // non-Unicode SkipCapture=YES // SkipComputerName=NO // SkipDomainMembership=YES // SkipAdminPassword=YES // SkipProductKey=YES // SkipComputerBackup=YES // SkipBitLocker=YES // BitLocker SkipSummary=YES // EventService=http://SRV04:9800 // Time Zone List
. \ Control \ Bootstrap.ini
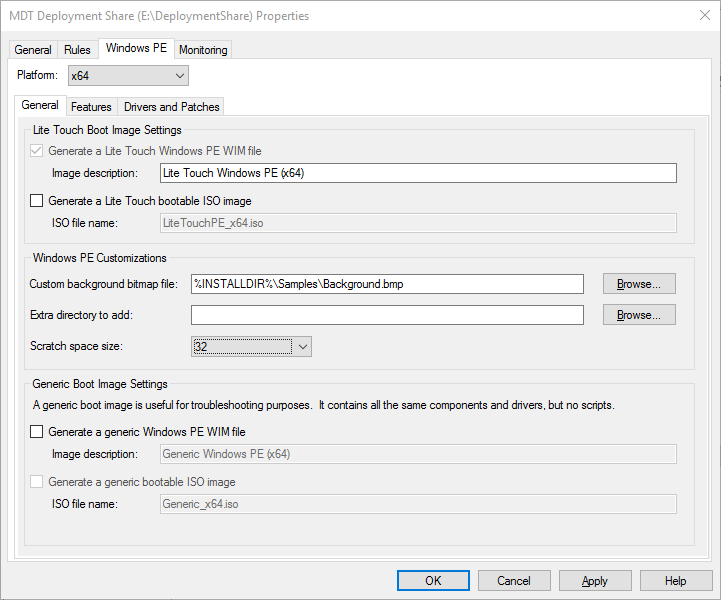
[Settings] Priority=Default [Default] DeployRoot=\\SRV04\DeploymentShare$ UserID=alx // Deployment Share UserDomain=alx*.com // UserPassword= // KeyboardLocale=en-US // SkipBDDWelcome=YES // On the Windows PE tab , the creation of boot images is configured. You can disable the creation of a .wim file on the first tab, but select the file on the third .iso file if we need it. Now I left only the x64 platform. The second item Generate a Lite Touch bootable ISO image is needed if we need a bootable ISO file that we could write to a USB flash drive or disk and boot from it. Scratch space size - the size of the memory in megabytes allocated for scripts and installer commands.
On the Features tab, we can add any components to the boot image. On the Drivers and Patches tab, it is better to select the Selection profile with network drivers created especially for the boot image.
On the next Monitoring tab, we enable the option to start receiving logs from clients during the installation and display the status in the Monitoring folder.
In accordance with our security policy, we add permissions to reading the DeploymentShare $ directory and this is the end of the simple MDT configuration.
Import Applications
In the context menu of the Applications folder, select New Application .
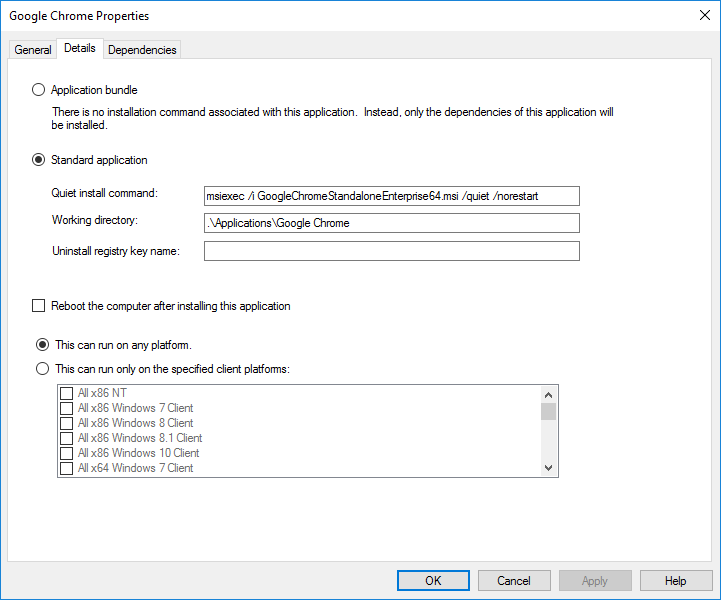
Add Google Chrome.
Download Standalone Enterprise on 64 bits and save to a separate temporary folder, for example, E: \ Soft . Specify where the program is located and select the option so that all the content has been moved to a new folder.
Next, we compose a command to silently install this application and fill in the appropriate field.
By analogy, we add all the software we need.
When switching to the properties of an imported application on the General tab, you can edit previously filled parameters, hide from the application selection list during installation (if you want to install through a task, for example) and disable this application in MDT altogether if you want to exclude its use in the installation but do not want delete (for example, testing or updating).
On the Details tab, you can change the settings you have made, make it necessary to reboot after installation and allow launching only on the selected platforms.
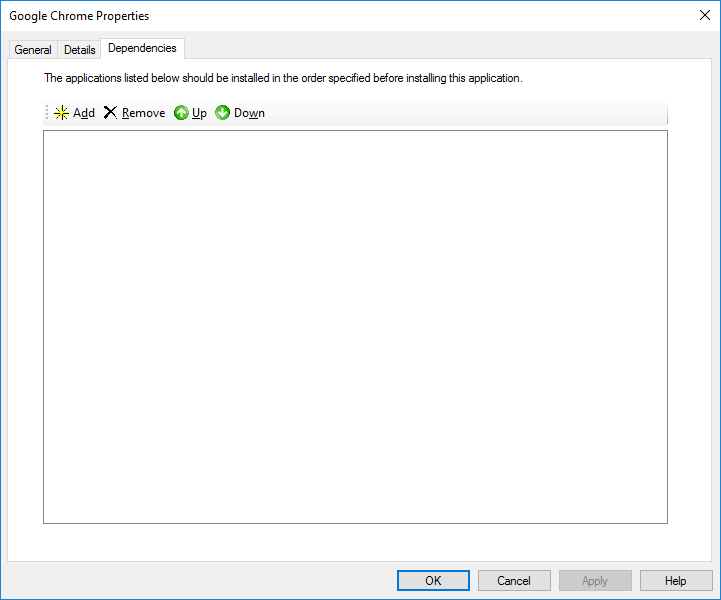
The last tab Dependencies shows the dependencies. If the application needs some additional installation, then their order is indicated here. Only after installing the dependencies will install the main application. The software specified in the list must be imported in advance.
Import Installation Images
Add operating system to the folder Operating Systems . I have a .wim file with Windows 10 Pro x64.
Why .wim?
There are no licenses for LTSC, only Pro. Therefore, with the release of the new version, it is necessary to download the current Windows 10 and use the MSMG ToolKit to clean the pre-installed ... program. The output is .iso with a nested .wim.
Rename to a more convenient look.
Import drivers
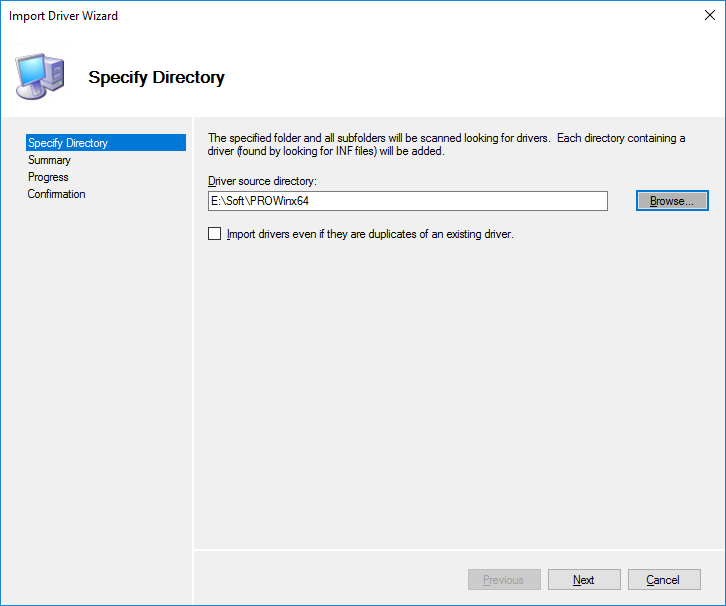
For example, import drivers for Intel network cards. It should immediately be noted that any archives must be unpacked. MDT automatically searches for the specified .inf files in the specified directory.
It is advisable to create subfolders for the separation of manufacturers and models of computer equipment. We should also highlight the drivers for network cards and disks for the boot image using Selection Profiles .
Import packages
If there is WSUS , then you can point to the folder with its location and all packages will be found automatically (from the found ones, sort by Selection Profiles ). If not, you must manually download the packages and specify their location.
Creating tasks
Task Sequences is a task sequence for installation. You can add, remove, or change installation steps. On the first page when adding is set ID and the name.
A template is selected.
The choice of operating system from previously added.
Enter license keys. The key will be specified after or during installation, therefore it is not specified.
Enter user name and organization name.
The password of the future local administrator.
After creation, you can similarly view its properties and make changes.
The Task Sequence tab describes the entire installation process. The sequence must be changed to fit your needs.
For example, I will add a script that includes the ability to connect via RDP. it is disabled by default after installation.
A script on the Enable_RDP.ps1 PowerShell was created in the folder . \ Scripts \ Custom :
(Get-WmiObject Win32_TerminalServiceSetting -Namespace root\cimv2\TerminalServices).SetAllowTsConnections(1,1) (Get-WmiObject -Class "Win32_TSGeneralSetting" -Namespace root\cimv2\TerminalServices -Filter "TerminalName='RDP-tcp'").SetUserAuthenticationRequired(1) Enable-NetFirewallRule -DisplayGroup "Remote Desktop" Next, select the desired place in this order and add a new item.
On the Options tab, we can disable the execution of this step and enable the continuation of the installation if an error occurs at this step. In the same place additional necessary conditions for performance of this step are added.
I recommend to study in more detail the capabilities of different types of tasks. After you finish editing the sequence, you can start creating boot images.
To create images, select the second item.
You must perform the update DeploymentShare after:
- updates of boot drivers (network cards and disk drives);
- Add components to the boot image
- change the boot image settings;
- Windows version update ADK;
- changes to bootrstrap.ini;
- change files "extra" directory.
Go to the WDS console and add the created boot image to the Boot Images folder. WDS copies this image to its working directory.
Testing
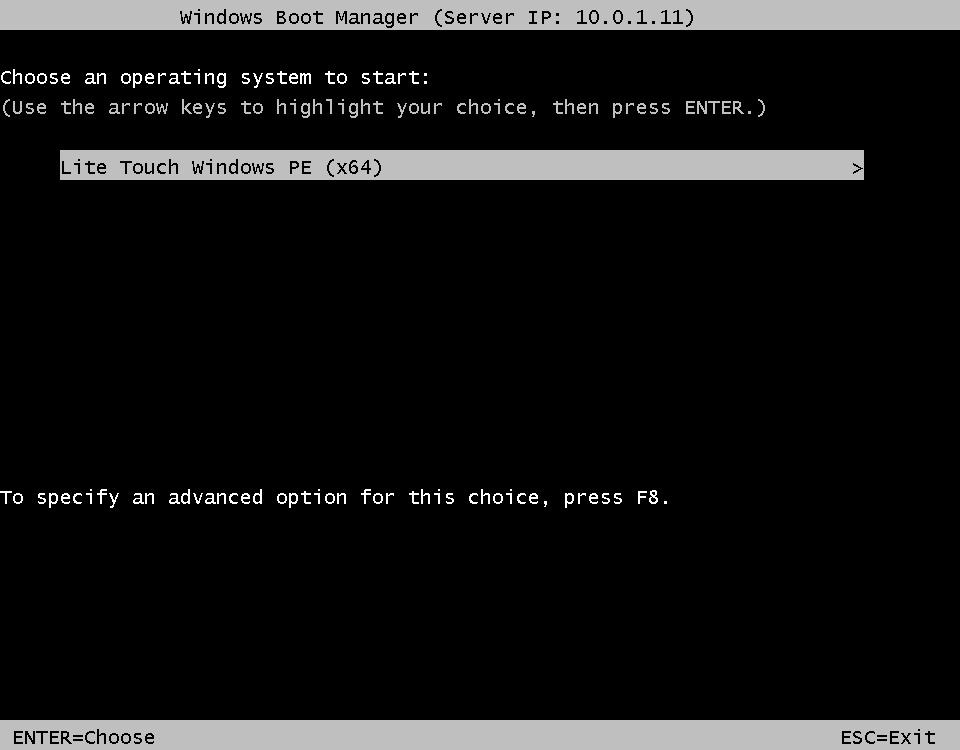
We configure on the test computer network boot. WDS server is automatically detected. By default, the computer waits for F12 to continue the download. This setting is changed in the properties of the WDS server on the Boot tab.
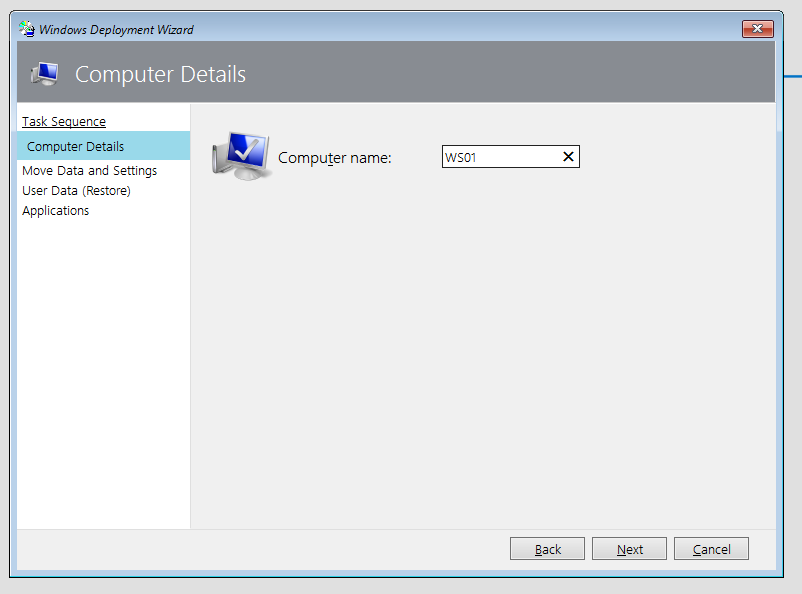
Most of the settings have been defined in the configuration files, it remains to fill in the missing. Select the available Task Sequences.
Set the computer name.
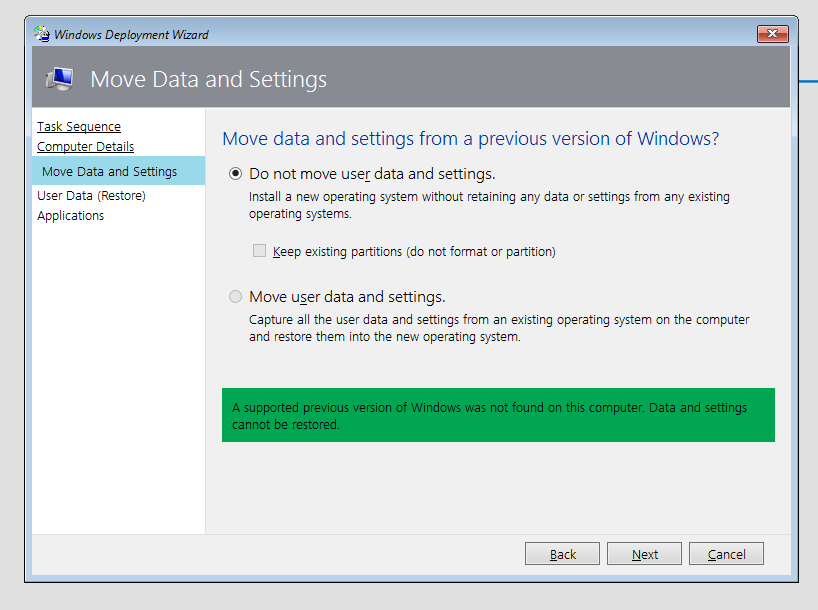
This setting allows you to save user profiles. We have a clean installation, so leave as is.
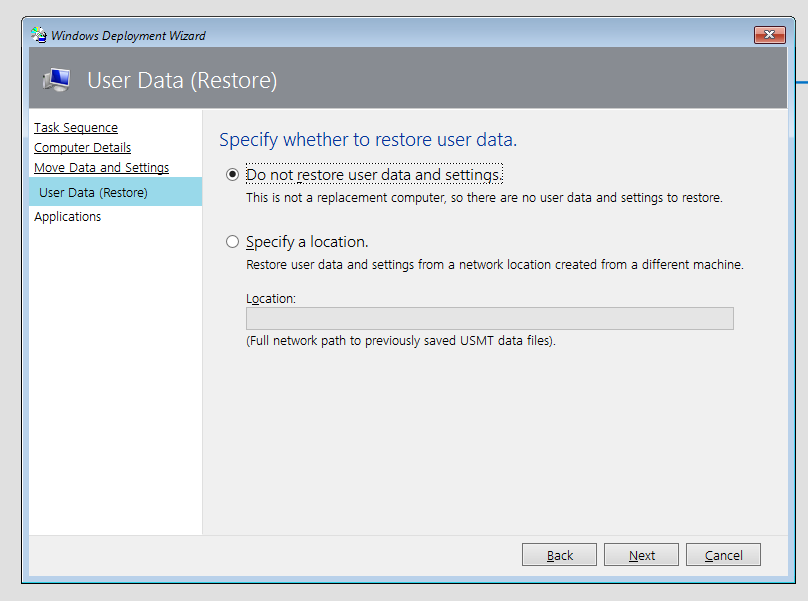
You can and restore from anywhere.
Choose the necessary software.
Further installation is done automatically.
With monitoring enabled, the progress of the installation process can be monitored via the console.
In the end, having spent a couple of minutes of our time (not counting the installation) on booting over the network and entering the remaining settings, we get a ready-to-work operating system that meets our requirements. The complexity of the final result is determined in advance, therefore, it does not make much sense.
The obvious advantages of automation:
- Save your time. During the installation we can do interesting things.
- Uniformity of installed systems.
- Less waiting time than it would be done manually.
- The ability to change individual elements with changes, rather than reassemble the entire image.
Full official MDT documentation
Source: https://habr.com/ru/post/442834/
All Articles