What to collect and how to build a C ++ project
Asking this question, I, first of all, formulated the requirements: hard and optional (but desirable) for the build system and the graphical development environment.
At once I want to note that we are talking about writing C ++ code not for some specific platform such as Android or a framework, for example Qt, - where everything is already ready, both with the construction and editing the code, and about generic code not tied to a specific platform or framework
In the light of these "hotelok" I reviewed several build systems and graphical development environments. This small review does not in any way pretend to be complete and contains my subjective assessments, but perhaps it will seem useful to someone as an initial stage.
Make - [antiquity] mastodon and honored veteran of the assembly systems, which everyone still does not want to let go of retirement, and forced to carry on himself more and more new projects. This is a very low-level tool with its own specific language, where, for a space instead of a tab, you are immediately threatened with execution on the spot. With make, you can do anything you want - a build of any complexity, but you have to pay for it with your efforts to write the script and keep it up to date. Transferring the build logic from project to project will also be expensive. There are some modern "substitutes" make-a: like ninja and jam, but essentially they do not change - this is a very low-level tools. Just as in the assembler, you can write anything you like, but is it worth it?
CMake - [Middle Ages] the first attempt to get away from the low-level details of the make. But, unfortunately, it was not possible to go far - the engine here is the same make for which CMake generates huge make-files based on another text file with a more high-level description of the build. Qmake works in a similar way. This approach reminds me of the beautiful facade of an old wooden house, which we carefully lined up with fresh plastic. CMake is a stable and well-proven system, there is even built-in integration with Eclipse, but, unfortunately, it did not work for me because it contradicts some of the requirements outlined at the beginning of the article. Everything seems to be fine under Linux, but if you need to build the same project under Windows using MSVC - and I prefer the native MinGW compiler, the files for NMake will be generated. Those. dependencies on another tool and different build commands for another platform. And all this is a consequence of a bit of crooked architecture, when the main part of the work is done by other “helpers”.
')
Ant - [Renaissance] is a peculiar clone of make for Java. Frankly, I spent quite a bit of time checking Ant (as well as Maven) as a build system for C ++. And I immediately had the feeling that C ++ support here is purely “for show” and insufficiently developed. In addition, even in Java projects, Ant is rarely used. As the script language (as well as for Maven), XML is chosen here - this vile bird language :). This fact of optimism did not add to me at all for further immersion in the topic.
SCons - [new times] self-sufficient, cross-platform build system written in Python. SCons works equally well with both Java and C ++ builds. The dependencies of the drivers for the incremental build are processed correctly (as far as I understood, a certain database is created with the build metadata), and on Windows “without a tambourine” MSVC works. The build script language is Python. A very worthy system, and I even wanted to finish my research on it, but as you know, there is no limit to perfection, and on a more detailed examination, some drawbacks were revealed in the light of the above requirements.
There are no abstract settings for the compiler, so if, for example, it becomes necessary to change the toolchain, you may need to look for places in the build script to make changes. The same macros will have to be registered with nested conditions - if this is Windows, then do this, if this is GCC, do this, etc.
There is no support for remote artifacts and high-level dependency of one build to another.
The overall architecture is built so that the so-called user defined builders exist almost in isolation and there is no possibility to use the existing build logic to supplement it with your own through an uncomplicated plugin. But in general, it is a worthy choice for small projects.
Gradle [modernity] - I already had a positive experience of using Gradle for Java and Kotlin projects and I had high hopes for it.
For JVM languages in Gradle is a very convenient concept of working with libraries necessary for building a project (build dependencies):
At first I checked out the “old” plugin for C ++ support - `cpp` - and I was disappointed - the script structure is not intuitive: model, component, nativespec - and some kind of jumble of different types of binaries: and executables and libraries all in one script. It is not clear where to place unit tests. This structure was very different from what I used for Java.
But it turned out that there are also “new” plugins for C ++ support: `cpp-application` for applications,` cpp-library` for libraries: static and dynamic, and finally `cpp-unit-test` for unit testing. And that was what I was looking for! :)
The project folder structure by default is similar to the project for Java:
Such a structure is not rigid - it can always be changed in the script, but still you should not do this without special need, it is quite reasonable.
By the way, the build script is usually build.gradle , this is a Groovy or Kotlin DSL ( build.gradle.kts ) language to choose from. Inside the script, the Gradle API and the API of the plug-ins added to the script are always available.
For libraries, you can choose the type: static or dynamic (or collect both options).
By default, two build options are configured: Debug ( gradle assemble ) and Release ( gradle assembleRelease ).
The principle of launching a unit of testing is the same as in Java: gradle test will do the main component building, then the tests, if they are in the src / test / cpp folder, and then run the test application.
The notorious defaults can be defined abstractly - Gradle itself will generate the necessary compiler parameters. There are some more abstract settings like optimization, debug information, etc.
Out of the box are supported GCC, Microsoft Visual C ++, CLang.
The system of plug-ins is very developed, and the architecture of extensions is conveniently arranged - you can take ready-made logic and decorate / expand it. Plug-ins come in two forms: dynamic, which are written directly to Groovy and embedded in a script or written in Java (or in another language with JVM) and compiled into binary artifacts. For plug-ins, there is a free Gradle-artifactories, in which anyone can place their plug-in, which will be available to all. What was successful and the author of this article did :) but more on that later.
I would like to dwell in more detail on the system of working with binary components in Gradle for C ++: it is almost the same as in Java! Build dependencies work in almost the same way as I described above.
Take for example the composite build:
In the file build.gradle from the app folder, it is enough to register such a dependency:
And everything else will do Gradle! Add a path to the compiler to search for utils header files and prints the library's binary.
And all this works equally well both under Linux GCC, and under Windows MSVC.
The incremental build, of course, also works great, and if you change the drivers in utils, the app will be rebuilt.
As it turned out, Gradle went ahead and implemented the ability to upload C ++ artifacts in the Maven Repository! To do this, use the standard `maven-publish` plugin.
In the script you need to specify the repository where you want to put your artifact and make a gradle publish (or gradle publishToMavenLocal for local publishing). Gradle will build a project and
lay out in a special format - taking into account the version, platform, architecture and version of the build.
The binary library files themselves and the public header files are laid out - from the src / main / public folder.
It is clear that you can not put a C ++ artifact on Maven Cental - it will not pass the mandatory system checks. But to raise the Maven repository on the network is not difficult at all, but for the local repository you don’t need to do anything at all - it’s just a folder on the disk.
Now, if you want to use someone’s library in your project, you can write something like this in the build script:
It says that for unit testing you need to use the gtest version 1.8.1 artifact from the Maven repository .
By the way, this is a very real repository in which my build of Google Test v1.8.1 is laid out, built using Gradle for Windows and Linux x86_64.
Naturally, all the low-level work on configuring the compiler and linker to work with the external component Gradle takes over. It is enough for you to declare your intentions to use such and such a library with such a version from such and such repository.
To integrate with IDE, Gradle has two built-in plug-ins for Visual Studio and Xcode. They work well, except that the Visual Studio plugin ignores the unit test code from the src / test / cpp folder and generates a project for the main code only.
Eclipse CDT (2018-12R) is a mature and high-quality product. If he was able to successfully parse your project, then you are lucky - it will be comfortable to edit. Most likely, he will even “understand” the most confused auto types. But if not ... Then he will furiously emphasize with a red dotted line everything and swear in bad words. For example, it does not digest the standard MSVC and Windows SDK header files. Even a completely innocuous printf is underlined in red dotted line and is not perceived as meaningful. There was also std :: string. Under Linux with his gcc family everything is fine. But even when trying to get him to index the project from a related Android Native, problems started. In the bionic headers, he refused to see the definition of size_t, and at the same time all the functions that used it. Probably, under Windows, you can correct the situation if instead of heading Microsoft files, slip him, for example, Cygwin or MinGW SDK, but such tricks are not very interesting to me, I would still like to have software of this level “eat what they give”, and not just what does he like".
Navigation, refactoring, and generating template code are wonderful, but here are some questions to the letter-case assistant: let's say we type a few characters from some long name, why not suggest completion options? No, the assistant waits patiently until the user gets to. or -> or ::. You have to constantly press Ctrl + Space - annoying. In Java, this annoying flaw could be fixed by selecting the entire alphabet in the CDT as the trigger, but I did not find a simple solution.


NetBeans 8.1 / 10.0 - I used it to use this IDE for Java, I remembered as a good and lightweight software with all the necessary functionality. For C ++, it has a plugin developed not by the community, but directly by NetBeans. For C ++ projects, there is a pretty hard dependency on make and gcc. The code editor is leisurely. I didn’t find a very simple thing in the generator of the template code: add a new method in the class header file - you need to generate the method body in the cpp file - it doesn’t know how. The degree of “understanding” of the code is average, it seems like something is in progress, but something is not. For example, it is already quite difficult for it to iterate on a map with an auto-iterator. On macros from Google Test swears. Zakastomizirovat team build is problematic - on Linux with gcc and make available (this is despite the fact that another build system is being used) will work, on Windows it will require MinGW, but even if it is present it will refuse to build. In general, working in NetBeans with C ++ is possible, but I would not call it comfortable, I probably need to love this environment very much so as not to notice its various sores.

KDevelop 5.3.1 - was once conceived as a developer tool for KDE (Linux), but now there is a version for Windows. It has a fast and nice code editor with beautiful syntax highlighting (based on Kate). Zakostomizirovat left build system will not work - for him the main build system CMake. It is tolerant of MSVC and Windows SDK headers, in any case printf and std :: string do not exactly stupor it like Eclipse CDT. Very smart code writing assistant - good completion options are offered almost immediately while typing. It has an interesting opportunity to generate template code: you can write your template and put it online. When creating from a template, you can connect to the database of ready-made templates and download the one you like. The only thing that upset: the built-in template for creating a new class works crookedly both under Windows and under Linux. The class creation wizard has several windows in which you can customize a lot of things: which constructors are needed, which class members, etc. But at the final stage under Windows, some error pops up to catch the text of which is impossible and two files h and cpp of 1 byte size are created. In Linux, for some reason, designers cannot be selected - the tab is empty, and only the header file is correctly generated at the output. In general, childhood diseases for such a mature product look somehow frivolous.


QtCreator 4.8.1 (open source edition) - probably, having heard this name, you are wondering how this monster sharpened for Qt with a distribution kit in gigabyte with hooks started to work here. But this is a “light” version of the environment for generic projects. Its distribution kit weighs only about 150 MB and does not carry Qt-specific things with it: download.qt.io/official_releases/qtcreator/4.8 .
Actually, he knows how to do almost everything I wrote about in my requirements, quickly and correctly. It parses the standard headers of both Windows and Linux, customizes for any build system, prompts completion options, conveniently generates new classes, body methods, allows you to refactor and navigate through the code. If you just want to work comfortably without thinking constantly about how to overcome this or that problem, it makes sense to look at QtCreator.


Actually, it remains to talk about what I lacked in Gradle for full-fledged work: integration with IDE. In order for the build system to generate the project files for the IDE itself, which would already contain commands for building the project, all the source files are listed, paths are needed to search for header files and definitions.
For this purpose, I wrote a plugin for the Gradle `cpp-ide-generator` and published it on the Gradle Plugin Portal.
The plugin can only be used in conjunction with `cpp-application`,` cpp-library` and `cpp-unit-test`.
Here is an example of its use in build.gradle :
The plugin supports integration with all of the above graphical development environments, but you can disable support for unnecessary IDEs in the plugin configuration block ide.
If the autoGenerate parameter is set to true, project files for all allowed IDEs will be automatically generated directly during the build. Also in the mode of automatic generation, project files will be deleted when the build is cleared: gradle clean .
Incremental generation is supported, i.e. only those files that require a real update will be updated.
Here is a list of goals that the plugin adds:
During generation, the plugin “sniffs” the build and extracts all the necessary information from it to create project files. After the project is opened, the IDE should see all the source files, specify the paths to all the headers, as well as set up the basic build commands - build / clean.
The second plugin I’ve done is called `cpp-build-tuner` and it also works in conjunction with cpp-application`,` cpp-library` and `cpp-unit-test`.
The plugin has no settings, it is enough to simply zaplap:
The plugin performs small manipulations with the settings of the toolchains (compiler and linker) for different build options - Debug and Release. MSVC, gcc, CLang are supported.
This is especially true for MSVC, because by default, as a result of the release build, you will get a “fat” non-aesthetic binary with debug information and a statically linked standard library. Part of the settings for MSVC, I "spied" in Visual Studio itself, which by default it adds to its C ++ projects. For both gcc / CLang and MSVC, the release profile includes link time optmizations.
Note: Plugins were tested with the latest version of Gradle v5.2.1 and have not been tested for compatibility with previous versions.
Source codes of plug-ins, as well as simple examples of using Gradle for libraries: static and dynamic, as well as applications that use them can be viewed: bitbucket.org/akornilov/tools further gradle / cpp.
The examples also show how to use Google Test for unit testing libraries.
Maven Repository with Google Test v1.8.1 built in Gradle (without mock).
At once I want to note that we are talking about writing C ++ code not for some specific platform such as Android or a framework, for example Qt, - where everything is already ready, both with the construction and editing the code, and about generic code not tied to a specific platform or framework
Are common:
- Free.
- Cross platform (at least Windows and Linux).
Assembly system:
- A single team to build on different platforms.
- Incremental build with correct consideration of all dependencies: header files and third-party components used for assembly.
- The build script should contain only the required minimum configuration specific to a particular project. The general logic of the build should not roam from the script to the script, but resides in the build system or its plugins.
- Built-in parallel assembly.
- Support for various toolchains (at least gcc, Visual C ++, CLang).
- Ability to change toolchain with minimal cost, without rewriting the entire build script.
- Easily switchable build options: Debug and Release.
- Dependencies on some additional low-level make tools are completely undesirable. In short, the assembly system must be self-sufficient.
- Integration of the build system with repositories of third-party components like pkg-config or as Maven Central for the JVM is highly desirable.
- The build system must be extensible plugins, because The assembly procedure for each specific project may be more complicated than a typical construction concept (generating code, for example, or building some non-standard image).
- Conveniently, the build script is some kind of high-level programming language, or better yet, DSL. This will allow not particularly costly and expressively change the behavior of the construction directly in the script.
- When setting up the compiler and linker from the build script, it’s very convenient when the build system provides at least basic abstractions: for example, I want to add a macro - why think which command line parameter of the compiler is responsible for this? / D on MSVC or -D on gcc - let the assembly system resolve these irrelevant parts by itself.
- Good integration with graphical development environments (IDE).
IDE:
- The IDE's ability to correctly "understand" C ++ code. The IDE should be able to index all project files, as well as all third-party and system header files and definitions (defines, macro).
- The IDE should provide the ability to customize commands for building a project, as well as where to look for header files and definitions.
- It should effectively help in typing code, i.e. suggest the most appropriate completion options, warn about syntax errors, etc.
- Navigating a large project should be easy to use, and finding usage is quick and easy.
- Provide opportunities for refactoring: renaming, etc.
- You also need the ability to generate a template code — creating a framework of a new class, header file, and implementation file. Generation of getters / setters, method definitions, overloading of virtual methods, implementation patterns of pure virtual classes (interfaces), etc.
- Highlighting and tag support for documenting code such as Doxygen.
In the light of these "hotelok" I reviewed several build systems and graphical development environments. This small review does not in any way pretend to be complete and contains my subjective assessments, but perhaps it will seem useful to someone as an initial stage.
Make - [antiquity] mastodon and honored veteran of the assembly systems, which everyone still does not want to let go of retirement, and forced to carry on himself more and more new projects. This is a very low-level tool with its own specific language, where, for a space instead of a tab, you are immediately threatened with execution on the spot. With make, you can do anything you want - a build of any complexity, but you have to pay for it with your efforts to write the script and keep it up to date. Transferring the build logic from project to project will also be expensive. There are some modern "substitutes" make-a: like ninja and jam, but essentially they do not change - this is a very low-level tools. Just as in the assembler, you can write anything you like, but is it worth it?
CMake - [Middle Ages] the first attempt to get away from the low-level details of the make. But, unfortunately, it was not possible to go far - the engine here is the same make for which CMake generates huge make-files based on another text file with a more high-level description of the build. Qmake works in a similar way. This approach reminds me of the beautiful facade of an old wooden house, which we carefully lined up with fresh plastic. CMake is a stable and well-proven system, there is even built-in integration with Eclipse, but, unfortunately, it did not work for me because it contradicts some of the requirements outlined at the beginning of the article. Everything seems to be fine under Linux, but if you need to build the same project under Windows using MSVC - and I prefer the native MinGW compiler, the files for NMake will be generated. Those. dependencies on another tool and different build commands for another platform. And all this is a consequence of a bit of crooked architecture, when the main part of the work is done by other “helpers”.
')
Ant - [Renaissance] is a peculiar clone of make for Java. Frankly, I spent quite a bit of time checking Ant (as well as Maven) as a build system for C ++. And I immediately had the feeling that C ++ support here is purely “for show” and insufficiently developed. In addition, even in Java projects, Ant is rarely used. As the script language (as well as for Maven), XML is chosen here - this vile bird language :). This fact of optimism did not add to me at all for further immersion in the topic.
SCons - [new times] self-sufficient, cross-platform build system written in Python. SCons works equally well with both Java and C ++ builds. The dependencies of the drivers for the incremental build are processed correctly (as far as I understood, a certain database is created with the build metadata), and on Windows “without a tambourine” MSVC works. The build script language is Python. A very worthy system, and I even wanted to finish my research on it, but as you know, there is no limit to perfection, and on a more detailed examination, some drawbacks were revealed in the light of the above requirements.
There are no abstract settings for the compiler, so if, for example, it becomes necessary to change the toolchain, you may need to look for places in the build script to make changes. The same macros will have to be registered with nested conditions - if this is Windows, then do this, if this is GCC, do this, etc.
There is no support for remote artifacts and high-level dependency of one build to another.
The overall architecture is built so that the so-called user defined builders exist almost in isolation and there is no possibility to use the existing build logic to supplement it with your own through an uncomplicated plugin. But in general, it is a worthy choice for small projects.
Gradle [modernity] - I already had a positive experience of using Gradle for Java and Kotlin projects and I had high hopes for it.
For JVM languages in Gradle is a very convenient concept of working with libraries necessary for building a project (build dependencies):
- The script contains the addresses of repositories with artifacts: maven or ivy - for example. It can also be a repository of any other type / format - as long as there is a plugin for it. This could be a remote repository, some kind of Maven Central or your personal hosting somewhere on the network or just a local rep on a file system.
- Also, in the special section of the script, the dependencies for building are indicated directly - a list of necessary binary artifacts with the indication of versions.
- Before starting to build, Gradle tries to kill all the dependencies and looks for artifacts with the given versions in all repositories. Binary files are loaded into the cache and automatically added to the build. This is very convenient and I hoped that for C ++, you might have done something similar.
At first I checked out the “old” plugin for C ++ support - `cpp` - and I was disappointed - the script structure is not intuitive: model, component, nativespec - and some kind of jumble of different types of binaries: and executables and libraries all in one script. It is not clear where to place unit tests. This structure was very different from what I used for Java.
But it turned out that there are also “new” plugins for C ++ support: `cpp-application` for applications,` cpp-library` for libraries: static and dynamic, and finally `cpp-unit-test` for unit testing. And that was what I was looking for! :)
The project folder structure by default is similar to the project for Java:
- src / main / cpp - root folder for the main * .cpp files of the project.
- src / main / headers - folder for internal header files.
- src / main / public - folder for exported headers - for libraries.
- src / test / cpp - folder for files * .cpp unit of the test.
Such a structure is not rigid - it can always be changed in the script, but still you should not do this without special need, it is quite reasonable.
By the way, the build script is usually build.gradle , this is a Groovy or Kotlin DSL ( build.gradle.kts ) language to choose from. Inside the script, the Gradle API and the API of the plug-ins added to the script are always available.
For libraries, you can choose the type: static or dynamic (or collect both options).
By default, two build options are configured: Debug ( gradle assemble ) and Release ( gradle assembleRelease ).
The principle of launching a unit of testing is the same as in Java: gradle test will do the main component building, then the tests, if they are in the src / test / cpp folder, and then run the test application.
The notorious defaults can be defined abstractly - Gradle itself will generate the necessary compiler parameters. There are some more abstract settings like optimization, debug information, etc.
Out of the box are supported GCC, Microsoft Visual C ++, CLang.
The system of plug-ins is very developed, and the architecture of extensions is conveniently arranged - you can take ready-made logic and decorate / expand it. Plug-ins come in two forms: dynamic, which are written directly to Groovy and embedded in a script or written in Java (or in another language with JVM) and compiled into binary artifacts. For plug-ins, there is a free Gradle-artifactories, in which anyone can place their plug-in, which will be available to all. What was successful and the author of this article did :) but more on that later.
I would like to dwell in more detail on the system of working with binary components in Gradle for C ++: it is almost the same as in Java! Build dependencies work in almost the same way as I described above.
Take for example the composite build:
- utils - folder with library
- app is the folder with the application that uses utils.
- settings.gradle - Gradle file for merging these two components into a composite build.
In the file build.gradle from the app folder, it is enough to register such a dependency:
dependencies { implementation project(':utils') } And everything else will do Gradle! Add a path to the compiler to search for utils header files and prints the library's binary.
And all this works equally well both under Linux GCC, and under Windows MSVC.
The incremental build, of course, also works great, and if you change the drivers in utils, the app will be rebuilt.
As it turned out, Gradle went ahead and implemented the ability to upload C ++ artifacts in the Maven Repository! To do this, use the standard `maven-publish` plugin.
In the script you need to specify the repository where you want to put your artifact and make a gradle publish (or gradle publishToMavenLocal for local publishing). Gradle will build a project and
lay out in a special format - taking into account the version, platform, architecture and version of the build.
The binary library files themselves and the public header files are laid out - from the src / main / public folder.
It is clear that you can not put a C ++ artifact on Maven Cental - it will not pass the mandatory system checks. But to raise the Maven repository on the network is not difficult at all, but for the local repository you don’t need to do anything at all - it’s just a folder on the disk.
Now, if you want to use someone’s library in your project, you can write something like this in the build script:
repositories { maven { url = 'https://akornilov.bitbucket.io/maven' } } unitTest { dependencies { implementation 'org.bitbucket.akornilov.tools:gtest:1.8.1' } } It says that for unit testing you need to use the gtest version 1.8.1 artifact from the Maven repository .
By the way, this is a very real repository in which my build of Google Test v1.8.1 is laid out, built using Gradle for Windows and Linux x86_64.
Naturally, all the low-level work on configuring the compiler and linker to work with the external component Gradle takes over. It is enough for you to declare your intentions to use such and such a library with such a version from such and such repository.
To integrate with IDE, Gradle has two built-in plug-ins for Visual Studio and Xcode. They work well, except that the Visual Studio plugin ignores the unit test code from the src / test / cpp folder and generates a project for the main code only.
Now it's time to talk about IDE and how to make them friends with Gradle.
Eclipse CDT (2018-12R) is a mature and high-quality product. If he was able to successfully parse your project, then you are lucky - it will be comfortable to edit. Most likely, he will even “understand” the most confused auto types. But if not ... Then he will furiously emphasize with a red dotted line everything and swear in bad words. For example, it does not digest the standard MSVC and Windows SDK header files. Even a completely innocuous printf is underlined in red dotted line and is not perceived as meaningful. There was also std :: string. Under Linux with his gcc family everything is fine. But even when trying to get him to index the project from a related Android Native, problems started. In the bionic headers, he refused to see the definition of size_t, and at the same time all the functions that used it. Probably, under Windows, you can correct the situation if instead of heading Microsoft files, slip him, for example, Cygwin or MinGW SDK, but such tricks are not very interesting to me, I would still like to have software of this level “eat what they give”, and not just what does he like".
Navigation, refactoring, and generating template code are wonderful, but here are some questions to the letter-case assistant: let's say we type a few characters from some long name, why not suggest completion options? No, the assistant waits patiently until the user gets to. or -> or ::. You have to constantly press Ctrl + Space - annoying. In Java, this annoying flaw could be fixed by selecting the entire alphabet in the CDT as the trigger, but I did not find a simple solution.
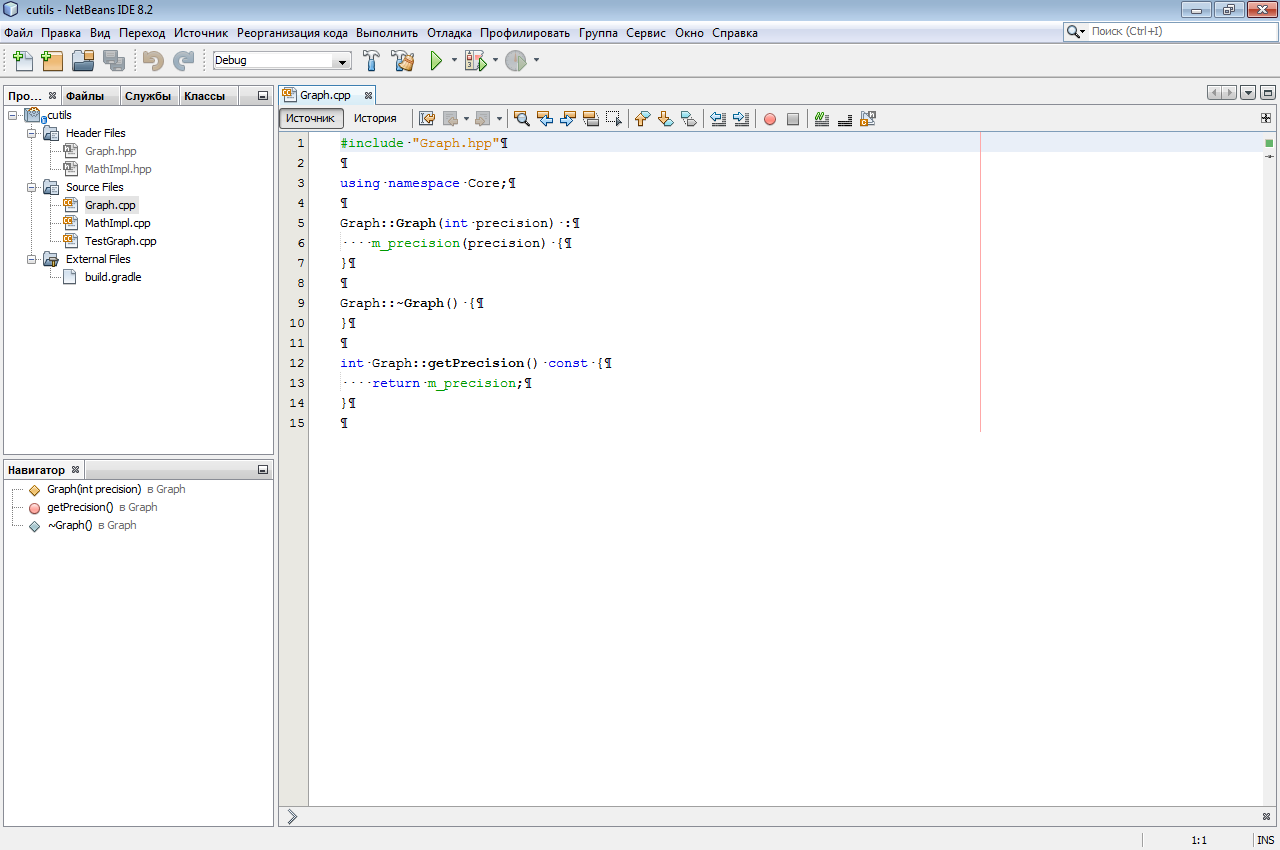
NetBeans 8.1 / 10.0 - I used it to use this IDE for Java, I remembered as a good and lightweight software with all the necessary functionality. For C ++, it has a plugin developed not by the community, but directly by NetBeans. For C ++ projects, there is a pretty hard dependency on make and gcc. The code editor is leisurely. I didn’t find a very simple thing in the generator of the template code: add a new method in the class header file - you need to generate the method body in the cpp file - it doesn’t know how. The degree of “understanding” of the code is average, it seems like something is in progress, but something is not. For example, it is already quite difficult for it to iterate on a map with an auto-iterator. On macros from Google Test swears. Zakastomizirovat team build is problematic - on Linux with gcc and make available (this is despite the fact that another build system is being used) will work, on Windows it will require MinGW, but even if it is present it will refuse to build. In general, working in NetBeans with C ++ is possible, but I would not call it comfortable, I probably need to love this environment very much so as not to notice its various sores.
KDevelop 5.3.1 - was once conceived as a developer tool for KDE (Linux), but now there is a version for Windows. It has a fast and nice code editor with beautiful syntax highlighting (based on Kate). Zakostomizirovat left build system will not work - for him the main build system CMake. It is tolerant of MSVC and Windows SDK headers, in any case printf and std :: string do not exactly stupor it like Eclipse CDT. Very smart code writing assistant - good completion options are offered almost immediately while typing. It has an interesting opportunity to generate template code: you can write your template and put it online. When creating from a template, you can connect to the database of ready-made templates and download the one you like. The only thing that upset: the built-in template for creating a new class works crookedly both under Windows and under Linux. The class creation wizard has several windows in which you can customize a lot of things: which constructors are needed, which class members, etc. But at the final stage under Windows, some error pops up to catch the text of which is impossible and two files h and cpp of 1 byte size are created. In Linux, for some reason, designers cannot be selected - the tab is empty, and only the header file is correctly generated at the output. In general, childhood diseases for such a mature product look somehow frivolous.
QtCreator 4.8.1 (open source edition) - probably, having heard this name, you are wondering how this monster sharpened for Qt with a distribution kit in gigabyte with hooks started to work here. But this is a “light” version of the environment for generic projects. Its distribution kit weighs only about 150 MB and does not carry Qt-specific things with it: download.qt.io/official_releases/qtcreator/4.8 .
Actually, he knows how to do almost everything I wrote about in my requirements, quickly and correctly. It parses the standard headers of both Windows and Linux, customizes for any build system, prompts completion options, conveniently generates new classes, body methods, allows you to refactor and navigate through the code. If you just want to work comfortably without thinking constantly about how to overcome this or that problem, it makes sense to look at QtCreator.
Actually, it remains to talk about what I lacked in Gradle for full-fledged work: integration with IDE. In order for the build system to generate the project files for the IDE itself, which would already contain commands for building the project, all the source files are listed, paths are needed to search for header files and definitions.
For this purpose, I wrote a plugin for the Gradle `cpp-ide-generator` and published it on the Gradle Plugin Portal.
The plugin can only be used in conjunction with `cpp-application`,` cpp-library` and `cpp-unit-test`.
Here is an example of its use in build.gradle :
plugins { id 'cpp-library' id 'maven-publish' id 'cpp-unit-test' id 'org.bitbucket.akornilov.cpp-ide-generator' version '0.3' } library { // Library specific parameters } // Configuration block of plugin: ide { autoGenerate = false eclipse = true qtCreator = true netBeans = true kdevelop = true } The plugin supports integration with all of the above graphical development environments, but you can disable support for unnecessary IDEs in the plugin configuration block ide.
kdevelop = false If the autoGenerate parameter is set to true, project files for all allowed IDEs will be automatically generated directly during the build. Also in the mode of automatic generation, project files will be deleted when the build is cleared: gradle clean .
Incremental generation is supported, i.e. only those files that require a real update will be updated.
Here is a list of goals that the plugin adds:
- generateIde - generate project files for all allowed IDEs.
- cleanIde - remove project files for all allowed IDEs.
- generateIde [name] - generate project files for the IDE with the specified name (IDE must be enabled), for example generateIdeQtCreator.
- Available names: Eclipse, NetBeans, QtCreator, KDevelop.
- cleanIde [name] - delete project files for the IDE with the specified name, for example, cleanIdeQtCreator.
During generation, the plugin “sniffs” the build and extracts all the necessary information from it to create project files. After the project is opened, the IDE should see all the source files, specify the paths to all the headers, as well as set up the basic build commands - build / clean.
The second plugin I’ve done is called `cpp-build-tuner` and it also works in conjunction with cpp-application`,` cpp-library` and `cpp-unit-test`.
The plugin has no settings, it is enough to simply zaplap:
plugins { id 'cpp-library' id 'maven-publish' id 'cpp-unit-test' id 'org.bitbucket.akornilov.cpp-build-tuner' version '0.5' } The plugin performs small manipulations with the settings of the toolchains (compiler and linker) for different build options - Debug and Release. MSVC, gcc, CLang are supported.
This is especially true for MSVC, because by default, as a result of the release build, you will get a “fat” non-aesthetic binary with debug information and a statically linked standard library. Part of the settings for MSVC, I "spied" in Visual Studio itself, which by default it adds to its C ++ projects. For both gcc / CLang and MSVC, the release profile includes link time optmizations.
Note: Plugins were tested with the latest version of Gradle v5.2.1 and have not been tested for compatibility with previous versions.
Source codes of plug-ins, as well as simple examples of using Gradle for libraries: static and dynamic, as well as applications that use them can be viewed: bitbucket.org/akornilov/tools further gradle / cpp.
The examples also show how to use Google Test for unit testing libraries.
Maven Repository with Google Test v1.8.1 built in Gradle (without mock).
Source: https://habr.com/ru/post/442682/
All Articles