Gatsby.js in detail
As you know, on some boilerplates you won't get far, so you have to go deep into any technology to learn how to write something worthwhile. This article covers the details of Gatsby.js , the knowledge of which will allow you to create and maintain complex websites and blogs.
Previous article on how to create and publish a personal blog using the JAM stack
Topics covered below:
- Page structure and routing
- Components, patterns and their interaction
- Work with data
- Plugins
- Styling applications
- React-helmet seo optimization
- PWA Setup
Training
yarn global add gatsby-cli npx gatsby new gatsby-tutorial https://github.com/gatsbyjs/gatsby-starter-hello-world cd gatsby-tutorial git init git add . git commit -m "init commit" yarn start If there are no errors in the console, and in the browser on the path http: // localhost: 8000 you can see "Hello world!" then everything is working properly. You can try changing the contents of the /src/pages/index.js file to check the hot-reload.
Page structure and routing
To create a page in Gatsby, simply place the new file in the / src / pages folder, and it will be compiled into a separate HTML page. It is important to note that the path to this page will correspond to the actual path with the name . For example, add some more pages:
src └── pages ├── about.js ├── index.js └── tutorial ├── part-four.js ├── part-one.js ├── part-three.js ├── part-two.js └── part-zero.js Content is not important yet, so you can use any text to distinguish between pages.
import React from "react"; export default () => <div>Welcome to tutorial/part-one</div>; Check in the browser:
In this way, by structuring the files, you can immediately solve the routing issues.
There is also a special createPage API , with which you can more flexibly manage the paths and names of pages, but to work with it we need an understanding of how the data works in Gatsby, so we will look at it a little further in the article.
Let's combine the created pages with the help of links, for this we will use the <Link /> component from the Gatsby package, which was created specifically for internal navigation. For all external links, use the regular <a> tag.
/src/pages/index.js
import React from "react"; import { Link } from "gatsby"; export default () => ( <div> <ul> <li> <Link to="/about">about</Link> </li> <li> <Link to="/tutorial/part-zero">Part #0</Link> </li> <li> <Link to="/tutorial/part-one">Part #1</Link> </li> <li> <Link to="/tutorial/part-two">Part #2</Link> </li> <li> <Link to="/tutorial/part-three">Part #3</Link> </li> <li> <Link to="/tutorial/part-four">Part #4</Link> </li> </ul> </div> ); <Link>under the hood has a very tricky mechanism for optimizing page load and is therefore used instead of<a>for navigating the site. You can read more here .
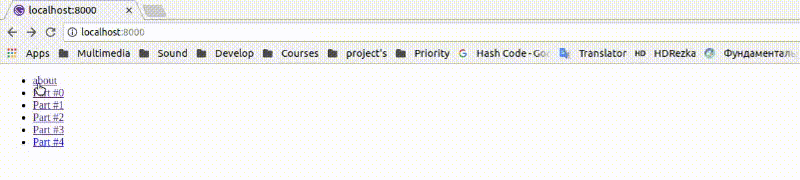
The pages are created, the links are added, it turns out that the navigation is finished.
Components, patterns and their interaction
As you know, in any project there are always duplicate elements, for websites it is a header, footer, navigation bar. Also the pages, regardless of the content, are structured according to a certain structure, and since Gatsby is a compiler for React , the same component approach is used here to solve these problems.
Create components for the header and navigation bar:
/src/components/header.js
import React from "react"; import { Link } from "gatsby"; /** * * , React-. * , * " ". * "" GraphQL gatsby- */ import logoSrc from "../images/logo.png"; export default () => ( <header> <Link to="/"> <img src={logoSrc} alt="logo" width="60px" height="60px" /> </Link> That is header </header> ); /src/components/sidebar.js
import React from "react"; import { Link } from "gatsby"; export default () => ( <div> <ul> <li> <Link to="/about">about</Link> </li> <li> <Link to="/tutorial/part-zero">Part #0</Link> </li> <li> <Link to="/tutorial/part-one">Part #1</Link> </li> <li> <Link to="/tutorial/part-two">Part #2</Link> </li> <li> <Link to="/tutorial/part-three">Part #3</Link> </li> <li> <Link to="/tutorial/part-four">Part #4</Link> </li> </ul> </div> ); and add them to /src/pages/index.js
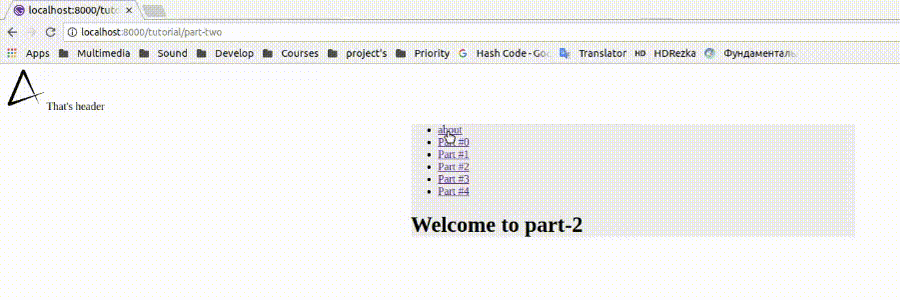
import React from "react"; import Header from "../components/header"; import Sidebar from "../components/sidebar"; export default () => ( <div> <Header /> <Sidebar /> <h1>Index page</h1> </div> ); Checking:

Everything works, but we need to import Header and Sidebar into each page separately, which is not very convenient, and to solve this issue it is enough to create a layout component and wrap each page with it.
Gatsby layout == React container
Yes, yes, it is a non-strict equality, because it is "almost" the same thing.
/src/components/layout.js
import React from "react"; import Header from "./header"; import Sidebar from "./sidebar"; export default ({ children }) => ( <> <Header /> <div style={{ margin: `0 auto`, maxWidth: 650, backgroundColor: `#eeeeee` }} > <Sidebar /> {children} </div> </> ); /src/pages/index.js (and all other pages)
import React from "react"; import Layout from "../components/layout"; export default () => ( <Layout> <h1>Index page</h1> </Layout> ); Done, look into the browser:
Why in the project all the file names in small letters? To begin with, we decide that the namespacing for React comes from the fact that "every file is a class, and the class is always called with a capital letter." In Gatsby, files still contain classes, but there is one “but” - “each file is a potential page, and its name is the URL to this page”. The community has concluded that links like http://domain.com/User/Settings are not comme-il-faut and have approved kebab-case for file names. src ├── components │ ├── header.js │ ├── layout.js │ └── sidebar.js ├── images │ └── logo.png └── pages ├── about.js ├── index.js └── tutorial ├── part-eight.js ├── part-five.js ├── part-four.js ├── part-one.js ├── part-seven.js ├── part-six.js ├── part-three.js ├── part-two.js └── part-zero.js Work with data
Now that the structure of the site is ready, you can proceed to filling the content. The classic "hardcode" approach did not suit the creators of the JAM stack, as well as the "render content from AJAX requests" and therefore they suggested filling sites with content during compilation. In the case of Gatsby , GraphQL is responsible for this, which makes it convenient to work with data streams from any sources.
To tell about GraphQL in a nutshell is impossible, so it is advisable to study it yourself or wait for my next article. You can read more about working with GraphQL here .
To work with GraphQL , from the second version, the gatsby package gatsby component, which can be used both on pages and in simple components, and this is its main difference from its predecessor - page query . So far, our site is not connected to any data sources, so we will try to display the metadata of the pages, for example, and then move on to more complex things.
To build a query you need to open http: // localhost: 8000 / ___ graphql , and use the sidebar with the documentation to find the available data on the site, and do not forget about autocompletion.
/src/components/sidebar.js
import React from "react"; import { Link, StaticQuery, graphql } from "gatsby"; export default () => ( <StaticQuery query={graphql` { allSitePage { edges { node { id path } } } } `} render={({ allSitePage: { edges } }) => ( <ul> {edges.map(({ node: { id, path } }) => ( <li key={id}> <Link to={path}>{id}</Link> </li> ))} </ul> )} /> ); Now we use query get data about the pages that we render in the navigation bar, and no longer need to worry about the fact that the link will not match the name, because all data is collected automatically.

In fact, this is all the data that can be on our site without using third-party plug-ins and without the good old "hardcode", so we smoothly go to the next topic of our article - plug-ins.
Plugins
At its core, Gatsby is a compiler with a bunch of buns, which are just plugins. Using them, you can customize the processing of certain files, data types and various formats.
Create the file /gatsby-config.js at the root level of the application. which is responsible for the configuration of the compiler as a whole, and try to configure the first plugin to work with files:
Installing the plugin:
yarn add gatsby-source-filesystem Configuration in the /gatsby-config.js file :
module.exports = { plugins: [ { resolve: `gatsby-source-filesystem`, options: { name: `images`, path: `${__dirname}/src/images/`, } } ], } /** * gatsby-config.js * JS * */ module.exports = { /** * 'plugins' pipeline * , */ plugins: [ /** * , * */ `gatsby-example-plugin`, { resolve: `gatsby-source-filesystem`, options: { name: `images`, path: `${__dirname}/src/images/`, } } ], } Remember we talked about the "correct" import of pictures in Gatsby ?
/src/components/header.js
import React from "react"; import { Link, StaticQuery, graphql } from "gatsby"; export default () => ( <StaticQuery query={graphql` { allFile(filter: { name: { eq: "logo" } }) { edges { node { publicURL } } } } `} render={({ allFile: { edges: [ { node: { publicURL } } ] } }) => ( <header> <Link to="/"> <img src={publicURL} alt="logo" width="60px" height="60px" /> </Link> That is header </header> )} /> ); Nothing has changed on the site, but now the picture is substituted using GraphQL, instead of a simple webpack-import. At first glance, it may seem that the constructions are too complicated and these were unnecessary gestures, but let's not be in a hurry with the conclusions, because everything is in the same plugins. For example, if we decided to post thousands of photos on the site, then in any case we had to think about optimizing the download of all the content, and in order not to build our lazy-load process from scratch, we would simply add a gatsby-image plugin that would optimize the loading of all images imported using query .
Installing plug-ins for styling:
yarn add gatsby-plugin-typography react-typography typography typography-theme-noriega node-sass gatsby-plugin-sass gatsby-plugin-styled-components styled-components babel-plugin-styled-components gatsby-config.js
module.exports = { plugins: [ { resolve: `gatsby-source-filesystem`, options: { name: `images`, path: `${__dirname}/src/images/` } }, // add style plugins below `gatsby-plugin-typography`, `gatsby-plugin-sass`, `gatsby-plugin-styled-components` ] }; On the official site you can find a plugin for every taste.
Styling applications
We proceed to the stylization of the application using various approaches. In the previous step, we already installed plugins for working with SASS , styled-components and the typography.js library, while it is important to note that css.modules are supported out of the box.
Let's start working with global styles, which, like other things related to the whole site, should be configured in the /gatsby-browser.js file:
import "./src/styles/global.scss"; More about gatsby-browser.js
/src/styles/global.scss
body { background-color: lavenderblush; } For various reasons, the trends of recent years tend towards the "CSS in JS" approach, so you should not abuse global styles and it’s better to limit yourself to specifying the font and reusable classes. This particular project is planning to use Typography.js for this purpose, so global styles will remain empty.
You may have already noticed changes in the appearance of the site after adding gatsby-plugin-typography to the configuration — this is because its default preset was applied, and now we will configure it for ourselves.
/src/utils/typography.js
import Typography from "typography"; import theme from "typography-theme-noriega"; const typography = new Typography(theme); export default typography; You can choose any other preset from the list or create your own using the API package (configuration example of the official Gatsby website)
/gatsby-config.js
module.exports = { plugins: [ { resolve: `gatsby-source-filesystem`, options: { name: `images`, path: `${__dirname}/src/images/` } }, { resolve: `gatsby-plugin-typography`, options: { pathToConfigModule: `src/utils/typography` } }, `gatsby-plugin-sass`, `gatsby-plugin-styled-components` ] }; And depending on the selected preset, the global style of the site will be changed. What approach to customize global styles is decided by yourself; this is a matter of personal preferences and there are no differences from a technical point of view, and we turn to styling components using styled-components :
Add a file with global variables /src/utils/vars.js
export const colors = { main: `#663399`, second: `#fbfafc`, main50: `rgba(102, 51, 153, 0.5)`, second50: `rgba(251, 250, 252, 0.5)`, textMain: `#000000`, textSecond: `#ffffff`, textBody: `#222222` }; import React from "react"; import { Link, StaticQuery, graphql } from "gatsby"; import styled from "styled-components"; import { colors } from "../utils/vars"; const Header = styled.header` width: 100%; height: 3em; display: flex; justify-content: space-between; align-items: center; background-color: ${colors.main}; color: ${colors.textSecond}; padding: 0.5em; `; const Logo = styled.img` border-radius: 50%; height: 100%; `; const logoLink = `height: 100%;`; export default () => ( <StaticQuery query={graphql` { allFile(filter: { name: { eq: "logo" } }) { edges { node { publicURL } } } } `} render={({ allFile: { edges: [ { node: { publicURL } } ] } }) => ( <Header> That is header <Link to="/" css={logoLink}> <Logo src={publicURL} alt="logo" /> </Link> </Header> )} /> ); import React from "react" import { Link, StaticQuery, graphql } from "gatsby" import styled from "styled-components" import { colors } from "../utils/vars" const Sidebar = styled.section` position: fixed; left: 0; width: 20%; height: 100%; display: flex; flex-direction: column; justify-content: center; background-color: ${colors.second}; color: ${colors.textMain}; ` const navItem = ` display: flex; align-items: center; margin: 0 1em 0 2em; padding: 0.5em 0; border-bottom: 0.05em solid ${colors.mainHalf}; postion: relative; color: ${colors.textBody}; text-decoration: none; &:before { content: ''; transition: 0.5s; width: 0.5em; height: 0.5em; position: absolute; left: 0.8em; border-radius: 50%; display: block; background-color: ${colors.main}; transform: scale(0); } &:last-child { border-bottom: none; } &:hover { &:before { transform: scale(1); } } ` export default () => ( <StaticQuery query={graphql` { allSitePage { edges { node { id, path } } } } `} render={({ allSitePage: { edges } }) => ( <Sidebar> { edges.map(({ node: { id, path } }) => ( <Link to={path} key={id} css={navItem} >{id}</Link> )) } </Sidebar> )} /> ) 
Already existing elements are stylized, and it's time to link the content with Contentful , connect the markaun plugin and generate pages using the createPages API .
Read more about how to link Gatsby and Contentful in the previous article.
[ { "id": "title", "type": "Symbol" }, { "id": "content", "type": "Text", }, { "id": "link", "type": "Symbol", }, { "id": "orderNumber", "type": "Integer", } ] Package installation:
yarn add dotenv gatsby-source-contentful gatsby-transformer-remark /gatsby-config.js
if (process.env.NODE_ENV === "development") { require("dotenv").config(); } module.exports = { plugins: [ `gatsby-transformer-remark`, { resolve: `gatsby-source-filesystem`, options: { name: `images`, path: `${__dirname}/src/images/`, } }, { resolve: `gatsby-plugin-typography`, options: { pathToConfigModule: `src/utils/typography`, }, }, { resolve: `gatsby-source-contentful`, options: { spaceId: process.env.CONTENTFUL_SPACE_ID, accessToken: process.env.CONTENTFUL_ACCESS_TOKEN, }, }, `gatsby-plugin-sass`, `gatsby-plugin-styled-components`, ], } Delete the / src / pages folder with all the files inside and create a new file to manage the nodes in Gatsby:
/gatsby-node.js
const path = require(`path`); /** * , * */ exports.createPages = ({ graphql, actions }) => { /** * * * */ const { createPage } = actions; return graphql(` { allContentfulArticle { edges { node { title link content { childMarkdownRemark { html } } } } } } `).then(({ data: { allContentfulArticle: { edges } } }) => { /** * * createPage() * */ edges.forEach(({ node }) => { createPage({ path: node.link, component: path.resolve(`./src/templates/index.js`), context: { slug: node.link } }); }); }); }; More about gatsby-node.js
Create a template file that will be the basis for the generated pages.
/src/templates/index.js
import React from "react"; import { graphql } from "gatsby"; import Layout from "../components/layout"; export default ({ data: { allContentfulArticle: { edges: [ { node: { content: { childMarkdownRemark: { html } } } } ] } } }) => { return ( <Layout> <div dangerouslySetInnerHTML={{ __html: html }} /> </Layout> ); }; export const query = graphql` query($slug: String!) { allContentfulArticle(filter: { link: { eq: $slug } }) { edges { node { title link content { childMarkdownRemark { html } } } } } } `; Why isn't the<StaticQuery />component used here? The thing is that it does not support variables for building a query, and we need to use the$slugvariable from the page context.
import React from "react"; import { Link, StaticQuery, graphql } from "gatsby"; import styled from "styled-components"; import { colors } from "../utils/vars"; const Sidebar = styled.section` position: fixed; left: 0; width: 20%; height: 100%; display: flex; flex-direction: column; justify-content: center; background-color: ${colors.second}; color: ${colors.textMain}; `; const navItem = ` display: flex; align-items: center; margin: 0 1em 0 2em; padding: 0.5em 0; border-bottom: 0.05em solid ${colors.main50}; postion: relative; color: ${colors.textBody}; text-decoration: none; &:before { content: ''; transition: 0.5s; width: 0.5em; height: 0.5em; position: absolute; left: 0.8em; border-radius: 50%; display: block; background-color: ${colors.main}; transform: scale(0); } &:last-child { border-bottom: none; } &:hover { &:before { transform: scale(1); } } `; export default () => ( <StaticQuery query={graphql` { allContentfulArticle(sort: { order: ASC, fields: orderNumber }) { edges { node { title link orderNumber } } } } `} render={({ allContentfulArticle: { edges } }) => ( <Sidebar> {edges.map(({ node: { title, link, orderNumber } }) => ( <Link to={link} key={link} css={navItem}> {orderNumber}. {title} </Link> ))} </Sidebar> )} /> ); 
SEO optimization
On the technical side, the site can be considered ready, so let's work with its meta-data. For this we need the following plugins:
yarn add gatsby-plugin-react-helmet react-helmet react-helmet generates a <head>...</head> for HTML pages and in conjunction with Gatsby rendering is a powerful and convenient tool for working with SEO./src/templates/index.js
import React from "react"; import { graphql } from "gatsby"; import { Helmet } from "react-helmet"; import Layout from "../components/layout"; export default ({ data: { allContentfulArticle: { edges: [ { node: { title, content: { childMarkdownRemark: { html } } } } ] } } }) => { return ( <Layout> <Helmet> <meta charSet="utf-8" /> <title>{title}</title> </Helmet> <div dangerouslySetInnerHTML={{ __html: html }} /> </Layout> ); }; export const query = graphql` query($slug: String!) { allContentfulArticle(filter: { link: { eq: $slug } }) { edges { node { title link content { childMarkdownRemark { html } } } } } } `; Now the title site will always correspond to the title of the article, which will significantly affect the issue of the site in the search results specifically on this issue. Here you can also easily add <meta name="description" content=" "> with the description of each article separately, thus allowing the user to understand what the article is about on the search page, in general, all SEO features are now available and manageable in one place.

PWA Setup
Gatsby is designed to deliver premium out-of-the-box performance. It takes care of the separation and minimization of code, as well as optimization in the form of preloading in the background, image processing, etc., so that the site you create has high performance without any manual configuration. These performance features are an important part of supporting a progressive approach to web applications.
But besides all the above, there are three basic criteria for the site, which define it as PWA :
- https protocol
- availability manifest.json
- offline access to the site at the expense of service workers
The first item cannot be solved by Gatsby, as the domain , hosting and protocol are deployment issues, and not development at all, but I can recommend Netlify , which solves the https issue by default.
Go to the rest of the points, for this we install two plugins:
yarn add gatsby-plugin-manifest gatsby-plugin-offline and configure them /src/gatsby-config.js
if (process.env.NODE_ENV === "development") { require("dotenv").config(); } module.exports = { plugins: [ { resolve: `gatsby-plugin-manifest`, options: { name: `GatsbyJS translated tutorial`, short_name: `GatsbyJS tutorial`, start_url: `/`, background_color: `#f7f0eb`, theme_color: `#a2466c`, display: `standalone`, icon: `public/favicon.ico`, include_favicon: true } }, `gatsby-plugin-offline`, `gatsby-transformer-remark`, { resolve: `gatsby-source-filesystem`, options: { name: `images`, path: `${__dirname}/src/images/` } }, { resolve: `gatsby-plugin-typography`, options: { pathToConfigModule: `src/utils/typography` } }, { resolve: `gatsby-source-contentful`, options: { spaceId: process.env.CONTENTFUL_SPACE_ID, accessToken: process.env.CONTENTFUL_ACCESS_TOKEN } }, `gatsby-plugin-sass`, `gatsby-plugin-styled-components`, `gatsby-plugin-react-helmet` ] }; You can customize your manifest using the documentation , as well as customize the service-workers strategy by overwriting the plugin settings .
You will not notice any changes in the development mode, but the site already meets the latest requirements of the web world, and when it is placed on the https: // domain it will not be equal.
Conclusion
A couple of years ago when I first encountered the problems of launching a React-application into the Internet, supporting it and updating content, I could not even imagine that there was already a JAM-stack approach on the market that simplifies all these processes, and now I can not stop wondering simplicity. Gatsby solves most of the issues affecting the performance of the site simply out of the box, and if you understand the subtleties a little more to customize it to fit your needs, you can get 100% performance on all items in the Lighthouse , which will significantly affect the search engine results ( least in google).
Afterword
As you may have noticed, the draft considered in the article copies the main site with the documentation of Gatsby.js, and this is no accident, because I swung to translate at least an introductory tutorial into Russian and Ukrainian languages to popularize this stack in our countries. View the current version here:
')
Source: https://habr.com/ru/post/442298/
All Articles