Chat bot for Vkontakte on ASP.NET Core C #
This article presents a step-by-step example of creating a simple chat bot in the VK social network on ASP.NET Core C #.
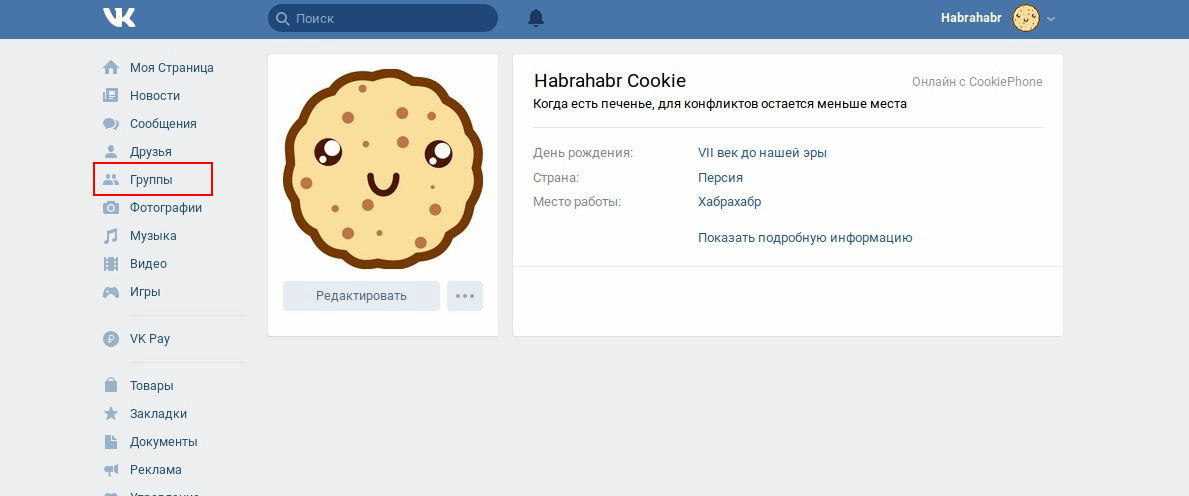
Chapter 1. Preparation
Start by creating and setting up a community.
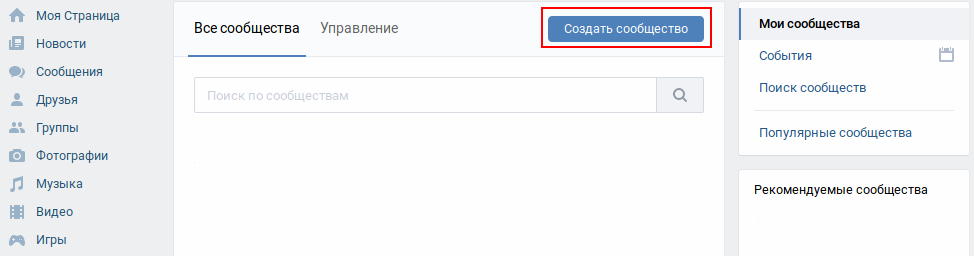
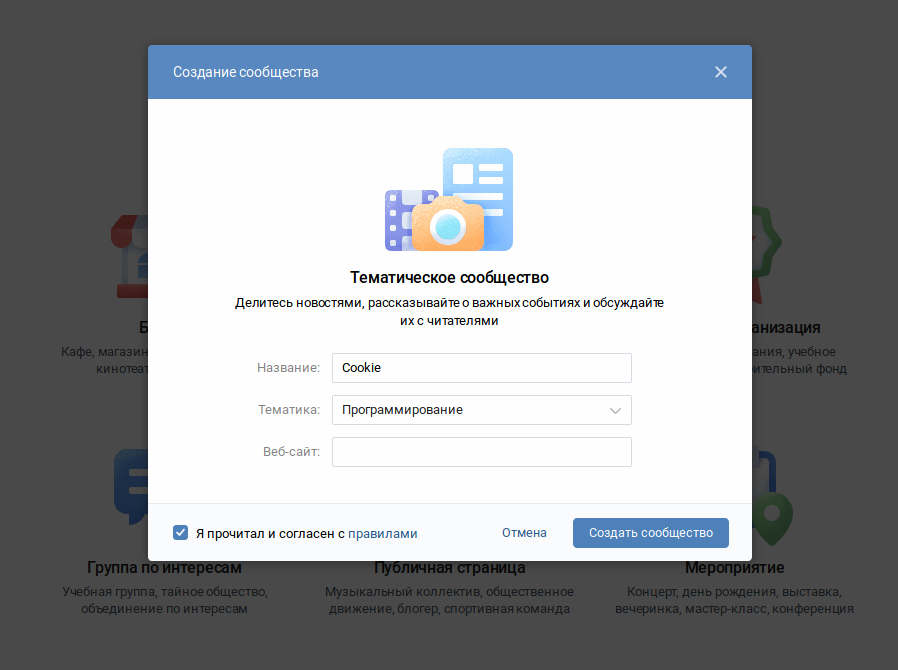
Choose any type of community

Fill in the fields with any data and ready! The group is created.
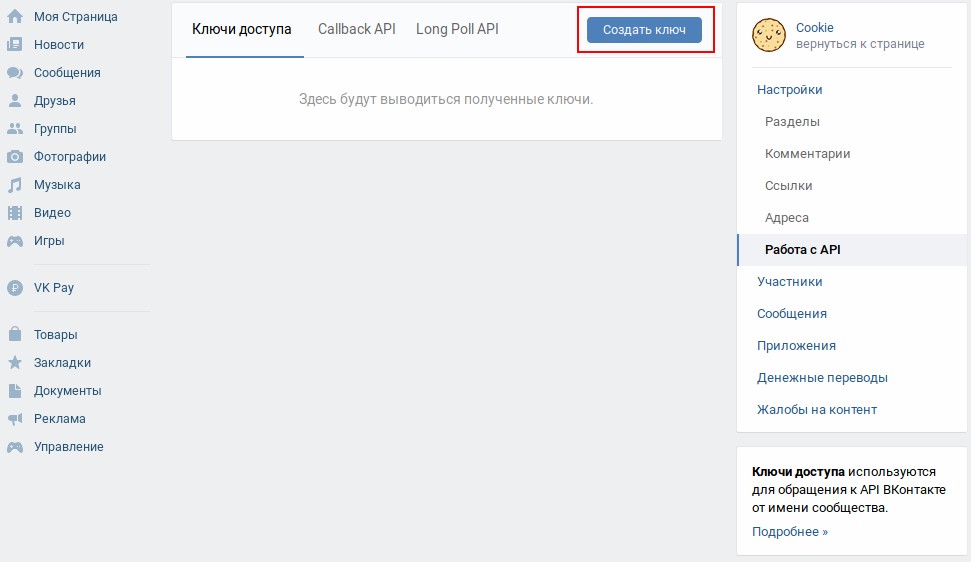
Let's get started configuring the API
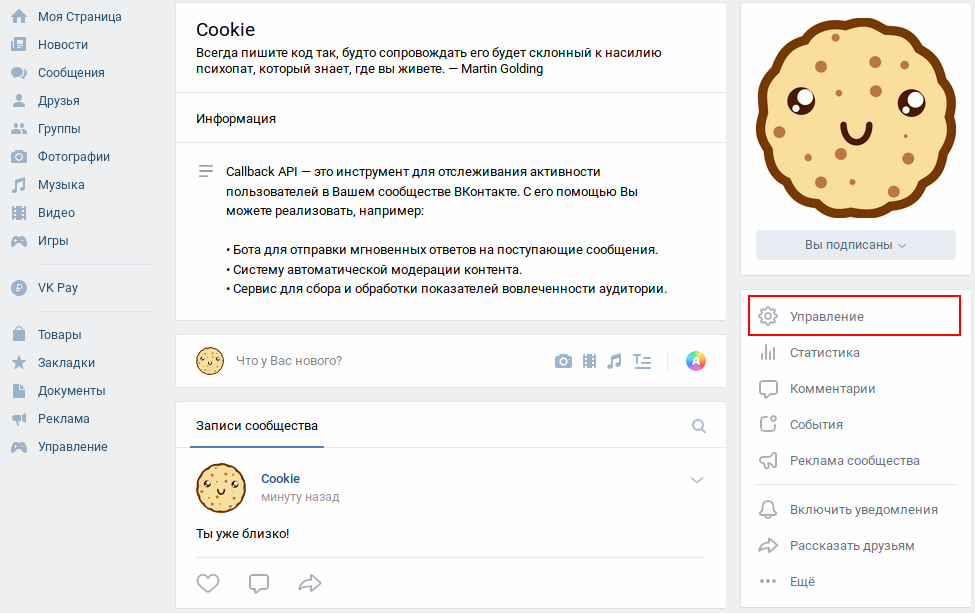
Create API key (Allow all)
To respond to any events, our script needs to know about them. To do this, there are two approaches - Callback API and Long Poll. We will implement the Callback API.
Callback API is a tool for tracking user activity in the VKontakte community. With it, you can implement, for example:
- A bot to send instant replies to incoming messages.
- Automatic content moderation system.
- Service for collecting and processing indicators of audience involvement.
Long Polling is a technology that allows you to receive data about new events using the "long requests". The server receives the request, but sends a response to it not immediately, but only when a certain event occurs (for example, a new message arrives), or the specified timeout expires.
Using the Callback API, we do not need to regularly repeat requests to track updates - we will receive them instantly.
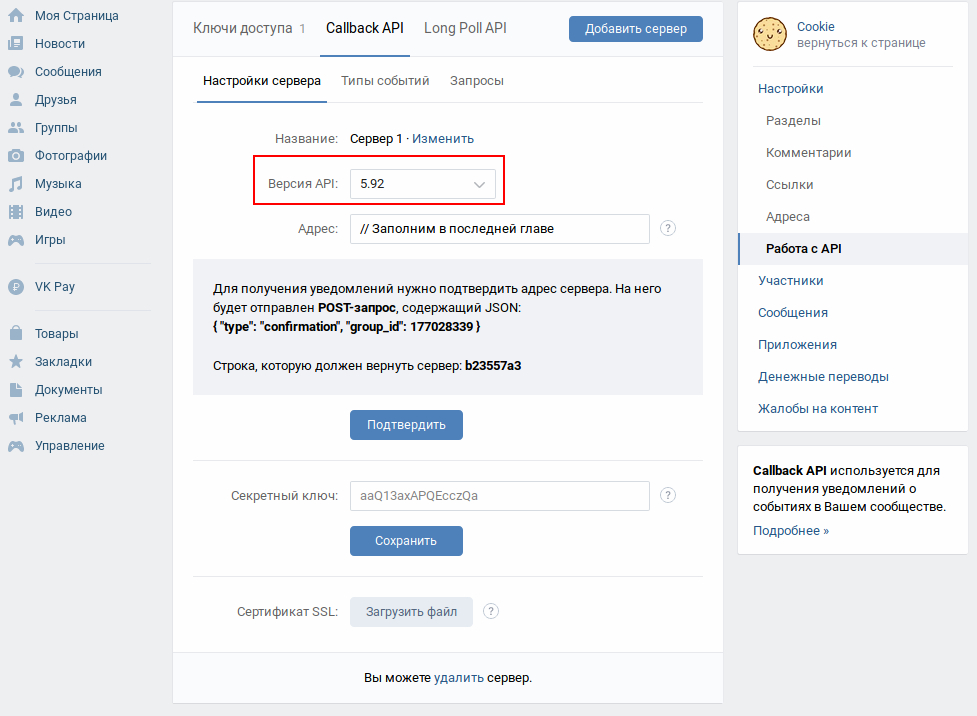
Setup Callback API
Choosing the latest API version
Select the type of event "incoming message".

Useful information:
Chapter 2. Implementing the Callback API
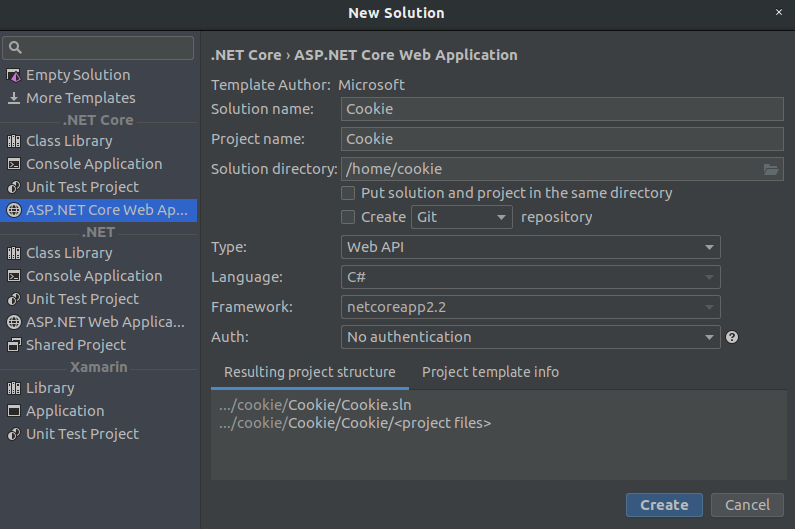
We start favorite IDE, we create ASP.NET Core Web Application.
Project Type: Web Api
Framework: netcoreapp 2.2
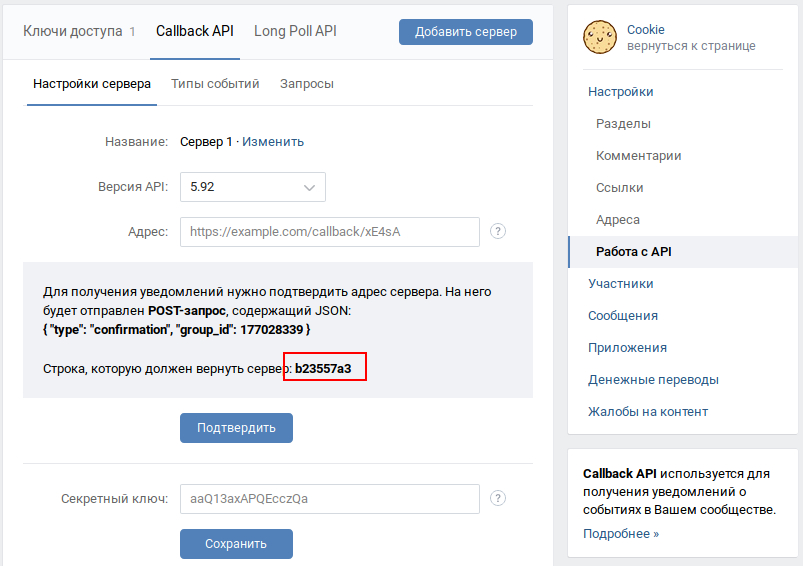
To confirm the server address, we will need to return a string with a unique value.
We take it in the settings of the Callback API.
Expand the configuration of our ASP.NET Core application .
Here we will store all the keys that will be involved in the development.

{ "Config": { "AccessToken": "0bd8573ea40badd694b4da0bbc7d54f52996", "Confirmation" : "b23557a3" }, "Logging": { "LogLevel": { "Default": "Warning" } }, "AllowedHosts": "*" } When an event occurs in the community, VK will send a request to the server with data in JSON format with basic information about the object that triggered the event.
{ "type":< >, "object":<, >, "group_id":<ID , > } For example:
{ "type":"group_join", "object":{ "user_id":1, "join_type":"approved" }, "group_id":1 } For the convenience of deserializing incoming JSON, we use the Data Transfer Object (DTO) pattern.
using System; using Newtonsoft.Json; namespace Cookie.Controllers { [Serializable] public class Updates { /// <summary> /// /// </summary> [JsonProperty("type")] public string Type { get; set; } /// <summary> /// , /// /// </summary> [JsonProperty("object")] public JObject Object { get; set; } /// <summary> /// ID , /// </summary> [JsonProperty("group_id")] public long GroupId { get; set; } } } To handle incoming requests, create CallbackController.cs .
using Microsoft.AspNetCore.Mvc; using Microsoft.Extensions.Configuration; namespace Cookie.Controllers { [Route("api/[controller]")] [ApiController] public class CallbackController : ControllerBase { /// <summary> /// /// </summary> private readonly IConfiguration _configuration; public CallbackController(IConfiguration configuration) { _configuration = configuration; } [HttpPost] public IActionResult Callback([FromBody] Updates updates) { // , "type" switch (updates.Type) { // case "confirmation": // return Ok(_configuration["Config:Confirmation"]); } // "ok" Callback API return Ok("ok"); } } } Please note: after receiving the notification, your server should return the string "ok" and HTTP status 200. If the server returns an error several times in a row, the Callback API temporarily stops sending notifications to it
Callback API is ready!
Useful information:
Chapter 3. Vk?
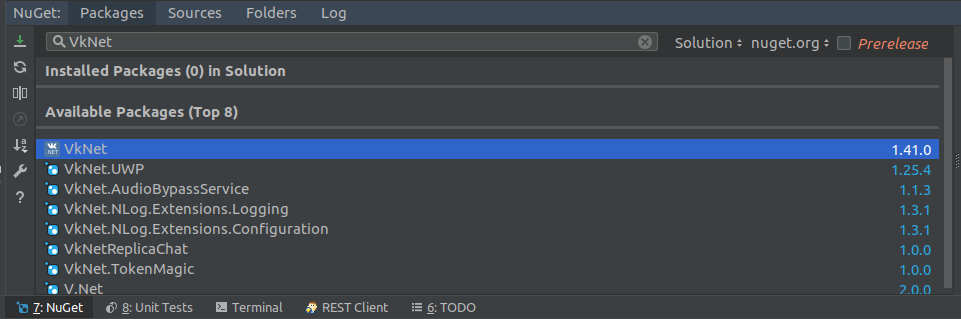
To interact with the VK API in C #, we will use the VkNET library .
Installation via Nuget:
Package manager:PM> Install-Package VkNet
.NET CLI:> dotnet add package VkNet
UI:
Useful information:
Chapter 4. More functionality!
Before extending the logic of the bot, let's authorize the group in our web application.
To do this, register IVkApi in the IoC container.
using VkNet; using VkNet.Abstractions; using VkNet.Model; services.AddSingleton<IVkApi>(sp => { var api = new VkApi(); api.Authorize(new ApiAuthParams{ AccessToken = Configuration["Config:AccessToken"] }); return api; }); Now we will expand our controller by adding inbound processing.
We implement IVkApi
using VkNet.Abstractions; private readonly IConfiguration _configuration; private readonly IVkApi _vkApi; public CallbackController(IVkApi vkApi, IConfiguration configuration){ _vkApi = vkApi; _configuration = configuration; } And the case itself, which will catch new messages. In it we add a bit of logic.
RandomId is a unique (in conjunction with the API_ID and the sender's ID) identifier designed to prevent re-sending the same message. It is saved with the message and is available in the message history.
The specified RandomId is used to verify uniqueness in the entire message history, so use a large range (up to int32).
PeerId is the destination identifier.
Text - the text of the personal message. Required parameter if the attachment parameter is not specified.
using VkNet.Model; using VkNet.Model.RequestParams; using VkNet.Utils; case "message_new":{ // var msg = Message.FromJson(new VkResponse(updates.Object)); // _vkApi.Messages.Send(new MessagesSendParams{ RandomId = new DateTime().Millisecond, PeerId = msg.PeerId.Value, Message = msg.Text }); break; } Chapter 5. Depla
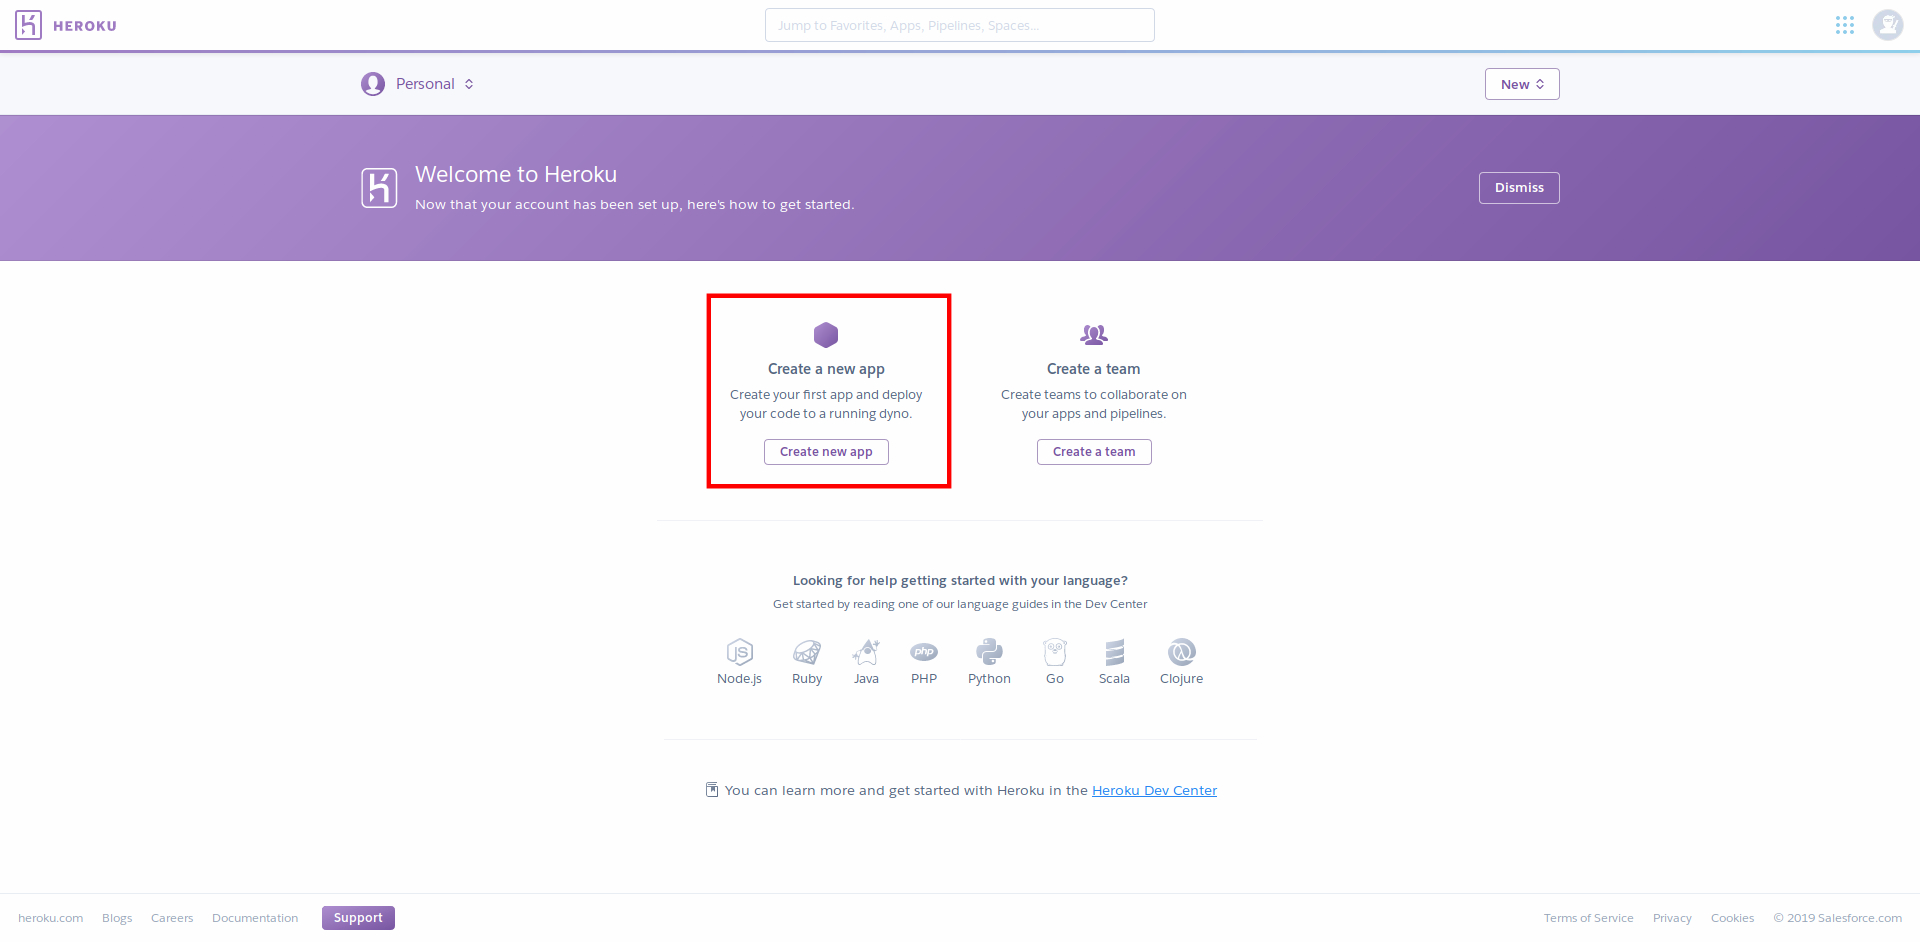
Now we need a server where all requests will be sent. One of the free options is Heroku .
After registering on the site, we will be asked to create a new application.
Enter the name of the project.
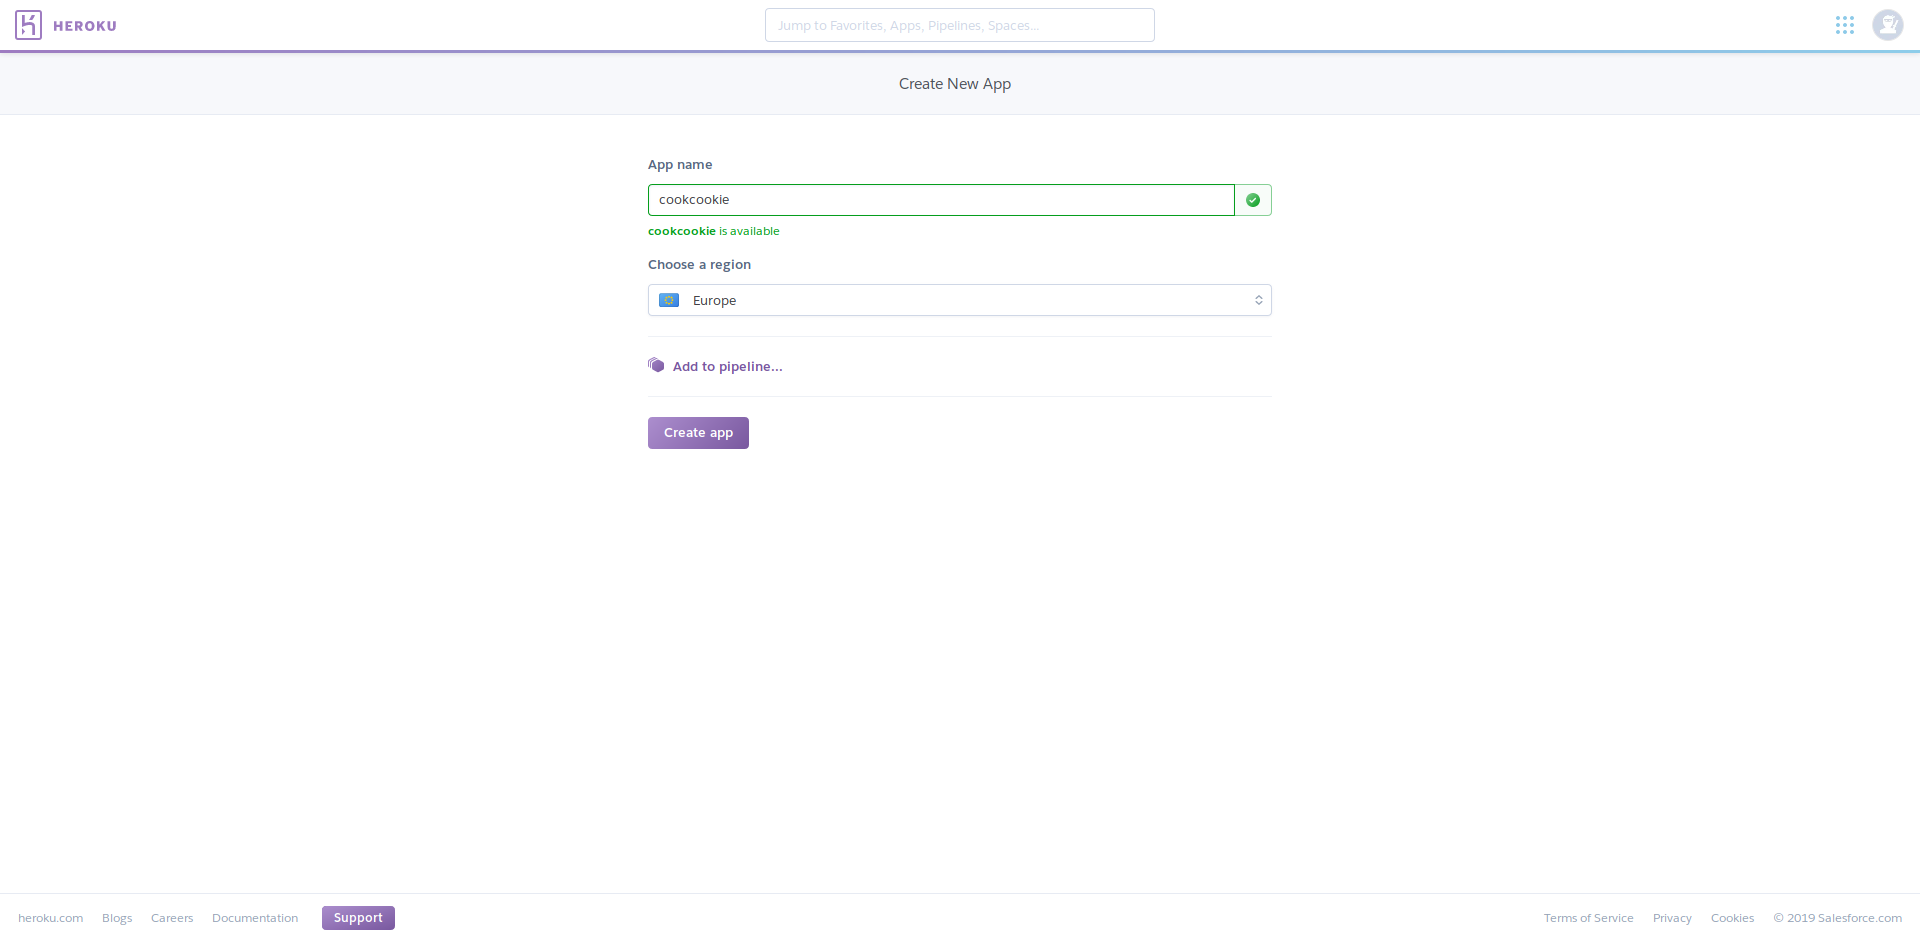
After creating the project will be redirected to the Deploy page
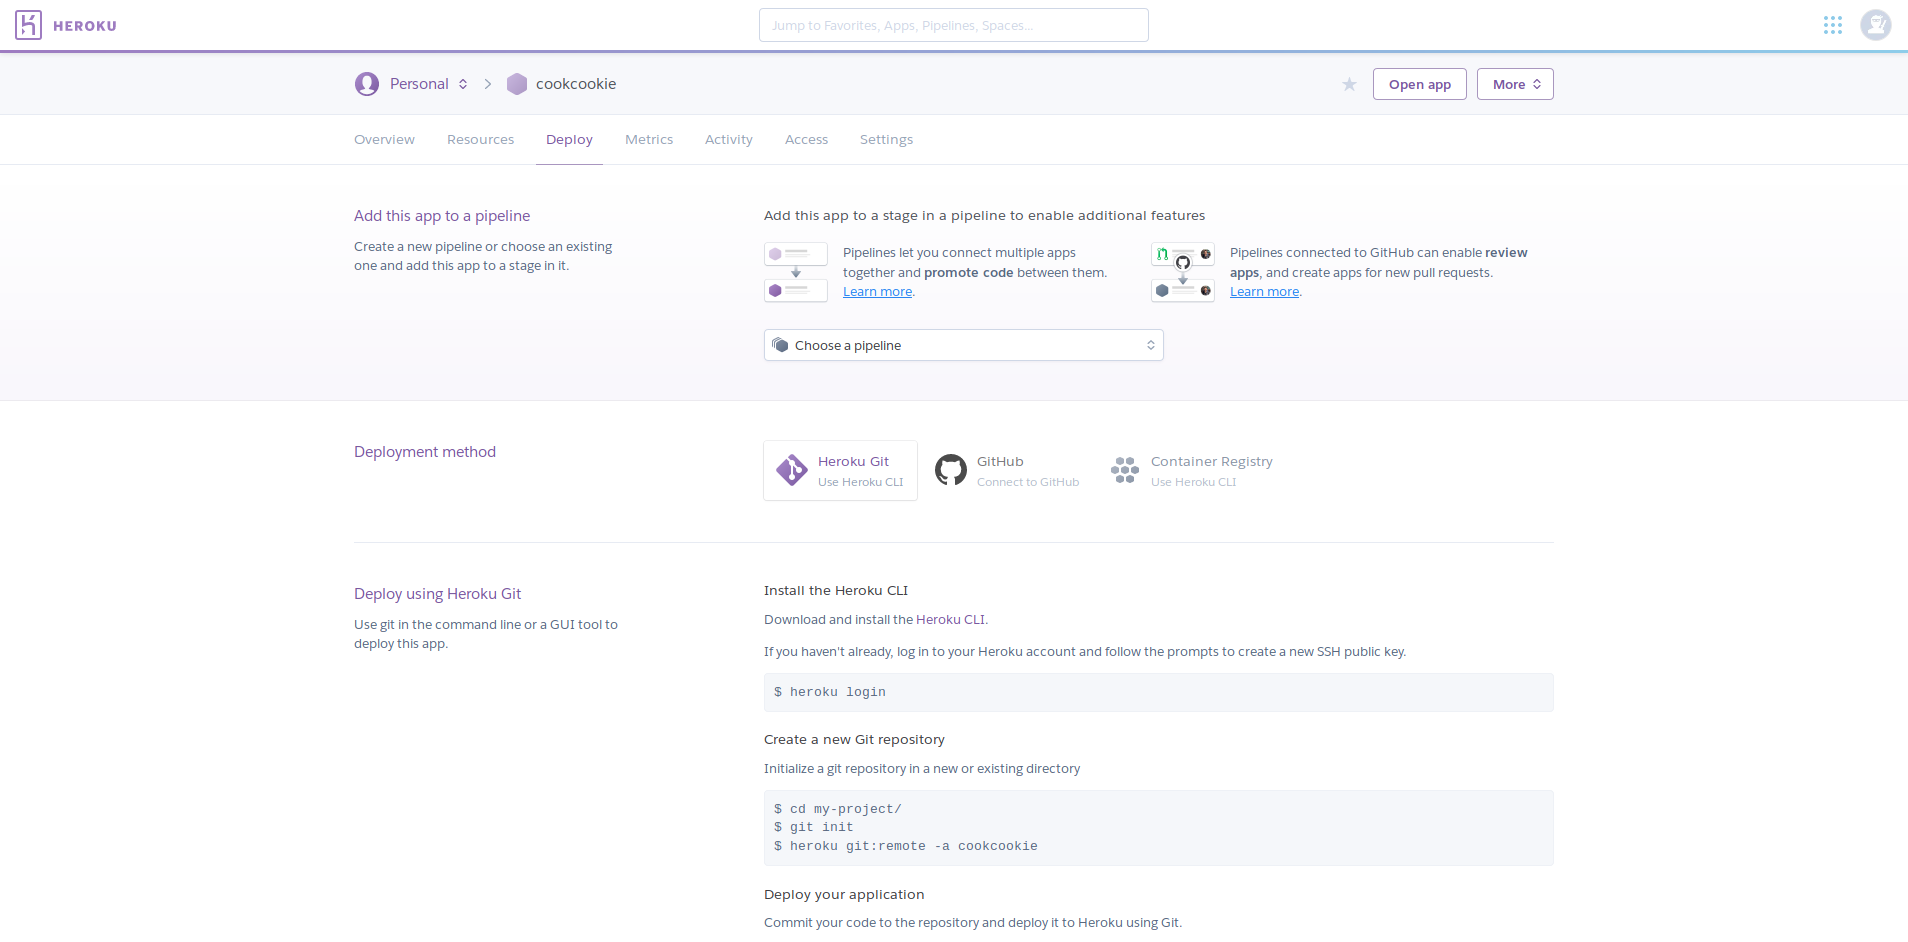
Heroku CLI requires Git . If you have not yet installed Git, then download it before installing the CLI.
To get started, download the Heroku CLI .
We authorize Heroku account.$ heroku login
Go to the project directory.$ cd ( )
Create a new directory in the current directory named .git containing all the necessary repository files - the basis of the Git repository.$ git init
Connect to remote repository (our project)$ heroku git:remote -a ( )
Buildpacks are responsible for converting the deployed code to slug, which can then be executed on dyno.$ heroku buildpacks:set https://github.com/jincod/dotnetcore-buildpack.git -a ( )
To start tracking (add version control) our files.$ git add .
$ git commit -am "cookie"
$ git push heroku master
And we go to make tea.
When our application is uploaded to Heroku, we can open it at the following link https: //**PROJECT_NAME**.herokuapp.com/
We return to our group, and in the settings of the Callback API indicate the link,
referring to the callback controller .
https: //**PROJECT_NAME**.herokuapp.com/api/callback
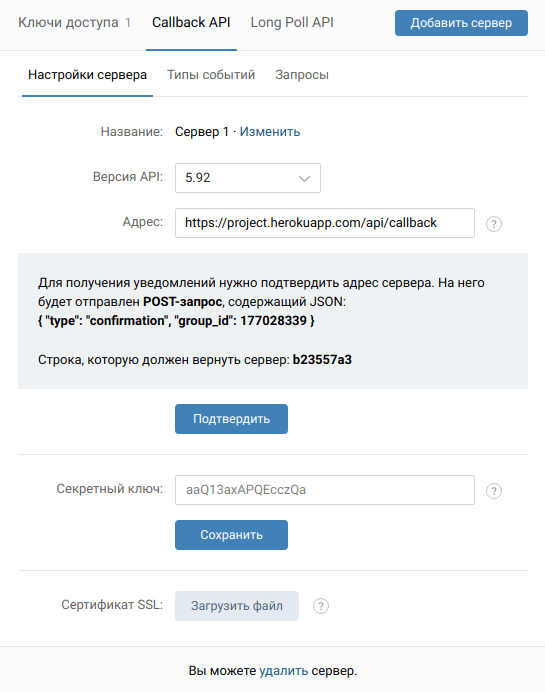
VK will send a JSON request to our server to confirm the address. After the response, the following notification will be displayed: Server address saved successfully
Now we will write to our bot in private messages.

Good coding!
')
Source: https://habr.com/ru/post/441720/
All Articles