Creating a Bottom Navigation Bar at Kotlin using Anko
Starting a new project, I decided to try to completely abandon the XML files on the basis of which layouts are formed, and create screens using the Anko library. Having little experience in developing for Android (about 2 years) and even less experience writing code on Kotlin (a little more than six months), I immediately encountered the problem of including the Bottom Navigation Bar in the application Navigation Architecture Component, or rather drawing it, created by BottomNavigationView .
First of all, I turned to Ineta to find a possible solution. But all the articles I found with varying degrees of clarity talked about how to work with components of navigation and none (of those whose articles I studied) did not do it on Anko. Having solved the task, I offer the community my own way of creating the Bottom Navigation Bar.
Completely all the code can be found here.
I skip the stage of creating a new project in Android Studio, I’ll just note that to work with Anko and the Navigation Architecture Component in build.gradle at the module level, I need to add the following dependencies:
implementation "org.jetbrains.anko:anko:$anko_version" implementation "org.jetbrains.anko:anko-constraint-layout:$anko_version" implementation "com.android.support.constraint:constraint-layout:2.0.0-alpha3" implementation 'android.arch.navigation:navigation-fragment:1.0.0-beta02' implementation 'android.arch.navigation:navigation-fragment-ktx:1.0.0-beta02' implementation 'android.arch.navigation:navigation-ui-ktx:1.0.0-beta02' implementation 'com.google.android.material:material:1.0.0' The next step is to create the structure of the future application. To render the main activation instead of the xml file, create the class MainActivityUI inherited from the AnkoComponent interface:
class MainActivityUI: AnkoComponent<MainActivity> { override fun createView(ui: AnkoContext<MainActivity>): View = with(ui) { constraintLayout { } } } In the MainActivity class, setContentView (R.layout.activity_main) is replaced by MainActivityUI (). SetContentView (this).
Then we create package fragments in which our fragments will lie and package ui to accommodate the classes responsible for rendering the screens of the corresponding fragments. This is the structure of the project:
fragments ui HomeUI UsersUI DetailsUI MoreUI HomeFragment UsersFragment DetailsFragment MoreFragment Now let's navigate directly and create the Bottom Navigation Bar.
A detailed description of the inclusion of new navigation components and a description of work in the Navigation Editor can be found on the documentation page here . To create a file (graph) of navigation between the application screens, you need to add another folder to the res folder, namely, navigation and add the file navigation_graph.xml to it. For this project it will be like this:
<navigation xmlns:android="http://schemas.android.com/apk/res/android" xmlns:app="http://schemas.android.com/apk/res-auto" android:id="@+id/navigation_graph" app:startDestination="@id/homeFragment"> <fragment android:id="@+id/homeFragment" android:name="com.arsinde.ankobottomnavbar.fragments.HomeFragment" android:label="HomeFragment"> <action android:id="@+id/action_homeFragment_to_detailsFragment" app:destination="@id/detailsFragment"/> </fragment> <fragment android:id="@+id/detailsFragment" android:name="com.arsinde.ankobottomnavbar.fragments.DetailsFragment" android:label="DetailsFragment"> <action android:id="@+id/action_detailsFragment_to_usersFragment" app:destination="@id/usersFragment"/> </fragment> <fragment android:id="@+id/usersFragment" android:name="com.arsinde.ankobottomnavbar.fragments.UsersFragment" android:label="UsersFragment"> <action android:id="@+id/action_usersFragment_to_moreFragment" app:destination="@id/moreFragment"/> </fragment> <fragment android:id="@+id/moreFragment" android:name="com.arsinde.ankobottomnavbar.fragments.MoreFragment" android:label="MoreFragment"/> </navigation> To display Bar himself, you need to create another resource folder, namely menu. It contains the file responsible for the visible part of the bar. This is how it looks in this project:
<menu xmlns:android="http://schemas.android.com/apk/res/android"> <item android:id="@id/homeFragment" android:icon="@drawable/ic_home" android:title="@string/menu_title_home"/> <item android:id="@id/usersFragment" android:icon="@drawable/ic_users" android:title="@string/menu_title_users"/> <item android:id="@id/detailsFragment" android:icon="@drawable/ic_info" android:title="@string/menu_title_details"/> <item android:id="@id/moreFragment" android:icon="@drawable/ic_more" android:title="@string/menu_title_more"/> </menu> It is time to put everything together and see how it works.
Add a fragment container to the MainActivityUI, and define a container for the navigation bar.
constraintLayout { val fragmentContainer = frameLayout { id = R.id.fragment_container }.lparams { width = matchParent height = matchConstraint } val bottomNavigation = bottomNavigation { id = R.id.bottom_nav_view inflateMenu(R.menu.bottom_navigation_menu) } applyConstraintSet { fragmentContainer { connect( START to START of PARENT_ID, END to END of PARENT_ID, TOP to TOP of PARENT_ID, BOTTOM to TOP of R.id.bottom_nav_view ) } bottomNavigation { connect( START to START of PARENT_ID, END to END of PARENT_ID, TOP to BOTTOM of R.id.fragment_container, BOTTOM to BOTTOM of PARENT_ID ) } } } It should be especially noted that in this example, bottomNavigation is an extantion function, which has the following form:
inline fun ViewManager.bottomNavigation(init: BottomNavigationView.() -> Unit = {}) = ankoView({ BottomNavigationView(it) }, theme = 0, init = init) Now in the MainActivity it is necessary to define the NavHostFragment object (see in the dock):
private val host by lazy { NavHostFragment.create(R.navigation.navigation_graph) } And in the onCreate () method, define:
supportFragmentManager.beginTransaction() .replace(R.id.fragment_container, host) .setPrimaryNavigationFragment(host) .commit() The final touch is to add an object of the NavController class to onStart () MainActivity, which allows you to navigate between fragments by selecting one or another navigation bar object:
override fun onStart() { super.onStart() val navController = host.findNavController() findViewById<BottomNavigationView>(R.id.bottom_nav_view)?.setupWithNavController(navController) navController.addOnDestinationChangedListener{_, destination, _ -> val dest: String = try { resources.getResourceName(destination.id) } catch (e: Resources.NotFoundException) { Integer.toString(destination.id) } Log.d("NavigationActivity", "Navigated to $dest") } } Run the application and vois là ...
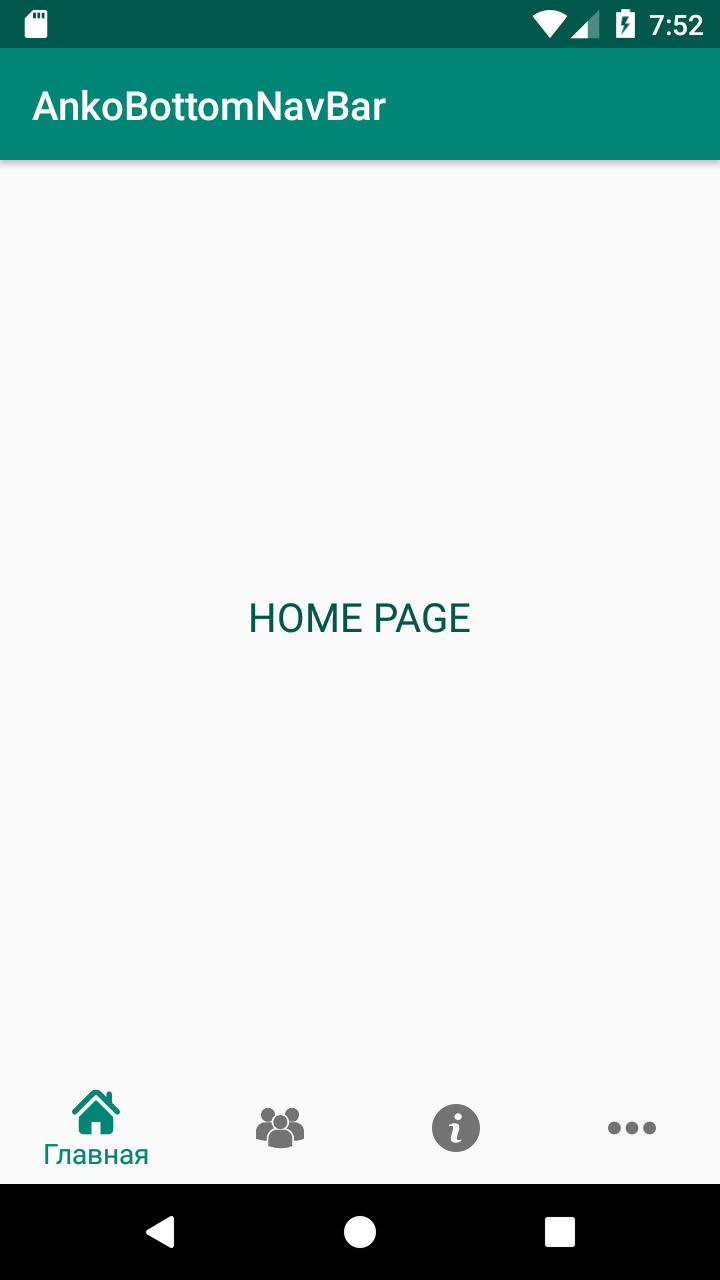
')
Source: https://habr.com/ru/post/441618/
All Articles