Ceedling + Eclipse or unit tests for microcontrollers

Do you program microcontrollers? Have you read about TDD, or are you just tired of looking for bugs and rewriting the code again?
Friend, try the tests.
This article will show you how to integrate Ceedling into Eclipse / SW4STM32 so that during each build the code passes through the tests.
')
What prompted me to write an article?
I could not find the detailed instructions, but I couldn’t do it according to the found instructions, because of their superficial or outdated contents (for example, launching ceedling is no longer done with the rake command).
Instructions for integrating ceedling into eclipse from developers are very scarce, and the only instruction found was paid (this was the last straw):

Instructions for integrating ceedling into eclipse from developers are very scarce, and the only instruction found was paid (this was the last straw):
Installation
On the example of OS Windows, CubeMX and SW4STM32.
Install Chocolatey
Open PowerShell.exe and execute:
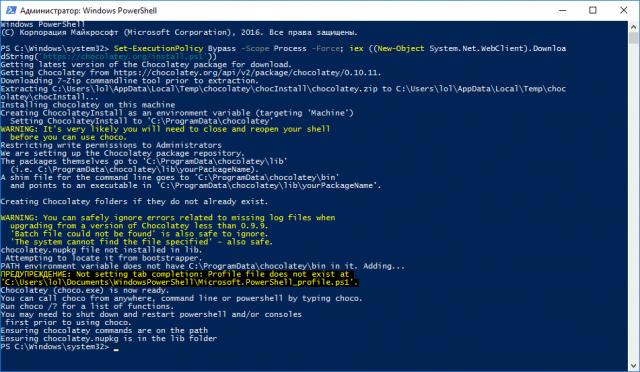
Set-ExecutionPolicy Bypass -Scope Process -Force; iex ((New-Object System.Net.WebClient).DownloadString('https://chocolatey.org/install.ps1')) Install MinGW
Open PowerShell.exe and execute:
choco install mingw Install ruby
Open PowerShell.exe and execute:
choco install ruby Install the gem ceedling
Restart PowerShell!
Open PowerShell.exe and execute:
Open PowerShell.exe and execute:
gem install ceedling Health check
Open PowerShell.exe and execute:
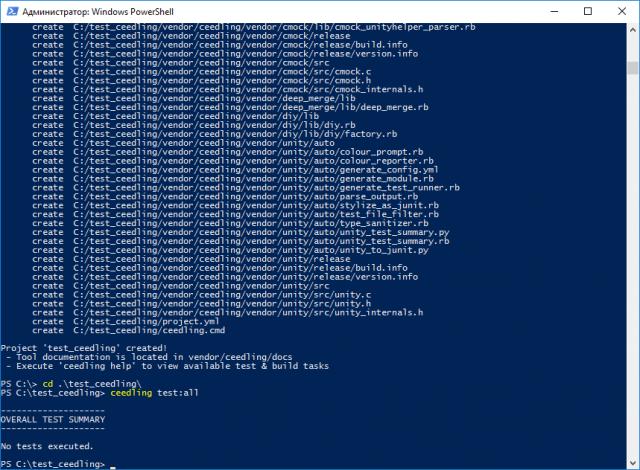
cd / ceedling new test_ceedling cd test_ceedling ceedling test:all Project creation
Create a project using CubeMX
Create a project in CubeMX under the toolchain / ide SW4STM32.
Run CubeMX as administrator to create a project in the C: / drive directory
Application structere -> advanced (otherwise the project is not immediately going to).
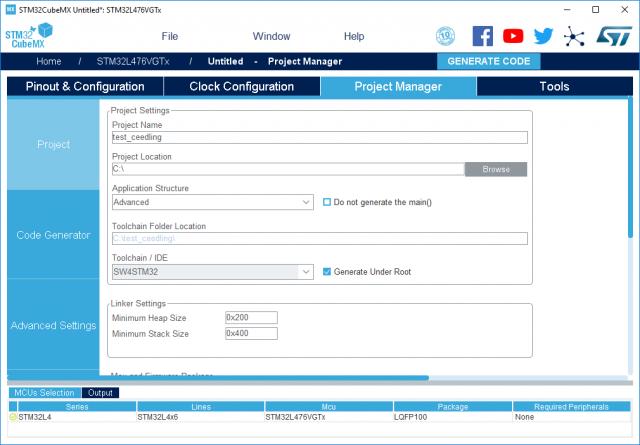
Run CubeMX as administrator to create a project in the C: / drive directory
Application structere -> advanced (otherwise the project is not immediately going to).
Initialize ceedling into the project:
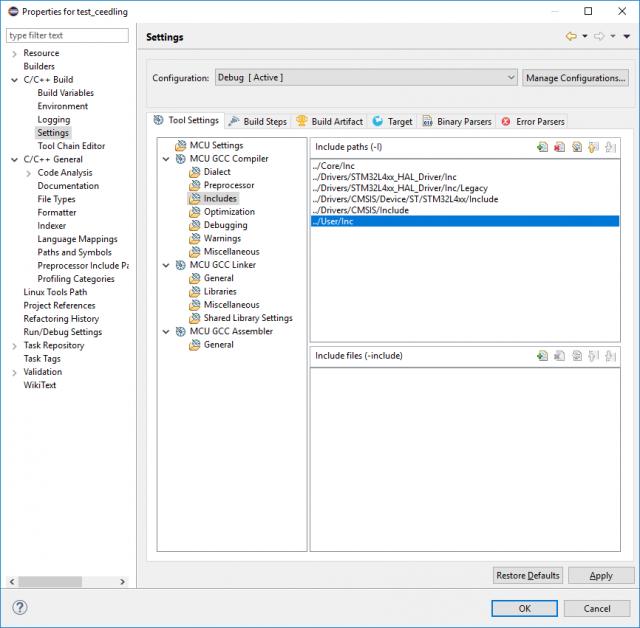
cd / ceedling new test_ceedling Create in the project the following structure and c./h. files, add paths to project.yml:
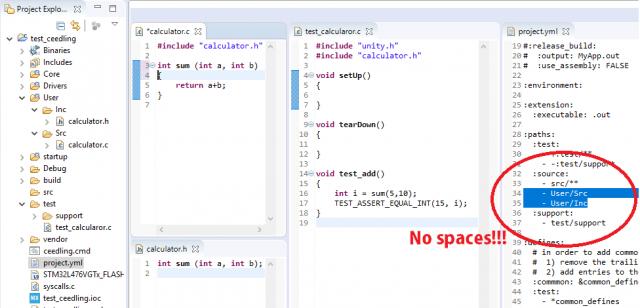
Add source location & includes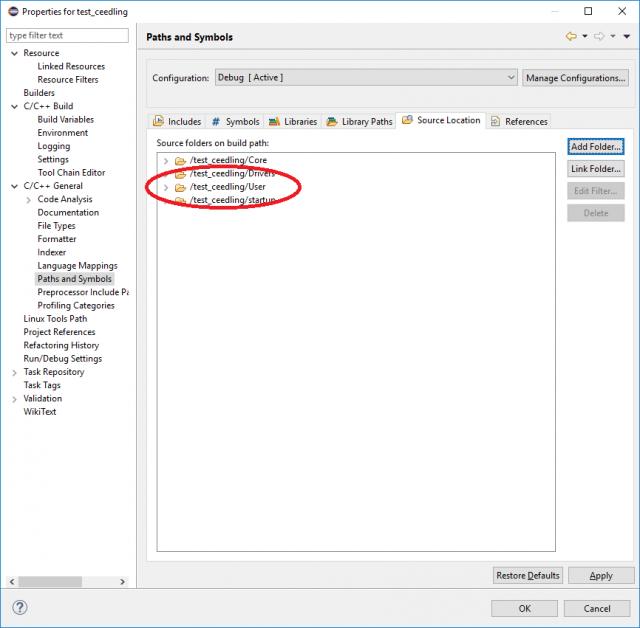
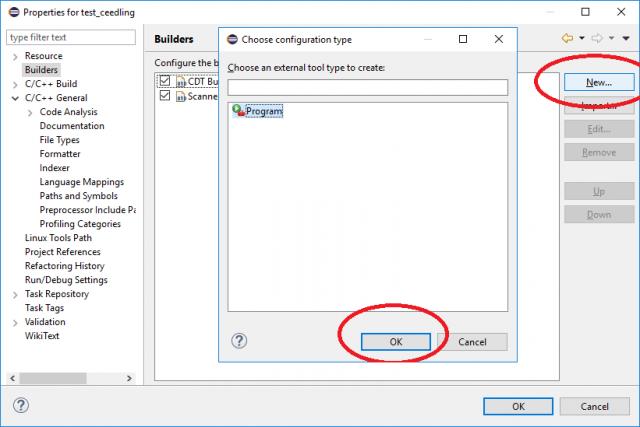
Create a new Builder:
Arguments -> test: all
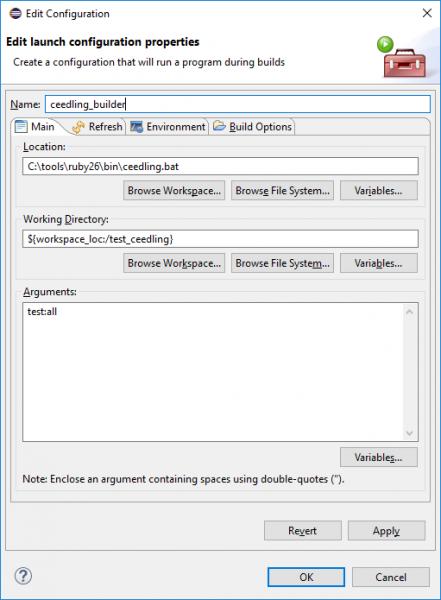
Launch
Create another console window for tests:

Switch it to displaying the results of the Ceedling builder:
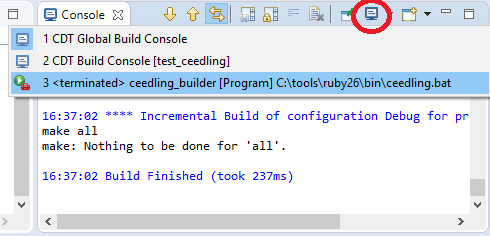
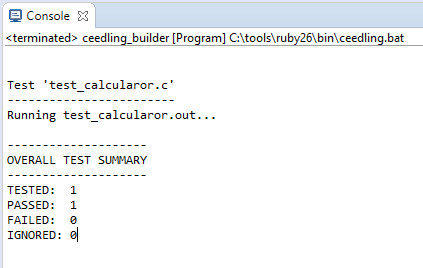
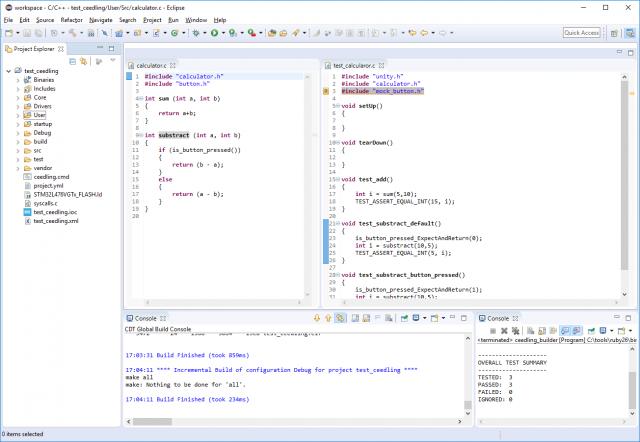
Press ctrl + B and see the test results in the console:
Add peripherals
Often the result of the function depends on the external components.
In addition to the test generation tool - Unity, the Ceedling utility supports CMock, a generator of mock objects and stubs.
Imagine that our calculator when calculating the difference,
a - b if the button is pressed, considers it differently.
b - a In this case, our tests may look like this:
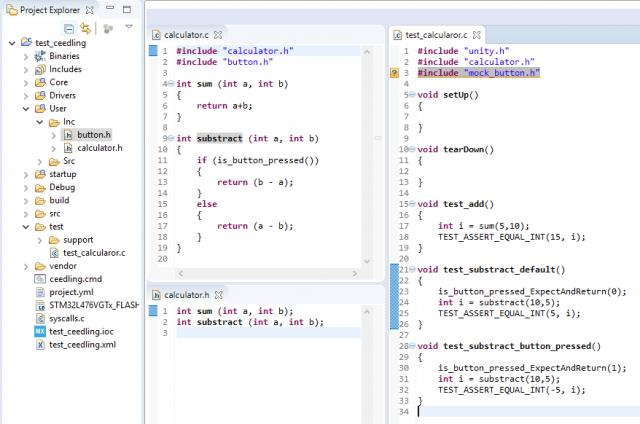
The push button test function was announced but not implemented (not written).
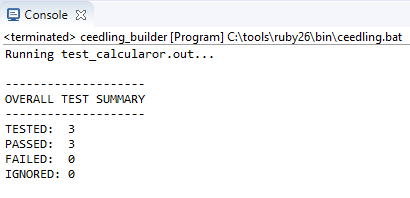
Press ctrl + B and see the test results in the console:
In this case, we created an imitation of a button, in the place of which there could be a UART, SPI, I2C, etc.
Conclusion
Now every time you build an application to the right in the corner, you will see the result of the tests performed:
Source: https://habr.com/ru/post/441268/
All Articles