vCloud Director Extender: Migration

This article will look at the procedure for expanding an enterprise network to a cloud provider through a VMware NSX® Edge ™ Gateway Standalone component. As well as detailed disassembled types of virtual machine migration.
Before you begin migrating and configuring the network, you need to make sure that all infrastructure components are deployed, configured, and running. To learn how to deploy and configure the infrastructure of VMware vCloud Director® Extender, you can see in the previous article .
')
All the steps below are required on the client infrastructure.
Connect to vCloud Director infrastructure
The vCloud Director infrastructure is managed in the VMware vCenter Server® interface. To add a new cloud:
- Go to the vcd extender control window
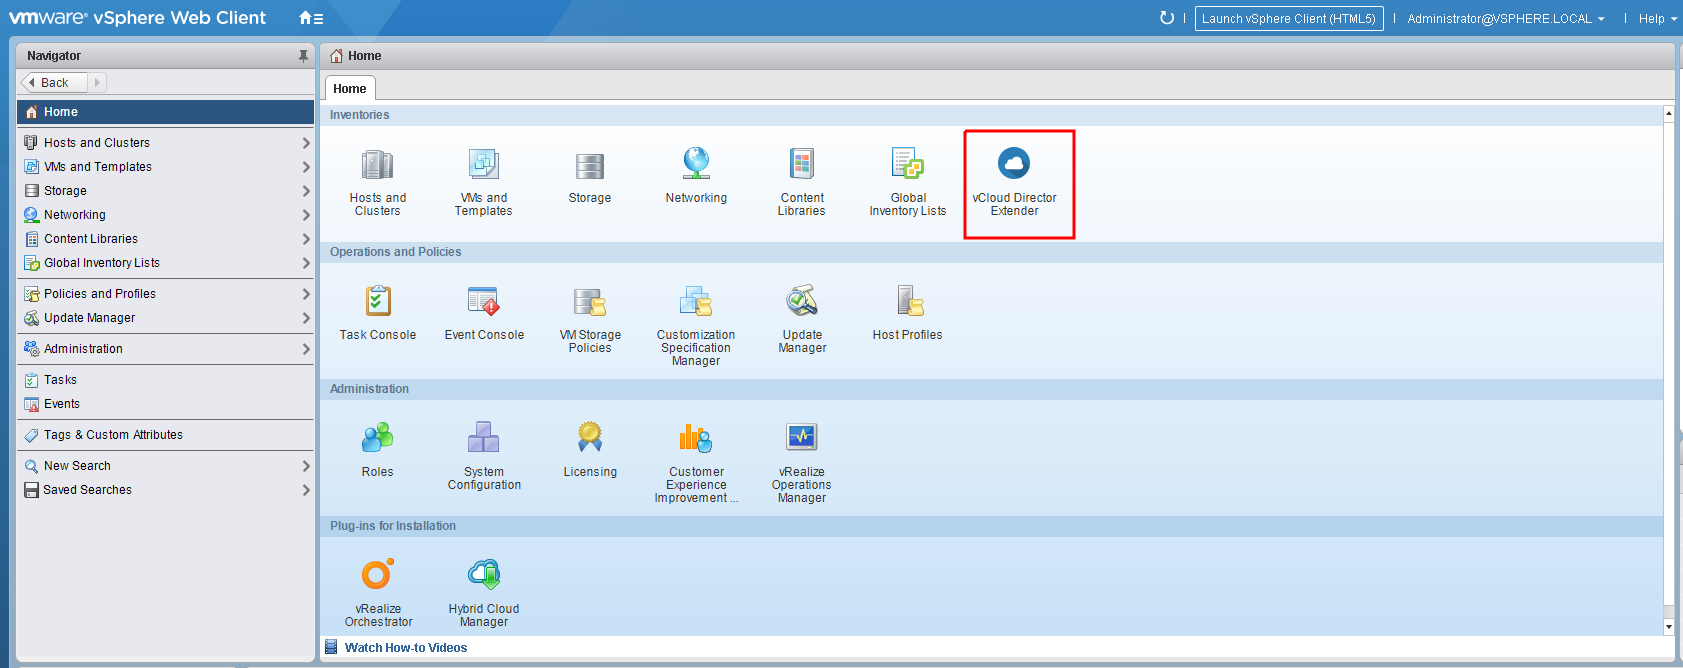
- In the Home section, click on the New Provider Cloud button.

- In the cloud connection window, fill in the specified fields and enter the vCloud organization administrator credentials
Provider Cloud Name - an arbitrary name under which this connection will be displayed
Provider Cloud URL - a link to a public cloud with the name of the organization
vCD Extender Cloud Service URL - link to the public address of vCloud Extender , deployed with the provider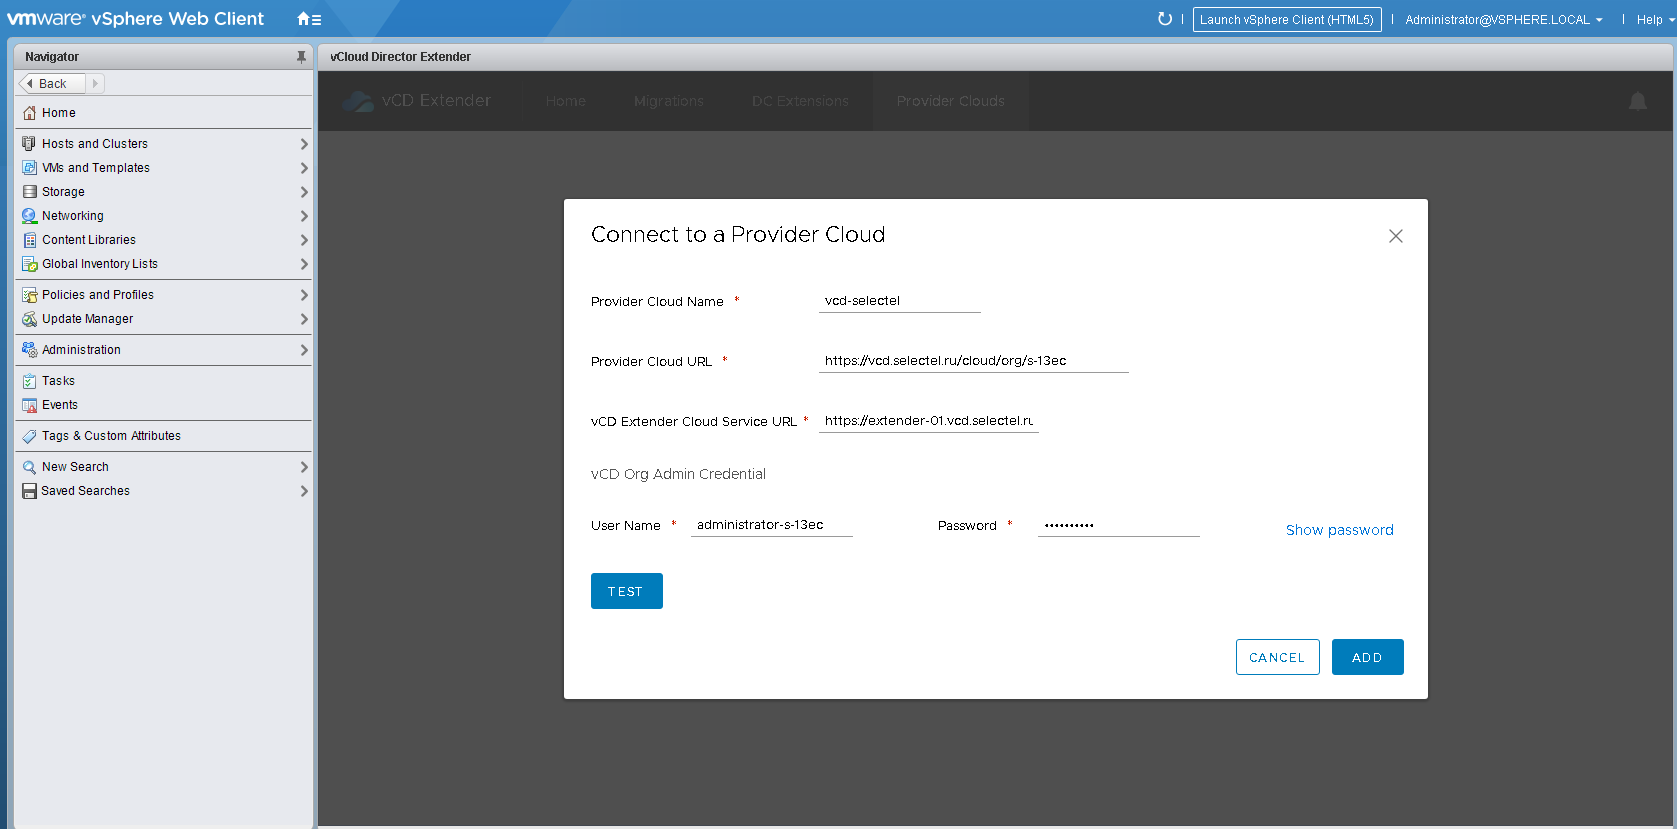
- Click the Test button and check that there were no errors during the connection test.
- To add a new cloud, click Add.
After the connection is made, in the Provider Clouds tab you can see information about connecting to the cloud, about the organization’s virtual data centers and resource consumption.

NSX Edge Gateway Standalone Deployment and Network Setup
Already in the current state, the system is ready for “cold” migration. But more on that later. First, we’ll finish the configuration so that we can carry out “hot” migrations.
Let's prepare a virtual data center to interact with the vCloud Director Extender :
- Go to the vCloud Director interface
- Go to the target virtual data center on the Edge Gateways tab for managing routers
By default, one virtual router will already be created. It should be noted that a large amount of traffic on the L2VPN channel will heavily load the router. We recommend to create a separate virtual router or request an increase in resources for the current one. In this example, we will work with the default router. - Right-click on the router and select Convert to Advanced Edge Gateway , otherwise it will be impossible to raise the tunnel between the virtual data center and the local infrastructure
The conversion will take no more than a couple of minutes, and the router’s network availability may be lost for 20-30 seconds.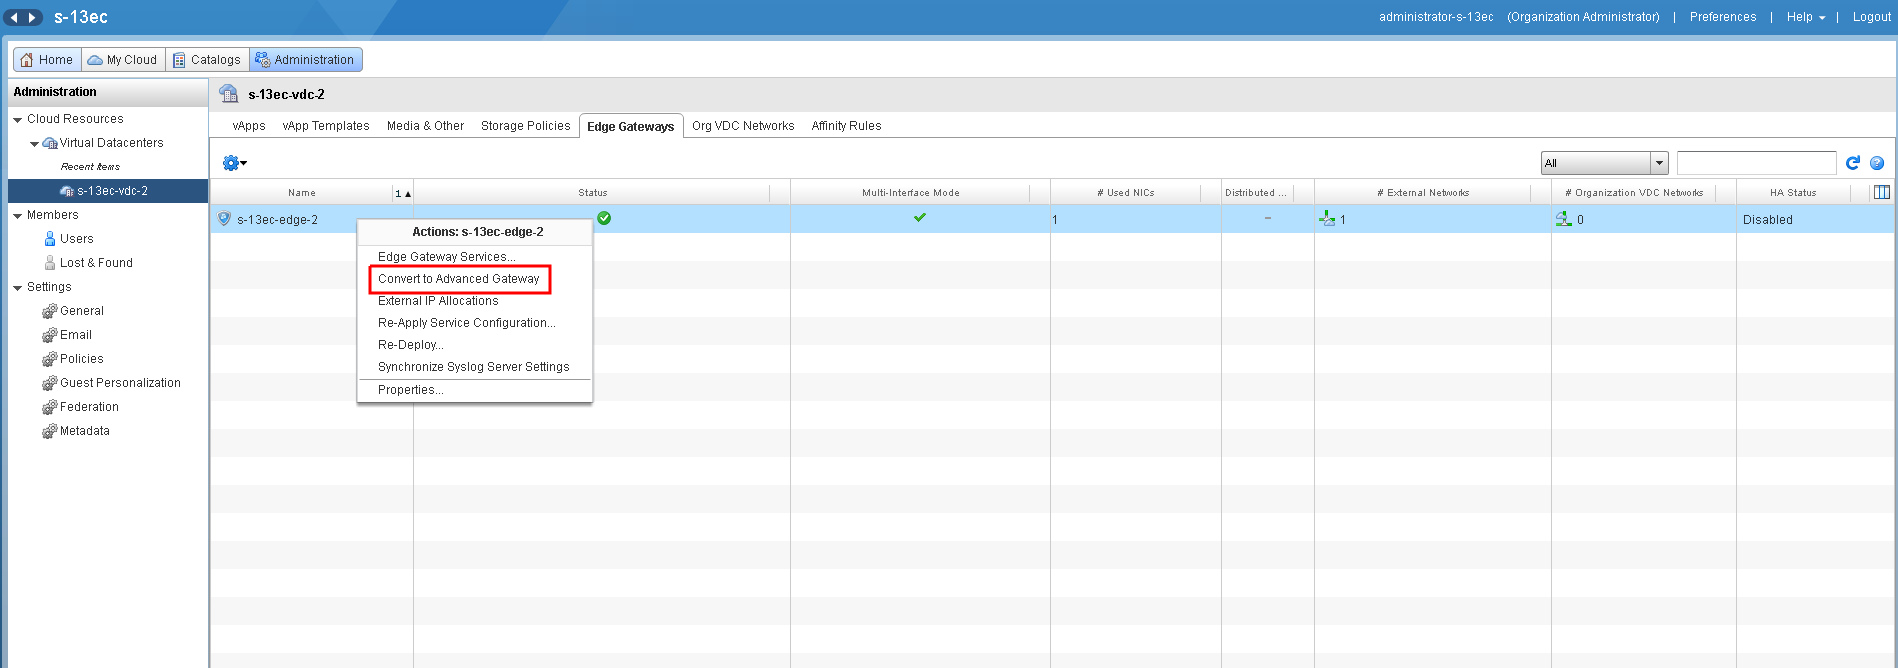
You can immediately prepare a network that we will subsequently “stretch” between the local vCenter and the cloud. - On the Org VDC Networks tab, create a new routed network.
It is important to note that the network must be created as a sub-interface. Check the checkbox in the Create as subinterface column .
- Since the network settings of the migrated virtual machines will not change, then set the parameters of the new network that are similar to those used locally.

- Specify an arbitrary network name. At this point, work with the vCloud Director interface so far.

- Return to the vCloud Extender Appliance Web Interface
- Go to the DC Extensions tab and create a configuration for the NSX-L2VPN-Edge virtual machine by clicking the ADD APPLIANCE CONFIGURATION button

In the L2 Appliance Configuration window that opens, specify the placement parameters of the applings virtual machine: folder, cluster, datastore, and port-group name.
Also, in the Uplink Network Pool IP column, set the IP address of the future virtual machine by typing it in the field and pressing the ADD button. Be sure to include the gateway address and network prefix. Click CREATE .
- The configuration has been created, and you can start creating the NSX Edge Gateway Standalone virtual machine itself, but already through the vCenter web client interface

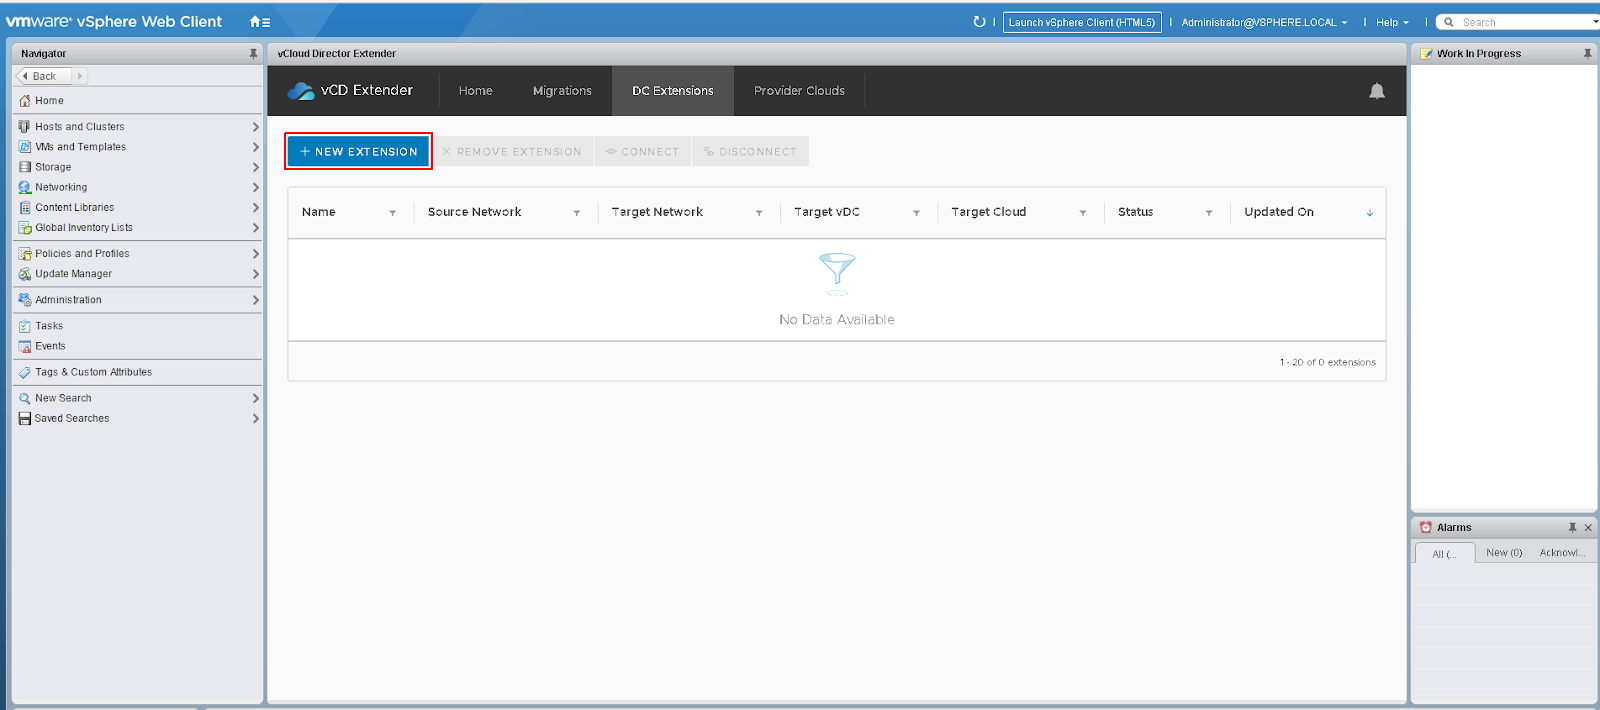
- Go to the vCloud Director Extender control panel, then to the DC Extensions tab and click NEW EXTENSION
- Specify a random but friendly name and select the source and destination parameters.
Select Source → Network - select a local port-group whose network we will “stretch”.
Select Target → vDC - select the target virtual data center.
Select Target → Network - select the network created earlier.
By the way, if the network has not yet been created, then it is possible to create it directly from this interface by clicking on the ADD NETWORK button. - Click START

In the process of deploying NSX Edge Gateway Standalone , an additional trunk port group is created and the OVF template of the virtual machine itself is deployed. After a couple of minutes, everything will be ready, and the tunnel connection to the cloud will be established.
Types of migration
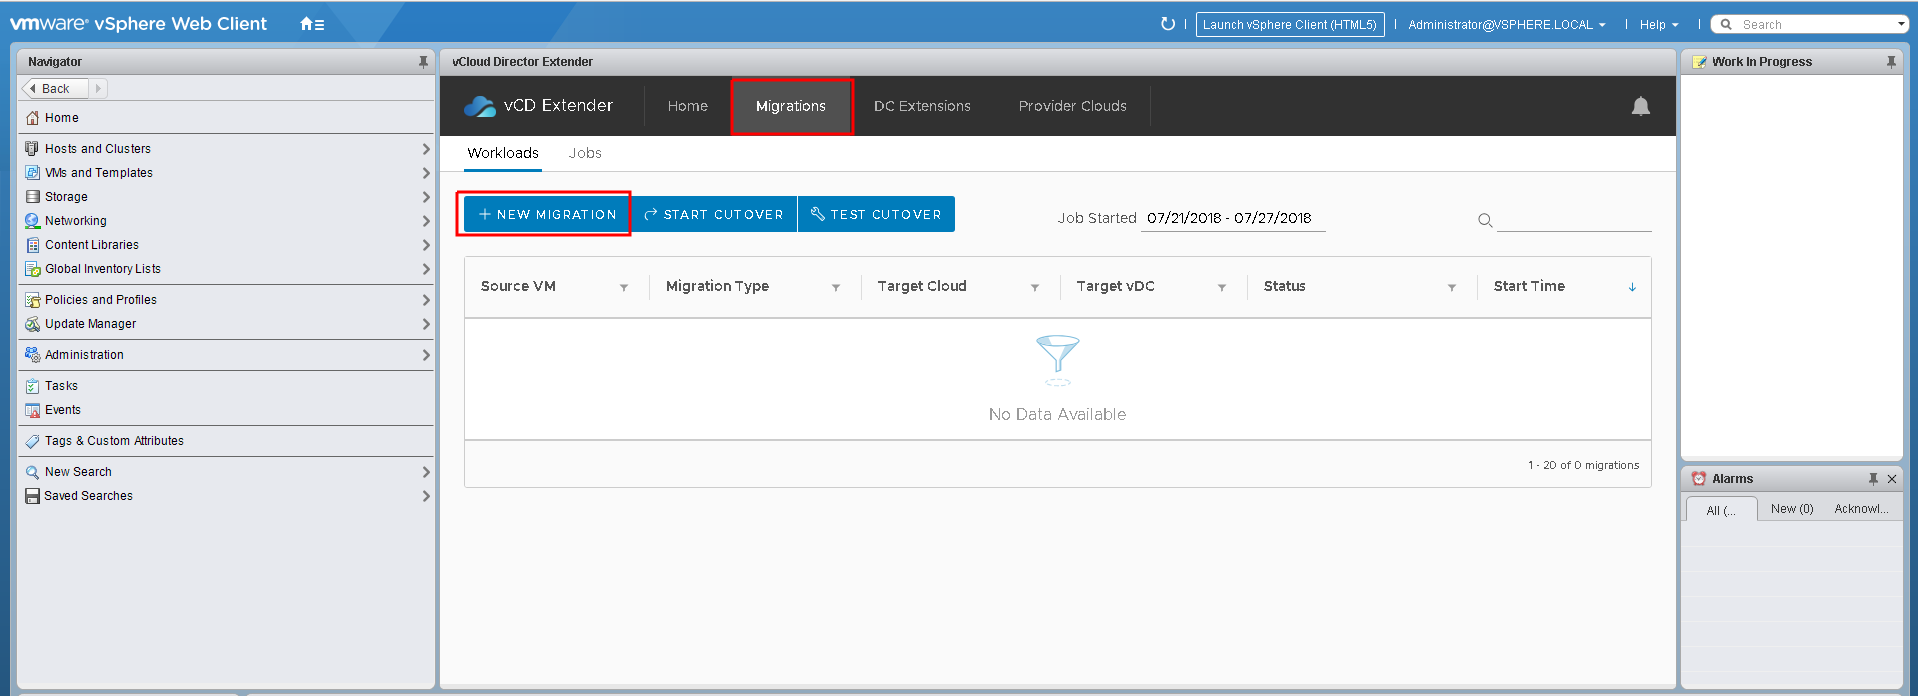
Any migration can be done by going to the Migrations tab and clicking on the NEW MIGRATION button. You can migrate as a single virtual machine or in groups.
Further, in order we consider all types of migration. And the first will be the "cold" migration (Cold Migration).
Cold Migration
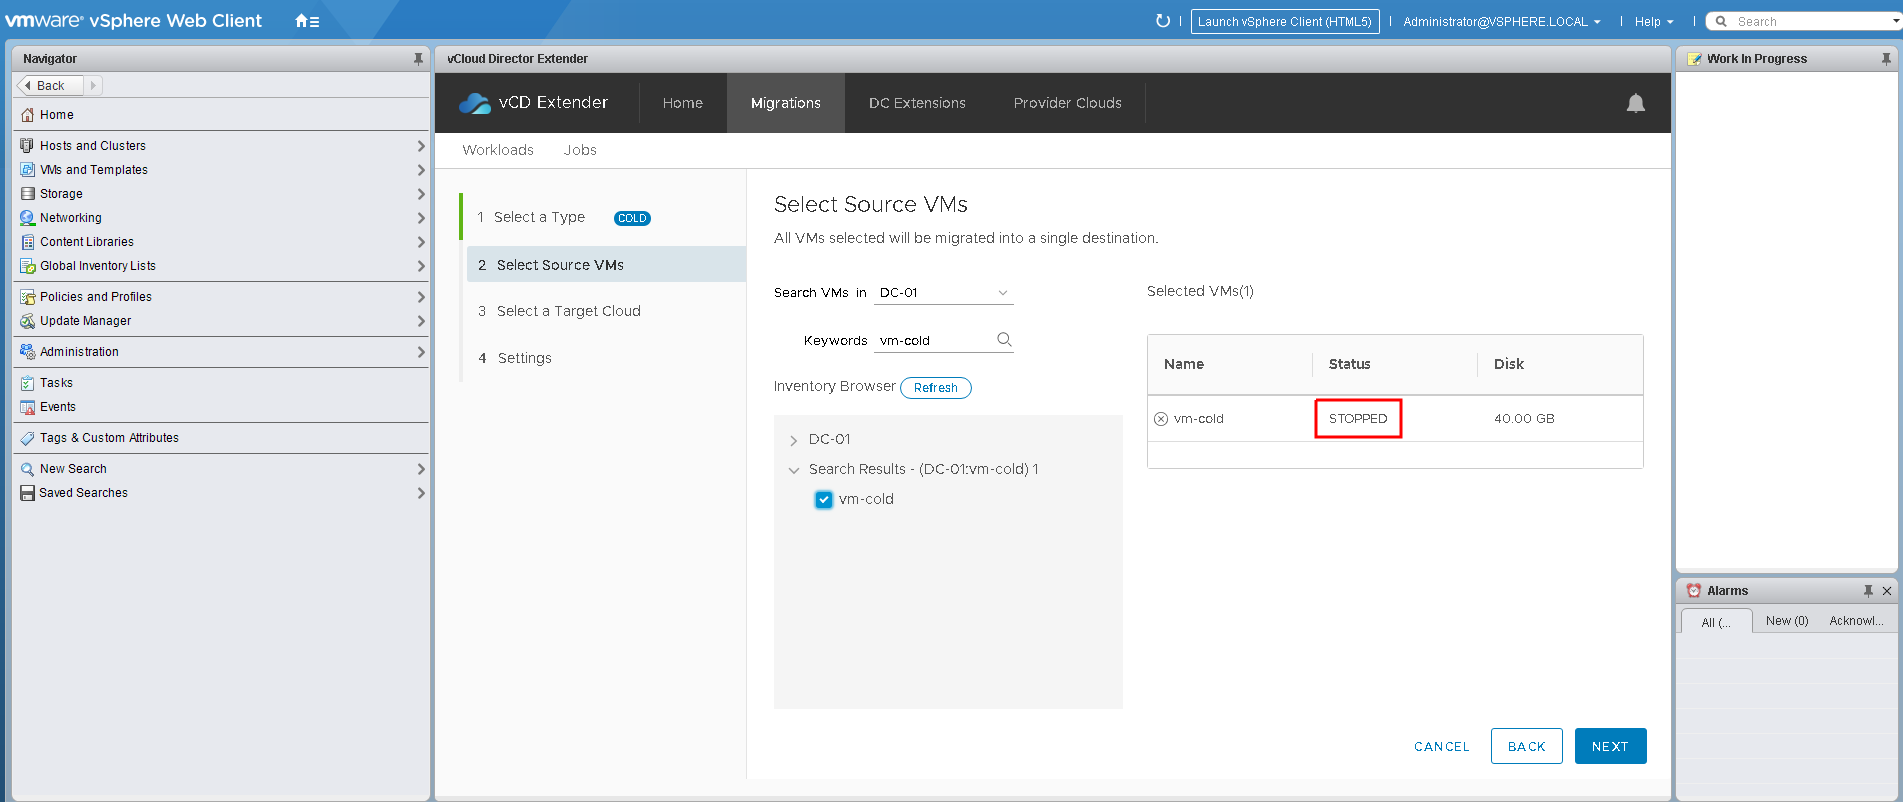
Select the Cold Migration type and follow the wizard’s instructions.
When marking virtual machines for “cold” migration, you need to consider that they should be turned off at the time of migration.
- Specify the “destination” in the Select a Target Cloud step
Note that grouping virtual machines when migrating to one vApp does not work as expected, which leads to unsuccessful migration of all virtual machines except one, so select Each VM stays individually .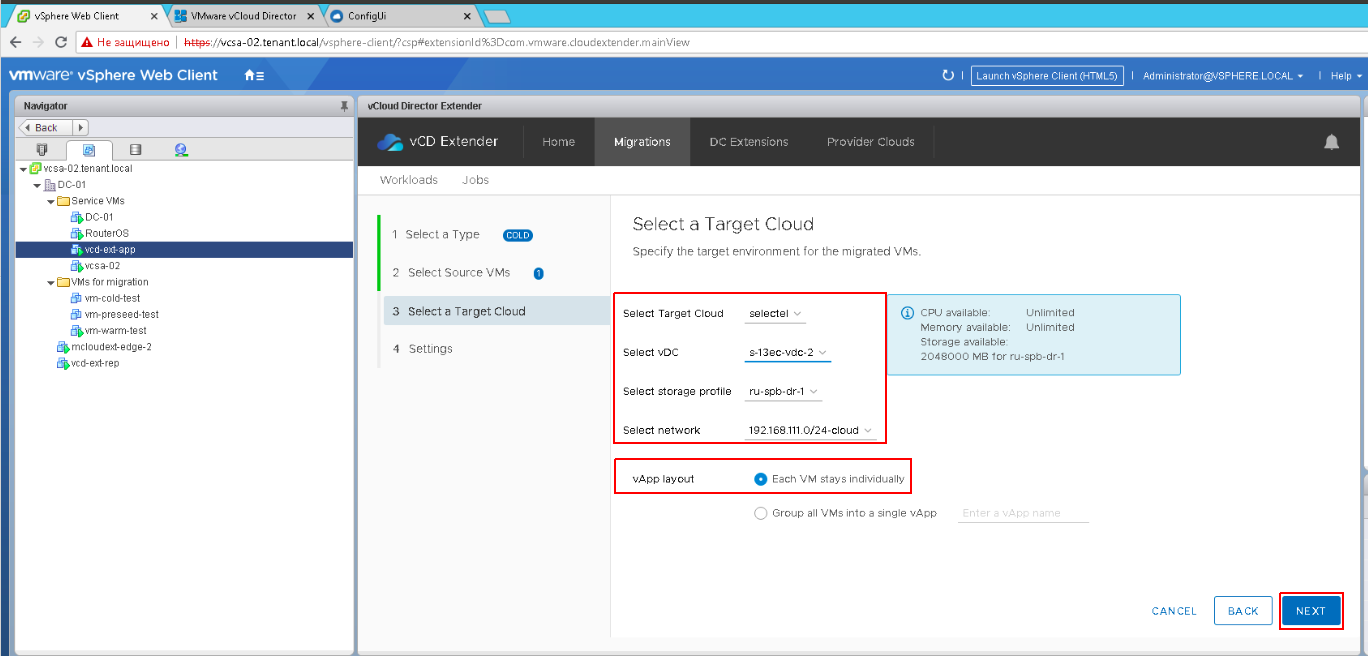
- Select the type of disk and the start time of the migration and start the process.
The duration of the migration depends on the bandwidth of the Internet channel and the size of the virtual machine.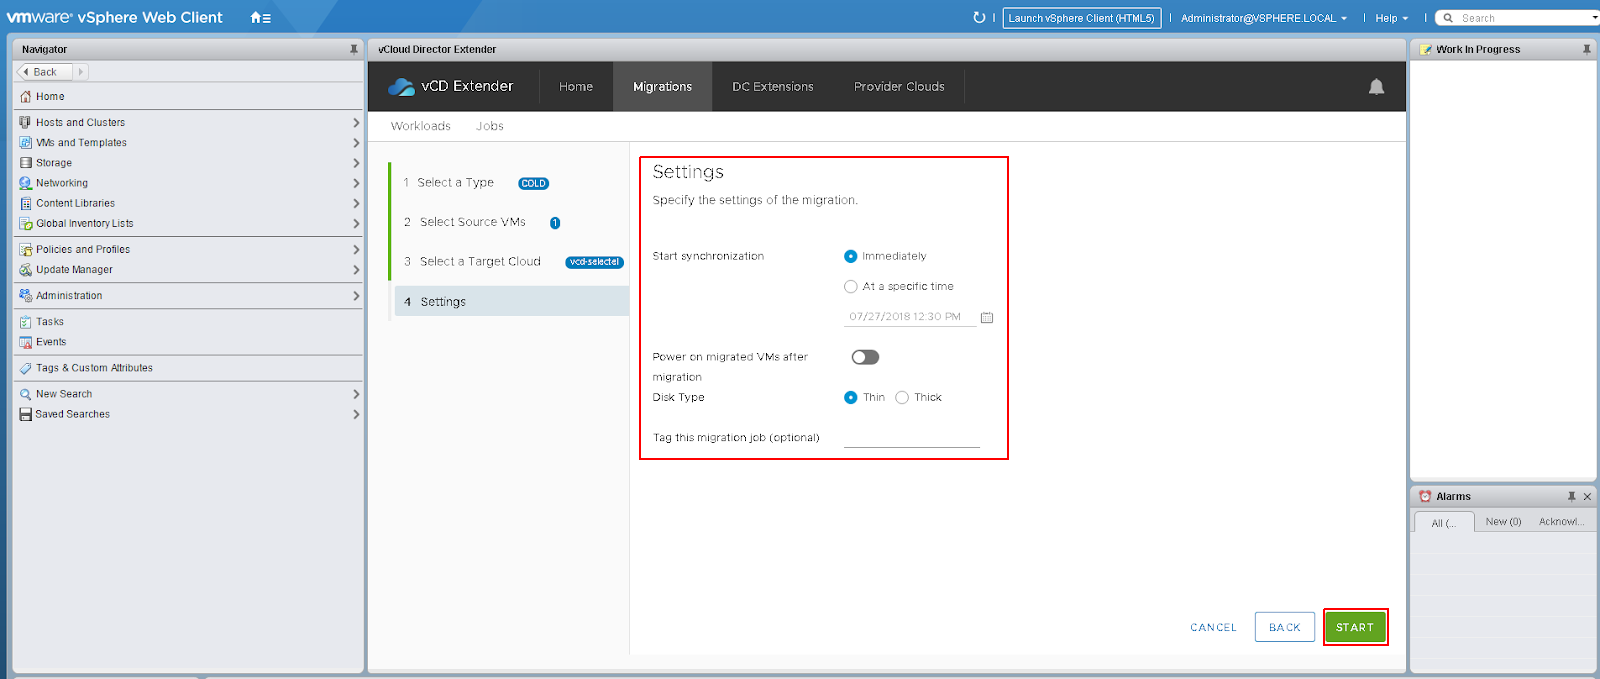
- Once the migration is completed, a copy of the virtual machine will be available for management via the vCloud Director interface.

Hot Migration (Warm Migration)
To perform a hot migration:
- Choose the appropriate type from the menu.
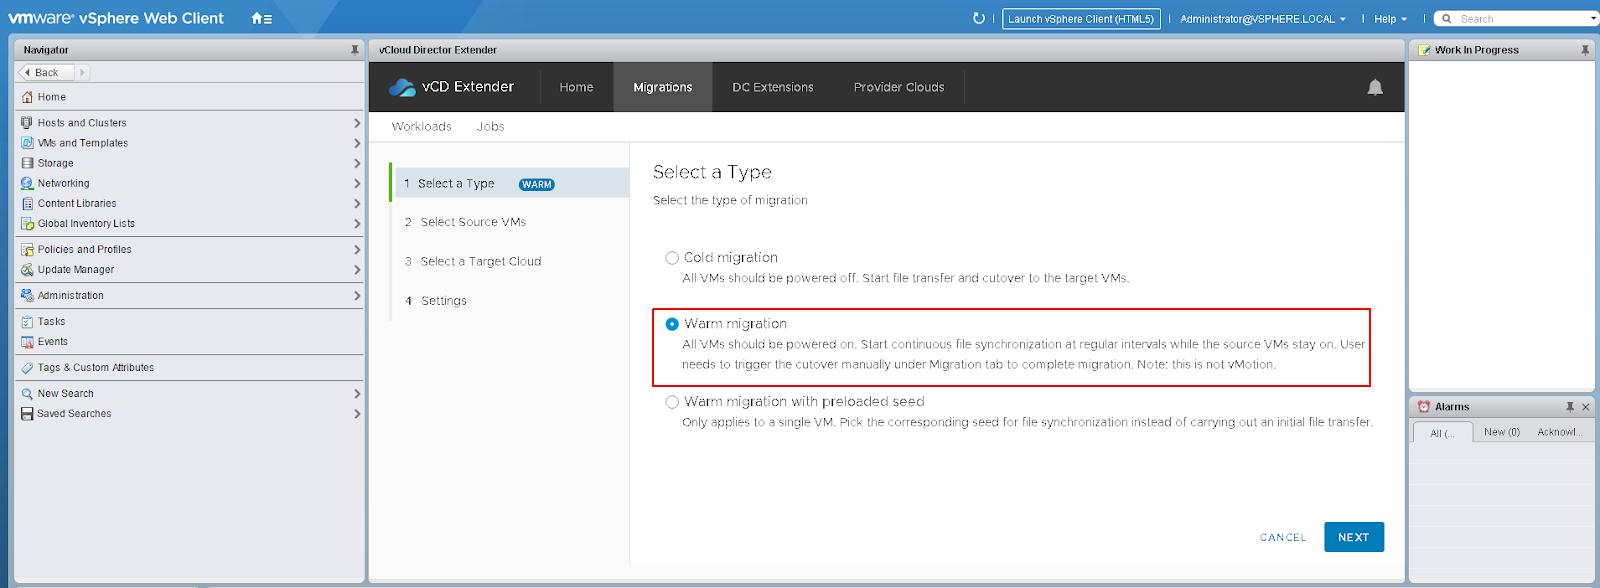
Hot migration is possible only on enabled virtual machines.
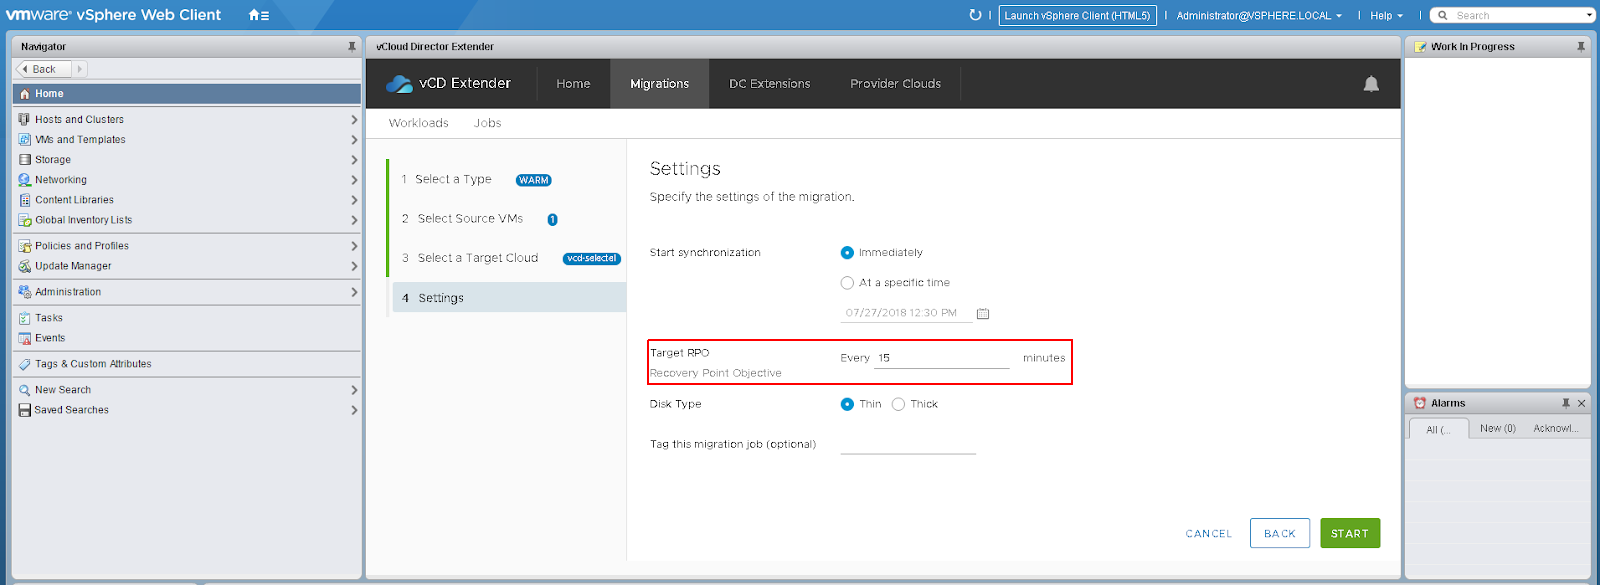
- Then a similar step follows with the choice of destination parameters. At the same time, we will choose the network for which the extension was configured.

- Before starting the migration, you will need to select the start time, type of disks and RPO (Recovery Point Objective - the time interval for which the permissible data loss during migration is possible) - at least five minutes (15 minutes by default)
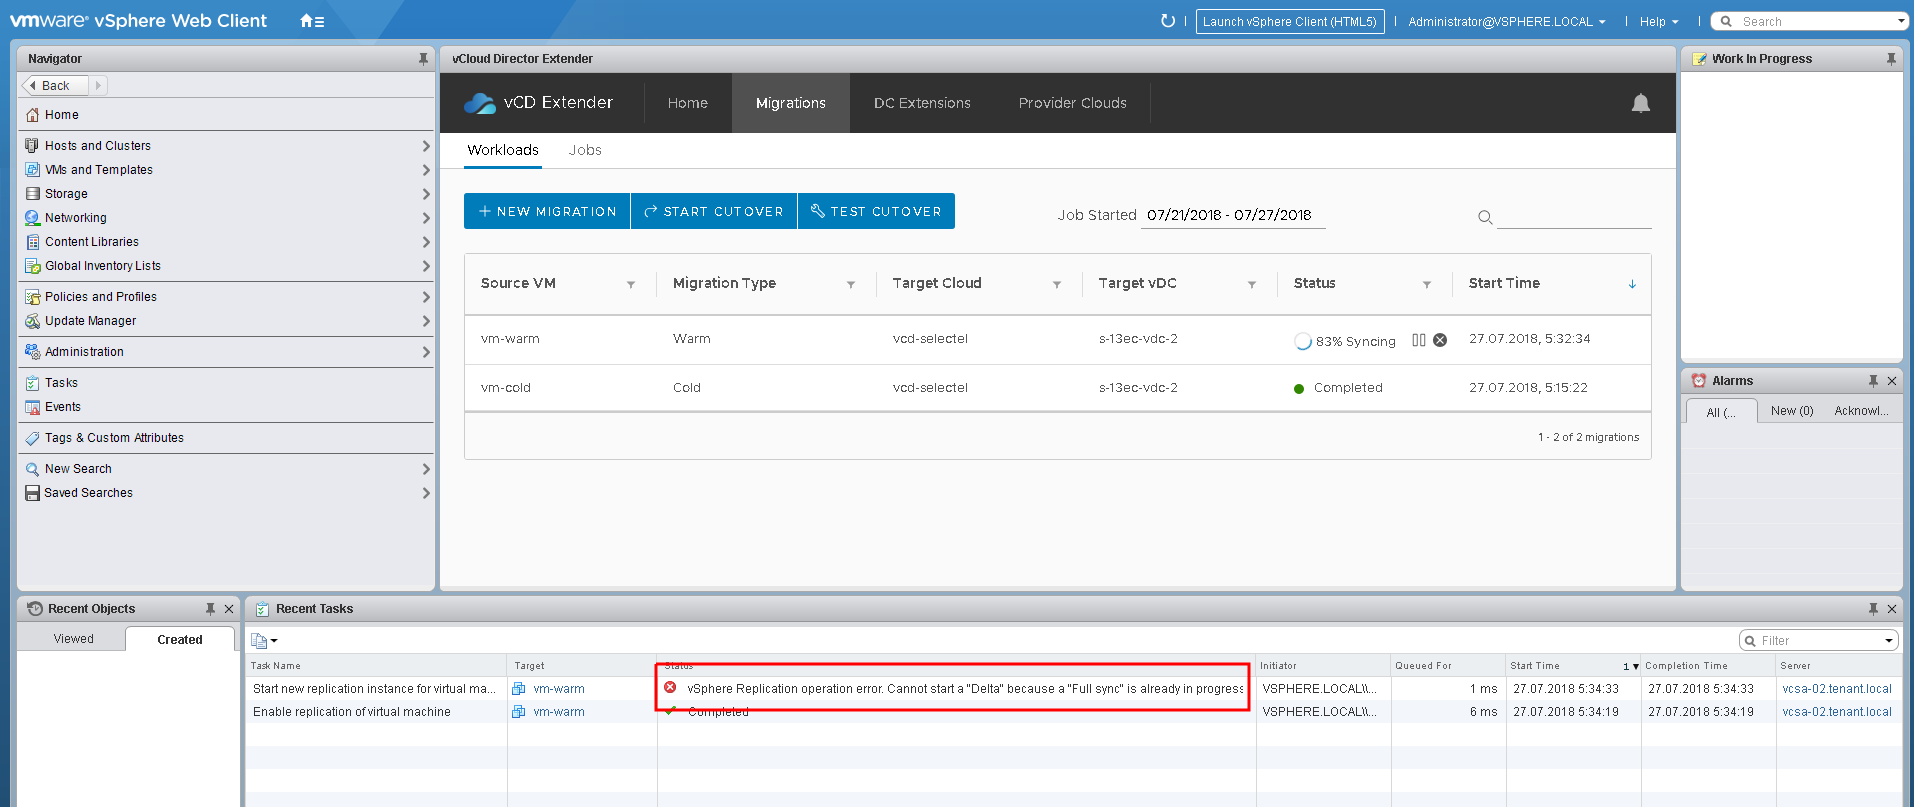
- After starting the migration and creating the task, an error will appear in the events of the vCenter server about the inability to start replication. Pay attention to it is not worth it, because it is a documented "bug" and in fact replication is correct
- After the data synchronization is completed, it is possible to proceed with the switch, which is indicated in the status of the migration task.
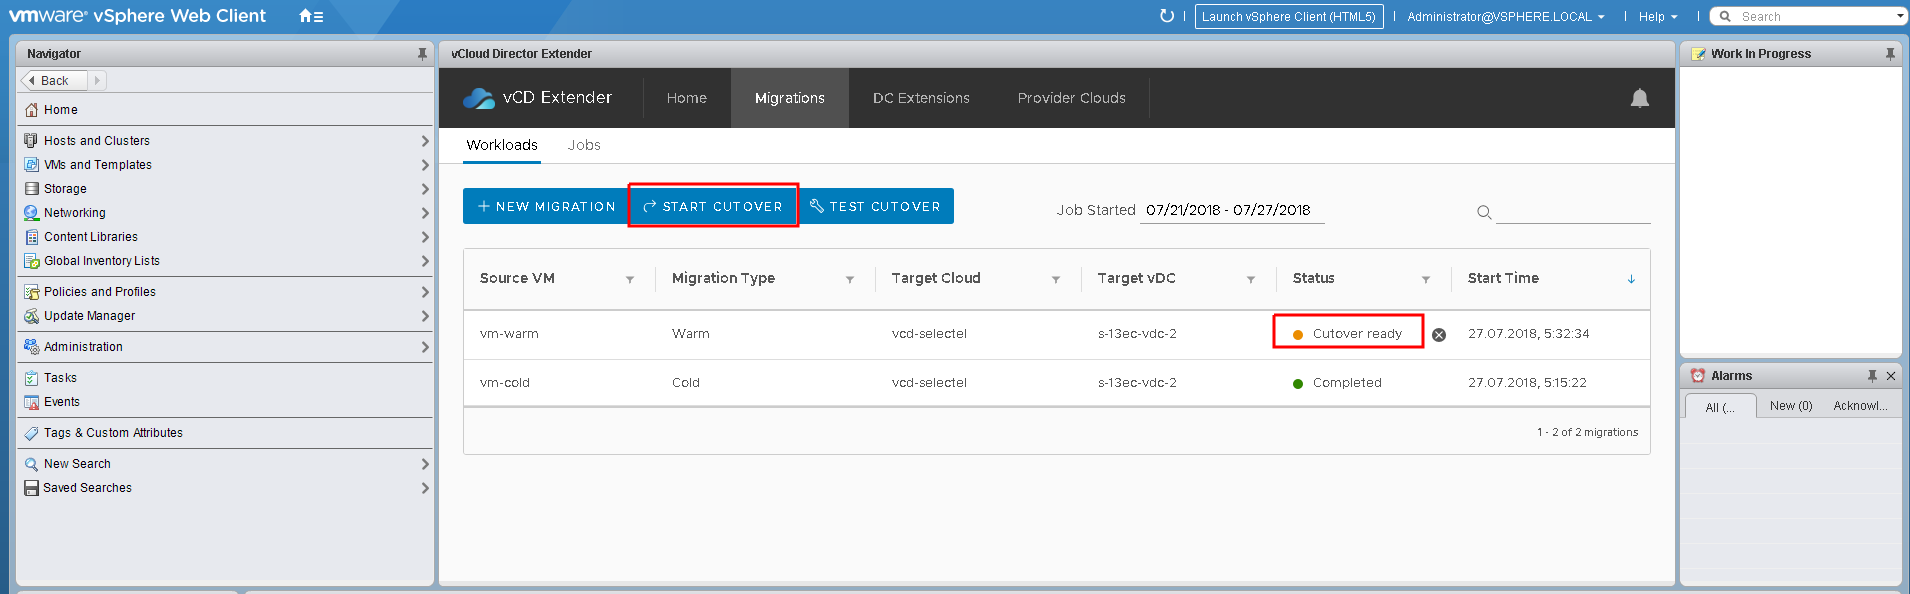
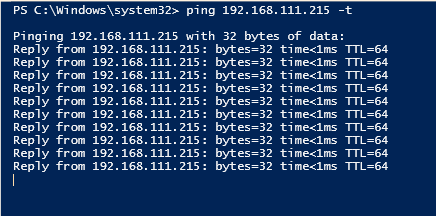
- But, before starting the switch, run the VM availability check using the PING command. Leave the command to run in the background. Thus, it will be possible to control the network accessibility of the VM when switching
- After the Start Cutover button was clicked, a list of virtual machines ready for switching became available, as well as a choice of additional enable options

- We are switching

The switching procedure will take some time. After the process is complete, the migration task will be marked as completed.
Checking the network availability of the VM at the time of switching, you can see that several requests failed. Just at that moment the final synchronization was carried out: shutting down the local machine and turning on the copy in the cloud. The virtual machine downtime was only about two minutes.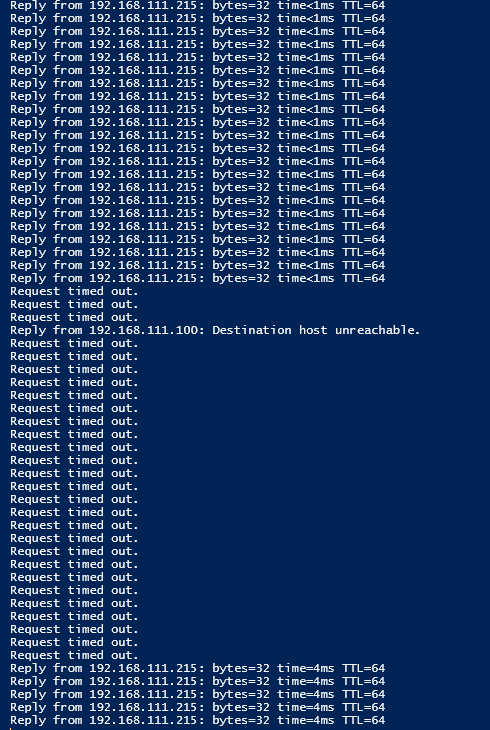
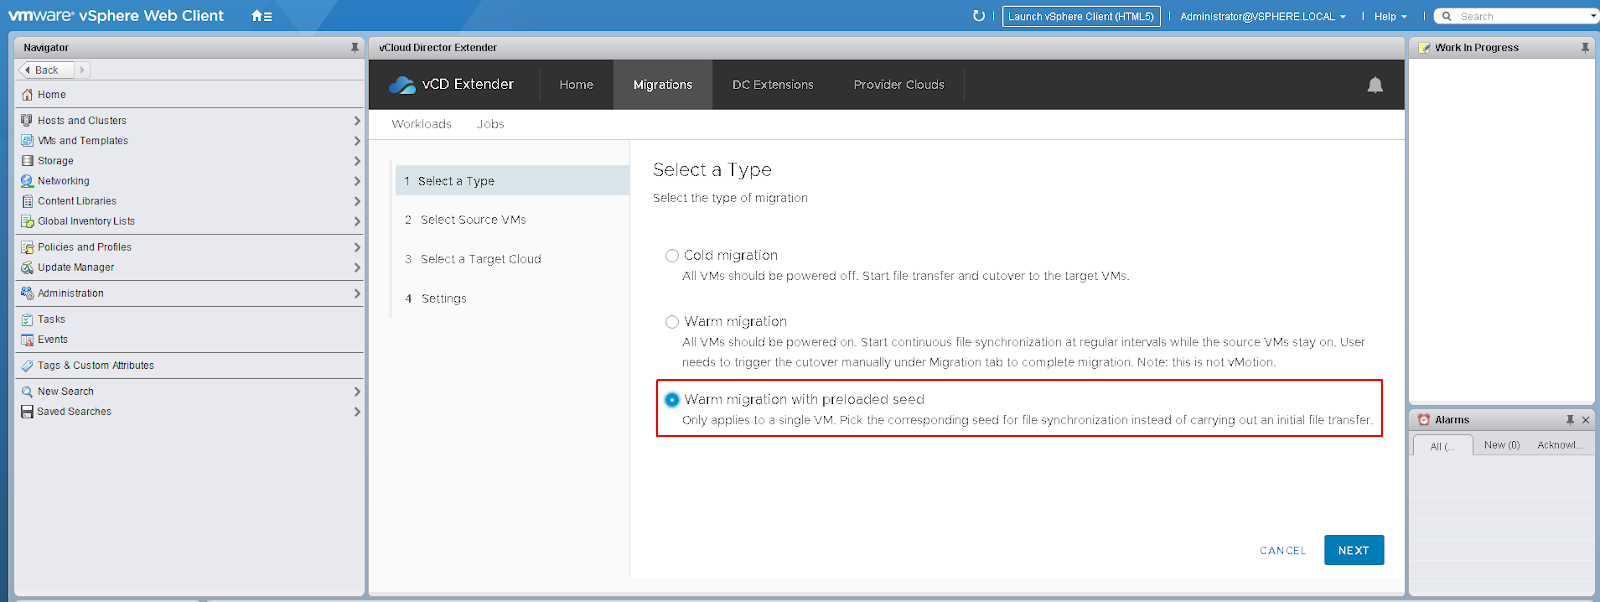
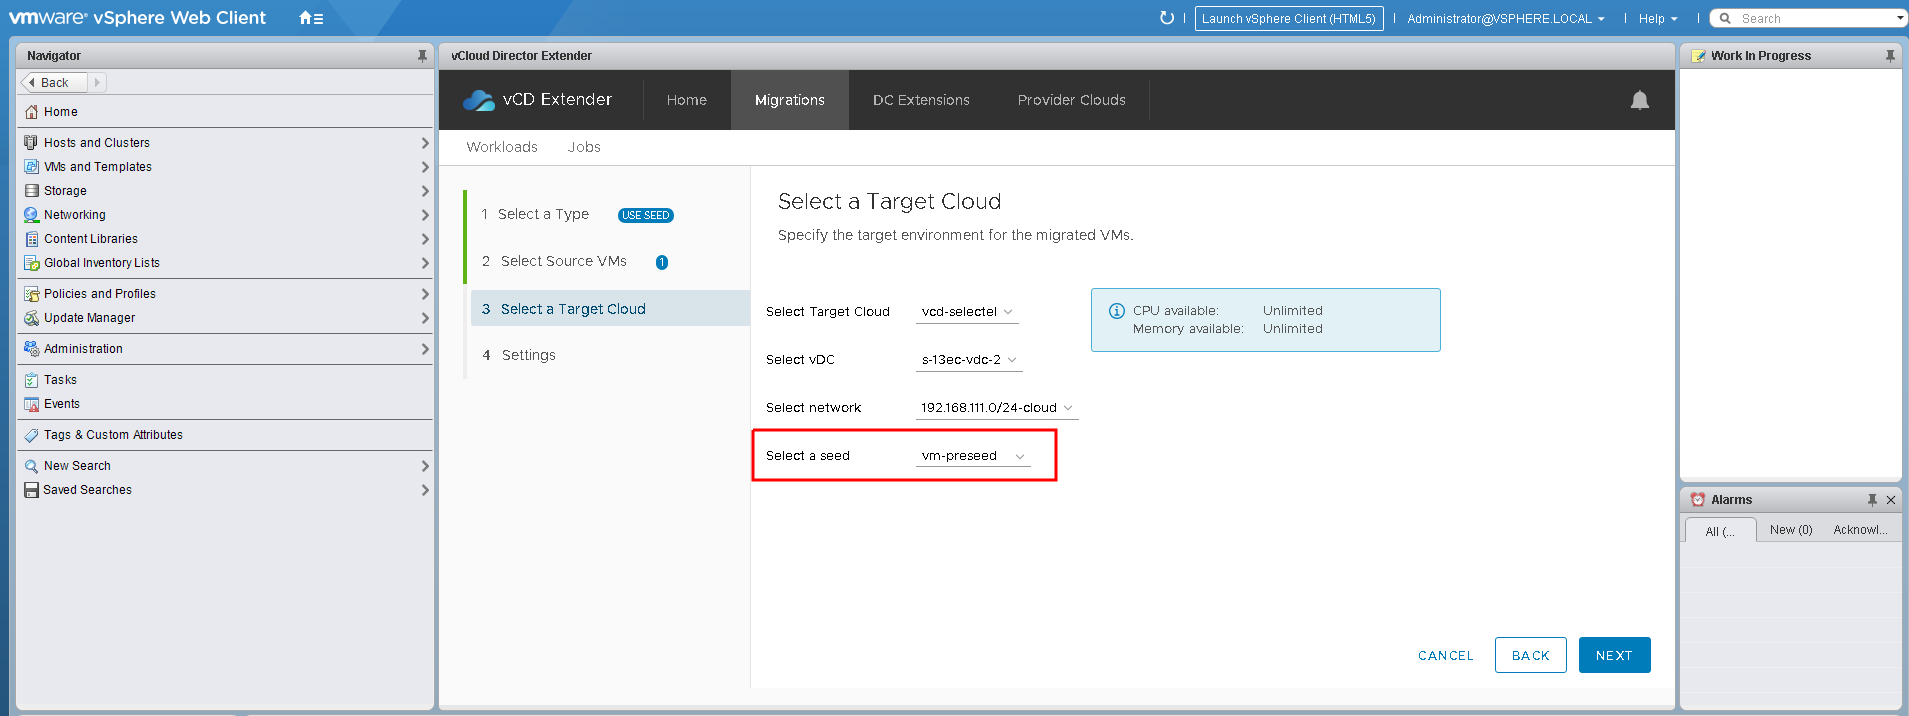
Migrating to a preloaded copy (Warm Migration with Preloaded Seed)
Migrating “to a pre-loaded copy” differs from the usual “hot” migration in that it will be necessary to specify this copy during the migration. The copy itself can be downloaded as an OVF template via the vCloud Director interface, or on a copy previously migrated “to cold”. A copy of the virtual machine in the cloud, on which we will "roll" replication, must be turned off.
It should be noted that in the Select a Target Cloud step, a drop-down menu will be available with a list of disabled virtual machines in the target data center.
Otherwise, all the steps performed will be similar to those described in the “hot migration”, followed by switching to the target copy in the cloud.
After the migrations were completed, the virtual machines are available for management via the vCloud Director interface.


VMware cloud migration usage scenarios
The following options can be considered as the most relevant use cases for the vCloud Extender solution:
Enterprise Infrastructure Migration to the Cloud
This process can be divided into several stages:
- Planning
At this stage, verification and mapping of the interaction of various infrastructure nodes is carried out. The calculation of the required computing and disk resources. Risk assessment is carried out. - Training
At the preparation stage, we make an additional order of the required resources, and increase the necessary quotas. We allocate network resources in the cloud. We configure networks in a virtual data center and raise VPN tunnels. - Testing
During the testing phase, it is important to check the availability of local infrastructure nodes from the cloud, but it is also equally important to check the bandwidth to estimate the migration time. To do this, you can deploy a small virtual machine from the template and carry out all the necessary tests. - Migration
The final step will be the migration itself. At the same time, it can be carried out during off-hours without staff participation, simply by planning all tasks in advance. If the migrations were “cold”, then in the morning it will just be to turn on all the virtual machines in the cloud.
If they were performed in the "hot" mode, then you need to perform tasks "trimming" replicas, which can also be scheduled for the next day or night. For such a scenario, the implementation of the migration to a pre-loaded copy is perfect.
Migrating pre-configured services to improve infrastructure resiliency
In this scenario, the service is pre-deployed and configured in the local infrastructure of the enterprise. In this case, you save money invested in the rental of cloud infrastructure, and after migration, you release your local resources for use for other needs. This scenario is perfect for deploying web portals, mail servers and similar services.
Conclusion
This article examined the possibility of vCloud Director Extender for scaling an enterprise network in the VMware vCloud cloud. A review was also given to three types of migration: “cold”, “hot” and “to a pre-loaded copy”. As can be seen from the above, the migration procedure, as well as the process of installing components, does not require special knowledge and skills that go beyond the competences of the enterprise system administrator.
Perhaps one of the most significant advantages is the ability to relieve human resources and migrate automatically, according to a predetermined plan.
Nevertheless, despite all the seeming simplicity of the process of migration to the cloud, this process should be treated responsibly and carefully. The most important step is not the migration itself, but its preparation and planning. A well-written and tested plan will help save time, nerves, money and keep a peaceful sleep!
If you decide to transfer part of your infrastructure to the VMware-based cloud , but don’t know where to start, we hope that this article will help you take the first step.
Source: https://habr.com/ru/post/435498/
All Articles