React Tutorial, Part 7: Inline Styles
Today, in the next part of the React course, we’ll talk about inline styles.

→ Part 1: Course Overview, React, ReactDOM, and JSX Reasons
→ Part 2: Functional Components
→ Part 3: Component Files, Project Structure
→ Part 4: Parent and Child Components
→ Part 5: Getting Started on a TODO Application, Basics of Styling
→ Part 6: Some of the features of the course, JSX and JavaScript
→ Part 7: Inline Styles
→ Part 8: continued work on the TODO application, familiarity with the properties of components
→ Part 9: Component Properties
→ Part 10: Workshop on working with the properties of components and styling
→ Part 11: dynamic markup generation and the map array method
→ Part 12: workshop, the third stage of work on the TODO application
→ Part 13: Class Based Components
→ Part 14: Workshop on Class Based Components, Component State
→ Part 15: workshops on working with the state of components
→ Part 16: the fourth stage of the work on the TODO application, event handling
→ Part 17: the fifth stage of working on a TODO application, modifying the state of components
')
→ Original
At the end of the last lesson, we created a component that analyzes the time of day and displays the corresponding greeting. Here is the full code of the
Now we need to stylize what this code prints to the page. In this case, we are going to use an approach here that differs from the styling of elements discussed earlier using CSS classes. Namely, we are talking about the use of HTML attribute
Actually - nothing good. The text on the page will not get, instead, an error message will be displayed. Its essence boils down to the fact that here, when setting styles, it is expected not a string value, but an object containing
Trying to use HTML attributes in JSX code, we should not forget that what we work with, although it looks like ordinary HTML code, is not. As a result, how this or that construction will look like here may differ from what is accepted in HTML. In this case, we need a regular JavaScript object containing a description of the styles. Armed with this idea, we will rewrite the above code snippet like this:
So, unfortunately, our code won't work either. As a result of its execution, an error message will again appear, but not the same as last time. It now reports that where the system can expect a brace, it finds something else. In order to solve this problem, you need to remember what we talked about in the previous lesson. Namely, the fact that the JavaScript code embedded in JSX must be enclosed in braces. Those curly braces that are already in our code are used to describe the object literal, and not to highlight the JS code. Fix this:
Now the component forms exactly what is needed on the page.
Stylized text displayed on the page component
What if we decide to continue styling this text? To do this, we need to remember that we describe the styles in the JS object, which means that we need to add additional
This construction will result in an error message. The point here is that we describe styles using a normal JS object, while in JavaScript variables and property names for objects ( identifiers ) cannot contain the “-” symbol, a dash. In fact, this restriction can be circumvented, for example, by enclosing the name of an object property in quotes, but in our case this is irrelevant. We are in such situations, when the names of CSS properties contain a dash, we remove this symbol and make the first letter of the word that follows it capitalized. It is easy to see that with this approach, the CSS property names will be written in the camel style - just as in JavaScript, it is customary to write variable names consisting of several words. Rewrite the code:
Let's look at the results of his work.
Stylized text displayed on the page component
In the process of styling text, the code of an object with styles becomes longer. Working with him is uncomfortable. If you try to break this code into several lines, nothing good will happen either. Therefore, we will render the object description with styles from the JSX code, creating a constant named
This code works exactly the same as the one described above, but this approach turns out to be very convenient when it becomes necessary to add new styles to the object. This does not lead to the proliferation of code returned by the component.
As you can see, now the values of CSS properties are set in the
Here, the number
Here we have specified the size in pixels, but if necessary, other units of measurement can be used in similar constructions.
Speaking of built-in styles, one can not fail to mention the limitations of this approach. So, if you need to add browser prefixes to styles, this can be a bit more difficult than adding other styles. But something like pseudo clashes , such as
Perhaps after learning about this restriction of inline styles, you will wonder why you should use them if the CSS classes allow you to achieve the same effect and have more extensive capabilities. One of the reasons for using embedded styles in React is that such styles can be formed dynamically. In this case, what will be one or another style is determined by means of JavaScript code. Let's rewrite our example so that the color of the text would change depending on the time of day at which the message is displayed.
Here is the complete component code that uses dynamic styling.
Notice that the
Strictly speaking, the point of all this is that dynamic data can affect how the elements formed by the components look. This opens up great opportunities for the developer.
Today we talked about the built-in styles, their capabilities and limitations. In the next lesson, we will continue to work on the TODO application, as well as begin our acquaintance with the properties of components, with the most important concept of React. Therefore, it is recommended that all those involved in this course, before continuing their studies, should repeat everything and experiment with everything that we have already disassembled.
Dear readers! If you are well versed in React development, please tell us which libraries you use to style components.

→ Part 1: Course Overview, React, ReactDOM, and JSX Reasons
→ Part 2: Functional Components
→ Part 3: Component Files, Project Structure
→ Part 4: Parent and Child Components
→ Part 5: Getting Started on a TODO Application, Basics of Styling
→ Part 6: Some of the features of the course, JSX and JavaScript
→ Part 7: Inline Styles
→ Part 8: continued work on the TODO application, familiarity with the properties of components
→ Part 9: Component Properties
→ Part 10: Workshop on working with the properties of components and styling
→ Part 11: dynamic markup generation and the map array method
→ Part 12: workshop, the third stage of work on the TODO application
→ Part 13: Class Based Components
→ Part 14: Workshop on Class Based Components, Component State
→ Part 15: workshops on working with the state of components
→ Part 16: the fourth stage of the work on the TODO application, event handling
→ Part 17: the fifth stage of working on a TODO application, modifying the state of components
')
Lesson 15: Inline Styles
→ Original
At the end of the last lesson, we created a component that analyzes the time of day and displays the corresponding greeting. Here is the full code of the
index.js file that implements this functionality: import React from "react" import ReactDOM from "react-dom" function App() { const date = new Date() const hours = date.getHours() let timeOfDay if (hours < 12) { timeOfDay = "morning" } else if (hours >= 12 && hours < 17) { timeOfDay = "afternoon" } else { timeOfDay = "night" } return ( <h1>Good {timeOfDay}!</h1> ) } ReactDOM.render(<App />, document.getElementById("root")) Now we need to stylize what this code prints to the page. In this case, we are going to use an approach here that differs from the styling of elements discussed earlier using CSS classes. Namely, we are talking about the use of HTML attribute
style . Let's see what happens if we use this design: <h1 style="color: #FF8C00">Good {timeOfDay}!</h1> Actually - nothing good. The text on the page will not get, instead, an error message will be displayed. Its essence boils down to the fact that here, when setting styles, it is expected not a string value, but an object containing
: type pairs : , where keys are the names of CSS properties, and values are their values.Trying to use HTML attributes in JSX code, we should not forget that what we work with, although it looks like ordinary HTML code, is not. As a result, how this or that construction will look like here may differ from what is accepted in HTML. In this case, we need a regular JavaScript object containing a description of the styles. Armed with this idea, we will rewrite the above code snippet like this:
<h1 style={color: "#FF8C00"}>Good {timeOfDay}!</h1> So, unfortunately, our code won't work either. As a result of its execution, an error message will again appear, but not the same as last time. It now reports that where the system can expect a brace, it finds something else. In order to solve this problem, you need to remember what we talked about in the previous lesson. Namely, the fact that the JavaScript code embedded in JSX must be enclosed in braces. Those curly braces that are already in our code are used to describe the object literal, and not to highlight the JS code. Fix this:
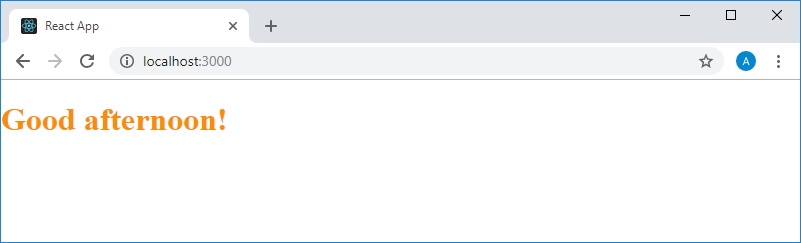
<h1 style={{color: "#FF8C00"}}>Good {timeOfDay}!</h1> Now the component forms exactly what is needed on the page.
Stylized text displayed on the page component
What if we decide to continue styling this text? To do this, we need to remember that we describe the styles in the JS object, which means that we need to add additional
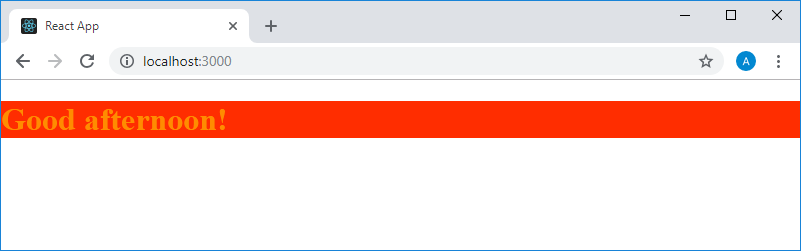
: pairs to this object. For example, let's try to style the text background in this way using the background-color CSS property and add the code like this: <h1 style={{color: "#FF8C00", background-color: "#FF2D00"}}>Good {timeOfDay}!</h1> This construction will result in an error message. The point here is that we describe styles using a normal JS object, while in JavaScript variables and property names for objects ( identifiers ) cannot contain the “-” symbol, a dash. In fact, this restriction can be circumvented, for example, by enclosing the name of an object property in quotes, but in our case this is irrelevant. We are in such situations, when the names of CSS properties contain a dash, we remove this symbol and make the first letter of the word that follows it capitalized. It is easy to see that with this approach, the CSS property names will be written in the camel style - just as in JavaScript, it is customary to write variable names consisting of several words. Rewrite the code:
<h1 style={{color: "#FF8C00", backgroundColor: "#FF2D00"}}>Good {timeOfDay}!</h1> Let's look at the results of his work.
Stylized text displayed on the page component
In the process of styling text, the code of an object with styles becomes longer. Working with him is uncomfortable. If you try to break this code into several lines, nothing good will happen either. Therefore, we will render the object description with styles from the JSX code, creating a constant named
styles , writing the object into it and using its name in JSX. As a result, we have the following: const styles = { color: "#FF8C00", backgroundColor: "#FF2D00" } return ( <h1 style={styles}>Good {timeOfDay}!</h1> ) This code works exactly the same as the one described above, but this approach turns out to be very convenient when it becomes necessary to add new styles to the object. This does not lead to the proliferation of code returned by the component.
As you can see, now the values of CSS properties are set in the
styles object as strings. When working with this object, it is worth considering some features that, in particular, relate to properties, the values of which are specified in the form of numbers. For example, this is the fontSize property (which looks like a font-size in CSS). So, this property can be set as a regular number, not as a string enclosed in quotes. For example, such a construction is quite acceptable: const styles = { color: "#FF8C00", backgroundColor: "#FF2D00", fontSize: 24 } Here, the number
24 will be interpreted as a font size indicated in pixels. If the unit of measurement needs to be specified explicitly, we will again need to use the string values of the properties. For example, the following code snippet is similar, in terms of impact on the font size, to the previous one, but the unit of measurement for size is here explicitly indicated: const styles = { color: "#FF8C00", backgroundColor: "#FF2D00", fontSize: "24px" } Here we have specified the size in pixels, but if necessary, other units of measurement can be used in similar constructions.
Speaking of built-in styles, one can not fail to mention the limitations of this approach. So, if you need to add browser prefixes to styles, this can be a bit more difficult than adding other styles. But something like pseudo clashes , such as
:hover , is not supported. If you need this at this stage of React mastering, it will be best to use styling elements using CSS classes. And in the future, you will probably find it most convenient to use specialized libraries like styled-components for such purposes. But now we restrict ourselves to the inline styles and styling of elements using CSS classes.Perhaps after learning about this restriction of inline styles, you will wonder why you should use them if the CSS classes allow you to achieve the same effect and have more extensive capabilities. One of the reasons for using embedded styles in React is that such styles can be formed dynamically. In this case, what will be one or another style is determined by means of JavaScript code. Let's rewrite our example so that the color of the text would change depending on the time of day at which the message is displayed.
Here is the complete component code that uses dynamic styling.
function App() { const date = new Date() const hours = date.getHours() let timeOfDay const styles = { fontSize: 30 } if (hours < 12) { timeOfDay = "morning" styles.color = "#04756F" } else if (hours >= 12 && hours < 17) { timeOfDay = "afternoon" styles.color = "#2E0927" } else { timeOfDay = "night" styles.color = "#D90000" } return ( <h1 style={styles}>Good {timeOfDay}!</h1> ) } Notice that the
styles declaration is now in front of the if block. In the object that defines the style, only the font size of the label is set to 30 pixels. Then a color property is added to the object, the value of which depends on the time of day. Recall that we are talking about a completely normal JavaScript object, and such objects support adding and changing properties after they are created. After the style is formed, it is applied when the text is displayed. In order to quickly test all branches of the conditional operator, you can, when initializing the date constant, transfer the desired date and time to the constructor of the Date object. For example, it might look like this: const date = new Date(2018, 6, 31, 15) Strictly speaking, the point of all this is that dynamic data can affect how the elements formed by the components look. This opens up great opportunities for the developer.
Results
Today we talked about the built-in styles, their capabilities and limitations. In the next lesson, we will continue to work on the TODO application, as well as begin our acquaintance with the properties of components, with the most important concept of React. Therefore, it is recommended that all those involved in this course, before continuing their studies, should repeat everything and experiment with everything that we have already disassembled.
Dear readers! If you are well versed in React development, please tell us which libraries you use to style components.
Source: https://habr.com/ru/post/435468/
All Articles