Onion controller. We break screens into parts
Atomic design and system design are popular in design: this is when everything consists of components, from controls to screens. It is easy for a programmer to write separate controls, but what to do with entire screens?
Let's sort on a New Year's example:
- we put everything in a heap;
- divide by controllers: select the navigation, template and content;
- reuse code for other screens.

All in a bunch
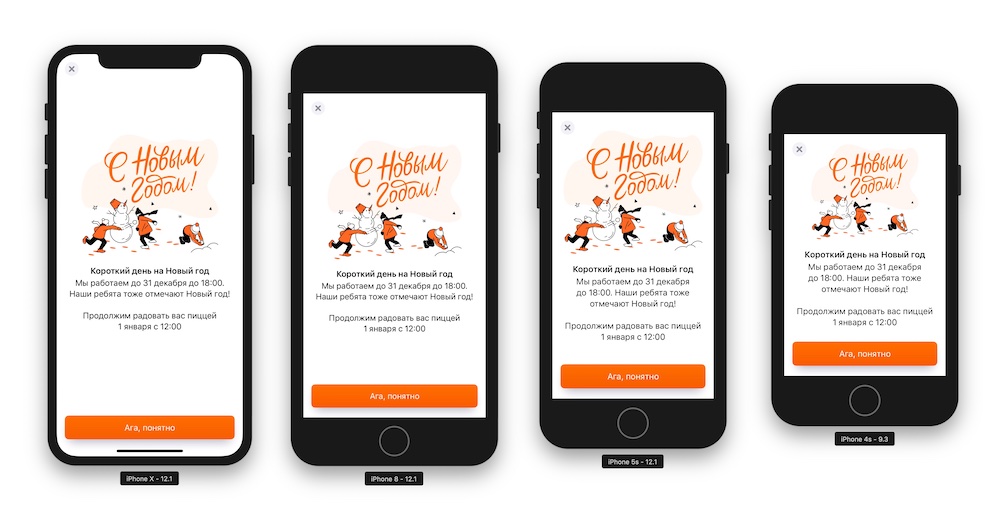
This New Year's screen tells about the special working hours of pizzerias. It is quite simple, so it will not be a crime to make it a single controller:

But. The next time when we need a similar screen, we have to repeat it all over again, and then make the same changes in all screens. Well, it does not happen without edits.
Therefore, it is wiser to divide it into parts and use it for other screens. I identified three:
- navigation,
- a template with an area for content and space for action at the bottom of the screen,
- unique content in the center.
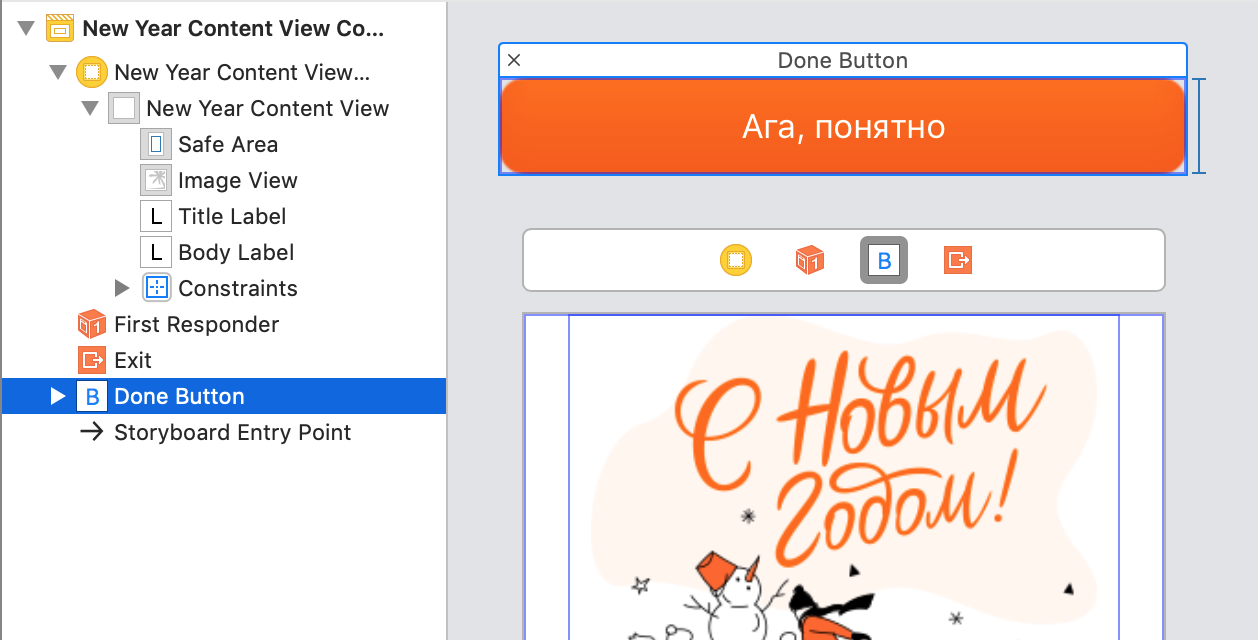
Select each part in its own UIViewController .
Container navigation
The most prominent examples of navigation containers are UINavigationController and UITabBarController . Each takes a strip on the screen under his control, and the remaining space is left for another UIViewController .
In our case there will be a container for all modal screens with only one close button.
If we want to move the button to the right, then we need to change only in one controller.
Or, if we decide to show all modal windows with special animation, and close interactively with a swipe, as in the AppStore story cards. Then UIViewControllerTransitioningDelegate will need to be installed only for this controller.

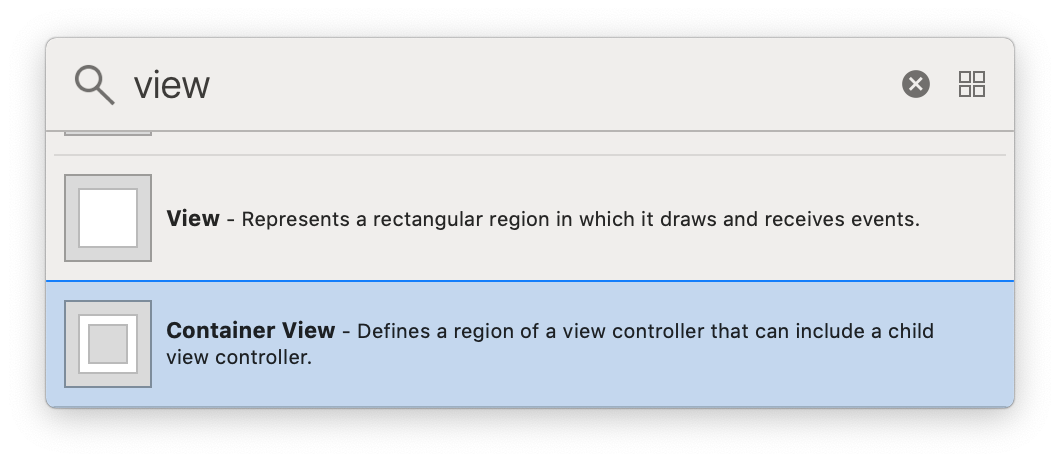
You can use container view to separate controllers: it will create a UIView in the parent and insert the child controller's UIView into it.
Stretch the container view to the edge of the screen. Safe area will automatically apply to the child controller:

Screen template
The content on the screen is obvious: picture, title, text. The button seems to be part of it, but the content is dynamic on different iPhones, and the button is fixed. You can see two systems with different tasks: one displays the content, and the other builds in and aligns it. They should be divided into two controllers.
The first is responsible for the layout of the screen: the content should be centered, and the button is nailed to the bottom of the screen. The second will draw content.

Without a template, all controllers are similar, but the elements are dancing.
The buttons on the last screen are different - depending on the content. Delegation will help solve the problem: the template controller will ask the controls for the content and show them in its UIStackView .
// OnboardingViewController.swift protocol OnboardingViewControllerDatasource { var supportingViews: [UIView] { get } } // NewYearContentViewController.swift extension NewYearContentViewController: OnboardingViewControllerDatasource { var supportingViews: [UIView] { return [view().doneButton] } } On how to specialize UIView with UIViewController you can read in my last article Controller, easy! We take out the code in UIView.
Buttons can be attached to the controller through related objects. Their IBOutlet and IBAction are stored in the content controller, just the elements are not added to the hierarchy.
You can get elements from the content and add them to the template at the preparation stage of the UIStoryboardSegue :
// OnboardingViewController.swift override func prepare(for segue: UIStoryboardSegue, sender: Any?) { if let buttonsDatasource = segue.destination as? OnboardingViewControllerDatasource { view().supportingViews = buttonsDatasource.supportingViews } } In the setter, we add controls to the UIStackView :
// OnboardingView.swift var supportingViews: [UIView] = [] { didSet { for view in supportingViews { stackView.addArrangedSubview(view) } } } As a result, our controller was divided into three parts: navigation, template and content. In the picture all container view shown in gray:
Dynamic size controller
The content controller has its maximum size, it is limited by internal constraints .
Container view adds constraints based on the Autoresizing mask , and they conflict with the internal dimensions of the content. The problem is solved in the code: in the content controller you need to specify that it is not affected by the constraints from the Autoresizing mask :
// NewYearContentViewController.swift override func loadView() { super.loadView() view.translatesAutoresizingMaskIntoConstraints = false } 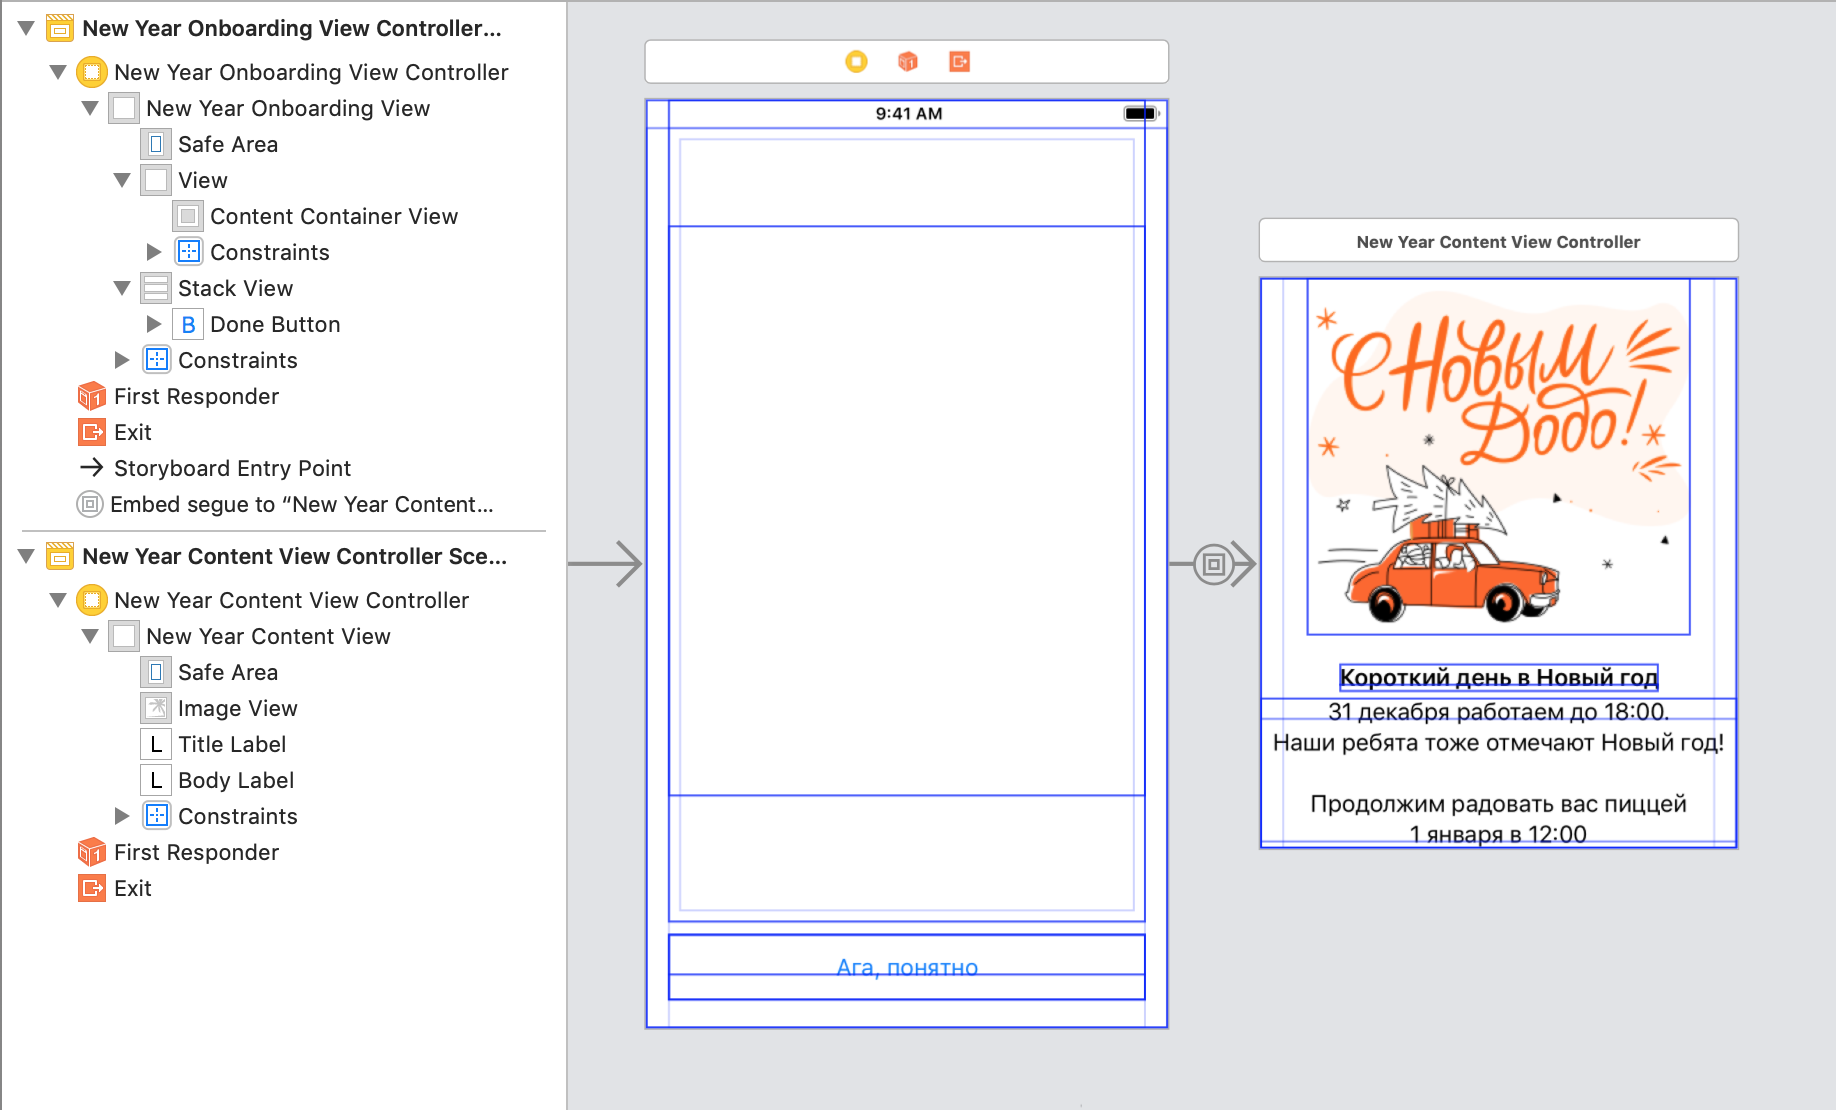
Interface Builder needs two more steps:
Step 1. Specify Intrinsic size for UIView . The real values will appear after the launch, but for now we will put any suitable ones.
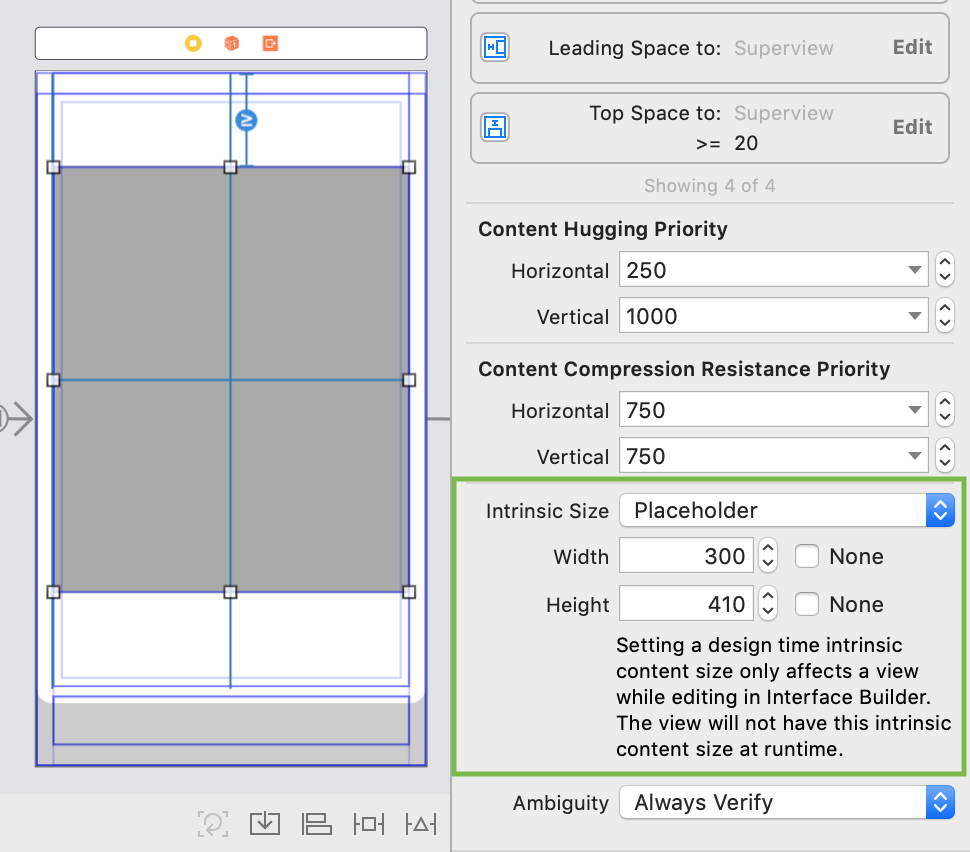
Step 2. For controller-content specify Simulated Size . It may not coincide with the past size.
Errors occur when AutoLayout cannot figure out how to decompose elements in its current size.
Most often, the problem goes away after the priority has been changed. It is necessary to put them down so that one of the UIView can expand / contract more than the others.
Separate and write in code
We have divided the controller into several parts, but for the time being we cannot reuse them, it is difficult to extract the interface from the UIStoryboard in parts. If we need to transfer some data to the content, then we will have to knock on it through the entire hierarchy. It should be the opposite: first take the content, set it up, and then wrap it in the right containers. Like an onion.
Three tasks appear on our way:
- Separate each controller into your
UIStoryboard. - To refuse
container view, add controllers to containers in code. - Tie it all back.
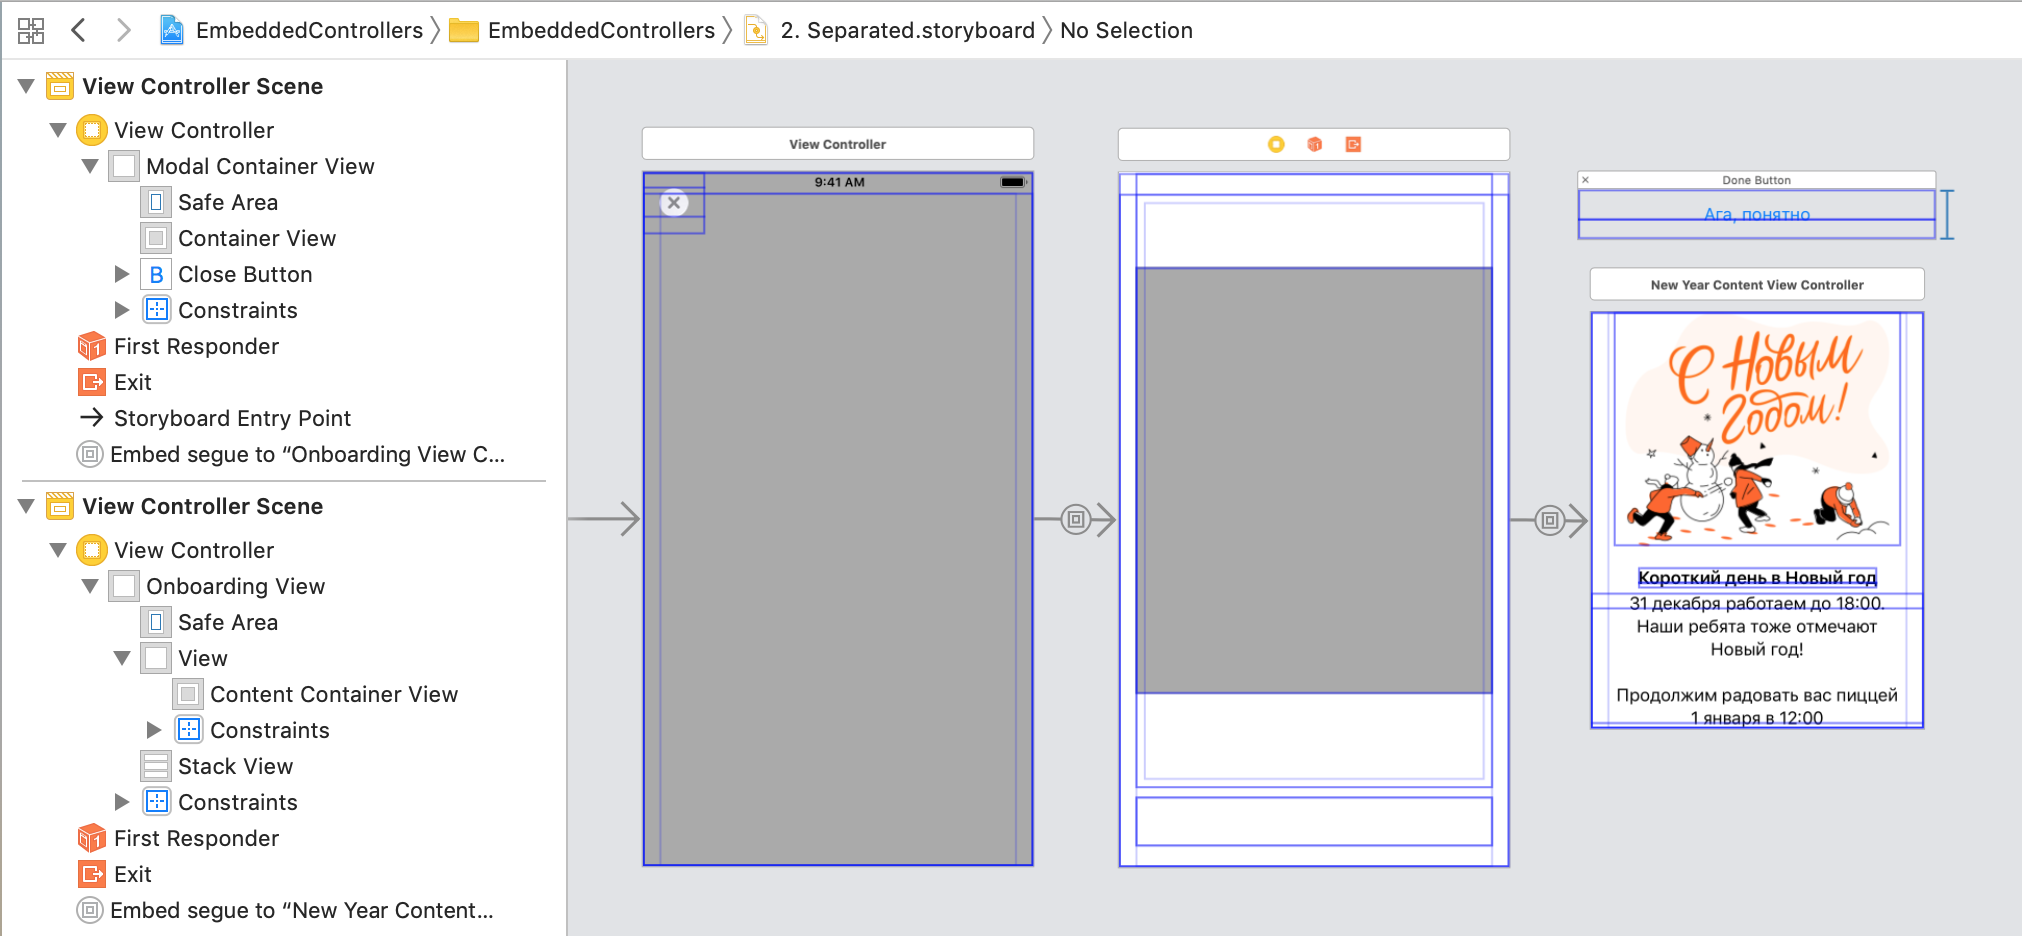
We divide UIStoryboard
You need to create two additional UIStoryboard and copy-paste to transfer the navigation controller and the template controller to them. Embed segue will Embed segue , but the container view with configured constrains will be transferred. The constraints must be saved, and the container view must be replaced with the usual UIView .
- open
UIStoryboardas a code (context menu of the file → Open as ... → Source code); change type from
containerViewtoview. It is necessary to change both opening and closing tags.In the same way, you can change, for example,
UIViewtoUIScrollView, if necessary. And vice versa.

Put the controller property is initial view controller , and call UIStoryboard as the controller.
If the name of the controller is the same as the name of the UIStoryboard , then the download can be wrapped in a method that will find the file itself:
protocol Storyboardable { } extension Storyboardable where Self: UIViewController { static func instantiateInitialFromStoryboard() -> Self { let controller = storyboard().instantiateInitialViewController() return controller! as! Self } static func storyboard(fileName: String? = nil) -> UIStoryboard { let storyboard = UIStoryboard(name: fileName ?? storyboardIdentifier, bundle: nil) return storyboard } static var storyboardIdentifier: String { return String(describing: self) } static var storyboardName: String { return storyboardIdentifier } } If the controller is described in .xib , then the standard designer will load without such dancings. Alas, .xib can contain only one controller, often this is not enough: in a good case, one screen consists of several. Therefore, we use UIStoryborad , it is easy to break the screen into parts.
Add a controller in the code
For normal operation of the controller, we need all the methods of its life cycle: will/did-appear/disappear .
To display correctly, you need to call 5 steps:
willMove(toParent parent: UIViewController?) addChild(_ childController: UIViewController) addSubview(_ subivew: UIView) layout didMove(toParent parent: UIViewController?) Apple offers to reduce the code to 4 steps, because addChild() itself calls willMove(toParent) . Eventually:
addChild(_ childController: UIViewController) addSubview(_ subivew: UIView) layout didMove(toParent parent: UIViewController?) For simplicity, you can wrap this all in an extension . For our case, we need a version with insertSubview() .
extension UIViewController { func insertFullframeChildController(_ childController: UIViewController, toView: UIView? = nil, index: Int) { let containerView: UIView = toView ?? view addChild(childController) containerView.insertSubview(childController.view, at: index) containerView.pinToBounds(childController.view) childController.didMove(toParent: self) } } For removal, the same steps are needed, but instead of the parent controller, you need to set nil . Now removeFromParent() calls didMove(toParent: nil) , and no layout is needed. The abbreviated version is very different:
willMove(toParent: nil) view.removeFromSuperview() removeFromParent() Layout
We put konstraynt
To set the size of the controller correctly, we will use AutoLayout . We need to nail all sides to all sides:
extension UIView { func pinToBounds(_ view: UIView) { view.translatesAutoresizingMaskIntoConstraints = false NSLayoutConstraint.activate([ view.topAnchor.constraint(equalTo: topAnchor), view.bottomAnchor.constraint(equalTo: bottomAnchor), view.leadingAnchor.constraint(equalTo: leadingAnchor), view.trailingAnchor.constraint(equalTo: trailingAnchor) ]) } } Add a child controller in the code
Now everything can be combined:
// ModalContainerViewController.swift public func embedController(_ controller: UIViewController) { insertFullframeChildController(controller, index: 0) } Because of the frequency of use, we can wrap all this in an extension :
// ModalContainerViewController.swift extension UIViewController { func wrapInModalContainer() -> ModalContainerViewController { let modalController = ModalContainerViewController.instantiateInitialFromStoryboard() modalController.embedController(self) return modalController } } A similar method is needed for the template controller. Previously, supportingViews configured in prepare(for segue:) , and now you can bind in the controller embedding method:
// OnboardingViewController.swift public func embedController(_ controller: UIViewController, actionsDatasource: OnboardingViewControllerDatasource) { insertFullframeChildController(controller, toView: view().contentContainerView, index: 0) view().supportingViews = actionsDatasource.supportingViews } Creating a controller looks like this:
// MainViewController.swift @IBAction func showModalControllerDidPress(_ sender: UIButton) { let content = NewYearContentViewController.instantiateInitialFromStoryboard() // let onboarding = OnboardingViewController.instantiateInitialFromStoryboard() onboarding.embedController(contentController, actionsDatasource: contentController) let modalController = onboarding.wrapInModalContainer() present(modalController, animated: true) } Connecting a new screen to a template is simple:
- remove something that does not apply to the content;
- specify action buttons by implementing the OnboardingViewControllerDatasource protocol;
- write a method that links the template and content.
More about containers
Status bar
It is often necessary that the controller with the content, and not the container, control the status bar . For this there is a pair of property :
// UIView.swift var childForStatusBarStyle: UIViewController? var childForStatusBarHidden: UIViewController? Using these property you can create a chain of controllers, the latter will be responsible for displaying the status bar .
Safe area
If the container buttons will overlap the content, then it is worth increasing the safeArea zone. This can be done in code: set additinalSafeAreaInsets for child controllers. You can call it from embedController() :
private func addSafeArea(to controller: UIViewController) { if #available(iOS 11.0, *) { let buttonHeight = CGFloat(30) let topInset = UIEdgeInsets(top: buttonHeight, left: 0, bottom: 0, right: 0) controller.additionalSafeAreaInsets = topInset } } If you add 30 points from the top, the button will stop overlapping the content and safeArea will take the green area:

Margins. Preserve superview margins
Controllers have standard margins . Usually they are equal to 16 points from each side of the screen and on Plus-sizes they are 20 points.
Constructs can be created based on margins , indentation to the edge will be different for different iPhones:

When we put one UIView into another, the margins are halved: to 8 points. To prevent this from happening, Preserve superview margins must be turned on. Then the margins child UIView will be equal to the margins parent. It is suitable for fullscreen containers.
the end
Container controllers are a powerful tool. They simplify code, share tasks and can be reused. You can write nested controllers in any way: in the UIStoryboard , in .xib or simply in code. Most importantly, they are easy to create and enjoyable to use.
→ Example from article on GitHub
Do you have screens from which to make a template? Share in the comments!
')
Source: https://habr.com/ru/post/434470/
All Articles