Edison Wooden Lamp with voice control. Issue price of $ 5

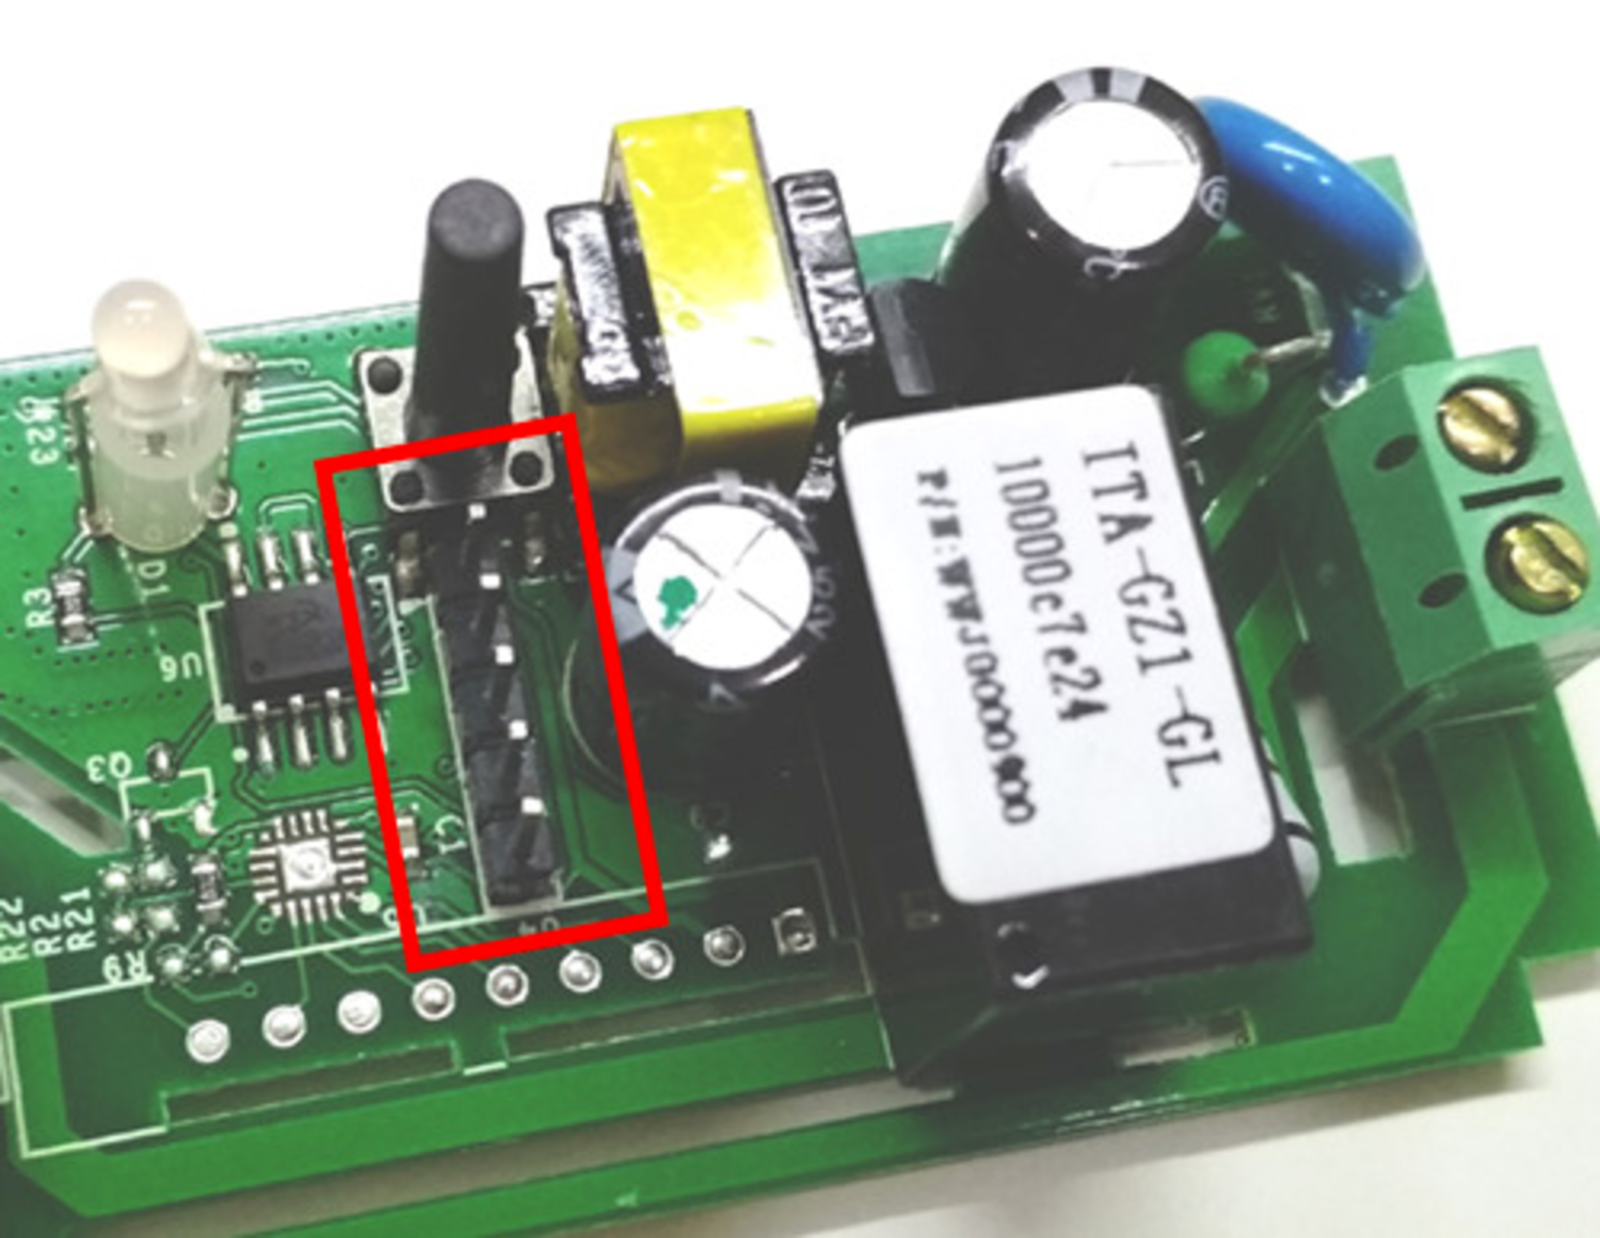
So much is the WiFi relay SONOFF (from ITEAD), which is the heart of this device.
“I had no setbacks. I just found 10 thousand ways that don't work. ”- Thomas Alva Edison
It is incredible, not in such a distant past, people in schools wrote with feathers. And today, everyone in the pocket has a magic brick with pictures that allows you to access information from around the world. Send instant messages to anyone on the planet. We have voice control, face recognition and, as people say, the threat to all of humanity from artificial intelligence. More recently, these technologies seemed unimaginable fiction. However, today I will show you how, with basic programming skills, absolutely everyone can use voice control. So let's get started!
ATTENTION!!! Work with high voltage. Be careful about everything you do! The author of the article is not responsible for the actions you commit and any material or physical damage that may arise from the use of information from this article! If you are not sure about something, ask for help from a more experienced person.
')
The main scheme of the device.
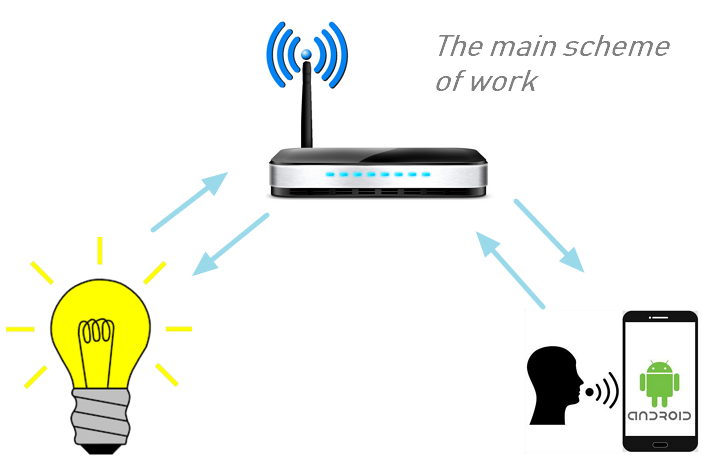
Since the phone can be connected to only one WiFi access point at a time, we will work through the router. In general, it is convenient when all your smart devices are on the same network, and you can easily manage them without having to constantly reconnect to each of them. The disadvantage of this is that all your devices depend on the performance of a single router.
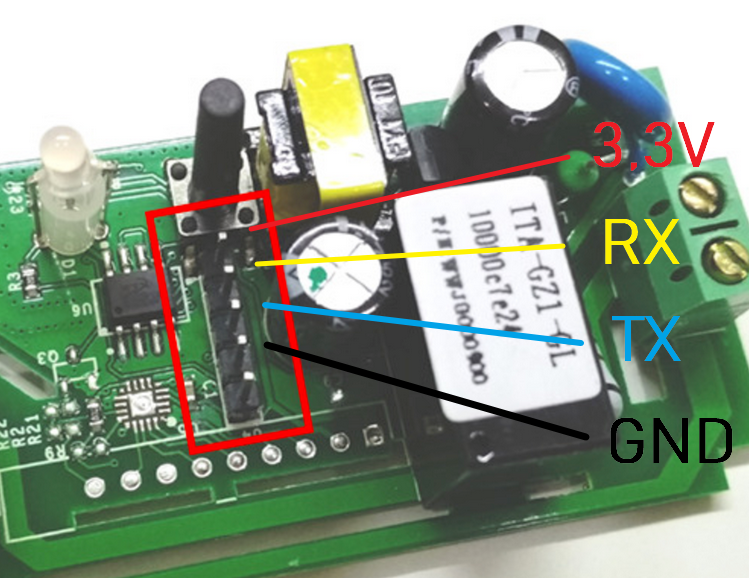
1 - we need to reprogram the Sonoff WiFi Relay
To do this, it is necessary to disassemble the relay and solder contacts for flashing to it. By default, it is configured to work through a Chinese server. Personally, it is not very clear to me why the light bulb in the toilet needs to be turned on through the server from the Middle Kingdom.
Now we can connect Silicon Labs cp2102 module for Sonoff flashing. I still use it to work with arduino mini.
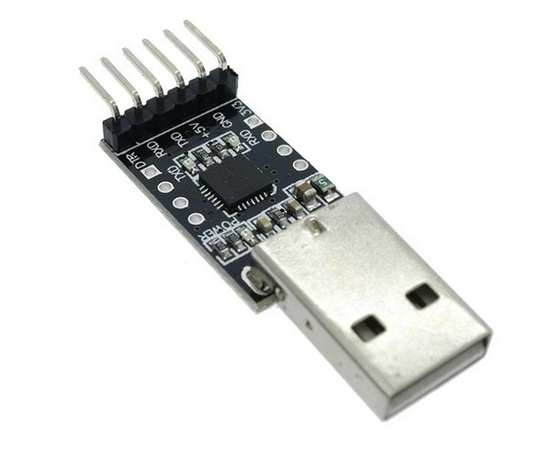
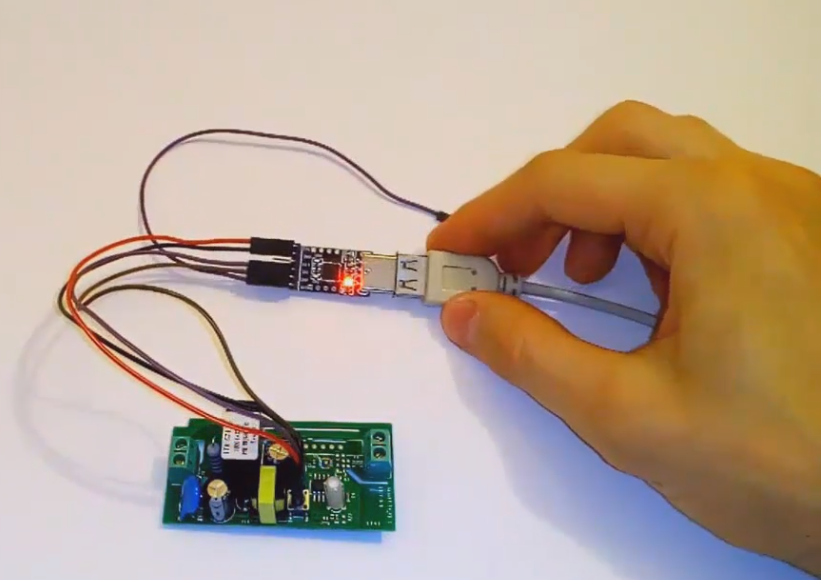
A WARNING!!! When reprogramming, do not connect the WiFi relay to the 220/110 volt network!
Re-program the relay is very simple. This is the usual esp8266 module. I took the standard sketch of the access point server from the Arduino IDE and changed it a bit.
#include <ESP8266WiFi.h> #include <ESP8266WebServer.h> #include <WiFiClient.h> // name and password from WiFi network const char* ssid = "Your access point (router) name"; const char* password = "router password"; IPAddress ip(192,168,1,112); // enter static ip IPAddress gateway(192,168,1,1); IPAddress subnet(255,255,255,0); // 80 WiFiServer server(80); void setup() { Serial.begin(115200); delay(100); //preparing GPIO pinMode(12, OUTPUT); digitalWrite(12, 1); pinMode(13, OUTPUT); digitalWrite(13, 1); // connecting to WiFi Serial.println(); Serial.println(); Serial.print("Connecting to "); Serial.println(ssid); WiFi.begin(ssid, password); WiFi.config(ip, gateway, subnet); // waiting for connection while (WiFi.status() != WL_CONNECTED) { delay(500); Serial.print("."); } Serial.println(""); Serial.println("WiFi connected"); // run server server.begin(); Serial.println("Server started"); // show ip Serial.println(WiFi.localIP()); } void loop() { // connection check WiFiClient client = server.available(); if (!client) { return; } // Waiting for data Serial.println("new client"); while (!client.available()) { delay(1); } // Reading the first line of the query String req = client.readStringUntil('\r'); Serial.println(req); client.flush(); // works with GPIO if (req.indexOf("/12/0") != -1) digitalWrite(12, 0); else if (req.indexOf("/12/1") != -1){ digitalWrite(12, 1); Serial.println("TEST OK"); String s = "HTTP/1.1 200 OK\r\nContent-Type: text/html\r\n\r\n<!DOCTYPE HTML>\r\n<html>\r\nTest OK. Uptime: "; // UpTime int Sec = (millis() / 1000UL) % 60; int Min = ((millis() / 1000UL) / 60UL) % 60; int Hours = ((millis() / 1000UL) / 3600UL) % 24; int Day = ((millis() / 1000UL) / 3600UL / 24UL); s += Day; s += "d "; s += Hours; s += ":"; s += Min; s += ":"; s += Sec; s += "</html>\n"; client.print(s); client.stop(); return; } else // If an invalid query write error { Serial.println("invalid request"); String s = "HTTP/1.1 200 OK\r\nContent-Type: text/html\r\n\r\n<!DOCTYPE HTML>\r\n<html>\r\nInvalid request"; s += "</html>\n"; client.print(s); client.stop(); return; } client.flush(); // Response formation String s = "HTTP/1.1 200 OK\r\nContent-Type: text/html\r\n\r\n<!DOCTYPE HTML>\r\n<html>\r\nGPIO set OK"; s += "</html>\n"; // Send the response to the client client.print(s); delay(1); Serial.println("Client disonnected"); } You will need to specify the name of your access point (router / router), password and static IP address for the light bulb. Relay control is on pin 12. Be sure to set the flash memory size to 1 MB in the IDE.
Press and hold the button on the Sonoff board. Insert the cp2102 USB converter into your computer (while holding down the button). After 2-3 seconds, release the button. Now the relay is in programming mode. Download the sketch file from the Arduino IDE. Click on Confirm / Compile. After you reprogram it, reboot the module.
2 - now let's create a mobile application to manage this relay via Wi-Fi. (Android)
I will give only the main code fragments. Then you can use them to implement in your applications. Google provides a very simple and convenient interface for voice recognition. Here is the code that allows you to convert a voice to text and save it to a regular string.
// Main code to start speech recognition. // You can put it's execution, on some button in your app. Intent speechIntent = new Intent(RecognizerIntent.ACTION_RECOGNIZE_SPEECH); speechIntent.putExtra(RecognizerIntent.EXTRA_LANGUAGE_MODEL, RecognizerIntent.LANGUAGE_MODEL_FREE_FORM); speechIntent.putExtra(RecognizerIntent.EXTRA_PROMPT, "Speak please"); startActivityForResult(speechIntent, RESULT_SPEECH_TO_TEXT); // Then on onAcivityResult we will get result @Override protected void onActivityResult(int requestCode, int resultCode, Intent data) { if (requestCode == RESULT_SPEECH_TO_TEXT && resultCode == RESULT_OK) { ArrayList<String> matches = data.getStringArrayListExtra(RecognizerIntent.EXTRA_RESULTS); if (!matches.isEmpty()) { String result_recognition_string = matches.get(0); // convert to lower case, since google speech recognition // returns "different" results. For example: youtube defines as YouTube result_recognition_string = result_recognition_string.toLowerCase(Locale.getDefault()); if (result_recognition_string.contains("lamp on") ) { // lamp on new LightOn().execute(); } } } } Then you can compare it with the commands you want to implement.
This is the code for working with Wi-Fi. Sending a message to the server.
public class LightOn extends AsyncTask<Void,Void,Void> { private static final String LOG_TAG = "MyLog"; @Override protected Void doInBackground(Void... params) { URL url; HttpURLConnection urlConnection = null; try { url = new URL("http://192.168.1.112/12/1"); // "0" to turn off urlConnection = (HttpURLConnection) url .openConnection(); InputStream in = urlConnection.getInputStream(); InputStreamReader isw = new InputStreamReader(in); int data = isw.read(); while (data != -1) { char current = (char) data; data = isw.read(); System.out.print(current); Log.e(LOG_TAG, "Reply from server - " + current); } } catch (Exception e) { e.printStackTrace(); } finally { if (urlConnection != null) { urlConnection.disconnect(); } } return null; } } // run it new LightOn().execute(); It is very simple. “1” turn on the light bulb, “0” turn off the light bulb. You can optionally add any checks, receive a response from the server, and so on. mn I created two programs for myself. The first is a voice control widget that is on the desktop and always at hand. The second is a simple application for turning on / off a light bulb by pressing a button.

I assume that you are already tired of reading all sorts of texts, so I suggest you see the video about how it was.
As Albert Einstein said: “Your possibilities are limited only by your imagination.”
I wish you a good day and only smart devices!
Source: https://habr.com/ru/post/432990/
All Articles