Panoramas on Stereo Pi
We continue experiments with the Raspberry Pi, equipped with two cameras simultaneously. Let me remind you that all the games occur around the Raspberry Pi Compute Module 3 Lite, inserted into the StereoPi crib.
In previous reviews, we installed cameras in parallel and worked with stereo. Here, the approach is exactly the opposite: the cameras look in different directions, but they are equipped with wide-angle lenses (200 degrees). And we will glue a spherical panorama of 360 degrees!
Introductory
Distraction: since on Habré there is no co-authorship of articles, I will mention the main text. This experiment was conducted jointly, with me - iron and experiments in the field, and with @Gol - the software part.
')
Let's start from the end: here is the result, the actual panorama .
So, this time, let's try to make a spherical panorama. In vain, perhaps, we have two cameras on board. Of course, it was possible to connect two cameras to a normal raspberry, in multiplexing mode (either one camera works, then the other, the choice of the right one - via GPIO). But then the shots will be taken sequentially, and in the presence of movement it is not very gut. However, when “simultaneous” shooting from two cameras, stereo recordings are also no synchronization, stupidly two raspistill simultaneously start. But there are more chances that the objects on the border will not run very fast. Also, the video can be simultaneously shot with two cameras, and then sewed into a spherical video panorama. But I'll try it sometime later, first you need to figure it out with photo panoramas.
Iron
We have StereoPi , there are two cameras with a fish lens (200 degrees). These are the cameras: RPi Camera (M) WaveShare
We have two cameras pop-to-pope:

We take photos from both cameras. Ideally - at the same time, but it can be alternately. raspistill to help us. We get these two pictures:
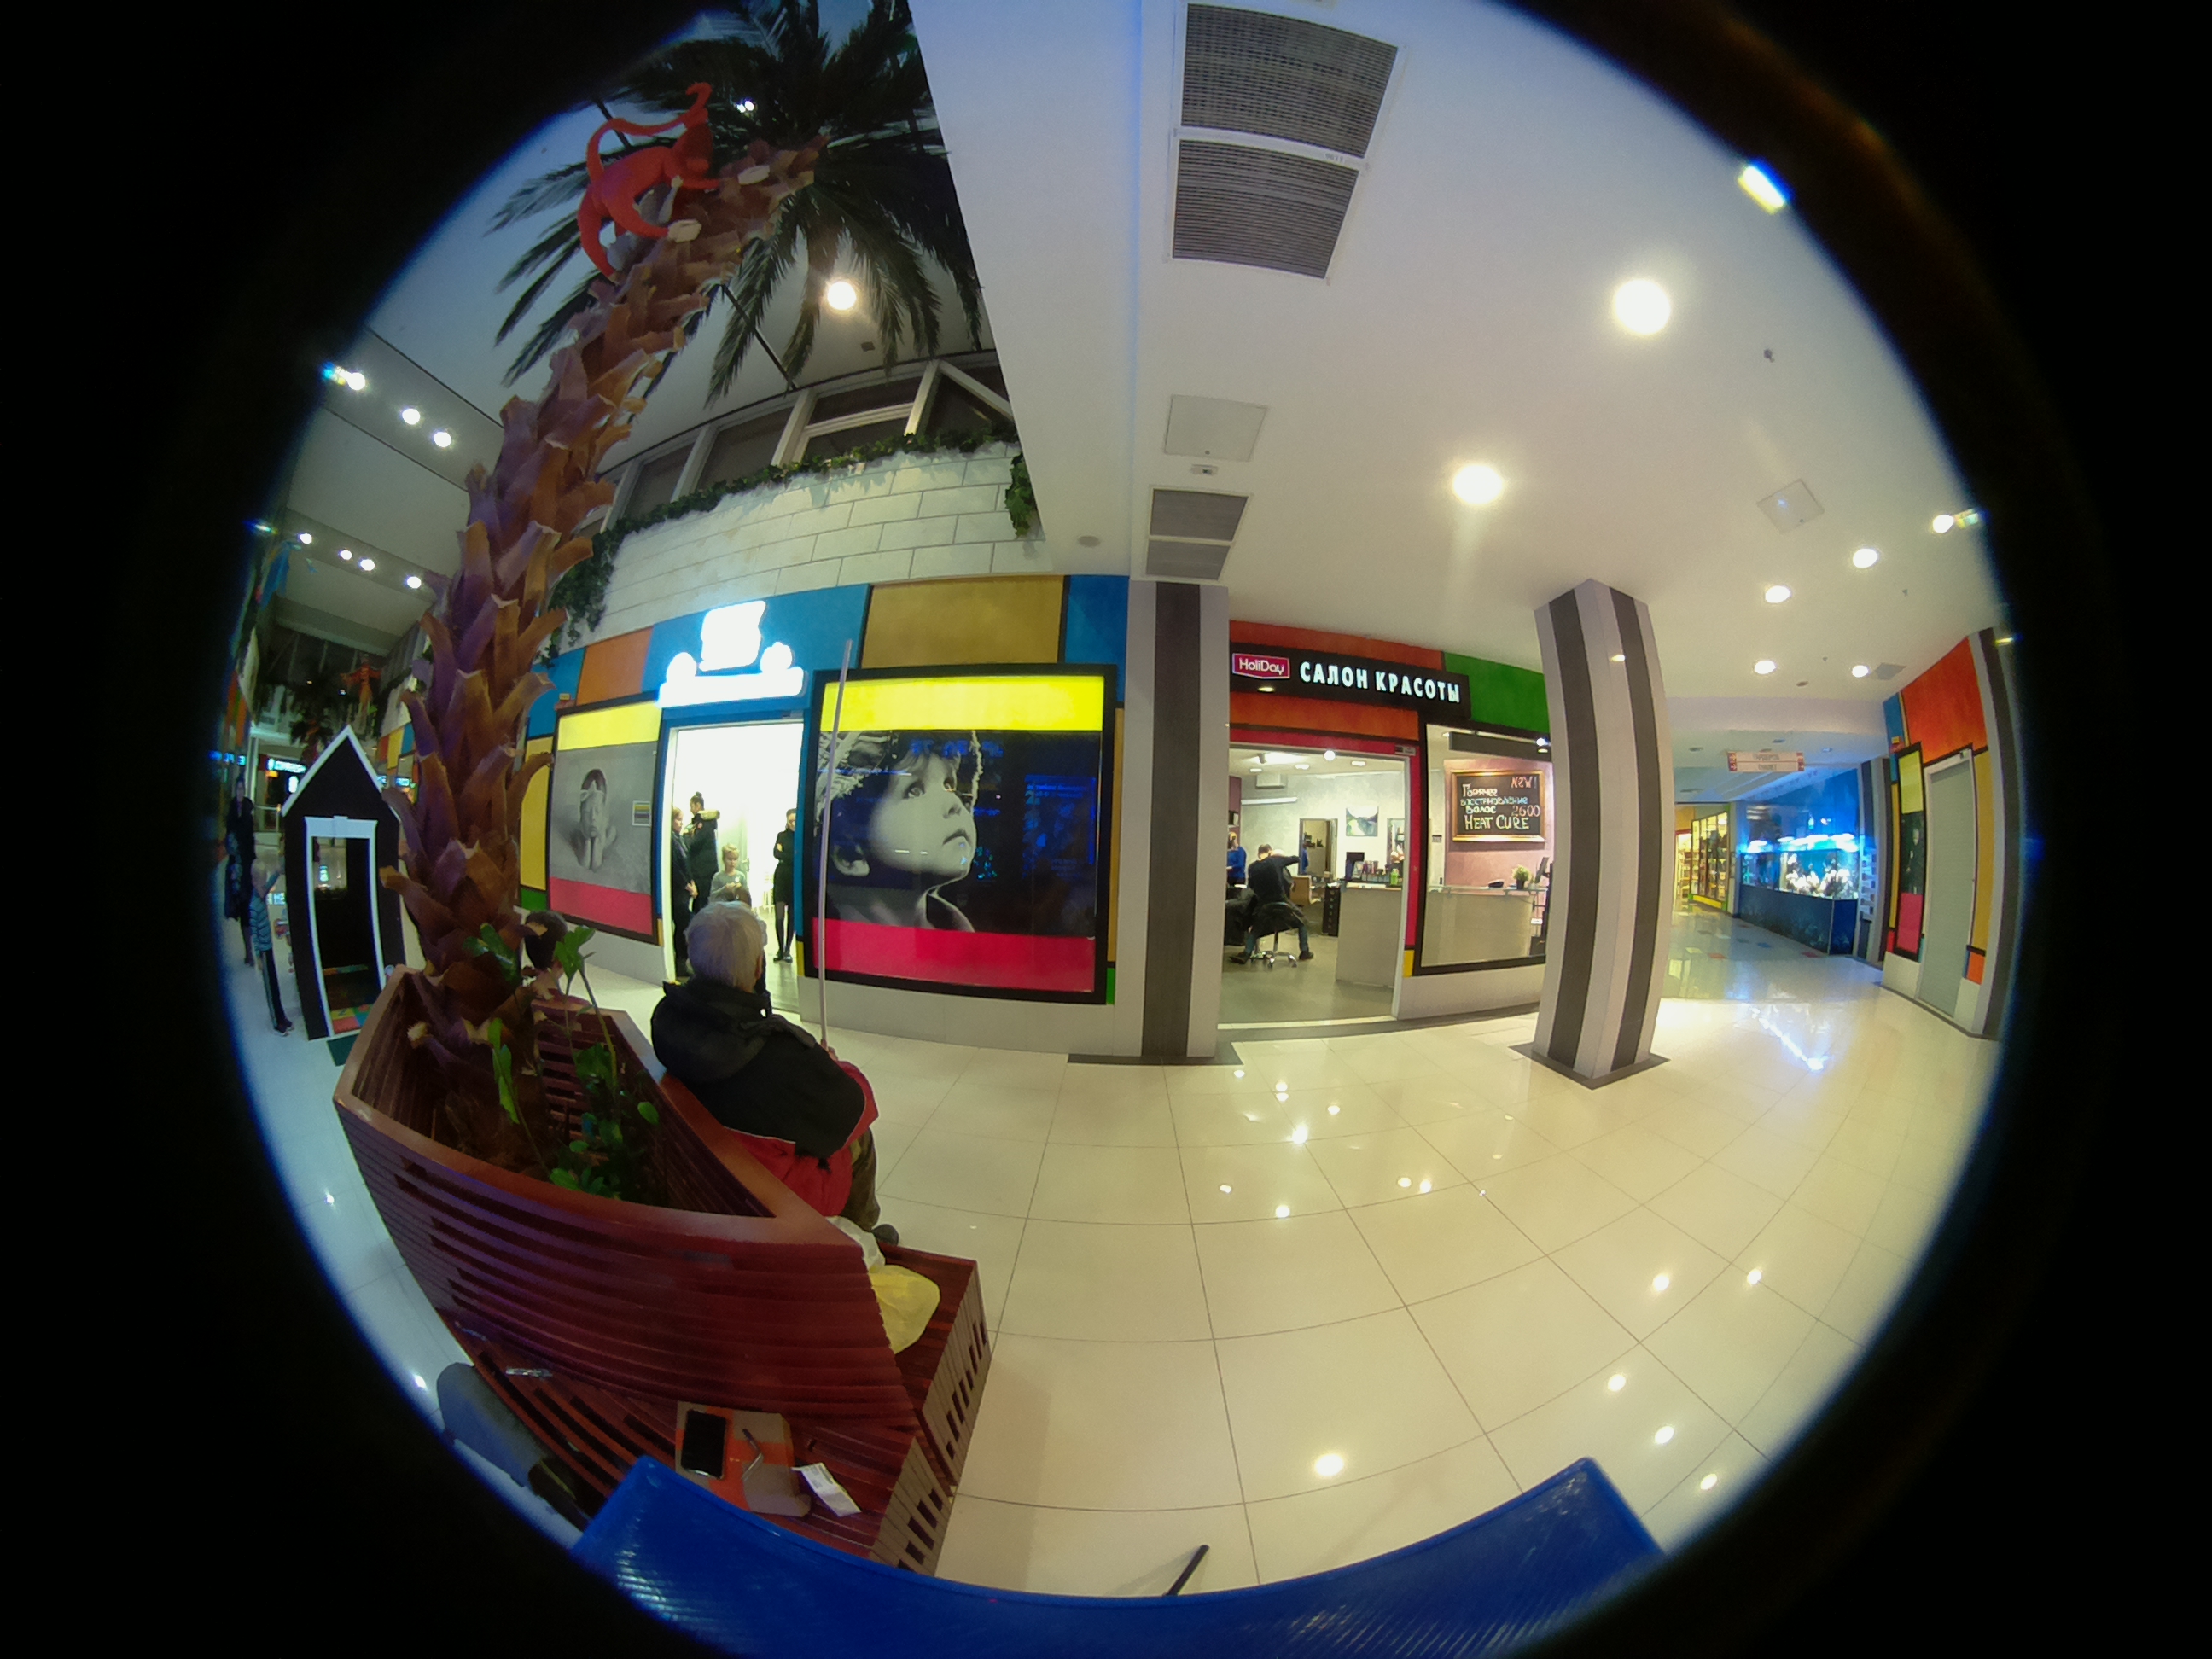
Full size
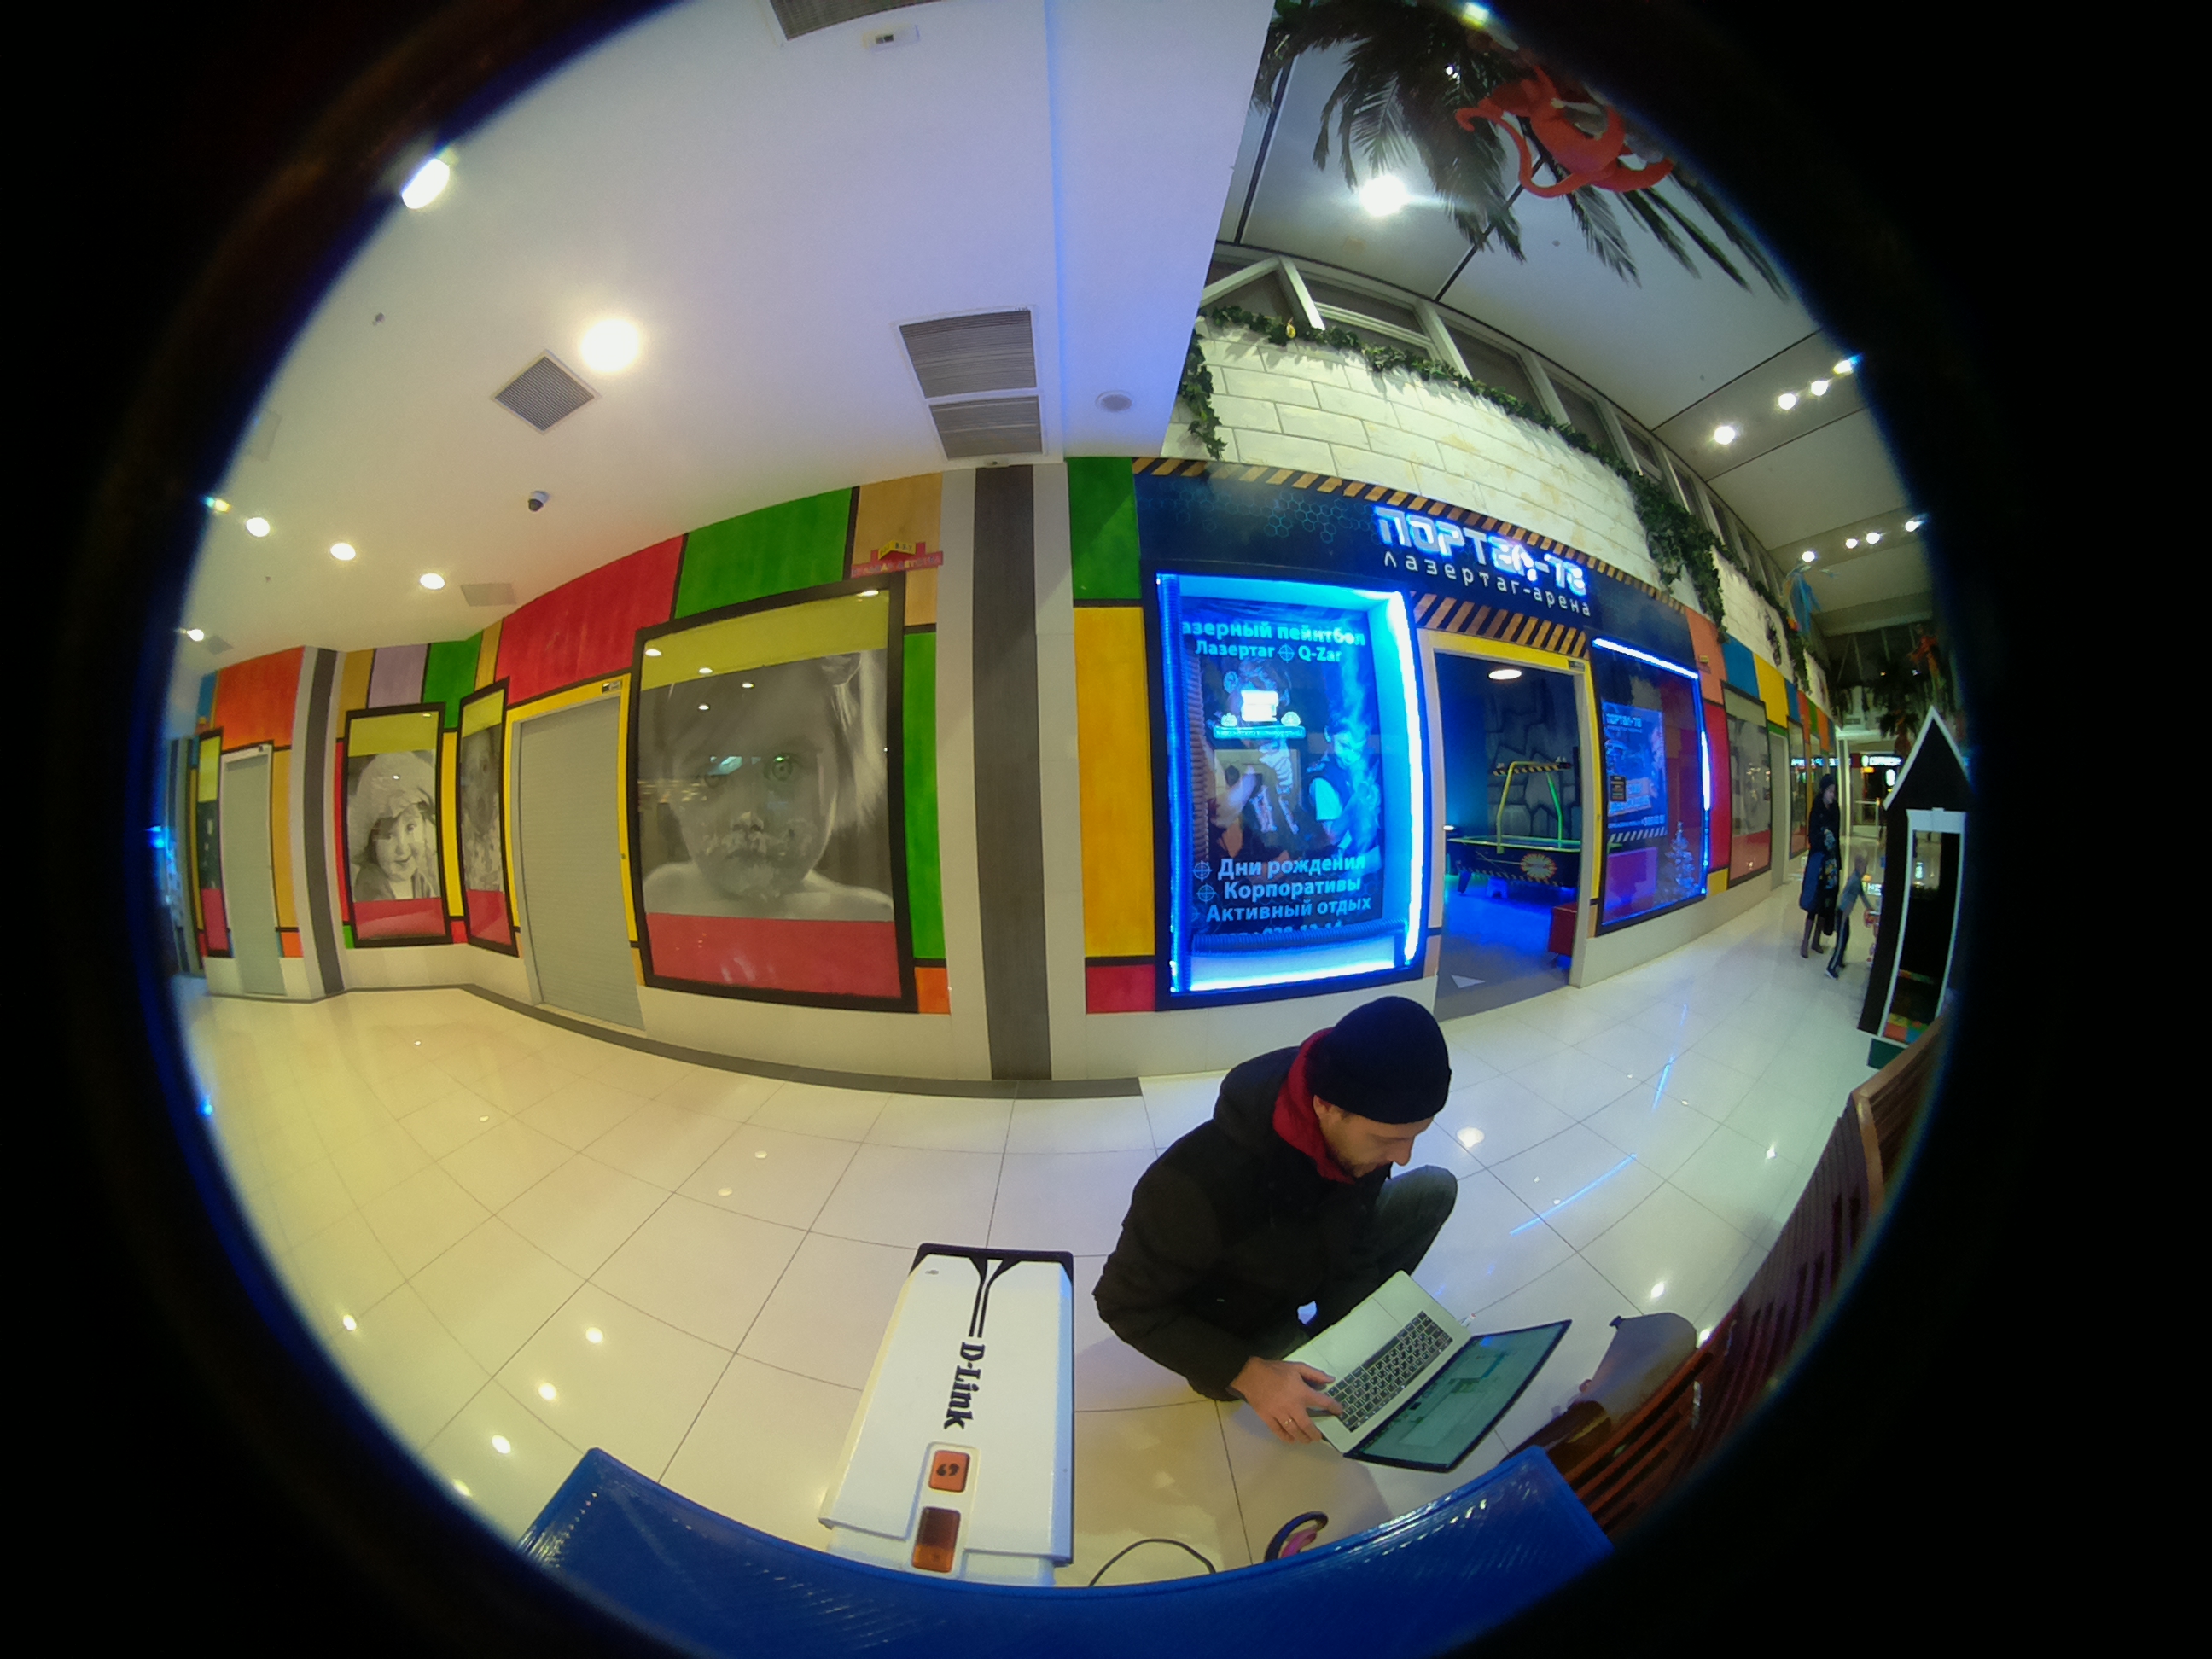
Full size
Stitching panorama
Then a problem arose - how to automatically make a picture with an equidistant projection from these two phishing pictures, which is eaten by almost all viewers of panoramas. You want to do the conversion right on board the stereo recordings, without using special panoramic software.
After much research, the 360-camera project was found, from where the scripts were taken as the basis.
But first, we still have to use a separate panoramic program to prepare a template for conversion. The program is called Hugin, you can download it here http://hugin.sourceforge.net/download/
1. So, downloaded, installed, launched.
2. Select the “Simple” option in the “Interface” menu.
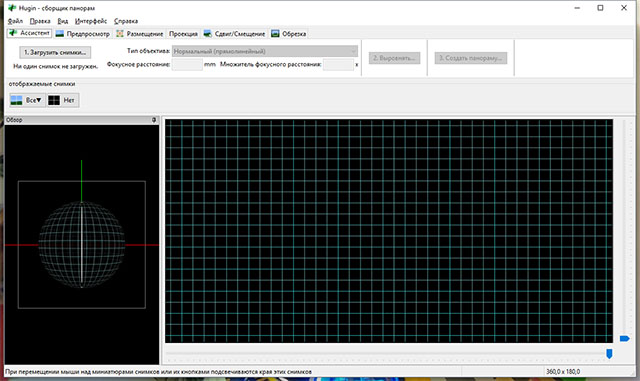
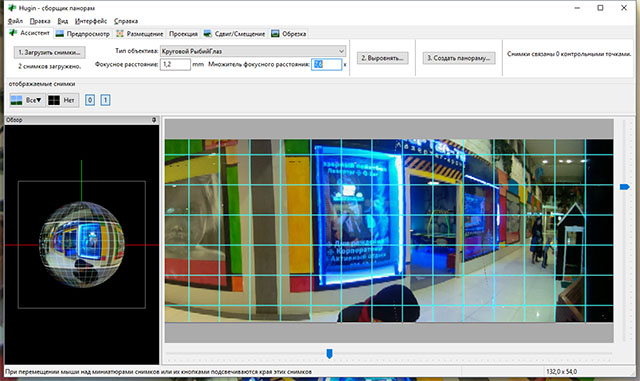
3. Click the button “Upload images ...” and add our two files (21.jpg and 21-2.jpg).

4. Set the "Lens Type" - "Circular VyrvIglaz." The “focal length” of 1.2mm and the “focal length multiplier” of 7.6x. And in the “Projection” tab, we are convinced that there is a field of view 360x180 and “Equidistant”. By default, the way it should be.
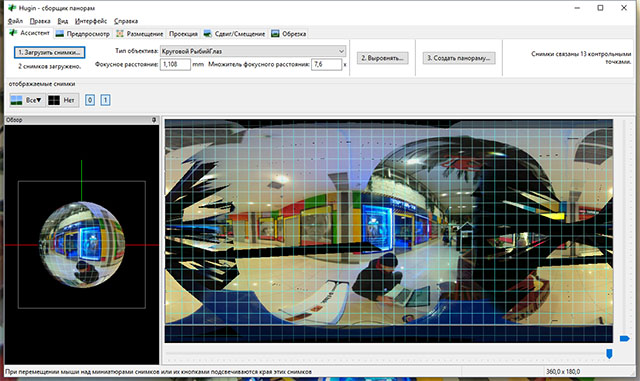
5. Click the button “2. Align ... ". The search for control points will begin, there should be somewhere between 10 and 13 points. The panorama is already starting to look like a panorama.
6. Now the most important thing is to save the project, since it is we who will need it for the subsequent automatic gluing of all subsequent panoramas shot by these two of our two fish cameras. “File” -> “Save As” -> file name stereopi-template.pto
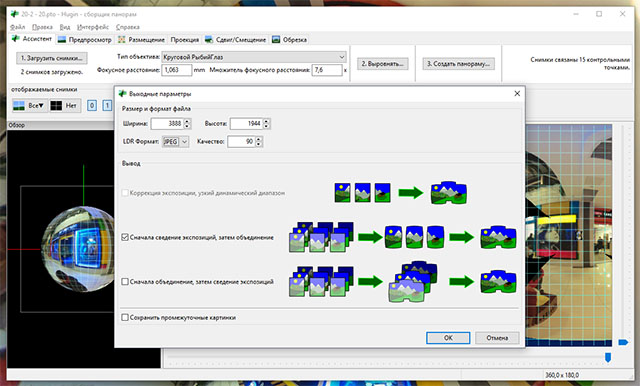
7. Go back to the “Assistant” tab (if we suddenly left it) and click “Create panorama ...” An additional window will open, select the height 1944, the width will be calculated. LDR Format (output picture format) we set JPEG. Quality - what you want, by default - 90. Corrections do not touch yet. Click OK. Set the file name with the result. And click "Save."
8. Another pair of windows will open, one of which will display the process log.
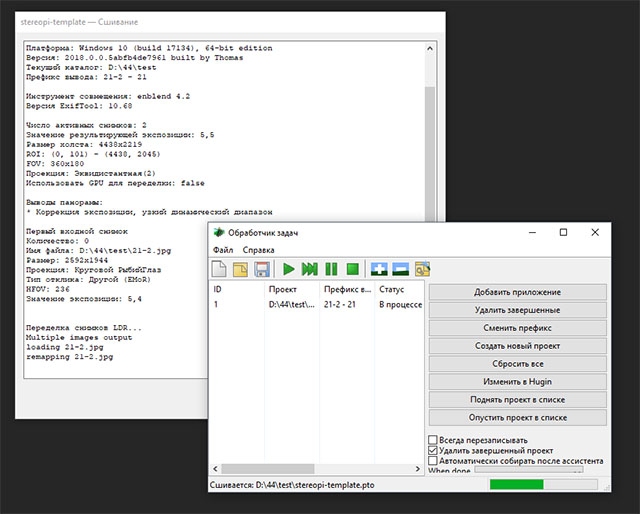
9. In the end, you’ll get something like this:
Full size
This is the equidistant projection of our spherical panorama that we need!
We transfer stitching on board
But it's all lyrics!
We do not want to bathe with each photo, we need to automate this process. To do this, you will need a project file, which we saved on step 6. We take our project file (I have this stereopi-template.pto ) and copy it to a stereo.
There we also copy the glue script stereopi-stich.sh. The script needs two input parameters - the file names of the phishing photo files to be glued into an equidistant projection.
But first you need to install all the necessary software on the stereo. Just download this script and run it on the steropishka. installer.sh
Now we run the glue script:
# ./stereopi-stich.sh 21.jpg 21-2.jpg Stiching files 21.jpg and 21-2.jpg Generating pto file... Reading /opt/Pano/test1/21-2.jpg... Reading /opt/Pano/test1/21.jpg... Assigned 1 lenses. Written output to /opt/Pano/test1/tmp/project.pto Written output to ./tmp/project.pto number of cmdline args: 1 ================================== Stitching panorama ================================== nona -z LZW -r ldr -m TIFF_m -o 21_21-2-pano -i 0 ./tmp/project.pto nona -z LZW -r ldr -m TIFF_m -o 21_21-2-pano -i 1 ./tmp/project.pto checkpto --generate-argfile= project.pto_21_21-2-pano.arg ./tmp/project.pto enblend --compression=90 -w -f2688x1344 -o 21_21-2-pano.jpg -- 21_21-2-pano0000.tif 21_21-2-pano0001.tif enblend: info: loading next image: 21_21-2-pano0000.tif 1/1 enblend: info: loading next image: 21_21-2-pano0001.tif 1/1 enblend: info: writing final output Bogus input colorspace exiftool -overwrite_original_in_place -TagsFromFile /opt/Pano/test1/21-2.jpg -WhitePoint -ColorSpace -@ /usr/share/hugin/data/hugin_exiftool_copy.arg -@ project.pto_21_21-2-pano.arg 21_21-2-pano.jpg 1 image files updated ================================== Remove temporary files ================================== rm project.pto_21_21-2-pano.arg 21_21-2-pano0000.tif 21_21-2-pano0001.tif The process takes about 50 seconds. It would be necessary to look for optimization possibilities, but so far so good.
The result is a file.
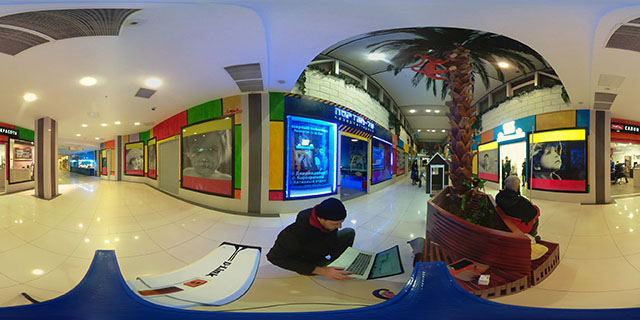
Full size
Everything! We automatically glued the two fish in equidistant! And the same script can be glued together and all subsequent photos, the main thing is that the mutual placement of our cameras does not change much, and then the gluing will go.
Now you need it vpendyurit somewhere on the site. To view our panorama on the site you need a panoramic player.
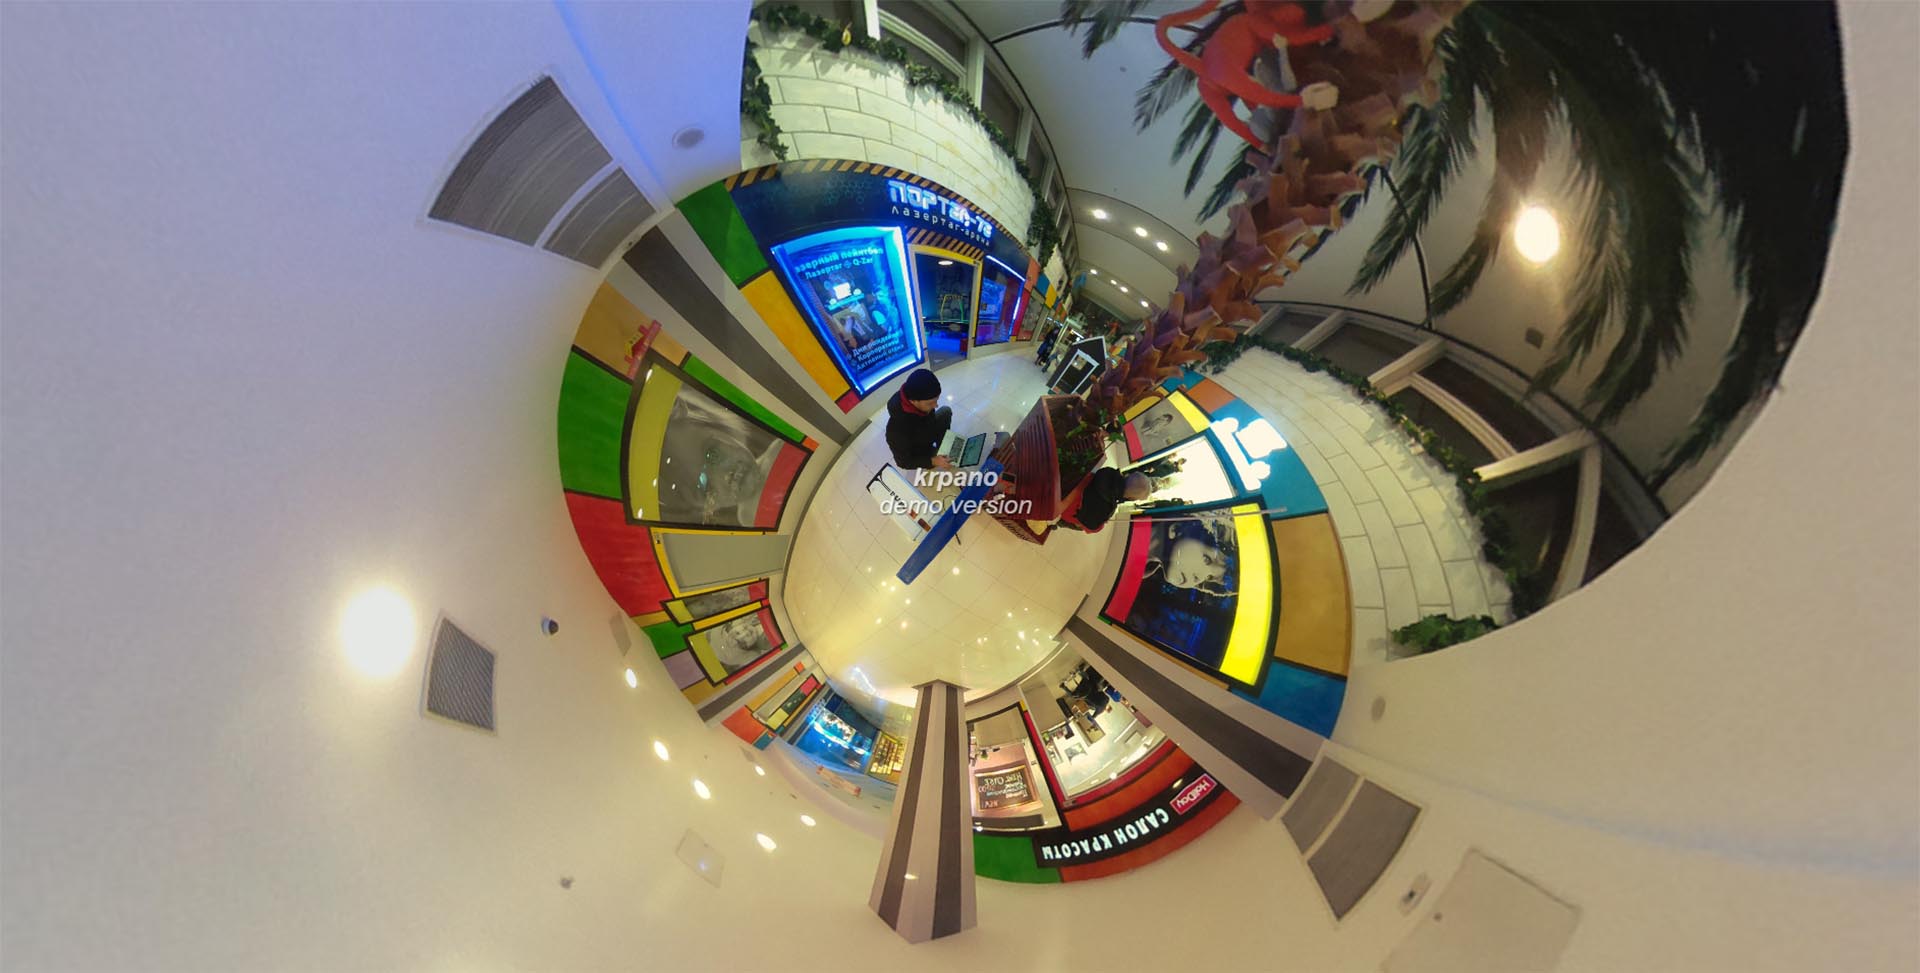
IMHO, the best embedded player for panoramas - KRPano. It can both photo and video. Yes, paid. I already bought a license for it five years ago, but then the player was made on a flash and HTML5 could not. And now he can, but you need to buy a license again.
You can download my archivist , where inside is already everything you need to see this . The most nishtyak is Little Planets (choice of viewing mode - right-click).

We hope that our experiment will be not only interesting for you, but also useful as a recipe. Thanks for attention!
Useful links:
Equirectangular projection
A lot of theory on phishing and equidistant projection
Software for viewing panoramas
Large manual for automatic gluing
BrianBock / 360-camera
Source: https://habr.com/ru/post/432898/
All Articles