We write trading robots using the StockSharp graphic framework. Part 1
In our blog, we write a lot about technologies and useful tools related to stock trading. One of them is StockSharp's free platform, which can be used for professional development of trading terminals and trading robots in C #. In this article, we will show how to use the graphical framework included in S # .API in order to create a trading terminal with the ability to run algorithmic strategies.
What is needed
- Visual Studio 2017 (Community, free version), we will program in it.
- Connecting to trading on the stock exchange, in the examples in this text the SMARTcom interface from ITI Capital is used .
Project creation
Create a new WPF application in Visual Studio:
')

Then you need to add the S # .API library. How to do this can be found in the documentation . The best option is to install using Nuget.
Since all S # .API graphic elements are created on the basis of DevExpress, and the DevExpress libraries go along with S # .API, it would be foolish not to use them. Let's go to the editor window MainWindow.xaml:

Replace Window with DXWindow, we need it to use different color schemes:

Visual Studio itself will offer to insert the necessary libraries.
We divide the window into three parts - on top there will be a strip with buttons for setting up connections and connections, at the bottom - a window with logs, and in the middle all the other panels. The easiest way is to break the window using LayoutControl from DevExpress.
In the resulting three parts we will add the elements we need.
<dx:DXWindow x:Class="ShellNew.MainWindow" xmlns="http://schemas.microsoft.com/winfx/2006/xaml/presentation" xmlns:x="http://schemas.microsoft.com/winfx/2006/xaml" xmlns:d="http://schemas.microsoft.com/expression/blend/2008" xmlns:mc="http://schemas.openxmlformats.org/markup-compatibility/2006" xmlns:dx="http://schemas.devexpress.com/winfx/2008/xaml/core" xmlns:dxlc="http://schemas.devexpress.com/winfx/2008/xaml/layoutcontrol" mc:Ignorable="d" Title="MainWindow" Height="450" Width="800"> <dxlc:LayoutControl Padding="0" Name="LayoutControlRoot" Orientation="Vertical"> <dxlc:LayoutGroup HorizontalAlignment="Stretch" Height="25"> <!-- --> </dxlc:LayoutGroup> <dxlc:LayoutGroup HorizontalAlignment="Stretch" > <!-- --> </dxlc:LayoutGroup> <dxlc:LayoutGroup HorizontalAlignment="Stretch" > <!-- --> </dxlc:LayoutGroup> </dxlc:LayoutControl> </dx:DXWindow> Configuring the connection to the connector
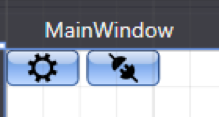
Add two buttons, one button to configure the connection, and the second button to connect. To do this, use the Button SimpleButton from DevExpress. The buttons will be located at the top of the application. In each button we will place the pictures, customary for S # .Designer , S # .Data and S # .Terminal .
<dx:DXWindow x:Class="ShellNew.MainWindow" xmlns="http://schemas.microsoft.com/winfx/2006/xaml/presentation" xmlns:x="http://schemas.microsoft.com/winfx/2006/xaml" xmlns:d="http://schemas.microsoft.com/expression/blend/2008" xmlns:mc="http://schemas.openxmlformats.org/markup-compatibility/2006" xmlns:dx="http://schemas.devexpress.com/winfx/2008/xaml/core" xmlns:dxlc="http://schemas.devexpress.com/winfx/2008/xaml/layoutcontrol" xmlns:xaml="http://schemas.stocksharp.com/xaml" mc:Ignorable="d" Title="MainWindow" Height="450" Width="800"> <dxlc:LayoutControl Padding="0" Name="LayoutControlRoot" Orientation="Vertical"> <dxlc:LayoutGroup HorizontalAlignment="Stretch" Height="25"> <!-- --> <dxlc:LayoutItem Width="40"> <dx:SimpleButton x:Name="SettingsButton" Click="SettingsButton_Click" > <Image Source="{xaml:ThemedIcons Key=Settings}" Width="16" /> </dx:SimpleButton> </dxlc:LayoutItem> <dxlc:LayoutItem Width="40"> <dx:SimpleButton x:Name="ConnectButton" Click="ConnectButton_Click" > <Image Source="{xaml:ThemedIcons Key=Connect}" Width="16" /> </dx:SimpleButton> </dxlc:LayoutItem> </dxlc:LayoutGroup> <dxlc:LayoutGroup HorizontalAlignment="Stretch" View="Tabs"> <!-- --> </dxlc:LayoutGroup> <dxlc:LayoutGroup HorizontalAlignment="Stretch" > <!-- --> </dxlc:LayoutGroup> </dxlc:LayoutControl> </dx:DXWindow> In the upper right corner of the screen form we will see the following picture:
Double click on each button to create button click event handlers. In the MainWindow code, you need to declare the connector, as well as the location and file name in which the connector settings will be stored.
public readonly Connector Connector; private const string _dir = "Data"; private static readonly string _settingsFile = $@"{_dir}\connection.xml"; In the event handler for clicking the connector settings button, we will open the connector configuration window and save it to a file.
private void SettingsButton_Click(object sender, RoutedEventArgs e) { if (Connector.Configure(this)) { new XmlSerializer<SettingsStorage>().Serialize(Connector.Save(), _settingsFile); } } In the constructor, we will check if there is a directory and a file with the connector settings, and if there is one, we will load it into the connector:
//---------------------------------------------------------------------------------- Directory.CreateDirectory(_dir); Connector = new Connector(); if (File.Exists(_settingsFile)) { Connector.Load(new XmlSerializer<SettingsStorage>().Deserialize(_settingsFile)); } //---------------------------------------------------------------------------------- Most of the S # .API objects have the Save and Load methods, with which you can save and load this object from an XML file.
In the handler method of clicking on the connect button, we connect the connector.
private void ConnectButton_Click(object sender, RoutedEventArgs e) { Connector.Connect(); } Now you can run the program and check it.
Set a dark theme
Many traders prefer the dark themes of trading applications. Therefore, we immediately make the theme of the program dark. For you need to find the App.xaml file:
And replace the Application in it with the charting: ExtendedBaseApplication, and Visual Studio will offer us to insert the necessary libraries.
<charting:ExtendedBaseApplication x:Class="ShellNew.App" xmlns="http://schemas.microsoft.com/winfx/2006/xaml/presentation" xmlns:x="http://schemas.microsoft.com/winfx/2006/xaml" xmlns:charting="http://schemas.stocksharp.com/xaml" StartupUri="MainWindow.xaml"> </charting:ExtendedBaseApplication> And in the file App.xaml.cs you need to delete ": Application".
namespace ShellNew { /// <summary> /// Interaction logic for App.xaml /// </summary> public partial class App { } } In the MainWindow constructor, we write
ApplicationThemeHelper.ApplicationThemeName = Theme.VS2017DarkName;The full code at the moment:
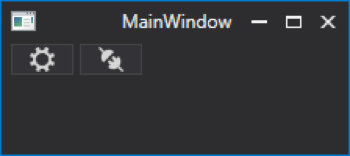
public partial class MainWindow { public readonly Connector Connector; private const string _dir = "Data"; private static readonly string _settingsFile = $@"{_dir}\connection.xml"; public MainWindow() { //---------------------------------------------------------------------------------- ApplicationThemeHelper.ApplicationThemeName = Theme.VS2017DarkName; //---------------------------------------------------------------------------------- Directory.CreateDirectory(_dir); Connector = new Connector(); if (File.Exists(_settingsFile)) { Connector.Load(new XmlSerializer<SettingsStorage>().Deserialize(_settingsFile)); } //---------------------------------------------------------------------------------- InitializeComponent(); } private void SettingsButton_Click(object sender, RoutedEventArgs e) { if (Connector.Configure(this)) { new XmlSerializer<SettingsStorage>().Serialize(Connector.Save(), _settingsFile); } } private void ConnectButton_Click(object sender, RoutedEventArgs e) { Connector.Connect(); } } We start to check the dark theme:
Creating a toolbar
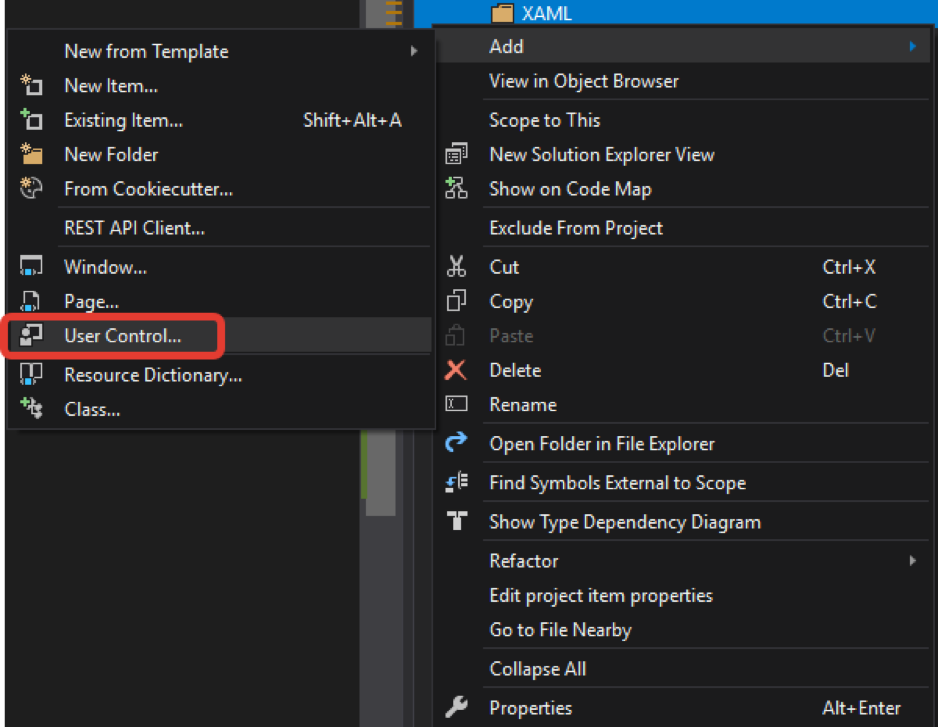
Add a folder where we will store all the controllers we created, and name it XAML. Add our first UserControll to it, give it the name SecurityGridControl.
We add one SecurityPicker element to it. It will display the available tools. By analogy with the main window, we will use the LayoutControl from DevExpress.
<UserControl x:Class="ShellNew.XAML.SecurityGridControl" xmlns="http://schemas.microsoft.com/winfx/2006/xaml/presentation" xmlns:x="http://schemas.microsoft.com/winfx/2006/xaml" xmlns:mc="http://schemas.openxmlformats.org/markup-compatibility/2006" xmlns:d="http://schemas.microsoft.com/expression/blend/2008" xmlns:xaml="http://schemas.stocksharp.com/xaml" mc:Ignorable="d" d:DesignHeight="450" d:DesignWidth="800"> <xaml:SecurityPicker x:Name="SecPicker" /> </UserControl> Go to the designer of the main window and change the central part to the bookmarks view. In one of the tabs we place the control panel we created with SecurityPicker:
<dxlc:LayoutGroup HorizontalAlignment="Stretch" View="Tabs"> <!-- --> <dxlc:LayoutGroup Header="Securities"> <myxaml:SecurityGridControl x:Name="SecurityPanel" /> </dxlc:LayoutGroup> </dxlc:LayoutGroup> Now that we have a toolbar, we need to set a data source for it, in our case, this is a connector. You could just
MainWindow
SecurityPanel.SecPicker.SecurityProvider = Connector;
in the MainWindow
SecurityPanel.SecPicker.SecurityProvider = Connector; constructor MainWindow
SecurityPanel.SecPicker.SecurityProvider = Connector; .But do not clutter the MainWindow code that does not apply to it. Therefore, we will create a static variable Instance and, in the constructor of MainWindow, assign it the value MainWindow:
… public static MainWindow Instance; … Instance = this; … Now, anywhere in our program, we can access the properties of the MainWindow through the code MainWindow.Instance.XXX.
In the SecurityGridControl constructor, thus specify the Connector as the data source:
public SecurityGridControl() { InitializeComponent(); SecPicker.SecurityProvider = MainWindow.Instance.Connector; } Run to check:

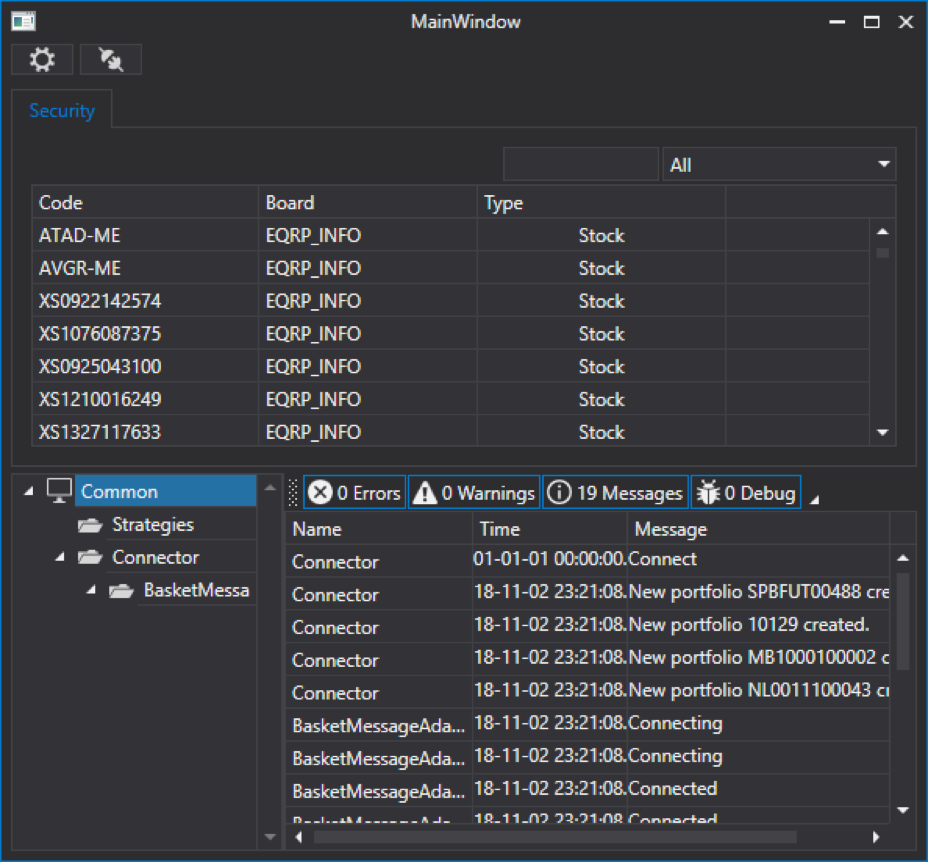
Add logging
The work of the program, connector or robot must be monitored. For this, S # .API has a special LogManager class. This class receives messages from sources and sends them to listeners. In our case, the sources will be the Connector, strategies, etc., and the listener will be the file and the log panel.
In the MainWindow code, we declare the LogManager object and the place where it will be stored:
public readonly LogManager LogManager; private static readonly string _logsDir = $@"{_dir}\Logs\"; In the MainWindow constructor, create a LogManager, give it the source Connector and the listener file:
//---------------------------------------------------------------------------------- LogManager = new LogManager(); LogManager.Sources.Add(Connector); LogManager.Listeners.Add(new FileLogListener { SeparateByDates = SeparateByDateModes.SubDirectories, LogDirectory = _logsDir }); //---------------------------------------------------------------------------------- By analogy with the toolbar, create a log panel in the XAML folder add another UserControl. Give it the name MonitorControl. Add a Monitor element to it.
<UserControl x:Class="ShellNew.XAML.MonitorControl" xmlns="http://schemas.microsoft.com/winfx/2006/xaml/presentation" xmlns:x="http://schemas.microsoft.com/winfx/2006/xaml" xmlns:mc="http://schemas.openxmlformats.org/markup-compatibility/2006" xmlns:d="http://schemas.microsoft.com/expression/blend/2008" xmlns:xaml="http://schemas.stocksharp.com/xaml" mc:Ignorable="d" d:DesignHeight="450" d:DesignWidth="800"> <xaml:Monitor x:Name="Monitor" /> </UserControl> In the MonitorControl constructor, we also set the MonitorManager as a listener in the LogManager:
public MonitorControl() { InitializeComponent(); MainWindow.Instance.LogManager.Listeners.Add(new GuiLogListener(Monitor)); } In the lower part of the MainWindow, add the created MonitorControl:
<dxlc:LayoutGroup HorizontalAlignment="Stretch" dxlc:LayoutControl.AllowVerticalSizing="True"> <!-- --> <myxaml:MonitorControl x:Name="MonitorControl" /> </dxlc:LayoutGroup> Run to check:
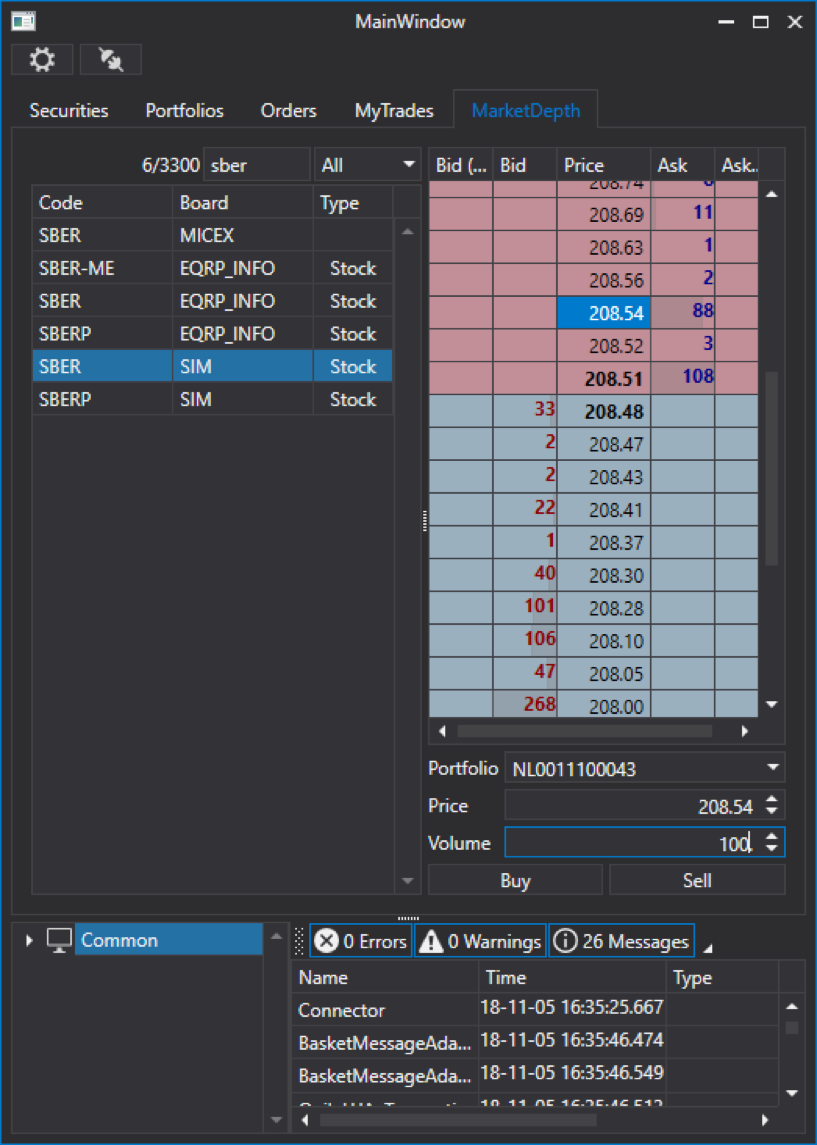
Creating the glasses panel
By analogy with the previous panels, create a glasses panel, add another UserControl to the XAML folder. Give it the name MarketDepthControl.
In MainWindow we already used LayoutControl, in this control we will also use LayoutControl. Split the panel into two parts horizontally:
<UserControl x:Class="ShellNew.XAML.MarketDepthControl" xmlns="http://schemas.microsoft.com/winfx/2006/xaml/presentation" xmlns:x="http://schemas.microsoft.com/winfx/2006/xaml" xmlns:mc="http://schemas.openxmlformats.org/markup-compatibility/2006" xmlns:d="http://schemas.microsoft.com/expression/blend/2008" xmlns:dxlc="http://schemas.devexpress.com/winfx/2008/xaml/layoutcontrol" mc:Ignorable="d"> <dxlc:LayoutControl Padding="0" Name="LayoutControlRoot" Orientation="Horizontal"> <dxlc:LayoutGroup> <!--Left--> </dxlc:LayoutGroup> <dxlc:LayoutGroup Orientation="Vertical" dxlc:LayoutControl.AllowHorizontalSizing="True"> <!--Rigth--> </dxlc:LayoutGroup> </dxlc:LayoutControl> </UserControl> Add a SecurityPicker to the left side - we met it when we created the toolbar.
<dxlc:LayoutGroup> <xaml:SecurityPicker x:Name="SecPicker" SecuritySelected="SecPicker_SecuritySelected" /> </dxlc:LayoutGroup> . : <dxlc:LayoutGroup Orientation="Vertical" dxlc:LayoutControl.AllowHorizontalSizing="True"> <dxlc:LayoutItem VerticalAlignment="Stretch"> <xaml:MarketDepthControl x:Name="MarketDepth" MaxHeight="2000" SelectionChanged="MarketDepth_SelectionChanged" /> </dxlc:LayoutItem> </dxlc:LayoutGroup> For MarketDepthControl, you need to set some MaxHeight value, otherwise the application will not start.
Under the glass we place the elements of the task portfolio, prices, and the volume of the application:
<dxlc:LayoutItem Label="Portfolio" Height="20"> <xaml:PortfolioComboBox x:Name="PortfolioComboBox" /> </dxlc:LayoutItem> <dxlc:LayoutItem Label="Price" Height="20"> <dxe:SpinEdit MinValue="0" Name="SpinEditPrice" /> </dxlc:LayoutItem> <dxlc:LayoutItem Label="Volume" Height="20"> <dxe:SpinEdit MinValue="0" Name="SpinEditVolume" /> </dxlc:LayoutItem> It is worth noting the Label property in LayoutItem, it allows you to set the text in front of the item. As well as the SpinEdit element from DevExpress in which it is convenient to set numerical values. These elements look like this:

Lower and lower buttons to buy and sell:
<dxlc:LayoutGroup Orientation="Horizontal" Height="20" VerticalAlignment="Stretch"> <dxlc:LayoutItem VerticalAlignment="Stretch"> <dx:SimpleButton Content="Buy" x:Name="BuyButton" Click="BuyButton_Click" /> </dxlc:LayoutItem> <dxlc:LayoutItem VerticalAlignment="Stretch"> <dx:SimpleButton Content="Sell" x:Name="SelltButton" Click="SelltButton_Click" /> </dxlc:LayoutItem> </dxlc:LayoutGroup> Full code:
<UserControl x:Class="ShellNew.XAML.MarketDepthControl" xmlns="http://schemas.microsoft.com/winfx/2006/xaml/presentation" xmlns:x="http://schemas.microsoft.com/winfx/2006/xaml" xmlns:mc="http://schemas.openxmlformats.org/markup-compatibility/2006" xmlns:d="http://schemas.microsoft.com/expression/blend/2008" xmlns:dxlc="http://schemas.devexpress.com/winfx/2008/xaml/layoutcontrol" xmlns:dx="http://schemas.devexpress.com/winfx/2008/xaml/core" xmlns:xaml="http://schemas.stocksharp.com/xaml" xmlns:dxe="http://schemas.devexpress.com/winfx/2008/xaml/editors" mc:Ignorable="d"> <dxlc:LayoutControl Padding="0" Name="LayoutControlRoot" Orientation="Horizontal"> <dxlc:LayoutGroup> <xaml:SecurityPicker x:Name="SecPicker" SecuritySelected="SecPicker_SecuritySelected" /> </dxlc:LayoutGroup> <dxlc:LayoutGroup Orientation="Vertical" dxlc:LayoutControl.AllowHorizontalSizing="True"> <dxlc:LayoutItem VerticalAlignment="Stretch"> <xaml:MarketDepthControl x:Name="MarketDepth" MaxHeight="2000" SelectionChanged="MarketDepth_SelectionChanged" /> </dxlc:LayoutItem> <dxlc:LayoutItem Label="Portfolio" Height="20"> <xaml:PortfolioComboBox x:Name="PortfolioComboBox" /> </dxlc:LayoutItem> <dxlc:LayoutItem Label="Price" Height="20"> <dxe:SpinEdit MinValue="0" Name="SpinEditPrice" /> </dxlc:LayoutItem> <dxlc:LayoutItem Label="Volume" Height="20"> <dxe:SpinEdit MinValue="0" Name="SpinEditVolume" /> </dxlc:LayoutItem> <dxlc:LayoutGroup Orientation="Horizontal" Height="20" VerticalAlignment="Stretch"> <dxlc:LayoutItem VerticalAlignment="Stretch"> <dx:SimpleButton Content="Buy" x:Name="BuyButton" Click="BuyButton_Click" /> </dxlc:LayoutItem> <dxlc:LayoutItem VerticalAlignment="Stretch"> <dx:SimpleButton Content="Sell" x:Name="SelltButton" Click="SelltButton_Click" /> </dxlc:LayoutItem> </dxlc:LayoutGroup> </dxlc:LayoutGroup> </dxlc:LayoutControl> </UserControl> In the MarketDepthControl constructor, set the source of tools for the SecurityPicker and the source of the portfolios for the PortfolioComboBox, in our case this will be the Connector:
public MarketDepthControl() { InitializeComponent(); SecPicker.SecurityProvider = MainWindow.Instance.Connector; PortfolioComboBox.Portfolios = new PortfolioDataSource(MainWindow.Instance.Connector); } Create a tool allocation event handler in the SecurityPicker. In it we check if the resulting tool is not equal to zero. If it is not equal to zero, we save the resulting tool in a local variable, it will be useful to us when updating the glass. After that, we clear and register the received tool in Connector to receive the glass using the RegisterMarketDepth method. Using the GetMarketDepth method, we obtain the current cups of the instrument so that they can update the MarketDepthControl.
private Security _selectedSecurity; private void SecPicker_SecuritySelected(Security security) { if (security == null) return; _selectedSecurity = security; MainWindow.Instance.Connector.RegisterMarketDepth(_selectedSecurity); var marketDepth = MainWindow.Instance.Connector.GetMarketDepth(_selectedSecurity); MarketDepth.UpdateDepth(marketDepth); } So that the glass is constantly updated in the MarketDepthControl constructor, we subscribe to the MarketDepthChanged glass change event at the connector. In the event handler for this event, we will check to which tool the received glass belongs, and if it belongs to the selected tool in SecurityPicker, then we update it with: MarketDepthControl.
public MarketDepthControl() { InitializeComponent(); SecPicker.SecurityProvider = MainWindow.Instance.Connector; PortfolioComboBox.Portfolios = new PortfolioDataSource(MainWindow.Instance.Connector); MainWindow.Instance.Connector.MarketDepthChanged += Connector_MarketDepthChanged; } private void Connector_MarketDepthChanged(MarketDepth marketDepth) { if (_selectedSecurity == null || marketDepth.Security != _selectedSecurity) return; MarketDepth.UpdateDepth(marketDepth); } Add the MarketDepthControl panel created to the central part of the MainWindow:
<dxlc:LayoutGroup HorizontalAlignment="Stretch" View="Tabs"> <!-- --> <dxlc:LayoutGroup Header="Securities"> <myxaml:SecurityGridControl x:Name="SecurityPanel" /> </dxlc:LayoutGroup> <dxlc:LayoutGroup Header="Portfolios"> <myxaml:PortfolioGridControl x:Name="PortfolioGridControl" /> </dxlc:LayoutGroup> <dxlc:LayoutGroup Header="Orders"> <myxaml:OrderGridControl x:Name="OrderGridControl" /> </dxlc:LayoutGroup> <dxlc:LayoutGroup Header="MyTrades"> <myxaml:MyTradeGridControl x:Name="MyTradeGridControl" /> </dxlc:LayoutGroup> <dxlc:LayoutGroup Header="MarketDepth"> <myxaml:MarketDepthControl x:Name="MarketDepthControl" /> </dxlc:LayoutGroup> </dxlc:LayoutGroup> At this stage, you can run the program and check the update work glasses.
Create an event handler for clicking on the buy and sell buttons. In each handler, we create an Order, in it we specify the tool selected in SecurityPicker, the portfolio selected in PortfolioComboBox, the volume and price from the corresponding SpinEdit. Register the application in the Connector using the RegisterOrder method.
private void BuyButton_Click(object sender, RoutedEventArgs e) { Order order = new Order() { Security = _selectedSecurity, Portfolio = PortfolioComboBox.SelectedPortfolio, Volume = SpinEditVolume.Value, Price = SpinEditPrice.Value, Direction = StockSharp.Messages.Sides.Buy, }; MainWindow.Instance.Connector.RegisterOrder(order); } private void SelltButton_Click(object sender, RoutedEventArgs e) { Order order = new Order() { Security = _selectedSecurity, Portfolio = PortfolioComboBox.SelectedPortfolio, Volume = SpinEditVolume.Value, Price = SpinEditPrice.Value, Direction = StockSharp.Messages.Sides.Sell, }; MainWindow.Instance.Connector.RegisterOrder(order); } Both handlers differ only in the direction of the application.
We will do so that when a quote is selected in a glass, the SpinEditPrice value changes to the price of the selected quote. To do this, create an event handler for the SelectionChanged event at MarketDepthControl. In which we will update the SpinEditPrice value with the price of the selected quote if the selected quote is not zero.
private void MarketDepth_SelectionChanged(object sender, GridSelectionChangedEventArgs e) { if (MarketDepth.SelectedQuote == null) return; SpinEditPrice.Value = MarketDepth.SelectedQuote.Price; } Run to check:
Save Market Data
To save portfolios, tools, sites, we need the class CsvEntityRegistry. It is necessary to alter the storage location of the entities and call the Init method to load them.
_csvEntityRegistry = new CsvEntityRegistry(_csvEntityRegistryDir); _csvEntityRegistry.Init(); To save candles, deals, etc. we will need a StorageRegistry:
_storageRegistry = new StorageRegistry { DefaultDrive = new LocalMarketDataDrive(_storageRegistryDir), }; We also need the SnapshotRegistry snapshot repository registry:
_snapshotRegistry = new SnapshotRegistry(_snapshotRegistryDir); All this we pass to the Connector when it is created:
Connector = new Connector(_csvEntityRegistry, _storageRegistry, _snapshotRegistry) { IsRestoreSubscriptionOnReconnect = true, StorageAdapter = { DaysLoad = TimeSpan.FromDays(3) }, }; Connector.LookupAll(); Here we also indicated that the Connector will reconnect when the connection is broken, and also indicate how many days of history you need to download. String Connector.LookupAll (); asks for available data:
//---------------------------------------------------------------------------------- Directory.CreateDirectory(_dir); _csvEntityRegistry = new CsvEntityRegistry(_csvEntityRegistryDir); _csvEntityRegistry.Init(); _storageRegistry = new StorageRegistry { DefaultDrive = new LocalMarketDataDrive(_storageRegistryDir), }; _snapshotRegistry = new SnapshotRegistry(_snapshotRegistryDir); Connector = new Connector(_csvEntityRegistry, _storageRegistry, _snapshotRegistry) { IsRestoreSubscriptionOnReconnect = true, StorageAdapter = { DaysLoad = TimeSpan.FromDays(3) }, }; Connector.LookupAll(); if (File.Exists(_settingsFile)) { Connector.Load(new XmlSerializer<SettingsStorage>().Deserialize(_settingsFile)); } //---------------------------------------------------------------------------------- After downloading the application, going to the Data folder, we will see that new folders have appeared:

When you reconnect the toolbar and portfolios will already be filled.
We smoothly approached the end of the first part. At this stage, the program allows you to display all the market data available to us. In the next part, the most delicious will be shown - namely, trading both in manual and in automatic mode.
To be continued...
The author : Ivan Zalutsky
Source: https://habr.com/ru/post/432812/
All Articles