Recognizing Android Things with ABBYY RTR SDK and django
Hello! My name is Azat Kalmykov, I am a second year student of the “ Applied Mathematics and Computer Science ” faculty of the Faculty of Computer Science of the National Research University Higher School of Economics and an intern at the mobile development department of ABBYY. In this article I will tell you about my small project, completed as part of the summer internship.
Imagine a small conveyor. It is driven by goods or some details on which it is important to recognize the text (perhaps this is some kind of unique identifier, or maybe something more interesting). A good example would be the parcel. The work of the conveyor is remotely controlled by the operator who monitors the problem and in which case solves the problem. What can help him in this? The device on the Android Things platform can be a good solution: it is mobile, easily configured and can work via Wi-Fi. We decided to try to use ABBYY technologies and find out how they are suitable for such situations - text recognition in the stream on “non-standard devices” from the Internet of Things category. We will deliberately simplify many things, as we simply build a concept. If it became interesting, welcome under cat.
Android Things
A great thing called Android Things Starter Kit came to our office from the Google I / O conference at ABBYY. Do not lose the good, and we wanted to play with it in the search for various scenarios for the use of our recognition libraries . First you need to assemble our device, and then run. Make it easy, it is sufficient to strictly follow the instructions from the manufacturer.
Read more about the platform here and here .
What came into my hands
And at the end of the post, I'll show you what the assembled device looks like.
What are we doing?
We will write an application for the Android Things platform, which will process the image from the camera, sending the recognized text and (periodically) frames to our server so that the conditional operator can understand what is happening on the pipeline. The server will be written in django.
I hasten to note that to carry out this project you will not need any investments, as well as registration and SMS (well, on AWS you will still need to register and get a free account).
Run rocket into space server
 We assume that you already have a free AWS account. We tie our card so that an evil Amazon, in the case of our rashness, writes off a couple of shekels from us. Let's use AWS EC2 and create a virtual machine on Ubuntu Server 18.04 LTS (HVM) with SSD Volume Type. For this OS and when using a free account, only one configuration is available, choose it (do not worry, one gigabyte of RAM is enough for us with a head). Let's create an ssh-key (or use the one that is already ready) and try to connect to our machine. We also create Elastic IP (something like static IP) and immediately link it to our machine. Please note that Elastic IP, which is not tied to any virtual machine, will cost you money during development.
Connect to the server. Install the necessary toolkit on the machine.
Python third version preinstalled. The case is left for small.
$ sudo apt-get update $ sudo apt-get install python3-pip $ sudo pip3 install virtualenv Install the docker, we will need it later.
$ sudo apt-get install docker.io You also need to open port 8000. We will contact him when using the web service. Port 22 for ssh is open by default.
Hooray! Now we have a remote computer to run our applications. We will write the code directly on the server.
Django (+ channels)
I decided to use django, as this will allow you to quickly and easily create a small web service. The additional library django channels will give us the opportunity to work with web sockets (namely, to make crutch broadcast through the transfer of pictures without updating the page).
Create a directory in which we place the project. Install django along with django channels, without deviating from the instructions in the documentation .
$ mkdir Project $ cd Project $ virtualenv venv $ source venv/bin/activate $ pip install -U channels # django $ pip install channels_redis # Redis $ pip install djangorestframework $ django-admin startproject mysite $ cd mysite Create a project. We will have 3 subdirectories. The main one will have the same name - mysite (automatically created), the other two - streaming and uploading. The first will be responsible for displaying information on the web page, and the second - for downloading through the REST API.
$ python3 manage.py startapp streaming $ cd streaming $ rm -r migrations admin.py apps.py models.py tests.py $ cd .. $ python3 manage.py startapp uploading $ cd uploading $ rm -r migrations admin.py apps.py models.py tests.py We configure django channels. Comment out the line with WSGI_APPLICATION and add a new one with ASGI_APPLICATION. Now our application will work asynchronously.
# mysite/settings.py # ... # WSGI_APPLICATION = ... ASGI_APPLICATION = 'mysite.routing.application' # ... Also update the value of the INSTALLED_APPS list.
# mysite/settings.py # ... INSTALLED_APPS = [ 'channels', 'streaming', 'uploading', 'rest_framework', 'django.contrib.admin', 'django.contrib.auth', 'django.contrib.contenttypes', 'django.contrib.sessions', 'django.contrib.messages', 'django.contrib.staticfiles', ] # ... Architecture
We will write the code based on the official django channels tutorial . The structure of our small service will look like this:
MYIP: 8000 / frame - a web page that will show the result, conventionally, the page that the operator is looking at
MYIP: 8000 / upload / upload_text / - address for the POST request, send the recognized text
MYIP: 8000 / upload / upload_image / - address for a PUT request, send individual images
It is necessary to register this logic in the urls.py files of the respective directories.
# mysite/mysite/urls.py from django.contrib import admin from django.conf.urls import include, url urlpatterns = [ url(r'^frame/', include('streaming.urls')), url(r'^upload/', include('uploading.urls')), ] REST API
We proceed to the description of the logic of our API.
# mysite/uploading/urls.py from django.conf.urls import url from rest_framework.urlpatterns import format_suffix_patterns from . import views urlpatterns = [ url(r'^upload_text/$', views.UploadTextView.as_view()), url(r'^upload_image/$', views.UploadImageView.as_view()), ] urlpatterns = format_suffix_patterns(urlpatterns) # mysite/uploading/views.py from django.shortcuts import render from rest_framework.views import APIView from rest_framework.response import Response from channels.layers import get_channel_layer from rest_framework.parsers import FileUploadParser from asgiref.sync import async_to_sync import base64 # Create your views here. class UploadTextView(APIView): def post(self, request, format=None): message = request.query_params['message'] if not message: raise ParseError("Empty content") channel_layer = get_channel_layer() async_to_sync(channel_layer.group_send)("chat", { "type": "chat.message", "message": message, }) return Response({'status': 'ok'}) class UploadImageView(APIView): parser_class = (FileUploadParser,) def put(self, request, format=None): if 'file' not in request.data: raise ParseError("Empty content") f = request.data['file'] channel_layer = get_channel_layer() async_to_sync(channel_layer.group_send)("chat", { "type": "chat.message", "image64": base64.b64encode(f.read()).decode("ascii"), }) return Response({'status': 'ok'}) Webpage
All information will fit on one page, so the logic will be simple.
# mysite/streaming/urls.py from django.conf.urls import url from . import views urlpatterns = [ url(r'^', views.index, name='index'), ] # mysite/streaming/views.py from django.shortcuts import render from django.utils.safestring import mark_safe import json # Create your views here. def index(request): return render(request, 'index.html', {}) We need to write a small html document to display the results. It will have a built-in script for connecting to a web socket and filling content.
<!-- mysite/streaming/templates/index.html --> <!DOCTYPE html> <html> <head> <meta charset="utf-8"/> <title>Live from Android Things</title> </head> <body> <textarea id="chat-log" cols="100" rows="20"></textarea><br/> <img id="frame"> </body> <script> var chatSocket = new WebSocket( 'ws://' + window.location.host + '/ws/chat/'); chatSocket.onmessage = function(e) { var data = JSON.parse(e.data); var message = data['message']; var image64 = data['image64']; if (image64) { document.querySelector('#frame').setAttribute( 'src', 'data:image/png;base64,' + image64 ); } else if (message) { document.querySelector('#chat-log').value += (message + '\n'); } }; chatSocket.onclose = function(e) { console.error('Chat socket closed unexpectedly'); }; </script> </html> Setting up routing, sockets
How best to translate the word routing into Russian? Let's try to get this question out of our mind and just tune it (or her).
# mysite/mysite/settings.py # ... ALLOWED_HOSTS = ['*'] # [] ['*'], # ... CHANNEL_LAYERS = { 'default': { 'BACKEND': 'channels_redis.core.RedisChannelLayer', 'CONFIG': { "hosts": [('127.0.0.1', 6379)], }, }, } Now you need to register the logic of “forwarding” (the routing.py files are similar to the urls.py files, only now for web sockets).
# mysite/mysite/routing.py from channels.auth import AuthMiddlewareStack from channels.routing import ProtocolTypeRouter, URLRouter import streaming.routing application = ProtocolTypeRouter({ # (http->django views is added by default) 'websocket': AuthMiddlewareStack( URLRouter( streaming.routing.websocket_urlpatterns ) ), }) # mysite/streaming/routing.py from django.conf.urls import url from . import consumers websocket_urlpatterns = [ url(r'^ws/chat/$', consumers.FrameConsumer), ] And now we are implementing FrameConsumer itself at consumers.py
# mysite/streaming/consumers.py from asgiref.sync import async_to_sync from channels.generic.websocket import WebsocketConsumer, JsonWebsocketConsumer import json class FrameConsumer(WebsocketConsumer): def connect(self): self.room_group_name = 'chat' # Join room group async_to_sync(self.channel_layer.group_add)( self.room_group_name, self.channel_name ) self.accept() def disconnect(self, close_code): # Leave room group async_to_sync(self.channel_layer.group_discard)( self.room_group_name, self.channel_name ) # Receive message from WebSocket def receive(self, text_data): text_data_json = json.loads(text_data) message = text_data_json['message'] # Send message to room group async_to_sync(self.channel_layer.group_send)( self.room_group_name, { 'type': 'chat_message', 'message': message } ) # Receive message from room group def chat_message(self, event): if 'message' in event: # Send message to WebSocket self.send(text_data=json.dumps({ 'message': event['message'] })) elif 'image64' in event: self.send(text_data=json.dumps({ 'image64': event['image64'] })) And finally, with sweaty palms run.
$ docker run -p 6379:6379 -d redis:2.8 $ python manage.py runserver 0.0.0.0:8000 And now actually about Android
 We will use the RTR SDK from ABBYY for text recognition. Ultimate pack RTR SDK for our purposes can be downloaded here . We implement a fairly simple interface for processing frames, our application will be based on a sample from the archive downloaded from the previous link (/ sample-textcapture). We will remove extra parts from the application, we will slightly polish it to work with Android Things and implement communication with the server.
The library file .aar is in the libs directory of the downloaded archive, we import. Copy the contents of the assets folder of the archive (there are essentially files necessary for the recognition process itself) in the assets of our project. There we copy the license file from the archive, without it the application will not start.
In order to implement the ABBYY RTR SDK functionality we need, we need to create an object of type Engine, and with the help of it we need an object of type ITextCaptureService, which we will launch later.
try { mEngine = Engine.load(this, LICENSE_FILE_NAME); mTextCaptureService = mEngine.createTextCaptureService(textCaptureCallback); return true; } // ... In this case, you need to pass an object of type ITextCaptureService.Callback, create it directly in our MainActivity class, it must implement 3 methods.
private ITextCaptureService.Callback textCaptureCallback = new ITextCaptureService.Callback() { @Override public void onRequestLatestFrame(byte[] buffer) { // , . // . mCamera.addCallbackBuffer(buffer); } @Override public void onFrameProcessed( ITextCaptureService.TextLine[] lines, ITextCaptureService.ResultStabilityStatus resultStatus, ITextCaptureService.Warning warning) { // , if (resultStatus.ordinal() >= 3) { // , mSurfaceViewWithOverlay.setLines(lines, resultStatus); } else { // , mSurfaceViewWithOverlay.setLines(null, ITextCaptureService.ResultStabilityStatus.NotReady); } // warnings // ... } @Override public void onError(Exception e) { // } }; We delegated the receipt of the frame to the camera object. I'll show you what's going on inside.
private Camera.PreviewCallback cameraPreviewCallback = new Camera.PreviewCallback() { @Override public void onPreviewFrame(byte[] data, Camera camera) { // ( ) if (!mIsUploading) { mIsUploading = true; // new UploadImageTask(mCameraPreviewSize.width, mCameraPreviewSize.height).execute(data); } // mTextCaptureService.submitRequestedFrame(data); } }; To send messages, we will write a couple of classes, which in turn will delegate their work to the Uploader class object.
public static class UploadTextTask extends AsyncTask<String, Void, Void> { @Override protected Void doInBackground(String... params) { mUploader.uploadText(params[0]); return null; } } public static class UploadImageTask extends AsyncTask<byte[], Void, Void> { private int mCameraPreviewWidth; private int mCameraPreviewHeight; public UploadImageTask(int width, int height) { mCameraPreviewWidth = width; mCameraPreviewHeight = height; } @Override protected Void doInBackground(final byte[]... params) { byte[] jpegBytes = convertToJpegBytes(params[0]); if (jpegBytes != null) { mUploader.uploadImage(jpegBytes); } return null; } private byte[] convertToJpegBytes(byte[] rawBytes) { YuvImage yuvImage = new YuvImage( rawBytes, ImageFormat.NV21, mCameraPreviewWidth, mCameraPreviewHeight, null ); try (ByteArrayOutputStream os = new ByteArrayOutputStream()) { yuvImage.compressToJpeg( new Rect(0, 0, mCameraPreviewWidth, mCameraPreviewHeight), 40, os ); return os.toByteArray(); } catch (IOException e) { Log.d(TAG, "compress error"); return null; } } // ... } Communication with the network in the Uploader class is implemented using the convenient OkHttp3 library. It allows you to greatly simplify the interaction with the server.
Result
We get a working client-server application with ABBYY recognizer built into the Internet of Things - isn’t it cool?
Assembled device and small native advertising of my employer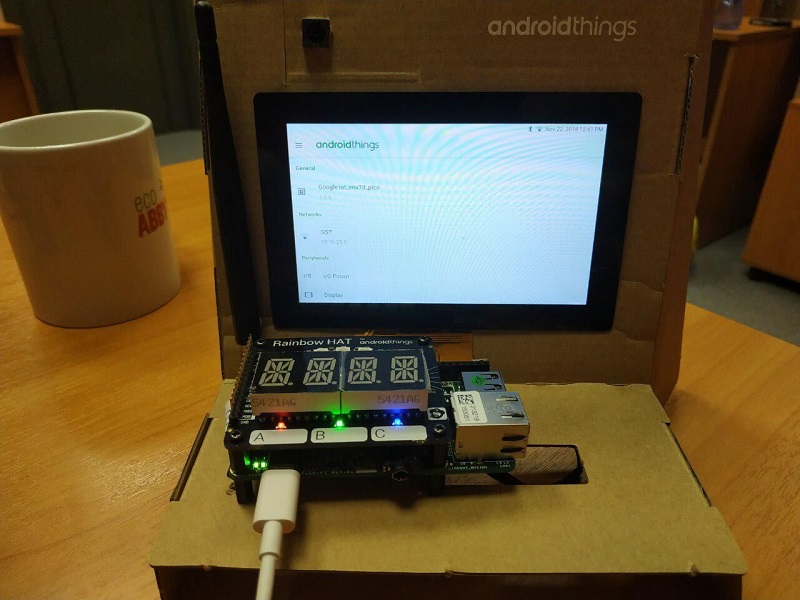
Text recognized
Selfie panorama with an overview of multiple devices
Vidos, how it may look like in real life
Repositories on github:
→ AndroidThingsTextRecognition-Backend
→ AndroidThingsTextRecognition-Android
Take and use!
')
Source: https://habr.com/ru/post/432514/
All Articles