ROS: Map of the depths on the Raspberry Pi "little blood"

If you use ROS when creating robots, you probably know that it has support for working with stereo cameras. You can build, for example, a map of the depths of the visible part of space or a cloud of points. And I wondered how easy it would be to use a Raspberry-based StereoPi stereo camera in ROS. Earlier, I was already convinced that the depth map is perfectly built by the forces of OpenCV, but I never dealt with ROS. And I decided to try. I want to talk about my adventures in finding a solution.
1. Does ROS on a Raspberry Pi ever happen?
At first I decided to find out if it was possible to build a ROS for the Raspberry Pi. The first thing Google suggested to me is a list of instructions for installing different versions of ROS on the Raspberry Pi, namely this page of the ROS wiki
Great, there is already something to push off! I remembered well how much the OpenCV build on Raspberry took (about eight hours), so I decided to search for ready-made images of MicroSD cards to save time.
')
2. Are there ready images of microSD cards with ROS for Raspberry?
It turned out that this issue has already been resolved by several development teams. If you do not take one-time build enthusiasts, then a couple of images were highlighted, which are constantly updated with the release of new versions of the OS and ROS.
The first option is ROS installed on the native Raspbian OS from the ROSbots team, here is a page with an updated link to the image: ready-to-use-image-raspbian-stretch-ros-opencv
The second is images from Ubiquiti Robotics on ubunt .
Well, the second question was also quickly closed. It's time to dive deep.
3. How does ROS work with the Raspberry Pi camera?
And which stereo cameras are generally supported in ROS? I looked at the page with stereo cameras, for which the presence of ready-made drivers for ROS is stated, this one:
wiki.ros.org/Sensors
There were two sections:
2.3 3D Sensors (range finders & RGB-D cameras)
2.5 Cameras
It turned out that the first section lists not only stereo cameras, but also TOF sensors, and scanning lidars - in general, everything that can immediately provide information in 3D. And in the second there are stereo cameras. Attempting to look at the drivers for several stereo cameras did not add to my joy, as I hinted at a serious immersion in the code.
Well, step back. How does the work with one Raspberry Pi camera in ROS go?
Three pleasant surprises awaited me here:
- it turns out that for ROS there is a special raspicam_node node just for working with the Raspberry Pi camera
- The soda nodes lie on github, the code is actively maintained and well documented: github.com/UbiquityRobotics/raspicam_node
- Rohan Agrawal node author ( @Rohbotics ) works for a company that actively supports one of the ready-made images for Raspberry Pi
I looked at the raspicam_node githabby repository and looked into the issues. There I found an open issue with the capacious name “stereo mode” almost seven months old, without answers and comments. Actually, in it further and all events developed.
4. Hardcore or not?
In order not to ask children's questions to the authors, I decided to look at the source code and evaluate what the addition of stereo mode threatens. I was more interested in the sishnaya part here: github.com/UbiquityRobotics/raspicam_node/tree/kinetic/src
Well, the guys wrote a driver plunging to the level of MMAL. I also remembered that the source codes for the work of raspberry in stereo were also open (evolution can be followed here on the raspberry forum ), and the task of writing a full-fledged stereo driver is solvable, but ambitious. Looking at the description of the drivers of other cameras, I realized that it was necessary to publish not only the left and right pictures, but also to output the parameters of both cameras, apply my own calibration results to each one and do many other things. It pulled on experiments a month or two long. Therefore, I decided to parallelize the approach, namely, to write the author a question about stereo support, and to look for a simpler, but working solution myself.
5. Dialogues with the author
In the branch about stereo mode on github I asked the author a question, mentioning that the stereo has been supported by raspberries since 2014, and suggested, if necessary, send him a debugging board for experiments. Let me remind you that I still doubted that in this distribution kit the stereo will work as in the native Raspbian.
Rohan answered surprisingly quickly, saying that their distrib uses the crimson kernel and everything should work. And asked to check it out on one of their assemblies.
Raspberry core! Hooray! Theoretically, the stereo image should be captured without dancing with a tambourine!
I downloaded and deployed their latest image from the link from Rohan and ran a simple python script to capture the stereo pair. It worked!
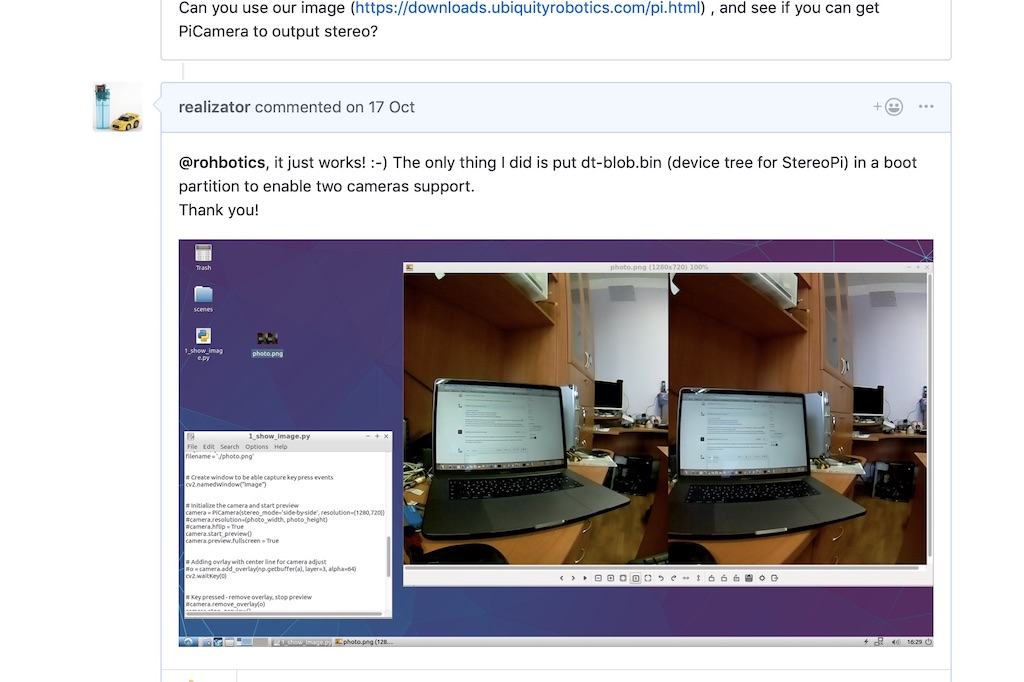
After that, Rohan wrote that he would look at the driver code for stereo, and wrote a couple of questions. For example, in our stereo mode we get one glued picture, but we would need to cut it into two - left and right. And the second question about the calibration parameters of each camera is how to deal with it.
I said that as a first step, you can take pictures from cameras independently. Yes, they will not be synchronized in the capture time and settings (such as brightness-contrast-white balance), but as a first step it may well go.
Rohan promptly rolled out a patch , allowing you to directly indicate from ROS which camera to take pictures from. I checked it - the choice of the camera works, already an excellent result.
6. Unexpected help
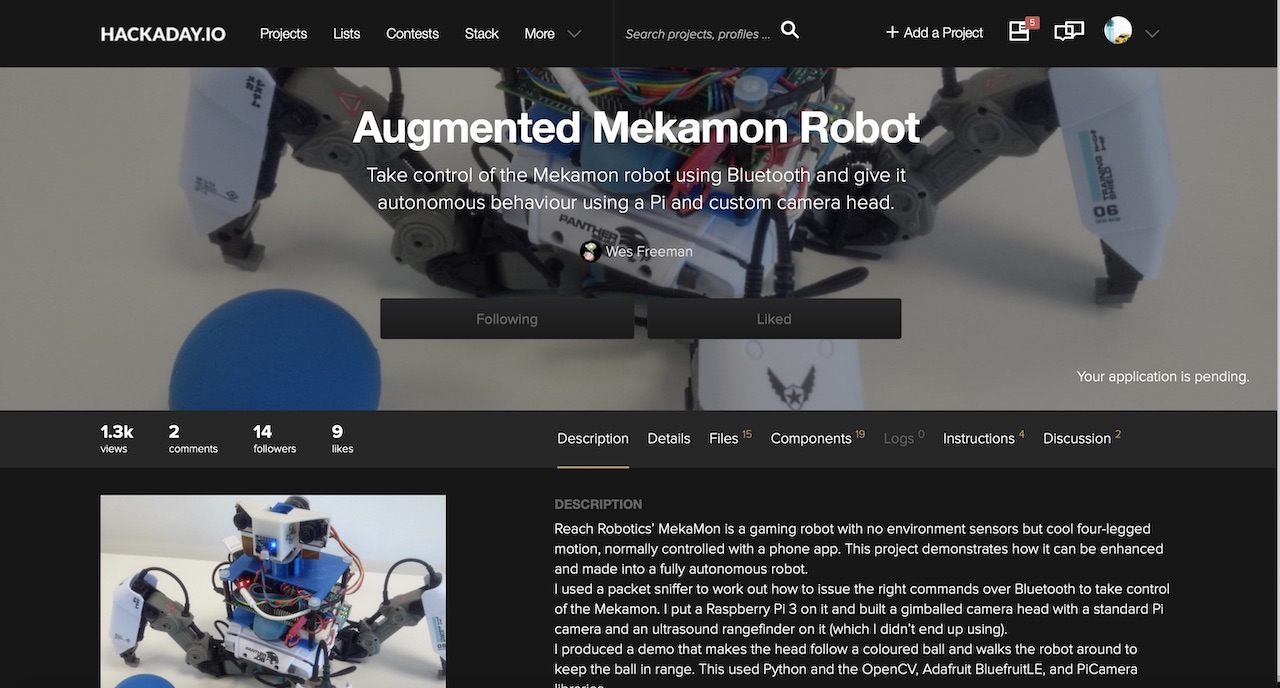
And here in the thread appears a comment from the user Wezzoid. He told me that he was doing a project based on a stereo camera on Pi Compute 3 using crimson devborda. His four-legged walking robot tracked the position of the object in space, changed the position of the cameras and kept the specified distance to it (the project is laid out on hackaday.io here ).
And he shared the code in which he captured the picture, cut it with python tools in half and published it as the nodes of the left and right cameras.
Python in these matters is not a very quick comrade, so he used a low resolution of 320x240 and a good life hack. If we capture the side-by-sibe stereo image (one camera on the left on the stereo image, the second on the right), then the python should cut each of the 240 lines in half. But if you make a top-bottom picture (the left camera is the upper half of the frame, the right is the bottom), then the python cuts the array in half in one operation. What was successfully done by the user Wezzoid.
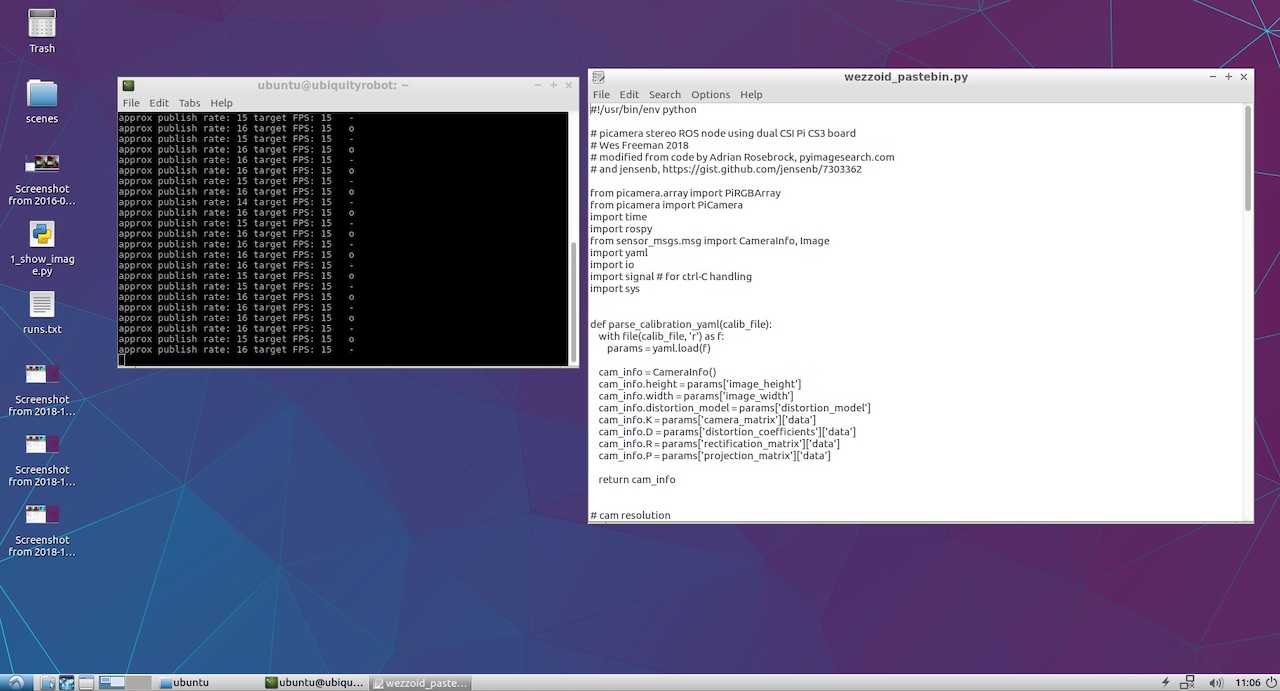
Plus, he put his python code on Pastebin, which did this operation. Here he is:
Wezzoid code for publishing nodes of two cameras from a stereo pair
#!/usr/bin/env python # picamera stereo ROS node using dual CSI Pi CS3 board # Wes Freeman 2018 # modified from code by Adrian Rosebrock, pyimagesearch.com # and jensenb, https://gist.github.com/jensenb/7303362 from picamera.array import PiRGBArray from picamera import PiCamera import time import rospy from sensor_msgs.msg import CameraInfo, Image import yaml import io import signal # for ctrl-C handling import sys def parse_calibration_yaml(calib_file): with file(calib_file, 'r') as f: params = yaml.load(f) cam_info = CameraInfo() cam_info.height = params['image_height'] cam_info.width = params['image_width'] cam_info.distortion_model = params['distortion_model'] cam_info.K = params['camera_matrix']['data'] cam_info.D = params['distortion_coefficients']['data'] cam_info.R = params['rectification_matrix']['data'] cam_info.P = params['projection_matrix']['data'] return cam_info # cam resolution res_x = 320 #320 # per camera res_y = 240 #240 target_FPS = 15 # initialize the camera print "Init camera..." camera = PiCamera(stereo_mode = 'top-bottom',stereo_decimate=False) camera.resolution = (res_x, res_y*2) # top-bottom stereo camera.framerate = target_FPS # using several camera options can cause instability, hangs after a while camera.exposure_mode = 'antishake' #camera.video_stabilization = True # fussy about res? stream = io.BytesIO() # ---------------------------------------------------------- #setup the publishers print "init publishers" # queue_size should be roughly equal to FPS or that causes lag? left_img_pub = rospy.Publisher('left/image_raw', Image, queue_size=1) right_img_pub = rospy.Publisher('right/image_raw', Image, queue_size=1) left_cam_pub = rospy.Publisher('left/camera_info', CameraInfo, queue_size=1) right_cam_pub = rospy.Publisher('right/camera_info', CameraInfo, queue_size=1) rospy.init_node('stereo_pub') # init messages left_img_msg = Image() left_img_msg.height = res_y left_img_msg.width = res_x left_img_msg.step = res_x*3 # bytes per row: pixels * channels * bytes per channel (1 normally) left_img_msg.encoding = 'rgb8' left_img_msg.header.frame_id = 'stereo_camera' # TF frame right_img_msg = Image() right_img_msg.height = res_y right_img_msg.width = res_x right_img_msg.step = res_x*3 right_img_msg.encoding = 'rgb8' right_img_msg.header.frame_id = 'stereo_camera' imageBytes = res_x*res_y*3 # parse the left and right camera calibration yaml files left_cam_info = parse_calibration_yaml('/home/pi/catkin_ws/src/mmstereocam/camera_info/left.yaml') right_cam_info = parse_calibration_yaml('/home/pi/catkin_ws/src/mmstereocam/camera_info/right.yaml') # --------------------------------------------------------------- # this is supposed to shut down gracefully on CTRL-C but doesn't quite work: def signal_handler(signal, frame): print 'CTRL-C caught' print 'closing camera' camera.close() time.sleep(1) print 'camera closed' sys.exit(0) signal.signal(signal.SIGINT, signal_handler) #----------------------------------------------------------- print "Setup done, entering main loop" framecount=0 frametimer=time.time() toggle = True # capture frames from the camera for frame in camera.capture_continuous(stream, format="rgb", use_video_port=True): framecount +=1 stamp = rospy.Time.now() left_img_msg.header.stamp = stamp right_img_msg.header.stamp = stamp left_cam_info.header.stamp = stamp right_cam_info.header.stamp = stamp left_cam_pub.publish(left_cam_info) right_cam_pub.publish(right_cam_info) frameBytes = stream.getvalue() left_img_msg.data = frameBytes[:imageBytes] right_img_msg.data = frameBytes[imageBytes:] #publish the image pair left_img_pub.publish(left_img_msg) right_img_pub.publish(right_img_msg) # console info if time.time() > frametimer +1.0: if toggle: indicator = ' o' # just so it's obviously alive if values aren't changing else: indicator = ' -' toggle = not toggle print 'approx publish rate:', framecount, 'target FPS:', target_FPS, indicator frametimer=time.time() framecount=0 # clear the stream ready for next frame stream.truncate(0) stream.seek(0) 7. Start the publication of the nodes of the left and right cameras
At the first start, the code cursed that there was no access to YML files with camera parameters. I used the V2 crimson cameras and remembered that on the githabe bundled raspicam_node had ready files with calibration results for different camera models: github.com/UbiquityRobotics/raspicam_node/tree/kinetic/camera_info
I took one of them, made two copies and saved them with the names left.yml and right.yml, writing in them the resolution of the cameras from the author's script. Here's what happened for the left camera:
left.yml
image_width: 320 image_height: 240 camera_name: left camera_matrix: rows: 3 cols: 3 data: [1276.704618338571, 0, 634.8876509199106, 0, 1274.342831275509, 379.8318028940378, 0, 0, 1] distortion_model: plumb_bob distortion_coefficients: rows: 1 cols: 5 data: [0.1465167016954302, -0.2847343180128725, 0.00134017721235817, -0.004309553450829512, 0] rectification_matrix: rows: 3 cols: 3 data: [1, 0, 0, 0, 1, 0, 0, 0, 1] projection_matrix: rows: 3 cols: 4 data: [1300.127197265625, 0, 630.215390285608, 0, 0, 1300.670166015625, 380.1702884455881, 0, 0, 0, 1, 0] For the right camera name is replaced by right, and the file itself is named right.yml. The rest of the file is identical.
Since I didn’t plan to do a complex project, I didn’t repeat the author’s long paths with nested subfolders and just put the files in the root of the home folder next to the python script. The code started successfully, displaying status messages in the console.
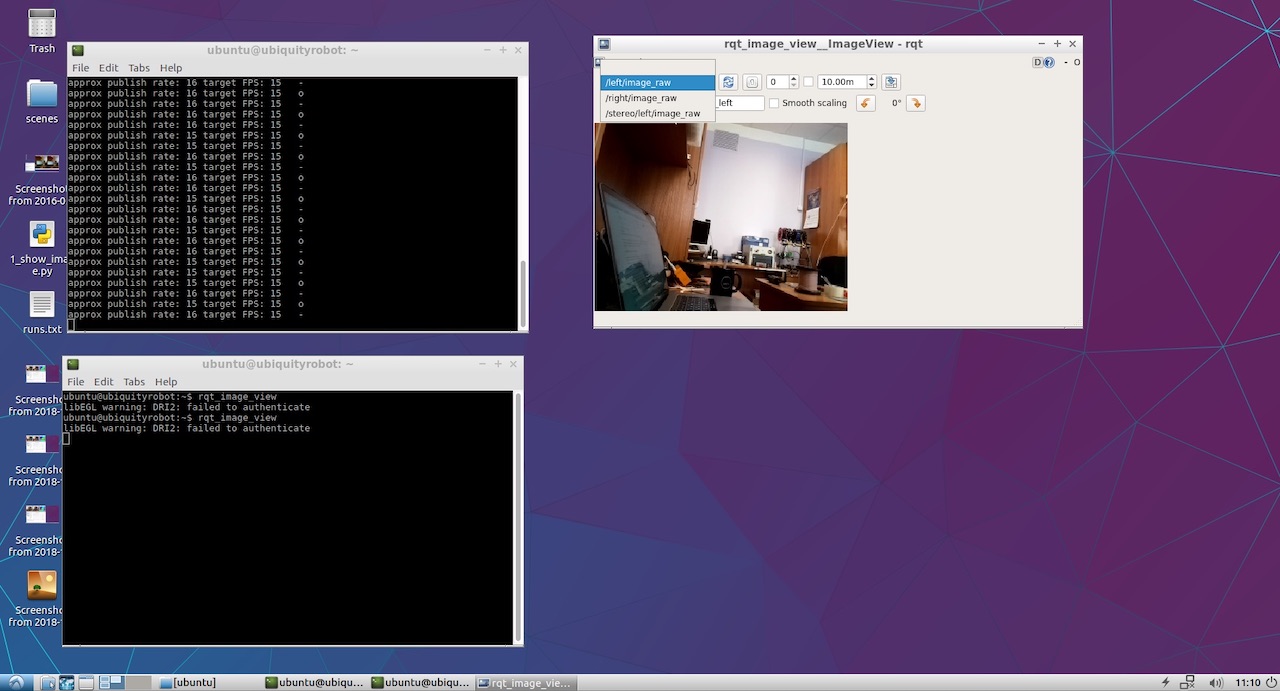
It only remained to see what was eventually published by our left and right cameras. For this, I launched rqt_image_view. The / left / image_raw and / right / image_raw items appeared in the drop-down menu. When selecting them, I saw images from the left and right cameras.
Well, this thing has earned! Now the fun part.
8. Watch the depth map.
To view the depth map, I did not invent my approach and went through the classic manual from ROS to set up stereo parameters .
From there I found out that it would be good to publish both nodes in a specific namespace, and not at the root as Wezzoid did. As a result, the old lines of the publication of the form
left_img_pub = rospy.Publisher('left/image_raw', Image, queue_size=1) began to look like this:
left_img_pub = rospy.Publisher('stereo/right/image_raw', Image, queue_size=1) After that, we start the stereo stereo processing node for stereo_image_proc:
ROS_NAMESPACE=stereo rosrun stereo_image_proc stereo_ige_proc Well, we also want to look at the result, so we start the viewer:
rosrun image_view stereo_view stereo:=/stereo image:=image_rect_color And to configure the parameters of the depth map, run the configuration utility:
rosrun rqt_reconfigure rqt_reconfigure As a result, we see the picture given at the very beginning of the article. Here is a slightly larger fragment:
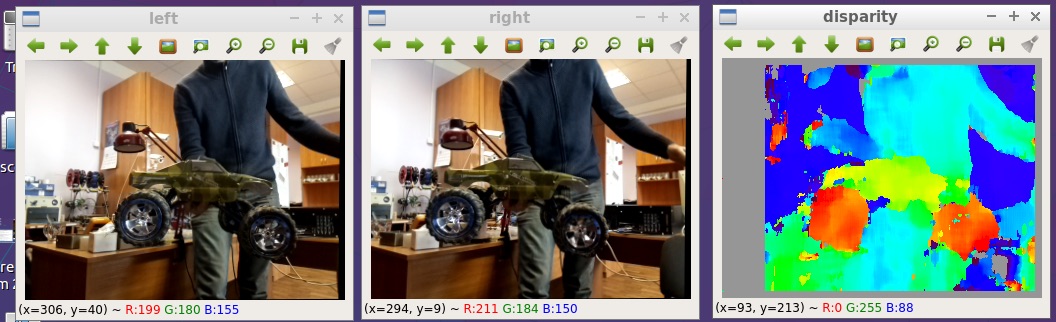
I posted all the files on the github: github.com/realizator/StereoPi-ROS-depth-map-test
9. Future plans
After my publication of the result in the discussion on the githaba, Rohan wrote “Cool! Hike I need to pick up my StereoPi. We wrote off with him by mail, I sent him a fee. I hope that with a working iron in his hands it will be easier for him to finish and debug a full-fledged stereo driver for ROS and Raspberry.
10. Results
The depth map from the stereo image on raspberry in ROS can be obtained, and in several ways. The path chosen for quick verification is not the most optimal in terms of performance, but can be used for application purposes. The beauty of its simplicity and the ability to immediately begin experiments.
Well, from the funny: after receiving the results, I noticed that Wezzoid, who proposed his solution, was the author of the question about the publication of two stereo images. He asked, he decided.
Source: https://habr.com/ru/post/431092/
All Articles