About Flutter, briefly: Basics

After the report of Yura Luchaninov , I decided to try Flutter for myself. To stretch the brain, and to have something to talk about with the men in the kitchen. It went. I began to look, then read, then write. And everything seems to be working, applications are being launched, and what they explain is clear, everything is simple. But not without “but” - not everyone explains. And since the platform, PL, approaches, and even the subject area are new to me, this is annoying, because you don’t start up, and you don’t even know what to google: Dart / Flutter / Window / Screen / Route / Widget?
Of course, I didn’t want to re-read all the documentation of Dart, Flutter and its widgets, because I don’t have much time, and I just wanted to look at Flutter. It would be great if there was a small guide, which describes everything that is necessary, but not more, for understanding and writing not too complicated applications on Flutter!
About guide
Most of the articles on this topic are well written and not complex. The problem is that most of them assume the existence of knowledge considered to be basic fundamentals, which, however, are not mentioned in other articles describing the basics. In this series of articles, I want to correct this situation. Let's start from scratch and, without leaving any of the above mentioned without attention, run one or more applications. In the process, we will learn how to use all the main components , create a unique interface , work with native modules , and, of course, build your application for both platforms .
I will write from the perspective of a web developer. Most of you are most likely familiar with the stack of the web, and the analogy with the familiar platform is better than the analogy with building houses or anything else, Animal, Dog, Foo, Bar ...
I will try to set out briefly so as not to delay. And for the most inquisitive, I will leave useful links on the topics discussed.
About the platform
Flutter is a young but very promising platform that has already attracted the attention of large companies that have launched their applications . This platform is interesting for its simplicity comparable to the development of web applications, and the speed of work on par with native applications. High application performance and development speed is achieved through several techniques:
- Unlike many currently known mobile platforms, Flutter does not use JavaScript in any way. As a programming language for Flutter, we chose Dart, which is compiled into a binary code, which achieves a speed of operations comparable to Objective-C, Swift, Java, or Kotlin.
- Flutter does not use native components , again, in any form, so you don’t have to write any layers to communicate with them. Instead, like game engines (and you know that games have a very dynamic UI), it draws the entire interface on its own. Buttons, text, media elements, background - everything is drawn inside the graphics engine in Flutter itself. After the foregoing, it is worth noting that the “Hello World” application on Flutter takes up very little space: iOS ≈ 2.5 MB and Android ≈ 4 MB.
- To build the UI, Flutter uses a declarative approach , inspired by the ReactJS web framework, based on widgets (in the web world, called components). For even greater gains in the interface speed, widgets are redrawn as needed - only when something has changed in them (just like Virtual DOM does in the world of web frontend).
- In addition, the Hot-reload is built into the framework, so familiar to the web, and still absent in native platforms.
On the practical benefits of these factors, I highly recommend reading the article by Android developer , who rewrote his application from Java to Dart and shared his impressions. Here I will only bring the number of files / lines of code named by him before (written in Java) - 179/12176, and after (rewritten to Dart) - 31/1735. The documentation can find a detailed description of the technical features of the platform . And here is another link, if you are interested to see other examples of running applications .
Pro Dart
Dart is a programming language in which we have to write applications for Flutter. It is very simple, and if you have experience with Java or JavaScript, you will quickly learn it.
I tried to write a review article about Dart, trying to describe only the necessary minimum for studying Flutter. But there are so many nuances in this language that, despite several attempts to write such an article, I did not manage to make it sufficiently complete and at the same time short. On the other hand, the authors of A Tour of the Dart Language did an excellent job with this task.
About preparation
This topic, like Dart, is very well described in the official guide. I could only copy it here, but I will not do it.
Without waiting for anything, we go to the installation guide page, select the platform and follow the steps to install the platform on our system. In our editor we will definitely connect plugins. In the same guide there is an instruction for setting up VS Code and IntelliJ . For your editor, there are also plugins for Dart and Flutter (usually you need to put two). We start application and we check its working capacity .
Tip for OSX users. I feel sorry for the place occupied by the painted frames of the phone in the iOS emulator, so I turned them off and switched to the iPhone 8 (it is not so long):
Hardware → Device → iOS # → iPhone 8Window → Show Device Bezels
You can live without buttons, because there are hot keys: Shift + Cmd + H is home, Cmd + Right is to turn the phone, the rest can be found in the Hardware menu. But I advise you to turn on the on-screen keyboard, because it is important to understand whether it is possible to work with the application when half of the screen is regularly blocked by the keyboard: Cmd + K (it works when the focus is on some input field).
iPhone 8 & iPhone X with Frames
iPhone 8 & Frameless iPhone X
About the structure
Go to the folder with the generated application and see what we have there. Not with everything, but with the necessary:
lib/- According to the principles of pub (Dart package manager) all code lies in this subfolder;pubspec.yml- application dependencies are written here that need to be installed to run it, just likepackage.json, but there is a nuance, you need to install them not through the standard Dart utility, mentioned above, but through the Flutter command:flutter pub get <package_name>;test/- you know what's there? You can run them by callingflutter test;ios/&android/- folders with settings for each of the platforms, it indicates what rights are needed to launch the application (access to location, bluetooth), icons and everything specific to the platform.
We dealt with the structure, go to the lib/ folder where the main.dart file is waiting for us. This, as you can guess, is the very file in which we need to run our application. And it runs in the same way as in the C language (and tons of others) by calling the main() function.
Pro Widgets (Hello World here)
In Flutter, everything is built on Widget 'ah: here you can see views and styles with themes, and the state is stored in widgets. There are two main types of widgets: with state and without, but not yet about that. Let's take it easy.
Remove everything from main.dart . We insert the following code carefully reading the comments:
import 'package:flutter/widgets.dart'; // // Dart main() main() => runApp( // runApp Flutter Text( // , , <span> 'Hello, World!!!', // — textDirection: TextDirection.ltr, // ), ); runApp(…) takes a single argument — the widget that will be the root for the entire project. By the way, Hot-reload cannot pick it up, so you will need to restart the application.Text(…) - Flutter cannot simply display a string on the screen. To display text, you must specify Text . textDirection . And this is not text alignment, like text-align , when compared with the web, this is analogous to direction . Part of the internationalization API for the application. Text will not work until it knows the direction, but there is no need to indicate it everywhere - then we will analyze how to adjust the text direction for the entire application.
Already run the app? “Hello, World!” Got out! Seems Yes? But something obviously went wrong.

The text is covered with system information. We have at our disposal the entire screen space, and we brought out the widget at the very beginning, where the system information is also displayed. Let's try to move our text somewhere.
import 'package:flutter/widgets.dart'; main() => runApp( Center( // , child: Text( 'Hello, World!', textDirection: TextDirection.ltr, ), ), ); Center(…) is a widget that allows you to place another widget passed in the child argument in the center horizontally and vertically. You will often see child and children in Flutter applications, since almost all widgets use these names to pass widgets, which must be drawn inside the called widget.
Widget compositions are used in Flutter to draw the UI, change the appearance, and even to transfer data. For example, the Directionality(…) widget sets the text direction for all child widgets:
import 'package:flutter/widgets.dart'; main() => runApp( Directionality( textDirection: TextDirection.ltr, child: Center( child: Text('Hello, World!'), ), ), ); Let's look at another very important widget and at the same time transform the look of our application:
import 'package:flutter/widgets.dart'; main() => runApp( Directionality( textDirection: TextDirection.ltr, child: Container( // ! <div> Flutter' // Container color color: Color(0xFF444444), child: Center( child: Text( 'Hello, World!', style: TextStyle( // , color: Color(0xFFFD620A), // fontSize: 32.0, // ), ), ), ), ), ); 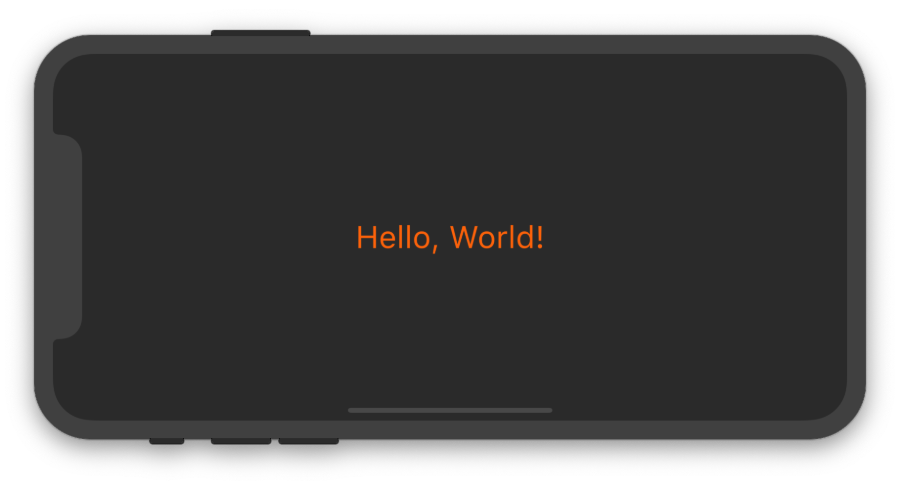
Color(…) - color. The documentation shows the different ways to set it up, but the main thing is to simply transfer the number to the class constructor. In the example above, we give the constructor a number written in hexadecimal form, which is very similar to HEX, only at the beginning we added two more characters, meaning the degree of transparency of the color, where 0x00 is absolutely transparent, and 0xFF is not transparent at all.
TextStyle(…) is an even more interesting widget, with its help you can set color, size, thickness, line spacing, add underlining and so on.
The application on Flutter is written, it's done! At the docks, you can read how to build it under Android and iOS , there are also references for you to find out how to send it to the desired Store. To whom this is not enough, I’m laying a few more lines about Flutter below, maybe more ...
Pro Stateless Widgets
How to use widgets - we figured out, let's now figure out how to create them. It has already been mentioned above that there are widgets that have a state and that do not have it. So far, we have only used stateless widgets. This does not mean that they do not have it at all, because widgets are just classes, and their properties can be changed. Just after the widget is drawn - changing its state will not lead to updating this widget in the UI. For example, if we need to change the text on the screen, we will need to generate another Text widget and specify the new content we want to display. Such widgets can be called constant if you know what I mean. And they are simple, so let's start with them.
To create a Stateless widget, you need:
- Come up with a beautiful name for the new class;
- Inherit class from
StatelessWidget; - Implement the
build()method, which takes aBuildContextas an argument and returns someWidget.
import 'package:flutter/widgets.dart'; main() => runApp( Directionality( textDirection: TextDirection.ltr, child: Center( child: MyStatelessWidget() ), ), ); class MyStatelessWidget extends StatelessWidget { // @override , , // // , @override Widget build(BuildContext context) { // [context] return Text('Hello!'); } } An example of a widget with one argument:
// … class MyStatelessWidget extends StatelessWidget { // Stateless final, const final String name; // MyStatelessWidget(this.name); // @override Widget build(BuildContext context) { // [context] return Text('Hello, $name!'); } } About Stateless more and nothing to add ...
About Hot Reload
Please note that when you change the content of our widget, the application will automatically redraw. After we took out the widget from the main() function, Hot-reload began to help us.
It is also important to understand that, due to the launch of the module for hot swapping, the application runs much slower.
About GestureDetector
In the next section, we will deal with StatefulWidget (with widgets that change when their state changes). In order for this to be interesting, we need to somehow change this state, agree? We will change the state of the widget in response to touching the screen. To do this, we will use GestureDetector(…) - a widget that does not draw anything, but follows the touches on the smartphone screen and reports this by calling the functions transferred to it.
Create a button in the center of the screen, when clicked, the message will be displayed in the console:
import 'package:flutter/widgets.dart'; main() => runApp( Directionality( textDirection: TextDirection.ltr, child: Container( color: Color(0xFFFFFFFF), child: App(), ), ), ); class App extends StatelessWidget { @override Widget build(BuildContext context) { return Center( child: GestureDetector( // onTap: () { // GestureDetector // , print('You pressed me'); }, child: Container( // decoration: BoxDecoration( // shape: BoxShape.circle, // color: Color(0xFF17A2B8), // ), width: 80.0, height: 80.0, ), ), ); } } Click on the blue button and see the message in the console. Click again and again we see a message in the console. Once again ... Okay, stop sticking.
Pro Stateful Widgets
StatefulWidget is simple, even simpler than StatelessWidget 's. But there is a nuance: they do not exist by themselves, for their work another class is needed that will store the state of this widget. At the same time, its visual part (the widgets of which it consists) also become its state.
First, let's take a look at the widget class:
// … class Counter extends StatefulWidget { // , , // createState() @override State<Counter> createState() => _CounterState(); // State, // State<> } Above, we created an “empty” widget that implemented a very simple createState() method. This separation of presentation and state allows Flutter to greatly optimize application performance.
The state object is not complicated at all. Moreover, it is almost identical to StatelessWidget 's written above. Its main difference is the parent class.
// … class _CounterState extends State<Counter> { // - , // . // , int counter = 0; // , // , Stateless . @override Widget build(BuildContext context) { // , // — : return Center( child: GestureDetector( onTap: () { // , , // counter. setState(() { // setState() , // , ++counter; }); }, child: Container( decoration: BoxDecoration( shape: BoxShape.circle, color: Color(0xFF17A2B8), ), width: 80.0, child: Center( child: Text( // counter '$counter', // style: TextStyle(fontSize: 30.0), ), ), ), ), ); } } 
Notice that the class name begins with an underscore. In Dart, all names beginning with an underscore identify private values. And the state of the widgets in Flutter is usually left private, although this is not necessary.
What a wonderful application we have done! This is a great result. But before finishing this part of the course, let's look at a couple of interesting widgets. Only this time we will write more code, just to make it more interesting. Most of the application should be familiar to you, and the rest you should have learned to understand:
import 'package:flutter/widgets.dart'; main() => runApp(App()); class App extends StatelessWidget { @override Widget build(BuildContext context) { return Directionality( textDirection: TextDirection.ltr, child: Container( padding: EdgeInsets.symmetric( vertical: 60.0, horizontal: 20.0, ), color: Color(0xFFFFFFFF), child: Content(), ), ); } } class Content extends StatelessWidget { @override Widget build(BuildContext context) { return Column( children: [ Counter('Manchester United'), Counter('Juventus'), ], ); } } class Counter extends StatefulWidget { final String _name; Counter(this._name); @override State<Counter> createState() => _CounterState(); } class _CounterState extends State<Counter> { int count = 0; @override Widget build(BuildContext context) { return Container( margin: EdgeInsets.only(bottom: 10.0), padding: EdgeInsets.all(4.0), decoration: BoxDecoration( border: Border.all(color: Color(0xFFFD6A02)), borderRadius: BorderRadius.circular(4.0), ), child: Row( mainAxisAlignment: MainAxisAlignment.spaceBetween, children: [ // widget — State, // , _CounterLabel(widget._name), _CounterButton( count, onPressed: () { setState(() { ++count; }); }, ), ], ), ); } } class _CounterLabel extends StatelessWidget { static const textStyle = TextStyle( color: Color(0xFF000000), fontSize: 26.0, ); final String _label; _CounterLabel(this._label); @override Widget build(BuildContext context) { return Text( _label, style: _CounterLabel.textStyle, ); } } class _CounterButton extends StatelessWidget { final _count; final _onPressed; _CounterButton(this._count, {@required this._onPressed}); @override Widget build(BuildContext context) { return GestureDetector( onTap: () { _onPressed(); }, child: Container( padding: EdgeInsets.symmetric(horizontal: 6.0), decoration: BoxDecoration( color: Color(0xFFFD6A02), borderRadius: BorderRadius.circular(4.0), ), child: Center( child: Text( '$_count', style: TextStyle(fontSize: 20.0), ), ), ), ); } } 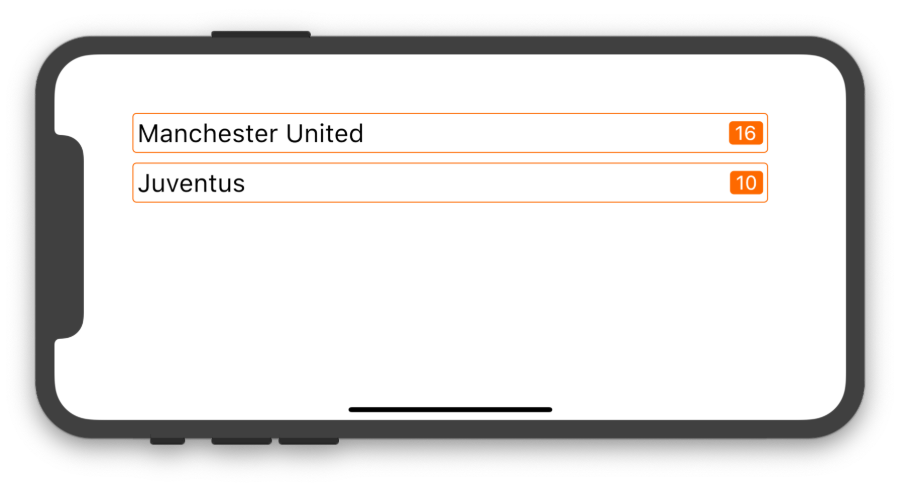
We have two new widgets: Column() and Row() . Try it yourself to guess what they are doing. And in the next article we will look at them in more detail, and also look at more than one widget that allows you to link other widgets together, and create a nice application using the Flutter library called Material.
About homework
If you want to read something else at your leisure, here is a list of interesting links:
- https://flutter.io/docs/get-started/flutter-for/web-devs
- Work with code from VS Code and from InteliJ
- More about widgets
- About Hot reload also need to read to understand when the code may not reboot
')
Source: https://habr.com/ru/post/430918/
All Articles