How to render a frame Middle Earth: Shadow of Mordor
Middle Earth: Shadow of Mordor was released in 2014. The game itself was a big surprise, and the fact that it was the spin-off of the storyline of the Lord of the Ring universe turned out to be quite unexpected. The game has gained great success, and at the time of this writing, the company Monolith has already released a sequel - Shadow of War. The graphics of the game is very beautiful, especially considering that it was released for different generations of consoles, including the Xbox 360 and PS3. The PC version is pretty well polished, contains additional graphic options and high-resolution texture packs that fully reveal the potential of the game.
The game uses a relatively new deferred renderer DX11. I used Renderdoc to deeply explore the techniques of rendering the game. When working, the maximum possible graphics parameters (ultra) were used and all possible “gadgets” were included, such as order-independent transparency, tessellation, occlusion in screen space, and various motion blur.
Frame
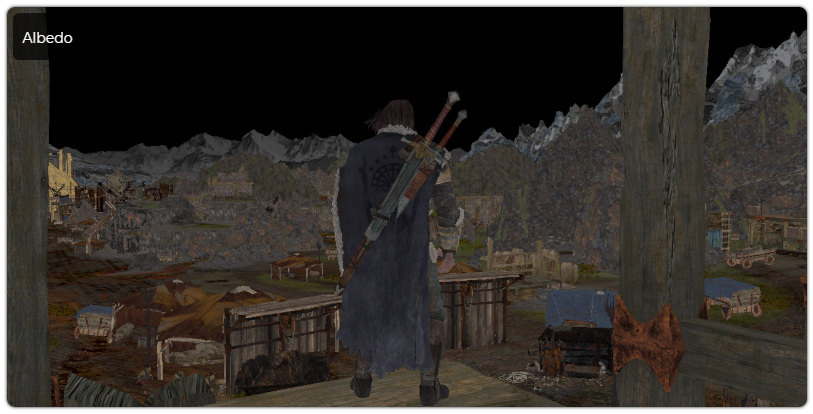
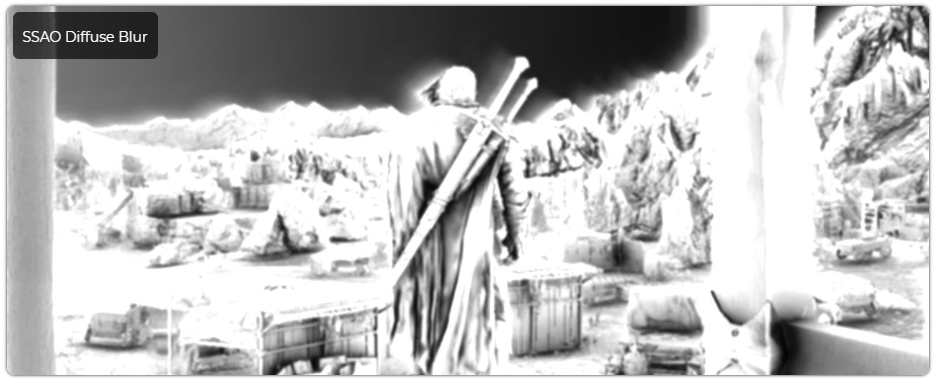
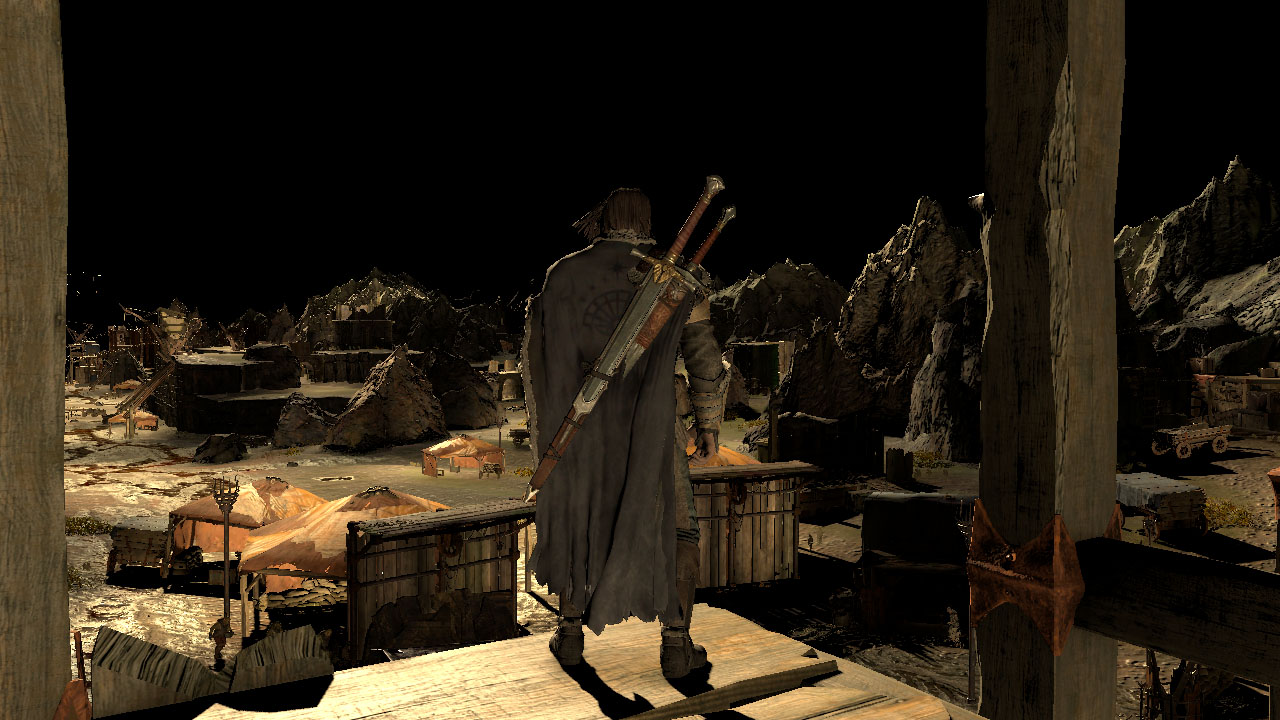
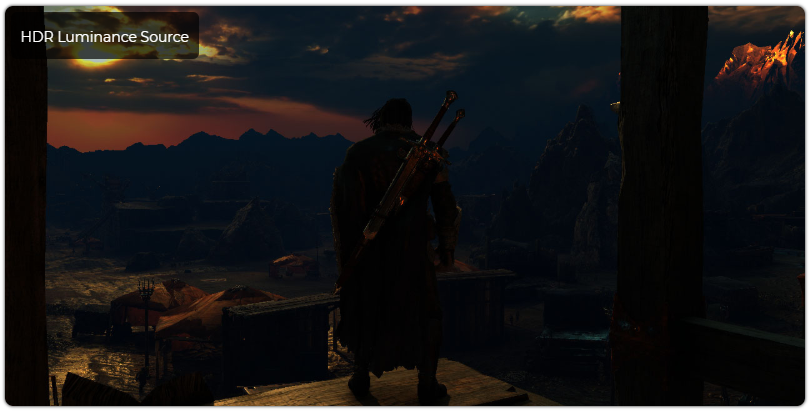
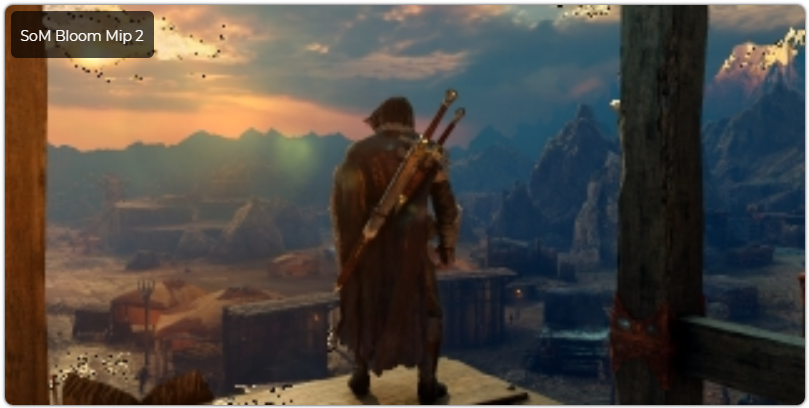
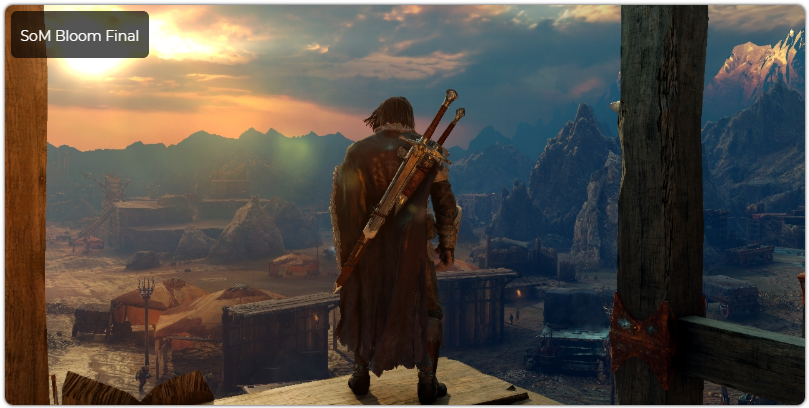
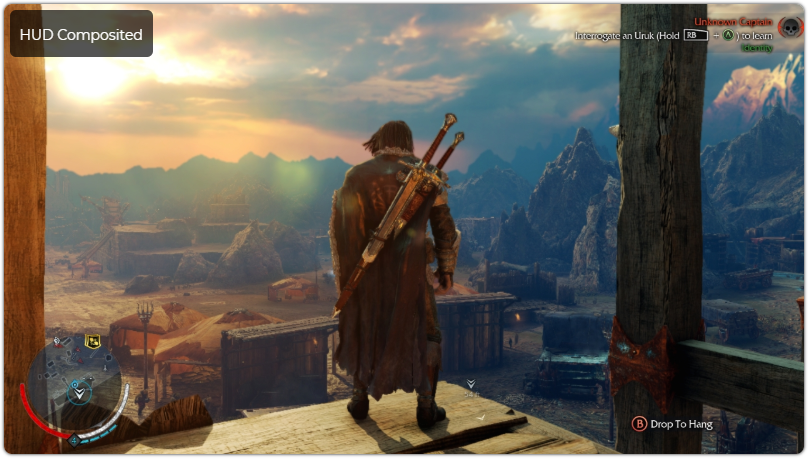
Here is a frame that we will analyze. The player is on the wooden platform in the Udun region. Shadow of Mordor uses mechanics that are similar to the mechanics of games like Assassin's Creed, where you can climb buildings and towers, and then enjoy the surrounding digital landscape from the rooftops.

Preliminary passage of the depths
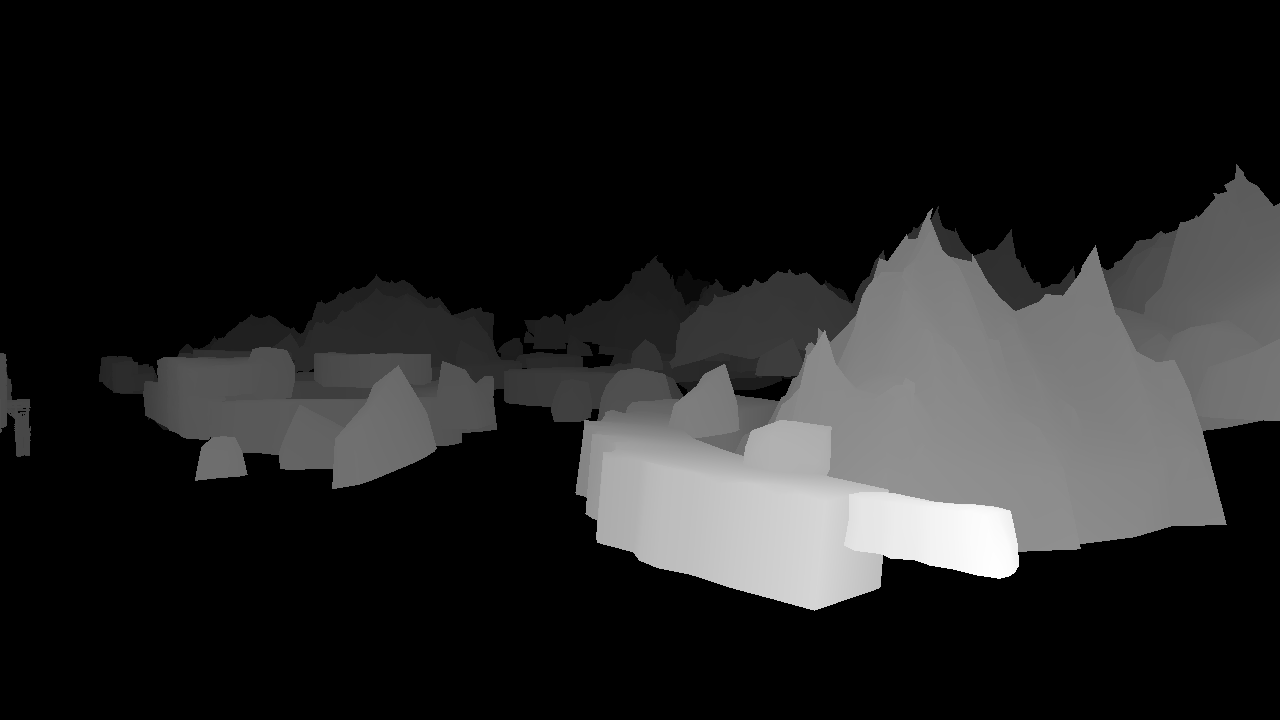
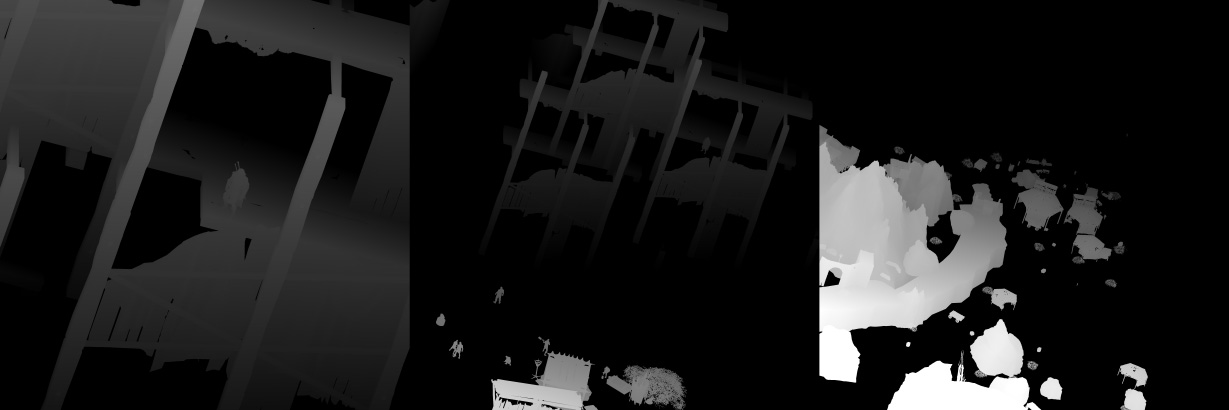
Approximately 140 first render calls perform a quick preliminary run to render the largest relief elements and buildings to the depth buffer. Most objects do not fall into this preliminary passage, but it helps when there are a very large number of draw calls in the game and you can look far into the distance. Interestingly, a character who is always in the center of the screen and occupies a decent share of screen space does not get into this passage. As in many other open world games, the engine uses inverse z values. Such a technique binds the near plane to the value 1.0, and the distant one - to the value 0.0 to improve accuracy at large distances and prevent z-conflicts. Read more about the accuracy of the z-buffer here .
')
G-buffer
Immediately after this, the G-buffer pass begins, running in approximately 2,700 draw calls. If you read my previous analysis of Castlevania: Lords of Shadow 2 or studied other similar articles, then this passage should be familiar to you. The property of the surfaces is written into a set of buffers, which are then read in the light calculation passes to calculate the reactions of the surfaces to light. In Shadow of Mordor, the classic deferred renderer is used, but to achieve this goal, a relatively small number of G-buffer render targets is used (3). For comparison: The Unreal Engine in this pass uses 5-6 buffers. G-buffer has the following scheme:
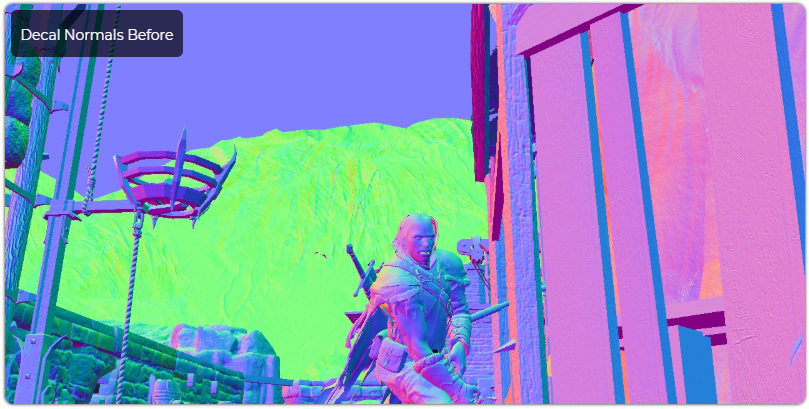
Normal buffer
| R | G | B | A |
| Normal.x | Normal.y | Normal.z | ID |
The normal buffer stores normals in world space in the “8 bits per channel” format. This is barely enough, and sometimes not enough at all to describe smoothly varying flat surfaces. If you look closely, it can be seen in some puddles in the game. The alpha channel is used as an ID to mark various types of objects. For example, I found out that 255 refers to a character, 128 to an animated part of the flag, and the sky is marked ID 1, because later these identifiers are used to filter it at the adding stage (the sky gets its own radial bloom).


In the original article, these and many other images are animated for greater clarity, so I recommend to look there.
Albedo Buffer
| R | G | B | A |
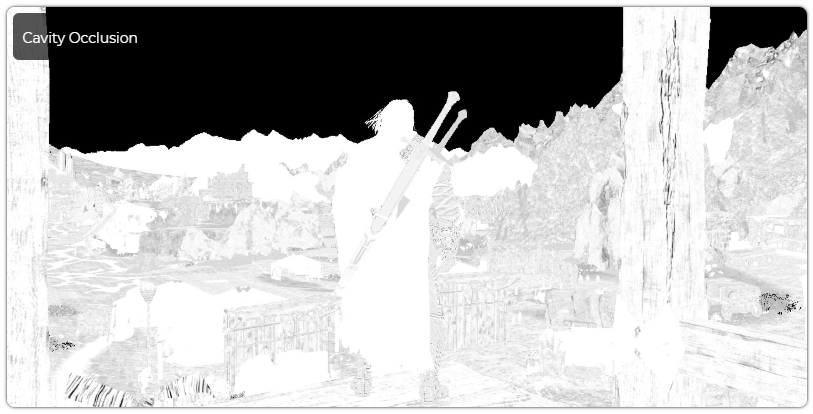
| Albedo.r | Albedo.g | Albedo.b | Cavity Occlusion |
The albedo buffer stores all three components of albedo and small-scale occlusion (sometimes called the cavity occlusion), which is used for shading small details that cannot be achieved with a shadow map or post-processing in screen space. It is mainly used for decorative purposes, such as tears and folds on clothes, small cracks in wood, small patterns on Talion's clothes, etc.
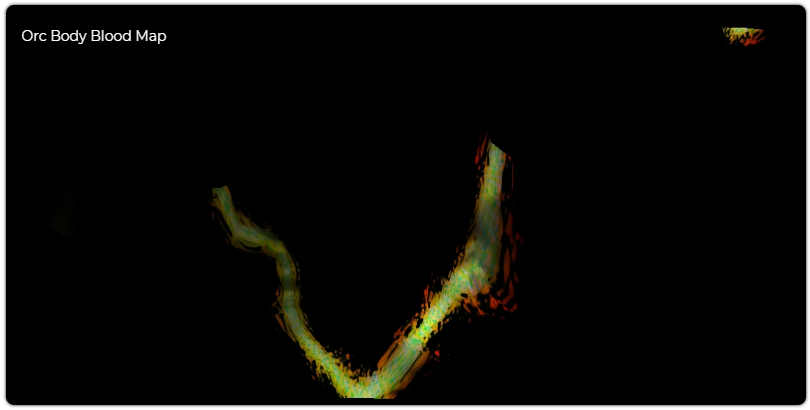
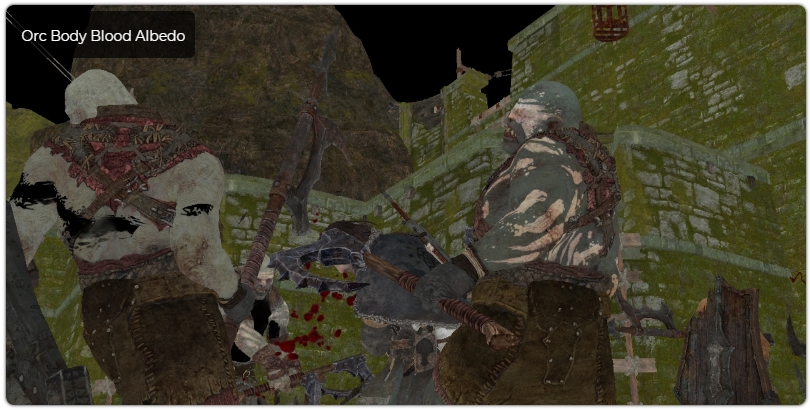
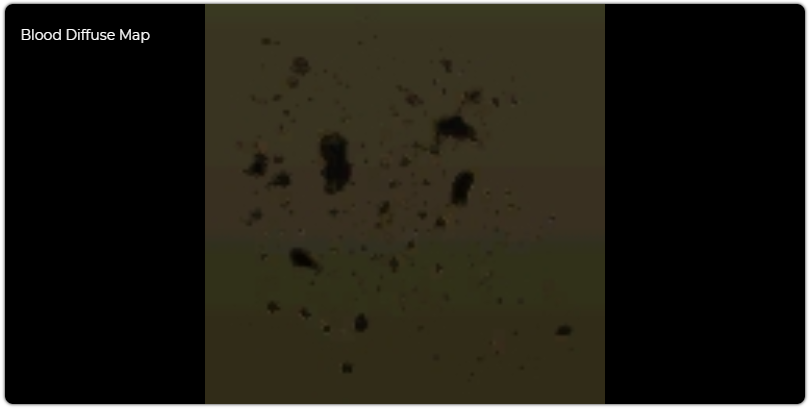
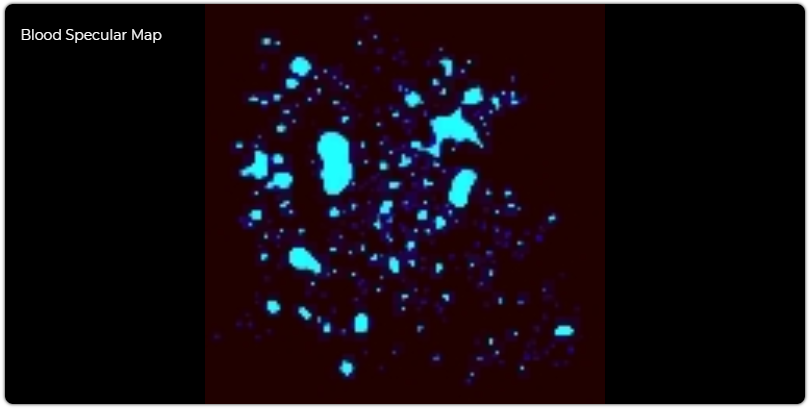
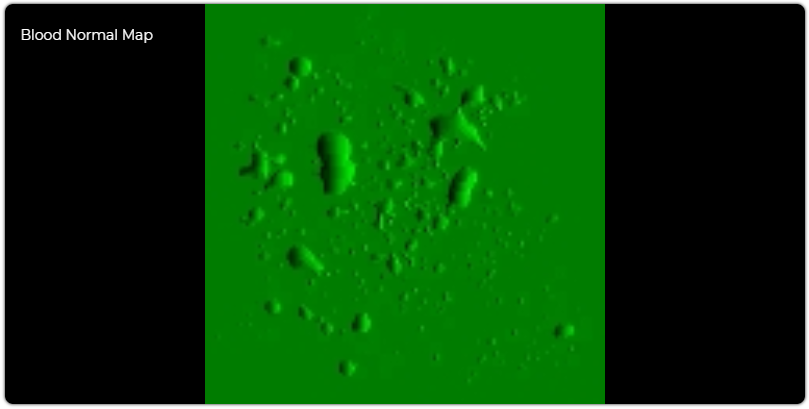
When processing enemies in a shader, albedo takes into account the texture of the blood (interestingly, Talion never gets visible wounds). The blood texture is the input to the rendering stage of the clothing and body of the enemies, but it does not set the color of blood, which is the input to the constant buffer, but determines the blood multipliers / levels to control the amount of blood displayed. The normal orientation is also used to scale the effect, allowing you to control the direction of the blood spatter. Then, albedo is essentially set off by the brightness of the wounds received by the enemy, taken from the appropriate place on the blood map, and also modifies other properties, such as specular, to obtain a convincing blood effect. I was not able to find the part of the frame in which the map is rendered, but I assume that they are recorded right at the beginning of the frame when the sword is affected and then used here.


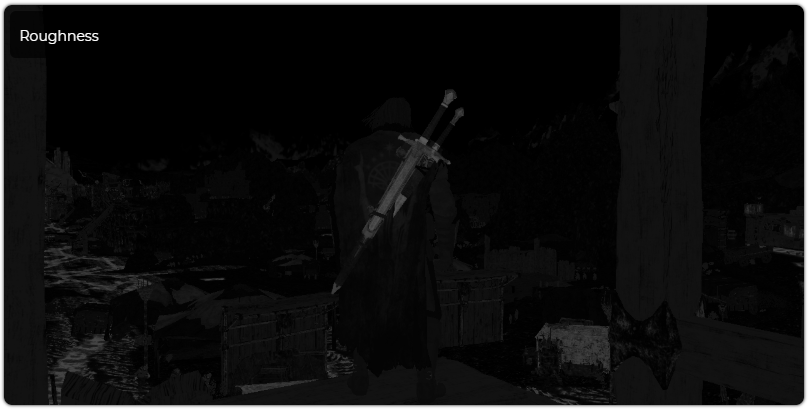
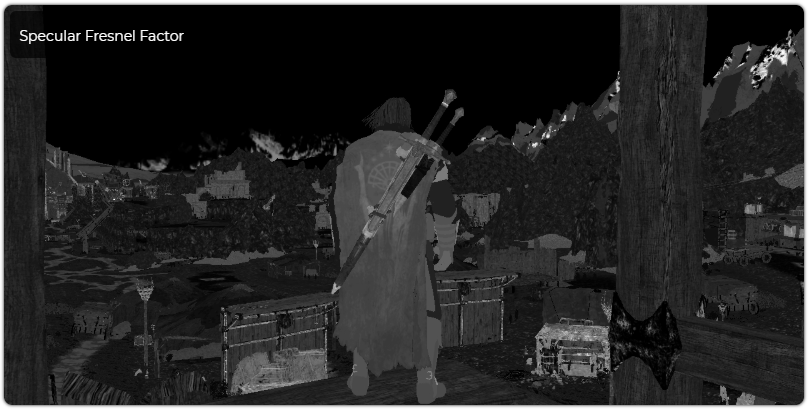
Specular buffer
| R | G | B | A |
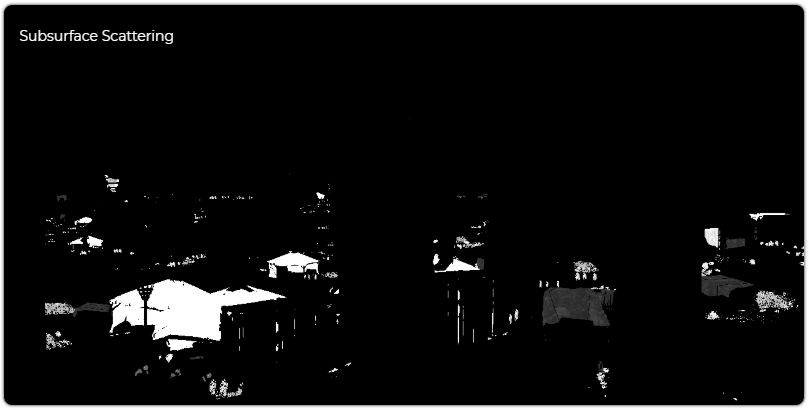
| Roughness | Specular Intensity | Fresnel | Subsurface Scattering Factor |
The specular buffer contains other surface properties that can be expected in games, such as roughness (this is not really roughness, but a scaled degree of specular, but it can be interpreted in this way), specular intensity, which scales albedo to get the right color specular, reflectivity factor (commonly referred to as F0 in the literature, because it is the input to the Fresnel mirror response) and the subsurface scattering component (subsurface scattering). The latter component is used to illuminate translucent materials, such as thin fabric, plants and leather. If we later dive into the study of the lighting shader, we find that the variation uses the normalized specular model according to Blinn-Fong .

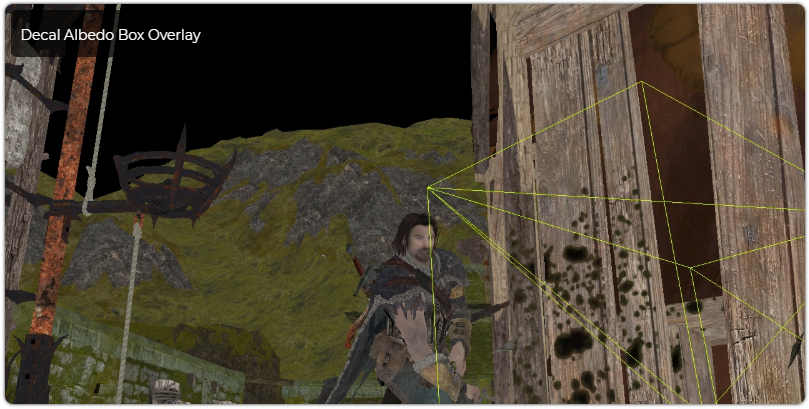
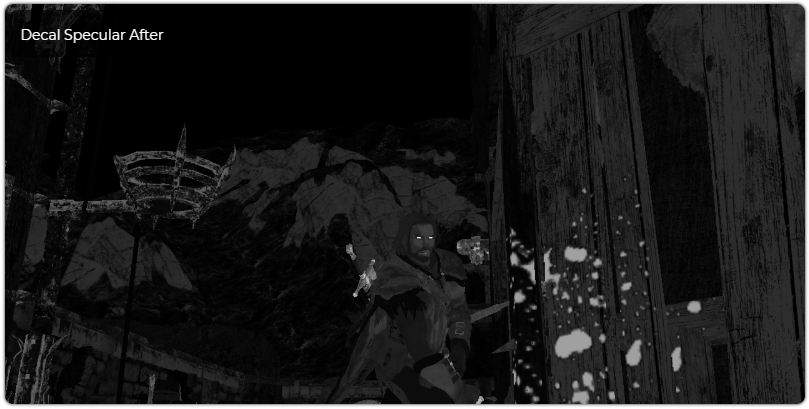
Deferred decals
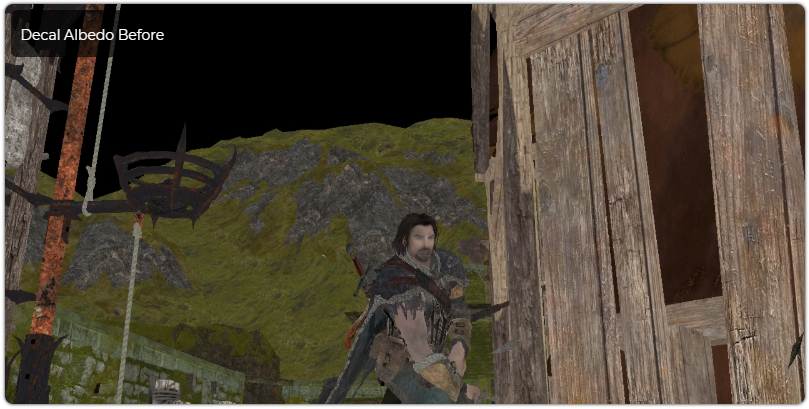
As we saw above, the Shadow of Mordor displays in some detail traces of blood on wounded characters. When Talion swings his sword, the entourage also receives his share of dark orcish blood. However, another technique is used for the environments - deferred decals . This technique consists of projecting a set of flat textures onto the surface of what was previously rendered. Thus, the contents of the G-Buffer are replaced with this new content before executing the lighting pass. In the case of blood, simply bloody sprays are sufficient, and when rendering many decals in turn, a rather gloomy landscape is quickly created.
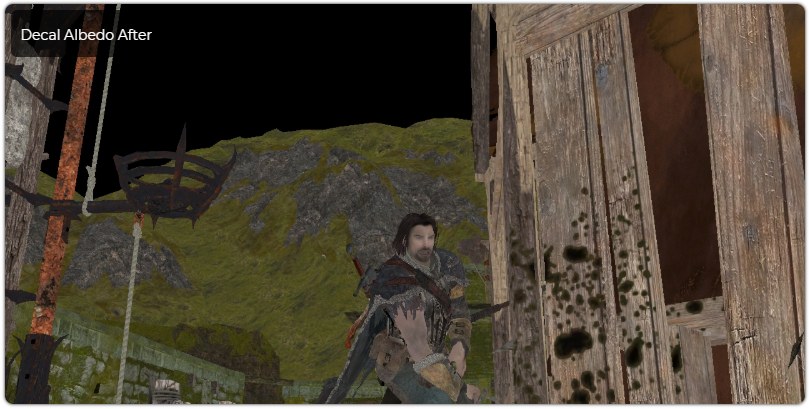


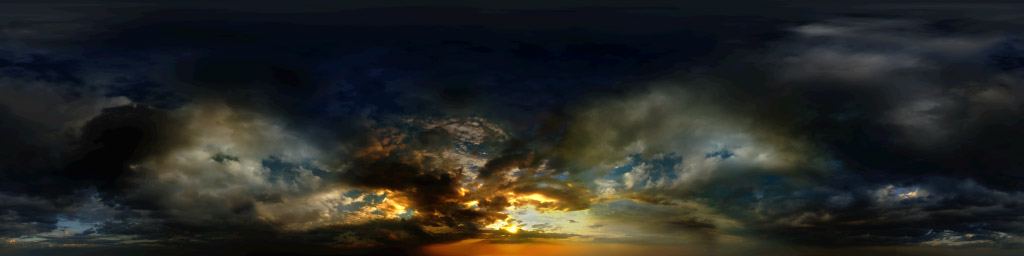
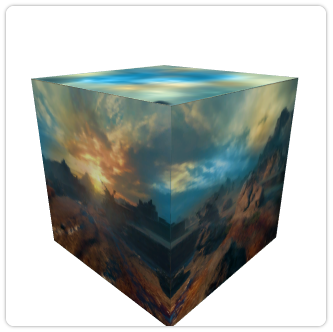
The last thing rendered in the G-Buffer Pass is the sky, a very high resolution sky texture (8192 × 2048) in the HDR BC6H format. I had to perform a slight tonal correction, because in HDR all colors are too dark.
Tessellation
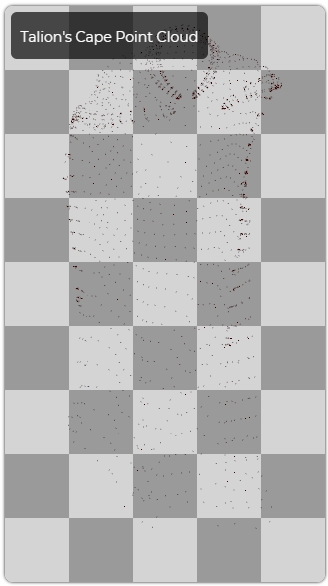
A very interesting "trick" of the game (if it is included) is tessellation. It is used for many different things, from relief to character rendering (as well as props and character objects). Here, tessellation does not subdivide the low poly mesh, but creates polygons from a point cloud, applying the necessary degree of subdivision depending on the criteria of the level of detail, for example, from the distance to the camera. An interesting example is the Talion cloak, which is transmitted to the GPU as a point cloud (after physics simulation), and the tessellation shader recreates polygons.

Order-independent transparency
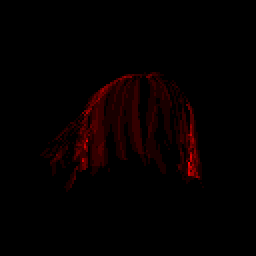
One of the first things that struck me with its strangeness is the passage of hair treatment, because it performs a very complex special shader. In the graphics options mentioned option OIT (Order-Independent Transparency) for the hair, that is, it should be it. First, it performs output to a separate buffer and counts the total number of overlapping transparent pixels, while simultaneously maintaining the properties in a “deep” structure, similar to a G-buffer. Later, another shader sorts the individual fragments according to their depth. It seems that the arrows are also rendered in this way (probably, their feathering requires proper sorting). This is a very subtle effect that does not add much graphic differences, but still it is an interesting detail. Here is a simple example: the image above displays the number of overlapping fragments (the redder, the more fragments). Normal transparency is still sorted into CPU and rendered as traditional alpha. Only individual entities enter the OIT pass.
Shadows of mordor
SoM has many sources of shadows. In addition to traditional shadow maps of dynamic light sources, SoM uses dual-channel ambient occlusion in screen space, microscale occlusion created for almost all objects in the game, and an occlusion texture similar to a height map with a top view.
Occlusion in screen space

The first pass renders with G-buffer ambient and specular occlusion in screen space. The shader itself is a huge unfolded loop, a sampling and full-size depth map, and a previously reduced average depth map, looking for adjacent samples in a given pattern. It uses a 4 × 4 square texture to select pseudo-random vectors in search of occlusion sources. It renders a noisy occlusion buffer, which is then smoothed out by a simple blur in two passes. The most interesting feature here is that there are two different channels of occlusion: one is used as specular occlusion, and the other as diffuse occlusion. In standard implementations, SSAO computes one channel that applies to all baked lighting. It also reads the SSAO card for transmission in the directional lighting passage, where it is applied.

Shadow maps
The next event is the rendering of the shadow map. Since the action of the game mainly takes place in open spaces, most of the light and shadows are taken from the main directional light. It uses cascading shadow maps (a variation of which is parallel divided shadow maps ), a fairly standard shadow overlay technique at long distances, which consists of rendering the same scene from a single point of view of the light source for different areas of space. Usually, shadow maps far from the camera coverage area are either at greater distances or have a lower resolution than the previous ones, essentially reducing the resolution in areas where details are still not required due to the fact that the geometry is too far away. In this scene, the game renders three cascades of shadows 4096 × 4096 (in fact, there is room for four in the game). The upper cascade is very close to Taleon, and the lower one includes mountains and objects very far from the camera. When working with shadows, the game uses the same trick with the inverse z coordinate as in the depth map. \
Shadow buffer
The next step is creating the shadow buffer. This is a single-channel texture, based on occlusion information from previous shadow maps, the coding shading factor in the interval [0, 1]. To create a smoothness around the edges, the shadow map is sampled 4 times using the state of a special bilinear sampler, which receives 4 samples and compares them with a given value (this is called Percentage Close Filtering ). Getting multiple samples and averaging their results is often called Percentage Closer Soft Shadows . In addition to reading the shadow map, the last component of the specular buffer (i.e., subsurface scattering coefficient) is also sampled, which is multiplied by the light bleed factor. It seems that it is necessary to eliminate the shading from these objects so that a little more light passes through them.

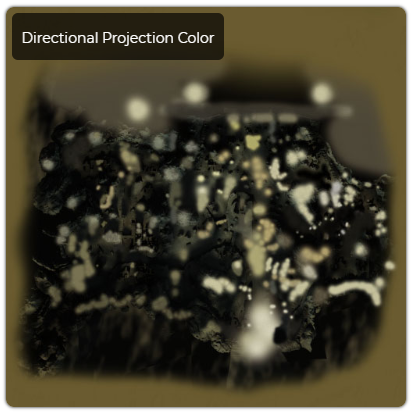
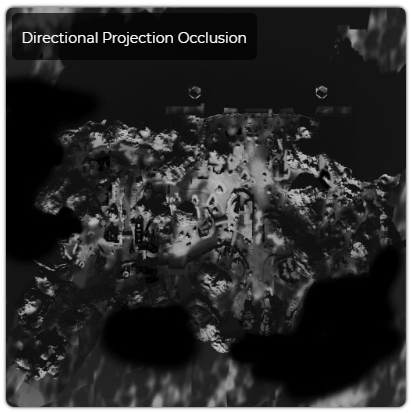
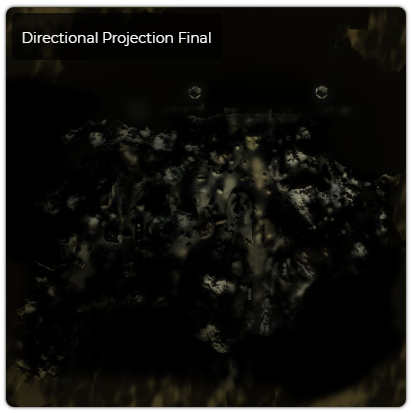
Texture of directed projections
Another source of light and shadows is a top view texture, which is sampled by a directional light source. This is the hue of the color added to the color of the directional light source plus the effect of global shading applied to the directional light. It seems that some of them were created manually on top of an automatically generated level map with a top view. It seems that the edges of the shadows for static geometry are manually corrected (perhaps to avoid conflicts with a real shadow map), and some parts also appear a little tinted by hand. Probably, the task of this texture is the low-cost addition of large-scale ambient occlusion and light imitations of global illumination in addition to directional lighting. The images below show shade, occlusion, and the product of both factors, giving us an idea of what the final color mask looks like.
The result of all lighting passes is saved in the render target format R11G11B10F. This is how the result looks like. I performed a tonal correction of the results in order to make the impact of directional lighting on the level more obvious.
All distant mountains (not shown in the image above) are also illuminated with directional light, but they are highlighted as a separate case so that you can better control the lighting. Some are scaled, but those further are actually flat textures (impostors) with cleverly created normals and albedo maps. They have special sources of directional lighting, affecting only the mountains.
Static lighting
Shadow of Mordor uses a very memory-demanding implementation of static lighting, which uses very large volumetric textures. The image below shows the three static textures of the lighting volume used to diffuse lighting of a portion of this area. Each of them is a huge compressed texture of 512x512x128 BC6H, that is, they occupy 32 MB for texture or 96 MB in general (we play with the maximum quality settings). The texture of the color indicates the intensity entering the voxel. The other two denote the strength or magnitude of this intensity along all six directions xyz and -xyz, and the normal is used to select the three components (positive or negative xyz, those that most coincide with the normal). Having constructed this vector, we take its vector product to the square of the normal, and this becomes the scaling factor for intensity. The formula looks like this:

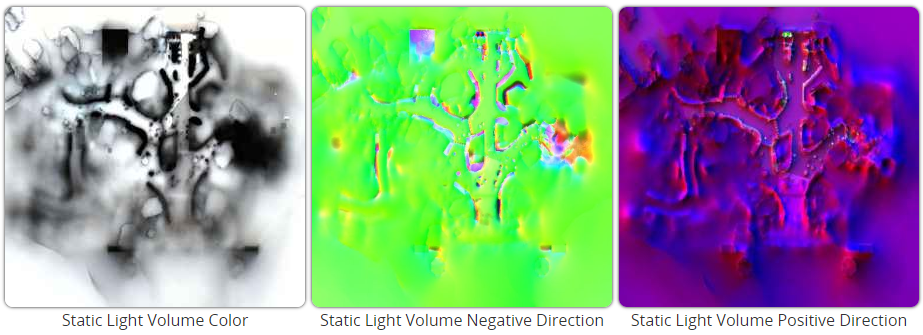
Static Light Volumes also render a cubic map for specular lighting, which is probably captured in the center of the SLV. Interestingly enough, volume textures store HDR values compressed in BC6H, and cubic maps are stored in BC3 (DXT5) format, which cannot store floating point values. To compensate for this limitation, the alpha channel retains its brightness, which then scales from 1-10. This is a slightly strange decision and for me it looks more like a legacy implementation. Do not forget that the game was released for the previous generation of consoles, which do not support the new formats of HDR textures.
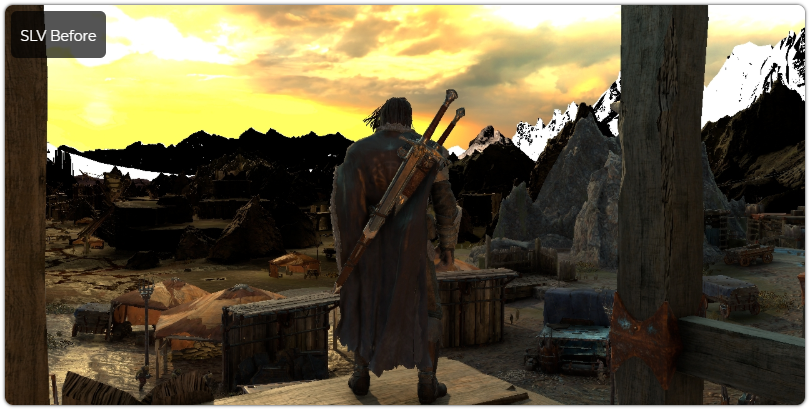
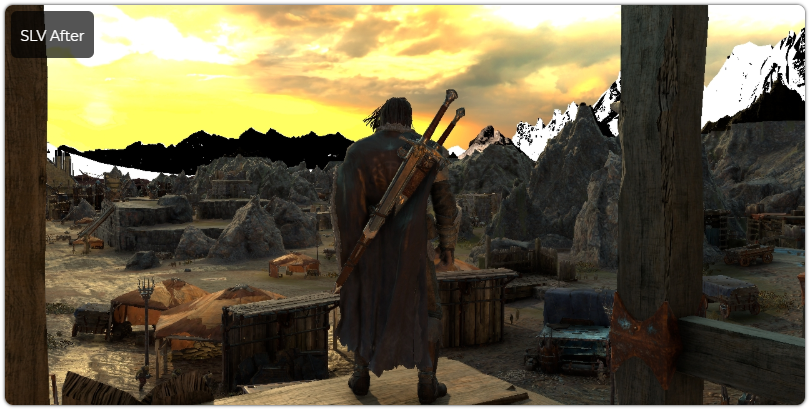
The frames below show the “before and after” results, taking into account the effects of the average image. For visualization, I performed a tone correction.

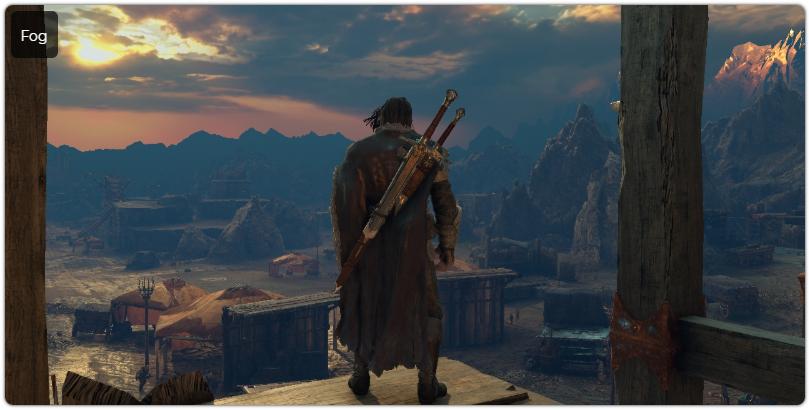
Atmospheric fog
In Shadow of Mordor there is a weather system and time of day, thanks to which the sun shines or it rains during the game in Mordor. This system is controlled by the sum of the components, and one of the most important is fog. Shadow of Mordor uses a fairly simple but physically valid model of atmospheric fog, including Rayleigh's single scattering, as well as spherical particle scattering (Mie scattering).
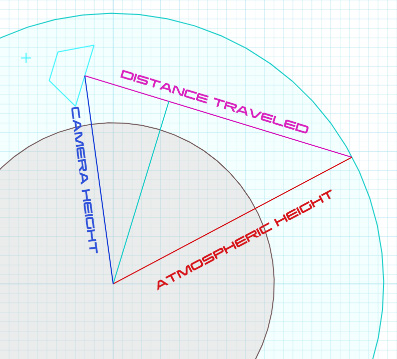
It begins by calculating the position of the camera relative to the center of the earth . Several trigonometric formulas allow us to determine where the camera is in the atmosphere, where the pixel is, and how far the beam has traveled in the atmosphere for a given maximum atmosphere height. In our case, the atmosphere is given a height of 65,000 meters above the surface of the planet. Taking this information into account, the Rayleigh and spherical particle coefficients are used to calculate the types of fog particle densities and its colors. These densities obscure the already shadowed pixels, scattering the light that enters the camera from the shadowed surface, and contributes to the fog. When simulating such a scattering, the brightness and direction of the sun are taken into account.

Exposure and tone correction
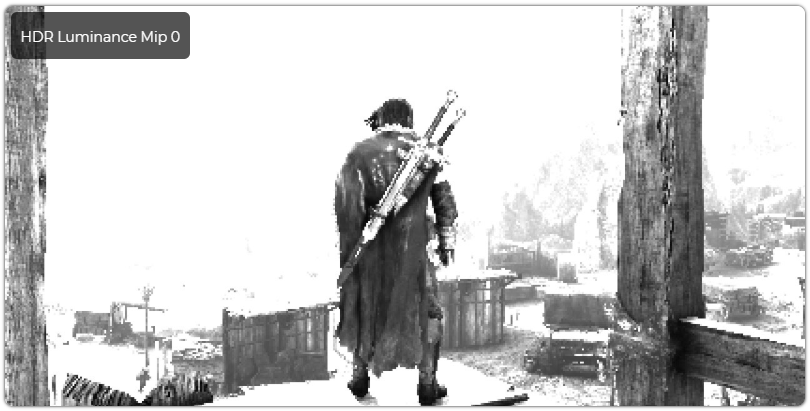
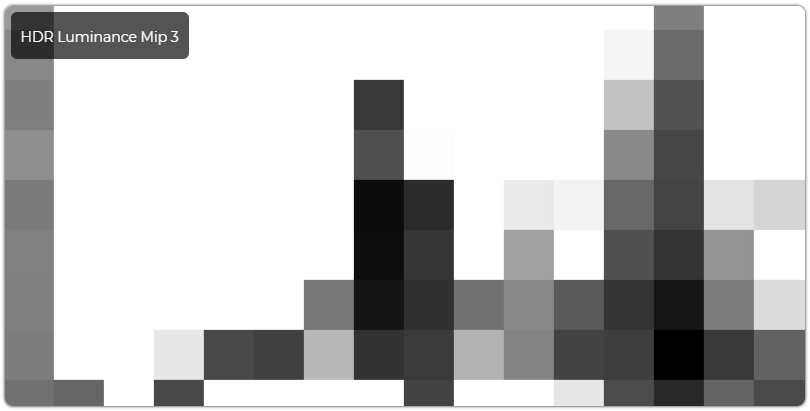
When calculating the shutter speed, a fairly standard approach is used: consistently reducing the resolution of the brightness buffer calculated from the main HDR-color buffer into a chain of textures, each of which is half the size of the previous texture, starting with a 1/3 texture from the main frame buffer. With this decrease in resolution, 4 samples are taken, averaging the values of the neighboring pixels, that is, after converting all the average values into a single texel, the final result becomes the average brightness. After the texture reaches a size of 16 × 9 texels, a compute shader runs, summarizing all the remaining texels. This value is immediately read in the tone correction pass to change the brightness values.


In the case of tone correction, the variant operator Reinhard is used, the optimized formula of which can be found here and here . In the code on hlsl it will look like this:
float3 hdrColor = tex2D(HDRTexture, uv.xy); hdrColor *= exposureValue; // This was calculated by the compute shader in the luminance downsampling pass float3 x = max(0.0, hdrColor - 0.004); float3 finalColor = (x * (6.2 * x + 0.5)) / (x * (6.2 * x + 1.7) + 0.06); If we plot this curve, we will see that this operator discards 10% of the white values even at the input value 2.0, while at the same time forcing a small part of the lower interval to be completely black. This creates an unsaturated, dark image.

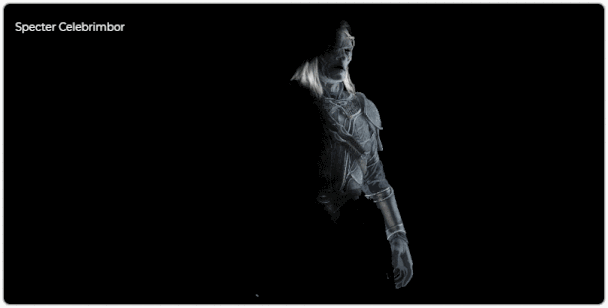
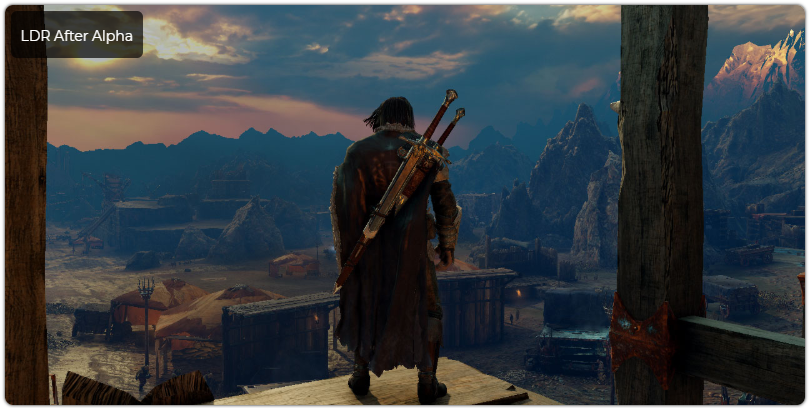
Alpha Stage
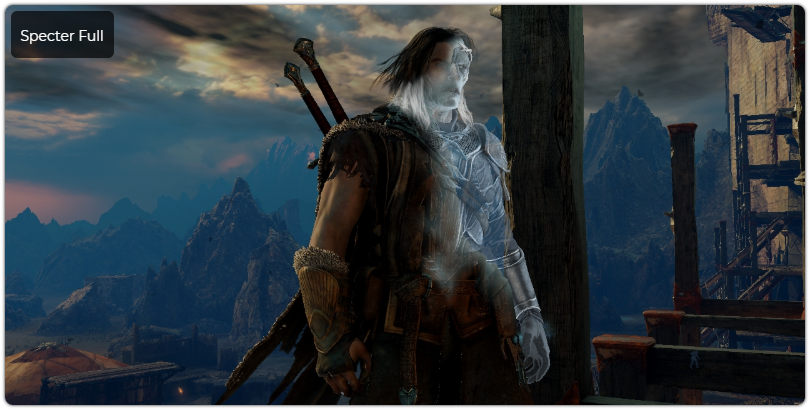
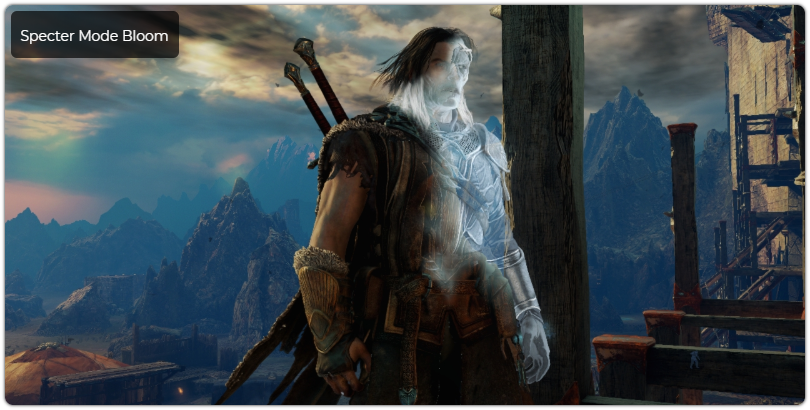
The alpha stage is a bit unusual because it renders objects directly into the LDR buffer. Other games will render them in the HDR buffer, so that they can participate in the passage of the excerpt. Anyway, the previously calculated brightness texture is limited to all objects lit by alpha (in some cases, for example, for objects emitting light, the shutter speed is calculated using shader constants rather than texture search), and therefore the shutter speed is applied when drawing automatically, and not executed in postprocessing. A very specific use case for the alpha game is to switch to the ghost mode (in it, the ghost of Celebrimbor, who forged the all-powerful rings in the LOTR universe, is rendered on top of the player’s character; thus, the game shows that he is always there, albeit invisible). The game passes into the meshes of both characters several parameters that control the opacity and allow the game to partially obscure Talion and gradually show Celebrimor. Other objects in the game in ghost mode also render ghost versions over opaque objects, such as enemies and towers. Here is another scene with the transition to the ghostly world.


Rain
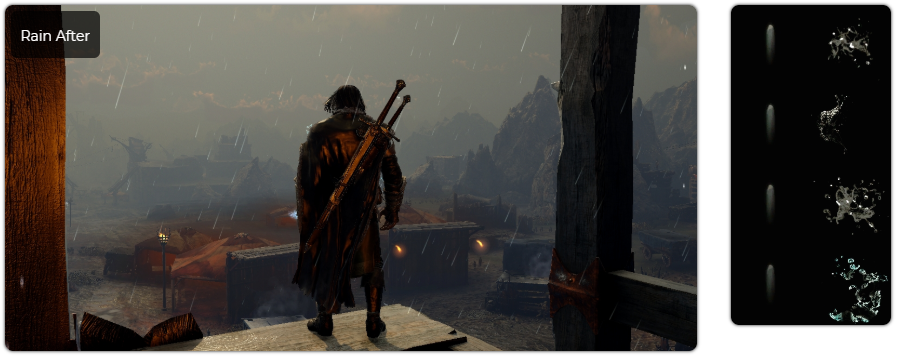
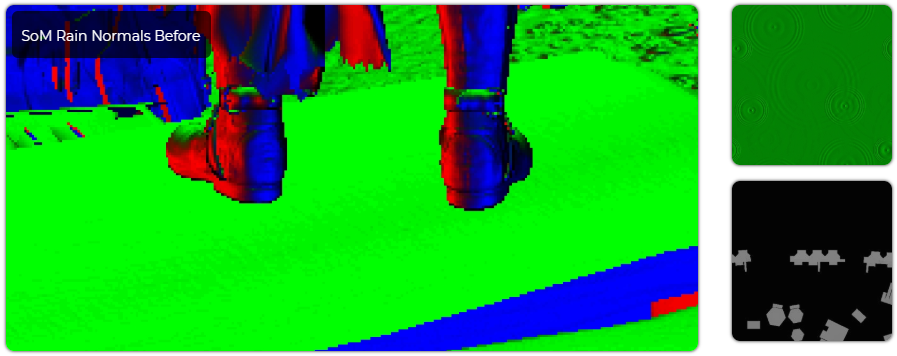
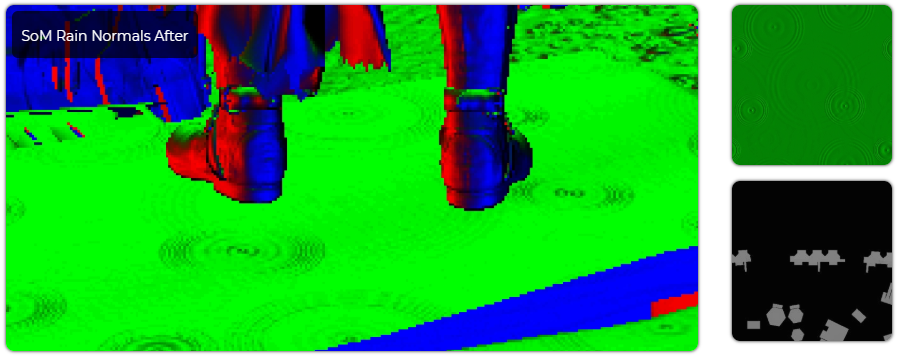
In the main frame, which we investigated, there is no rain, but the weather is such an important part of the game that I would like to mention it here. It is generated and simulated in the GPU, and rendered right at the end of the alpha stage. A compute shader runs, simulating and writing positions to the buffer. These positions are taken by another shader, which with the help of the instanced indirect call renders as many copies of quads as the number of positions was calculated in the previous pass. Vertex shader has a simple quad, which, if necessary, is deformed and turns to the camera. So that the rain does not penetrate the surfaces, the vertex shader also reads elevation maps from the top view, which allows you to deflect all drops below the overlapping surface. This elevation map is rendered right at the beginning of the frame. The same vertex shader tells the pixel shader where to get the sample from the drop texture; if the drop is close to the surface, it selects the area of the texture containing the spray animation. In addition, rain drops are performed in a pixel shader to calculate fog for perfect blending with the rest of the scene. Here is a screenshot from the same point of view on a rainy day.

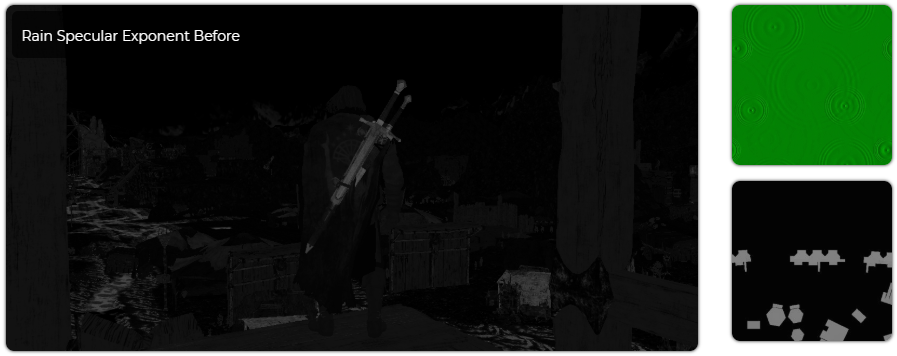
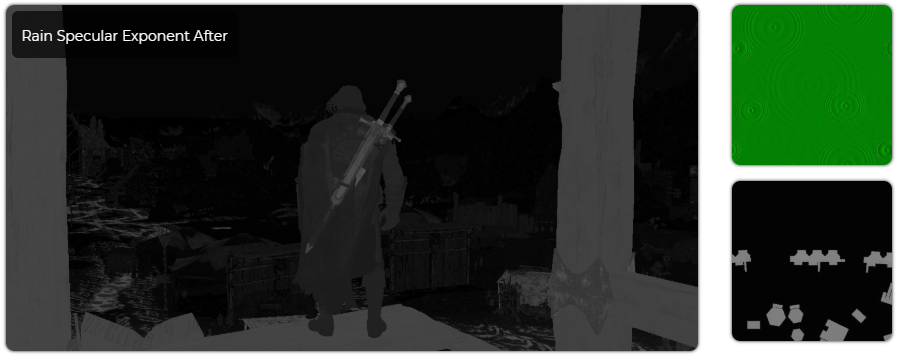
When the rain effect is activated, the specular buffer is globally modified to create wet surfaces, and rain waves are rendered into the normal buffer. Animation is hidden, so only one frame of looped animation is used. The normal buffer shown below is modified to show the waves rendered to the buffer.
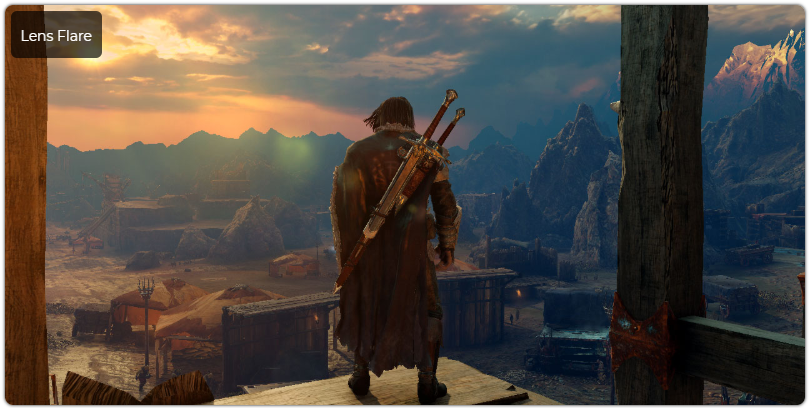
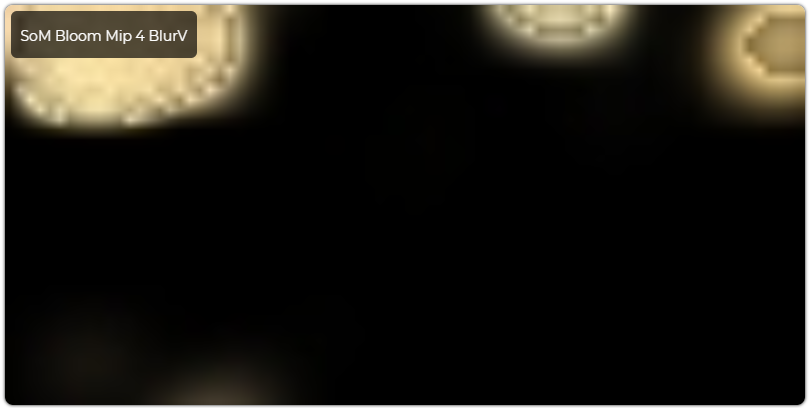
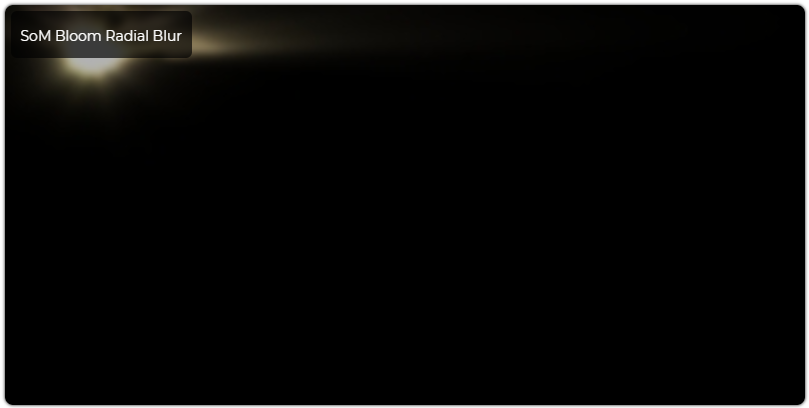
Lens Flares and Bloom
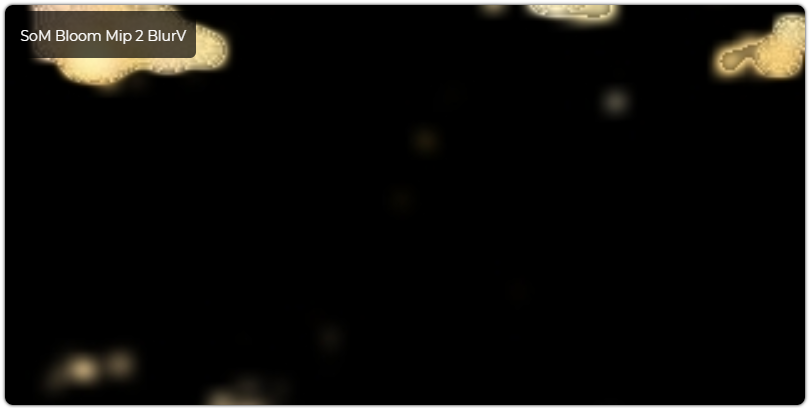
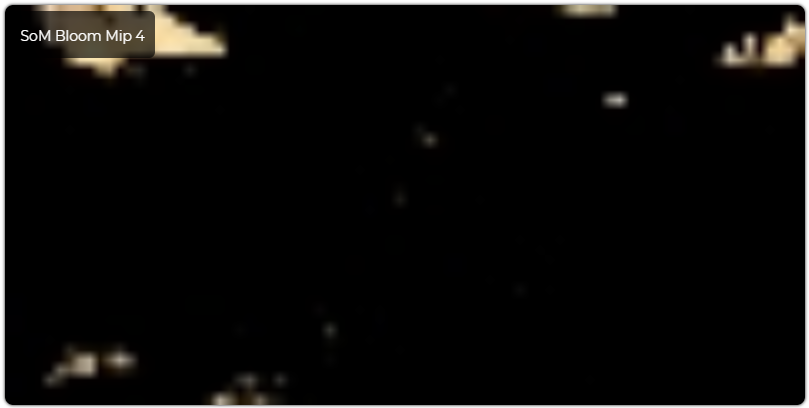
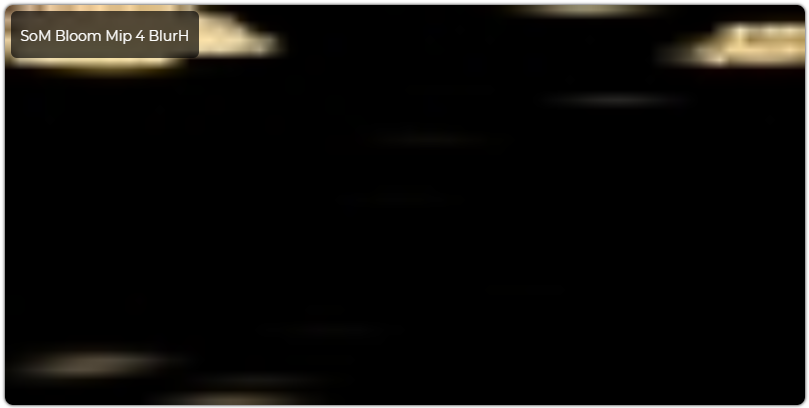
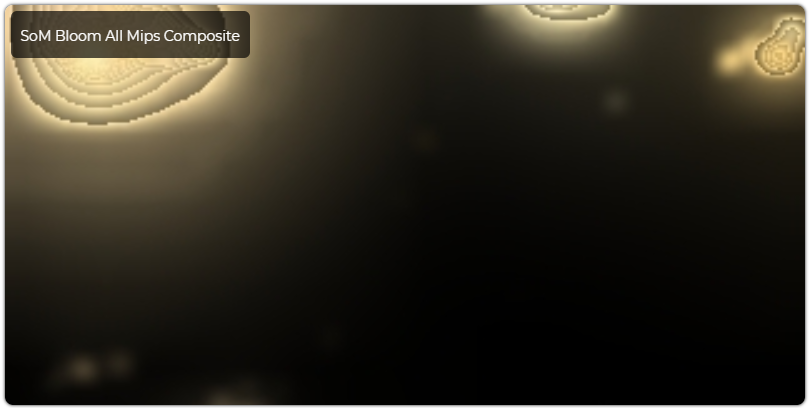
After the alpha rendering is complete, lens flares are rendered on top. A series of biased quads are rendered, starting from the point where directional light comes from (in our case, the sun). Immediately after this, the bloom is executed. This is a fairly standard technique, which consists of a series of reduced in size and blurry textures containing pixels whose brightness exceeds a certain threshold. Two bloom passes are used, common with Gaussian blur for the whole scene and a special radial blur applied only to the sky. Radial blur is one of the operations in which a special ID from the G-buffer of normal maps is used, because only sky pixels are taken into account. As a bonus, this blur will sample the depth map and can create low-cost twilight rays . Since at this stage we are working with the LDR buffer, the bloom threshold value differs from the value from the HDR carpet (values above the threshold, usually 1.0, lead to the calculation), and this means that the bloom obtained from it is a bit limited. In any case, this is a game for the benefit and here are the results. In the pictures below, the bloom mip-textures look a bit strange, because each pixel is scaled to the brightness contained in the alpha channel. This brightness was calculated earlier, at the stage of tone correction. In the final compositing, bloom is computed as bloom.rgb · bloom.a · bloomScale .


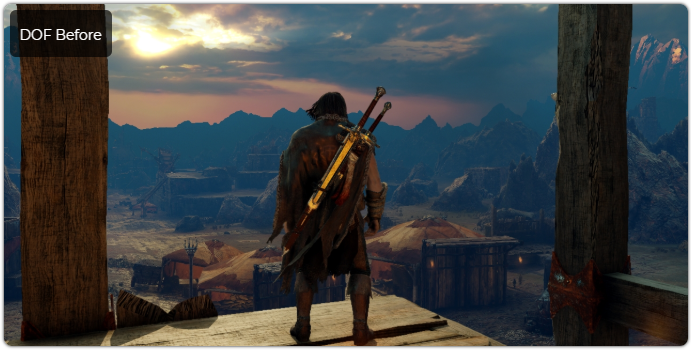
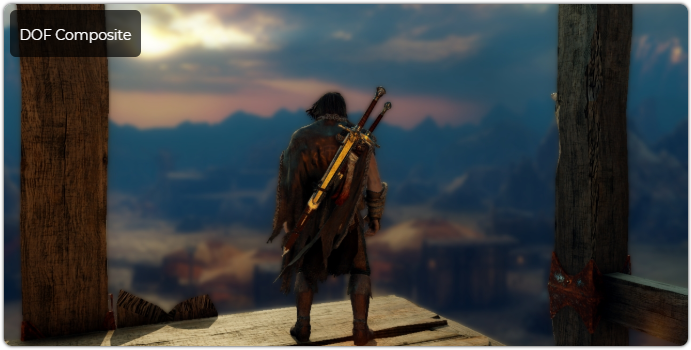
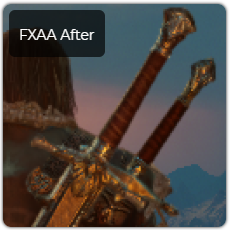
Antialiasing + Depth of Field
There is nothing special to say about these two operations; industry standard approaches are used. A simple FXAA anti-aliasing pass is performed immediately after bloom compositing with an LDR image, and the depth of field is performed directly behind it. For depth of field, the game renders two reduced blurred versions of the final buffer. The pixel depth is then used to blend the blurred and normal images, which has a defocusing effect. For the sake of clarity in this capture, I exaggerated the effect of depth of field. The game has a built-in screenshots mode that allows you to easily adjust these conditions.


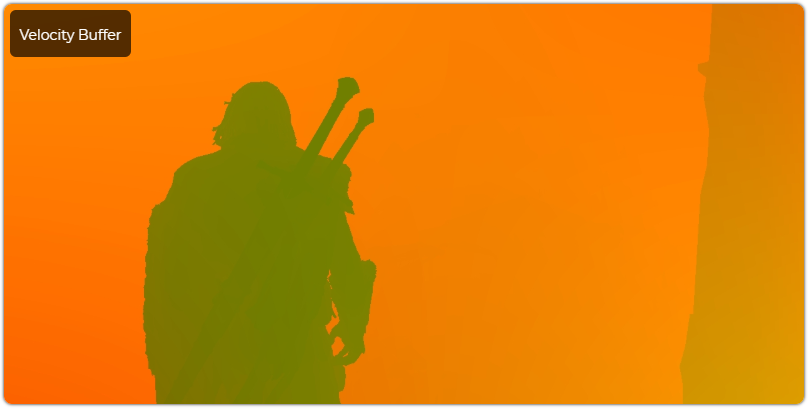
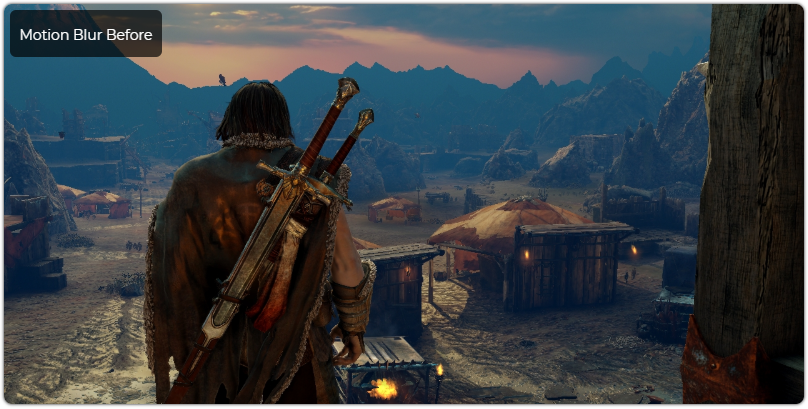
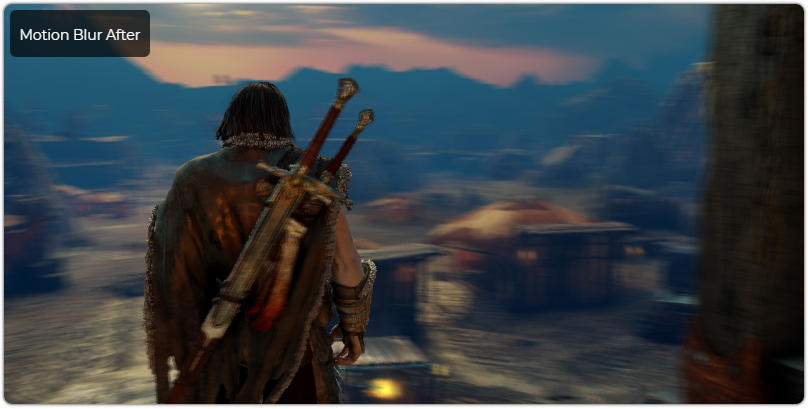
Motion blur
Motion blur consists of two passes. First, data from the previous and current camera orientation is transferred to the full-speed buffer. In this case, the two channels of the texture are filled with speed in the screen space. Now channel r contains the magnitude of the pixel change in the horizontal direction of the screen, and channel g contains the vertical one. This is how radial stripes are obtained when moving the camera. The character is rendered anew, this time filling the blue channel based on its current and previous postures, as is the case with the camera. The blue channel is used to mark whether visualization should be rendered. The alpha channel is also filled with a constant value (0.0598), but I have not investigated either its value or its goals. The resolution of the velocity buffer decreases to a very small texture by averaging a relatively wide neighborhood of the velocities in the original texture. In the last pass, this gives each pixel a rough idea of what the blur radius will be in the current blur pass.
The blur pass then reads out both velocity textures, a depth map, the original color buffer, and a noise texture. The latter is used to hide the effect of the mirror image, which can occur with this type of blur with a large radius. Then, the image buffer is sampled several times in the direction indicated by the velocity buffer, the colors are averaged, which causes the image to be blurred in the direction of the motion vectors. This effect also scales in accordance with the frame rate at which the game works. For this capture, I had to limit the game to 30fps, because at 60fps and above it is barely noticeable.

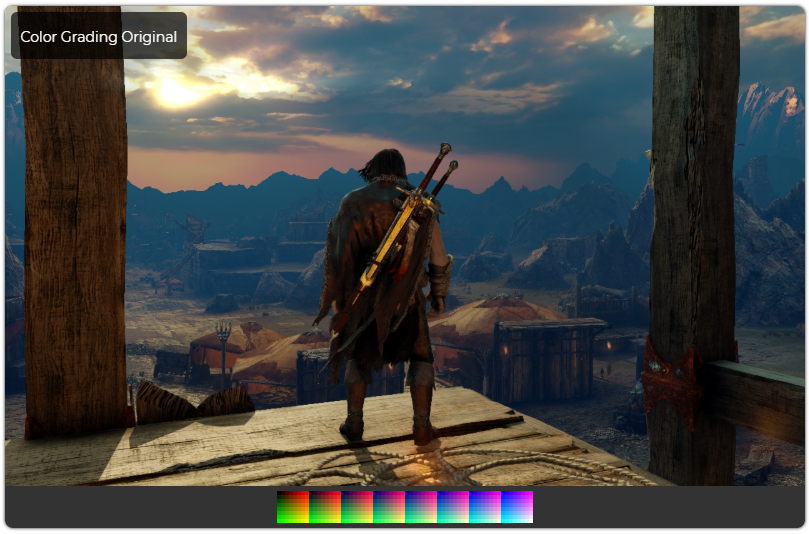
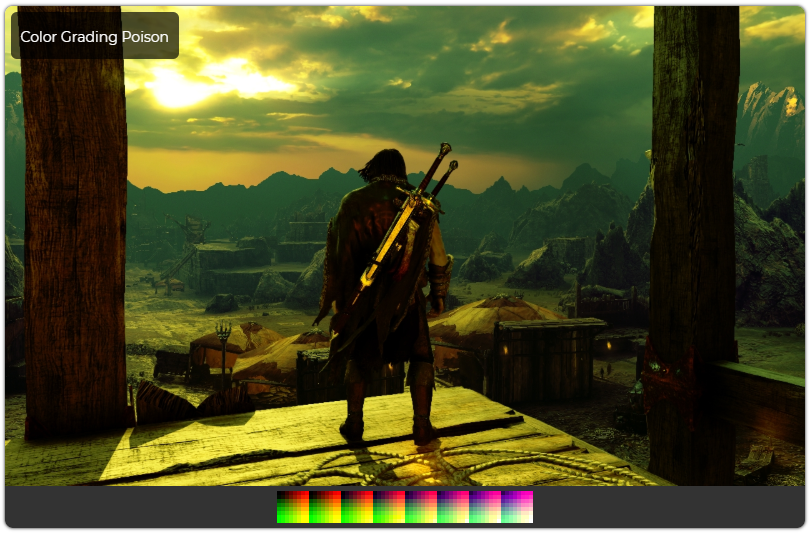
Color correction
The final pass color correction is performed using the "color cubes". A color cube is a 3D texture, the rgb components of which are attached to the xyz coordinates of the texture. These xyz coordinates contain the color with which we must replace the original color. In our case, the lookup table (LUT) is neutral (i.e. the coordinates and color contain the same value), so I modified the same scene using the presets that the game provides in the camera editor.


Final shot
After the creation of the main frame is completed, the UI is rendered in a separate buffer. This ensures that regardless of the UI size selected for the back buffer, it will always be rendered clear and beautiful in the native window size, while the game can change the resolution if necessary to ensure speed. At the end, both textures are mixed together based on the alpha data of the UI, and then rendered to the final frame buffer, which is ready for display on the screen.
I hope you enjoyed my analysis. I want to thank Adrian Correge for the amazing work that inspired me to study graphics, as well as the team at Monolith for this truly unforgettable game.
Source: https://habr.com/ru/post/430518/
All Articles