We simulate a realistic river in Houdini and Unreal Engine 4
When the transition from DX9 to DX10 began, many games began to appear with coolly modeled water with the right effects. Then the difference was very noticeable, especially if we compare the games of past generations and the same Crysis. Therefore, when I came across a guide, how to make a simple but realistic simulation of the river through the Houdini plug-in for UE4, I didn’t even think about it and quickly translated it.
Prologue
- Download Unreal and Houdini assets . Installation video - here .
- Most of the project I followed the tutorials of Ben Shriver and Andreas Glad .
- Do not be afraid of nodes and scripts. It is not as difficult as it may seem.
- For water, I used the normal map from Unreal Starter content.
Introduction
My name is Simon. I started programming in QBasic and Pascal when I was young (here are some examples ), I immediately realized that it was difficult to code, and switched to 3D art. At the same time, I always kept my interest in the technical side of creating games - it turned out that I became a VFX artist. This profession combines art and technology well.
I worked as a 3D artist on Sacred 2 and X: Rebirth , and a VFX artist on RiME , The Invisible Hours . I'm currently working on WiLD .
')

I also have several personal projects related to game development: Game Art Trick blog, German Game Dev Podcast, and YouTube channels with Unreal tutorials and Houdini .
Meet Houdini
I made friends with Houdini while working on The Invisible Hours. Then I made a small fluid simulator that could be paused, deployed and played backwards in real time. The result was:

Source: Fluid Simulation from The Invisible Hours
I had no idea how to add fluid modeling to Unreal. Fortunately, an amazing technology called Vertex-Count-Agnostic Morph Target-Based Fluid Animation was implemented in Houdini, so I was able to add my fluid simulation to the game. The technology was originally developed by Norman Shaar .
Source: Vertex-Count-Agnostic Morph targets in UE4 by Norman Shaar
If you want to learn more about the implementation, then look at this section of my report Cool Stuff with Textures:
Effect of the river: the beginning of the project
I wanted to learn how to make a procedurally-generated river for the Realtime VFX River Challenge , but I had no idea where to start. By chance, I stumbled upon a posh tutorial from Ben Shriver , where he talks about rivers at Horizon Zero Dawn. I was hooked and I decided to try it!
By the way, there is another very cool tutorial along the Houdini rivers from Andreas Glad :
These videos helped me a lot in the beginning and became the foundation.
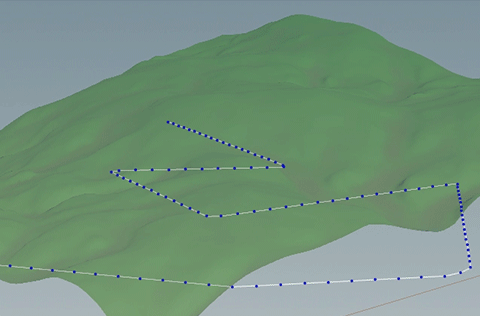
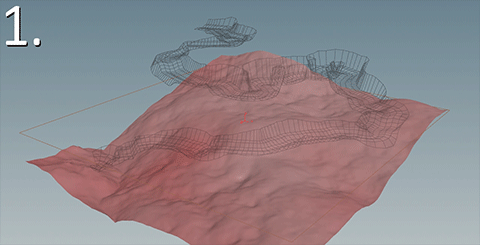
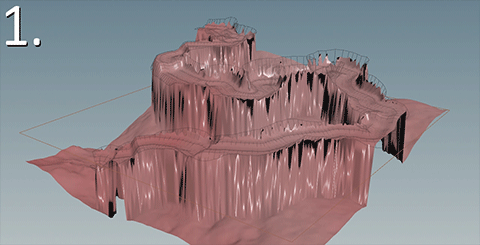
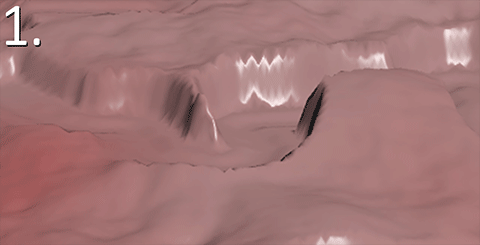
A very difficult way to build landscapes.
The relief was very difficult. I will illustrate the creation process so that everyone understands:
Source: Houdini Creation
Just kidding It's too easy.
River effect
The first steps are 100% copied from Ben's tutorial, and they are cool. First you create a spline and let it “fall” on the ground. This is done by reading the height of the relief at the points of the spline, and then moving the points to this height:
Then you allow spline points to “roll” down the slope to better integrate the river into the relief:
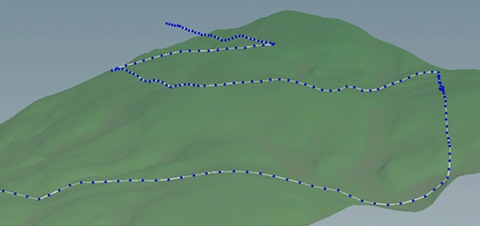
In fact, they do not roll down in a physical way. Instead, the base surface normal and point normal are used to calculate the local axis for each point (which moves down the slope from the spline). Then you move points a little along the computational axis (this process is very well shown in Ben's video).
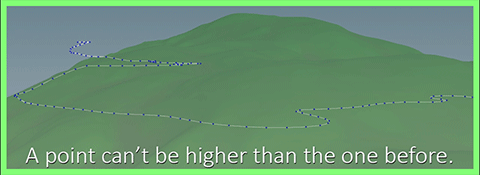
The next step is to make sure that the river does not flow upstream due to the landscape (because there is a small hill where the river goes along).

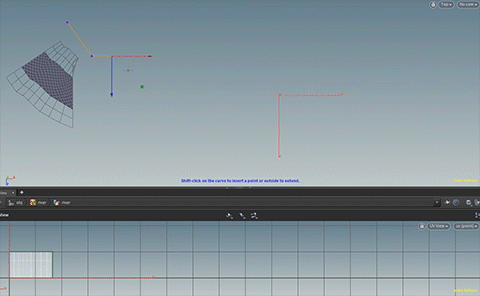
A small Python script ensures that the spline point in 3D space will never be higher than the previous one:
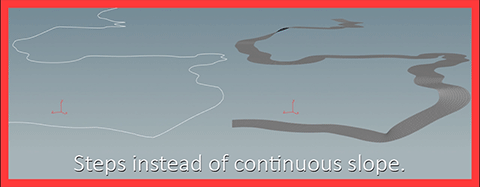
Another trick to add naturalness is avoiding continuous slopes. Instead, let the river flow in stages (for better visualization, I show the geometry of the river here, but in fact we are still working with only one spline).
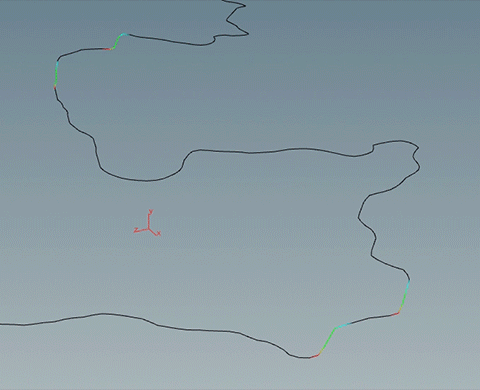
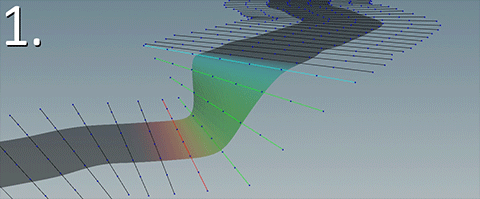
Finally, we reach the step where I bring in my own ideas: add colors to the spline to mark where the slope is (green), where it starts (turquoise) and where it ends (red). This will help me later to mix different water textures and place particle systems.

Let's quickly move on to creating the geometry of a river, since all of this is perfectly explained in Ben's video. The most important point is that only the outer edges of the river are again aligned with the relief (as we did with the spline in the first place):
Deforming the landscape according to the flow
Again, this is Ben’s 100% workflow, starting with the movement of the relief below the river’s geometry, so that they don’t intersect in any way:

Then for each point of the terrain you draw rays up. If they fall into the geometry of the river, then these points will move up to the point of impact:
Each point that has not got anywhere will receive an initial height.
This gif shows what happens when the spline changes:

Then the height area of the landscape is converted into polygons and re-mixed. Now it is ready for use in Unreal:
Now let's talk about UV conversion, materials, current maps and much more.
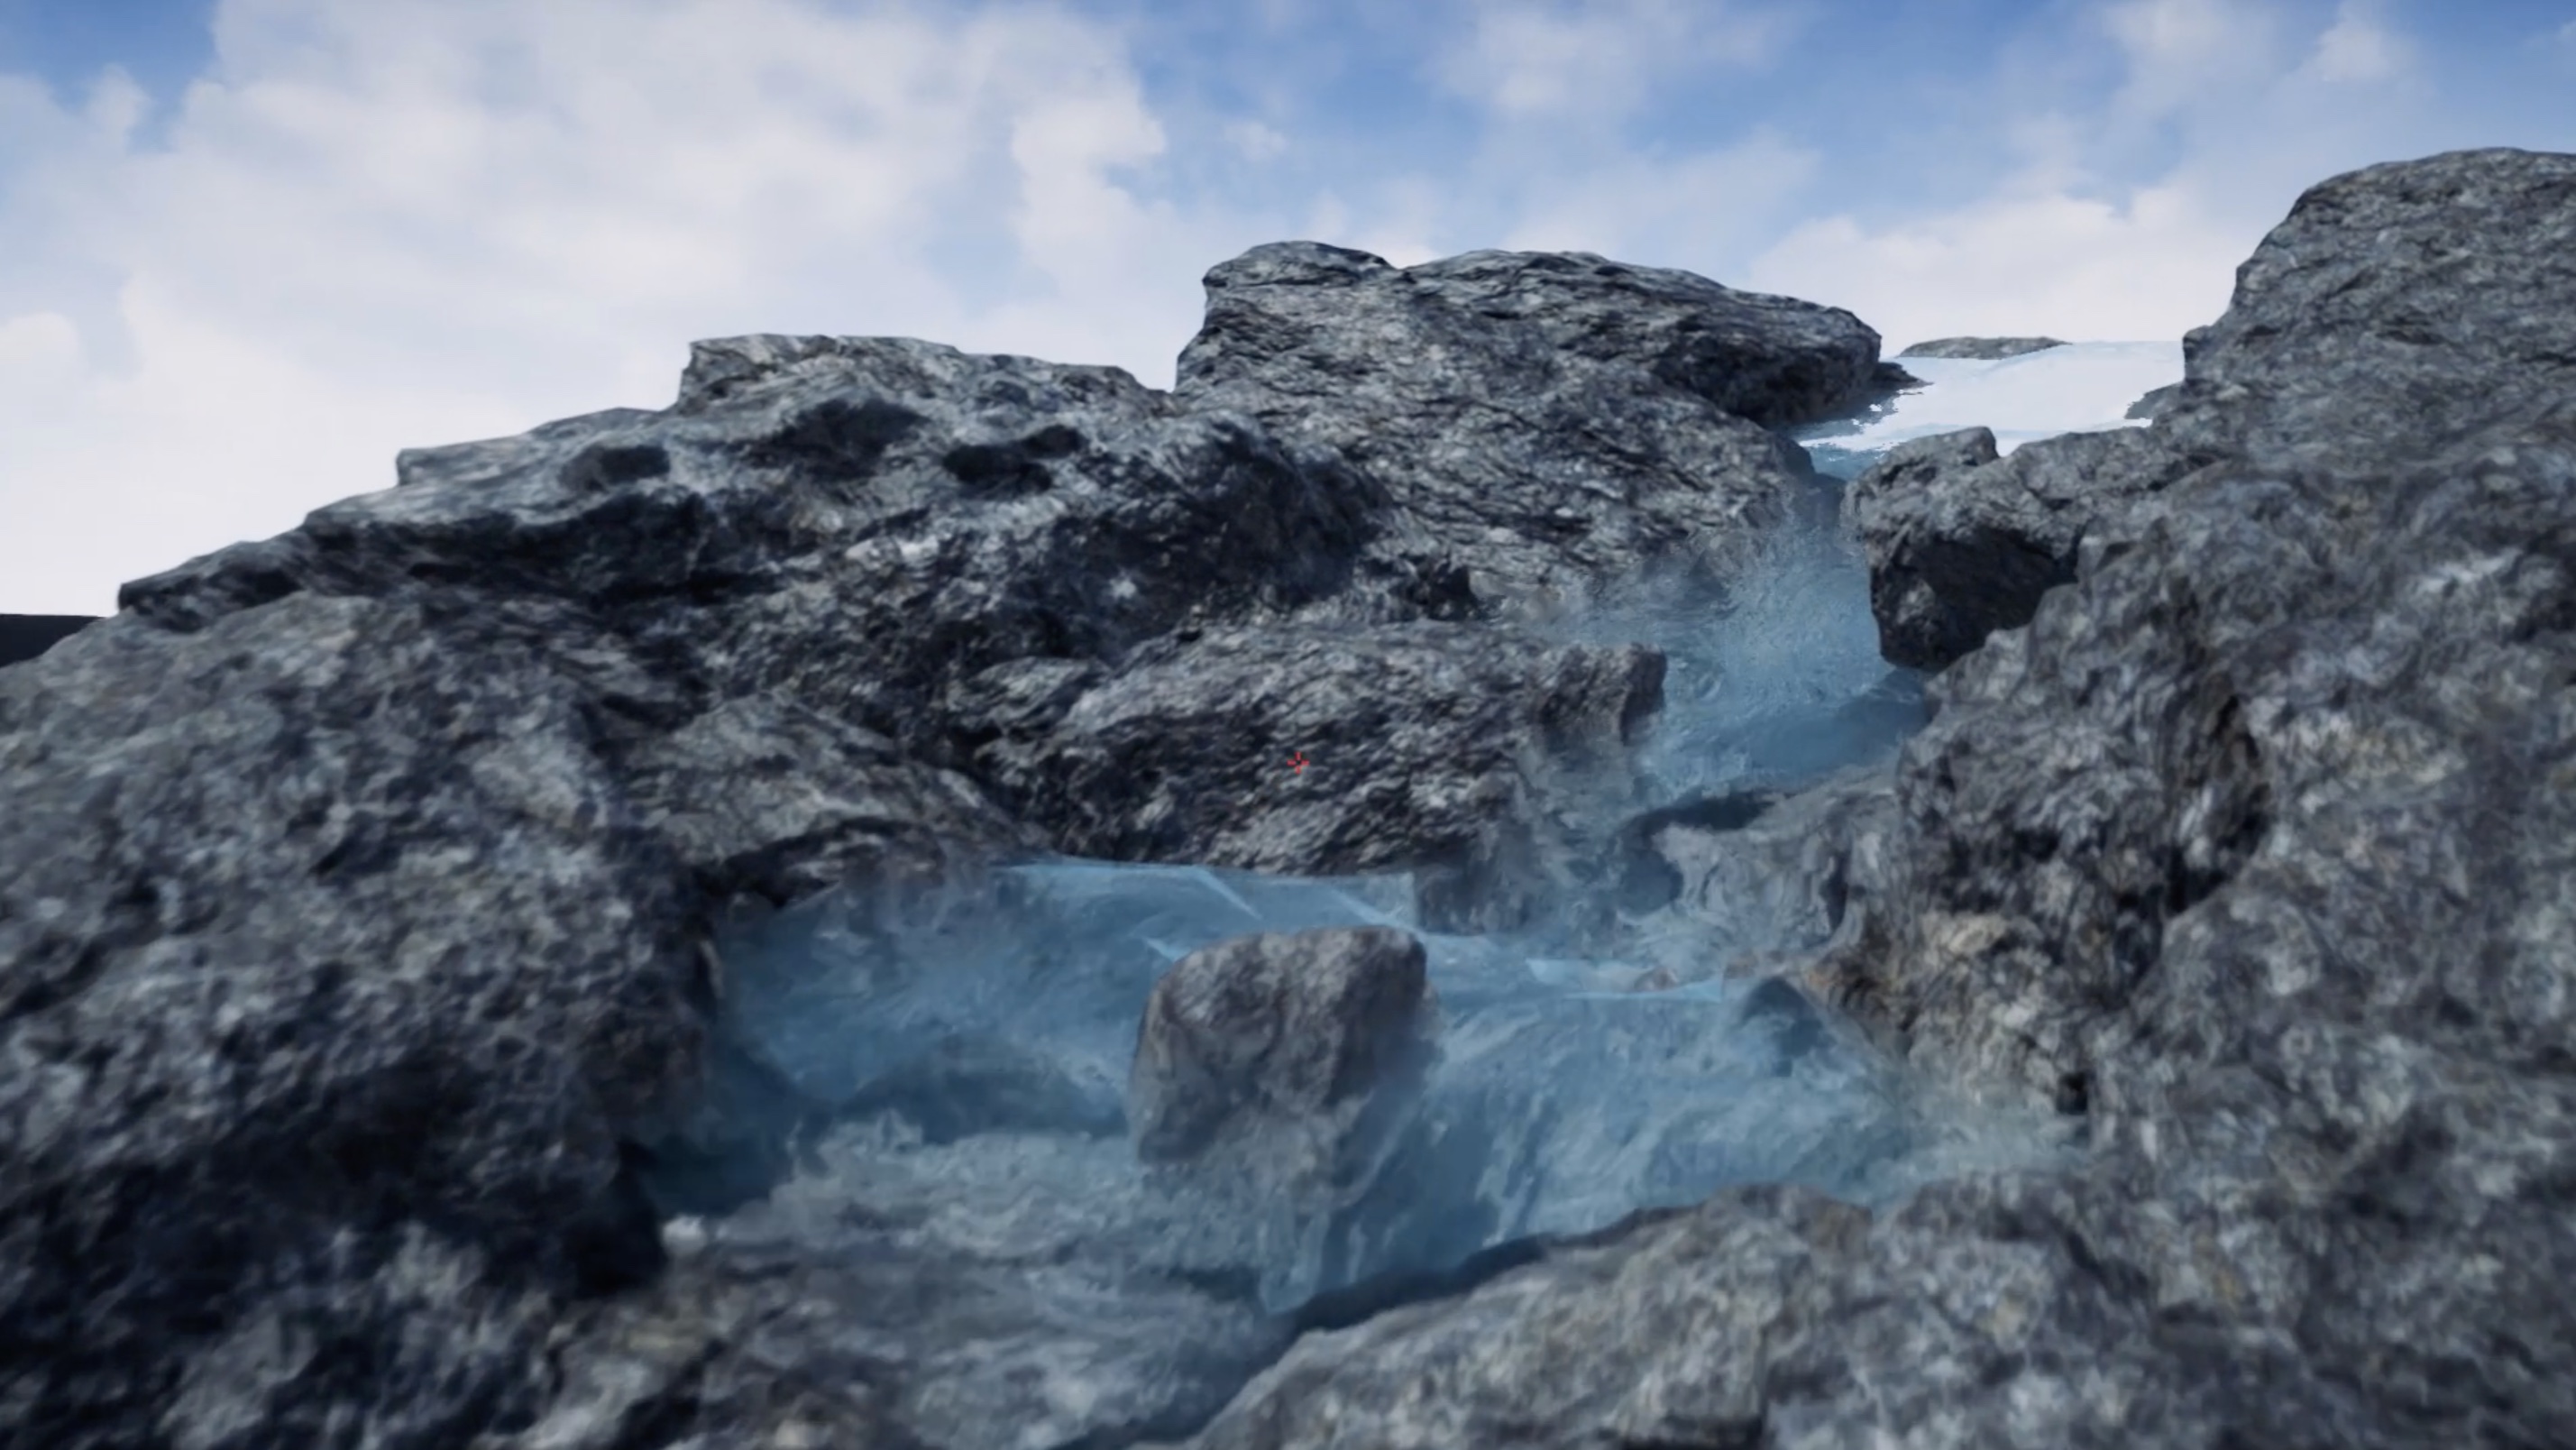
River geometry
The geometry of the river, which you saw before, was used only for cutting the terrain. This river is a bit thinner, has UV and was divided (note that my colors of the slopes are still there):
UV generation
Since the spline always varies in length, UV must adapt to this. Fortunately, it is very easy in Houdini. First you create UV in 0-1-UV-Space, and then measure the length of the spline. This value can be used to scale UV. Here you see how I change the spline, and at the bottom - how UV automatically adapts. Believe me, if you once tried this, then never again want to create UV manually.
Channel
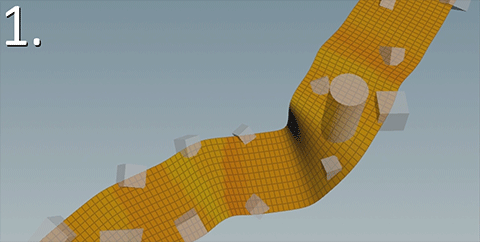
One more detail: I wanted to make the course darker and wet. To do this, I spend up a few rays from each polygon of the landscape, and if I get into the river, I assign color to all points of this polygon. The created mask looks like this:

And here is an example using a mask in a material to assign different values of vagueness and roughness:
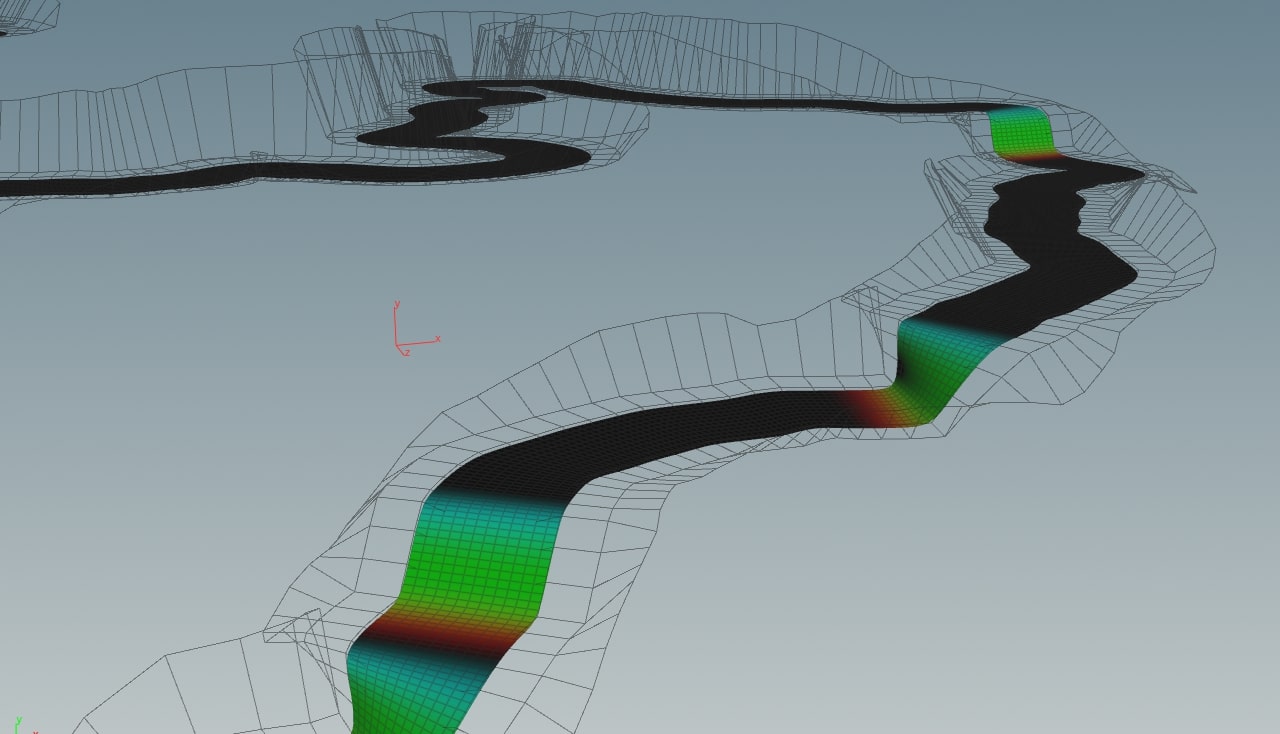
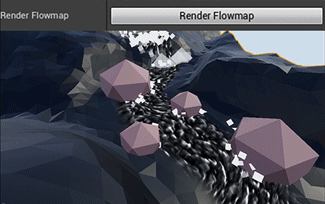
Flow map
Creating a flow map with Houdini is very easy. You just say to the special node “this is my river geometry, and this is a spline that indicates the direction of the river” and a boom, the geometry suddenly gets the vertex colors representing the flow of the river:
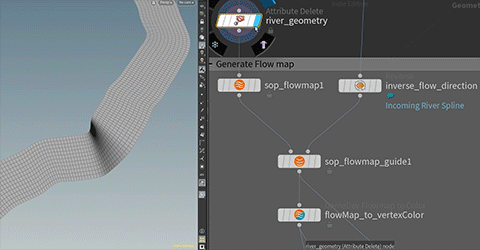
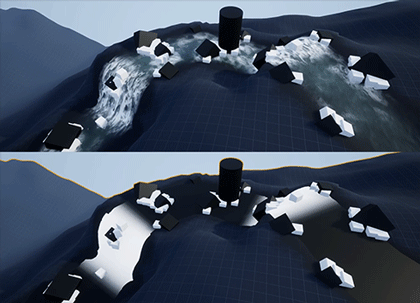
You can add another node that will make the flow map respond to obstacles. Now the water will flow around them:
And the coolest: you can cause the baking of the flow map in Unreal! No need to switch between Unreal and Houdini. Just set the Render button in Houdini as a parameter. Here you see how I change the obstacles, and then visualize the new flow map (note that baking takes longer than on the gif):
Foam mask
To make foam on the water around the obstacles, I use the so-called isoOffset node. It mainly stores the distance to the object in the color of the top of the river. Then I added some noise and the mask is ready:
To make the foam mask less static, I use a simple cloud-based Photoshop template, which I move along the river and subtract it from the original mask:
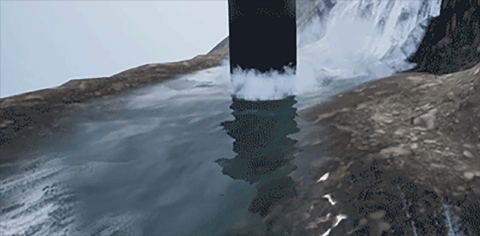
And since we are talking about foam: the cascades also have a simple foam texture, which is shown only on the slope of the river. The foam structure scrolls faster than river water:
Particle systems
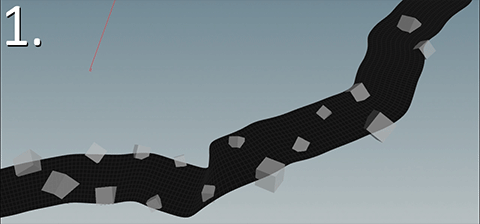
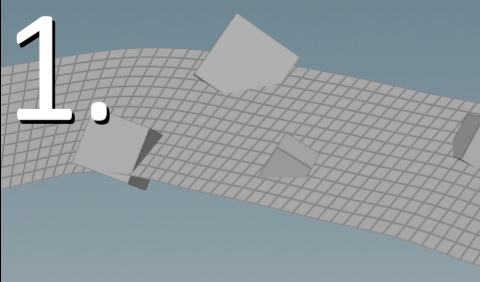
I noted where the upper and lower parts of my cascade are located, so I can filter these elements (the lines were used to create the geometry of the river), create a point in their center and copy the dummy-box into it. Later we will replace it with the particle system in Unreal:
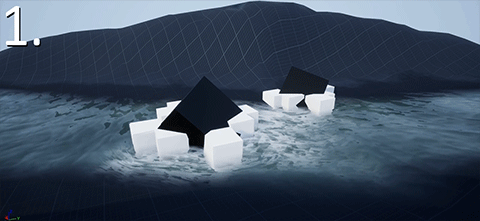
For particles around obstacles, I use a node called Intersection Analysis to get the intersection of obstacles and the river. These intersection edges have points. To their random number, I again copy the dummy-box (which later exchanges with the particle system in Unreal):
So it looks like when I replace the dummy-boxes in Unreal:

Export project to Unreal
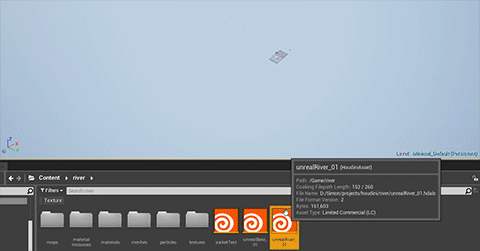
The so-called Houdini engine is a plug-in for Unity, Unreal, 3ds Max, Maya and Cinema 4D and executes the network of nodes that you create in Houdini directly in the specified programs. I need to make the terrain and river appear to save the Houdini file as a digital asset. It can be imported and used like any other resource in Unreal:
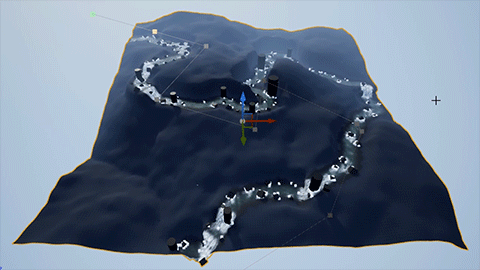
Now I can change the parameters (which I set in Houdini) or change the spline so that the river flows in a different way:
Materials are still being created and assigned to Unreal, but you can pre-assign them (my tutorial on this below).
Should we study Houdini workflows in the same way?
There is much to learn in Houdini. In addition, these are new development tools, so there will be inaccuracies in the documentation.
But this is a common situation for game developers. We are constantly working with advanced technologies that need to be tamed first. Most importantly: you are not alone. Thinking Procedural Discord is full of cool guys who will help and teach. You can even find SideFX developers in these chat rooms!
Links
- Unreal and Houdini Assets . Installation video - here .
- Chat Discord: Houdini Thinking Procedural
- Ben Shriver Tutorial
- Andreas Glad Tutorial
- River challenge thread
- Liquid Implementation Report in The Invisible Hours
- YouTube feeds with tutorials on Unreal and Houdini
- Vertex-count-agnostic Morph Targets by Norman Shaar
Source: https://habr.com/ru/post/430144/
All Articles