Using the Fish eye camera on a Raspberry Pi 3 with ROS - part 2
Good afternoon, dear readers of Habr! This is the second part of the story about using the fish eye camera on the Raspberry Pi 3. The first part can be found here . In this article I will talk about the calibration of the fish eye camera and the use of the camera in the detection of objects using the find_object_2d package. Who cares, I ask under the cat.
Here I describe the calibration procedure based on the official manual on the ros.org portal.
For calibration, we need a camera-calibration package. We can install it with apt:
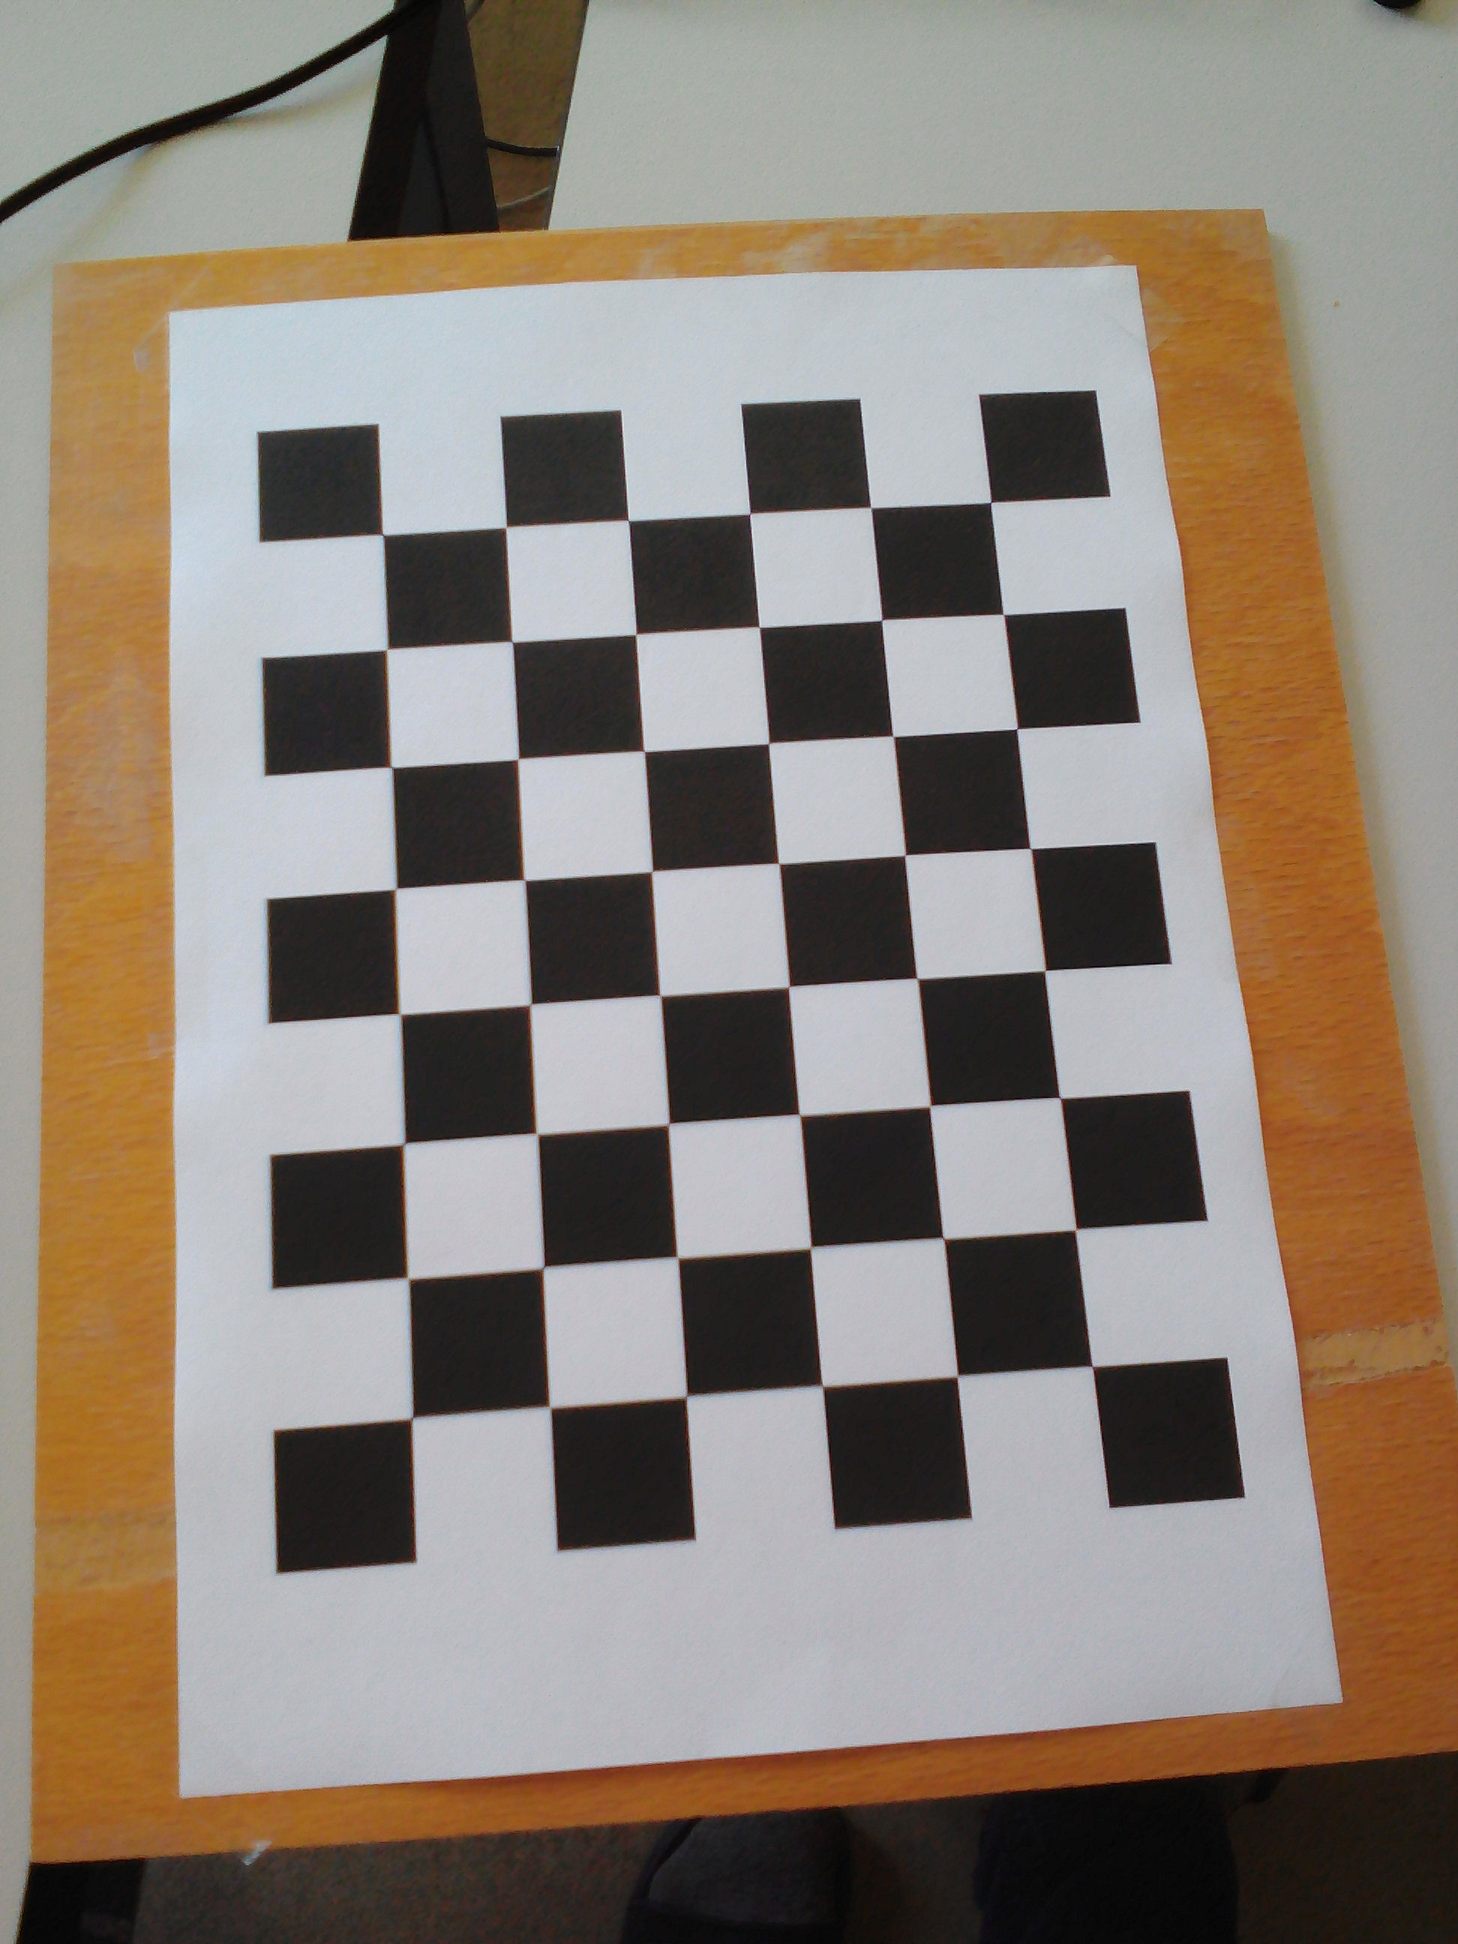
We will need a checkerboard template. Download the template from the official manual on ros.org and print it. For convenience, I pasted it on a plywood board:
')
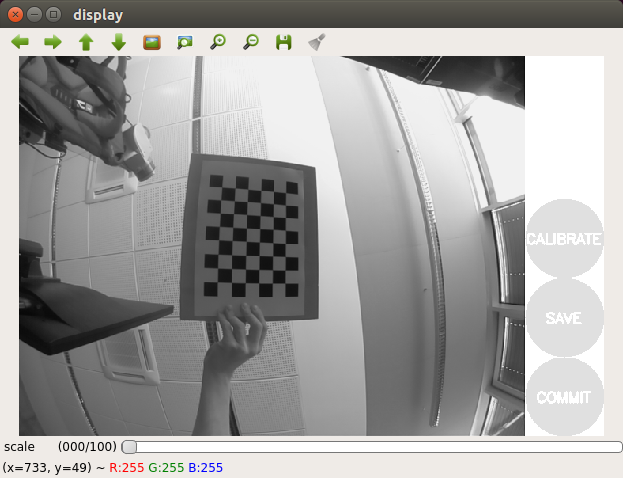
Let's run the calibration program:
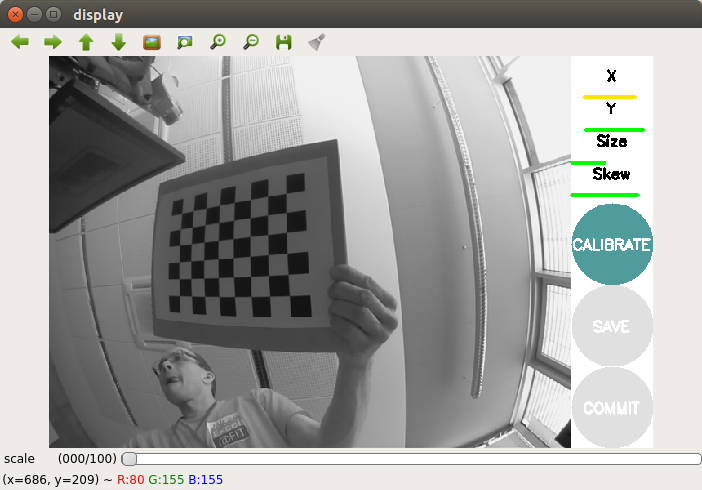
We get the picture:
Move the template a little and wait until the template is highlighted in the frame (colored lines with dots will not appear on the template).
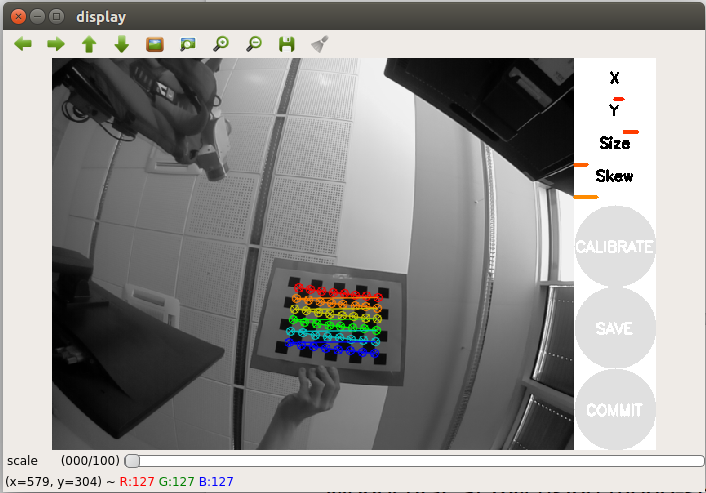
Move the template a little more to the side. To successfully perform the calibration, we need to perform a series of pattern movements in front of the camera from side to side so that the pattern falls into all angular positions in the camera's field of view (left, right, top and bottom). To the right of the camera image window in the program window there is a registration panel with three progress bars:
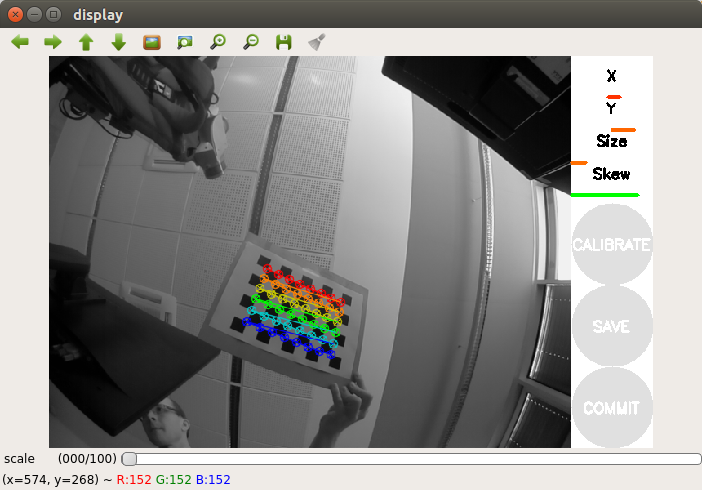
Thus, for successful calibration, it is important that the template is in different corners of the frame, it occupies the entire frame and is also tilted to the left, right, up and down.
Calibrating the fish eye camera on the Raspberry Pi can take quite a long time, so please be patient. My calibration procedure took 20 minutes.
When the calibration is complete, the Calibrate button should be activated (highlighted in color):
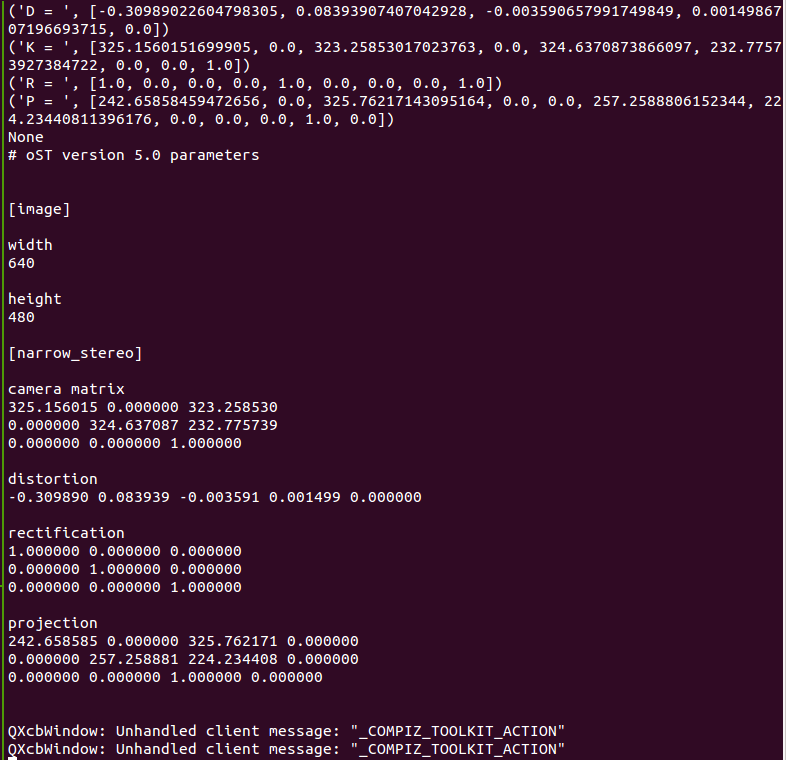
We can also see the calibration results in the terminal:
If you are satisfied with the result, press the COMMIT button. The program window closes and you see the message “writing calibration data to ...” in the terminal.
Check that the specified file was created:
Calibration complete. Now the obtained calibration data can be used in visual localization and SLAM algorithms in ROS.
Install the package is quite simple. Install it from the apt repository in Ubuntu 16.04 for ROS Kinetic:
Run the ROS master and rqt_image_view:
Use the following command to start the detector node:
The detection program window will open:
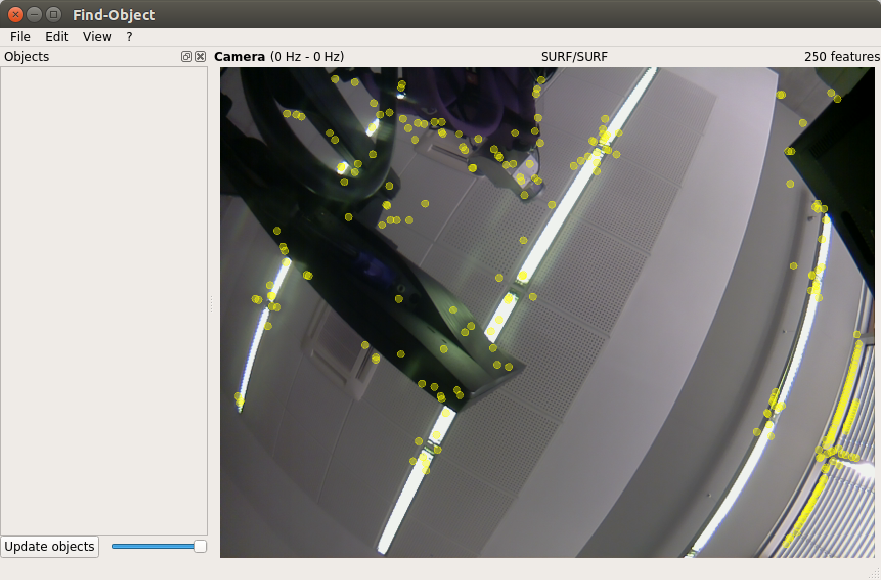
Here we will see the flow from the camera and the result of the detection of characteristic features on objects.
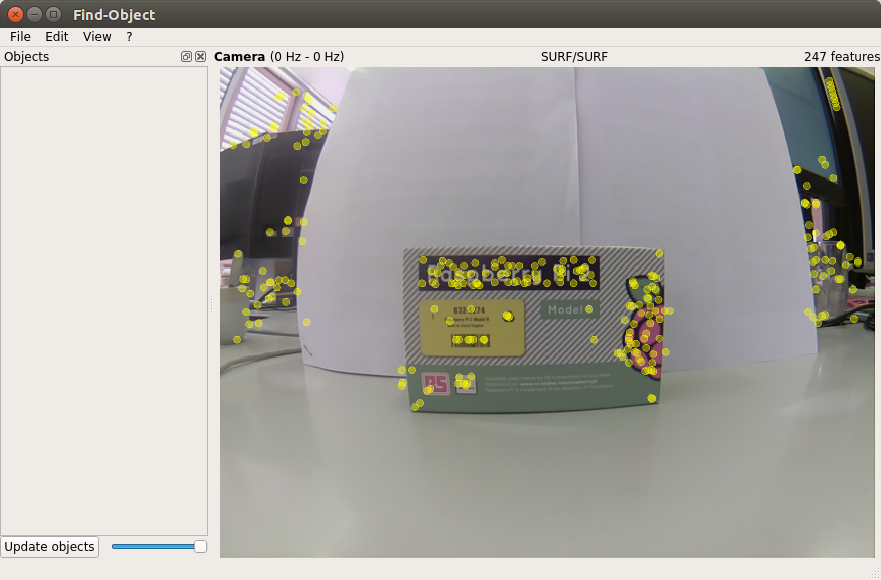
To begin with, we will conduct a detector training at our facilities. Place the first object in front of the camera:
Right-click on the Objects left pane in the window and the Add objects from scene option will open. Select this option and the add object window will open:
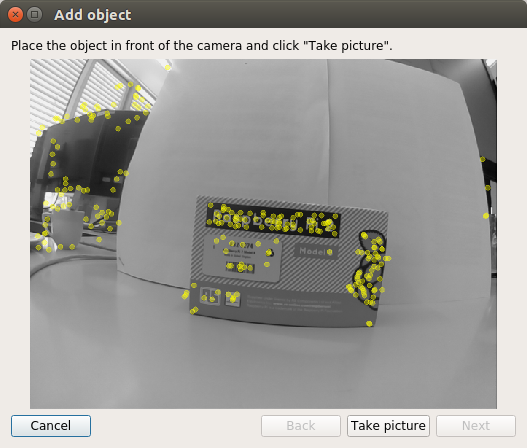
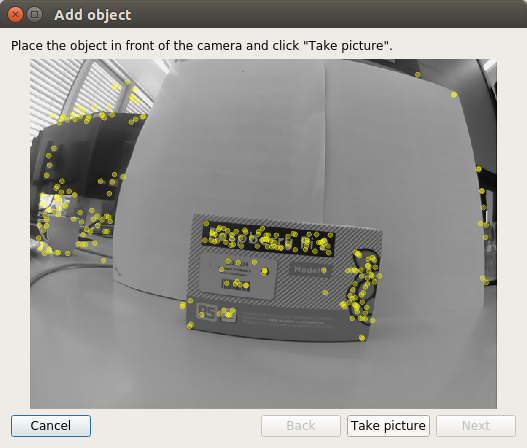
After selecting the best position for the object, click the Take Picture button to take a picture of the object:
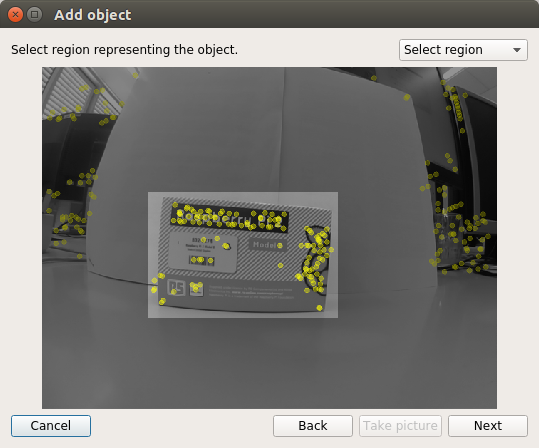
We need to select the object in the picture. Use the mouse cursor to select the object:
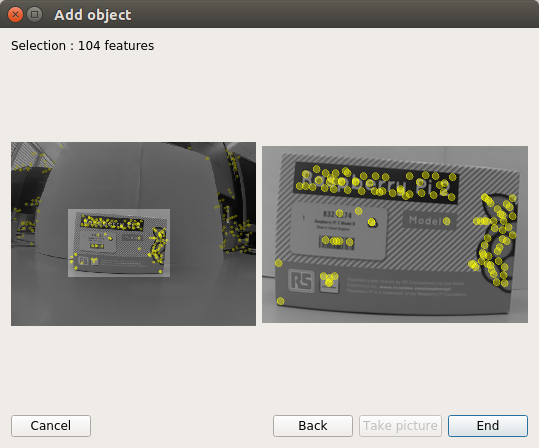
Click the Next button to cut the object in the picture and proceed to the next step. After cropping the image, we get the total number of characteristic features found on the object. It remains only to click the End button to add an object to the database of trained detector objects. Here we see the last step of the procedure for adding an object:
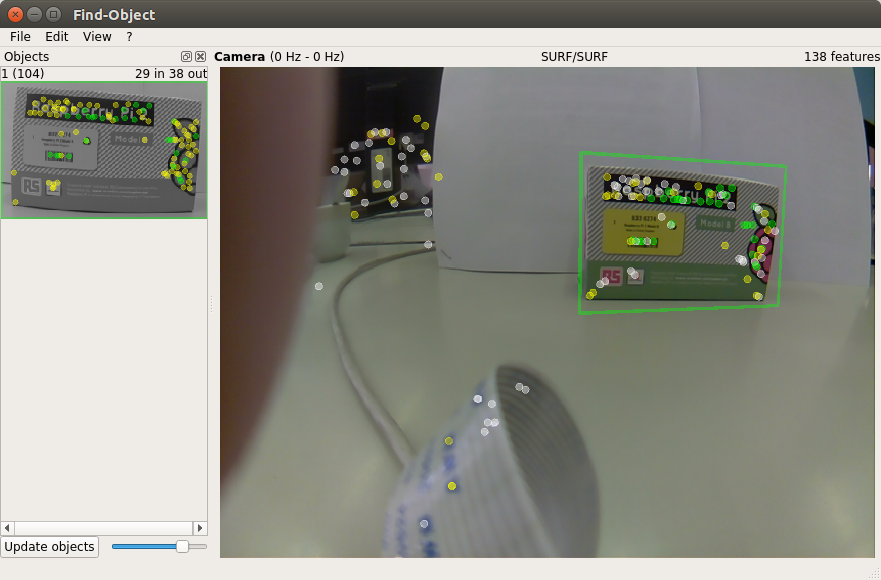
As a result, we trained the detector on the same site. Now you can try detecting an object in the scene:
Draw the position of the detected object in the terminal:
The output will be:
Let's display the list of topics:
Two new topics appeared in the list: / objects and / objectsStamped.
Let's display information about the detected objects:
Here, the second and third values (266.0, 177.0) represent the width and height of the object. All other values in the data field represent a 3x3 homography matrix (used to calculate the position and orientation of the object, as well as the scale and shift values).
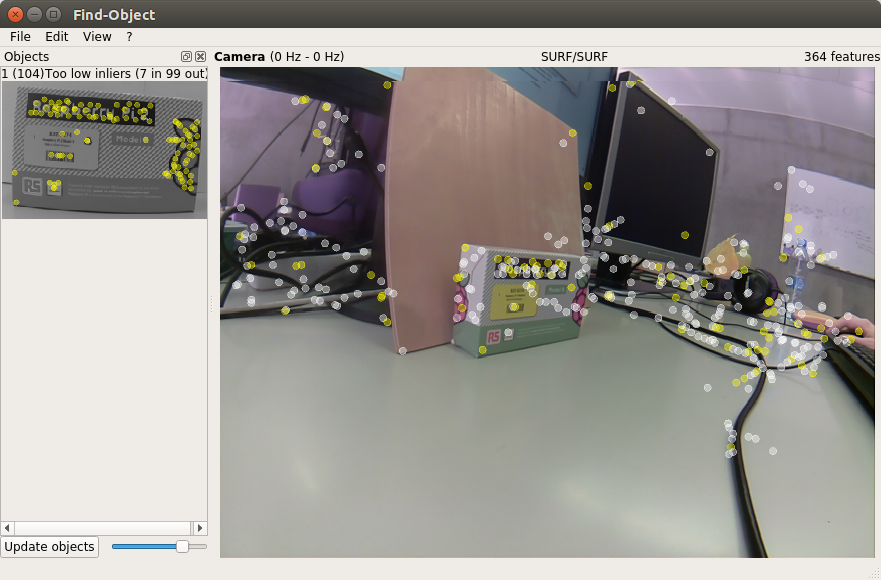
As observations show, find_object_2d does not cope well with the detection of objects with weak texture or without texture (textureless). In addition, the detector is ineffective in detecting an object at a large angle to the object (if we observe the object from the side), or at a large distance from the object.
After you finish working with the detector, find_object_2d will offer us to save the added objects to disk.
That's all for now. Good luck to everyone and see you soon!
Calibrate the fish eye camera using camera_calibration
Here I describe the calibration procedure based on the official manual on the ros.org portal.
For calibration, we need a camera-calibration package. We can install it with apt:
sudo apt-get install ros-kinetic-camera-calibration We will need a checkerboard template. Download the template from the official manual on ros.org and print it. For convenience, I pasted it on a plywood board:
')
Let's run the calibration program:
rosrun camera_calibration cameracalibrator.py --size 8x6 --square 0.108 image:=/usb_cam/image_raw camera:=/usb_cam We get the picture:
Move the template a little and wait until the template is highlighted in the frame (colored lines with dots will not appear on the template).
Move the template a little more to the side. To successfully perform the calibration, we need to perform a series of pattern movements in front of the camera from side to side so that the pattern falls into all angular positions in the camera's field of view (left, right, top and bottom). To the right of the camera image window in the program window there is a registration panel with three progress bars:
- X captures the movement of the pattern in the left / right direction (horizontal) in the field of view of the camera
- Y captures the movement of the pattern in the direction of the top / bottom (horizontal) in the field of view of the camera
- Size captures the approach / removal of the pattern from the camera and the slope relative to the camera.
- Skew fixes the slope of the pattern to the left, right, up and down (bevel).
Thus, for successful calibration, it is important that the template is in different corners of the frame, it occupies the entire frame and is also tilted to the left, right, up and down.
Calibrating the fish eye camera on the Raspberry Pi can take quite a long time, so please be patient. My calibration procedure took 20 minutes.
When the calibration is complete, the Calibrate button should be activated (highlighted in color):
We can also see the calibration results in the terminal:
If you are satisfied with the result, press the COMMIT button. The program window closes and you see the message “writing calibration data to ...” in the terminal.
Check that the specified file was created:
ll ~/.ros/camera_info/head_camera.yaml -rw-rw-r-- 1 vladimir vladimir 592 Apr 14 14:02 /home/vladimir/.ros/camera_info/head_camera.yaml Calibration complete. Now the obtained calibration data can be used in visual localization and SLAM algorithms in ROS.
Detection of objects using find_object_2d
Install the package is quite simple. Install it from the apt repository in Ubuntu 16.04 for ROS Kinetic:
sudo apt-get install ros-kinetic-find-object-2d source /opt/ros/kinetic/setup.bash Run the ROS master and rqt_image_view:
roscore roslaunch usb_cam usb_cam-test.launch Use the following command to start the detector node:
rosrun find_object_2d find_object_2d image:=/usb_cam/image_raw The detection program window will open:
Here we will see the flow from the camera and the result of the detection of characteristic features on objects.
To begin with, we will conduct a detector training at our facilities. Place the first object in front of the camera:
Right-click on the Objects left pane in the window and the Add objects from scene option will open. Select this option and the add object window will open:
After selecting the best position for the object, click the Take Picture button to take a picture of the object:
We need to select the object in the picture. Use the mouse cursor to select the object:
Click the Next button to cut the object in the picture and proceed to the next step. After cropping the image, we get the total number of characteristic features found on the object. It remains only to click the End button to add an object to the database of trained detector objects. Here we see the last step of the procedure for adding an object:
As a result, we trained the detector on the same site. Now you can try detecting an object in the scene:
Draw the position of the detected object in the terminal:
rosrun find_object_2d print_objects_detected The output will be:
Object 1 detected, Qt corners at (259.387238,103.530960) (448.684052,79.495495) (282.419050,240.049667) (458.438938,199.656717) --- Object 1 detected, Qt corners at (255.340408,104.615120) (451.348079,75.302353) (284.672425,230.382223) (452.696585,197.625600) --- Object 1 detected, Qt corners at (253.440521,102.973320) (447.226440,76.793541) (278.530854,238.918013) (454.377219,197.526599) --- Let's display the list of topics:
rostopic list Two new topics appeared in the list: / objects and / objectsStamped.
Let's display information about the detected objects:
rostopic echo /objects layout: dim: [] data_offset: 0 data: [1.0, 266.0, 177.0, 0.7527905702590942, 0.060980819165706635, 0.00022385441116057336, 0.3012462854385376, 0.8929792046546936, 0.0008534671505913138, 334.9065856933594, 182.55294799804688, 1.0] --- Here, the second and third values (266.0, 177.0) represent the width and height of the object. All other values in the data field represent a 3x3 homography matrix (used to calculate the position and orientation of the object, as well as the scale and shift values).
As observations show, find_object_2d does not cope well with the detection of objects with weak texture or without texture (textureless). In addition, the detector is ineffective in detecting an object at a large angle to the object (if we observe the object from the side), or at a large distance from the object.
After you finish working with the detector, find_object_2d will offer us to save the added objects to disk.
That's all for now. Good luck to everyone and see you soon!
Source: https://habr.com/ru/post/429894/
All Articles