Installing a 3CX PBX in the Amazon Lightsail Cloud
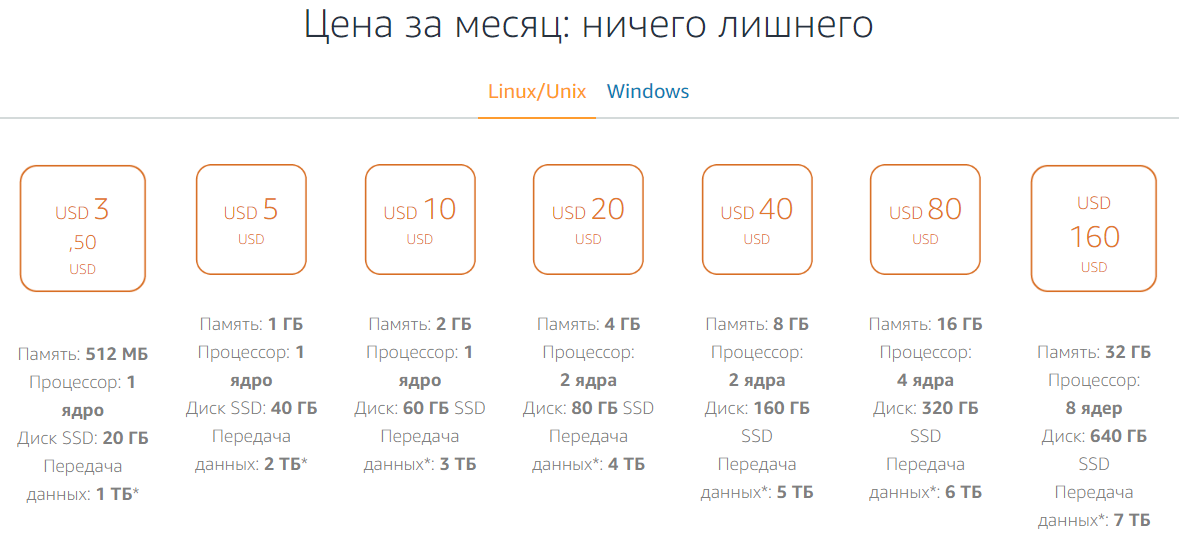
3CX recently certified to install virtual entities PBX new hosting - Amazon Lightsail. Amazon Lightsail is a simplified and cheap version of the famous Amazon AWS service. Running virtual servers with 3CX is now possible with less effort, cheaper and on an “all inclusive” basis. There are several ready-made configurations of VPS-servers, suitable for launching PBX of any capacity . For example, a configuration with 1 GB of RAM for $ 5 per month. Suitable for installations from 8 to 16 simultaneous calls. The configuration for $ 10 is suitable for systems up to 32 simultaneous calls (with an average load). Serious use of PBX, for example, as a call center (CRM connection, call recording and 35+ simultaneous users) will work well on a machine for $ 20 or $ 40 per month.
It is important to note that using your own hosting and 3CX license, it is you who remain the owner of the PBX (and not a third-party company - the owner of the cloud PBX, as it usually happens). You have access to all parameters of the system and manage users (users can be unlimited). You can also connect your own SIP trunks and those IP phones that are more suitable for you.
Installing a 3CX PBX on Amazon Lightsail takes a few minutes. Log in to your account, get an API key and use the PBX Express service.
')
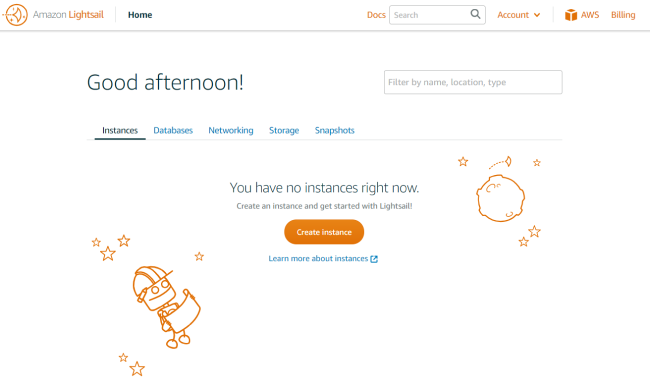
First, create an Amazon AWS account if you don’t have one yet. Enter your credit card details, even if you plan to use free offers. After registering, go to the AWS console . The start page should look like the one below. The Russian language in the Lightsail console is currently not supported.
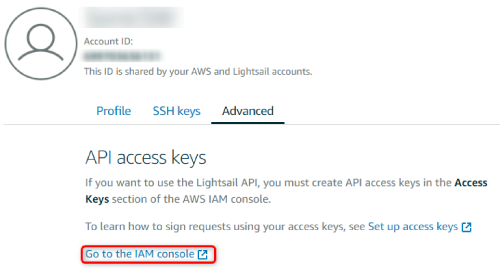
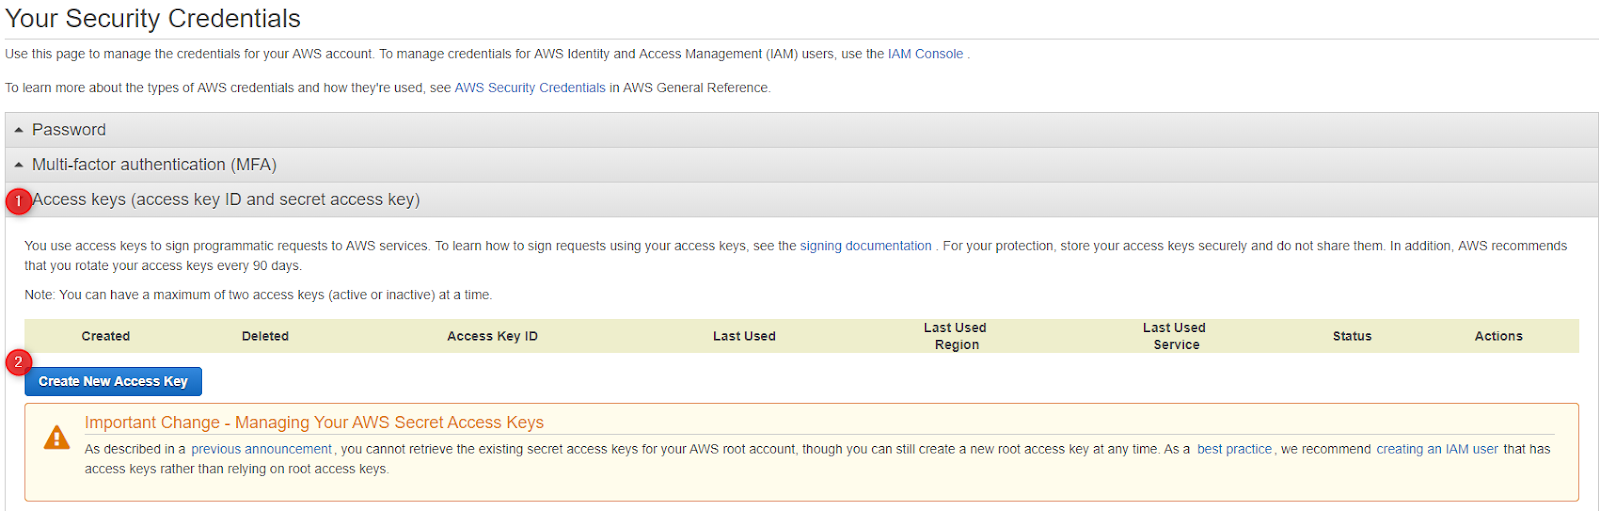
In order for the 3CX PBX Express service to create PBX entities for you, you must create an API access key. To do this, in the upper right corner of the console, select Account> Account. Click the Advanced tab, and then click the Go to the IAM console link.
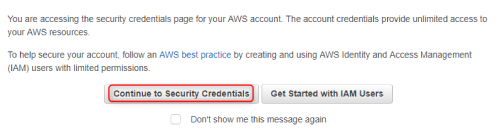
In the window that appears, click Continue to Security Credentials.
Expand the Access keys section (access key ID and secret access key) and click Create New Access Key.
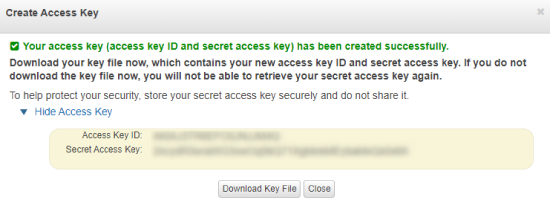
An access key will be created. Copy it or download the key file. You will use this key in the PBX Express wizard.
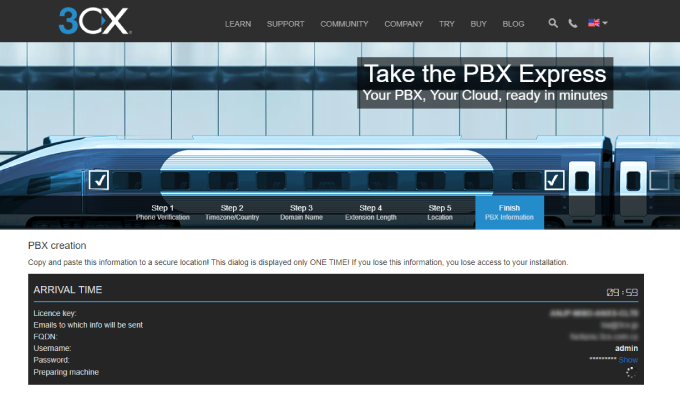
Further installation and configuration of the PBX is done using the PBX Express wizard . If you do not have a 3CX license, get it for free . Confirm your e-mail address, after which it will receive a license and a link to the PBX Express service. Follow this link to start setting up 3CX in your Amazon account.
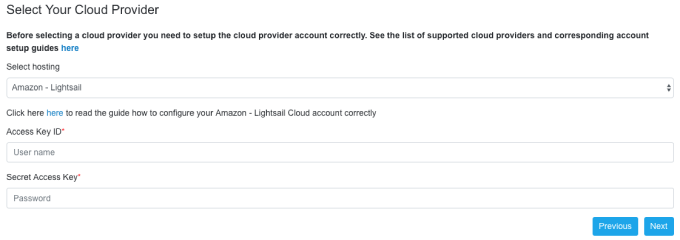
Log in to your Amazon account in the same browser window in which you launched PBX Express. Select the Amazon Lightsail service and specify the Access Key ID created earlier and the corresponding Secret Access Key.
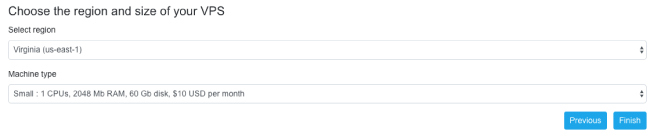
Select the type and region of your virtual server.
After that, the creation of a VPS server with 3CX in your account will begin. When you finish your PBX Express wizard in the Amazon console, go to the Instances section to see your 3CX server.
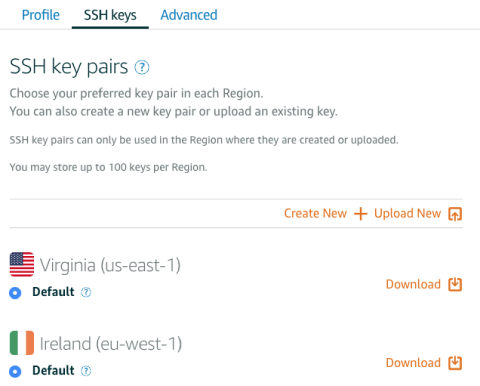
When you create the first server in the selected region, an SSH access key for Amazon Lightsail virtual servers will be created. You can download the key file from the section Account> Account> SSH keys. Virtual servers with admin username admin. Third-party SSH keys are not supported by the PBX Express service.
Installing 3CX PBX on Google Cloud , Microsoft Azure , OVH , AWS .
It is important to note that using your own hosting and 3CX license, it is you who remain the owner of the PBX (and not a third-party company - the owner of the cloud PBX, as it usually happens). You have access to all parameters of the system and manage users (users can be unlimited). You can also connect your own SIP trunks and those IP phones that are more suitable for you.
Installing a 3CX PBX on Amazon Lightsail takes a few minutes. Log in to your account, get an API key and use the PBX Express service.
')
Configuring Amazon Hosting
First, create an Amazon AWS account if you don’t have one yet. Enter your credit card details, even if you plan to use free offers. After registering, go to the AWS console . The start page should look like the one below. The Russian language in the Lightsail console is currently not supported.
API Access Key
In order for the 3CX PBX Express service to create PBX entities for you, you must create an API access key. To do this, in the upper right corner of the console, select Account> Account. Click the Advanced tab, and then click the Go to the IAM console link.
In the window that appears, click Continue to Security Credentials.
Expand the Access keys section (access key ID and secret access key) and click Create New Access Key.
An access key will be created. Copy it or download the key file. You will use this key in the PBX Express wizard.
Installing 3CX: PBX Express Wizard
Further installation and configuration of the PBX is done using the PBX Express wizard . If you do not have a 3CX license, get it for free . Confirm your e-mail address, after which it will receive a license and a link to the PBX Express service. Follow this link to start setting up 3CX in your Amazon account.
Log in to your Amazon account in the same browser window in which you launched PBX Express. Select the Amazon Lightsail service and specify the Access Key ID created earlier and the corresponding Secret Access Key.
Select the type and region of your virtual server.
After that, the creation of a VPS server with 3CX in your account will begin. When you finish your PBX Express wizard in the Amazon console, go to the Instances section to see your 3CX server.
Connecting to a 3CX server via SSH (Putty)
When you create the first server in the selected region, an SSH access key for Amazon Lightsail virtual servers will be created. You can download the key file from the section Account> Account> SSH keys. Virtual servers with admin username admin. Third-party SSH keys are not supported by the PBX Express service.
Additional Information
Installing 3CX PBX on Google Cloud , Microsoft Azure , OVH , AWS .
Source: https://habr.com/ru/post/429636/
All Articles